In today’s digital age, protecting our computers from malicious threats is paramount. Thankfully, Microsoft provides a powerful tool in the form of Defender Antivirus to safeguard our systems. One particularly effective feature is the ability to perform an offline virus scan, which can tackle even the most stubborn malware. In this user-friendly guide, we’ll walk you through the process step-by-step, ensuring your Windows 11 or 10 PC remains secure.
Understanding the Importance of Offline Virus Scans
Before diving into the steps, it’s essential to grasp why offline virus scans are crucial. Traditional scans occur while your operating system is running, which can make it challenging to detect and remove deeply embedded malware. By booting into a separate environment, an offline scan can target threats more effectively, providing an additional layer of security.
How to Perform an Offline Virus Scan using Microsoft Defender on Windows 11 or 10?
Follow these simple steps to perform an offline virus scan through Microsoft Defender on Windows 11 or 10:-
Step 1. Begin by opening Windows Security on your PC. You can do this by clicking on the Windows Security icon in the taskbar notification area or by searching for “Windows Security” in the Start menu.
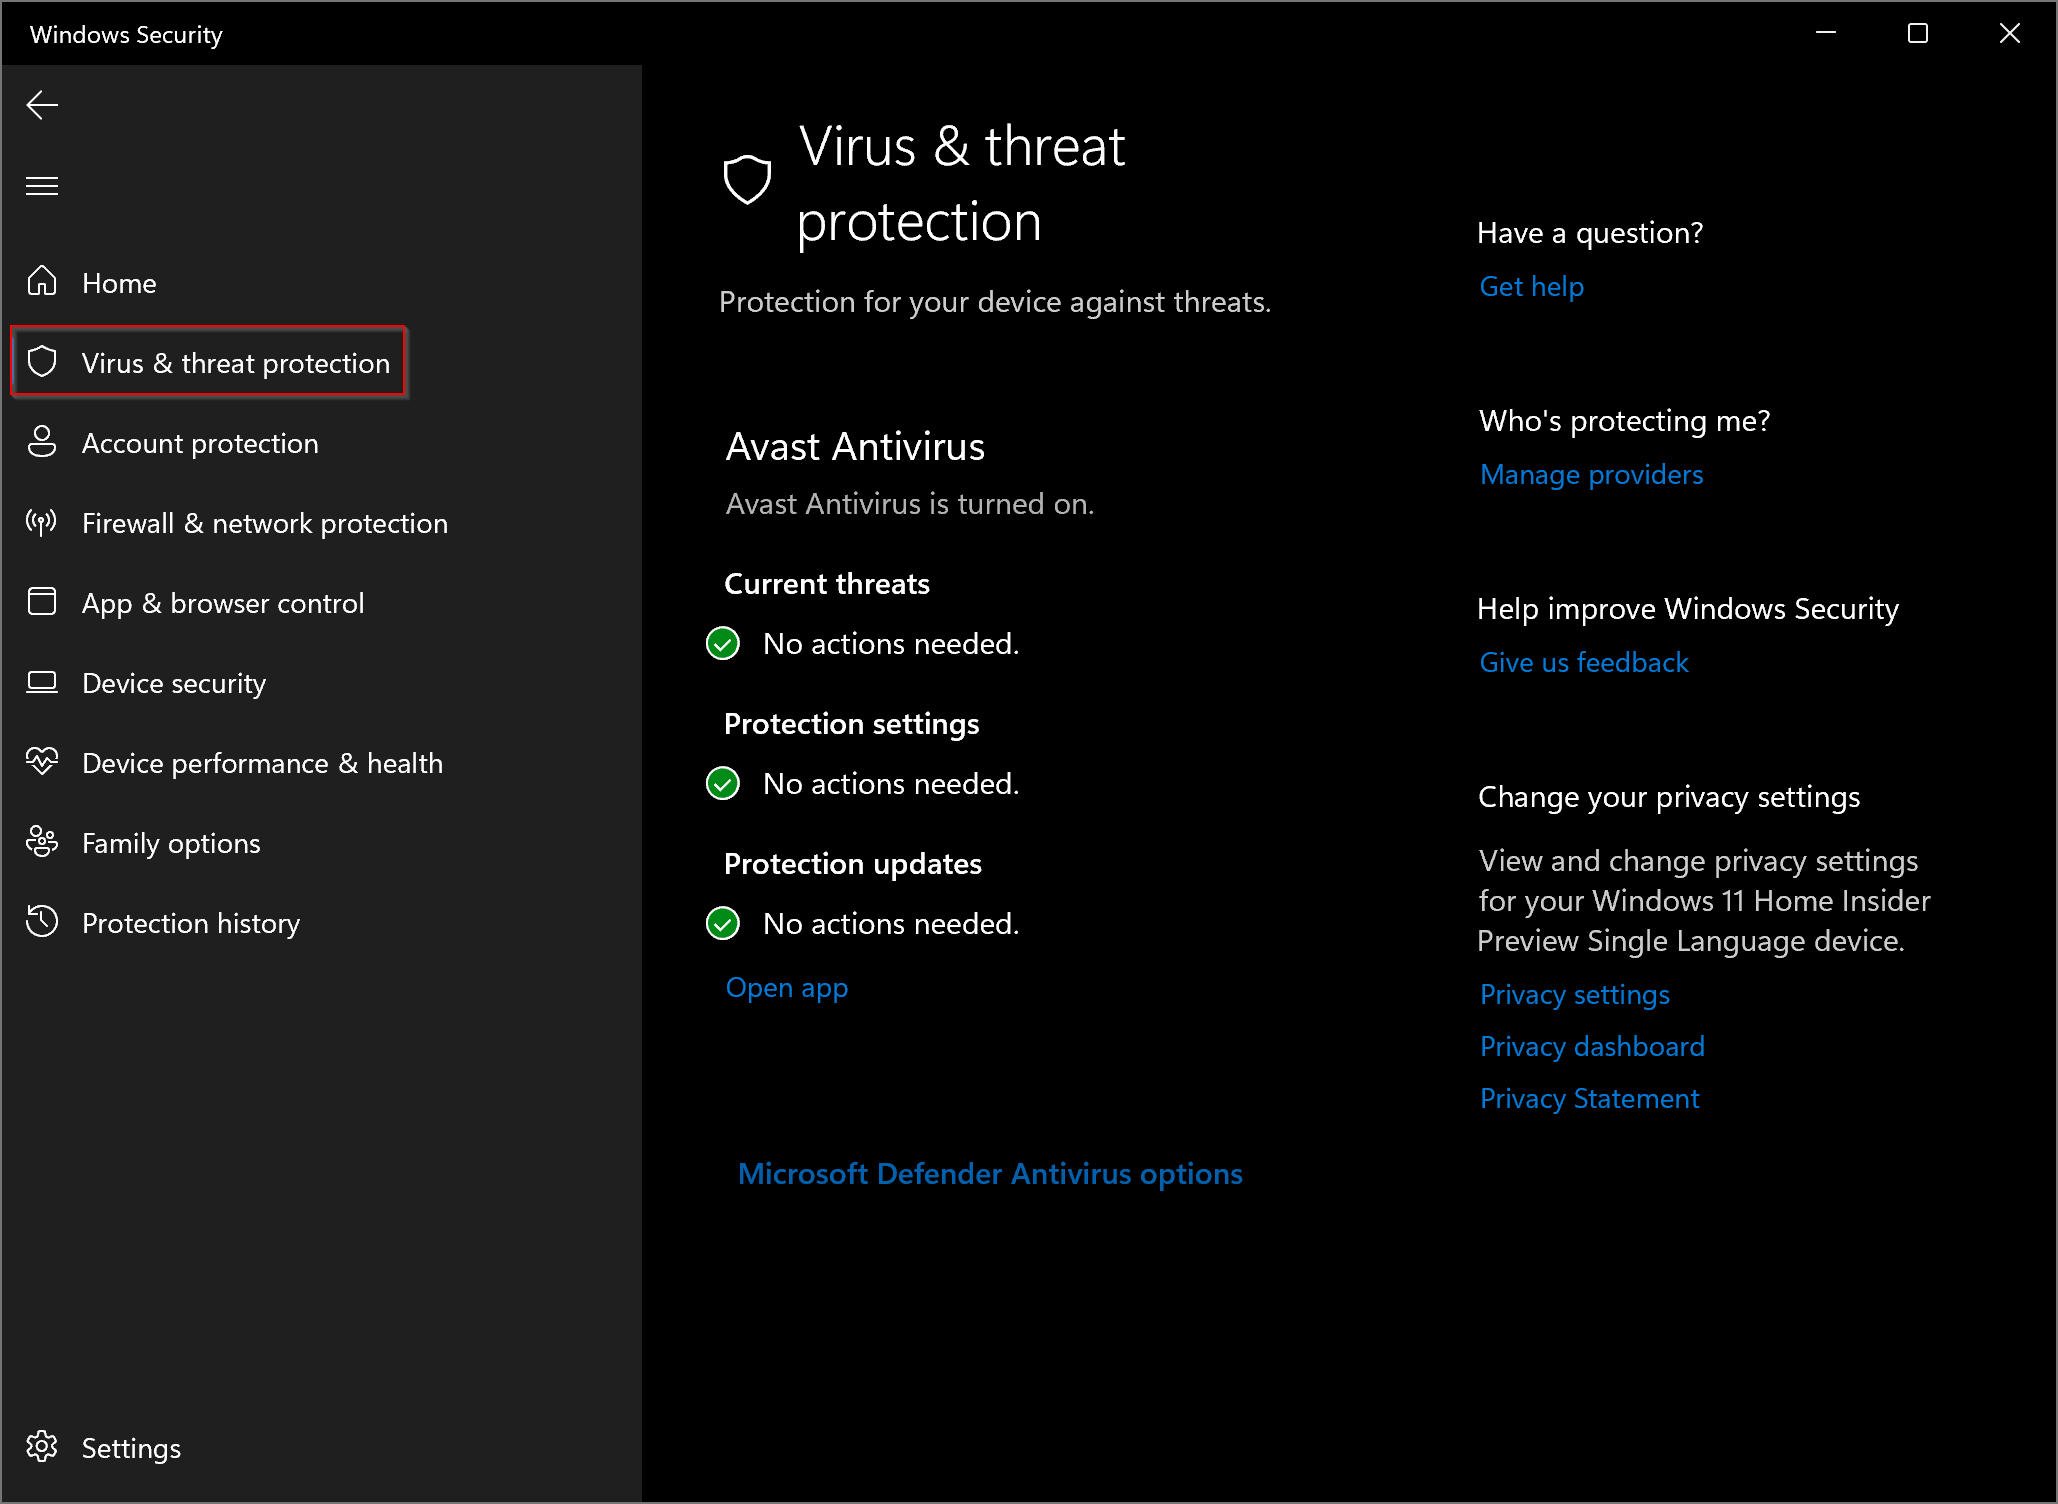
Step 2. Within Windows Security, select the “Virus & threat protection” option from the sidebar menu. This will open up the main interface for managing your PC’s security settings.
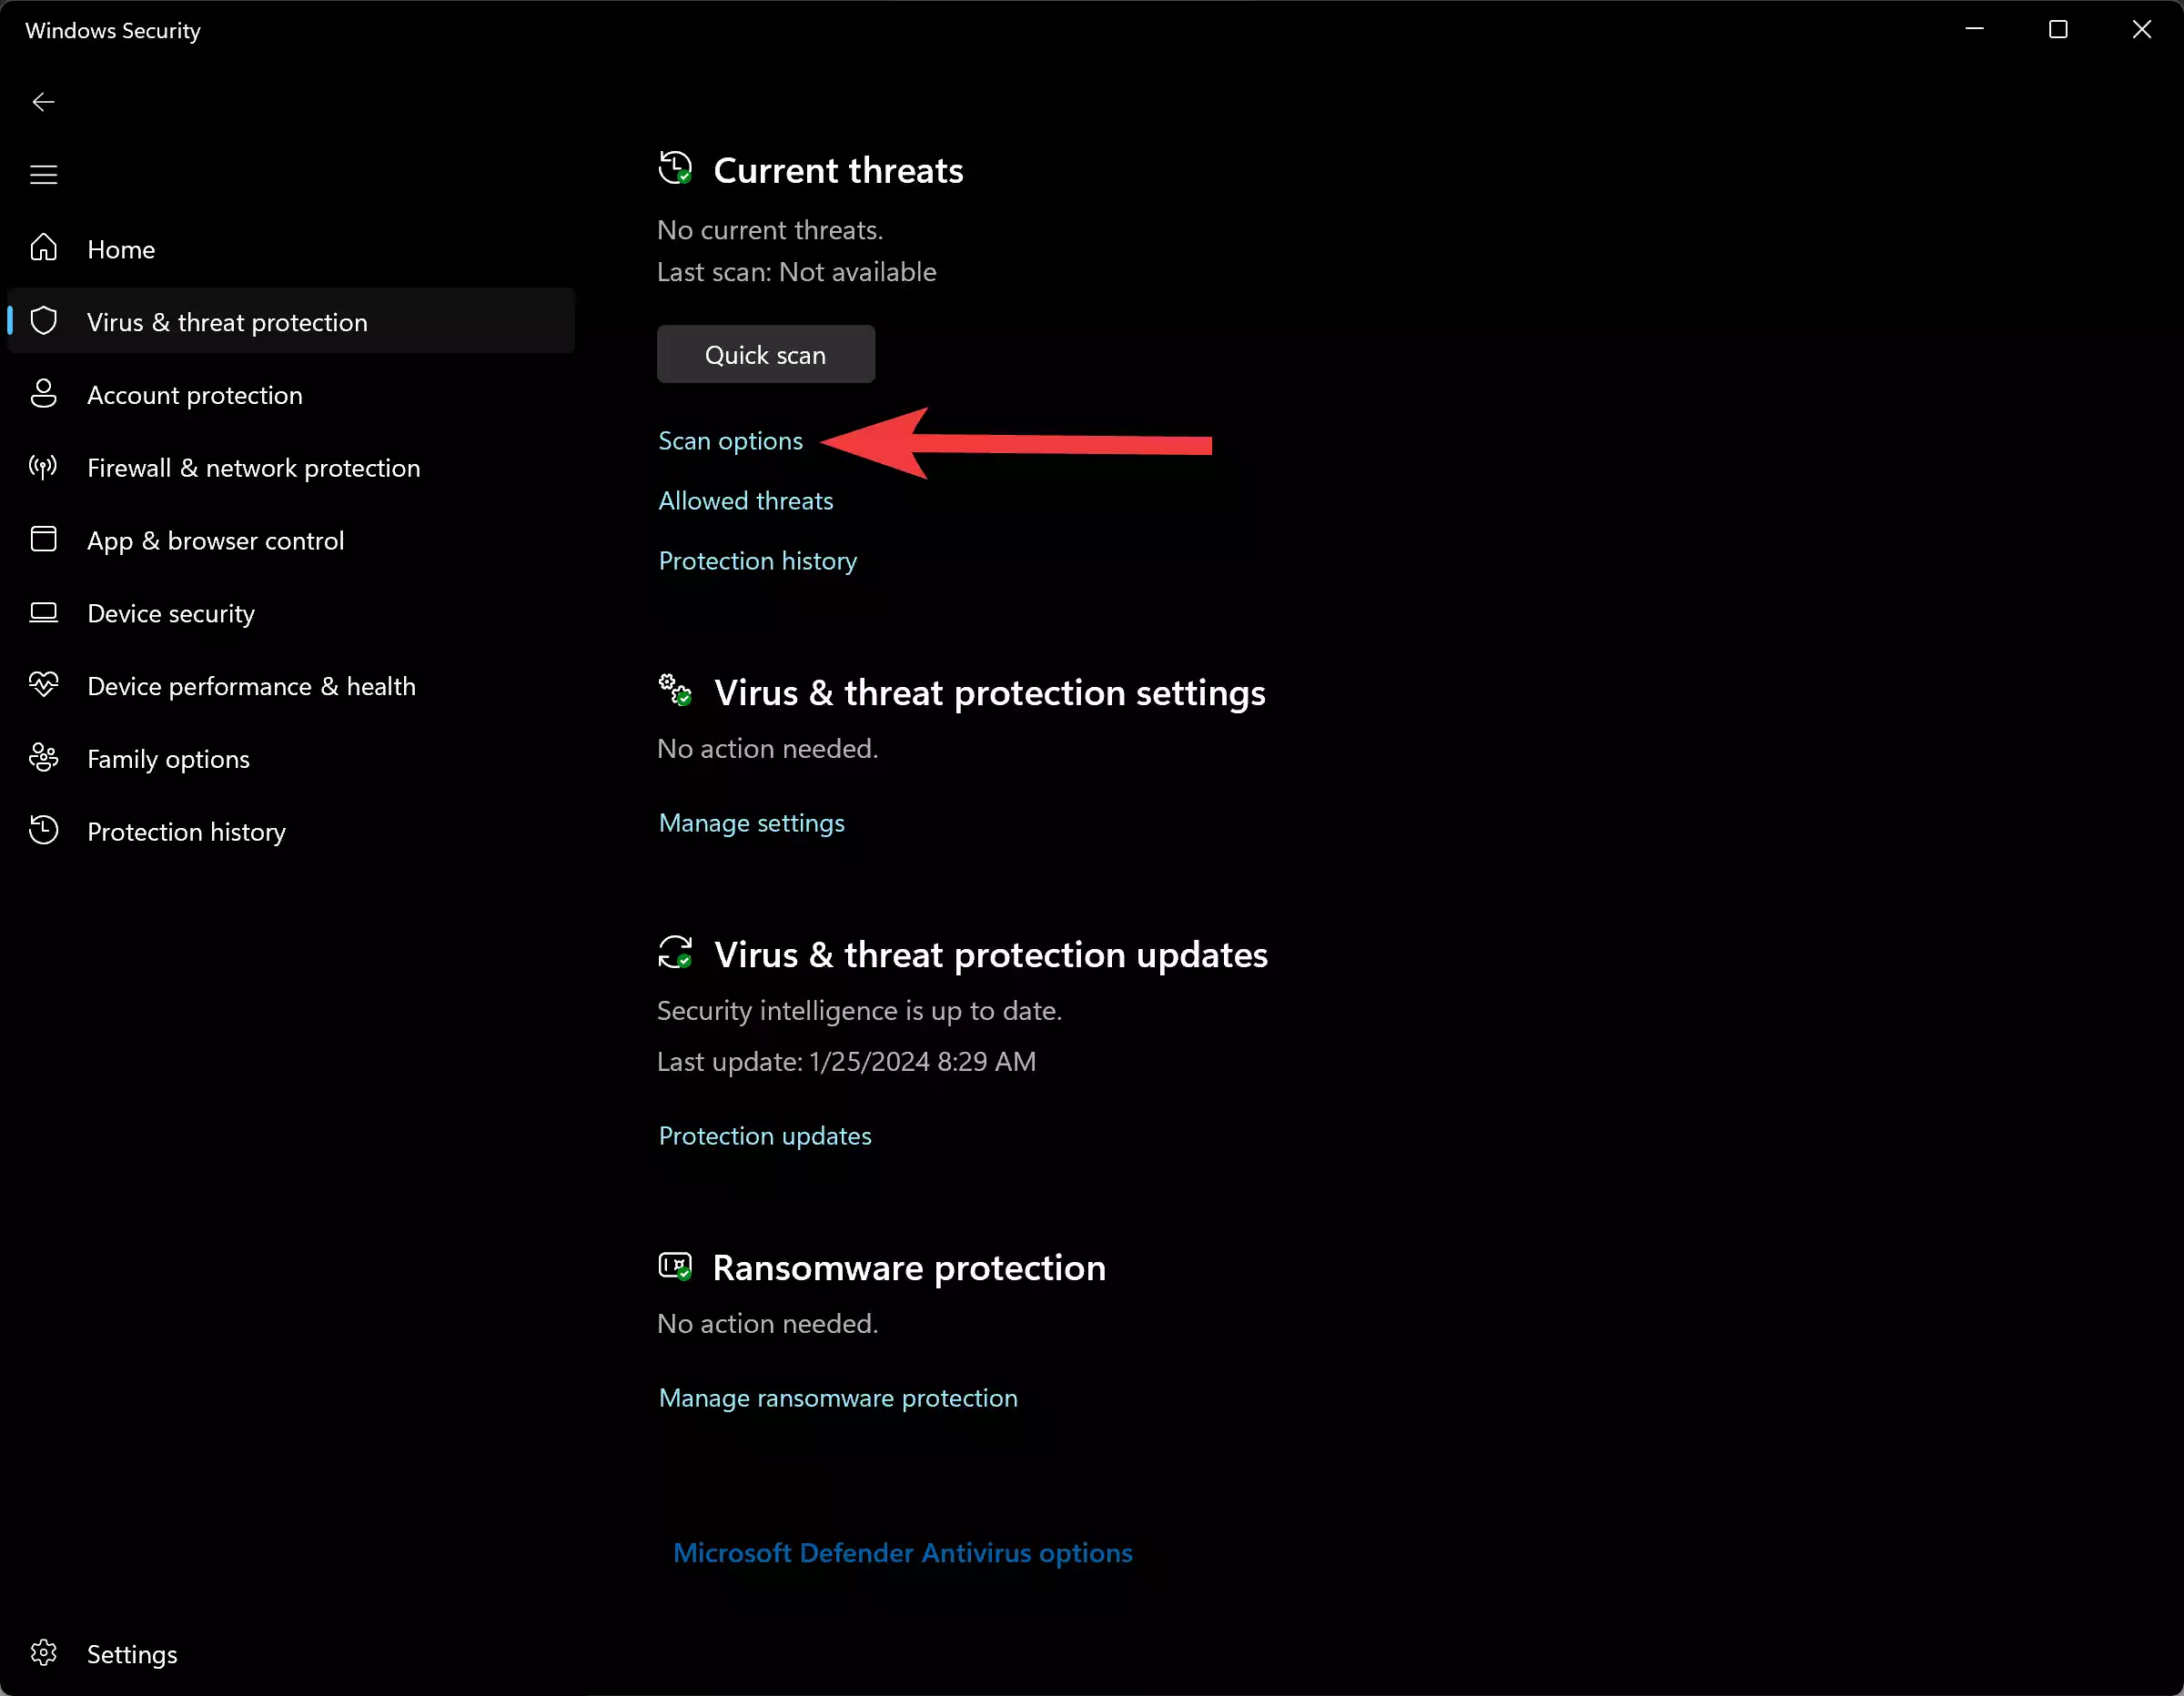
Step 3. In the Virus & threat protection window, locate the “Current threats” section. Underneath this, you’ll find the “Scan options” link. Click on it to reveal additional scanning choices.
Step 4. Within the Scan options menu, look for the “Microsoft Defender Antivirus (offline scan)” option. Check the box next to it to enable this specialized scanning mode.
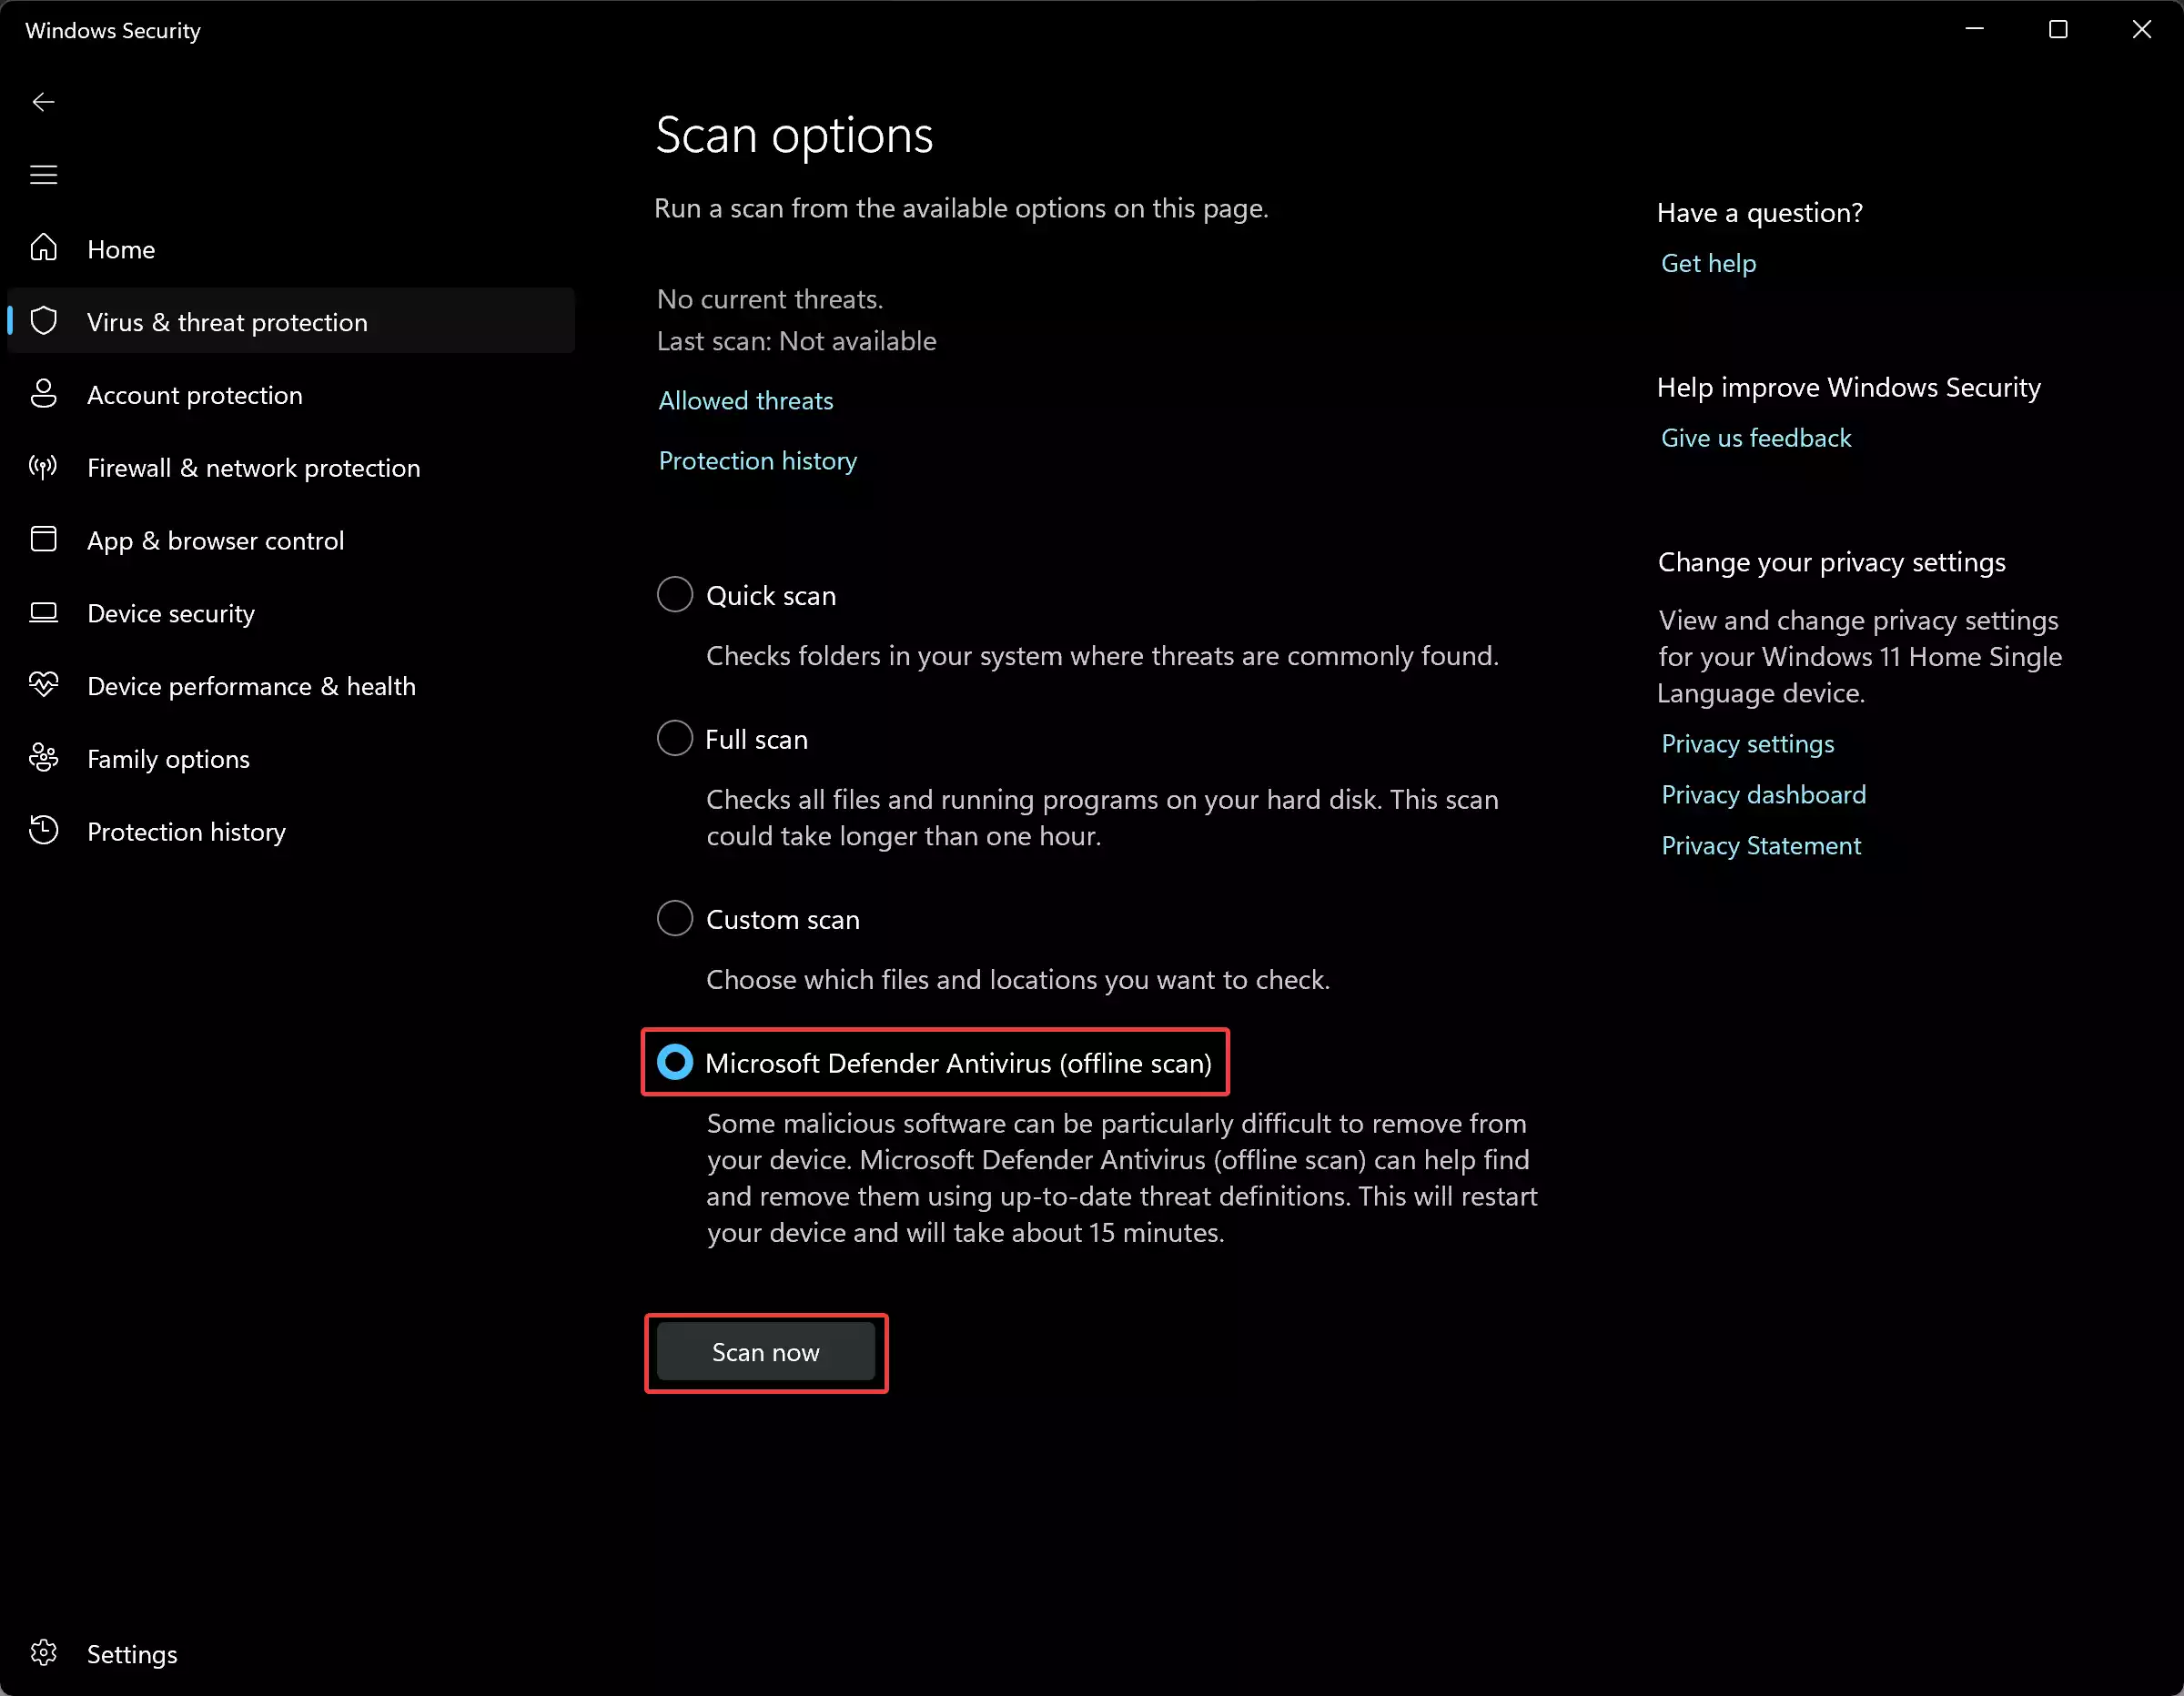
Step 5. With the Microsoft Defender Offline scan option selected, click on the “Scan now” button to start the process. This action will prompt your PC to reboot and initiate the offline virus scan.
Step 6. During the scanning process, your computer will boot into the system’s recovery environment. Here, Microsoft Defender will meticulously scan your system for any malicious software, including viruses, rootkits, and ransomware.
Step 7. Once the scan is complete, Microsoft Defender will automatically take action against any detected threats. You can review the results of the scan by returning to the Windows Security interface and navigating to “Virus & threat protection” > “Protection history.”
Final Thoughts
Performing an offline virus scan with Microsoft Defender is a proactive measure to ensure the security of your Windows 11 or 10 PC. By following these user-friendly steps, you can effectively remove even the most persistent malware from your system. Make it a habit to run offline scans regularly to stay one step ahead of potential threats and keep your digital life safe and secure.