Microsoft Excel is a powerful tool for data analysis and management, but it can become cluttered with blank rows that hinder your productivity. Whether you’ve inherited a spreadsheet with numerous empty rows or accidentally created them yourself, it’s essential to know how to remove these empty cells efficiently. In this gearupwindows article, we will walk you through a step-by-step guide on how to remove blank rows in Excel, making your data more organized and easier to work with.
Why Remove Blank Rows?
Blank rows in an Excel spreadsheet can be quite problematic. They consume valuable screen space, complicate data analysis, and may even lead to errors if formulas or data references incorporate these empty rows. By removing them, you can streamline your data, improve data accuracy, and present information more cleanly and professionally.
How to Remove Blank Rows in Excel?
Method 1: Manually Delete All Empty Rows in Excel
Step 1. Before you start removing blank rows, you need to identify them. Excel doesn’t provide a built-in tool to automatically detect and remove blank rows, so you’ll need to examine your data visually. Here’s how you can identify these empty rows:-
- Scroll through the spreadsheet: Manually scroll through your data to spot rows that contain no data. Look for entirely empty rows with no content in any cell.
- Use the Filter tool: Enable the Filter tool in the Data tab, which allows you to filter and sort data based on specific criteria. You can sort the data to display the blank rows on top, making them easier to spot.

Step 2. Once you’ve identified the blank rows, you need to select them for removal. There are a few methods to select these rows:-
- Manual Selection: Click on the row numbers (the numbers on the left side) for each blank row while holding down the Ctrl key (or Command key on Mac) to select multiple rows.
- Filtering: Use the Filter tool to filter and display only the blank rows. You can then select them all at once by clicking and dragging.
![]()
Step 3. After selecting the blank rows, it’s time to remove them. Here are a couple of methods to do this:-
- Right-Click and Delete: Right-click on one of the selected rows and choose “Delete Row.”

- Home Tab Method: Go to the Home tab, click on “Delete” in the Cells group, and choose “Delete Sheet Rows” from the dropdown menu. This will remove the selected blank rows.

Step 4. After removing the blank rows, your data is cleaner, but you might notice that the row numbers are not contiguous. If you’d like to have a sequential row numbering, you can renumber the rows. Here’s how:-
- Insert a New Column: Insert a new column by right-clicking on a column letter and selecting “Insert.”

- AutoFill Row Numbers: In the first and second cells of the new column, type ‘1‘ & ‘2‘ (or any starting number you prefer), press Enter, then copy both cells and drag the fill handle (the small square at the bottom-right corner of the cell) down to fill the numbers for all rows.

Method 2: Automatically Delete All Empty Rows in Excel
Excel offers an automatic method that finds and deletes all the blank rows in your worksheet. This way, you don’t have to manually find any empty rows and select them to delete – a method that can be time-consuming, especially when dealing with large datasets.
Here’s how to use this method:-
Step 1. Launch your spreadsheet with Microsoft Excel and highlight the dataset where you want to find and remove empty rows.
Step 2. In Excel’s ribbon at the top, select the “Home” tab.

Step 3. In the “Home” tab, in the “Editing” section, choose “Find & Select” and then click on “Go To Special.”
Step 4. A “Go To Special” window will open. Here, enable the “Blanks” option, then choose “OK” at the bottom.
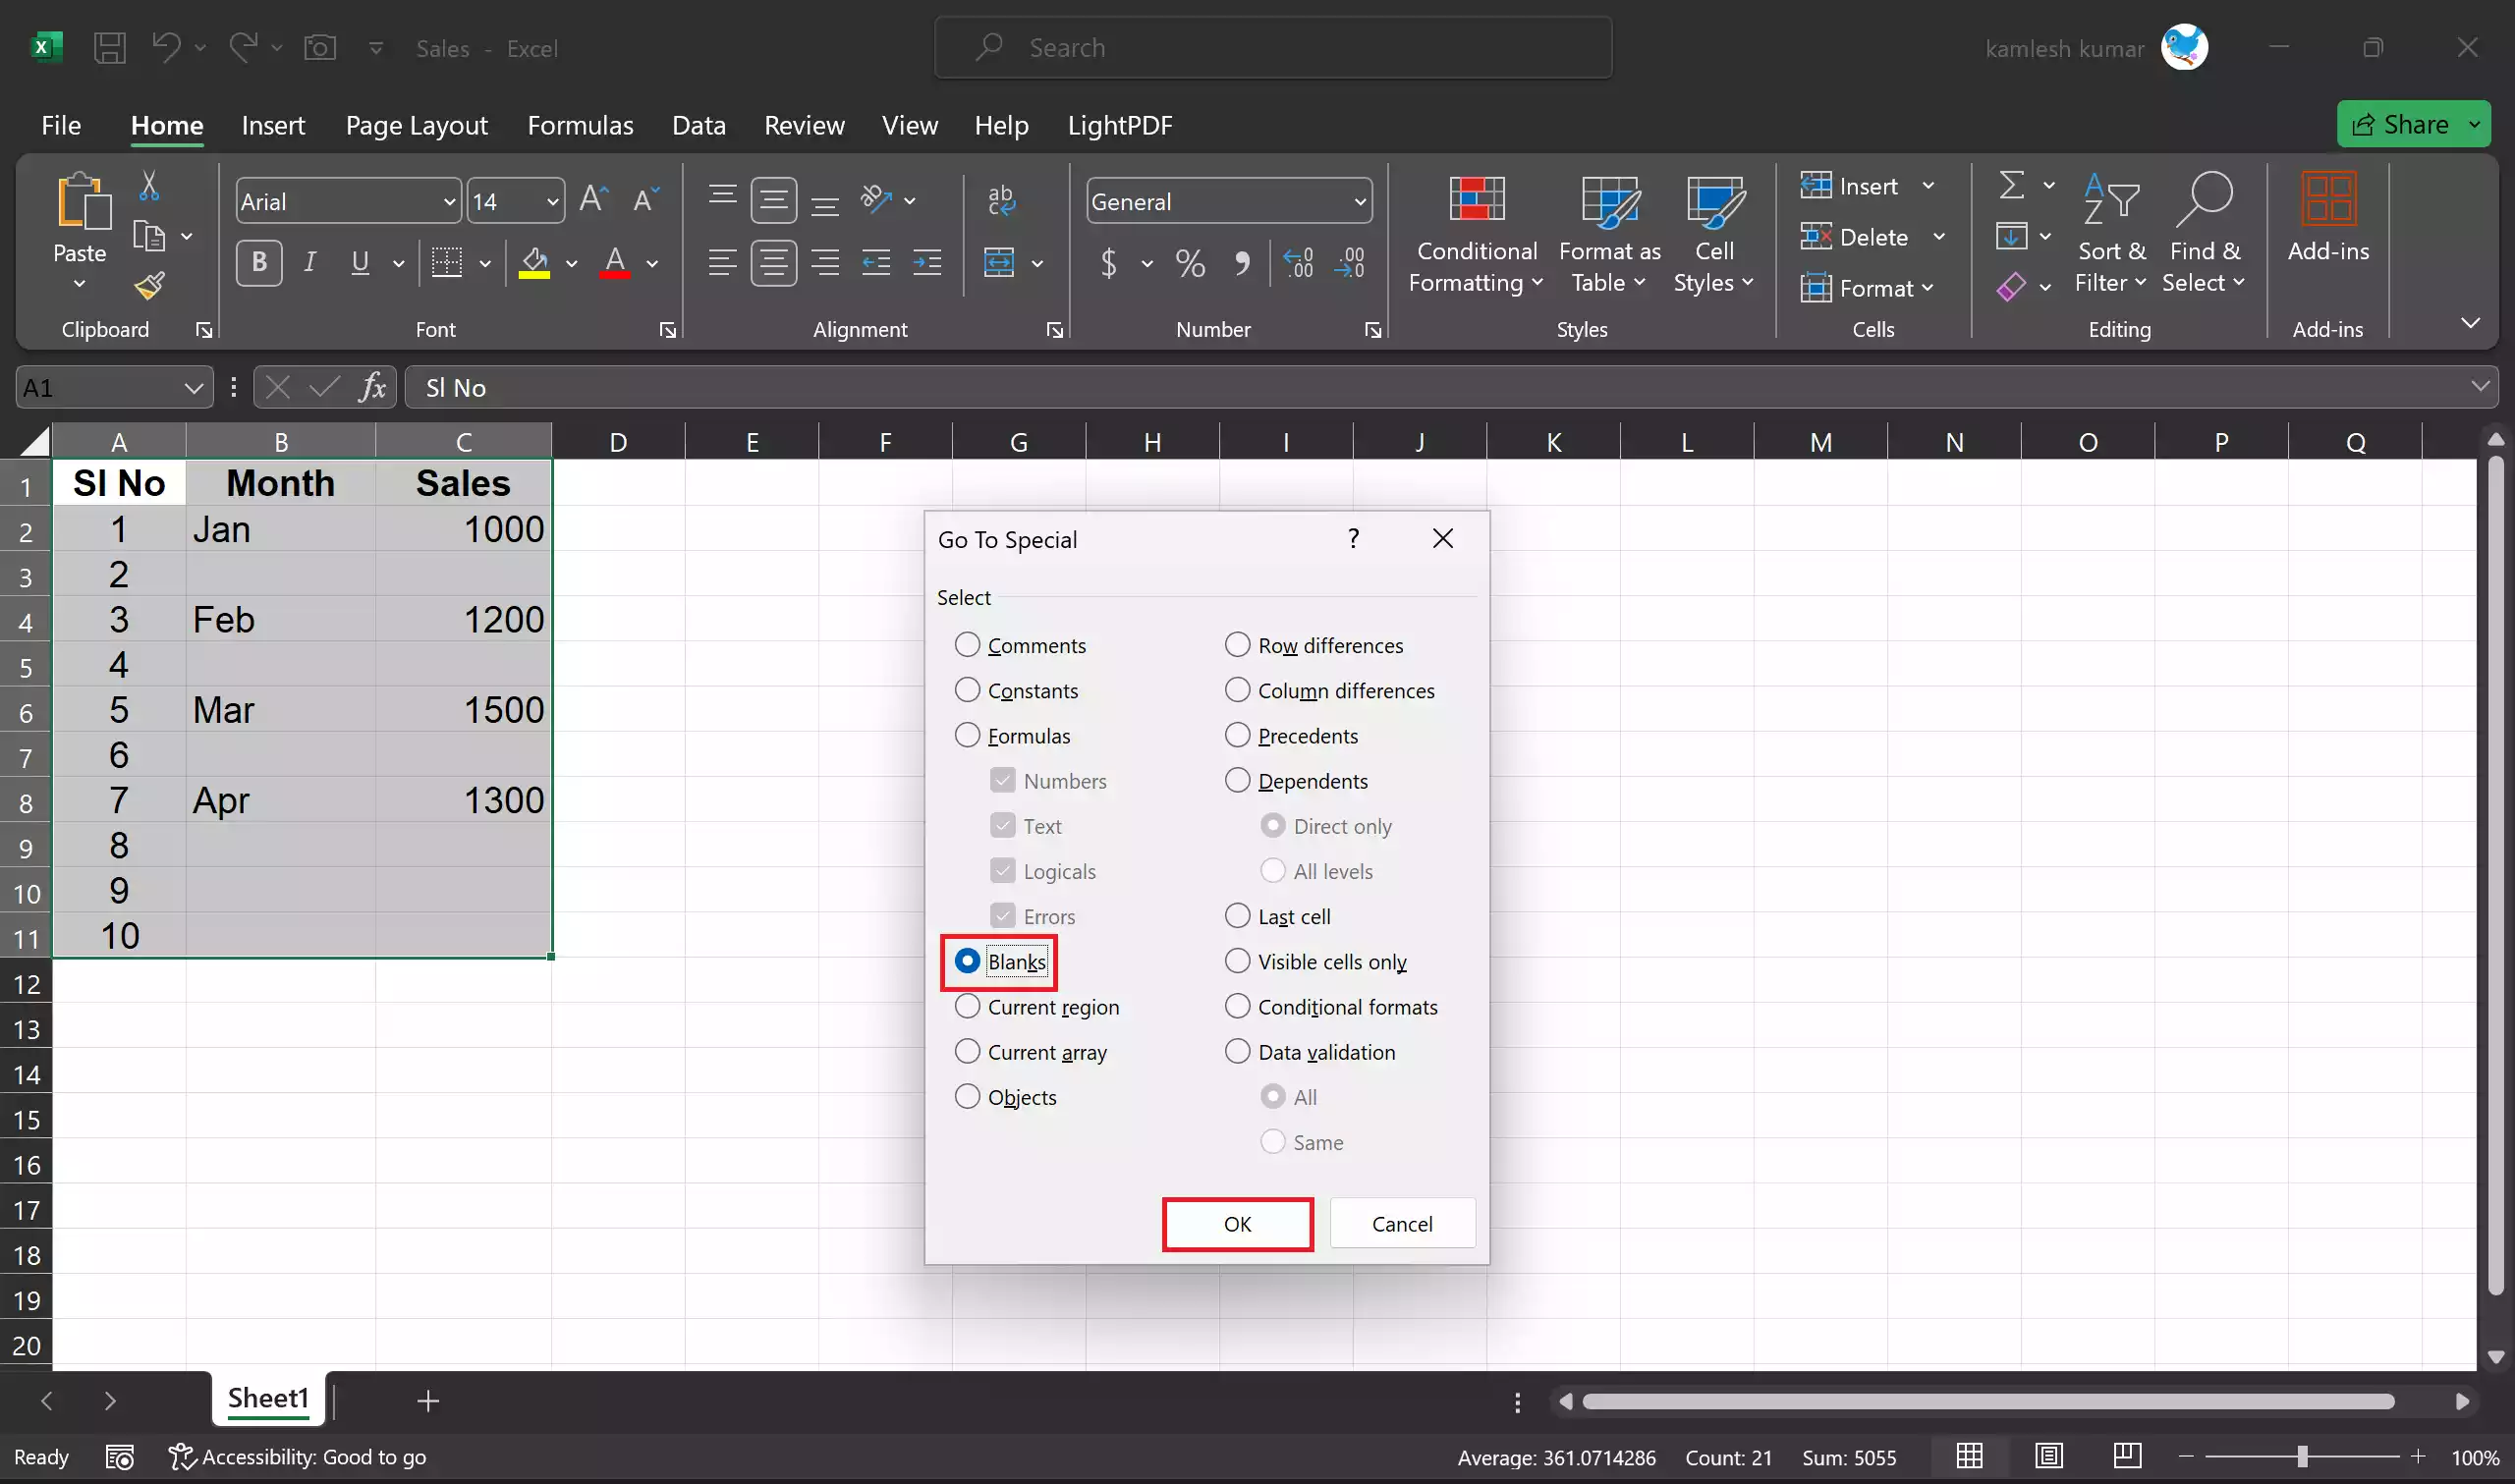
Step 5. All the blank rows in your selected dataset will now be highlighted.
![]()
Step 6. To remove the highlighted blank rows, go to the “Cells” section at the top in the “Home” group and choose “Delete,” then select “Delete Sheet Rows.”

Excel will automatically remove all the empty rows and shift your data up. This method is incredibly efficient and is especially useful when dealing with large spreadsheets.
![]()
Conclusion
In conclusion, Microsoft Excel is an invaluable tool for data analysis and management. However, the presence of blank rows in your spreadsheet can impede productivity, clutter your data, and potentially lead to errors. Removing these empty rows is essential to maintain organized and accurate data. This article has provided two methods for removing blank rows in Excel: a manual approach and an automated one, making it easier for users to keep their data clean and professional. By utilizing these methods, you can enhance your efficiency and presentation of information, ensuring a more effective data analysis process.
