If you don’t know, the term ransomware is used to refer to malicious software that is designed to block access to your system until a sum of money is paid to restore your access to the system. The malware will encrypt your data and demand money to decrypt your data.
Windows Defender has a built-in security feature known as Ransomware Protection to protect your data from such threats. Although this is a handy feature, this setting is not enabled on Windows PCs by default. To protect your PC from malware attacks, you must enable this feature manually.
How to Enable Ransomware Protection in Windows Defender on Windows 11/10?
To turn on Ransomware Protection in Windows Defender, do the following:-
Step 1. Click on the Start button (or Search button in Windows 11) and type Windows Security.
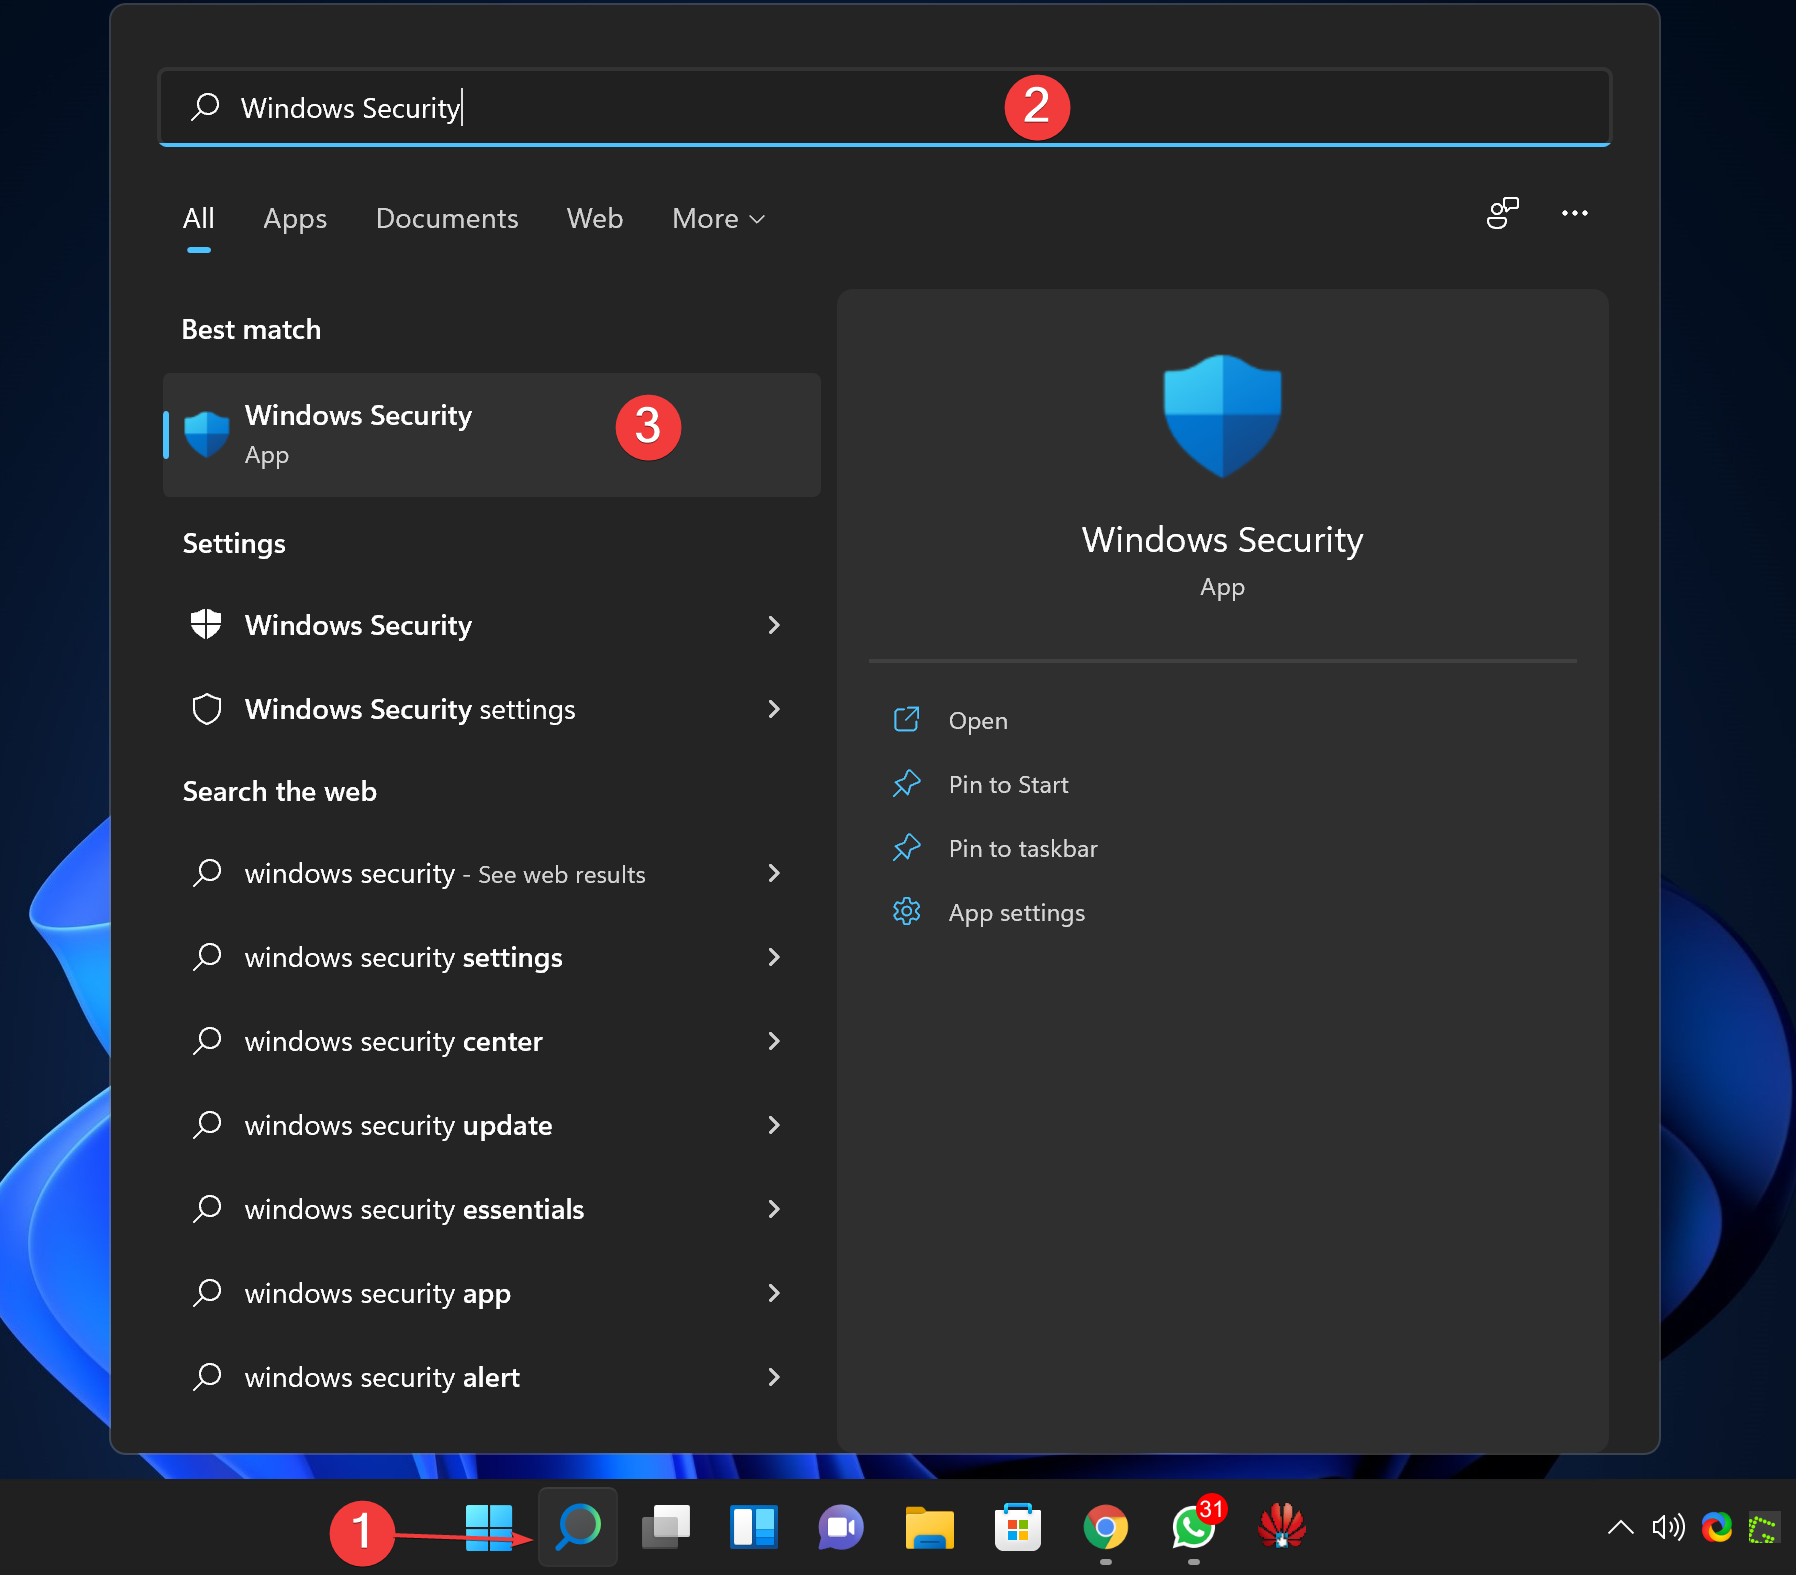
Step 2. Click on the “Windows Security” app in the search results to open it.
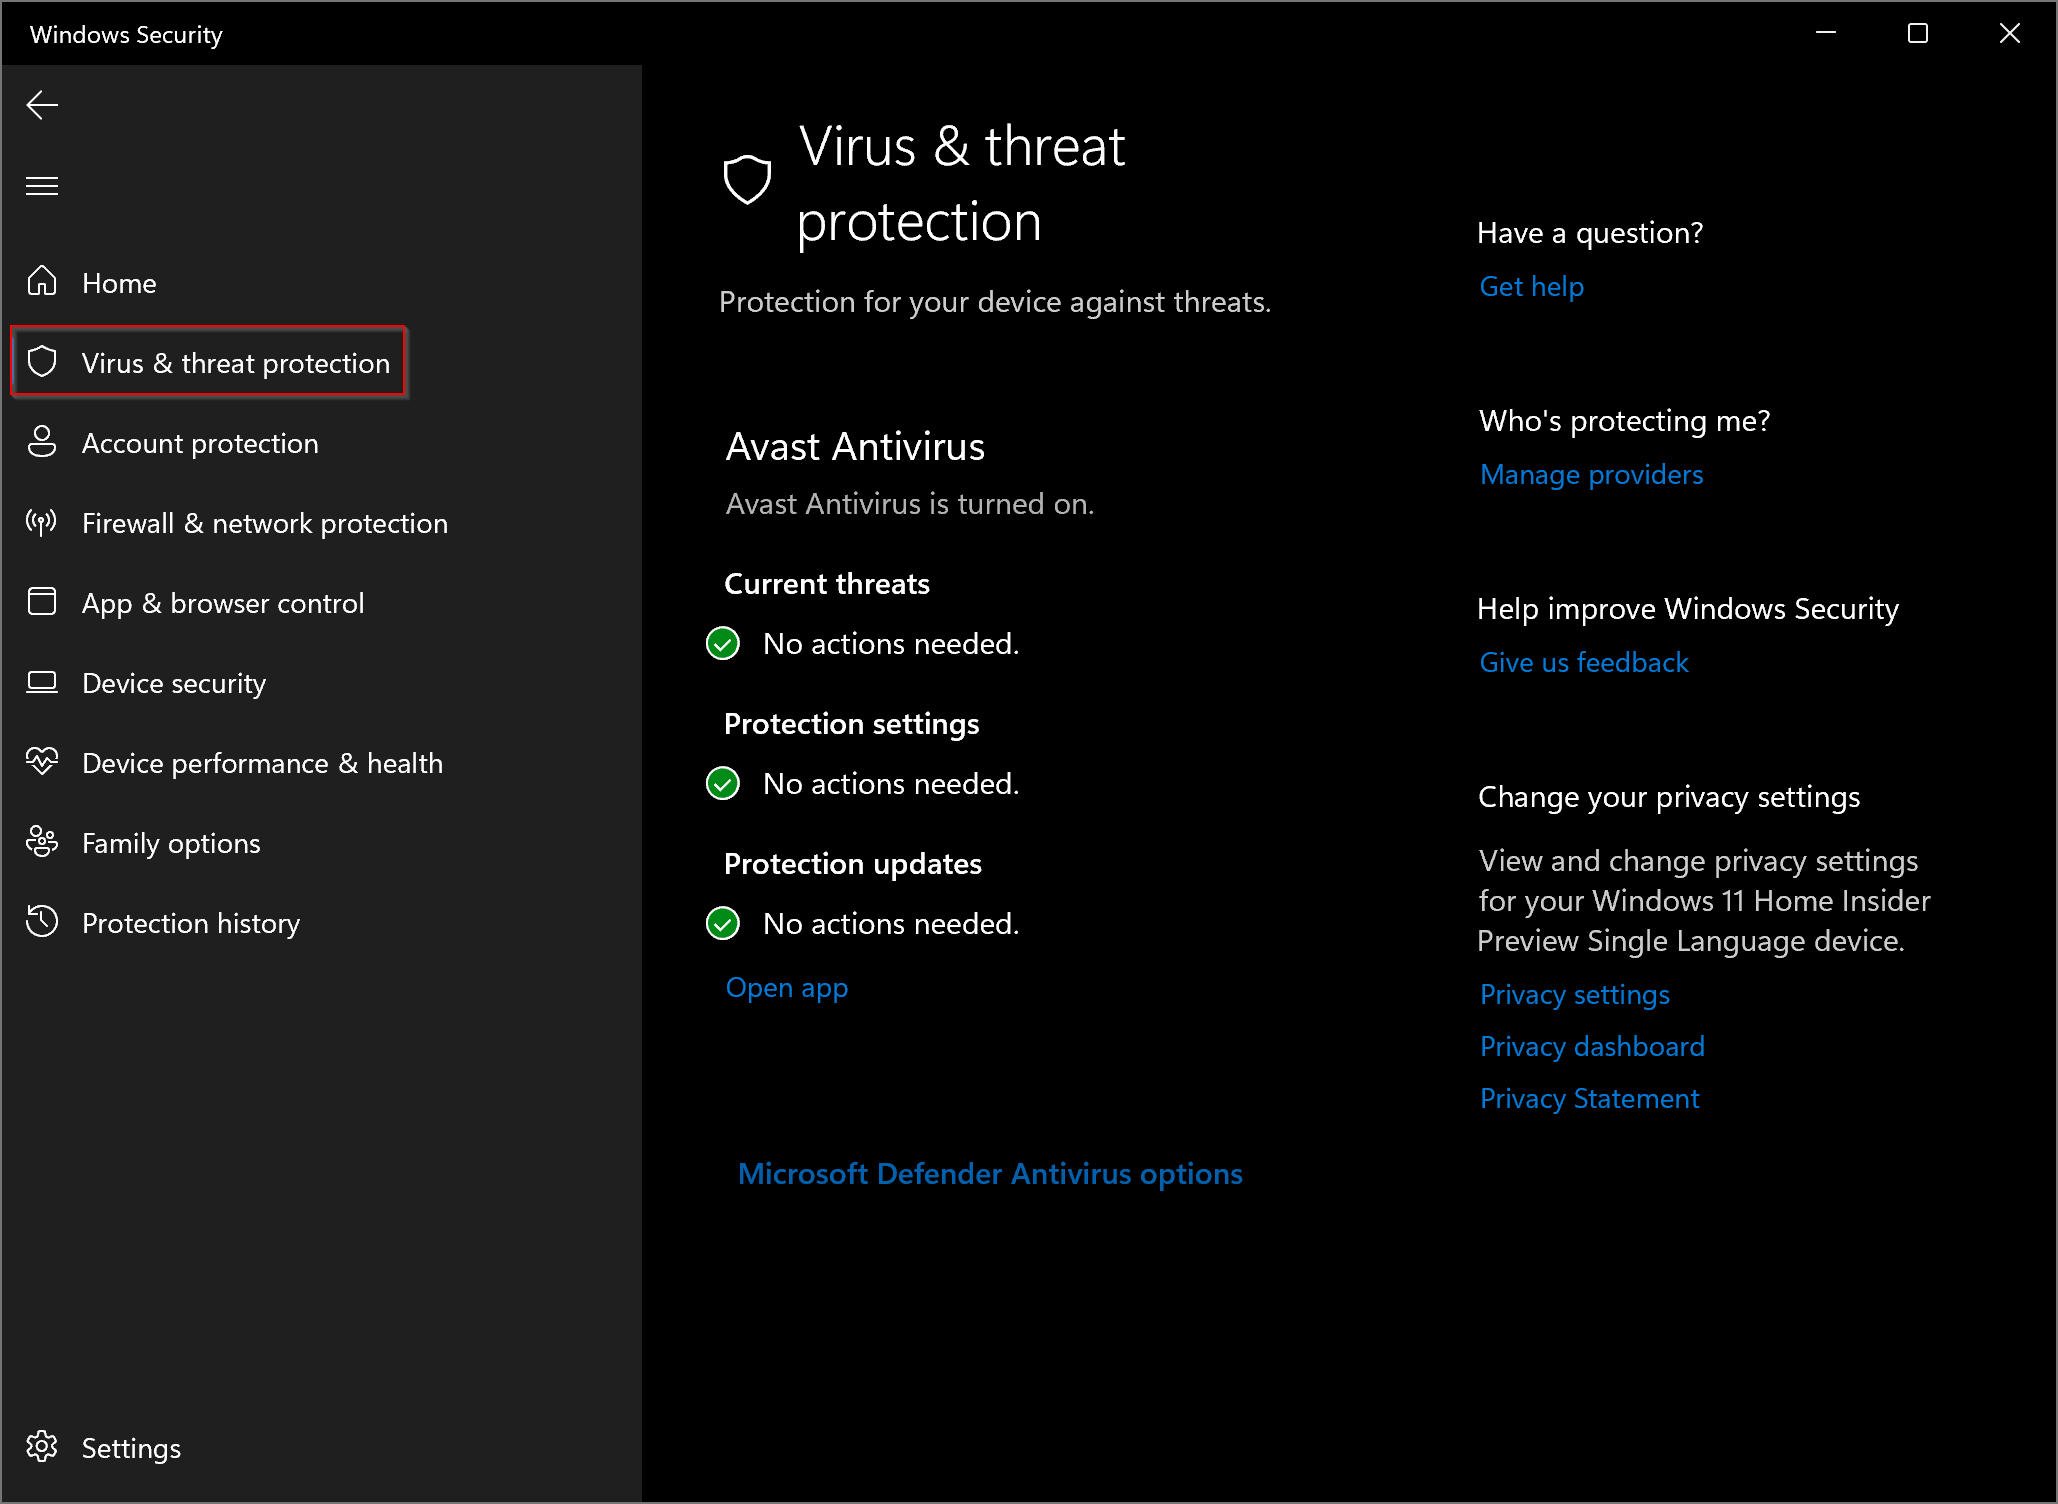
Step 3. In the Windows Security window, click on Virus & threat protection in the left sidebar.
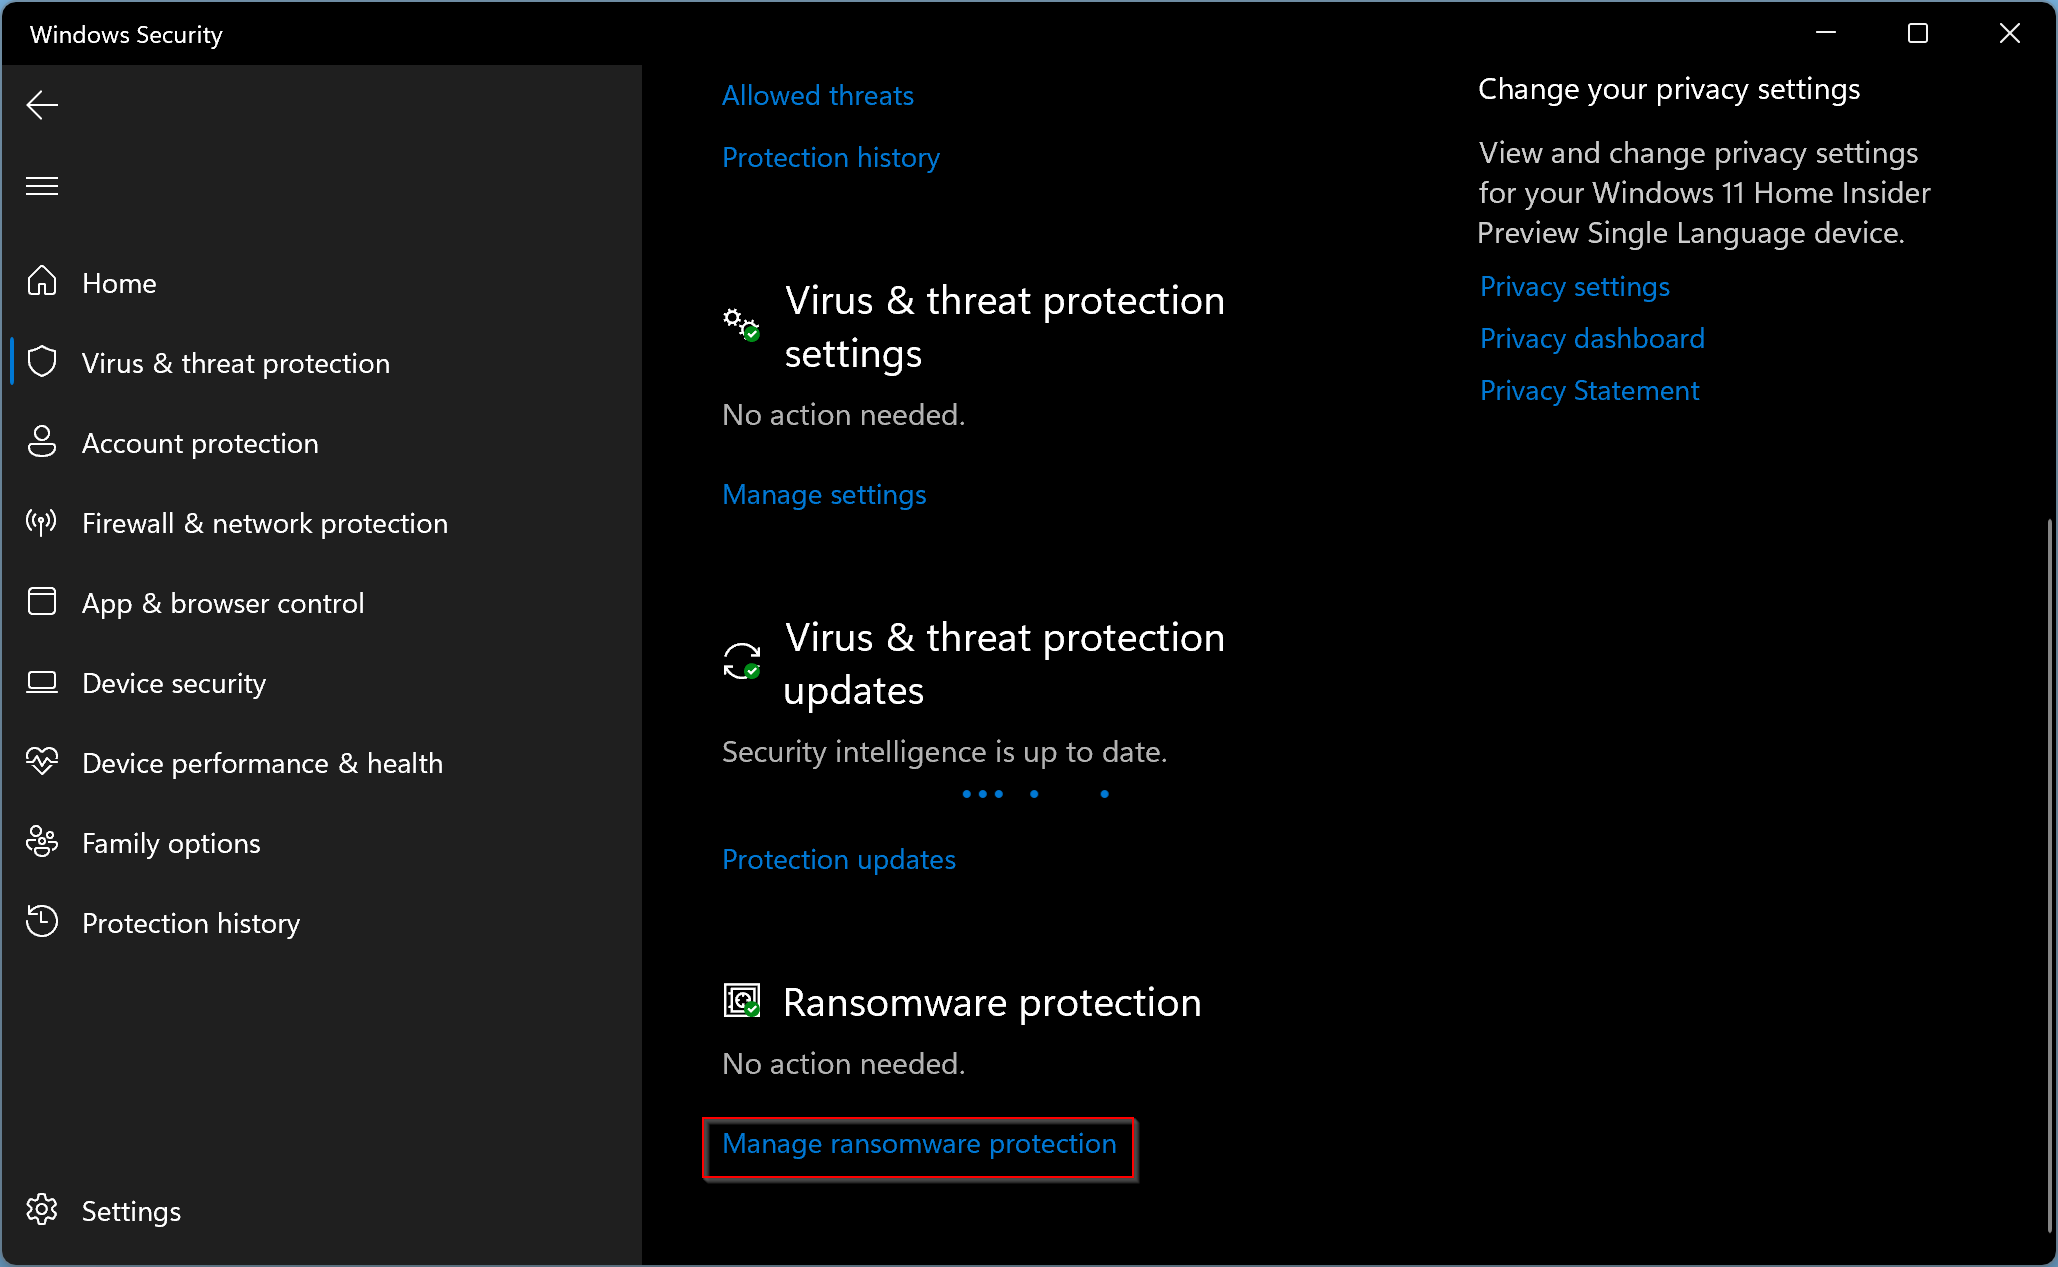
Step 4. Now, on the right side pane, scroll down and click on the Manage ransomware protection link under the “Ransomware protection” section.
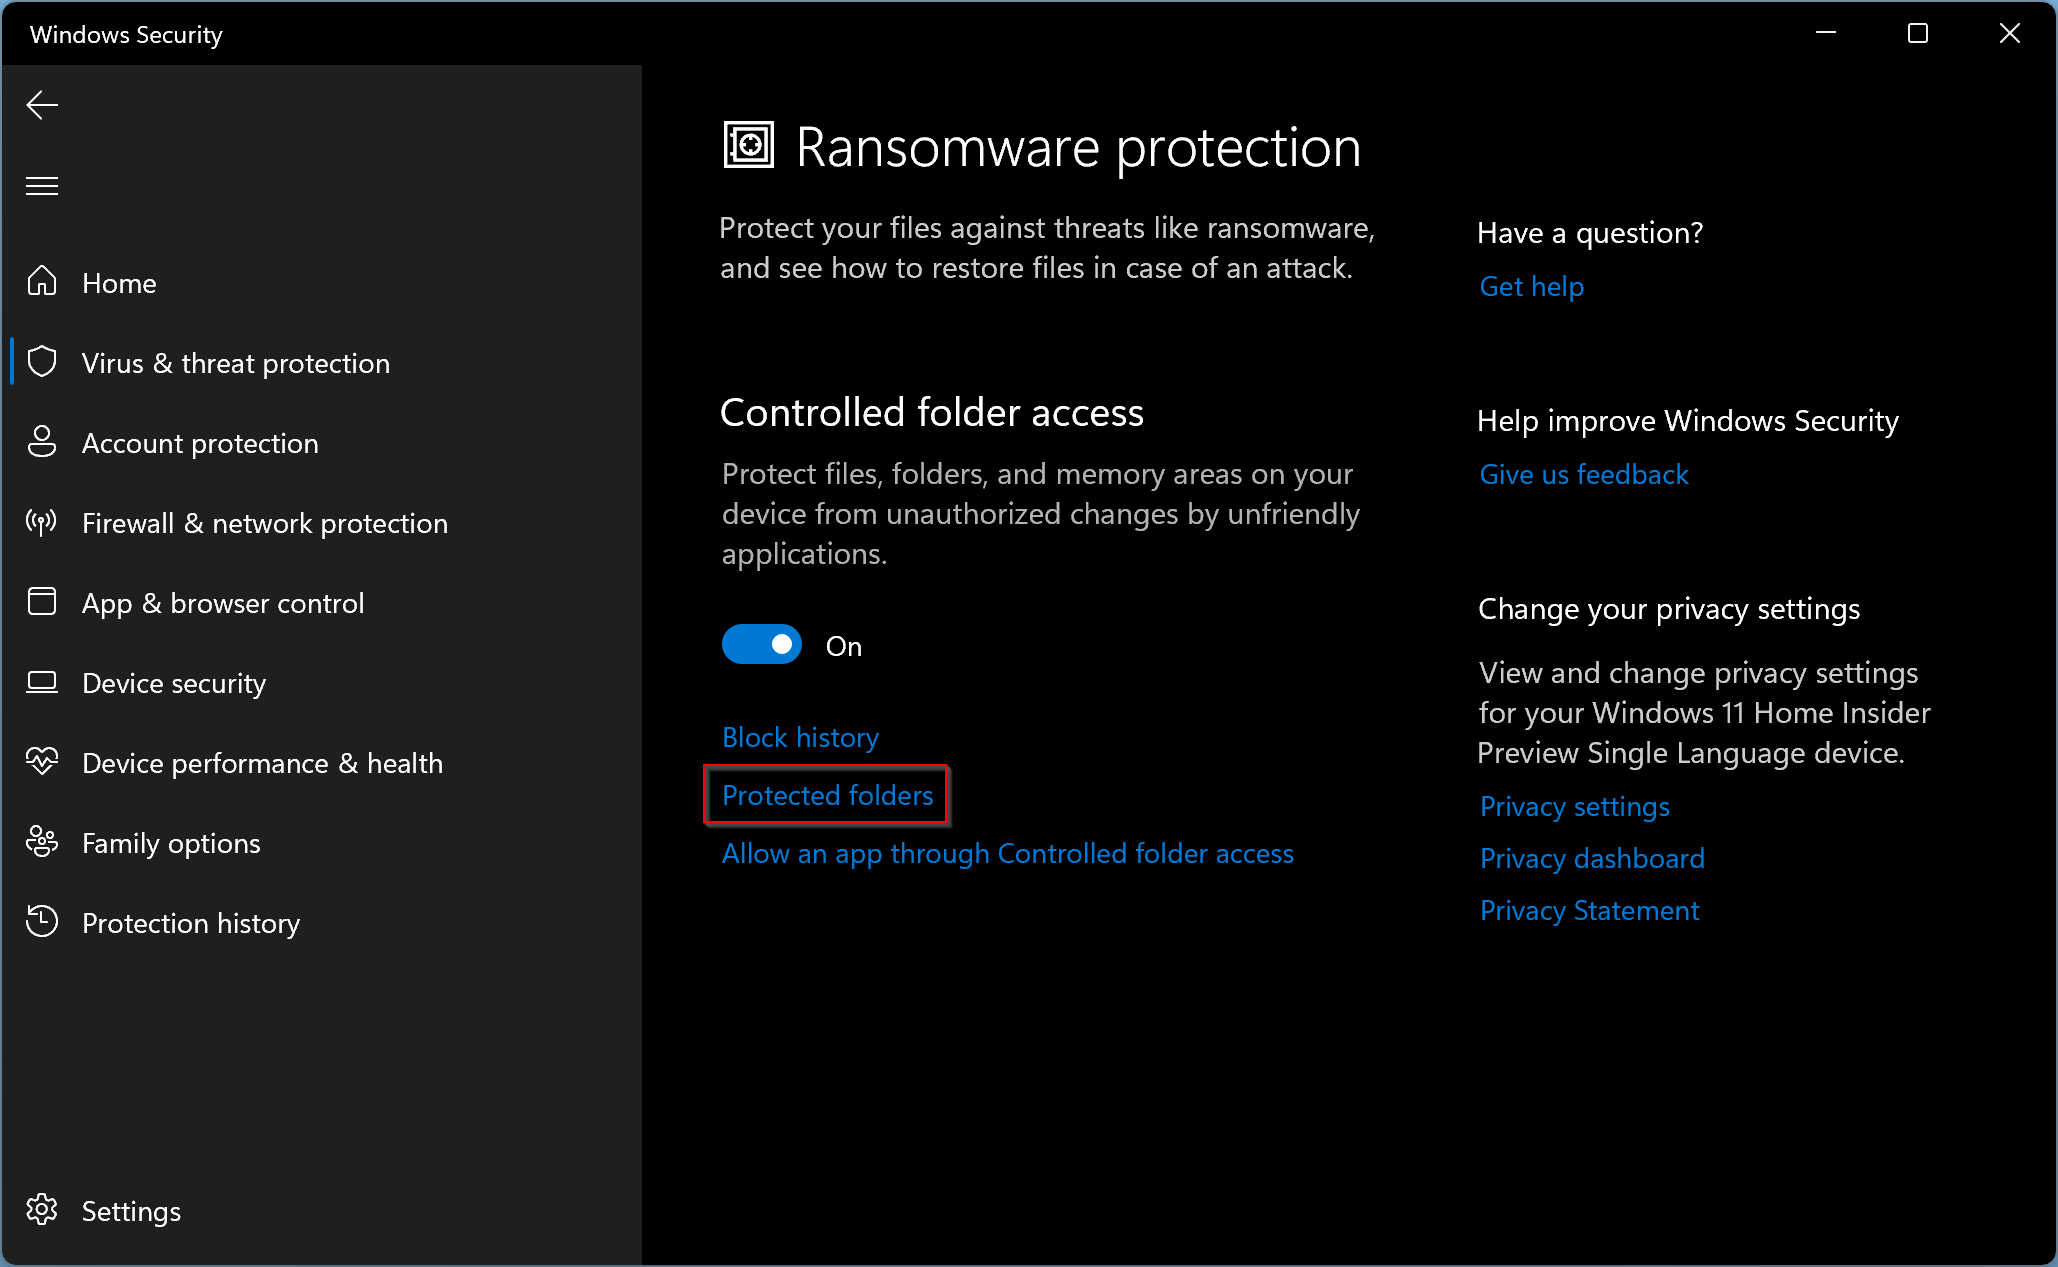
Step 5. Next, turn on the Controlled folder access toggle.
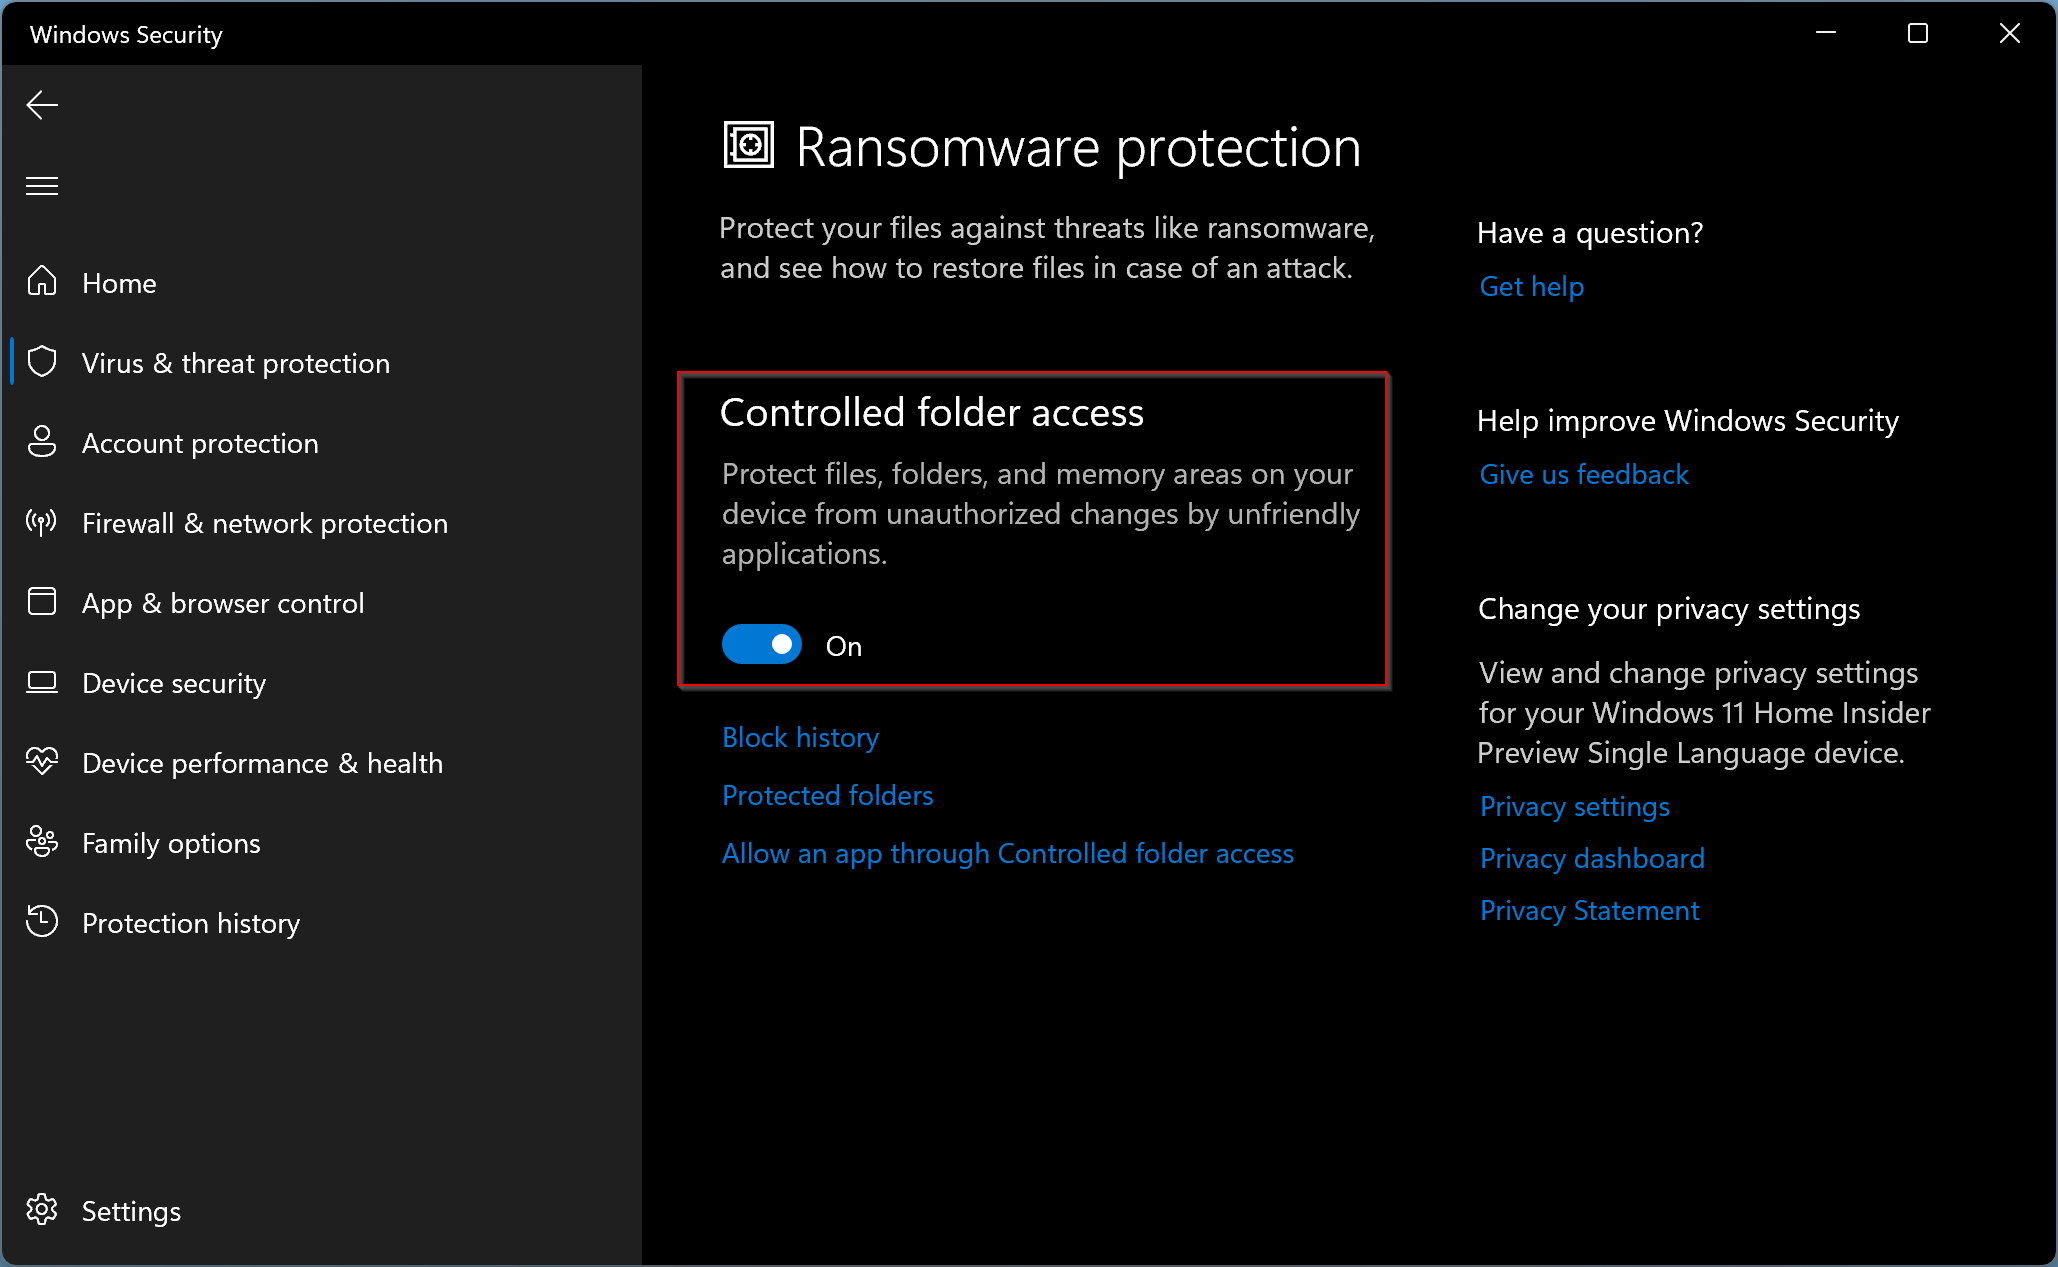
Step 6. Once you turn on “Controlled folder access,” more links will appear below. Click on the Protected folders link to manage the folders you want to protect.
Step 7. In the following screen, click on Add a protected folder button to add more folders. However, in the feature, you will not be able to delete any folders from the list.
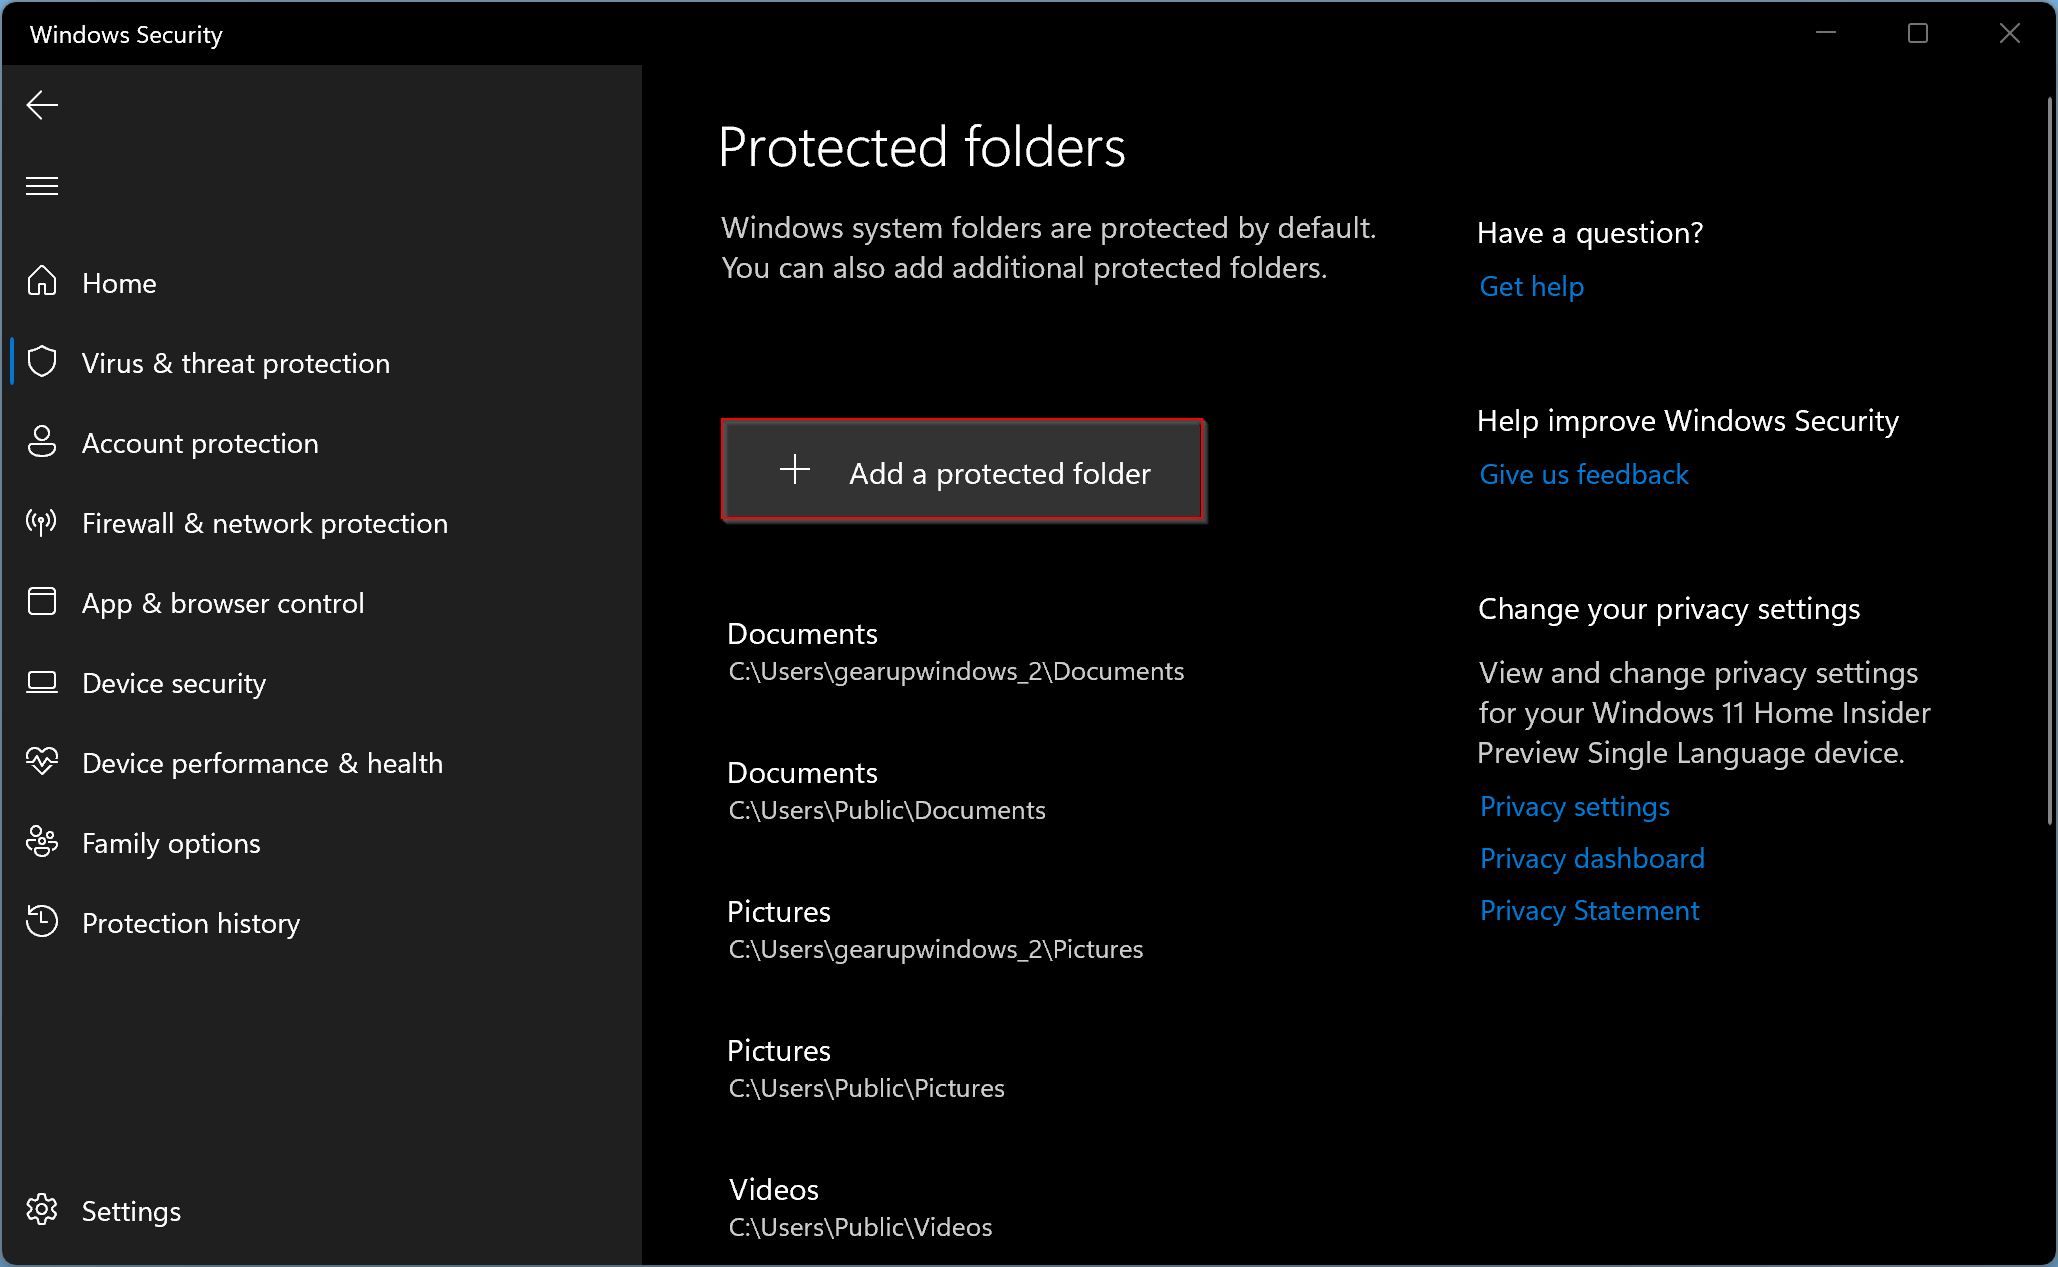
Step 8. Now File Explorer window will open. Select a folder you want to protect and click the Select Folder button.

That’s all. You have successfully turned on the Ransomware protection feature in Windows Defender. Your folders are now protected. The Windows Defender will monitor all programs and applications that will try to access your protected folders.
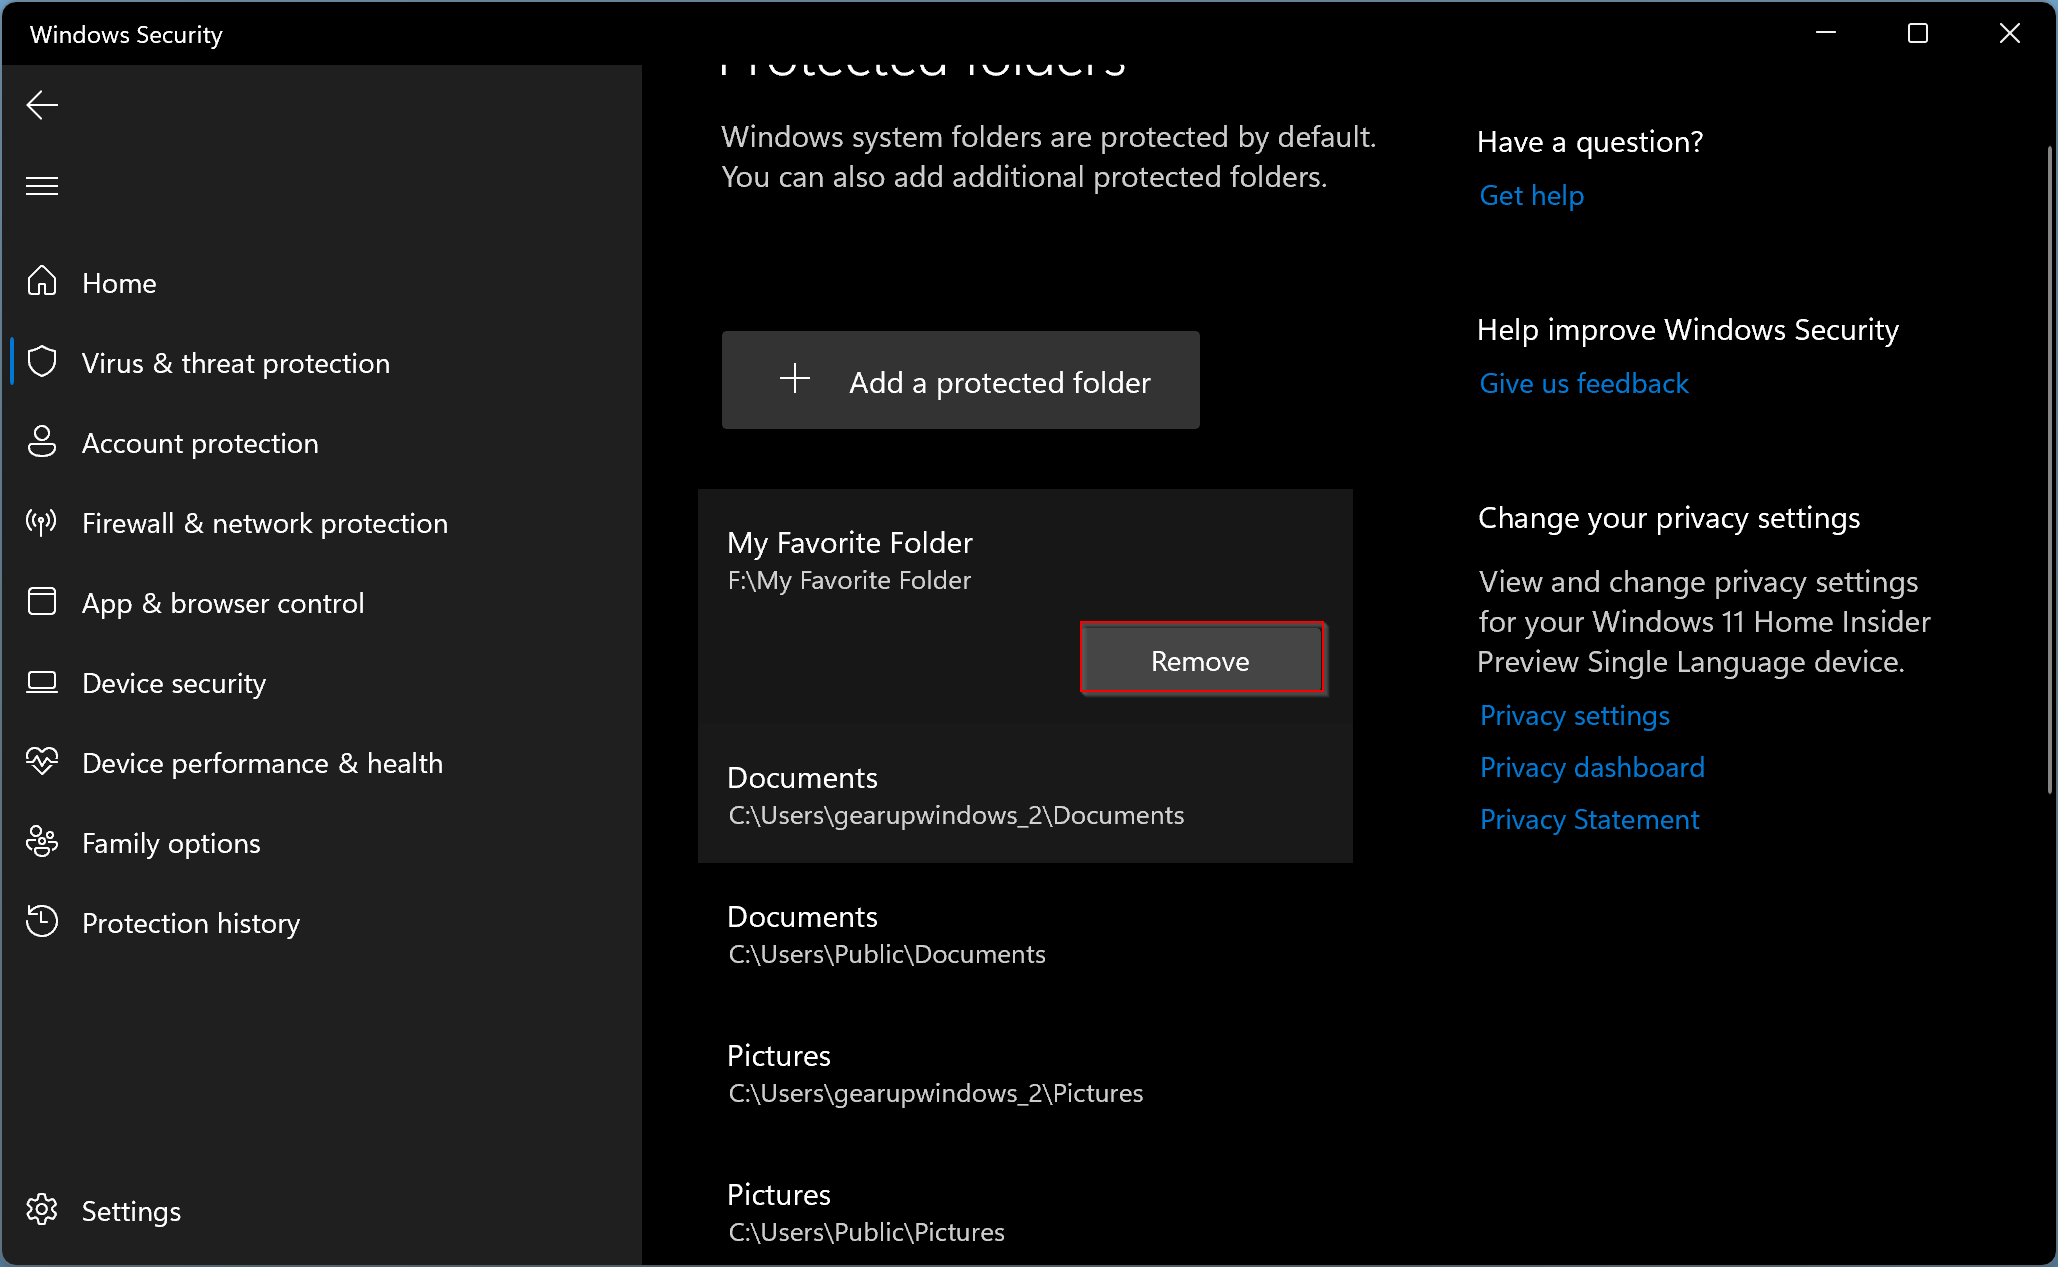
If you want to remove a folder from the Ransomware protection list, repeat the steps above from 1 to 6. Then, click the folder path you want to withdraw from the list. Finally, click on the Remove button. Click the OK button when prompted.
Conclusion
In conclusion, ransomware is a dangerous malware that can encrypt your data and demand money to restore your access to the system. Windows Defender has a built-in security feature known as Ransomware Protection to protect your data from such threats. In this article, we have provided a step-by-step guide on how to enable Ransomware Protection in Windows Defender on Windows 11/10. By following these steps, you can protect your folders and prevent unauthorized access to your system. Remember to regularly update your Windows Defender to ensure that your system remains secure against the latest threats.