Java, a versatile and widely used programming language, powers numerous applications and services across various platforms, including Windows 10. Whether you’re a developer or an end-user, knowing how to check the installed Java version on your Windows 10 system is crucial for ensuring compatibility and security. Additionally, understanding how to install or uninstall Java can help you manage your system efficiently. In this gearupwindows guide, we’ll walk you through the steps to view, install, and uninstall Java on your Windows 10 PC, empowering you with the knowledge to manage Java effectively.
How to View Java Version on Windows 10?
To know or find the Java version on your Windows 10 PC, follow these steps:-
Step 1. To begin, you’ll need to access Command Prompt or PowerShell, both of which provide command-line interfaces for executing commands on your Windows 10 system. You can do this by pressing the `Windows` key on your keyboard and typing “Command Prompt” or “PowerShell” into the search bar. Then, select the appropriate option from the search results.
Step 2. Once you have Command Prompt or PowerShell open, type the following command:-
java -version
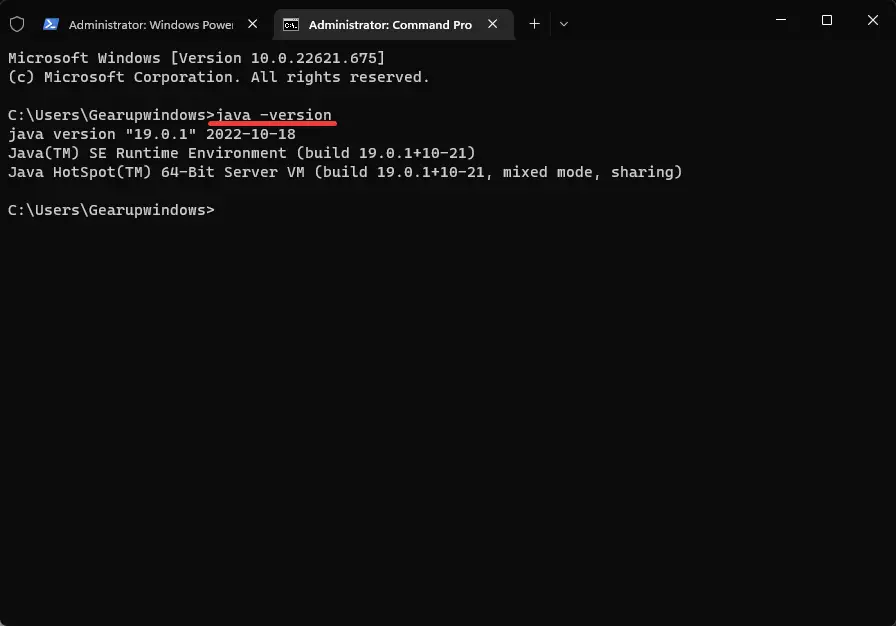
Step 3. Press `Enter` to execute the command.
After entering the command, the system will display information about the installed Java version, including the version number and any additional details.
How to Uninstall Java from Windows 10 PC?
If you no longer require Java on your Windows 10 PC or encounter issues with the current installation, follow these steps to uninstall it:-
Step 1. Press the `Windows` key and type “Control Panel.”
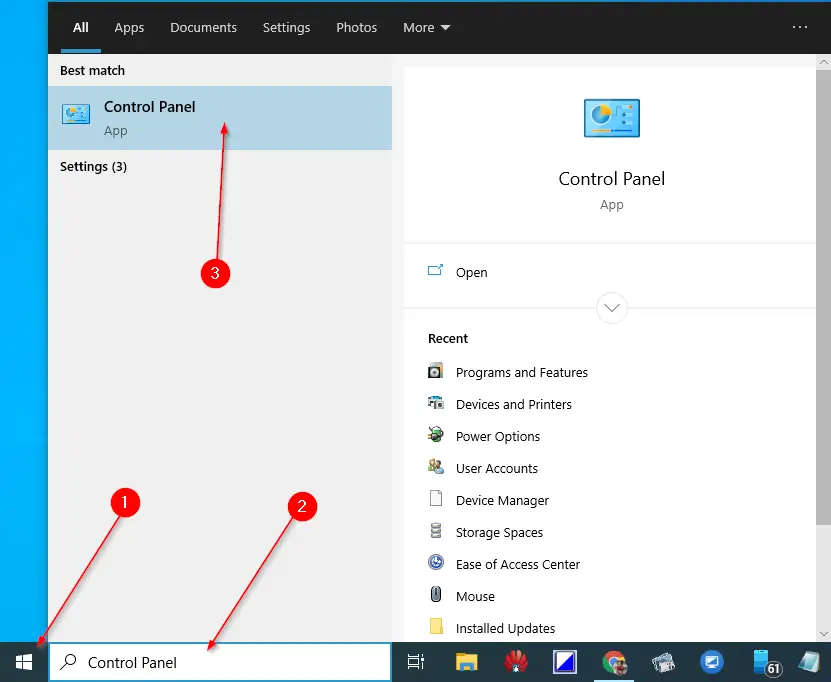
Step 2. In the search results, click on the Control Panel entry to open it.
Step 3. Once the Control Panel opens up, navigate to “Programs” > “Programs and Features.”
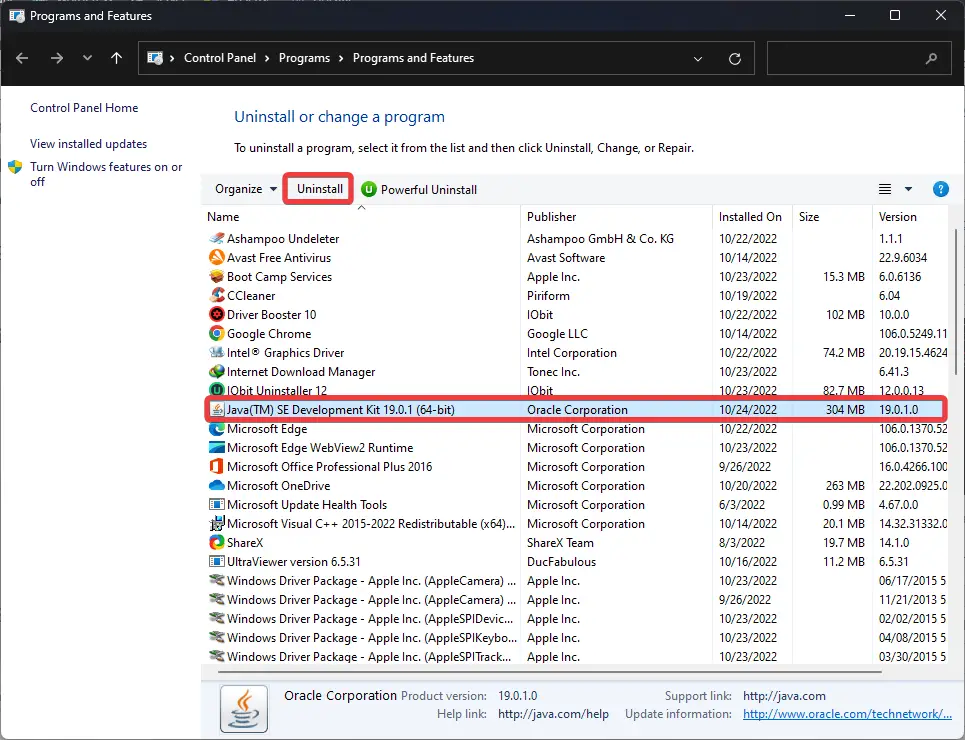
Step 4. Look for “Java” in the list of installed programs. The installed version will be displayed next to it.
Step 5. Select Java entry and click the Uninstall button to remove it from your PC.
Step 6. Follow the on-screen instructions to complete the uninstallation process.
How to Install Java on Windows 10 PC?
If Java is not installed on your Windows 10 PC or if you need to update to a newer version, follow these steps:-
Step 1. Navigate to the Java downloads page on the Oracle website.
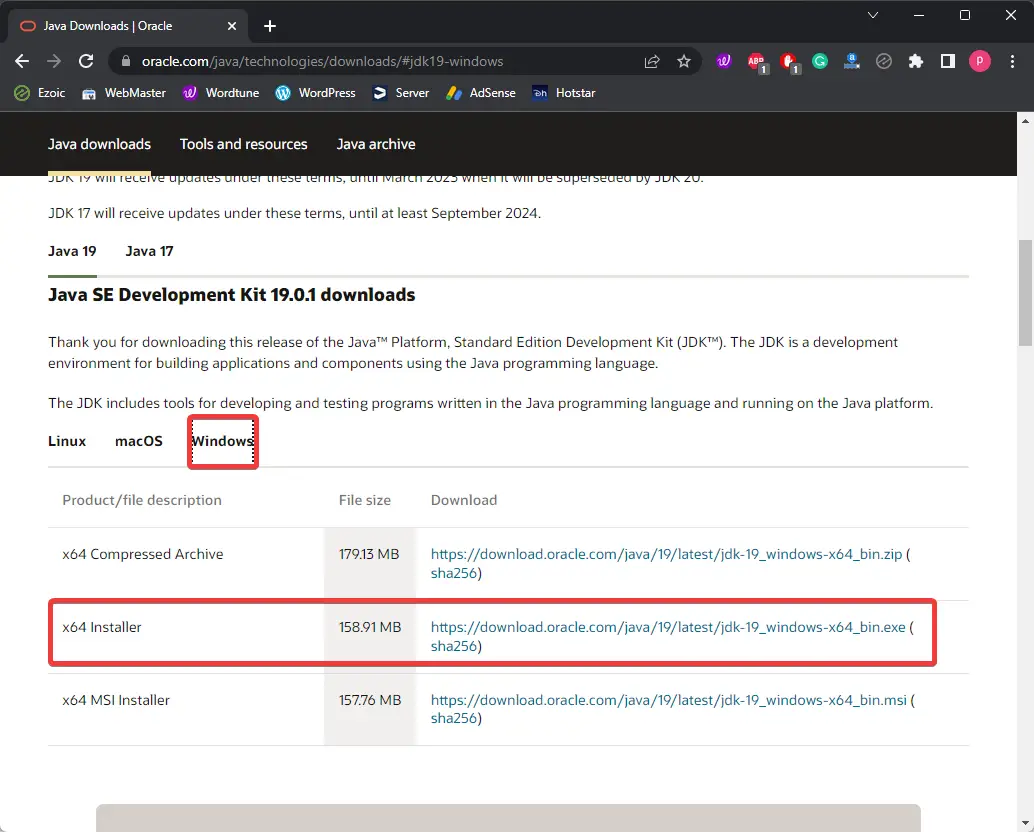
Step 2. Select the appropriate Java version for Windows and click on the download link.
Step 3. Once the download is complete, run the installer and follow the on-screen instructions to install Java on your system.
Additional Tips
– Updating Java: If you find that you’re running an outdated version of Java, it’s essential to update to the latest version to ensure compatibility, performance, and security improvements. You can download the latest version of Java from the official Oracle website and follow the installation instructions.
– Uninstalling Java: If you no longer require Java on your Windows 10 PC or encounter issues with the current installation, you can uninstall it like any other software application. Navigate to the “Apps & Features” section in the Windows Settings menu, locate Java in the list of installed programs, and select “Uninstall” to remove it from your system.
Conclusion
Knowing how to view, install, and uninstall Java on your Windows 10 PC is essential for maintaining compatibility, performance, and security. By following the simple steps outlined in this comprehensive guide, you can effectively manage Java on your system, ensuring seamless operation of Java-based applications and services. Stay informed about updates and maintenance tasks to keep your system optimized and secure.
