Enabling Remote Desktop on Windows 11 allows you to access your computer remotely from another device or location. This can be useful if you need to access files or programs on your computer when you are away from it or if you need to provide technical support to someone else who is using your computer. Enabling Remote Desktop on Windows 11 is a straightforward process that can be completed in just a few steps.
To enable Remote Desktop on Windows 11, you will need to make sure that your computer is running the Pro or Enterprise version of the operating system. If you are using the Home version of Windows 11, you will not be able to use Remote Desktop. Once you have confirmed that you are using the correct version of Windows, you can follow the steps outlined in this guide to enable Remote Desktop and start accessing your computer remotely.
How to Turn On Remote Desktop on Windows 11 Settings?
Enabling Remote Desktop on your Windows 11 computer is a simple process that can be done in just a few steps. Follow these steps to turn on Remote Desktop in Windows 11 Settings:-
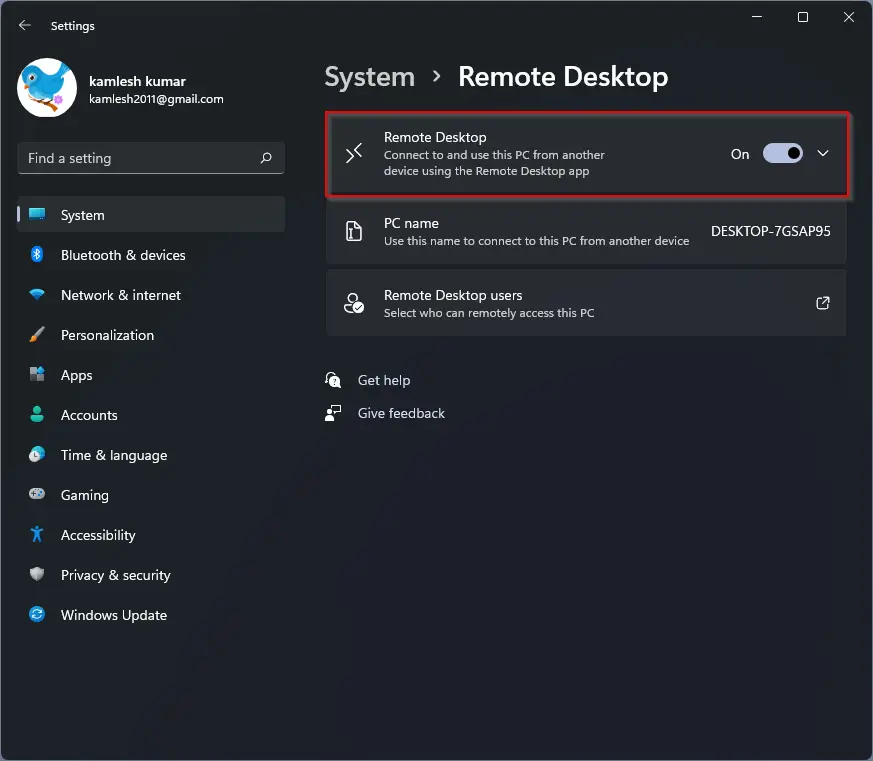
Step 1. Press the Windows key and the letter “I” at the same time to open the Settings app.
Step 2. In the Settings window, click on the “System” category in the left-hand pane.

Step 3. On the right-hand side of the System settings, click on the “Remote Desktop” tab.

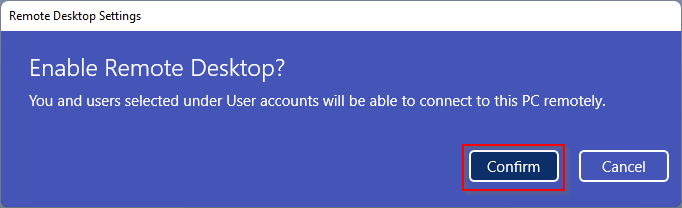
Step 4: Toggle the switch next to the “Remote Desktop” option to turn it on. If prompted with a pop-up window, click the “Confirm” button to proceed.
To disable Remote Desktop on your Windows 11 computer, simply repeat the above steps and toggle the switch next to the “Remote Desktop” option to turn it off.
Enabling Remote Desktop on Windows 11 via the Settings app is a convenient way to access your computer remotely from another device or location. Use these simple steps to enable or disable Remote Desktop on your Windows 11 computer today.
How to Turn On Remote Desktop on Windows 11 using Control Panel?
Enabling Remote Desktop on your Windows 11 computer using the Control Panel is a straightforward process that can be completed in just a few steps. Follow these simple steps to enable Remote Desktop on Windows 11 using the Control Panel:-
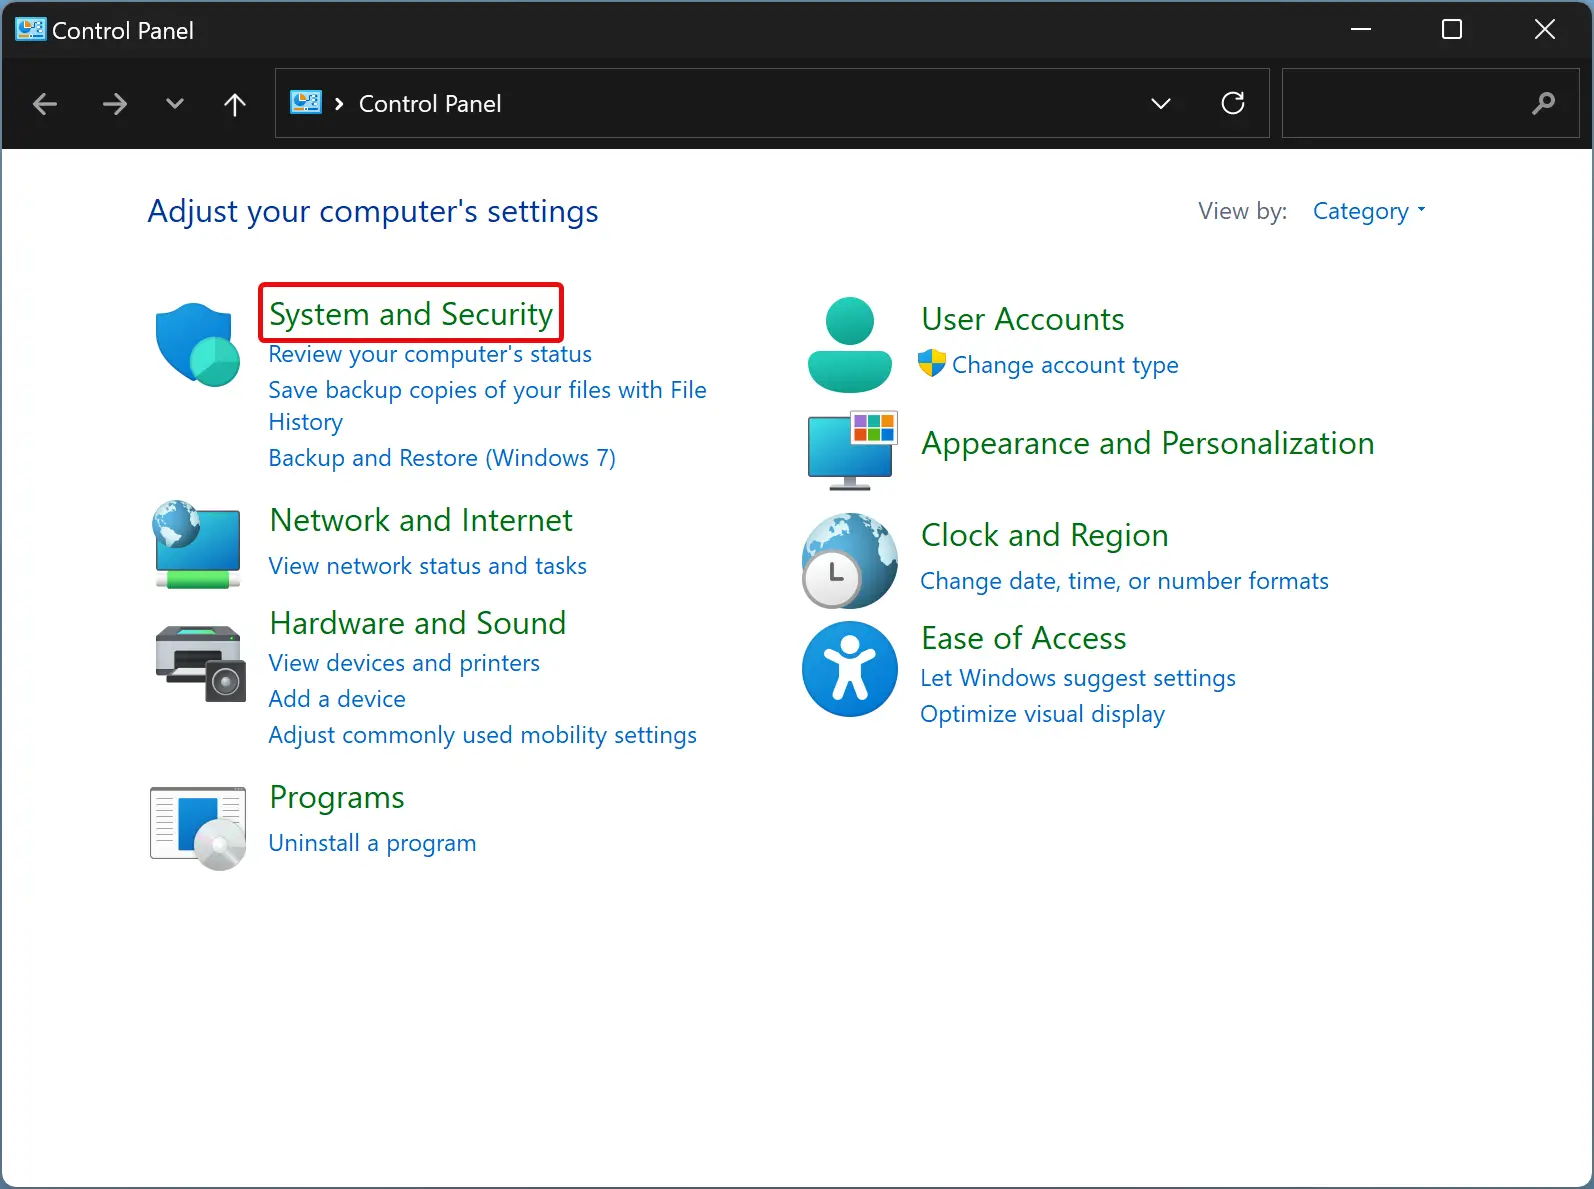
Step 1. Open the Control Panel.
You can do this by searching for “Control Panel” in the Start menu.
Step 2. Click on the “System and Security” option.
Step 3. Under the “System” section, click the “Allow remote access” option.

Step 4. In the following window, under the “Remote Desktop” section, select the “Allow remote connections to this computer” option.
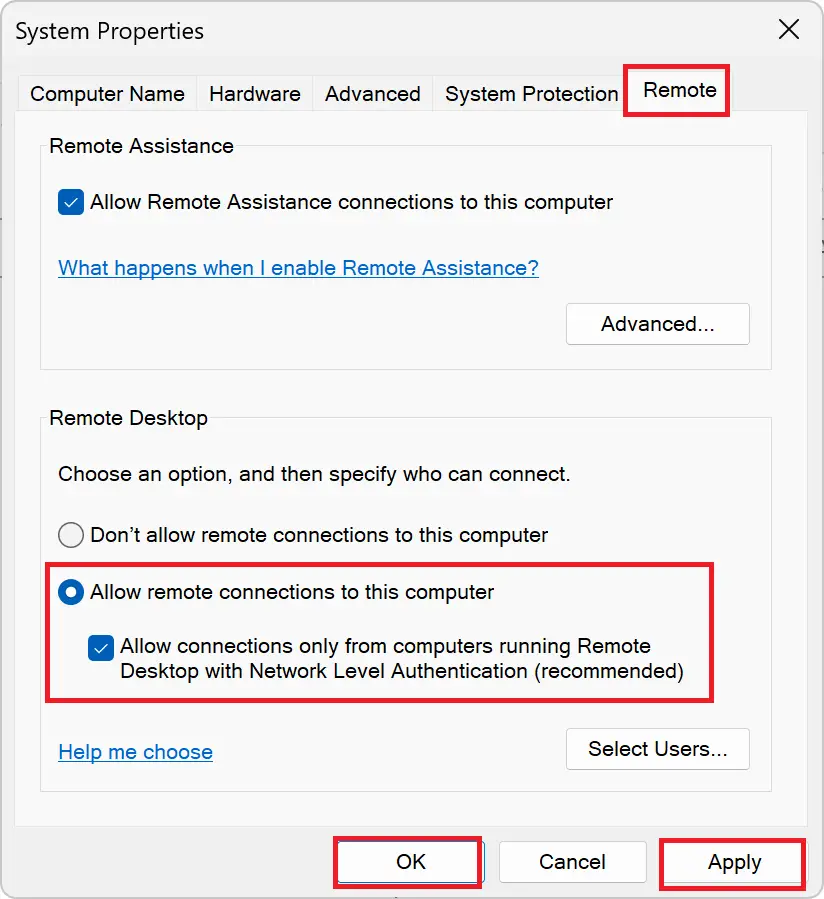
Step 5. Click the “Apply” button to save your changes.
Step 6. Click the “OK” button to close the window.
Once you have completed these steps, Remote Desktop will be enabled on your Windows 11 computer via the Control Panel. This will allow you to access your computer remotely from another device or location, making it easier to retrieve files or provide technical support. If you ever need to disable Remote Desktop, simply follow these same steps and select the “Don’t allow remote connections to this computer” option.
How to Turn On Remote Desktop on Windows 11 using Command Prompt?
To activate Remote Desktop on Windows 11 via Command Prompt, follow these steps:-
Step 1. Open the Start menu.
Step 2. Search for Command Prompt, right-click the top result, and choose “Run as administrator.”
Step 3. Now, enter the following command to enable the Remote Desktop Protocol and press Enter:-
reg add "HKEY_LOCAL_MACHINE\SYSTEM\CurrentControlSet\Control\Terminal Server" /v fDenyTSConnections /t REG_DWORD /d 0 /f
Optionally, enter the following command to enable Remote Desktop through the Windows Firewall and press Enter:-
netsh advfirewall firewall set rule group="remote desktop" new enable=Yes
Once completed, Remote Desktop will be activated, and the firewall will be configured, allowing for remote access to the computer.
How to Turn On Remote Desktop on Windows 11 through PowerShell?
To activate Remote Desktop on Windows 11 via PowerShell, follow these steps:-
Step 1. Open the Start menu.
Step 2. Search for PowerShell, right-click the top result, and choose “Run as administrator.”
Step 3. Now, enter the following command to enable the Remote Desktop Protocol and press Enter:-
Set-ItemProperty -Path 'HKLM:\System\CurrentControlSet\Control\Terminal Server' -name "fDenyTSConnections" -value 0
Optionally, enter the following command to enable Remote Desktop through the Windows Firewall and press Enter:
Enable-NetFirewallRule -DisplayGroup "Remote Desktop"
Once completed, you can use the Remote Desktop app on Windows 11 to remotely access the device, even when the firewall is enabled.
Conclusion
In summary, there are several methods to turn on Remote Desktop on Windows 11.
The first method involves using the System Properties window, where you can access the Remote tab and enable Remote Desktop.
The second method involves using the Control Panel, where you can enable Remote Desktop by navigating to System and Security and then System.
The third method involves using Command Prompt, where you can enable Remote Desktop using the reg add command and the netsh advfirewall firewall set rule group command.
The fourth method involves using PowerShell, where you can enable Remote Desktop by using the Set-ItemProperty command and the Enable-NetFirewallRule command.
All of these methods accomplish the same goal of turning on the Remote Desktop, but the choice of method may depend on personal preference or familiarity with the command line.