In Windows 10, when you perform a right-click on the program shortcut or folder on the desktop, the context menu includes an option, “Pin to Start,” that lets you pin the program or folder to the Start Menu for easy access. Similarly, if a program or folder is already pinned to Start Menu, the context menu provides an option to “Unpin from Start,” which removes the program or folder from the Start Menu.
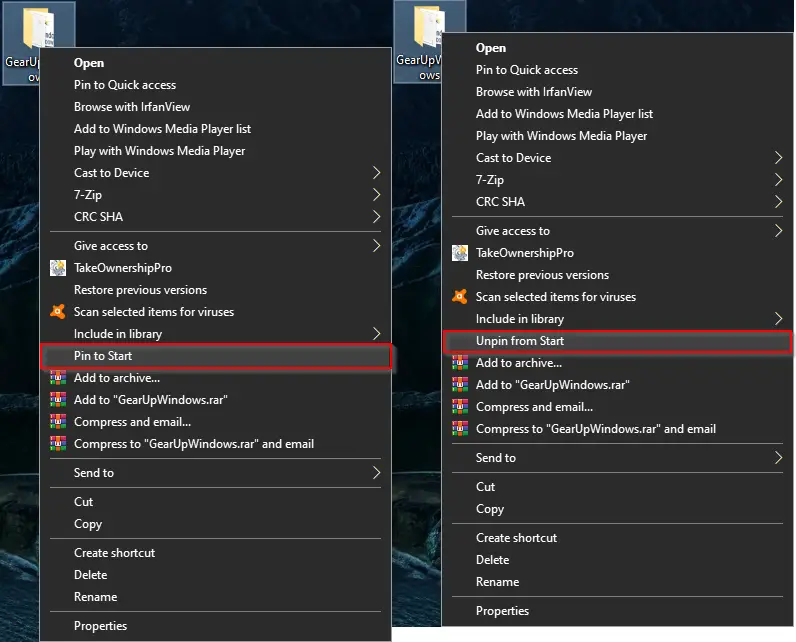
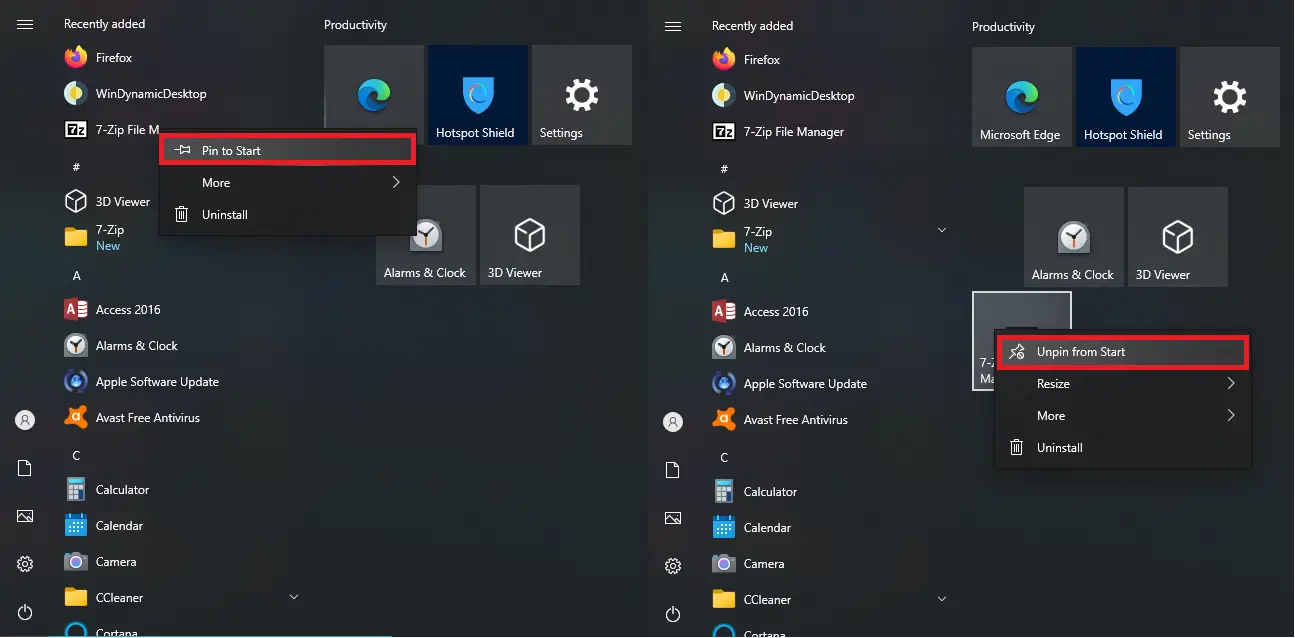
The problem is that many users are complaining that the “Pin to Start” option is missing when they perform a right-click on the Start menu app or the program shortcut.
Reasons may be many in Windows 10 for missing the “Pin to Start” and “Unpin from Start” features. It may be your PC is infected with malware or virus, corrupted registry entries, or some third-party programs have managed to change the Group Policy. If you suspect your Windows 10 PC is spoiled by malware or virus, perform a scan using good antivirus or clean Windows 10 PC using the Malicious Software Removal Tool.
Once you are sure that any virus or malware does not infect your PC, you can fix the “Pin to Start” and “Unpin from Start” context menus by performing any of these methods:-
- Fix the missing “Pin to Start” menu option in Windows 10 using Local Group Policy Editor
- Repair the missing “Pin to Start” menu option in Windows 10 using Registry Editor
Fix the missing “Pin to Start” menu option in Windows 10 using Local Group Policy Editor.
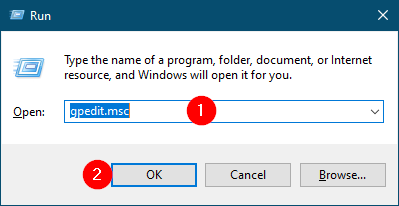
Step 1. Press the Windows logo + R keys to open the Run command box.
Step 2. Type in or copy and paste gpedit.msc in the Run box and hit Enter from the keyboard to open the Local Group Policy Editor window.
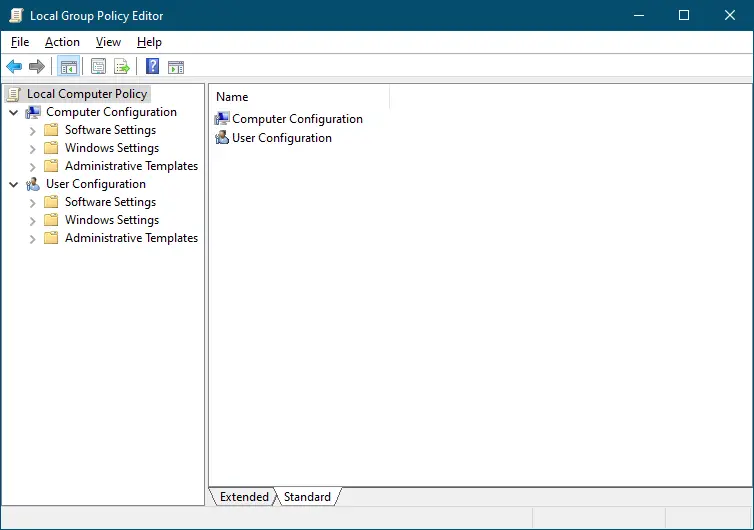
Step 3. In the Local Group Policy Editor window that appears, navigate to the following setting:-
User Configuration > Administrative Templates > Start Menu and Taskbar
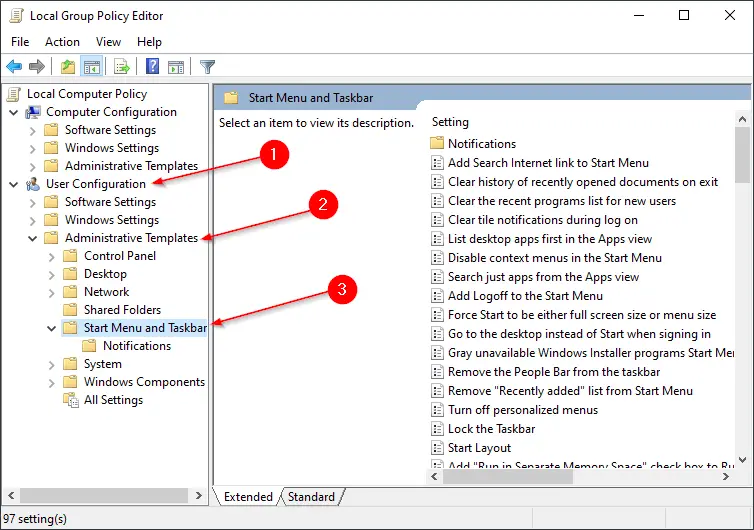
Step 4. On the right side of the “Start Menu and Taskbar,” click on the State column (once or twice) to sort settings. All the policies which have been changed on your PC will assemble in one place.
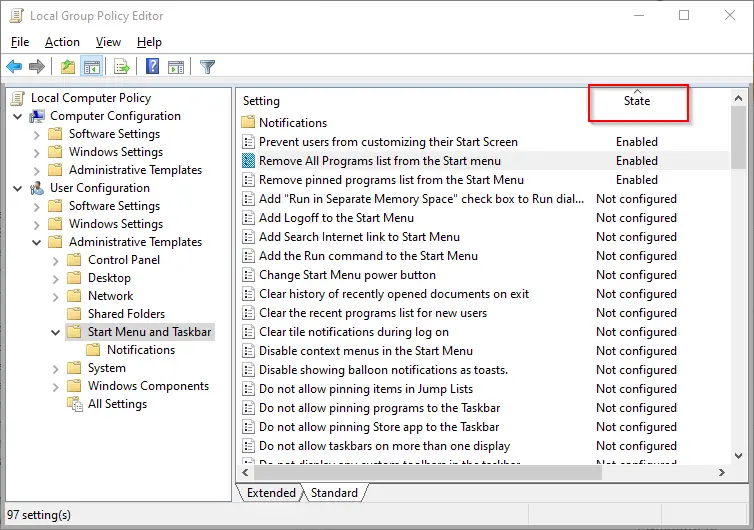
- Prevent users from customizing their Start Screen
- Remove All Programs list from the Start menu
- Remove pinned programs list from the Start Menu
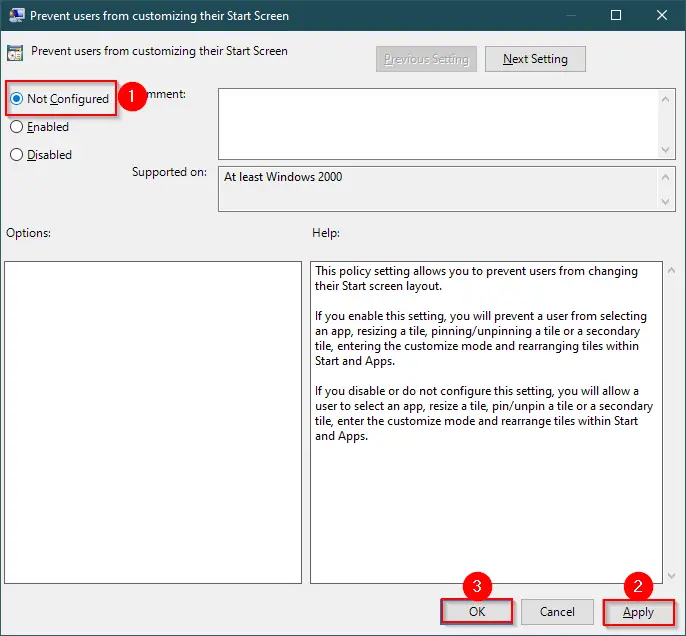
Step 6. Click Apply.
Step 7. Click OK.
Step 8. Reboot your computer.
Once you perform the above steps, “Pin to Start” and “Unpin from Start” should be visible in the Start menu/screen when you right-click on the program shortcut or folder on the desktop of Windows 10.
Fix the missing “Pin to Start” menu option in Windows 10 using Registry Editor.
If you are unable to open Group Policy due to some reason, you can opt for the hacking method. You need to perform the following steps to see the “Pin to Start” or “Unpin to Start” menu:-
Step 1. Press and hold the Windows logo key, then press the R key to open the Run dialog box.
Step 2. In the Run dialog box that appears, type notepad and hit Enter from the keyboard.

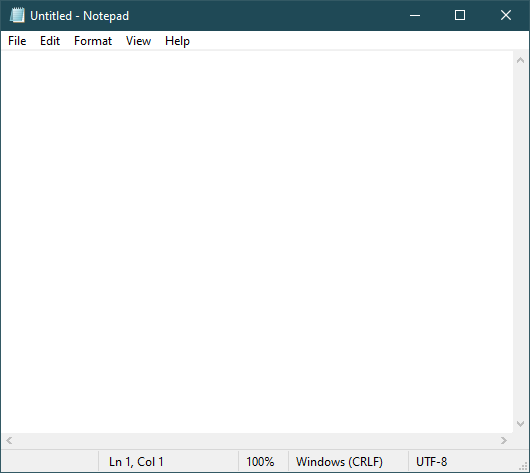
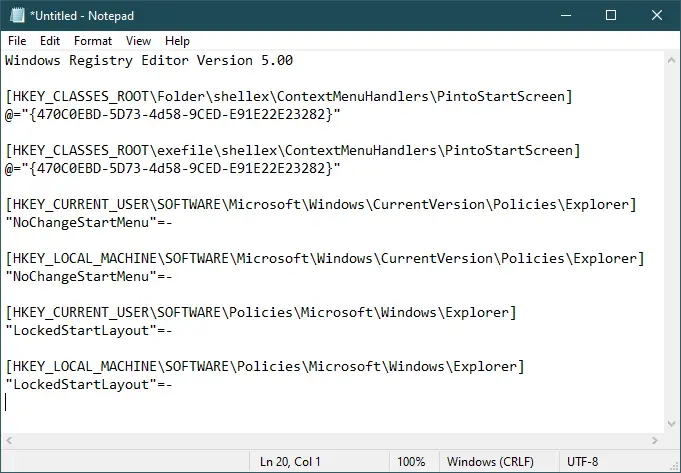
Step 3. Copy and paste the following text into the notepad file:-
Windows Registry Editor Version 5.00

[HKEY_CLASSES_ROOT\Folder\shellex\ContextMenuHandlers\PintoStartScreen]
@="{470C0EBD-5D73-4d58-9CED-E91E22E23282}"

[HKEY_CLASSES_ROOT\exefile\shellex\ContextMenuHandlers\PintoStartScreen]
@="{470C0EBD-5D73-4d58-9CED-E91E22E23282}"

[HKEY_CURRENT_USER\SOFTWARE\Microsoft\Windows\CurrentVersion\Policies\Explorer]
"NoChangeStartMenu"=-

[HKEY_LOCAL_MACHINE\SOFTWARE\Microsoft\Windows\CurrentVersion\Policies\Explorer]
"NoChangeStartMenu"=-

[HKEY_CURRENT_USER\SOFTWARE\Policies\Microsoft\Windows\Explorer]
"LockedStartLayout"=-

[HKEY_LOCAL_MACHINE\SOFTWARE\Policies\Microsoft\Windows\Explorer]
"LockedStartLayout"=-
Step 4. Click on the File menu in Notepad and then click the “Save as” option.
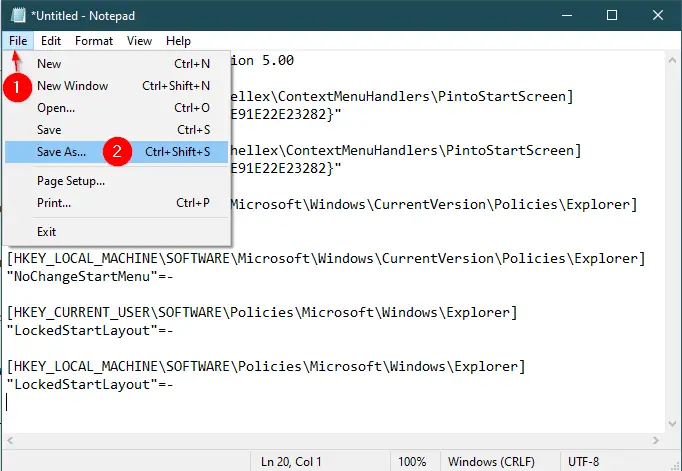

Step 6. Click the Save button.
Step 7. Now, double-click on the Fix_Pin_To_Start.reg file.
Step 8. If the User Account Control dialog prompts, click the Yes to continue.
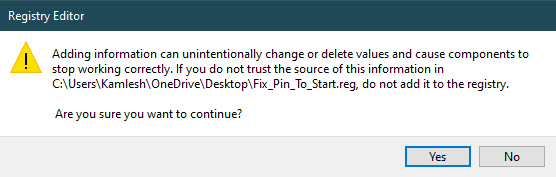
Step 9. Next, the registry editor will give a warning message. Click Yes to continue.
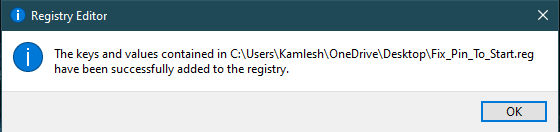
Step 10. Click OK on the next dialog box.
Step 11. Restart your computer.
Once you complete the above steps, “Pin to Start” and “Unpin from Start” should be visible in the Start menu/screen when you right-click on the program shortcut or folder on the desktop of Windows 10.