If you regularly use the Advanced Startup Options menu to troubleshoot problems on your Windows 11 or 10 machine, you may find it useful to add a “Boot to Advanced Startup Options” option to the context menu. This will allow you to quickly and easily restart your computer in the Advanced Startup Options menu without having to go through the normal boot process. In this article, we’ll walk you through the steps to add this option to your context menu.
Before we begin, it’s important to note that making changes to the Windows Registry can be risky and can potentially cause problems with your computer if you’re not careful. As always, we recommend backing up your registry before making any changes. With that said, let’s get started.
How to Add a “Boot to Advanced Startup Options” to the Windows 11 or 10 Context Menu?
Follow these steps to add a “Boot to Advanced Startup Options” to the Windows 11 or 10 Context Menu:-
Step 1. Open the Registry Editor.
The first step is to open the Registry Editor. To do this, press the Windows key + R on your keyboard to open the Run dialog box. Type “regedit” (without the quotes) and press Enter.
Step 2. Once you have the Registry Editor open, navigate to the following key:
HKEY_CLASSES_ROOT\Directory\Background\shell
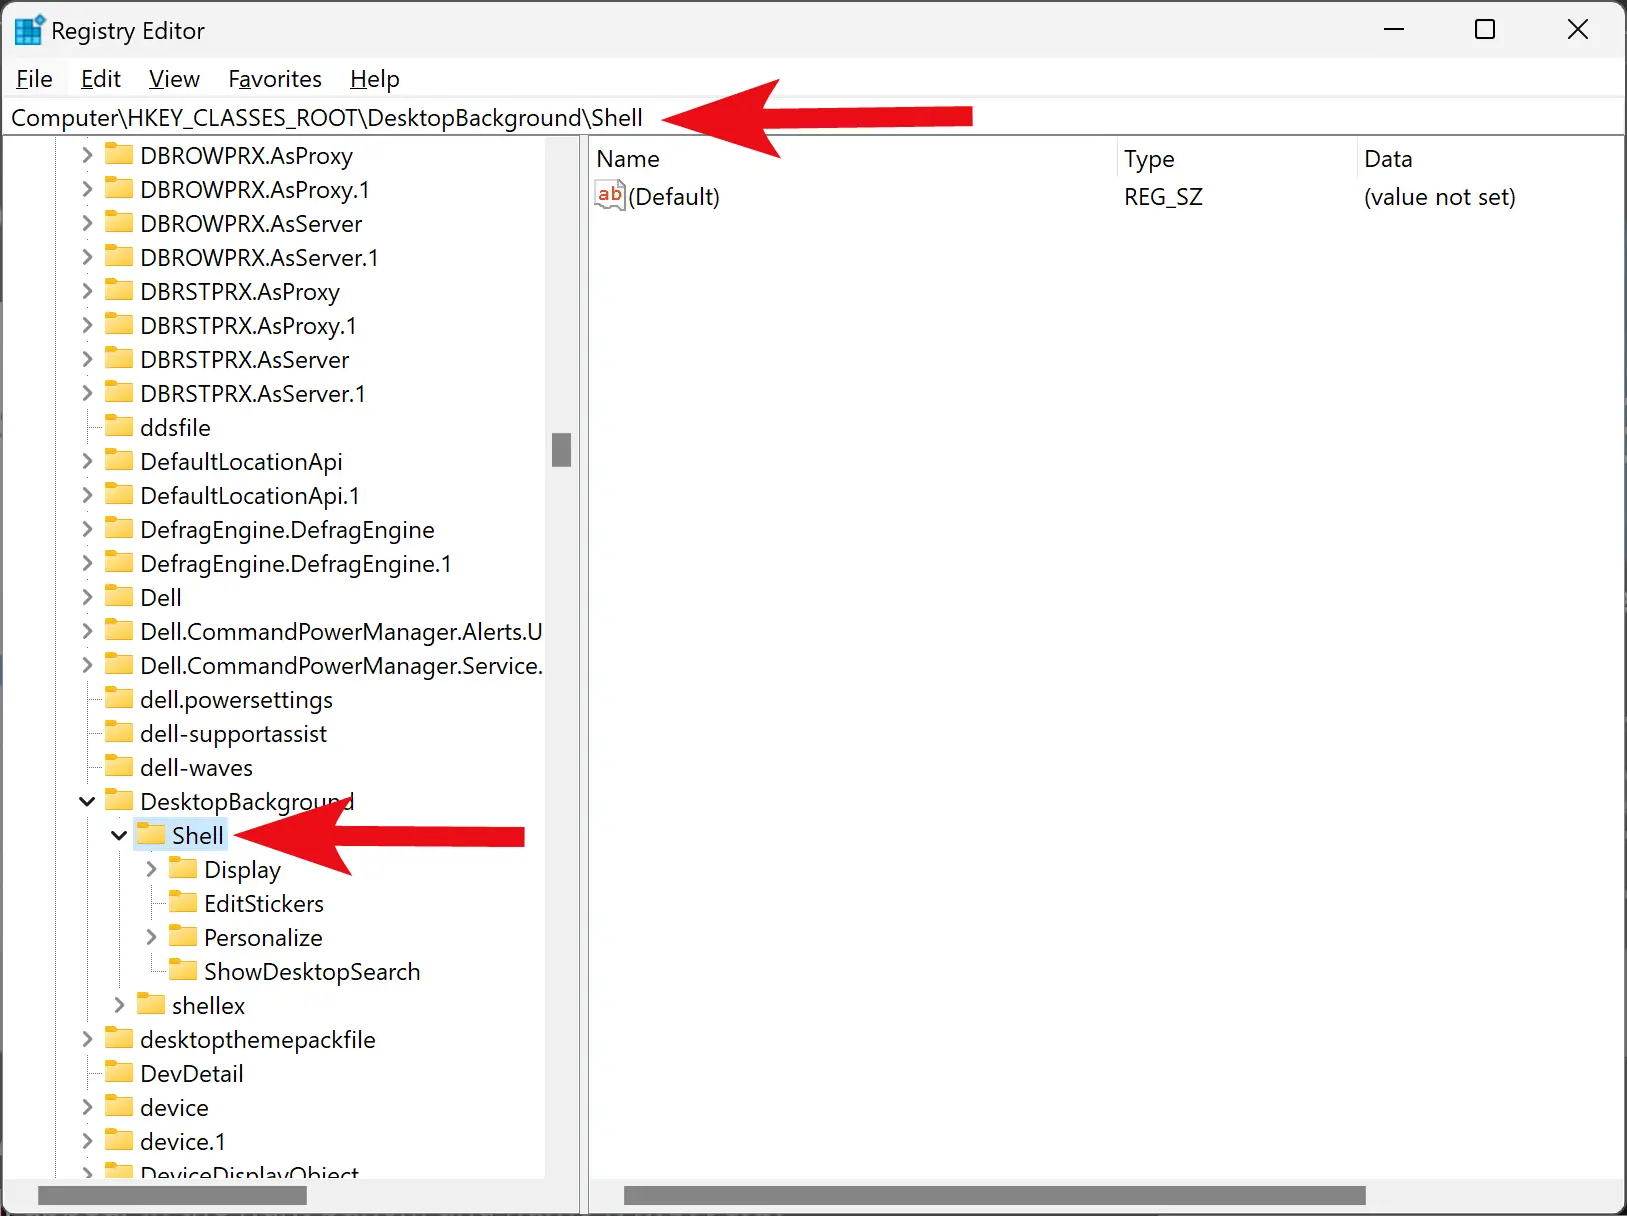
Step 3. Right-click on the “shell” key in the left-hand pane and select New > Key.
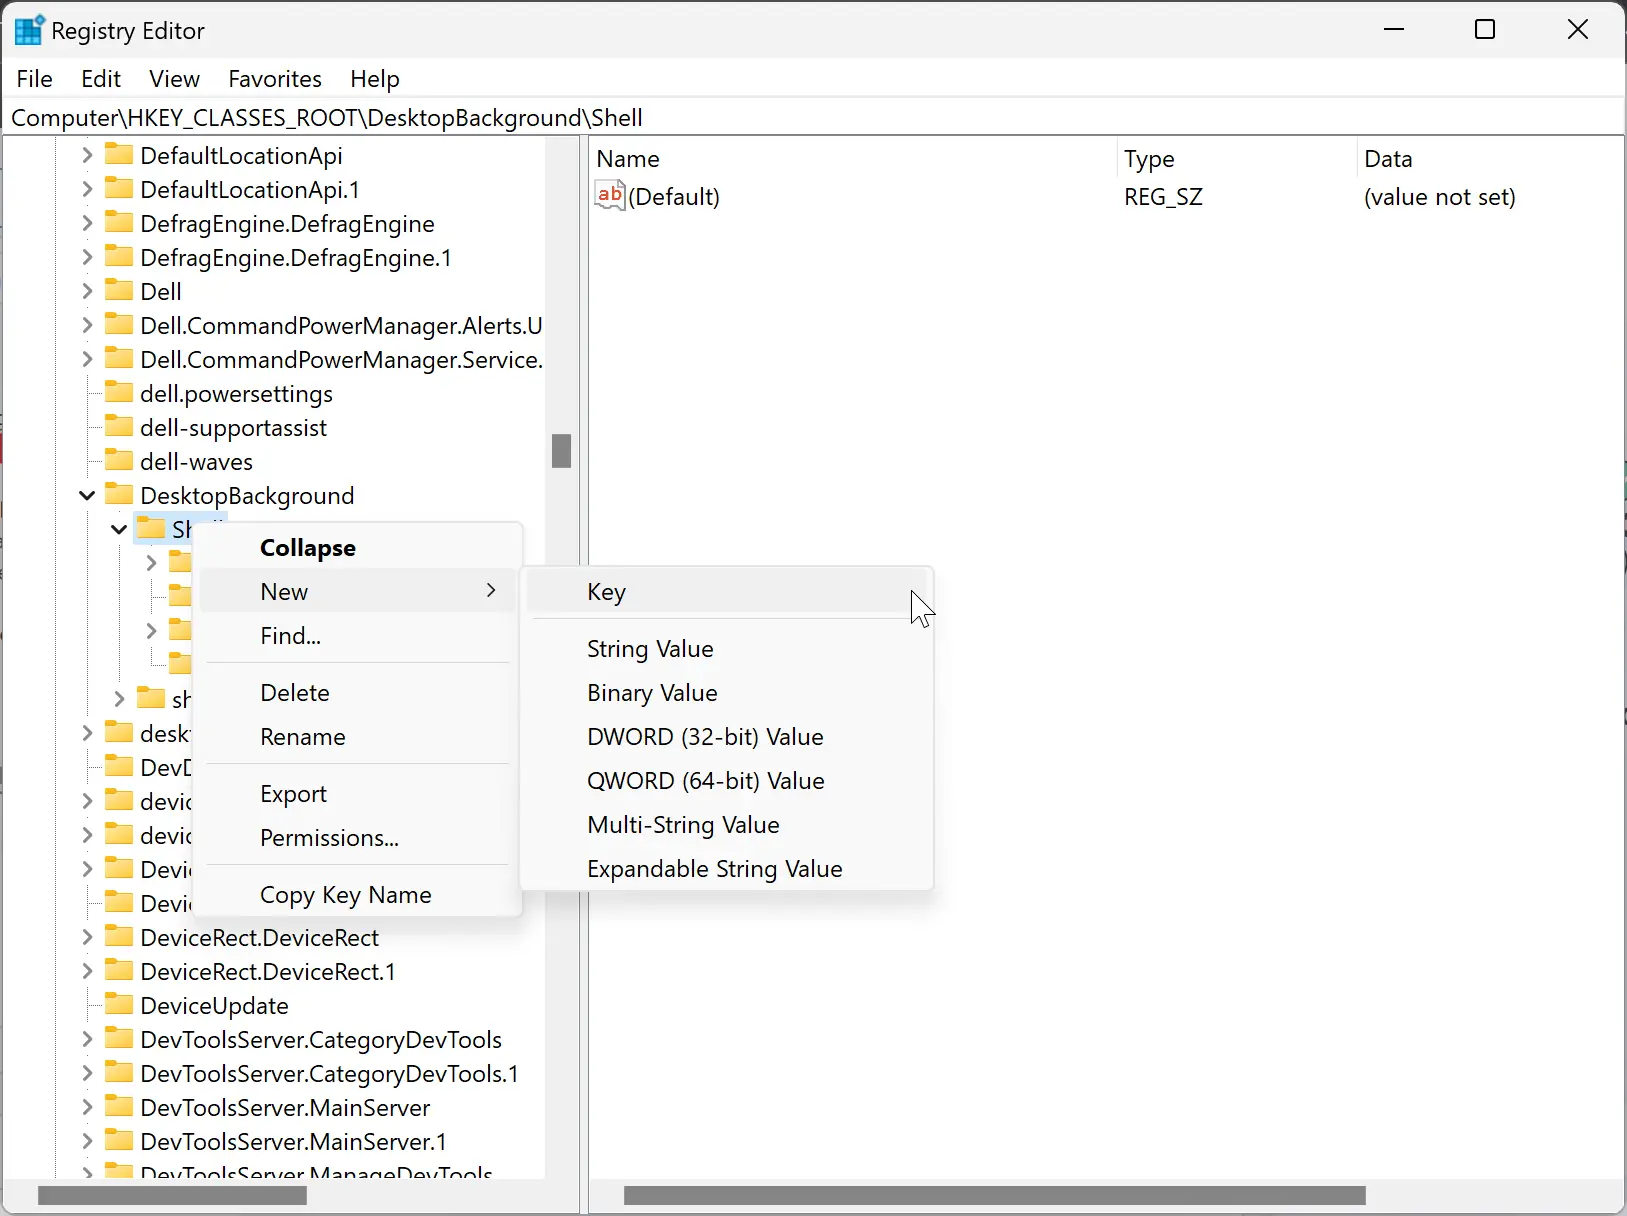
Step 4. Name the new key “AdvancedStartup” (without the quotes).
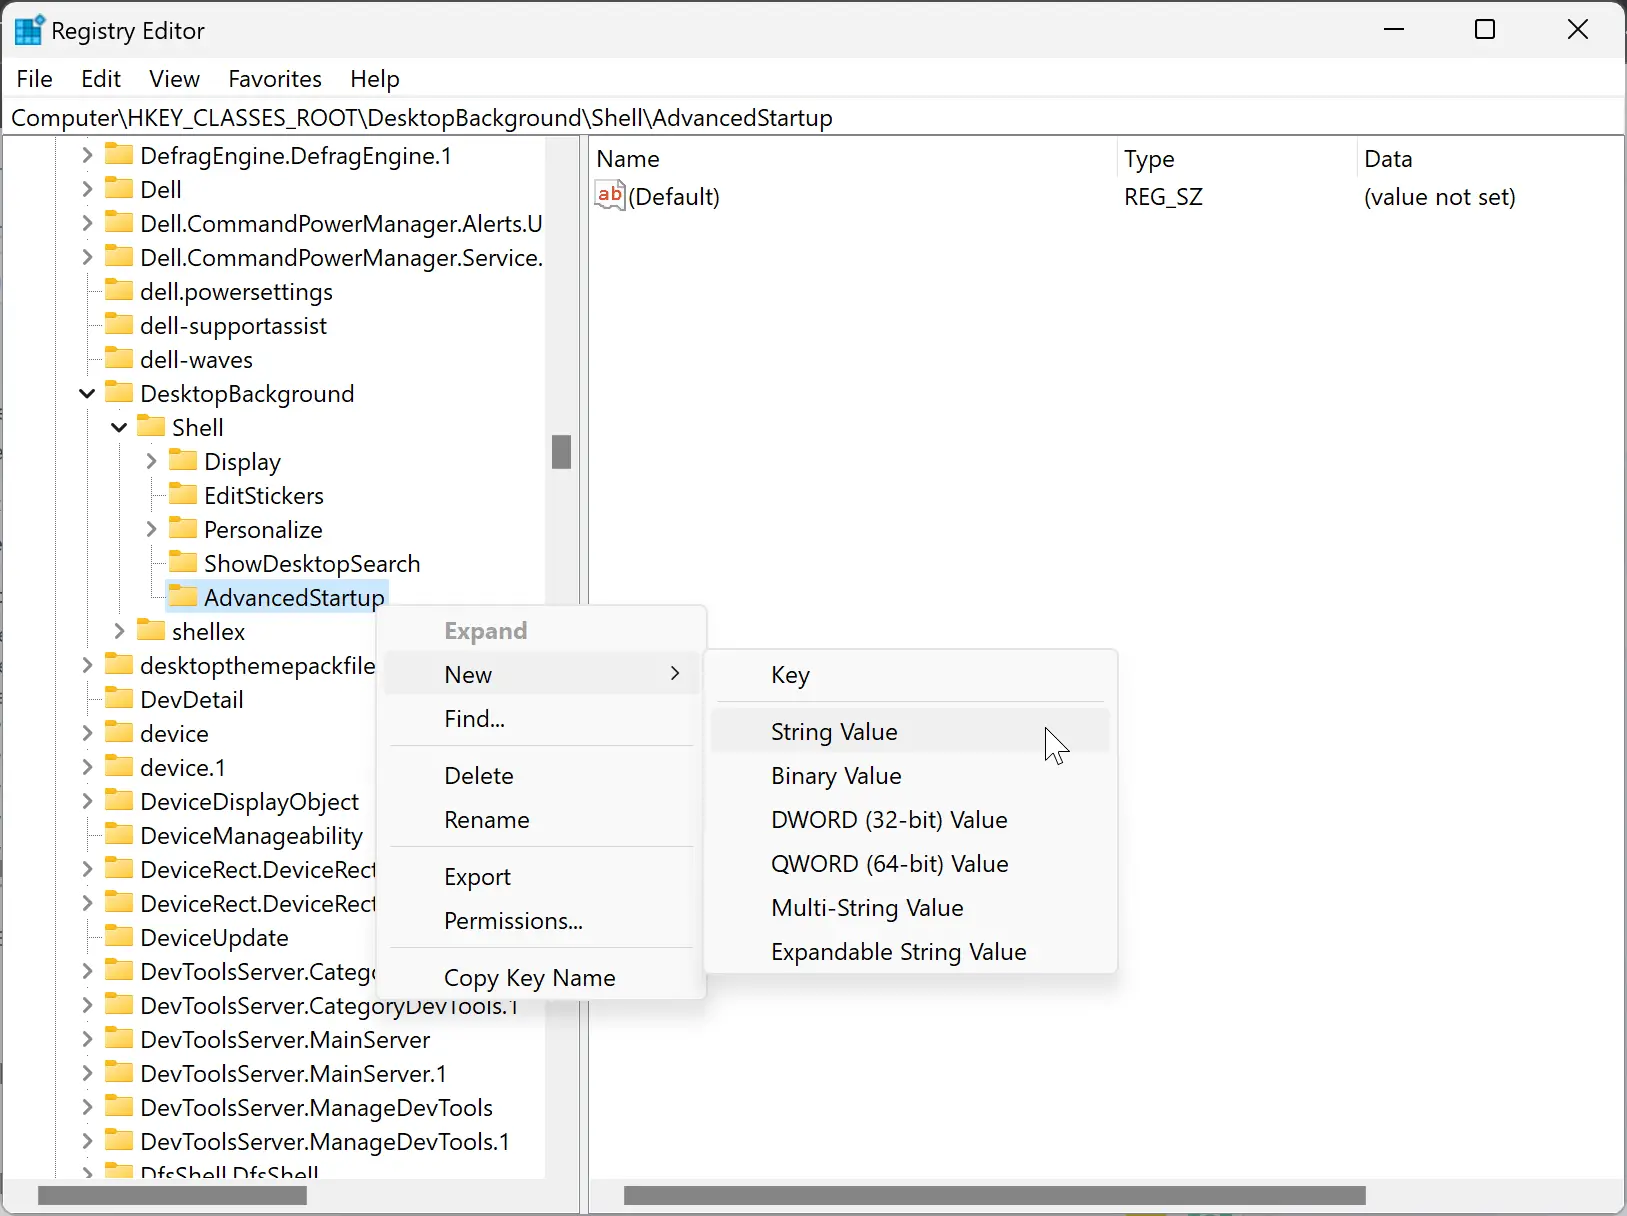
Step 5. Right-click on the “AdvancedStartup” key you just created and select New > String Value.
Step 6. Name the new value “MUIVerb” (without the quotes).
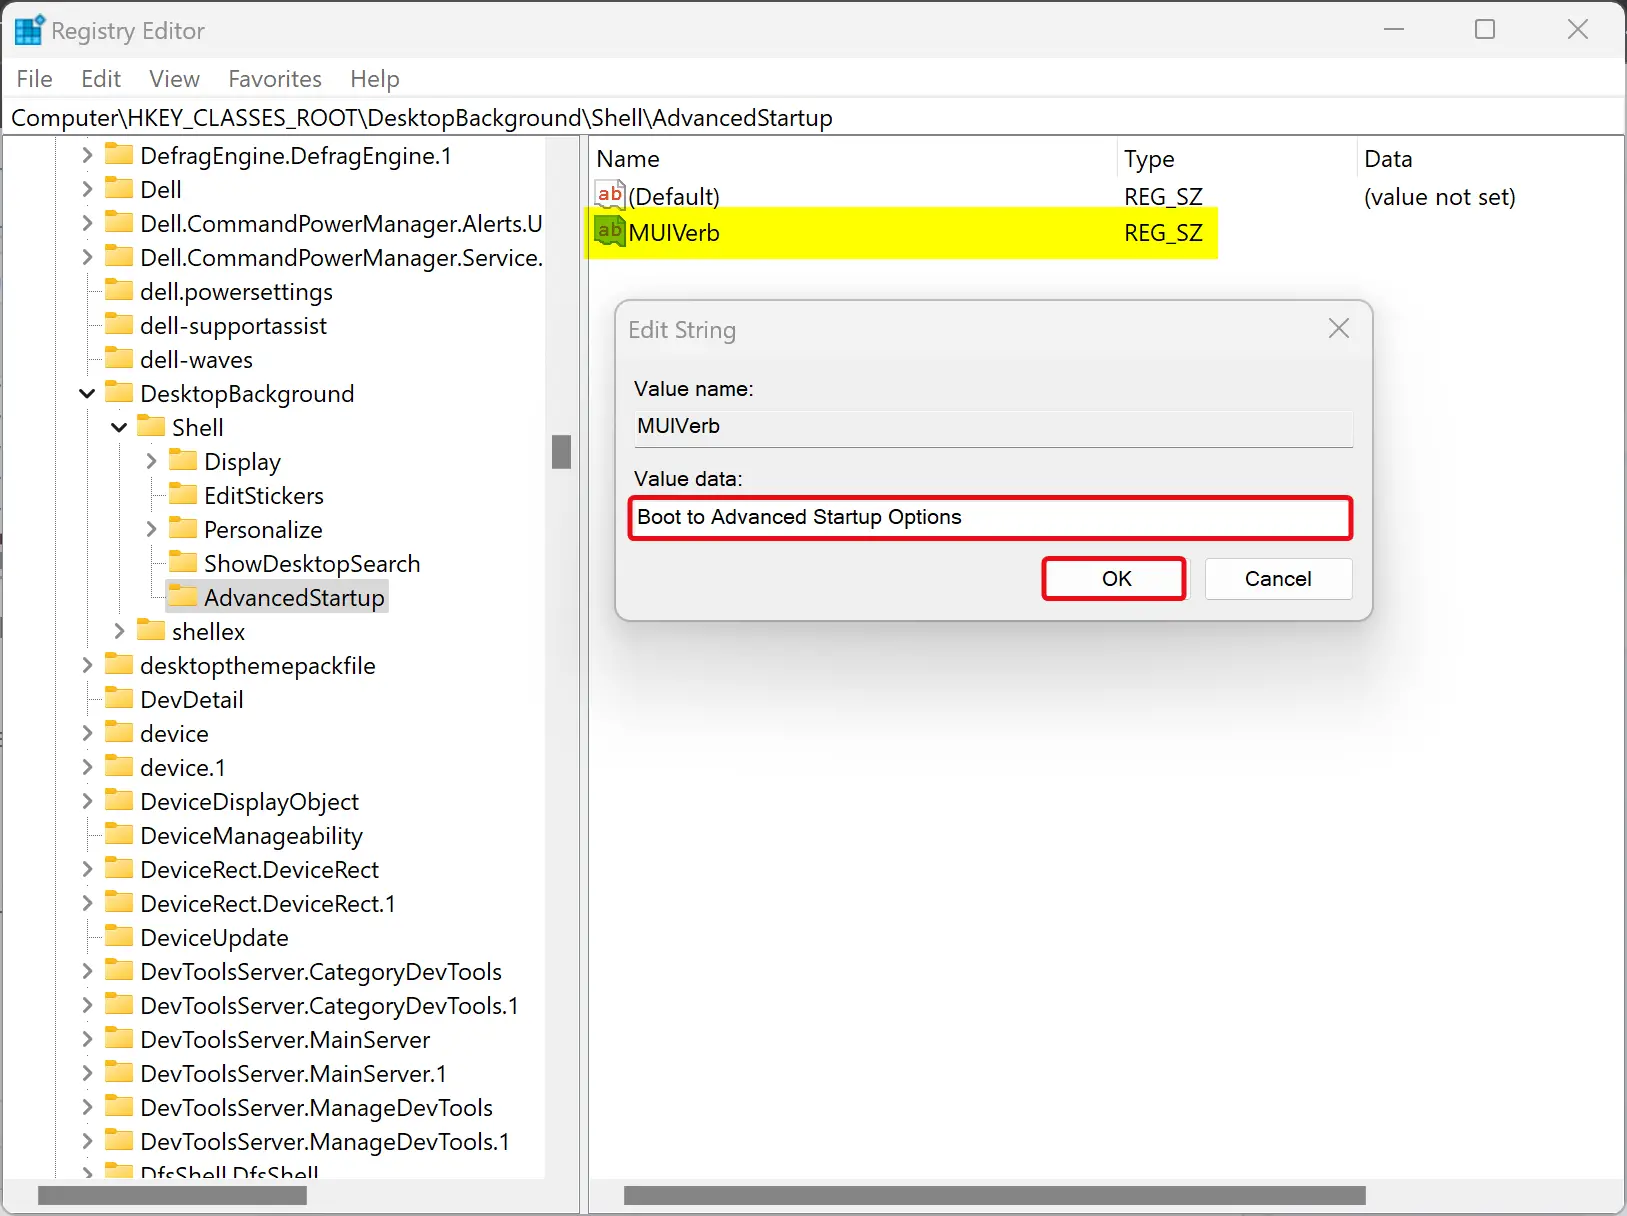
Step 7. Double-click on the “MUIVerb” value you just created and enter “Boot to Advanced Startup Options” (without the quotes) in the “Value data” field.
Step 8. Click OK to save your changes.
Step 9. Right-click on the “AdvancedStartup” key again and select New > String Value.
Step 10. Name the new value “Position” (without the quotes).
Step 11. Double-click on the “Position” value you just created and enter “Bottom” (without the quotes) in the “Value data” field.
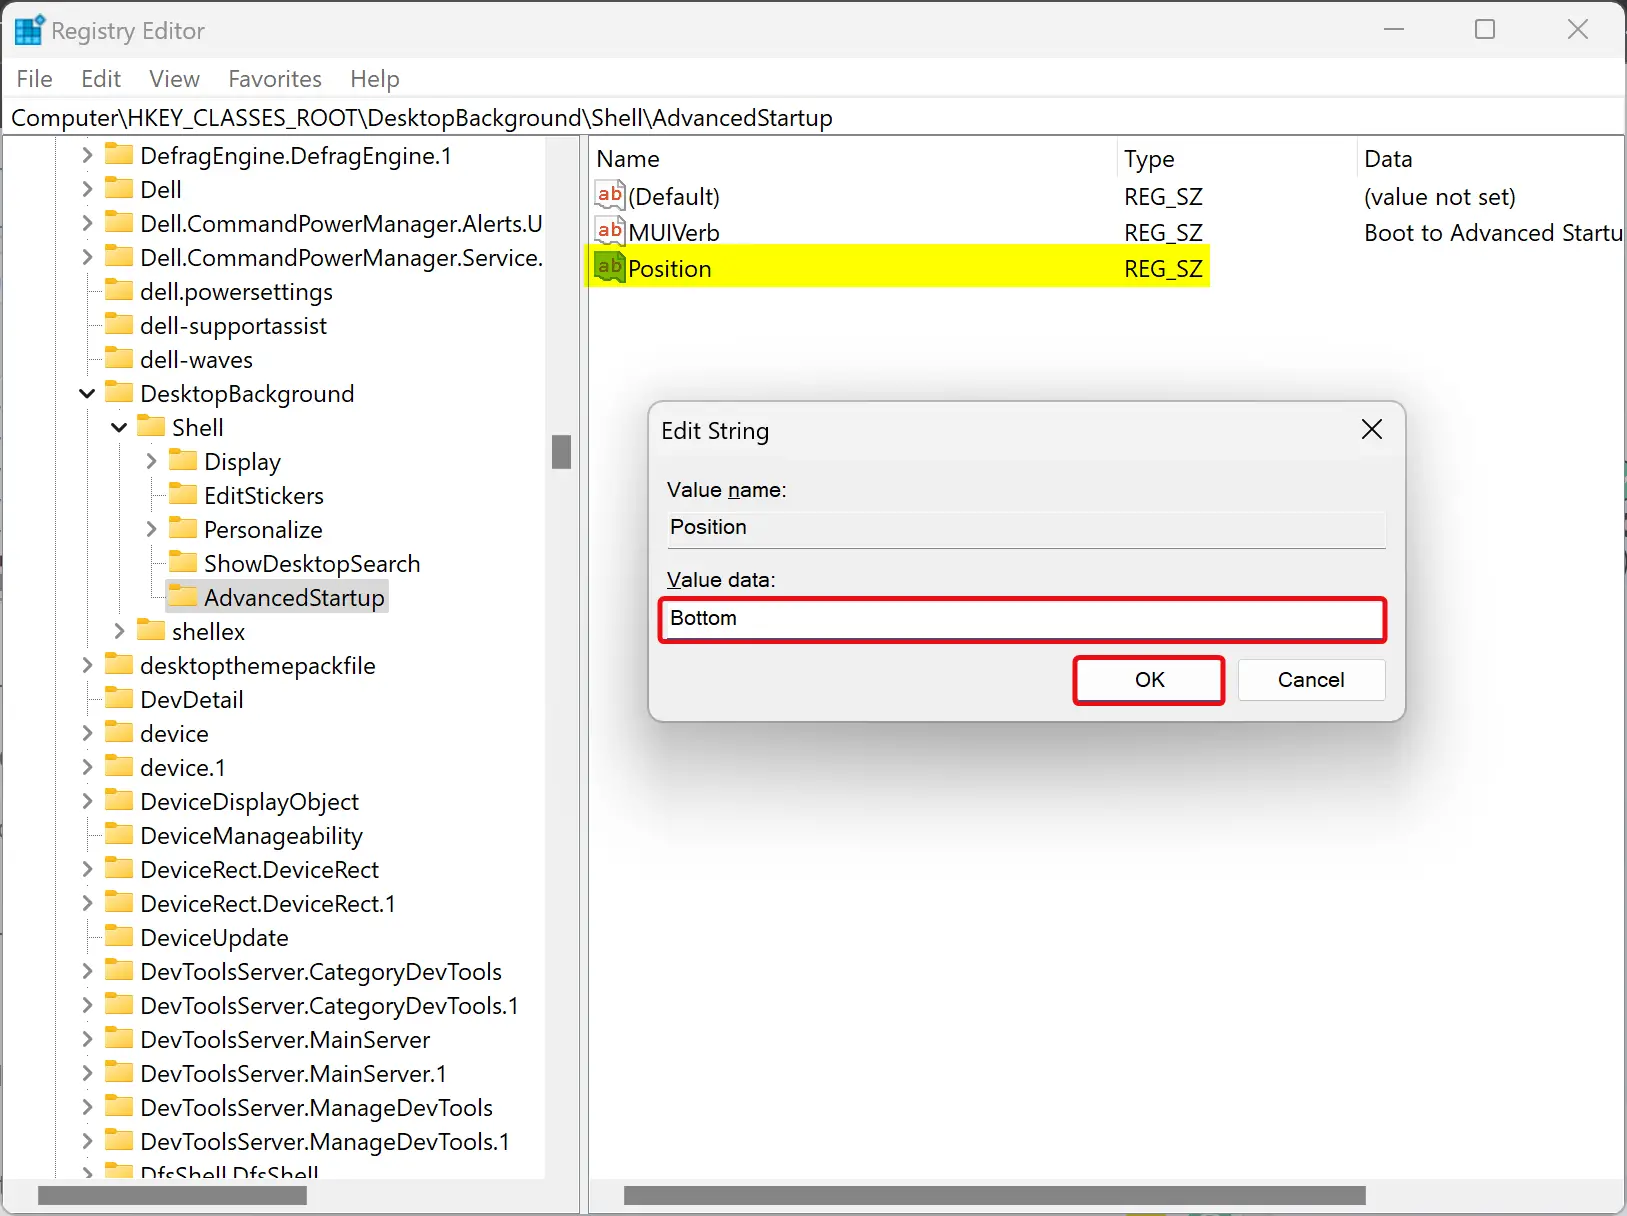
Step 12. Click OK to save your changes.
Step 13. Right-click on the “AdvancedStartup” key and select New > Key.
Step 14. Name the new key “command” (without the quotes).

Step 15. In the right-hand pane of the Registry Editor, you should now see a subkey named “(Default)” under the “command” key you just created. Double-click on the “(Default)” value and enter the following command in the “Value data” field:-
shutdown.exe /r /o /f /t 00
This command will tell Windows to shut down and then restart in the Advanced Startup Options menu.
Step 16. Click OK to save your changes and close the Registry Editor.
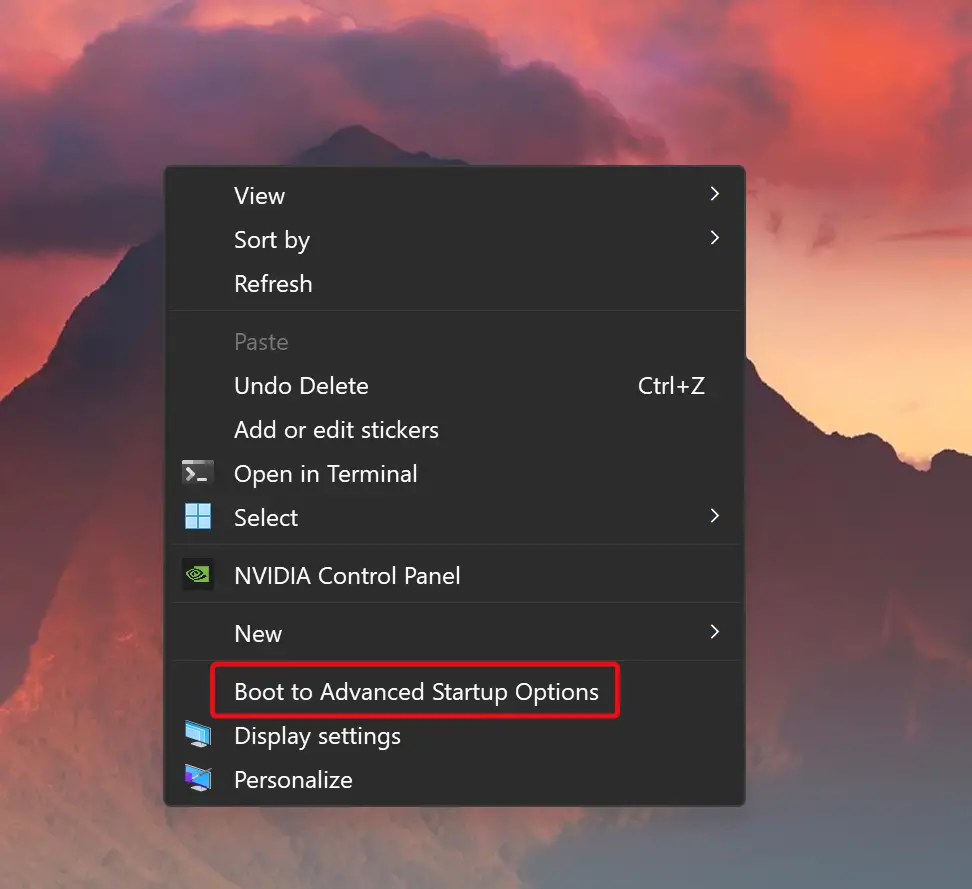
That’s it! You should now have a “Boot to Advanced Startup Options” option in your context menu. To test it out, right-click on your desktop or in a folder and select “Boot to Advanced Startup Options.” Your computer should now restart in the Advanced Startup Options menu.
Conclusion
Adding a “Boot to Advanced Startup Options” option to your Windows 11 or 10 context menu can be a useful way to access the Advanced Startup Options menu for troubleshooting purposes quickly. However, it’s important to exercise caution when making changes to the Windows Registry, as incorrect changes can cause issues with your computer. That’s why we recommend backing up your registry before making any changes.
If you follow the steps outlined in this article carefully, you should be able to add the “Boot to Advanced Startup Options” option to your context menu without any problems. Once you’ve added the option, you can test it out by right-clicking on your desktop or in a folder and selecting the option.
Overall, this is a simple but useful tweak that can save you time and effort if you frequently need to access the Advanced Startup Options menu on your Windows machine.