On Windows 10, the power management options under the power button menu inside the Start menu include Sign out, Sleep, Shut Down, and Restart by default. However, the Hibernate option may not be visible by default. Hibernate is a useful feature that allows you to power off your system without having to close your open documents and applications. When you use hibernation mode on Windows 10, you can resume your work exactly where you left off the next time you turn on your PC or laptop. This feature can save time and be very convenient.
One can Enable or Disable Hibernate in Windows 10/8 using the command prompt.
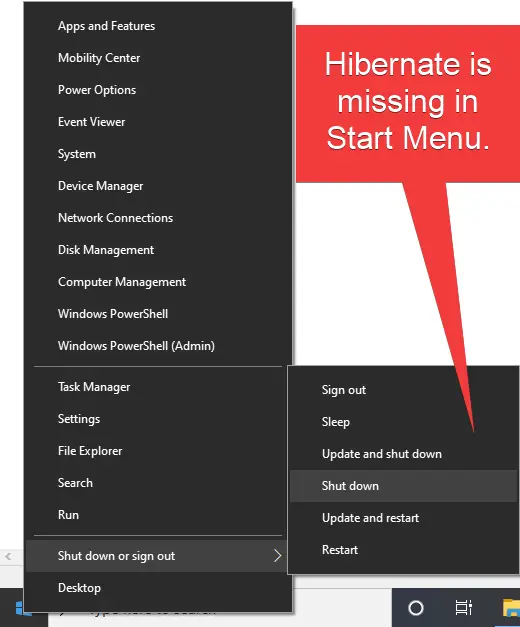
If the hibernate option is missing in your PC or laptop under the b button in the Start menu, this post will be useful for you.
How to add Hibernate to the Start Menu on Windows 10?
Follow these steps to add Hibernate to the Start Menu on Windows 10:-
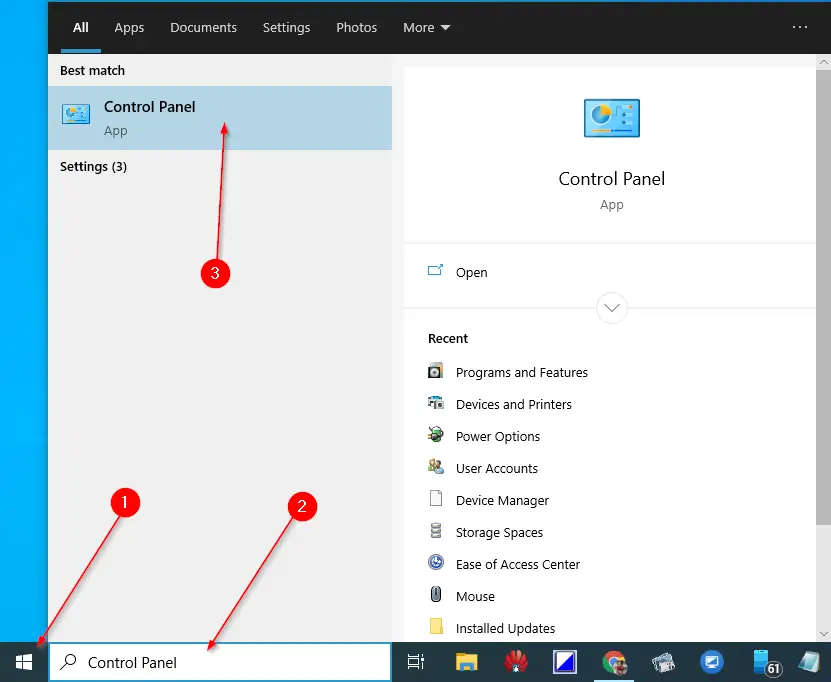
Step 1. Open the Control Panel.
To launch the Control Panel under Windows 10, click on the Start button and type Control Panel. Then, click on the Control Panel app from the available search results.
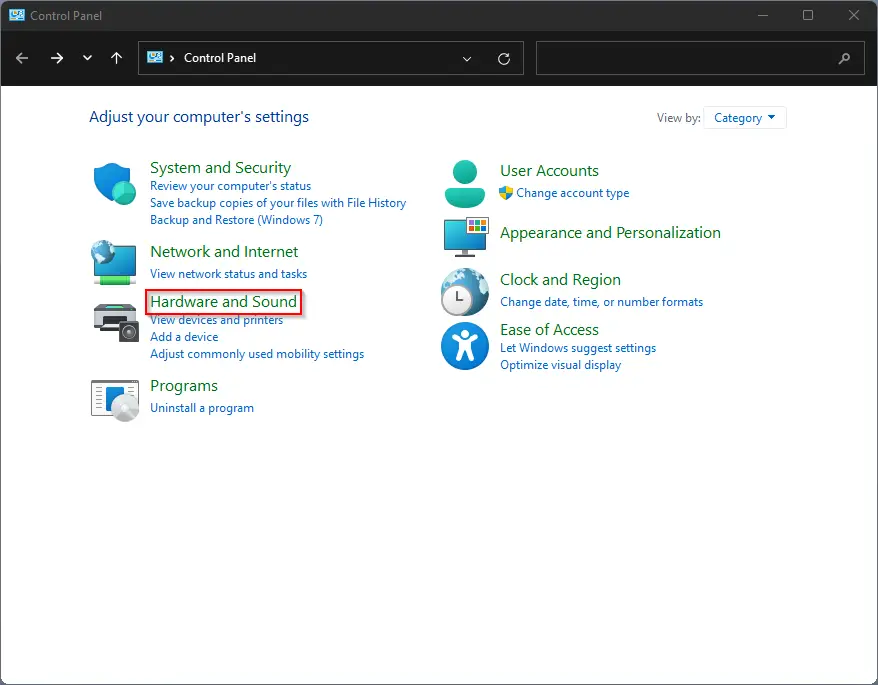
Step 2. Under Control Panel, click the Hardware and Sound option.
Step 3. Click the link Change what the power buttons do.

Step 4. Click the link Change Settings that are currently unavailable.
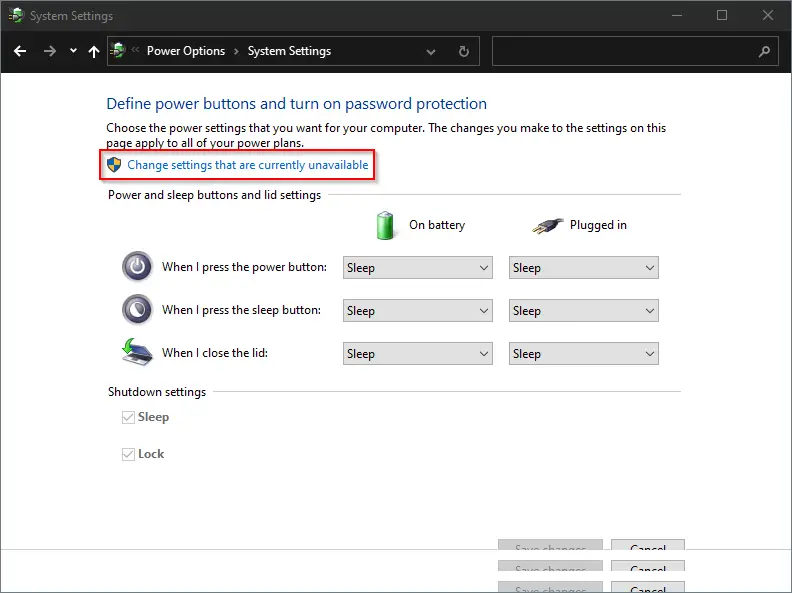
Now, the Shutdown options will be editable.
Step 5. Check the option Hibernate under the Shutdown settings section.

Step 6. Finally, click the Save Changes button to enable the Hibernate option in Start Menu on Windows 10.

Conclusion
In conclusion, adding the Hibernate option to the Start menu on Windows 10 can be a useful and time-saving feature. By default, the Hibernate option may be missing under the power button menu, but it can be easily added by following a few simple steps. This option can be very useful when you want to shut down your computer quickly without having to close all open documents and apps. With hibernation mode, you can resume your work exactly where you left off, making it a convenient feature for many Windows 10 users.