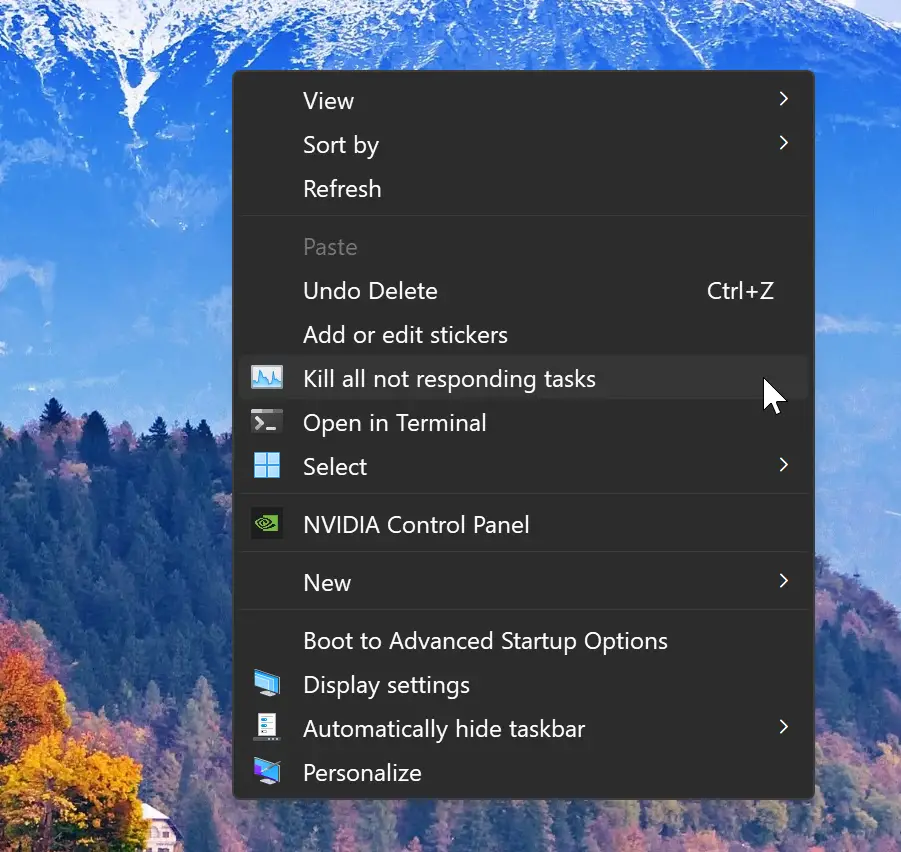
If apps stop frequently responding on your PC and you force close it, you should consider adding the “Kill all not responding tasks” desktop context menu on your Windows 11 or 10 PCs. Using this desktop context menu, you can quickly kill all “not responding” task processes simultaneously.
When you use the “Kill all not responding tasks” context menu, you will see a “No tasks running with the specified criteria” message if there are no “not responding” tasks running. And if a “not responding” task is found, they would be listed as being killed instead. The option triggers a Taskkill command that works only on the Non-responding processes of the running tasks.
In this gearupwindows article, you will learn how to add or remove the “Kill all not responding tasks” desktop context menu in Windows 11 and 10.
How to Add “Kill all not responding tasks” Context Menu in Windows 11 or 10?
To add the “Kill all not responding tasks” desktop context menu in Windows 11 or 10, use these steps:-
Step 1. Open Registry Editor.
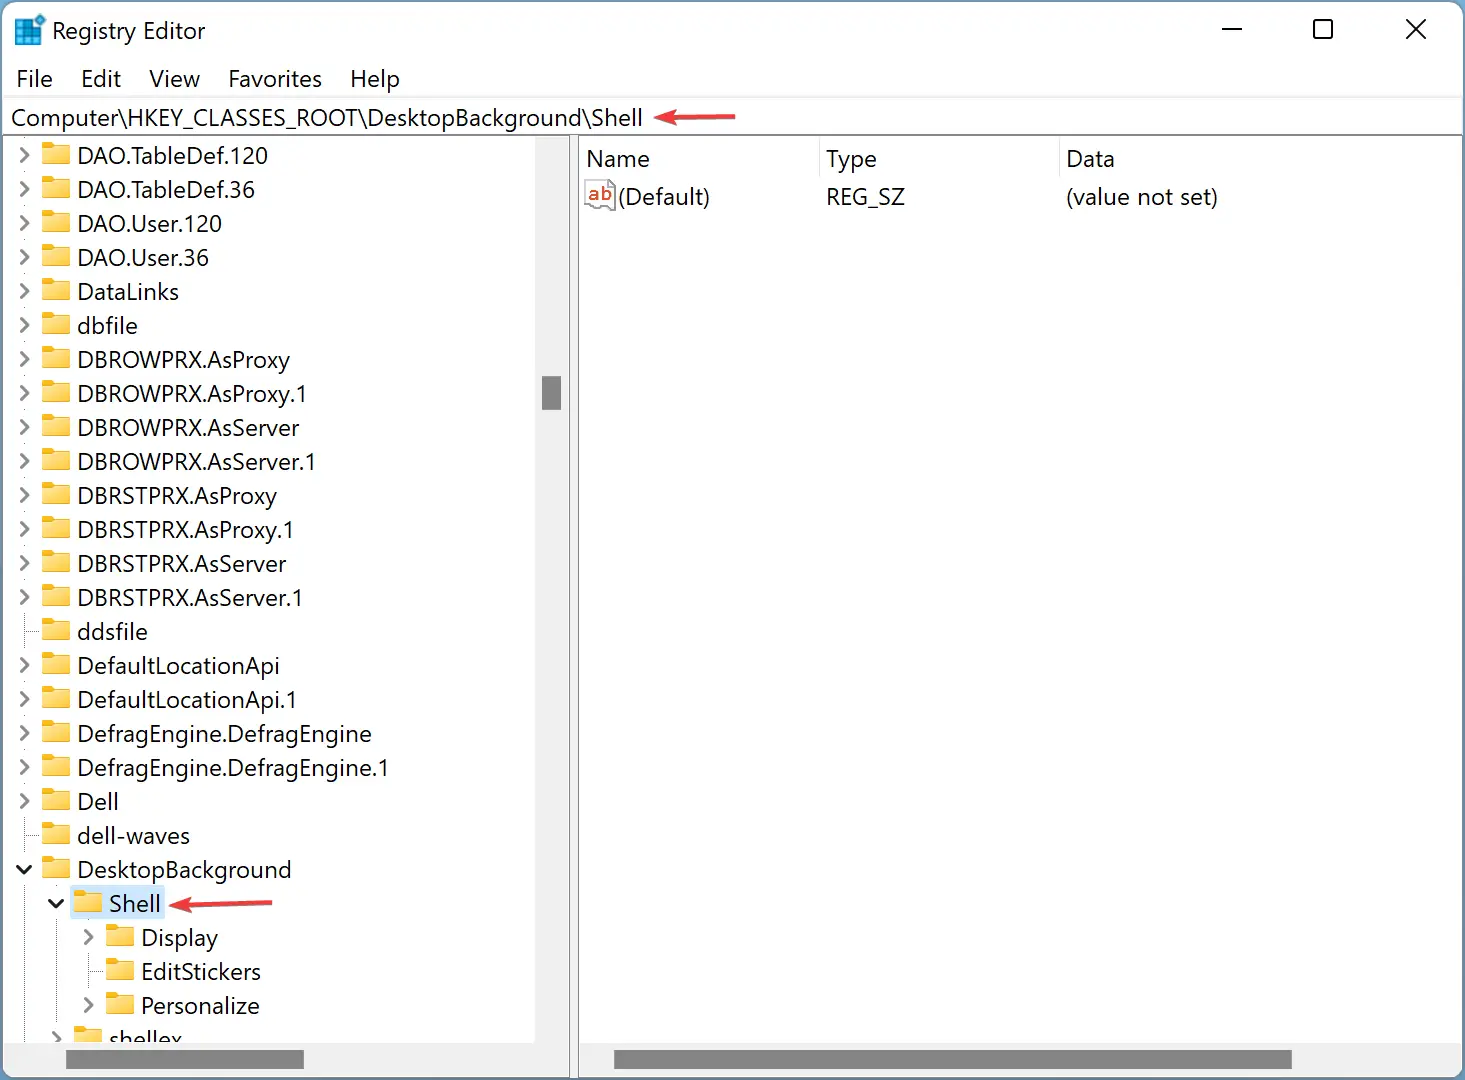
Step 2. Browse or navigate to the following key in the left sidebar of the Registry Editor window:-
HKEY_CLASSES_ROOT\DesktopBackground\Shell
Step 3. Right-click on the Shell key and select New > Key.
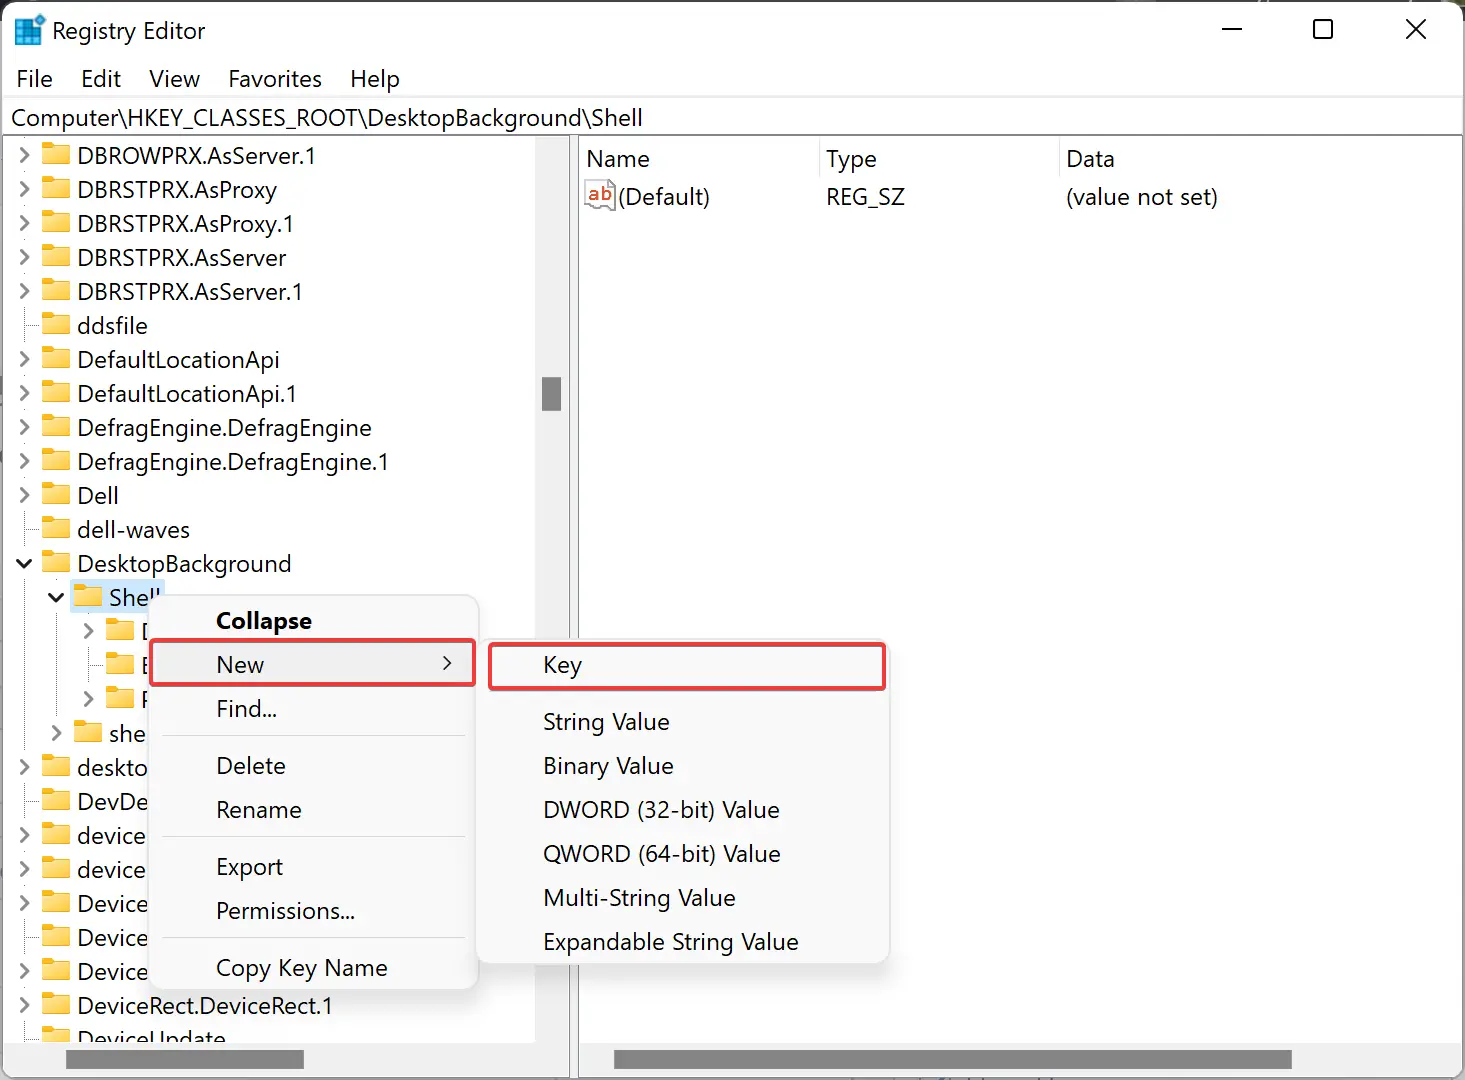
Step 4. Name the newly created key to KillNRTasks.
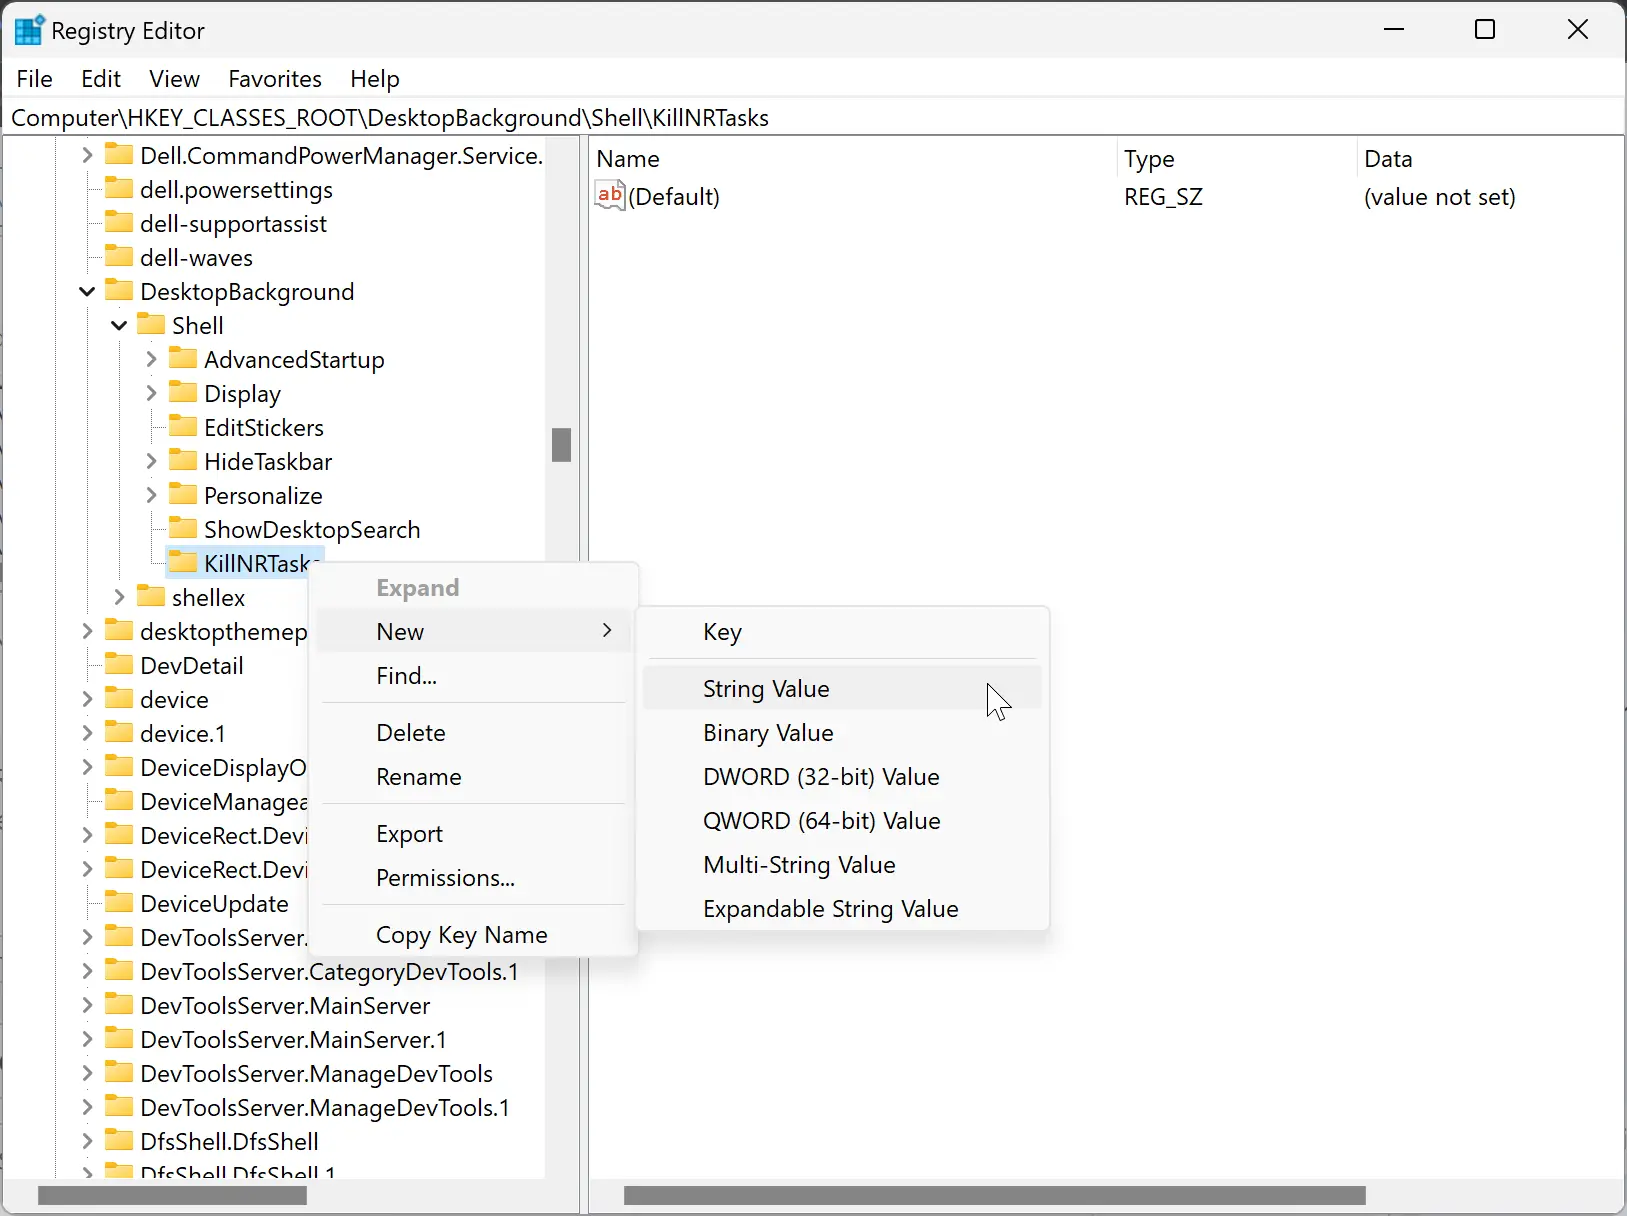
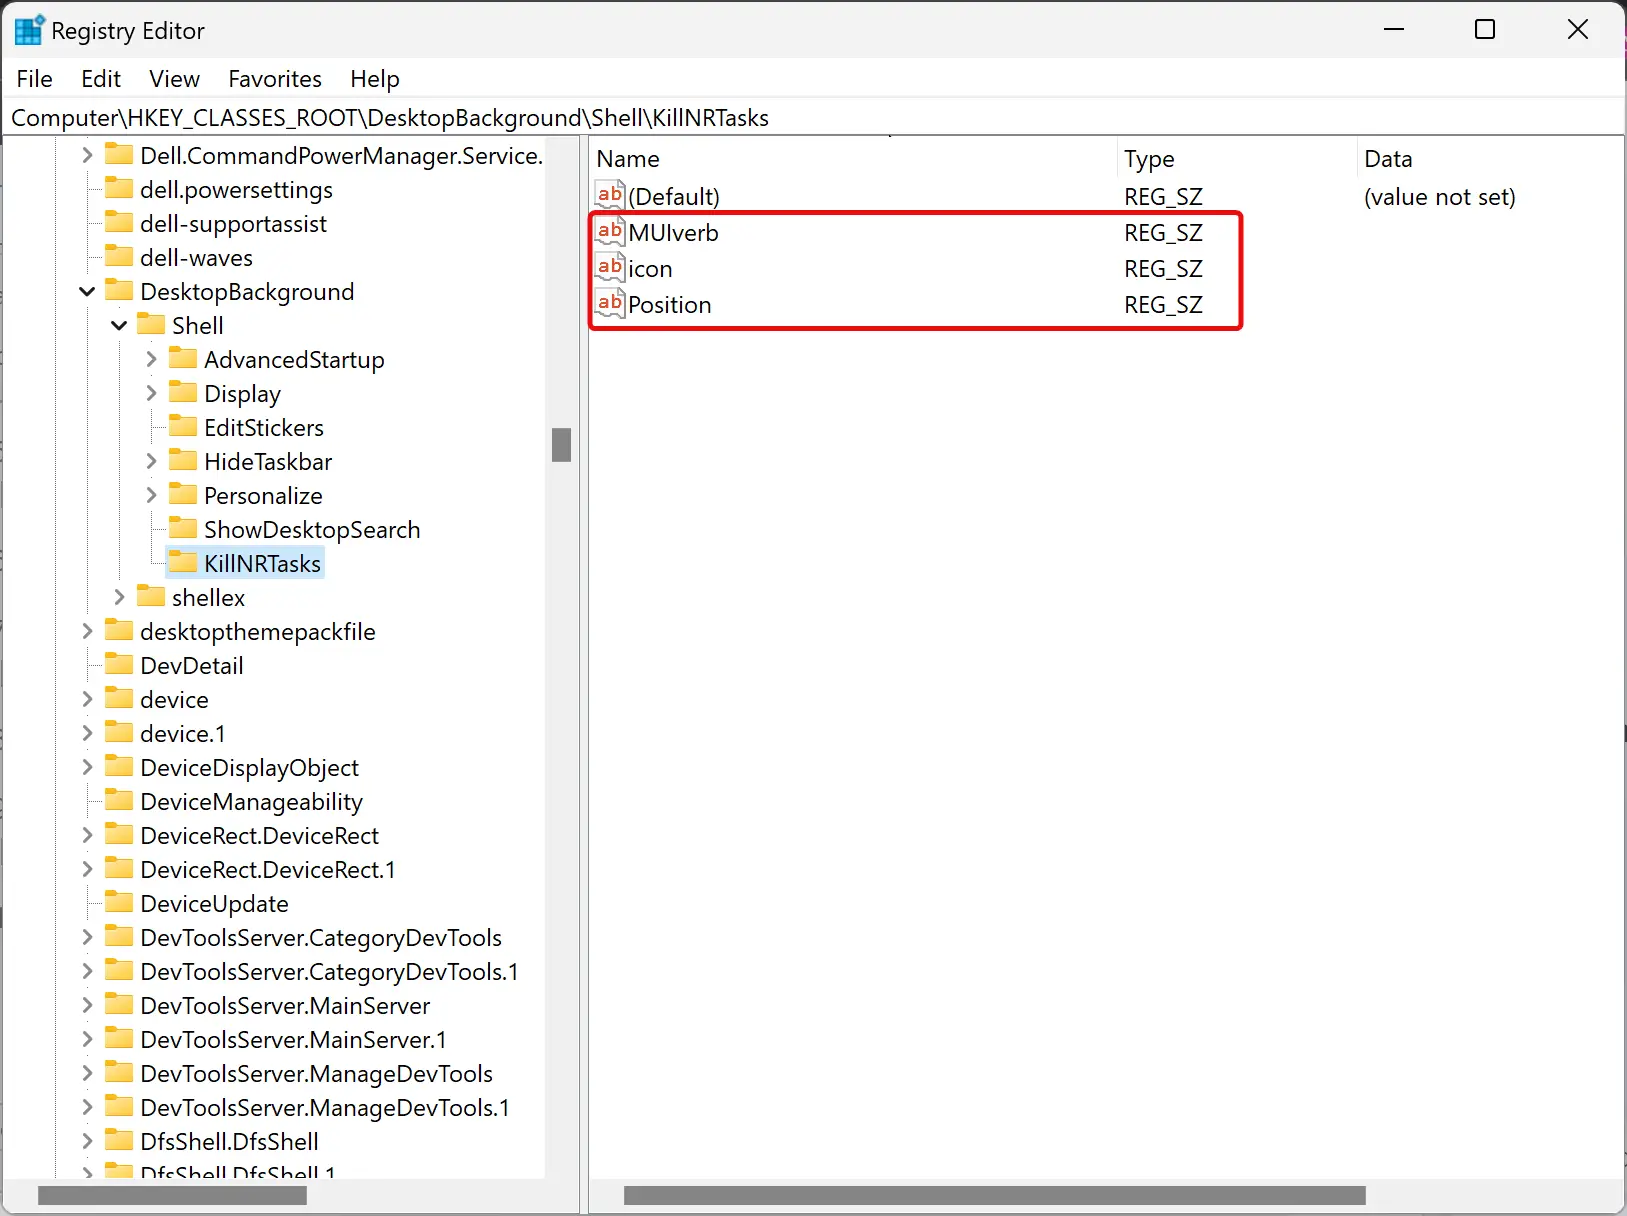
Step 5. Right-click on the KIllNRTasks key and select New > String Value.
Step 6. Name this newly created REG_SZ to MUIverb.
Step 7. Right-click on the KIllNRTasks key and select New > String Value.
Step 8. Name this newly created REG_SZ icon.
Step 9. Right-click on the KIllNRTasks key and select New > String Value.
Step 10. Name this newly created REG_SZ to Position.
Step 11. Double-tap on the MUIverb REG_SZ and set its “Value data” to Kill all not responding tasks.
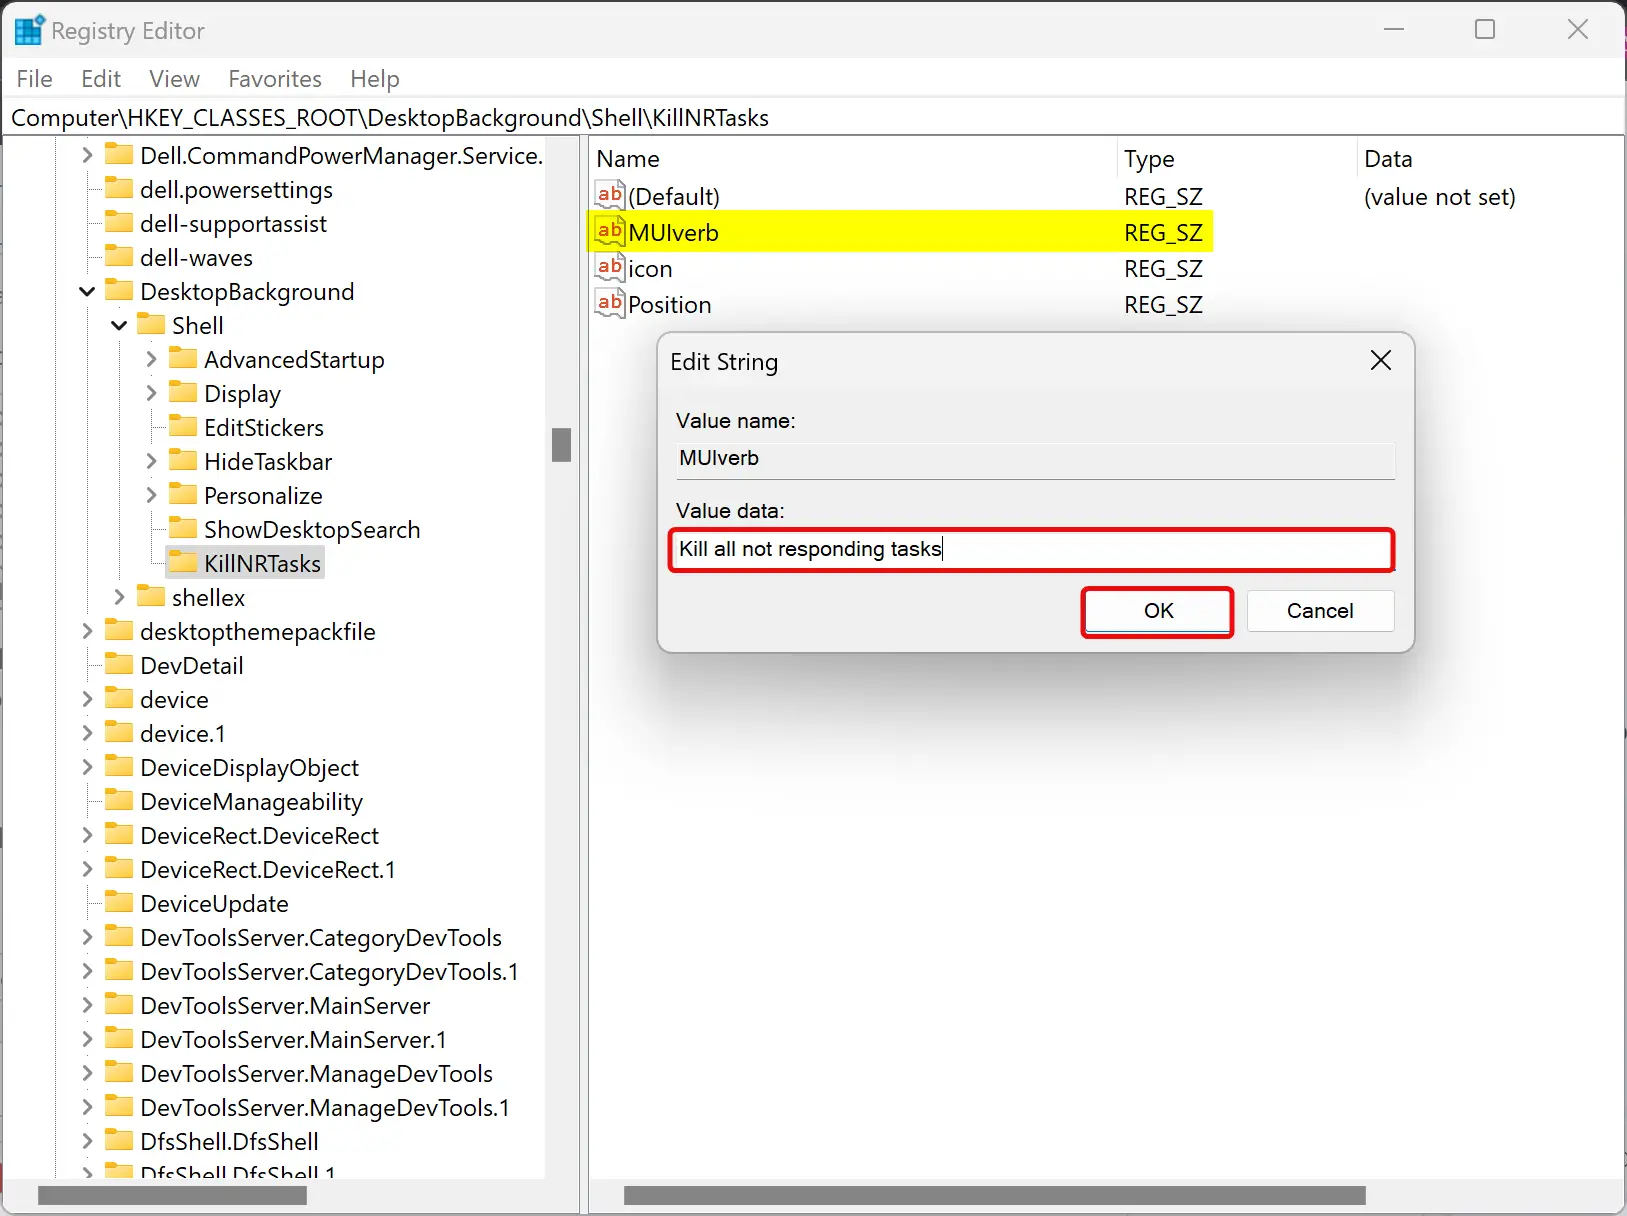
Step 12. Click OK.
Step 13. Double-tap on the Position REG_SZ and set its “Value data” to Middle, Up, or Bottom.
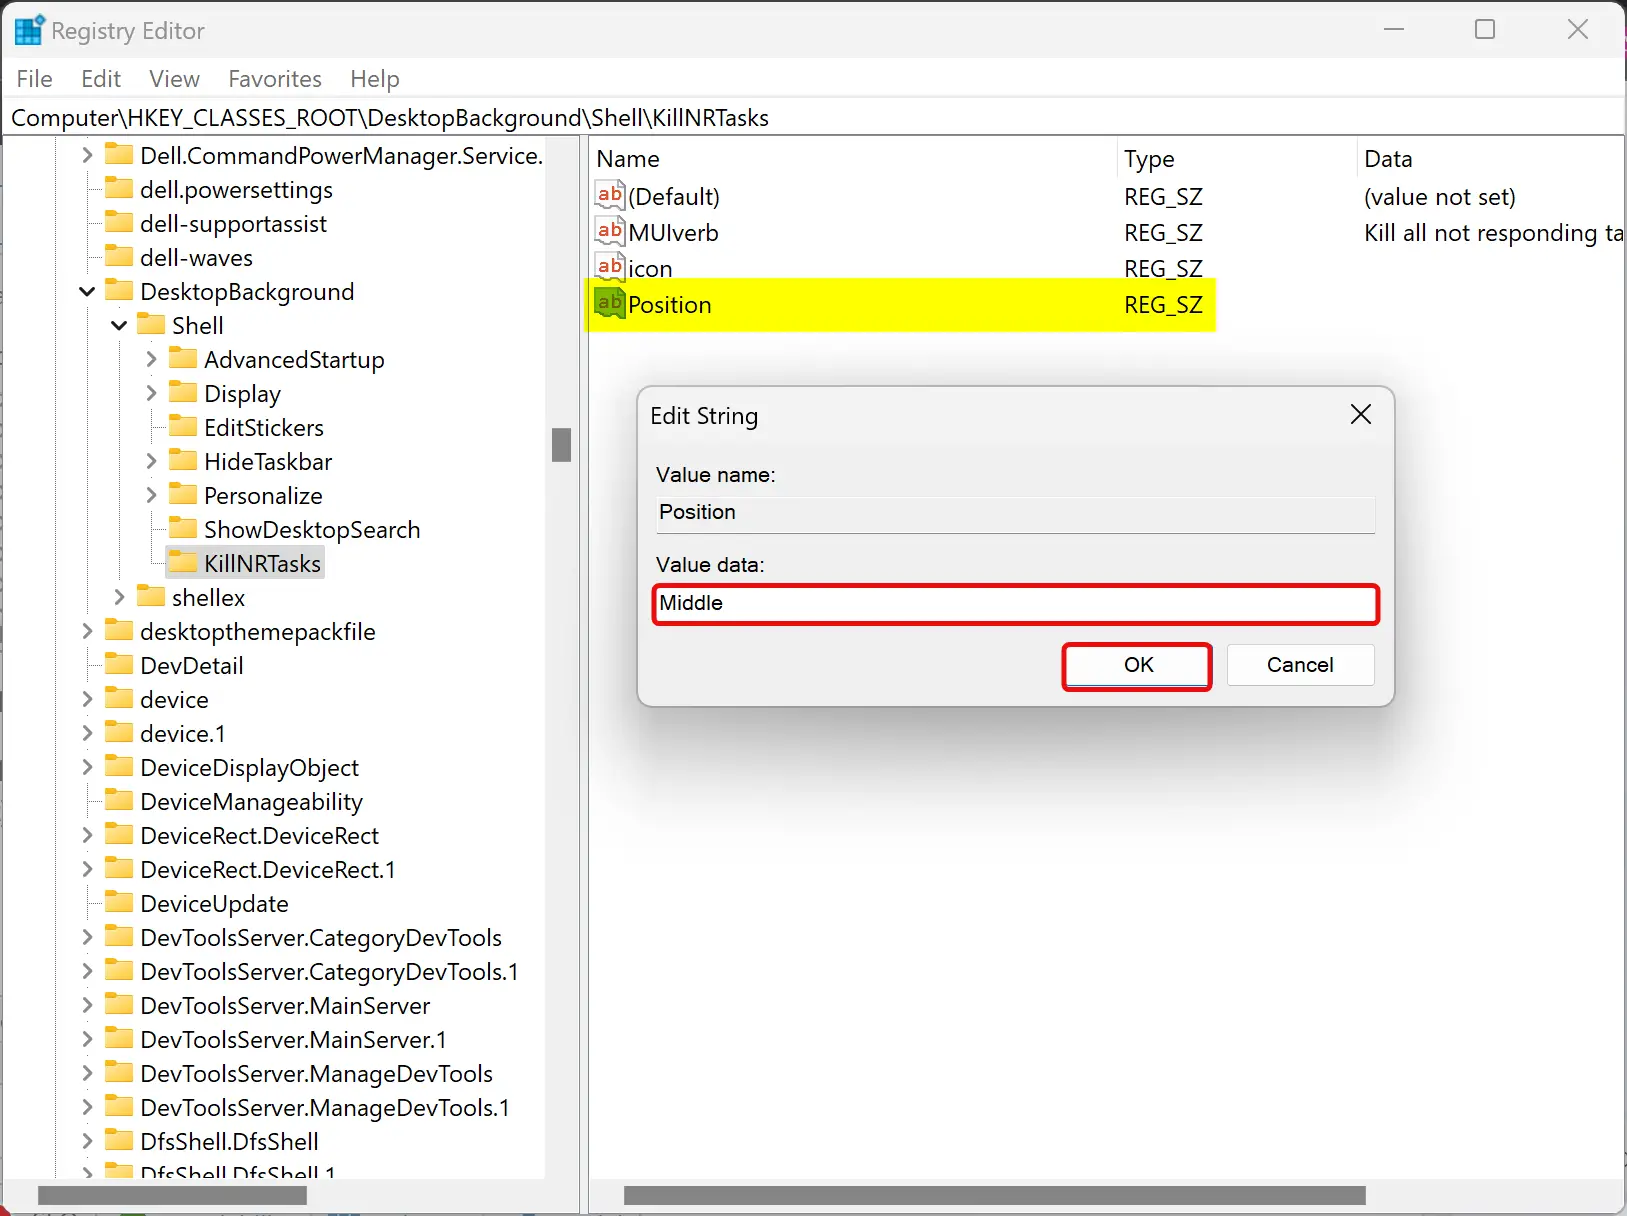
Step 14. Click OK.
Step 15. Double-tap on the icon REG_SZ and set its “Value data” to taskmgr.exe,-30651, Up, or Bottom.
![]()
Step 16. Click OK.
Step 17. Right-click on the KillNRTasks key and select New > Key.
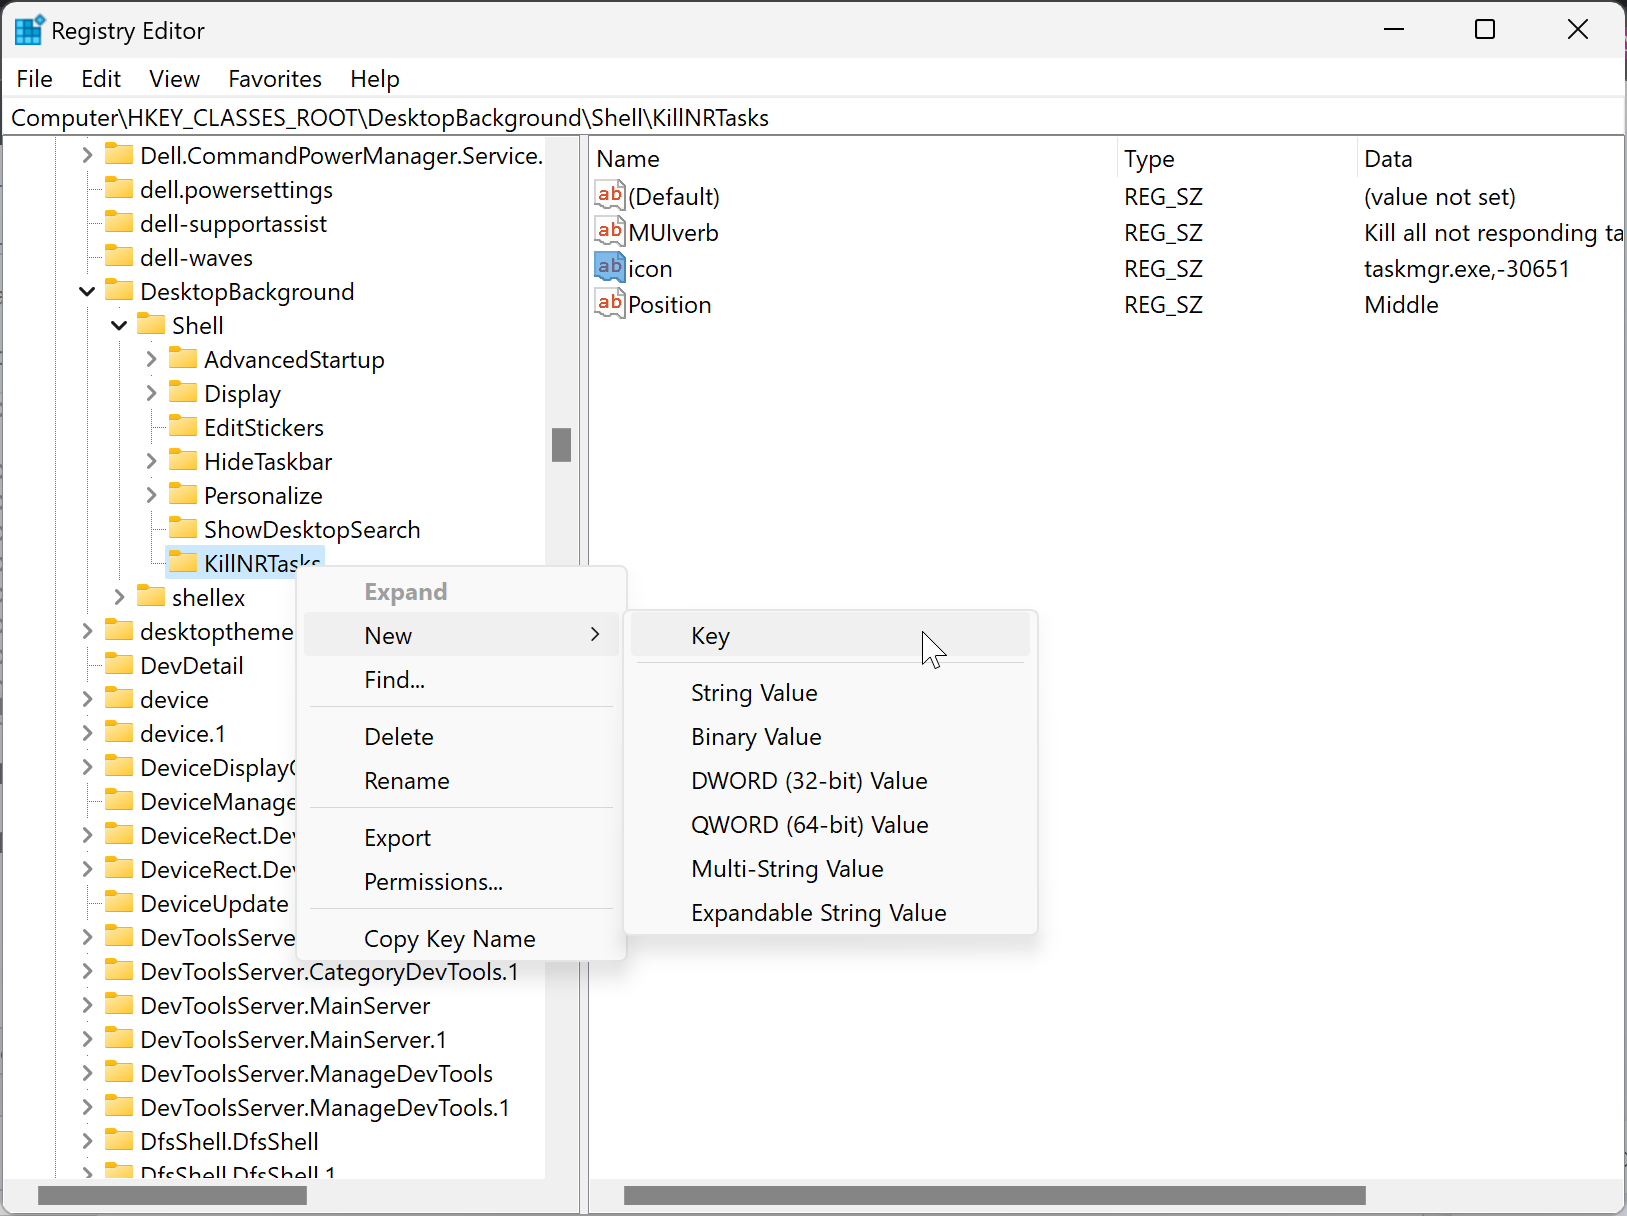
Step 18. Name the newly created key to the command.
Step 19. Look at the opposite side of the “command” key. You will find a (Default) REG_SZ. Double-click on the (Default) REG_SZ and set its “Value data” to the following:-
CMD.exe /C taskkill.exe /f /fi "status eq Not Responding" & Pause
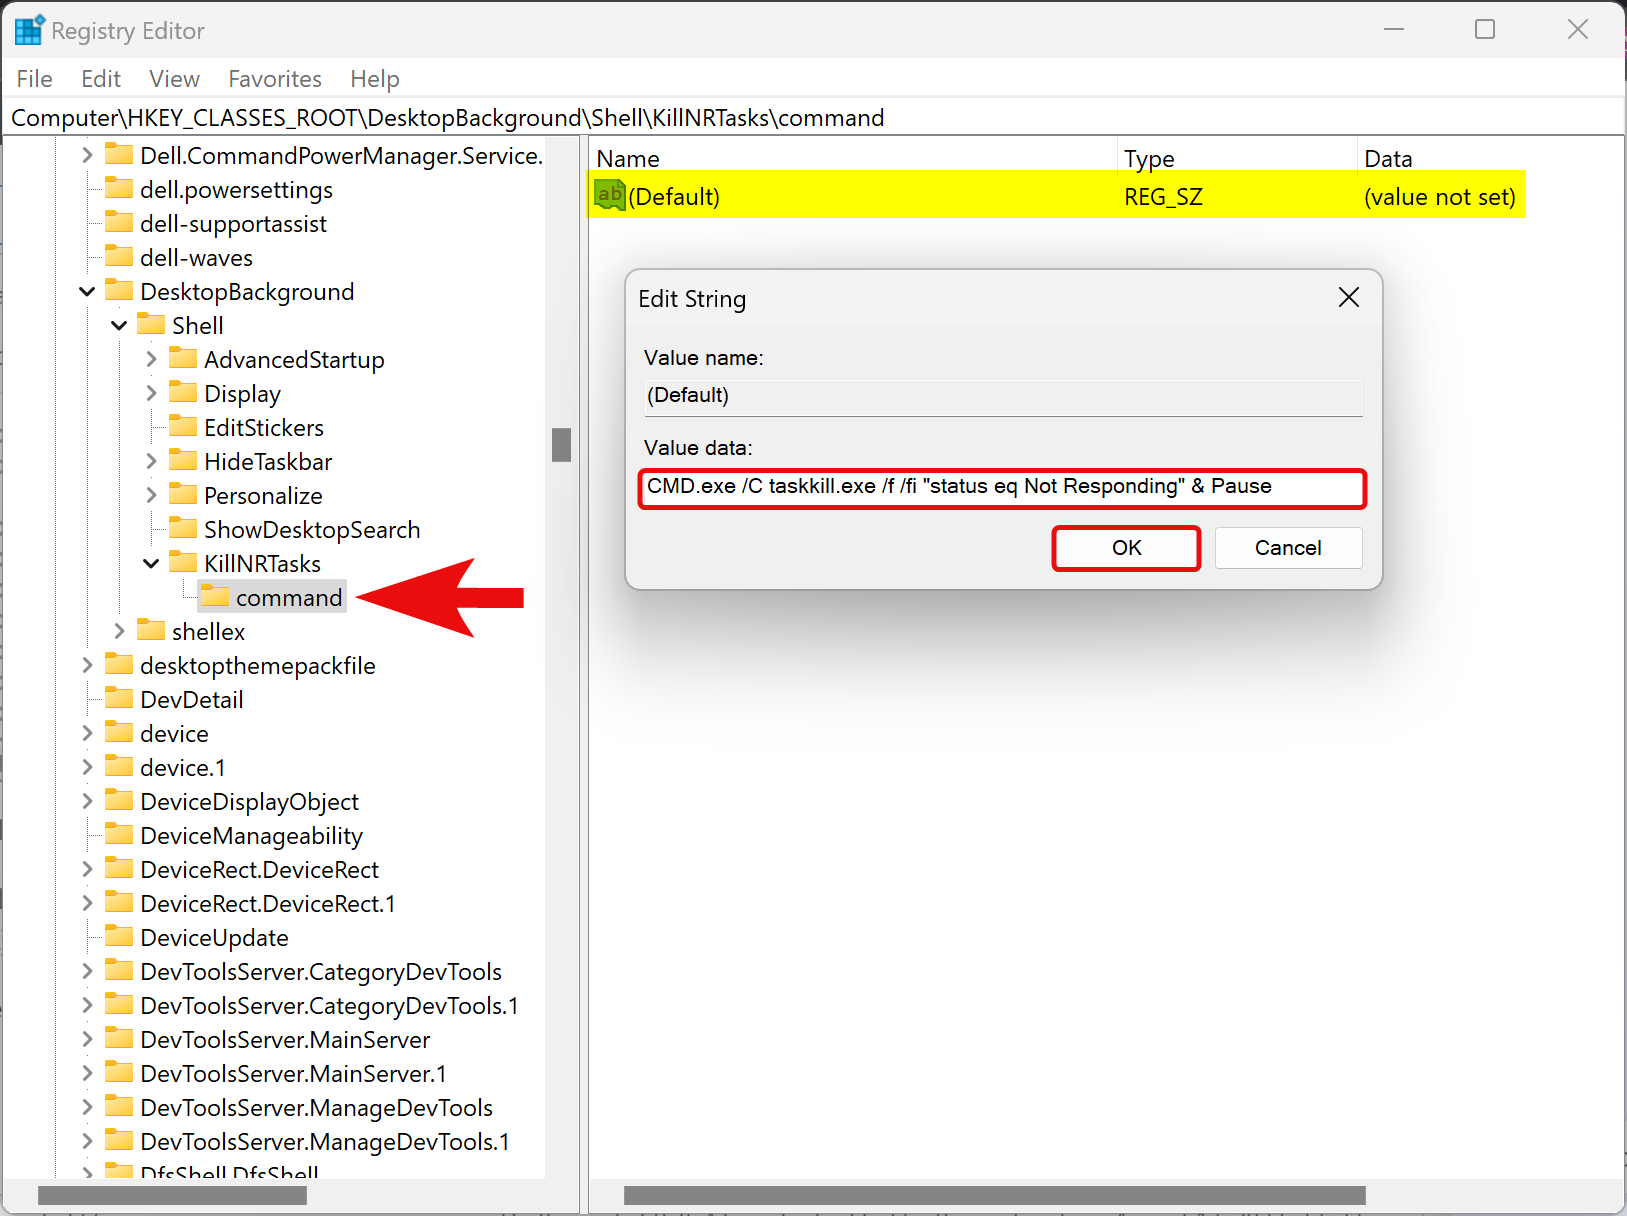
Step 20. Click OK.
Step 21. Restart your computer to apply the changes.
Whenever a program is stuck or unresponsive, open the desktop context menu and use the “Kill all not responding tasks” option. A CMD.exe window will open and check if there is any non-responding process(es). Once it finds that, it will kill those processes silently.
To remove the “Kill all not responding tasks” desktop context menu, open Registry Editor and navigate to the following path:-
HKEY_CLASSES_ROOT\DesktopBackground\Shell
Right-click on the KillNRTasks key and select the Delete option in the menu. Click the Yes button when prompted.
That’s it.
Conclusion
In conclusion, if you are frequently experiencing unresponsive apps on your Windows 11 or 10 PC, adding the “Kill all not responding tasks” context menu can be a quick and efficient solution to deal with the issue. With just a few simple steps, you can add this context menu to your desktop and use it to kill all non-responding processes simultaneously. The steps mentioned in this article can guide you through the process of adding or removing this context menu. By following these steps, you can enhance the performance of your PC and avoid any further inconveniences caused by unresponsive apps.