If you are a Windows 11 or 10 user, you might have encountered situations where you need to boot into the advanced startup options to troubleshoot or repair your PC. The advanced startup options menu allows you to perform a range of troubleshooting tasks, including system restore, startup repair, system image recovery, and more.
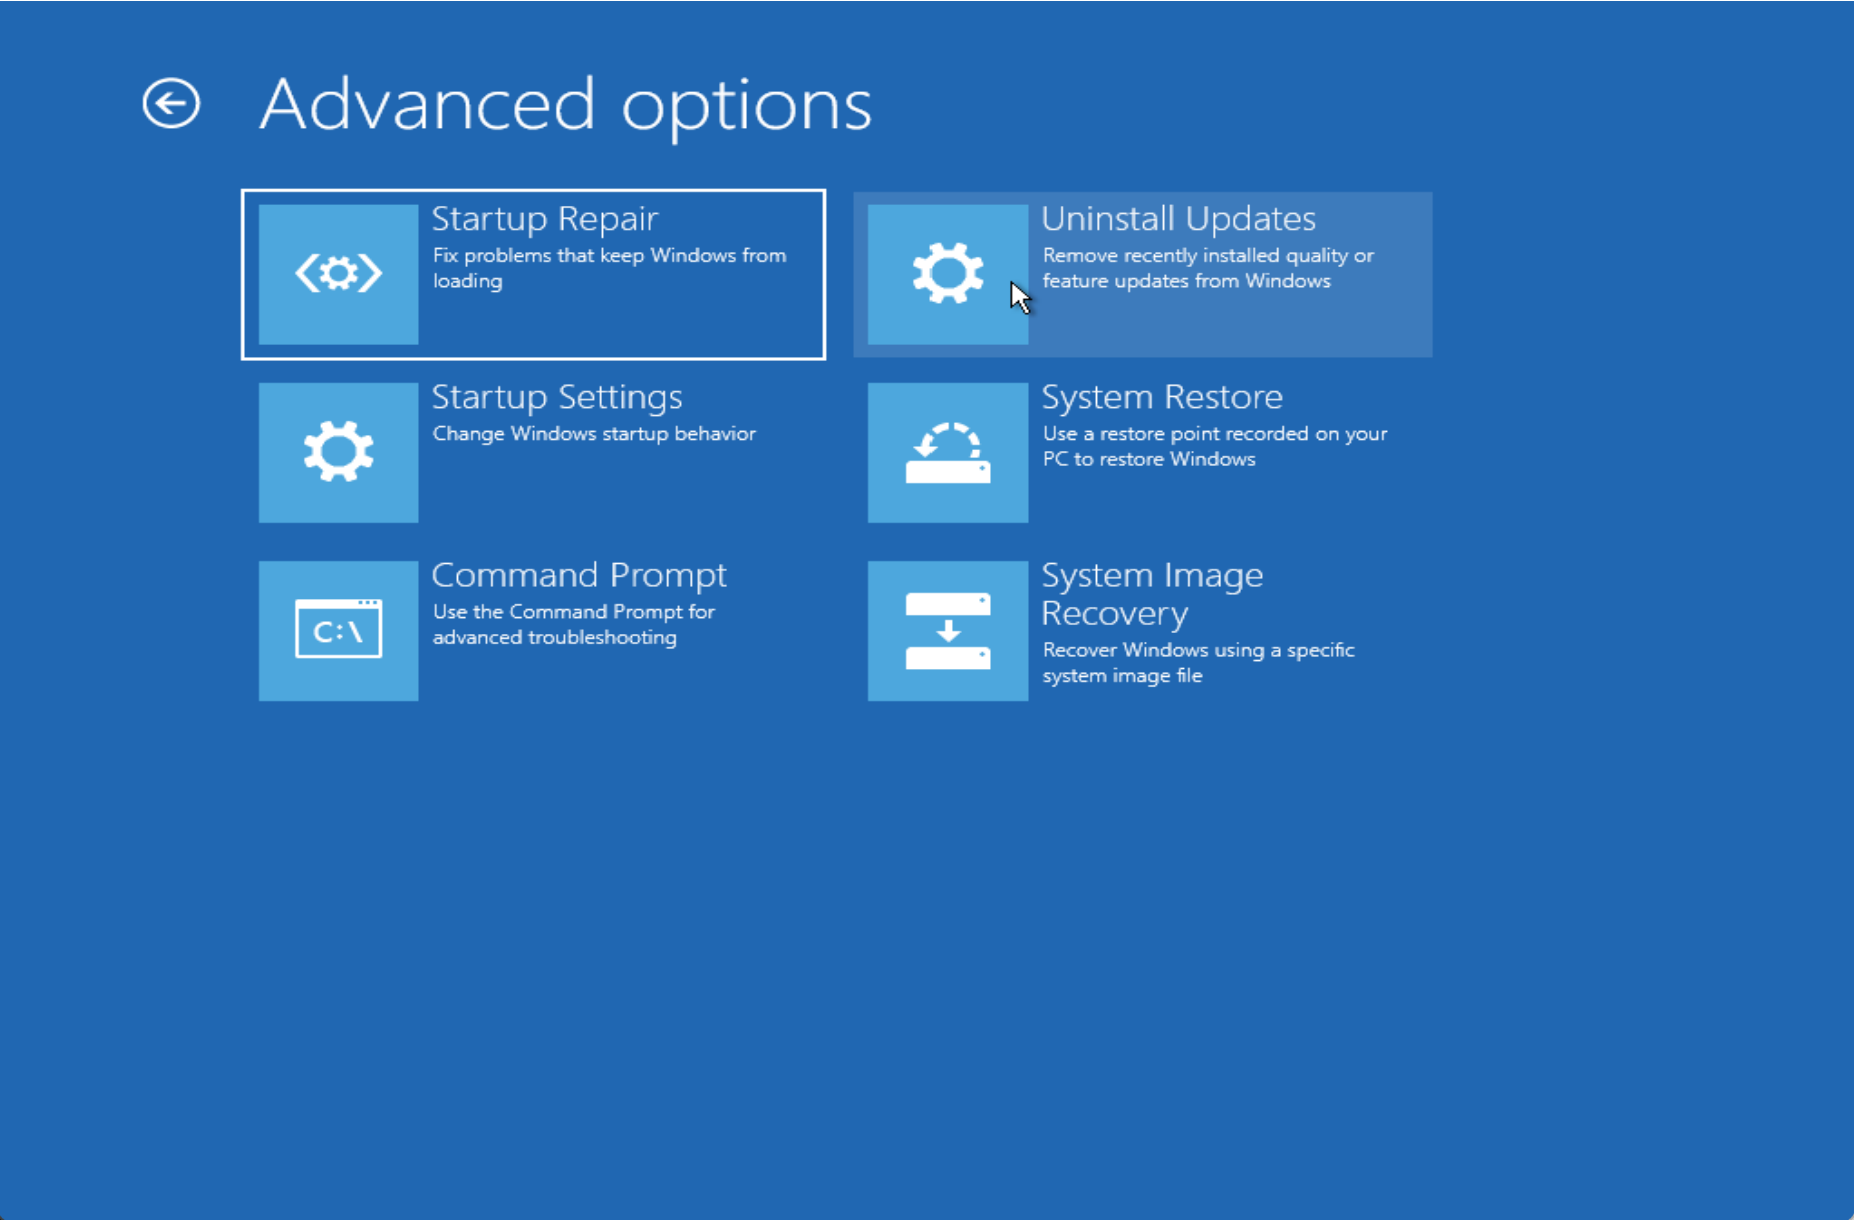
To make it easier to access the advanced startup options menu, you can add or remove the “Boot to Advanced Startup” context menu in Windows 11 or 10. This context menu provides a quick shortcut to access the advanced startup options menu directly from the desktop without having to go through the Settings or Control Panel.
In this article, we will guide you through the process of adding or removing the “Boot to Advanced Startup” context menu in Windows 11 or 10.
How to Add “Boot to Advanced Startup” Context Menu in Windows 11 or 10?
To add a “Boot to Advanced Startup” Context Menu in Windows 11 or 10, follow these simple steps:-
Step 1. First, open Registry Editor
Step 2. Then, navigate to the following Registry key in the left sidebar:-
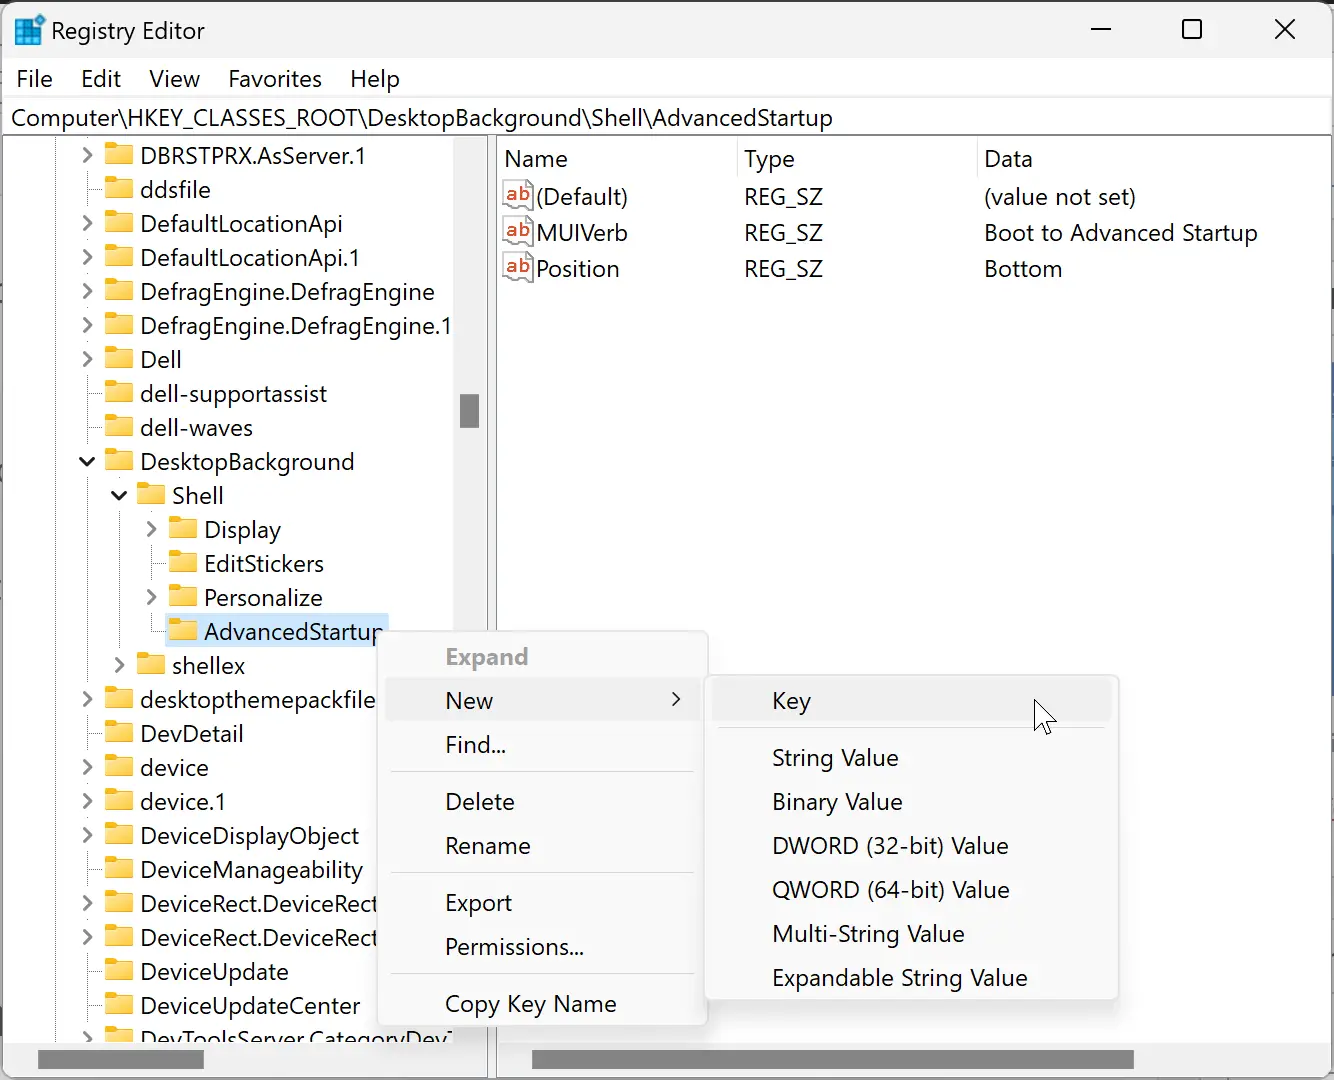
HKEY_CLASSES_ROOT\DesktopBackground\Shell
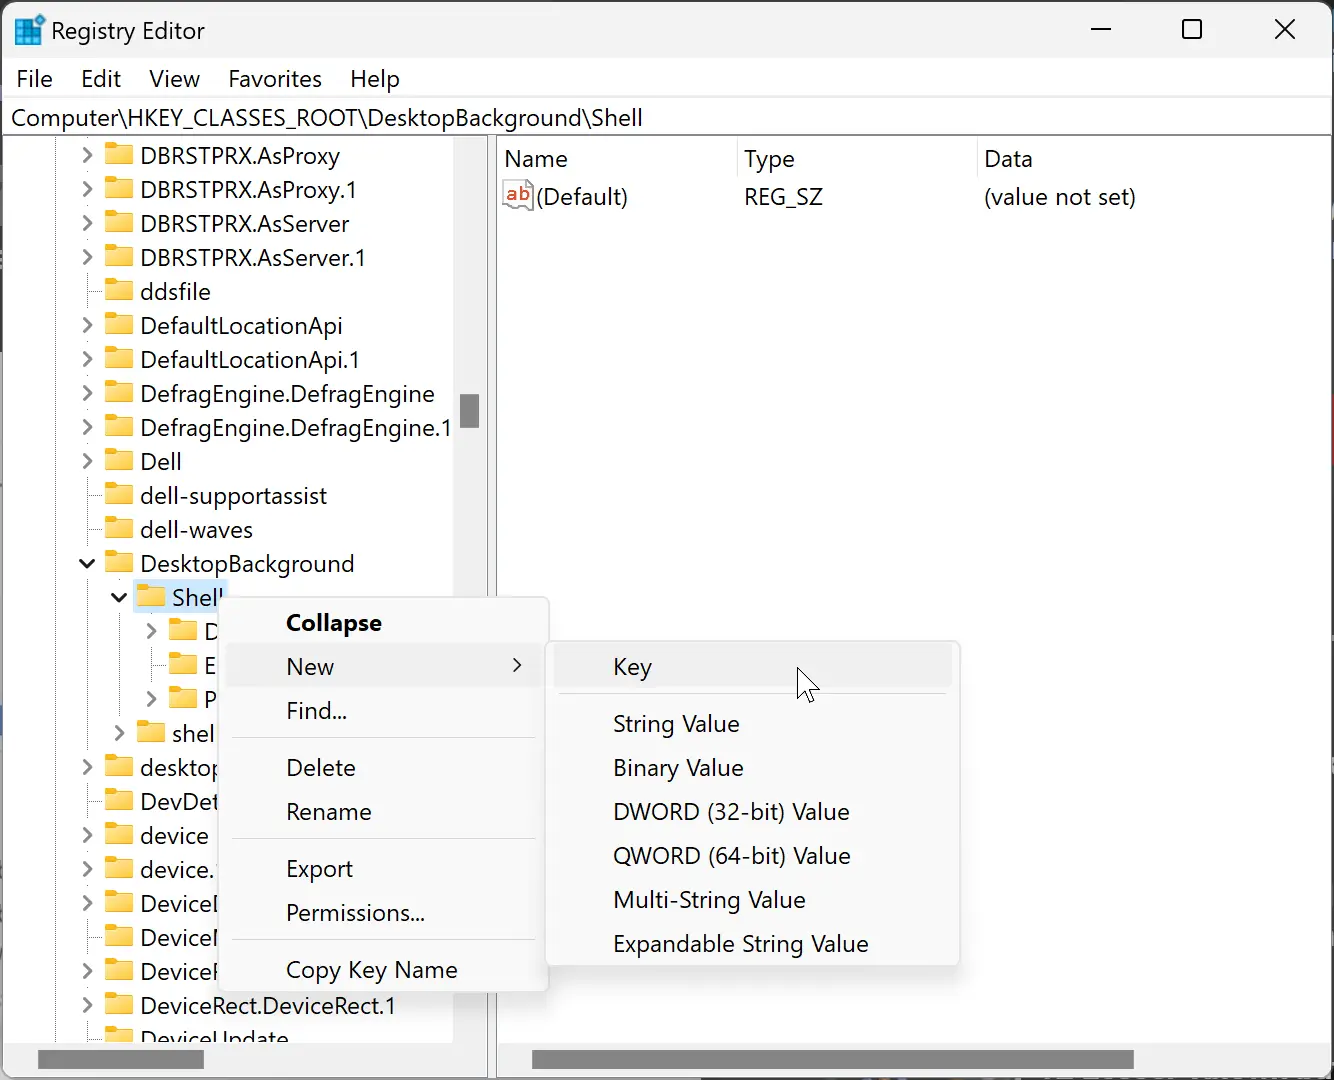
Step 3. Now, right-click on the “Shell” key, and select New > Key.
Step 4. Name the newly created key “AdvancedStartup.”
Step 5. On the opposite side of the “AdvancedStartup” key, right-click on the free space and select New > String Value.
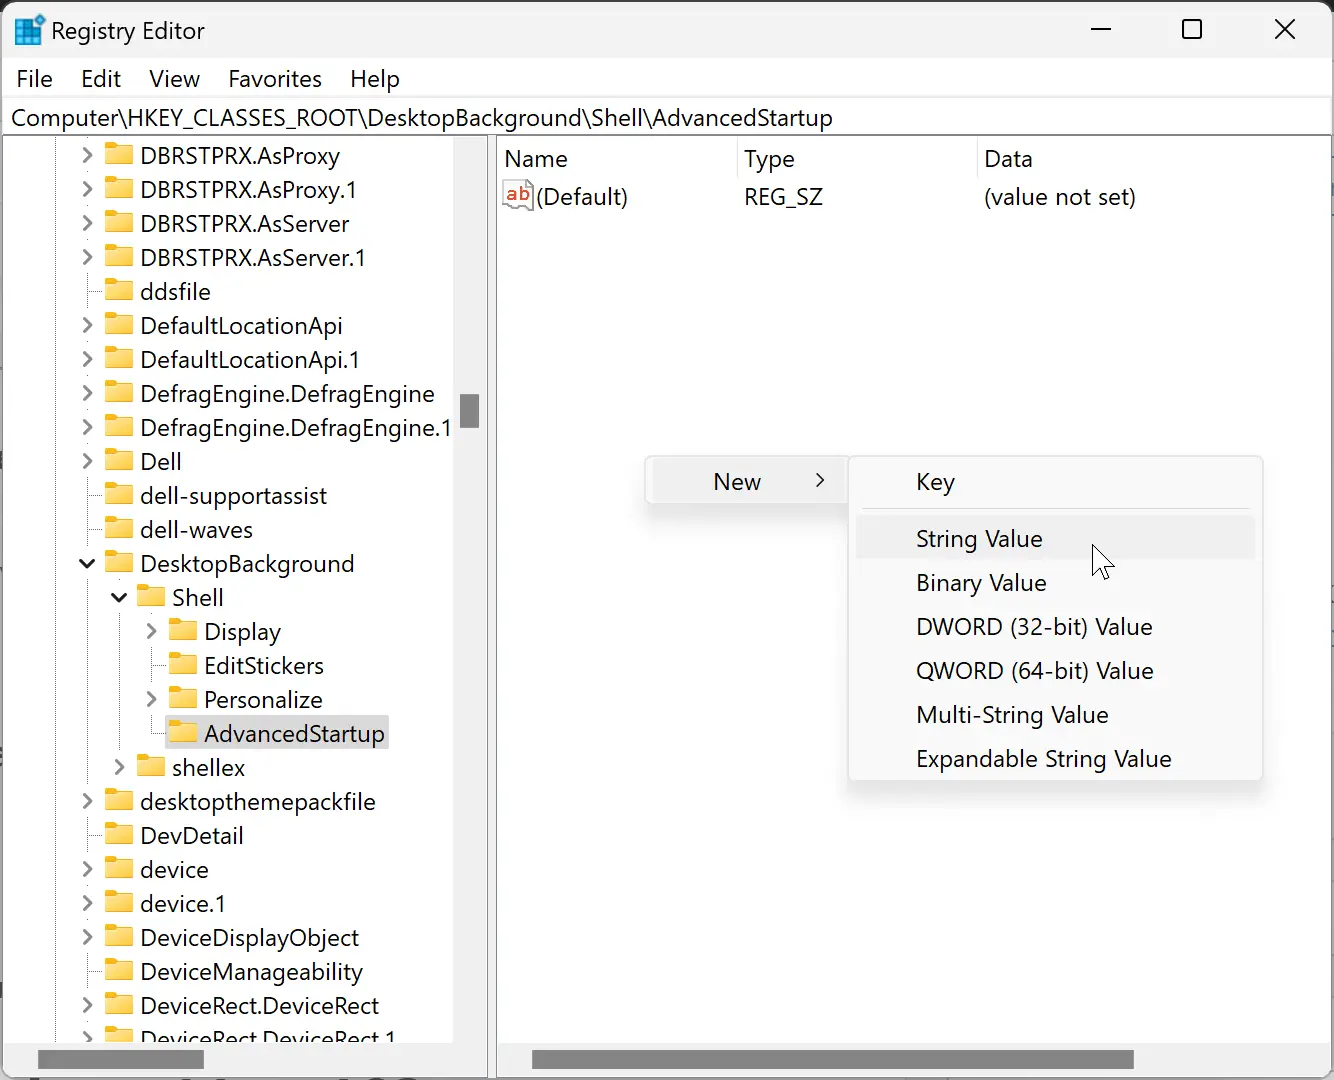
Step 6. Name this new REG_SZ MUIVerb.
Step 7. Now, double-click on the MUIVerb REG_SZ, and in the text box type “Boot to Advanced Startup” for Value data.
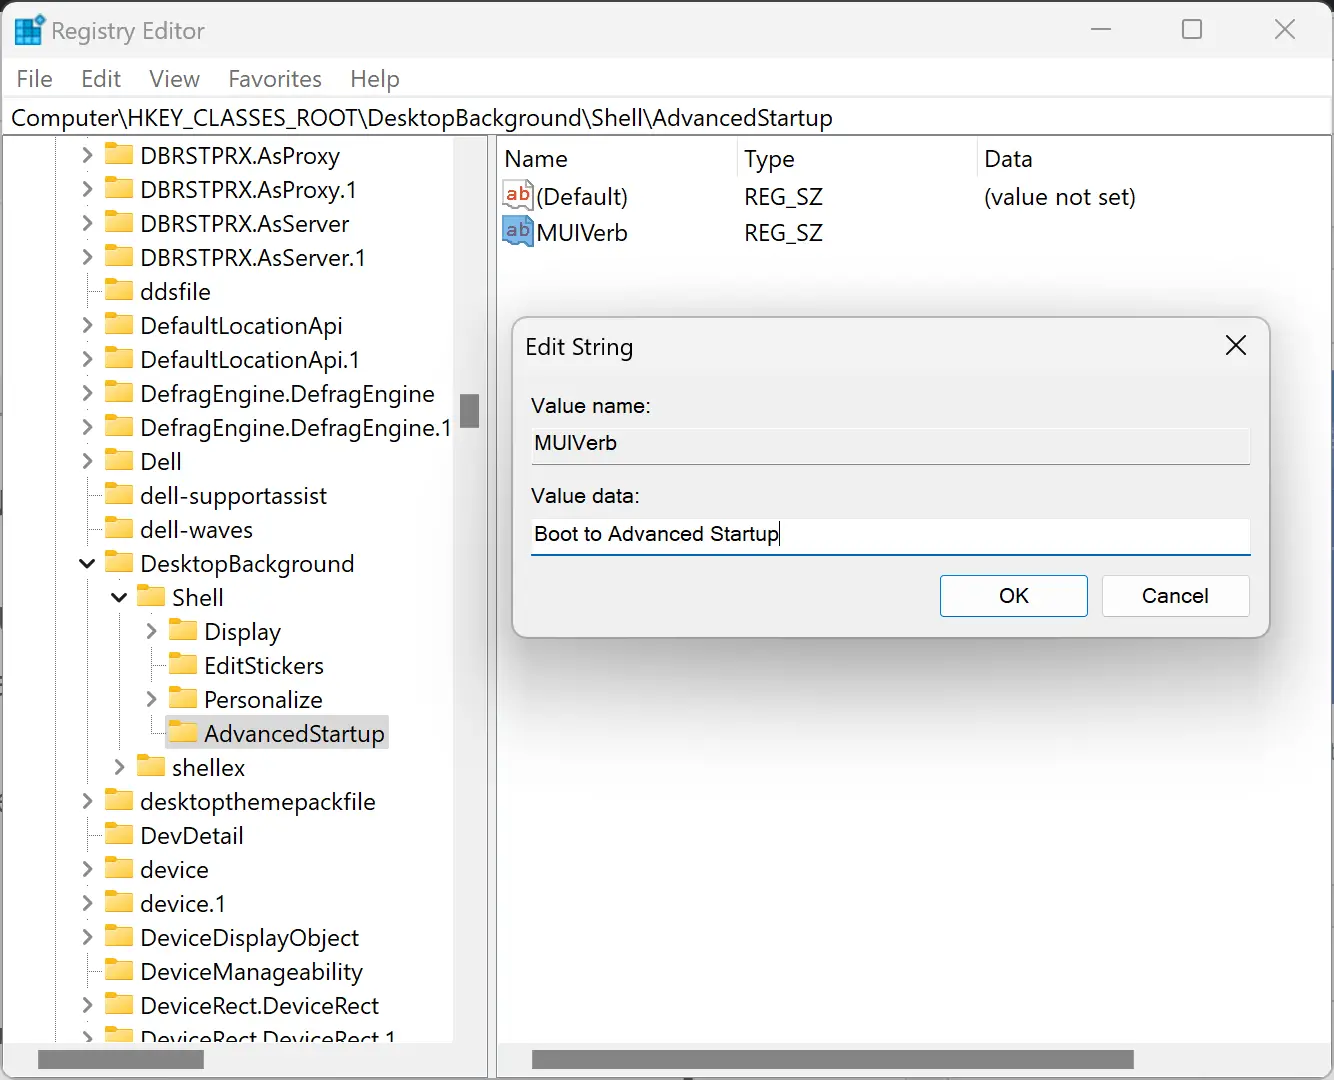
Step 8. Click OK to save the changes.
Step 9. Again, right-click on the free space on the right sidebar and select New > String Value.
Step 10. Name this REG_SZ Position.
Step 11. Next, double-click the Position REG_SZ and type Bottom in the text box for Value data.
Step 12. Click OK to save the changes.
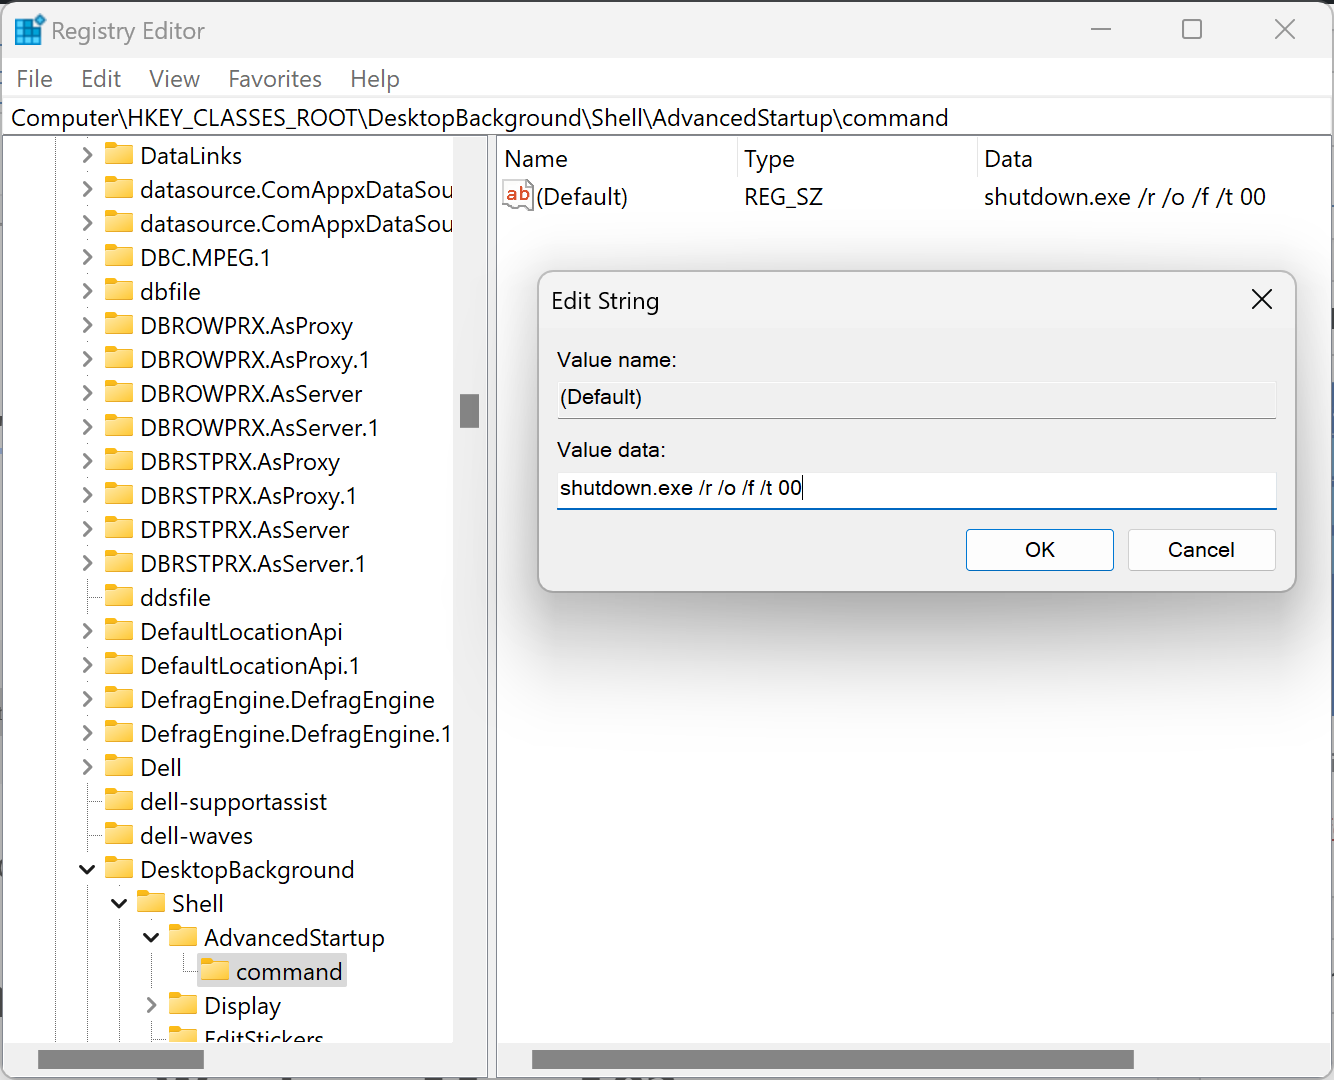
Step 13. Now, right-click on the AdvancedStartup key in the left panel and choose New > Key.
Step 14. Set the name command.
Step 15. When you’re done, you will find a (Default) string in the right panel. Double-click the (Default) REG_SZ and enter the below command in the text box for Value data.
shutdown.exe /r /o /f /t 00
Step 16. Click OK to save the changes.
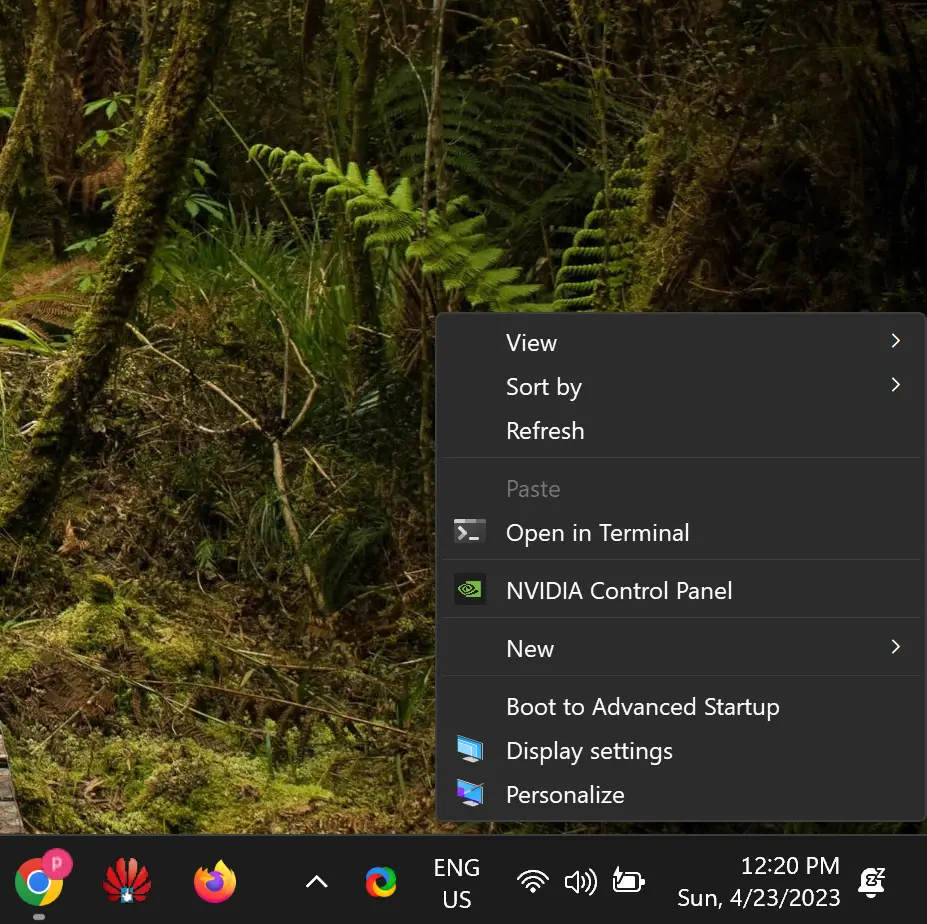
Once you complete the above steps, Boot to Advanced Startup will appear on right-click context menu on Windows 10 Desktop. In Windows 11, you need to click on “Show more options” in order to view this option.
How to Remove the “Boot to Advanced Startup” Context Menu in Windows 11 or 10?
Step 1. Open Registry Editor.
Step 2. Navigate to the following key in the left sidebar of Registry Editor:-
HKEY_CLASSES_ROOT\DesktopBackground\Shell
Step 3. Right-click on the “AdvancedOptions” key and select “Delete” to remove it.
That’s it. Once you complete the above steps, “Boot to Advanced Startup” option will no longer exist in Windows 11 or 10 context menu.
Conclusion
Adding or removing the “Boot to Advanced Startup” context menu in Windows 11 or 10 can be a useful customization for users who frequently need to access the advanced startup options menu. The process is relatively simple and can be accomplished by following the steps outlined above. By customizing your context menu, you can improve your productivity and streamline your PC usage.
