Windows 11 automatically configures the display scaling settings to ensure that elements (text, icons, navigations, and others) on the screen are the right size and readable. However, this setting is not perfect every time, and sometimes you need to adjust the settings manually.
For example, if elements on your screen are too small to view, you might want to enlarge that to avoid stressing your eyes. Changing the Windows 11 scale may also improve desktop viewing while showing a PowerPoint presentation on a projector.
In this gearupwindows article, we will guide you on changing the scale settings on a desktop monitor or laptop display.
How to Adjust the Display Scale with Recommended Settings on Windows 11?
To change a Windows 11 display scale size using the recommended settings, do the following steps:-
Step 1. First, open Windows 11 Settings.
To do that, use Windows + I shortcut keys. Or, right-click on the Start button and select Settings in the menu.
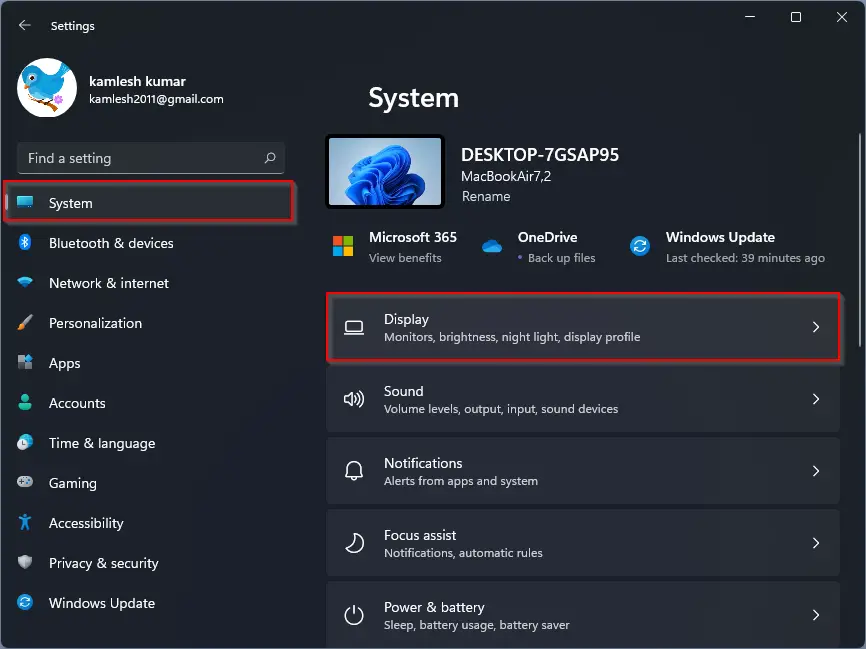
Step 2. When the Settings window appears, select the System category on the left side.

Step 3. Then, click the Display tile on the right side.
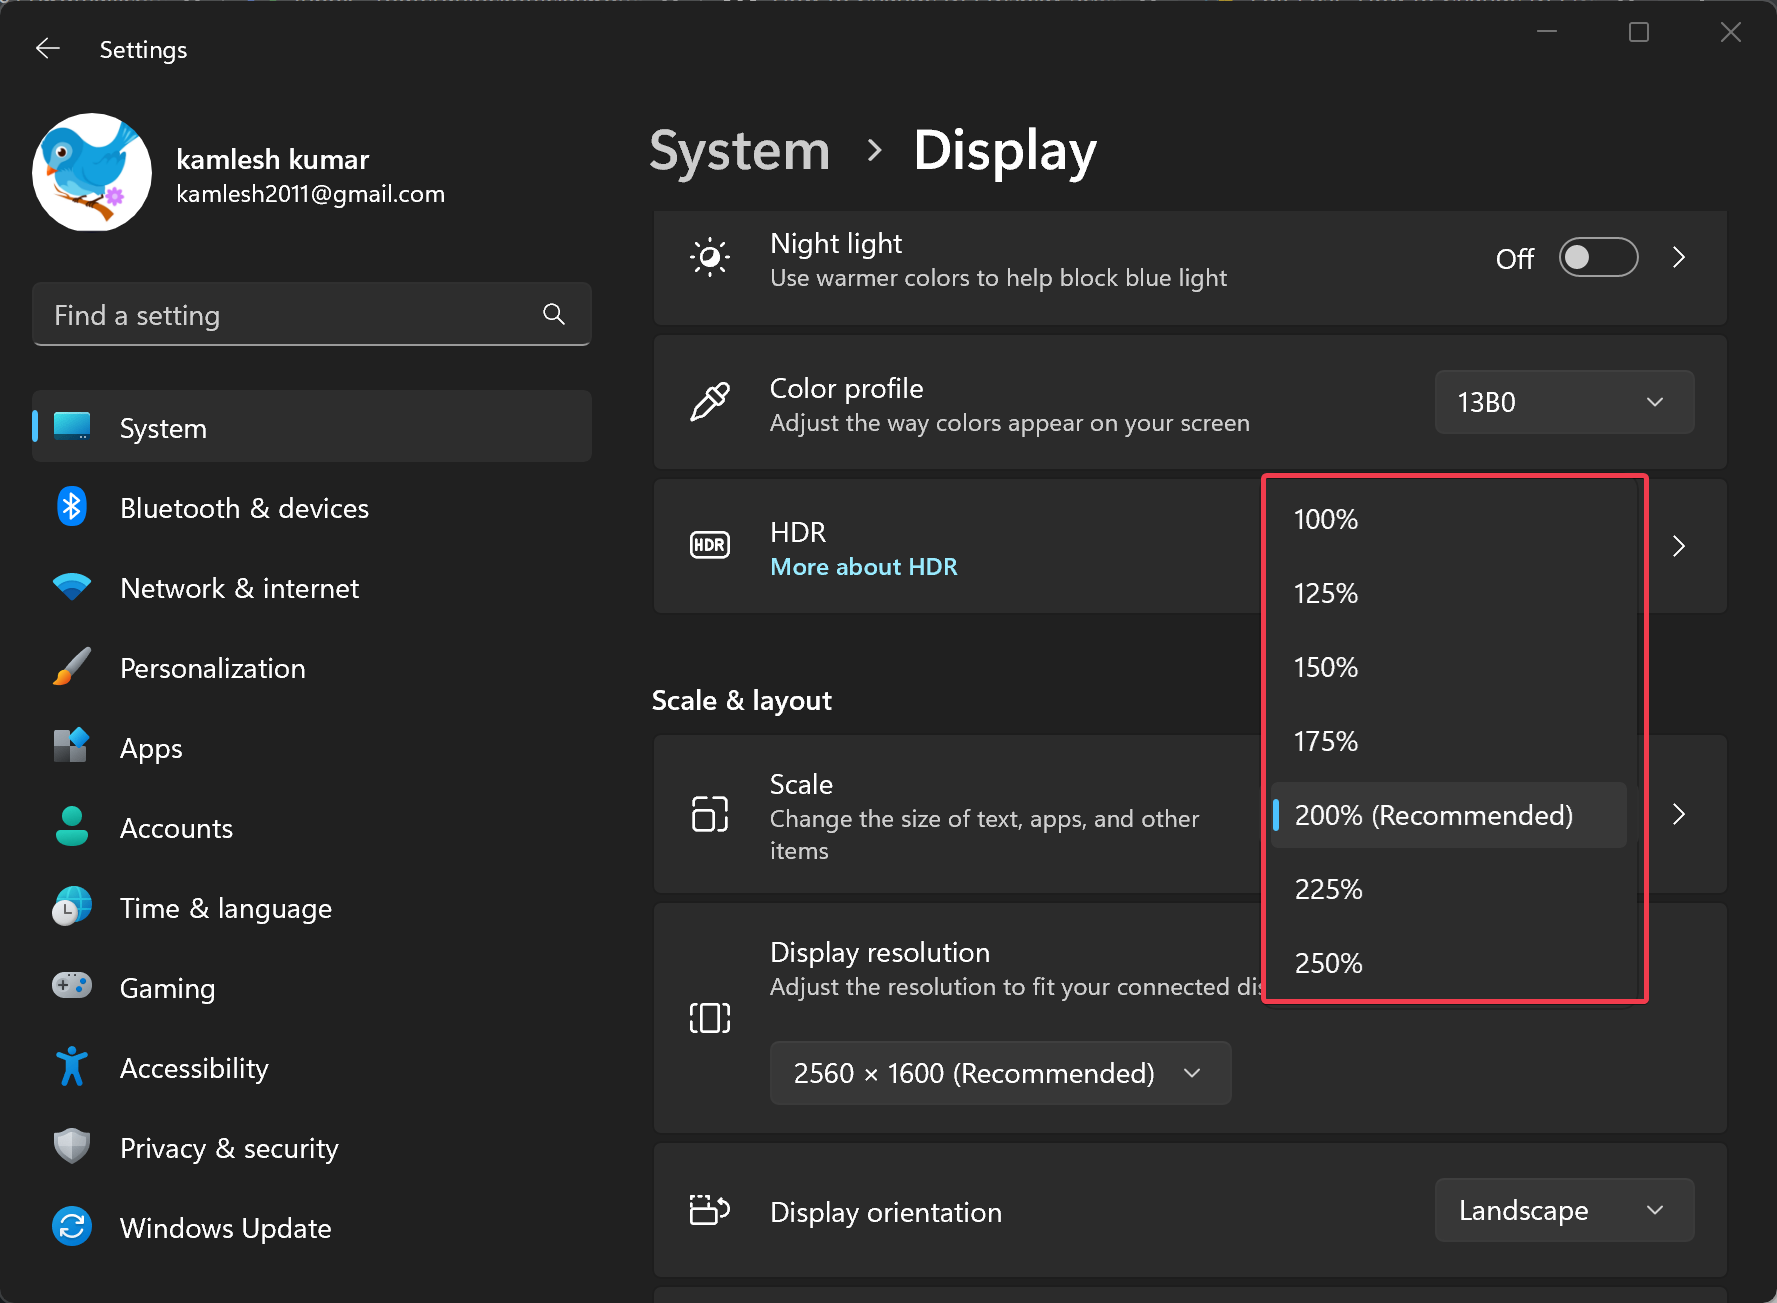
Step 4. Under the “Scale & layout” section, use the Scale drop-down menu and select the scale setting — for example, 100%, 125%, 150%, 175%, etc.
Once you perform the above steps, the new screen display scale will apply immediately. That means there is no need to restart your computer.
How to Change Display Scale with Custom Settings on Windows 11?
Although it is not recommended to adjust the scale settings using custom values because it may affect the viewing experience, if it’s necessary, use the following steps:-
Step 1. First, open Windows 11 Settings.
To do that, use Windows + I shortcut keys. Or, right-click on the Start button and select Settings in the menu.
Step 2. When the Settings window appears, select the System category on the left side.
Step 3. Then, click the Display tile on the right side.
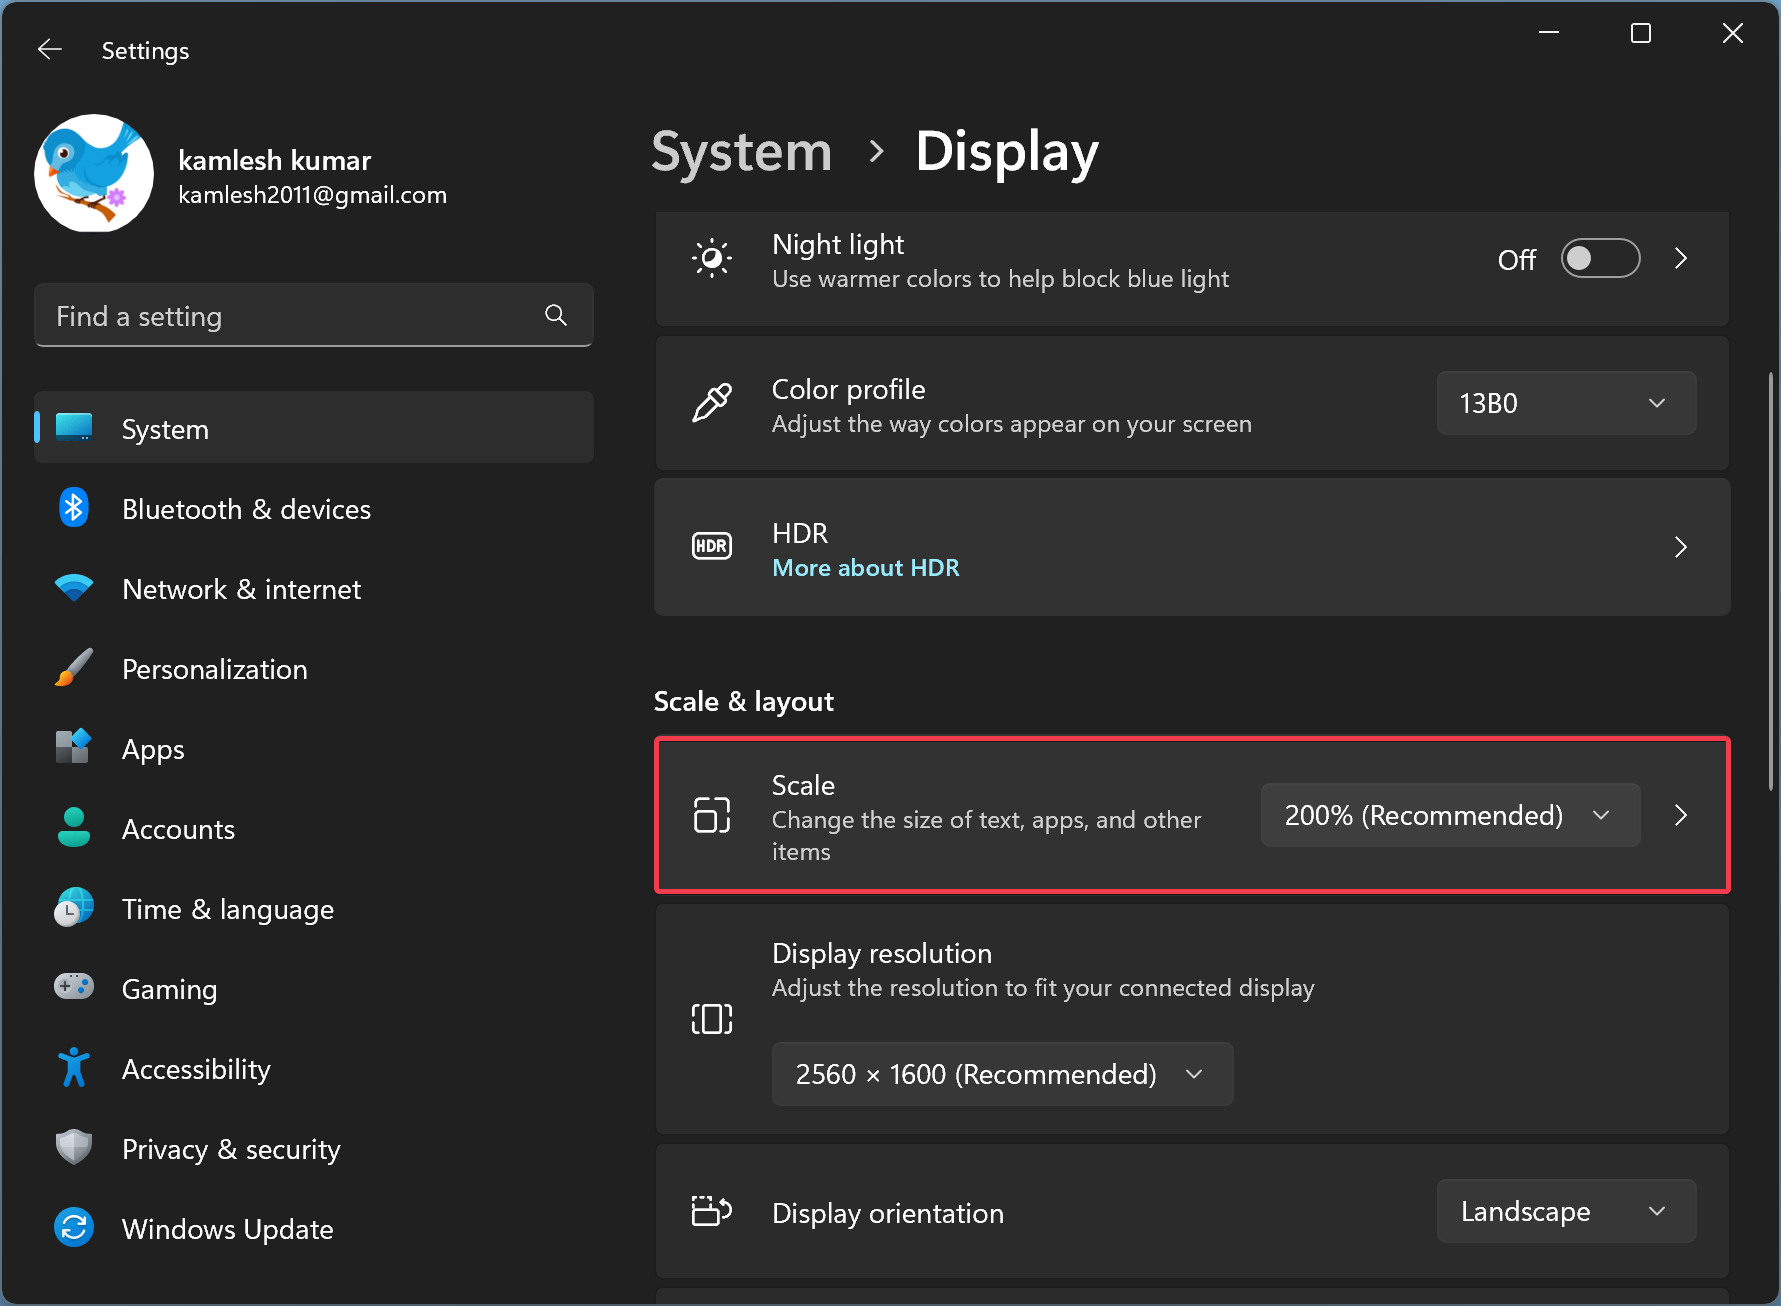
Step 4. Under the “Scale & layout” section, use the Scale drop-down menu and select the scale setting. After that, double-click on the Scale title to open Custom scaling.
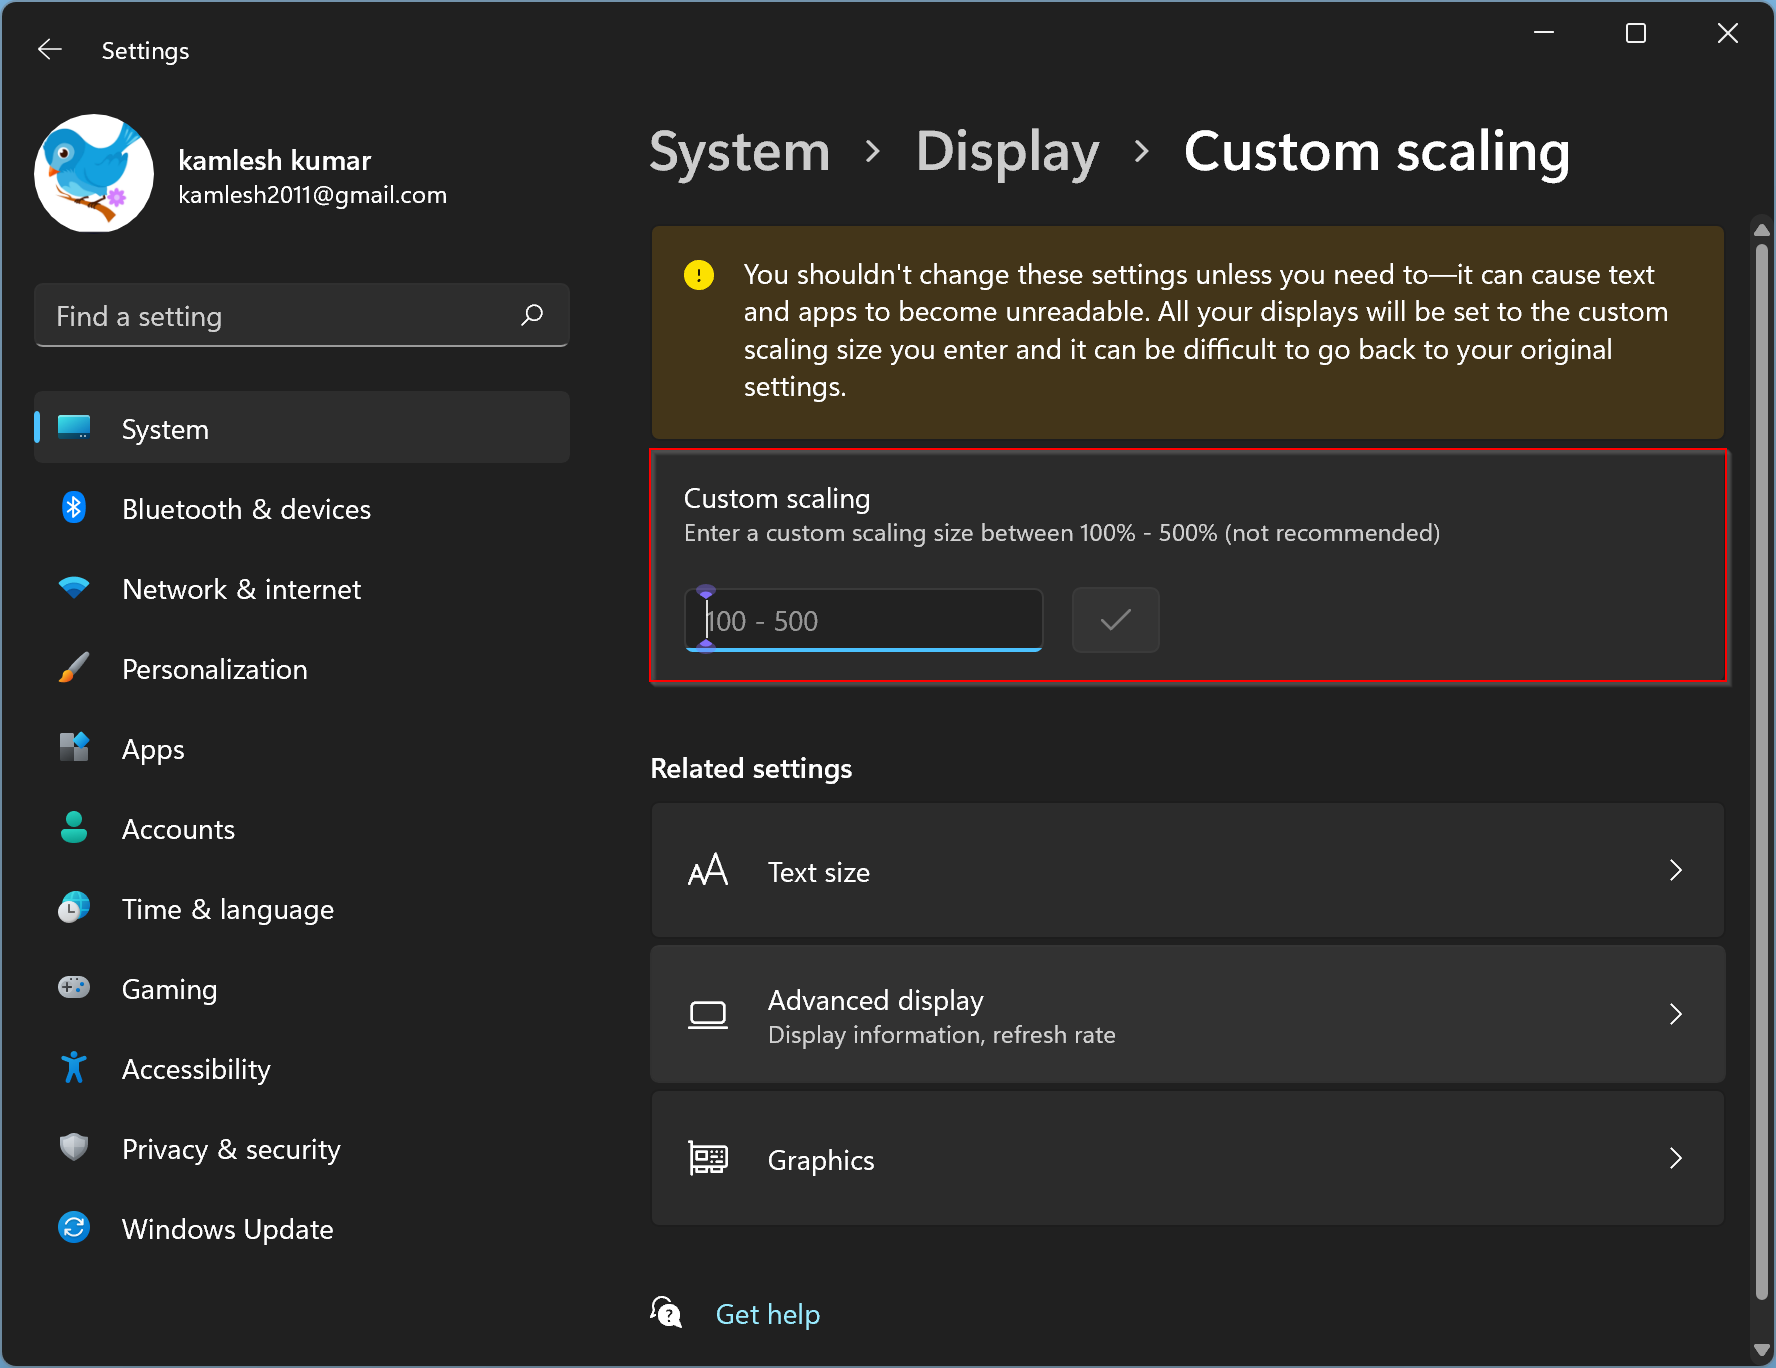
Step 5. Then, under the “Custom scaling” box, set a custom scaling size between 100% to 500%.
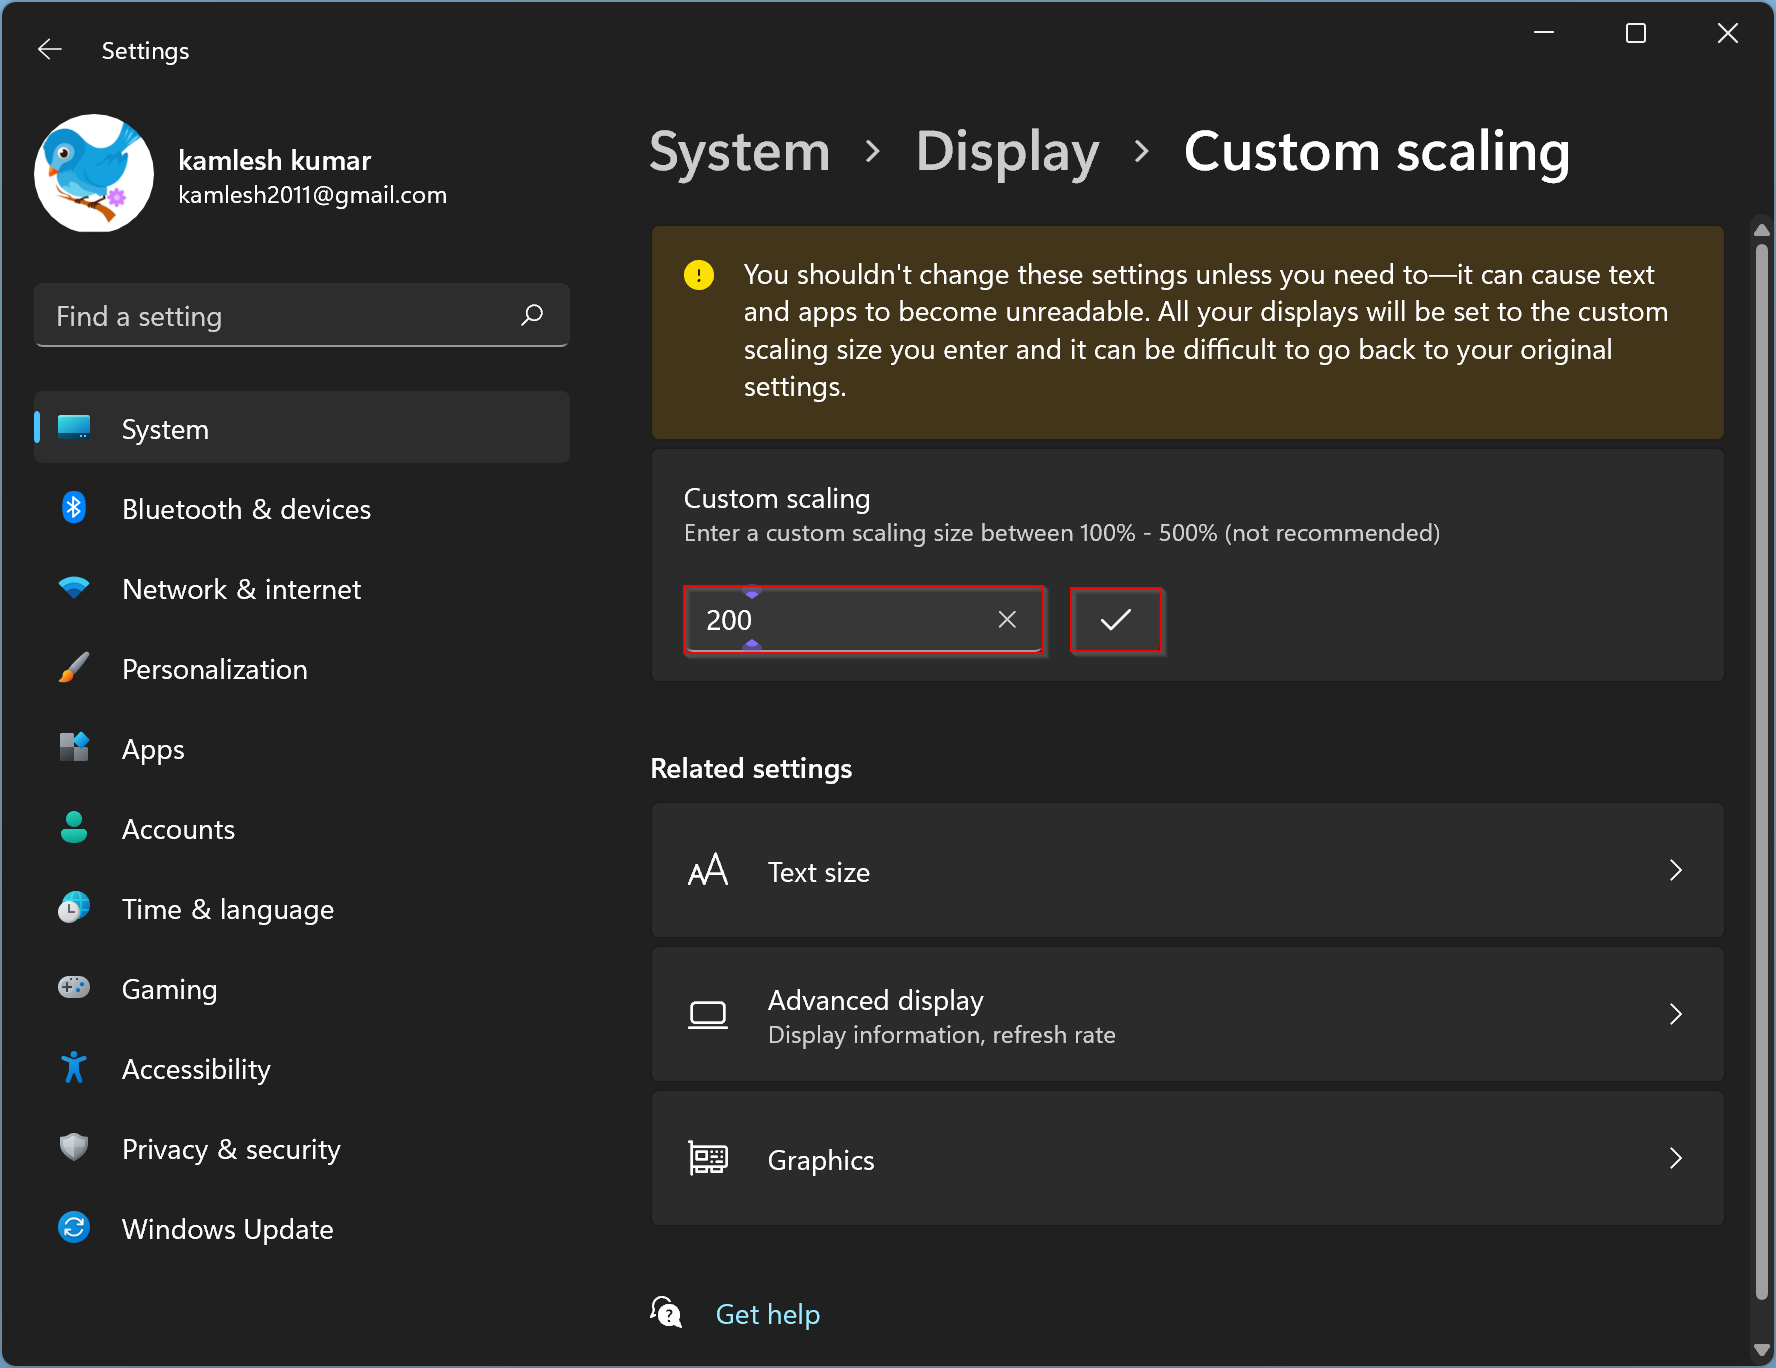
Step 6. Next, click the Check button.
Step 7. Finally, click the Sign out now button.
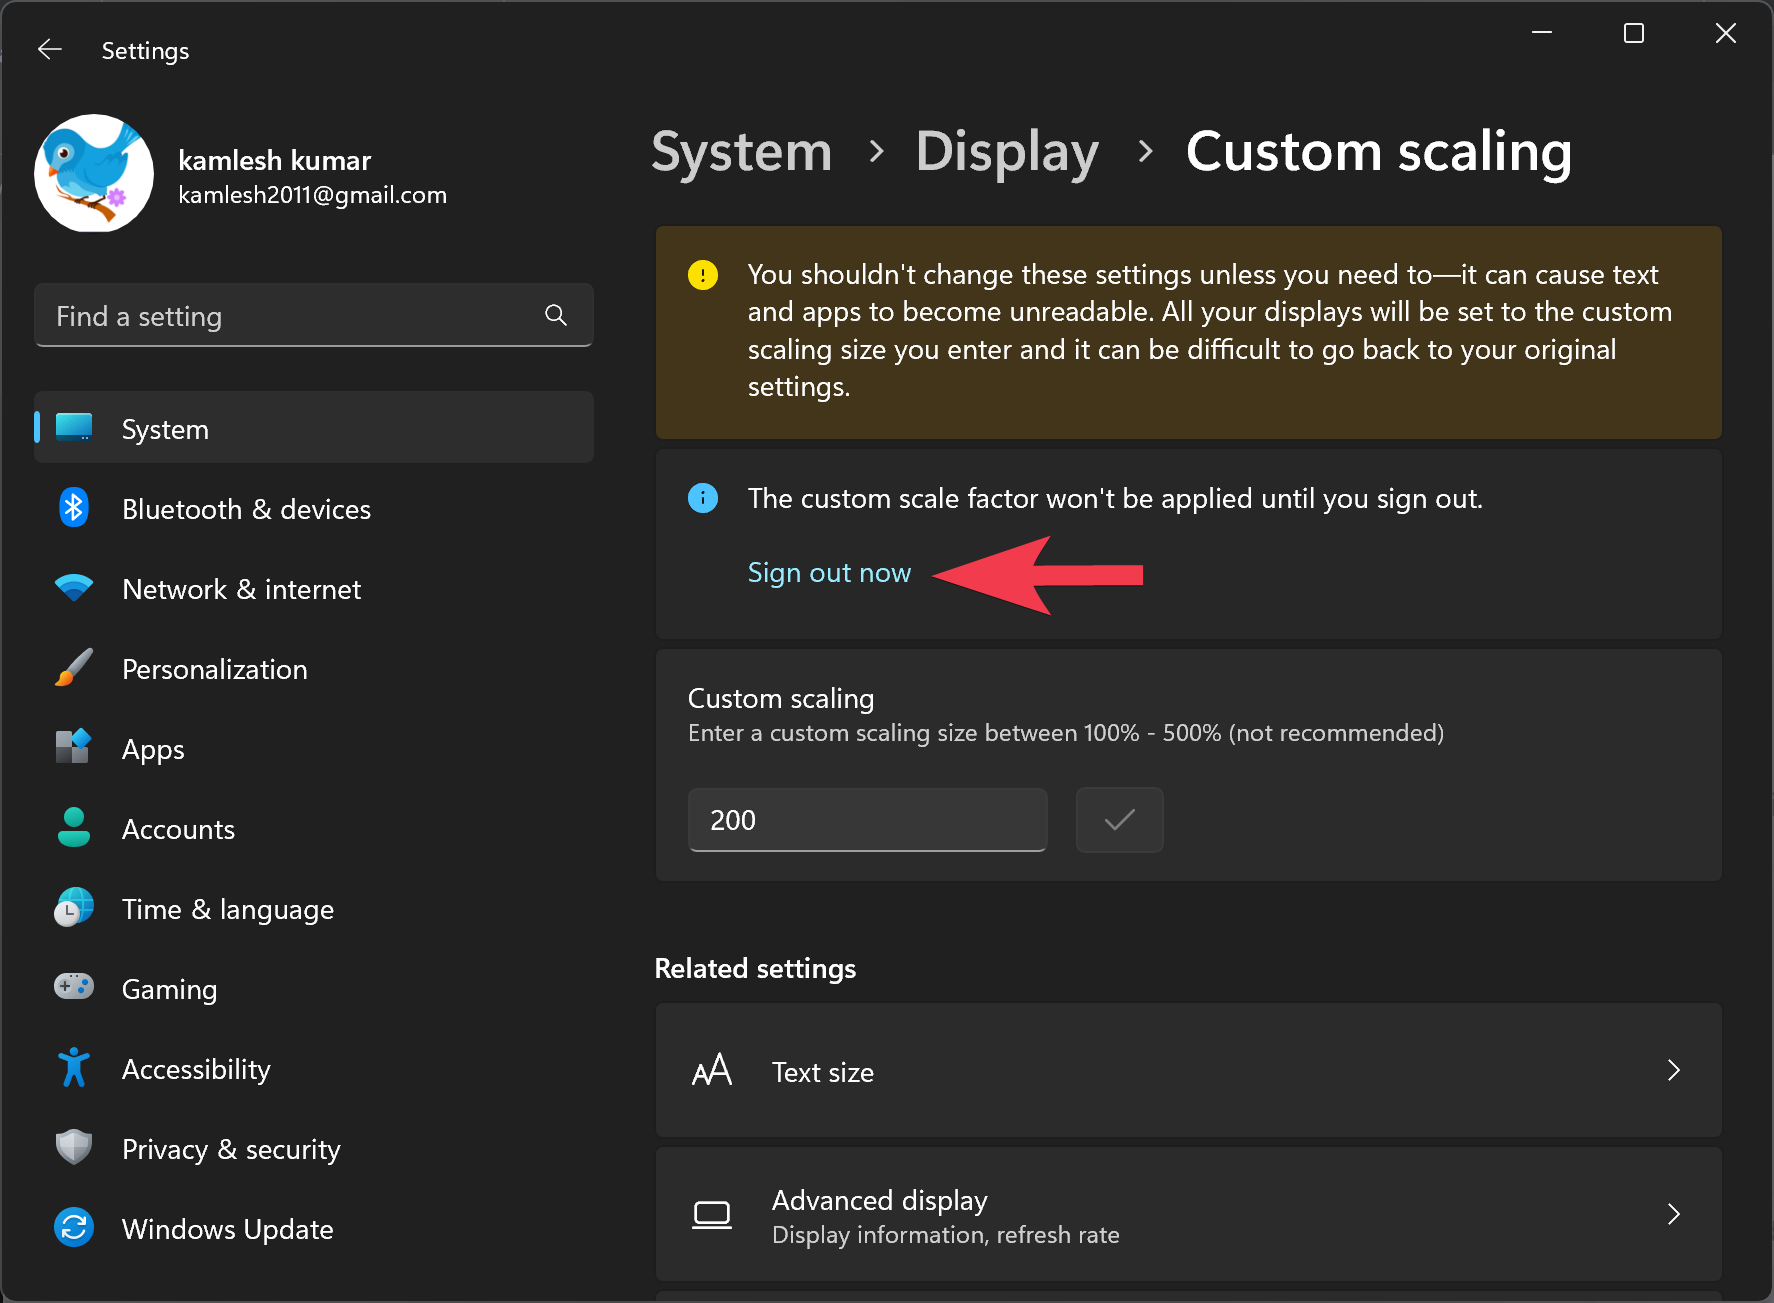
Now, sign in to your Windows 11 machine and see the changes.
How to Make Text Bigger without Changing Scale Settings on Windows 11?
If you want to make the text more readable but don’t want to adjust the scale settings, use these steps:-
Step 1. Open the Settings app.
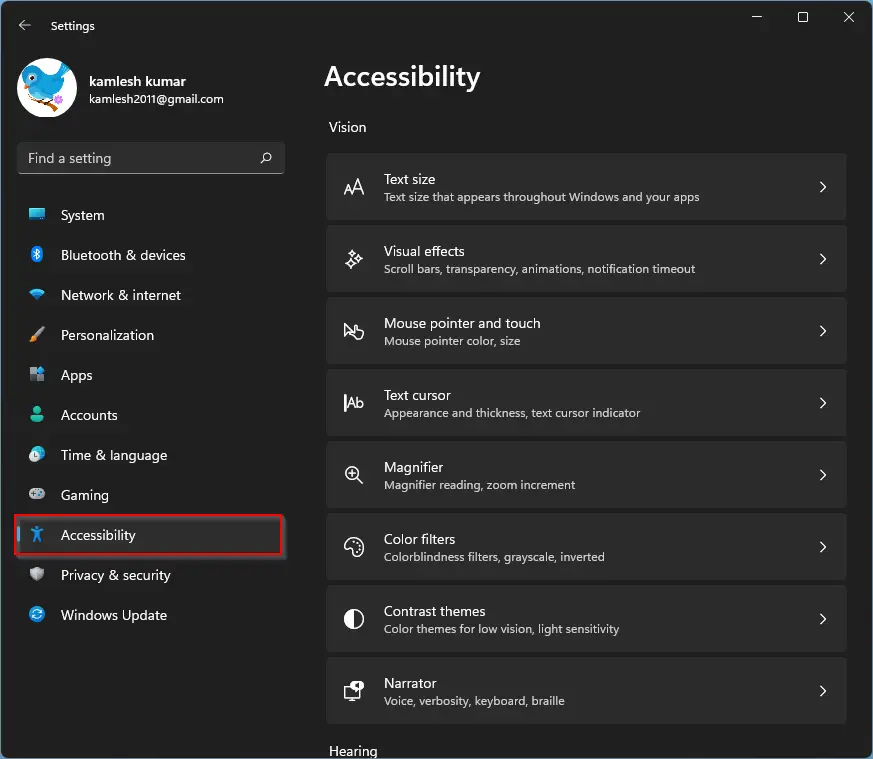
Step 2. Select the Accessibility category on the left side pane in the Settings window.
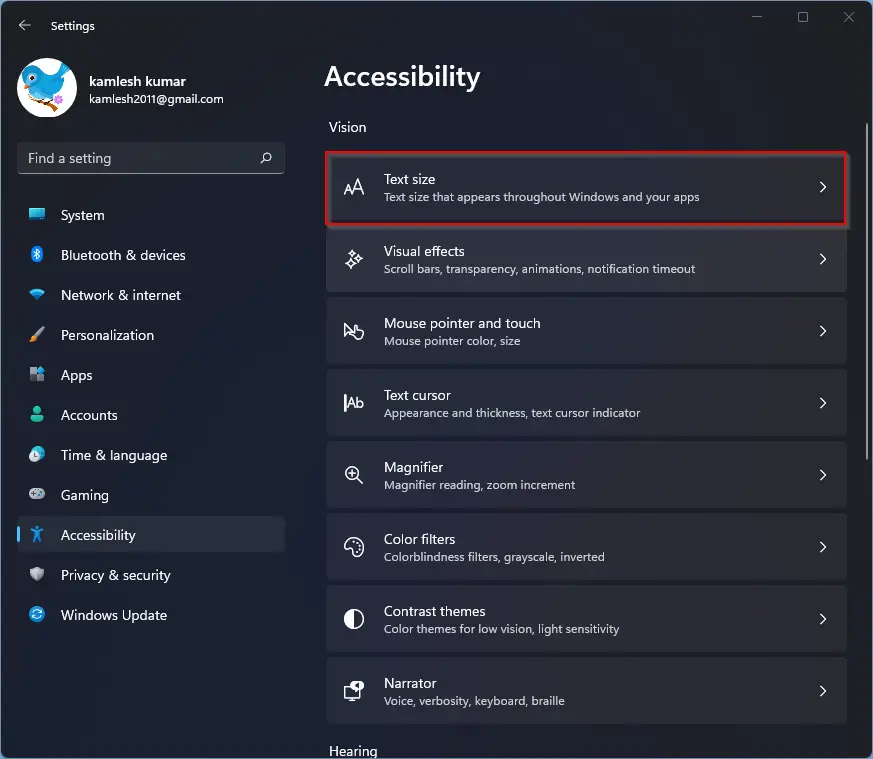
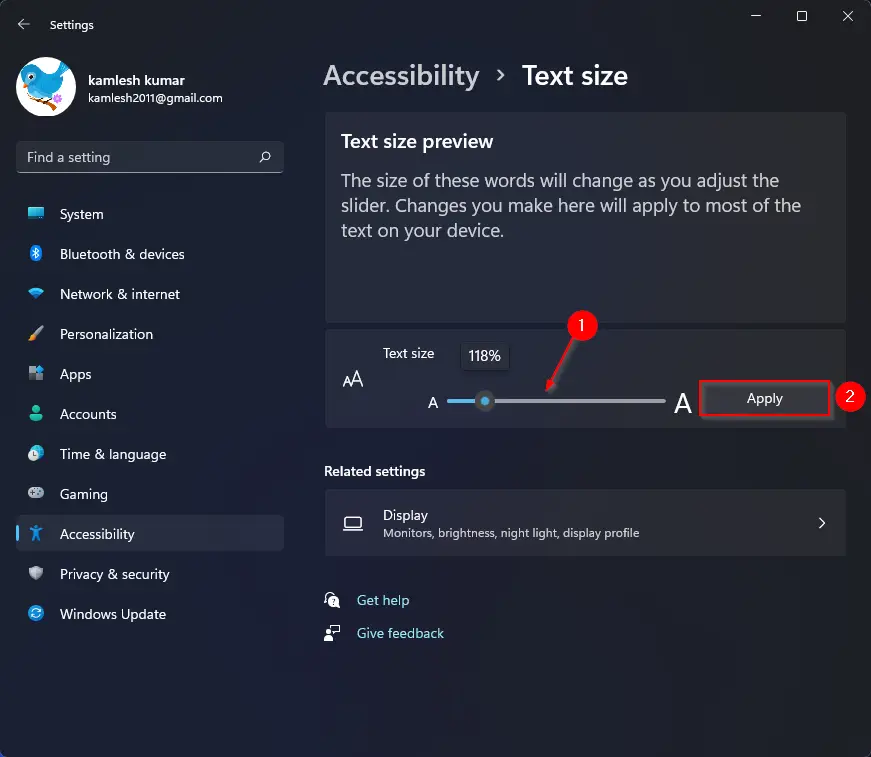
Step 3. On the right side of Accessibility, click on the Text size tile.
Step 4. In the following screen, move the slider to increase the Text size in percentage. Above the slider, you can see the preview of the changes. When you see the desired size, click on the Apply button beside the slider.
That’s it. You can close the Settings app. There is no need to reboot your computer.
Conclusion
In conclusion, adjusting the display scale settings on your Windows 11 device is crucial for ensuring the optimal viewing experience, especially if the elements on the screen are too small or too large. With the recommended settings, you can easily adjust the display scale by selecting from the available options. However, if you need to use custom settings, it’s essential to be cautious as it may affect your viewing experience. Additionally, you can make the text more readable without adjusting the scale settings by simply increasing the text size using the Accessibility settings. Overall, this guide provides simple and easy-to-follow steps that can help you adjust the display scale settings on your Windows 11 device to enhance your viewing experience.