If you’re someone who frequently forgets to shut down your Windows 10 or 11 PC after you’re done using it, you might be interested in learning how to shut it down when it’s idle automatically. This can not only save you energy costs but can also increase the lifespan of your computer by reducing unnecessary wear and tear. By setting up an automatic shutdown, you can ensure that your PC is always powered down when it’s not in use without remembering to do it yourself.
Thankfully, setting up an automatic shutdown on your Windows 10 or 11 PC is a relatively simple process that can be accomplished in just a few steps. There are a few different methods you can use to achieve this, including built-in Windows features as well as third-party tools, depending on your preferences and needs. In this article, we’ll go over some of the most effective and user-friendly ways to automatically shut down your Windows PC when it’s idle, so you can choose the method that works best for you.
How to Automatically Shut Down Windows 11 or 10 PC on Idle?
Follow these steps to automatically Shut Down a Windows 11 or 10 PC after a specified period of inactivity:-
Step 1. First, click the “Search/Start” button on your taskbar and type in “Task Scheduler.”
Step 2. Once Task Scheduler appears on your computer, click on Task Scheduler Library on the left sidebar.
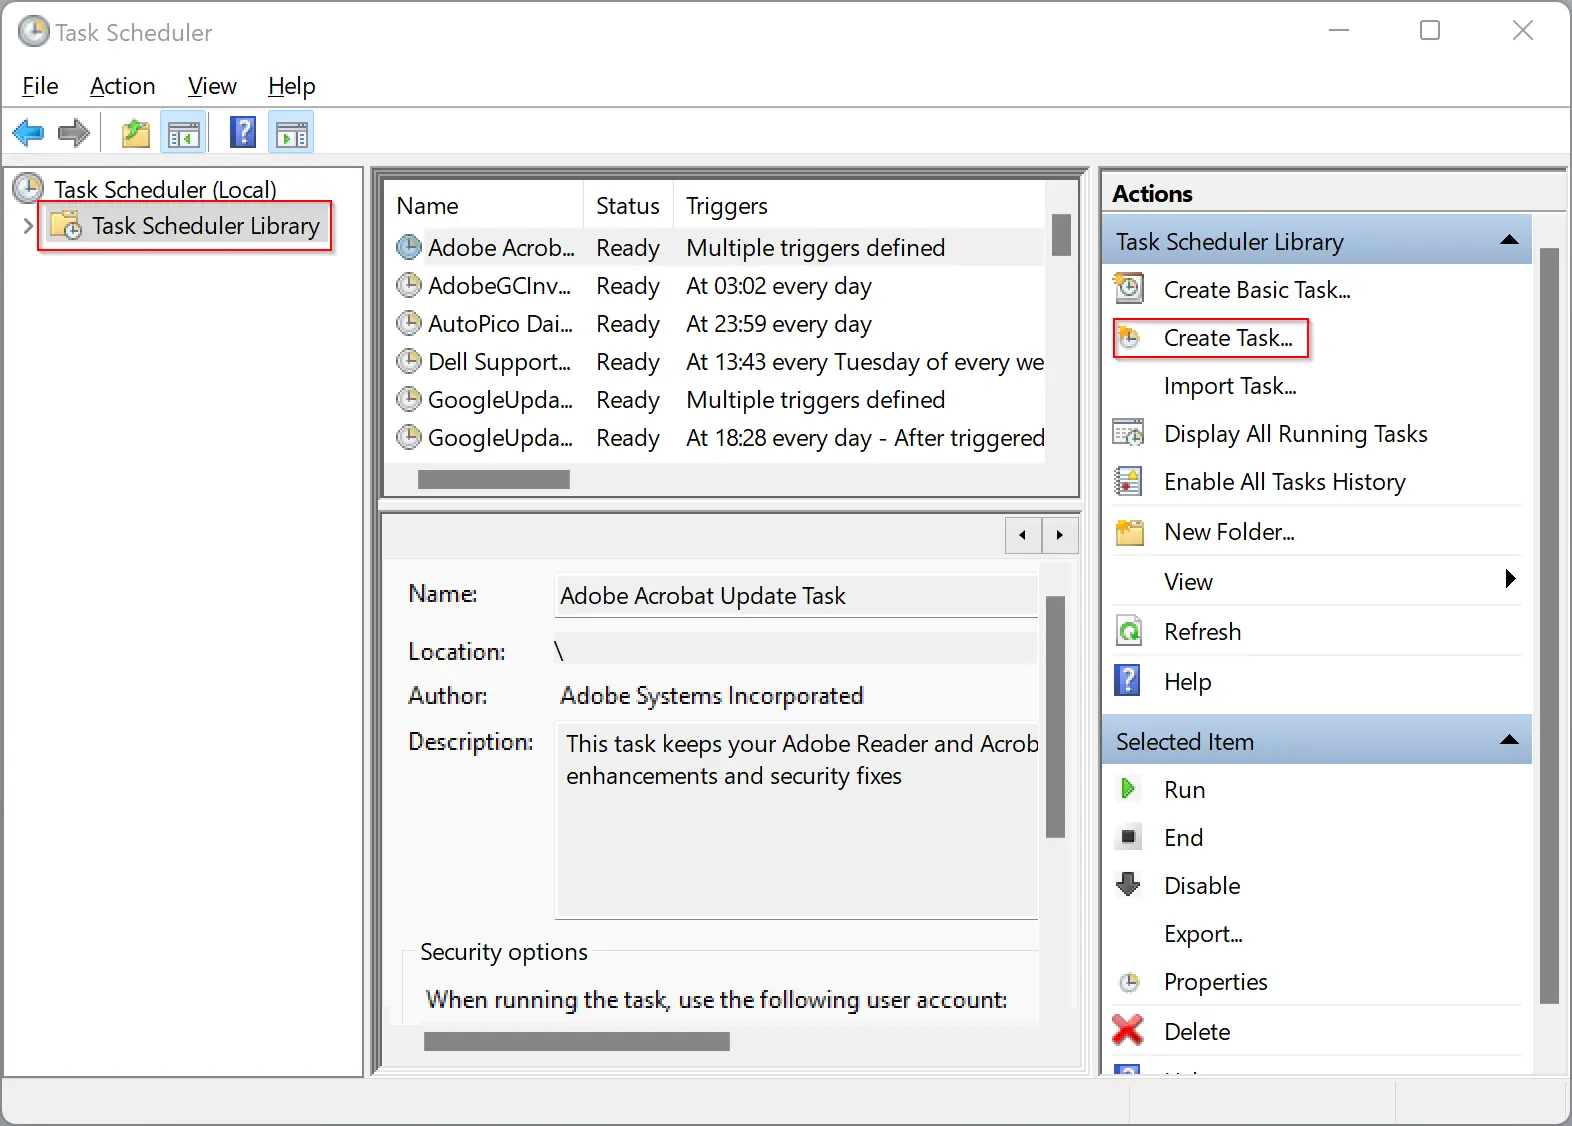
Step 3. On the right pane, click on the “Create Task” option.
Step 4. In the pop-up window that appears, switch to the “General” tab.
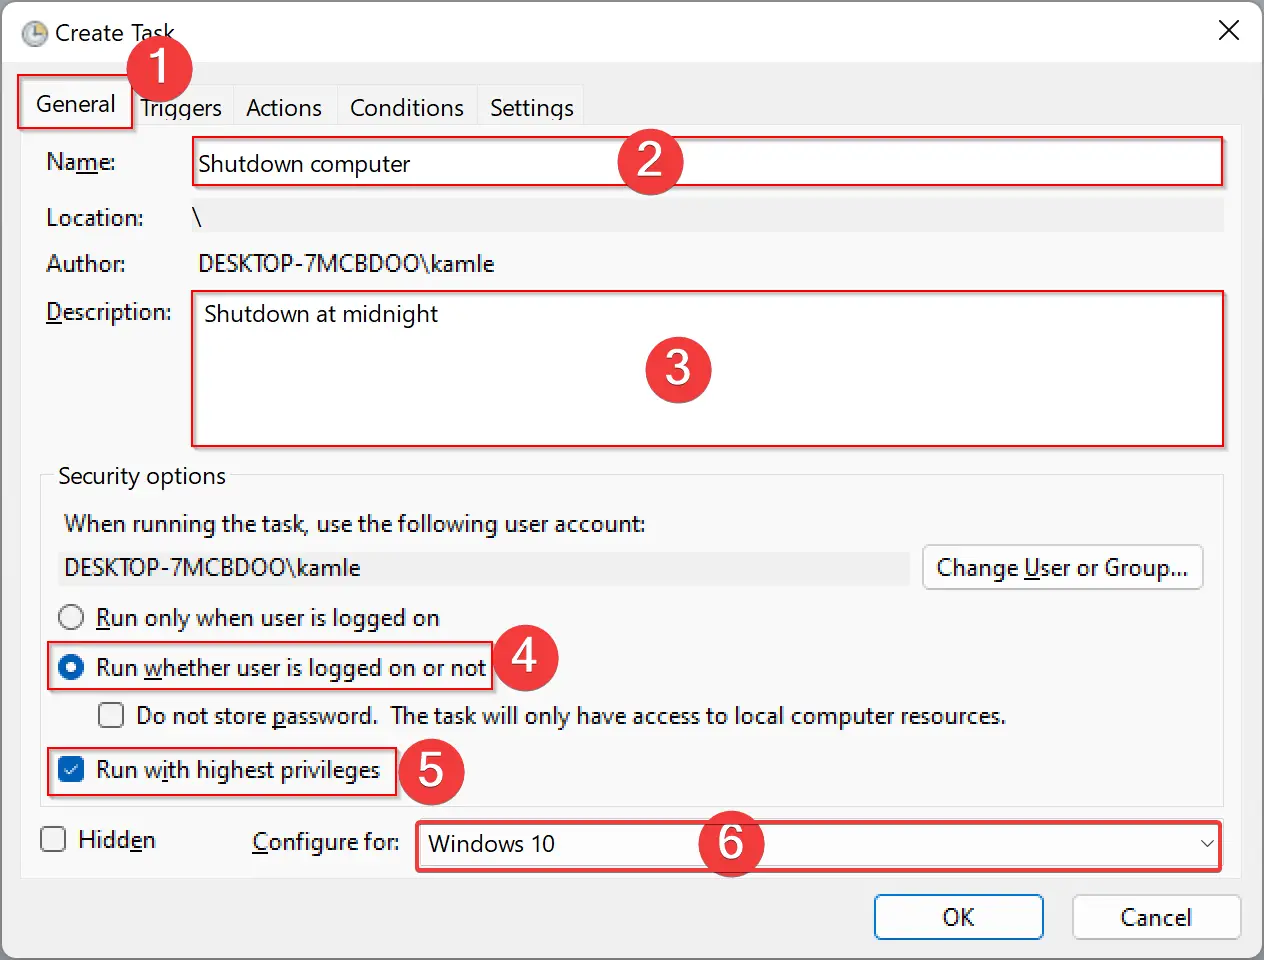
Step 5. Give a name to your task, such as “Shutdown Computer.”
Step 6. Write a description of the task in the Description box.
Step 7. Select the radio button “Run whether user is logged on or not.”
Step 8. Check the checkbox “Run with highest privileges.”
Step 9. Select “Windows 10” from the drop-down menu of “Configure for.”
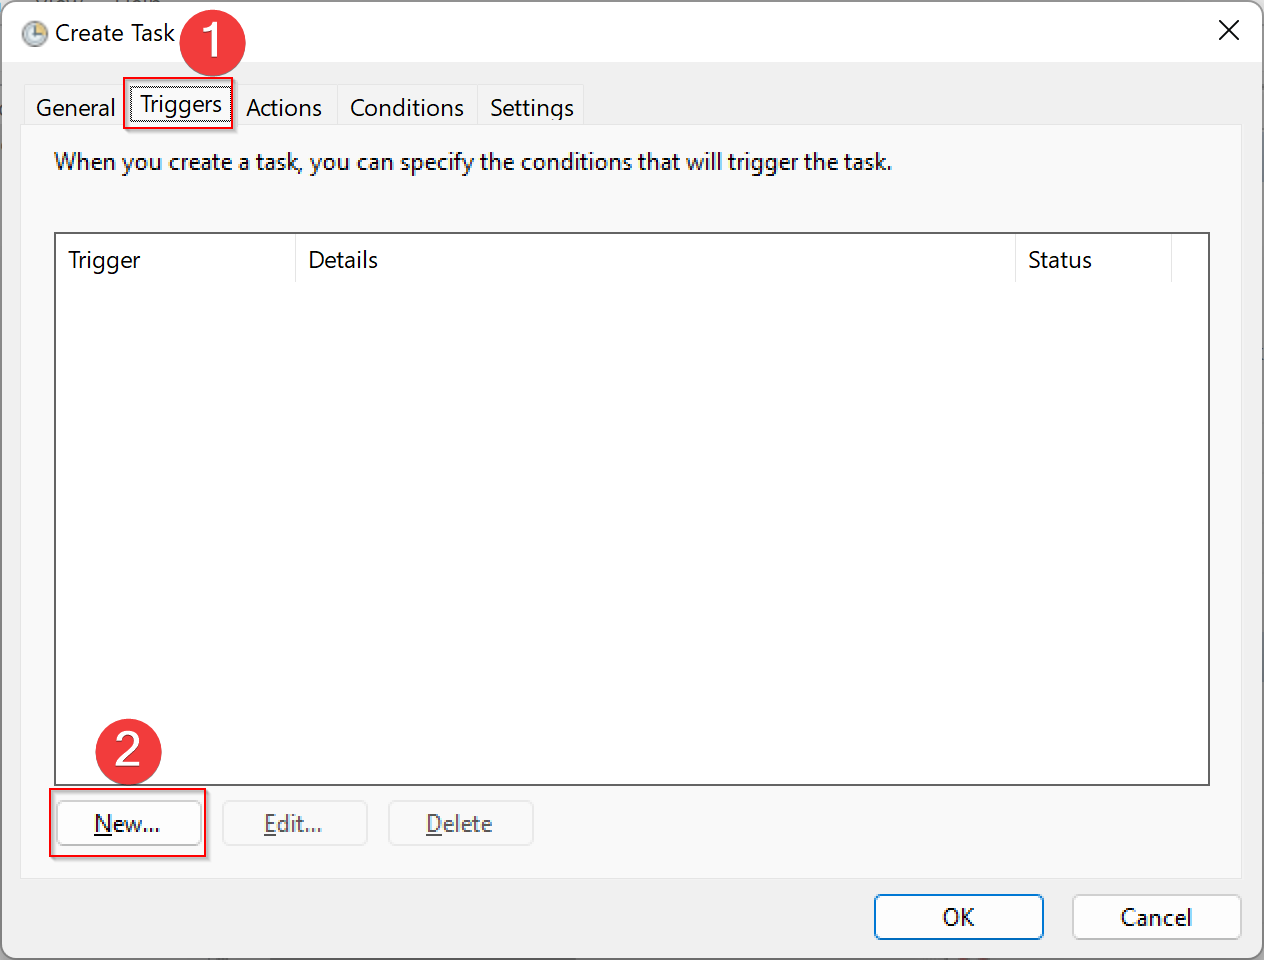
Step 10. Now, go to the “Triggers” tab and click the “New” button.
Step 11. A new pop-up window will open. Select “Begin the task” as “On a schedule.”
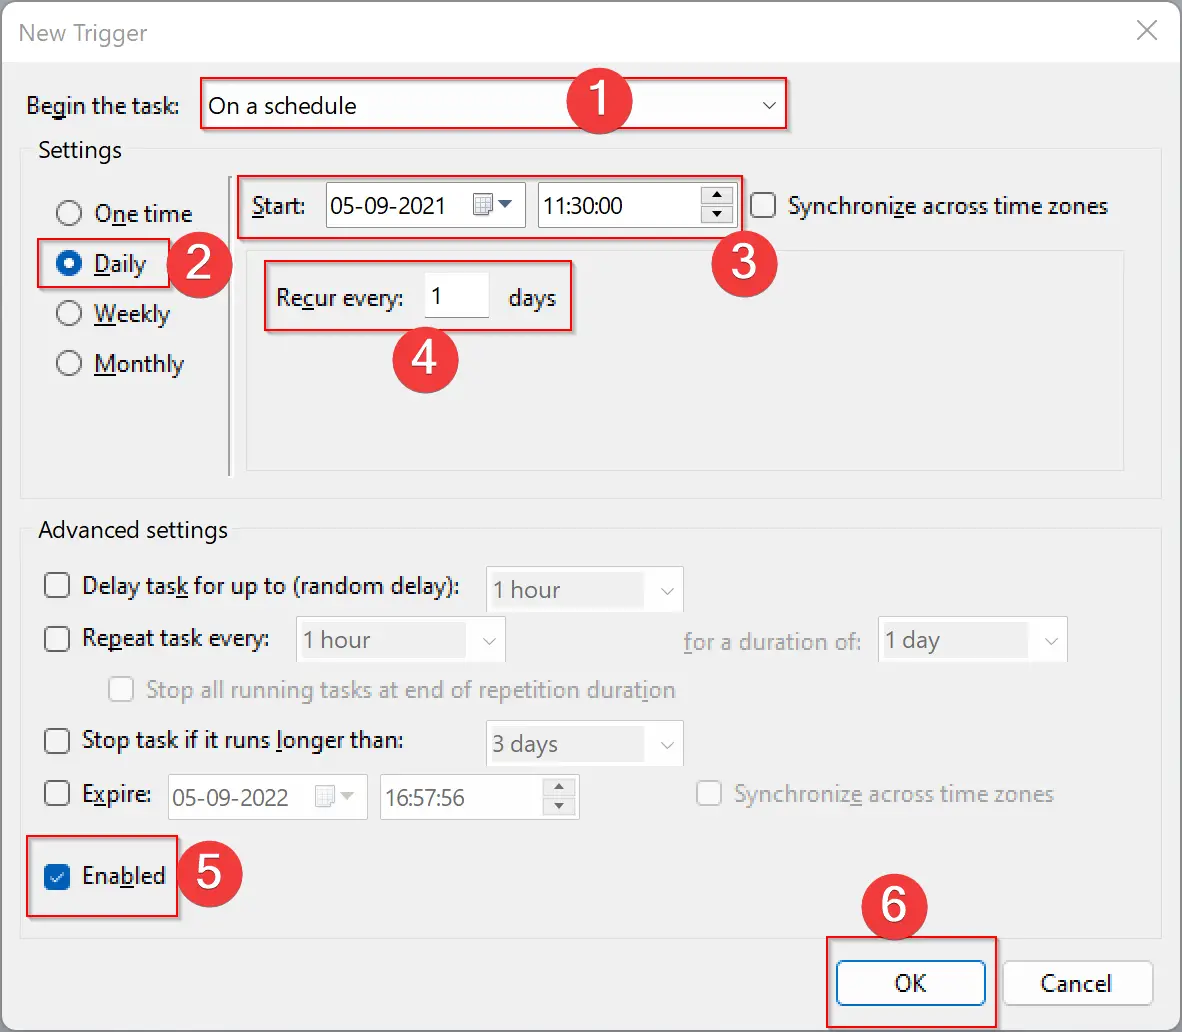
Step 12. Click the “Daily” option under the Settings section.
Step 13. Next to the Start option, select the date and time you want to trigger this task.
Step 14. Type “1” in the Recur every box.
Step 15. Check the option “Enabled” at the bottom.
Step 16. Click “OK” to exit from trigger settings.
Step 17. Next, go to the “Actions” tab, and click the “New” button.
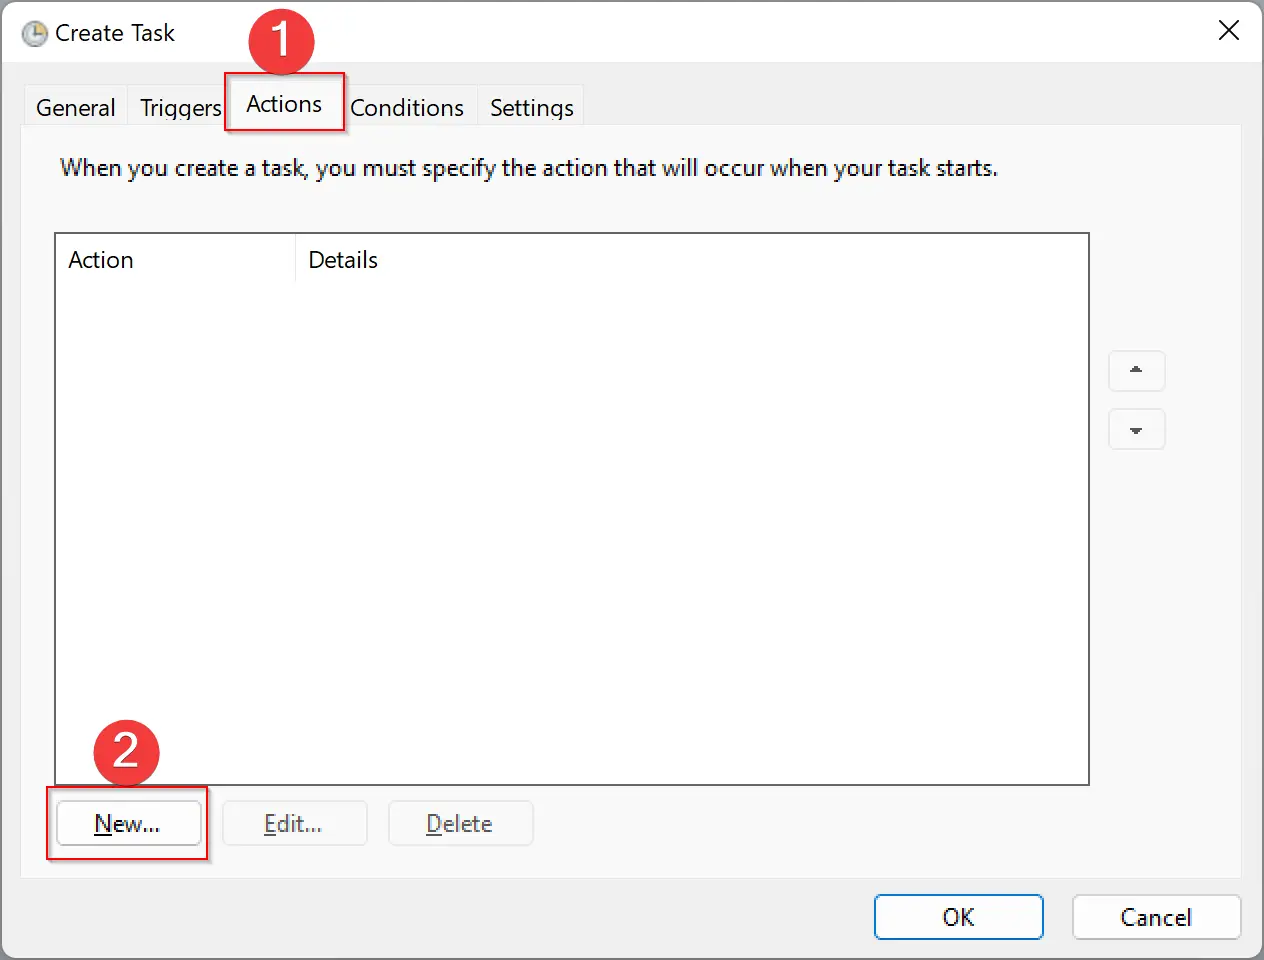
Step 18. On the new pop-up window, select “Start a program” from the Action drop-down menu.
Step 19. Type “shutdown.exe” in the “Program/script” box.
Step 20. Now, navigate to the “Conditions” tab.
Step 21. Select Start the task only if the computer is idle for option.
Step 22. In both the time field, enter the same time. For instance, if you enter 20 minutes, the Task Scheduler will wait for the system to be idle for 20 minutes before triggering the Shut down task.
Step 23. Click the OK button to save the changes.
How to Schedule Windows 11/10 Shutdown with Command Prompt or PowerShell?
Are you looking for a simple way to schedule a Windows 11/10 shutdown without having to navigate through the Task Scheduler? Well, you’re in luck! Windows 11/10 has a built-in command that lets you schedule a system shutdown quickly and easily using either the Command Prompt or PowerShell.
Here’s how to schedule a Windows 11/10 shutdown with Command Prompt/PowerShell:-
Step 1. Open Command Prompt or PowerShell as an administrator.
Step 2. In the elevated window, type the following command:-
shutdown /s -t Nseconds
Step 3. Replace “Nseconds” with the number of seconds you want to set as the timer. For example, if you want to set a timer for 10 minutes (600 seconds), the complete command will be:-
shutdown /s -t 600
This command will trigger a Windows logoff action and shut down your PC after 10 minutes.
Step 4. If you want to schedule a restart instead of a shutdown, type the following command and press Enter:-
shutdown -r -t Nseconds
Again, replace “Nseconds” with the number of seconds you want to set as the timer.
Step 5. To cancel the shutdown or restart the timer, type the following command and press Enter:-
shutdown -a
You’ll see a notification indicating that the shutdown has been canceled.
How to Schedule Auto Shut Down Using a Desktop Shortcut?
Have you ever wanted to schedule an automatic shutdown of your computer but found it a hassle to navigate through menus and settings to do so? Well, the good news is that you can create a desktop shortcut to schedule an automatic shutdown with just a few clicks. Here’s how:-
Step 1. Right-click on your desktop and select “New” from the context menu.
Step 2. Choose “Shortcut” from the list of options.
Step 3. In the location field, type in the following command:-
shutdown.exe -s -t XX
Note: Replace “XX” with the number of seconds you want to set as the timer for the shutdown. For example, if you want your computer to shut down after 30 minutes, type “1800” (30 x 60 seconds).
Step 4. Then, click “Next.”
Step 5. Give your shortcut a name, such as “Auto Shutdown.”
Step 6, Click “Finish.”
Step 7. Right-click on your newly created shortcut and select “Properties” from the context menu.
Step 8. In the “Target” field, add “-f” at the end of the command. This will force close any running programs before shutting down your computer. The command should now look like this:-
shutdown.exe -s -t XX -f
Step 9. Click “OK” to save your changes.
Step 10. Double-click the shortcut to run it, and your computer will automatically shut down after the specified time.
If you want to cancel the automatic shutdown, simply click on the “Cancel Shutdown” button in the pop-up message that appears.
Creating a desktop shortcut for automatic shutdown is a quick and easy way to schedule your computer to shut down without having to go through menus and settings. With just a few clicks, you can set up your computer to automatically shut down after a specified time.