Windows 11 comes with a lot of cool features and an all-new graphical interface, including a centered Start menu, rounded corners windows, themes, colors, and many more. Apart from that, Windows 11 allows you to change and switch your preferred language. That means you can change Windows 11 display and application language if you wish. The translations into other languages may be incomplete, and some applications may not transform fully, but Microsoft continuously added more languages in Windows 11. If Windows cannot change any application or program language, it will appear in the initially developed language.
In this gearupwindows article, we will guide you on changing users’ display language preferences in Windows 11.
How to Change Windows 11 Display Language?
To change the Windows 11 display language, do the following:-
Step 1. First, open Windows Settings by hitting Windows + I keys on the keyboard.
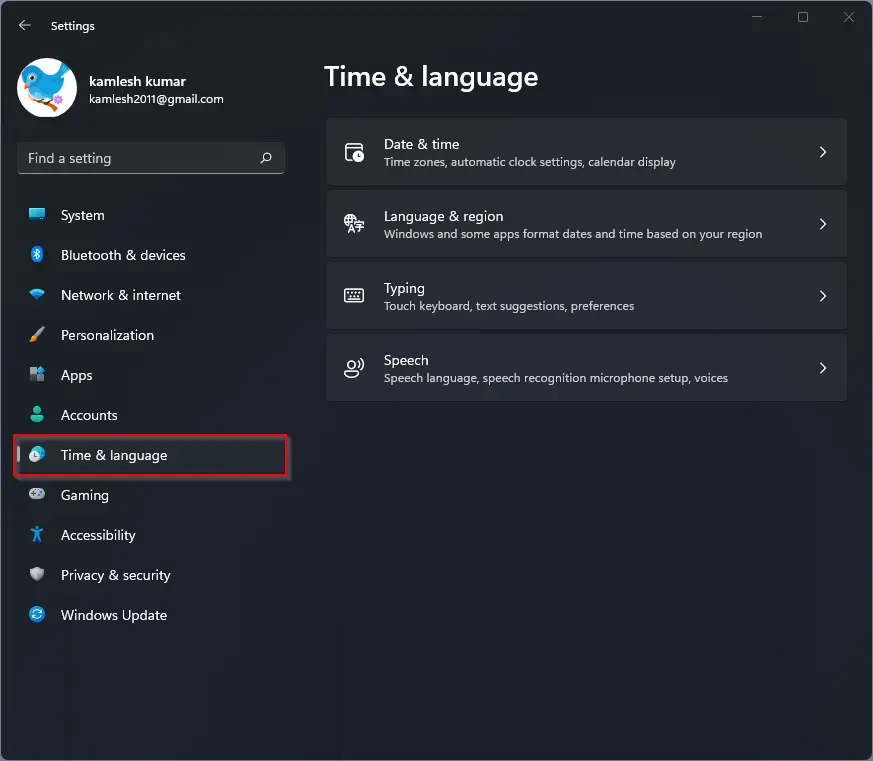
Step 2. After that, in Windows Settings, click Time & language in the left sidebar.
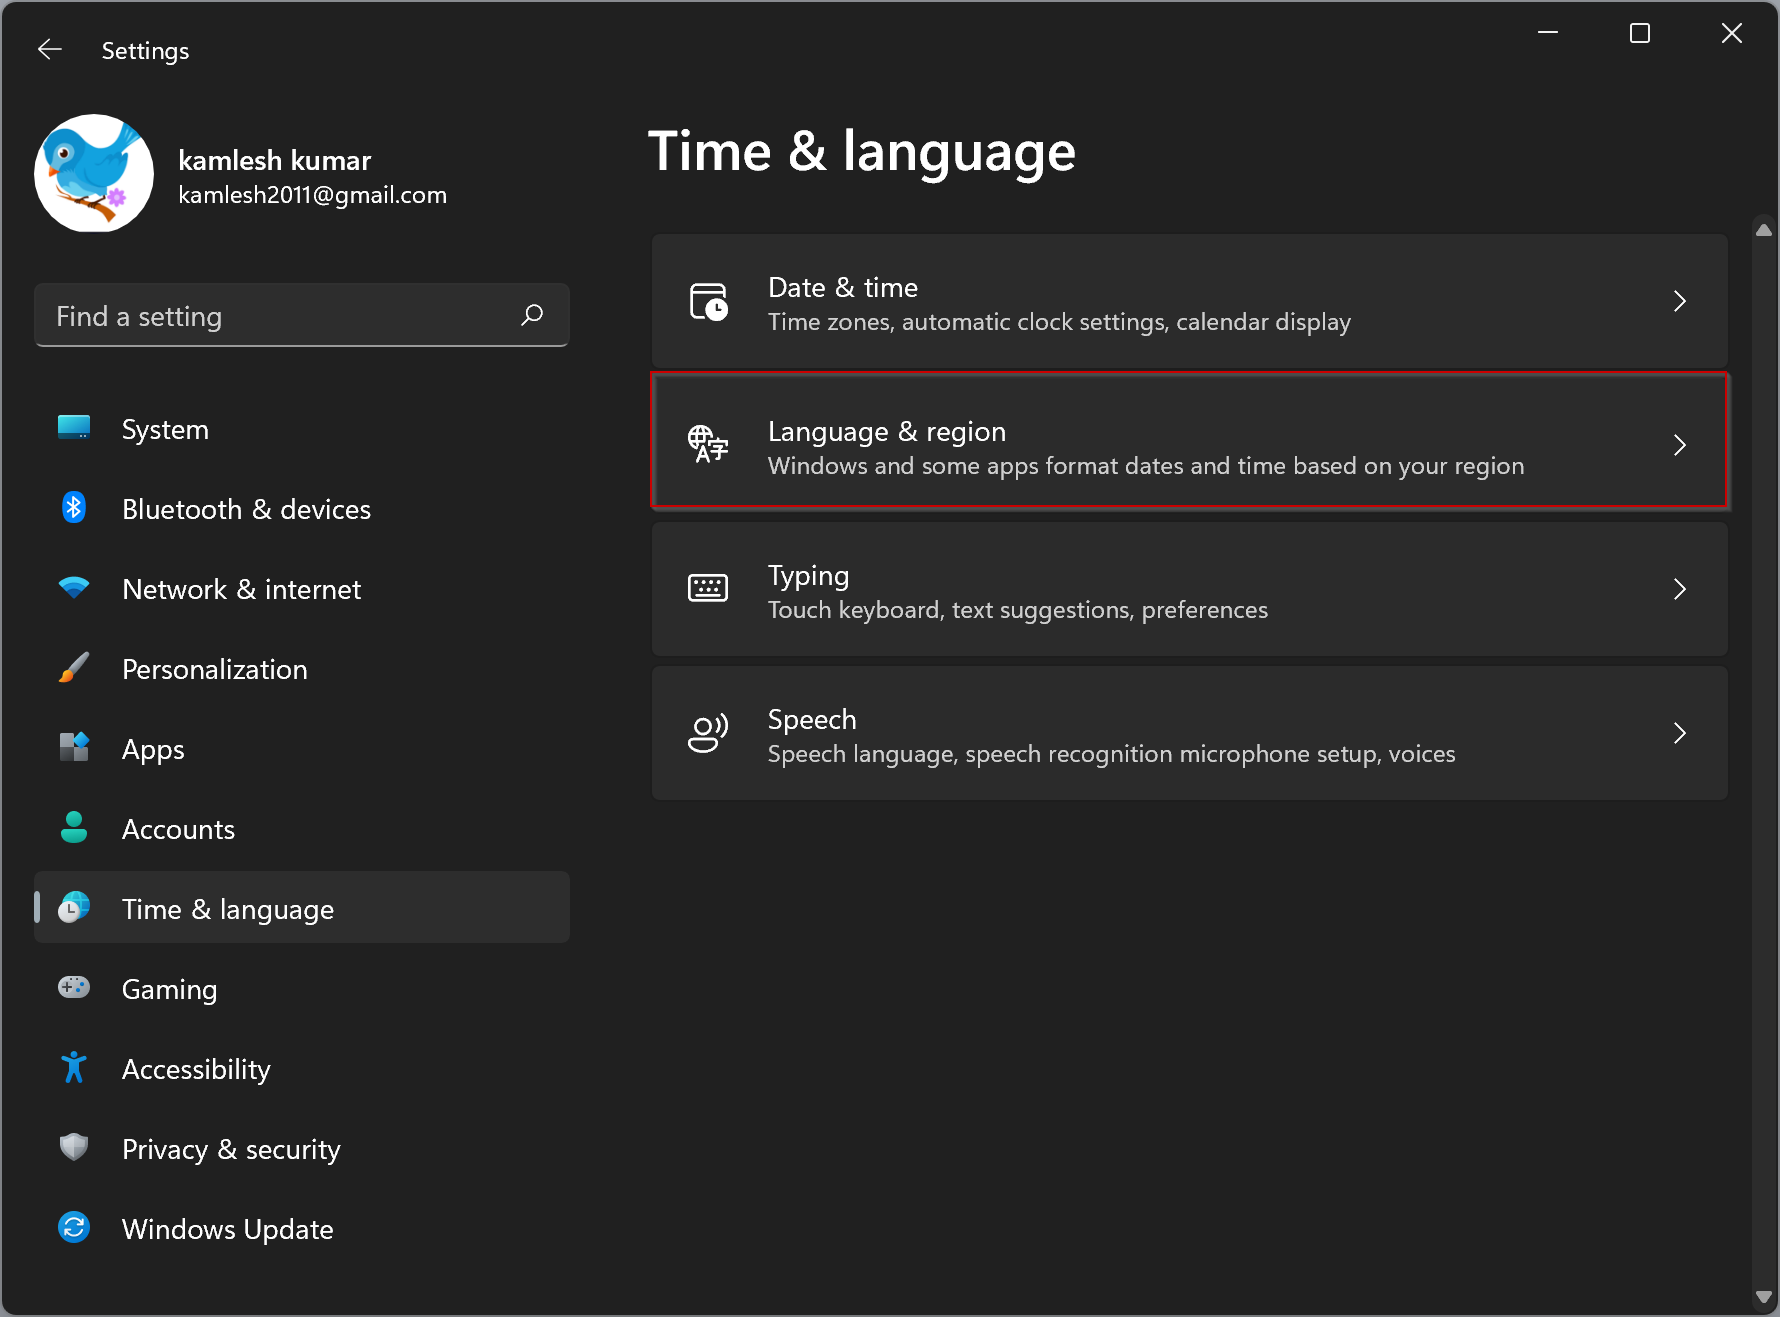
Step 3. Then select Language & region on the right pane of your screen.
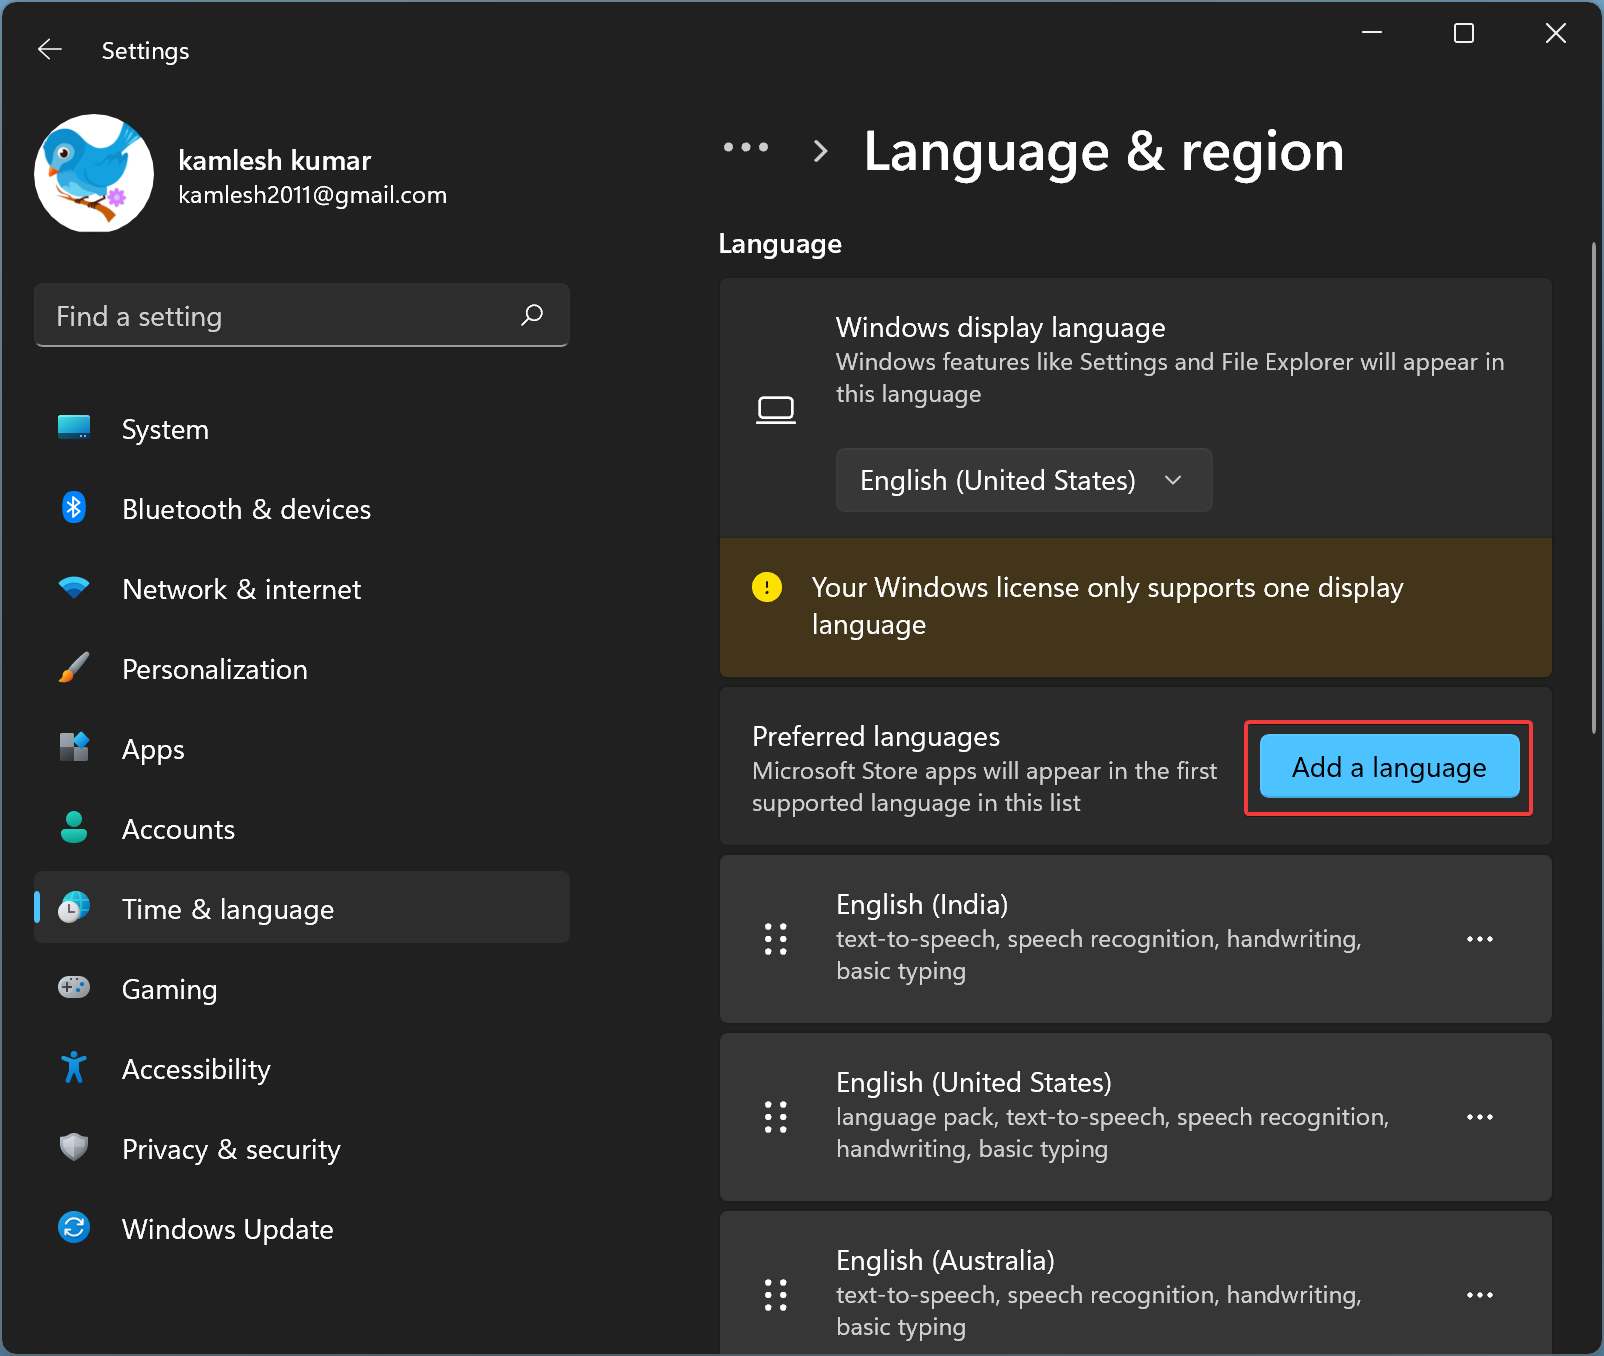
Step 4. On the Language & region settings page, click the Add a language button.
Step 5. Next, select your preferred language to install.
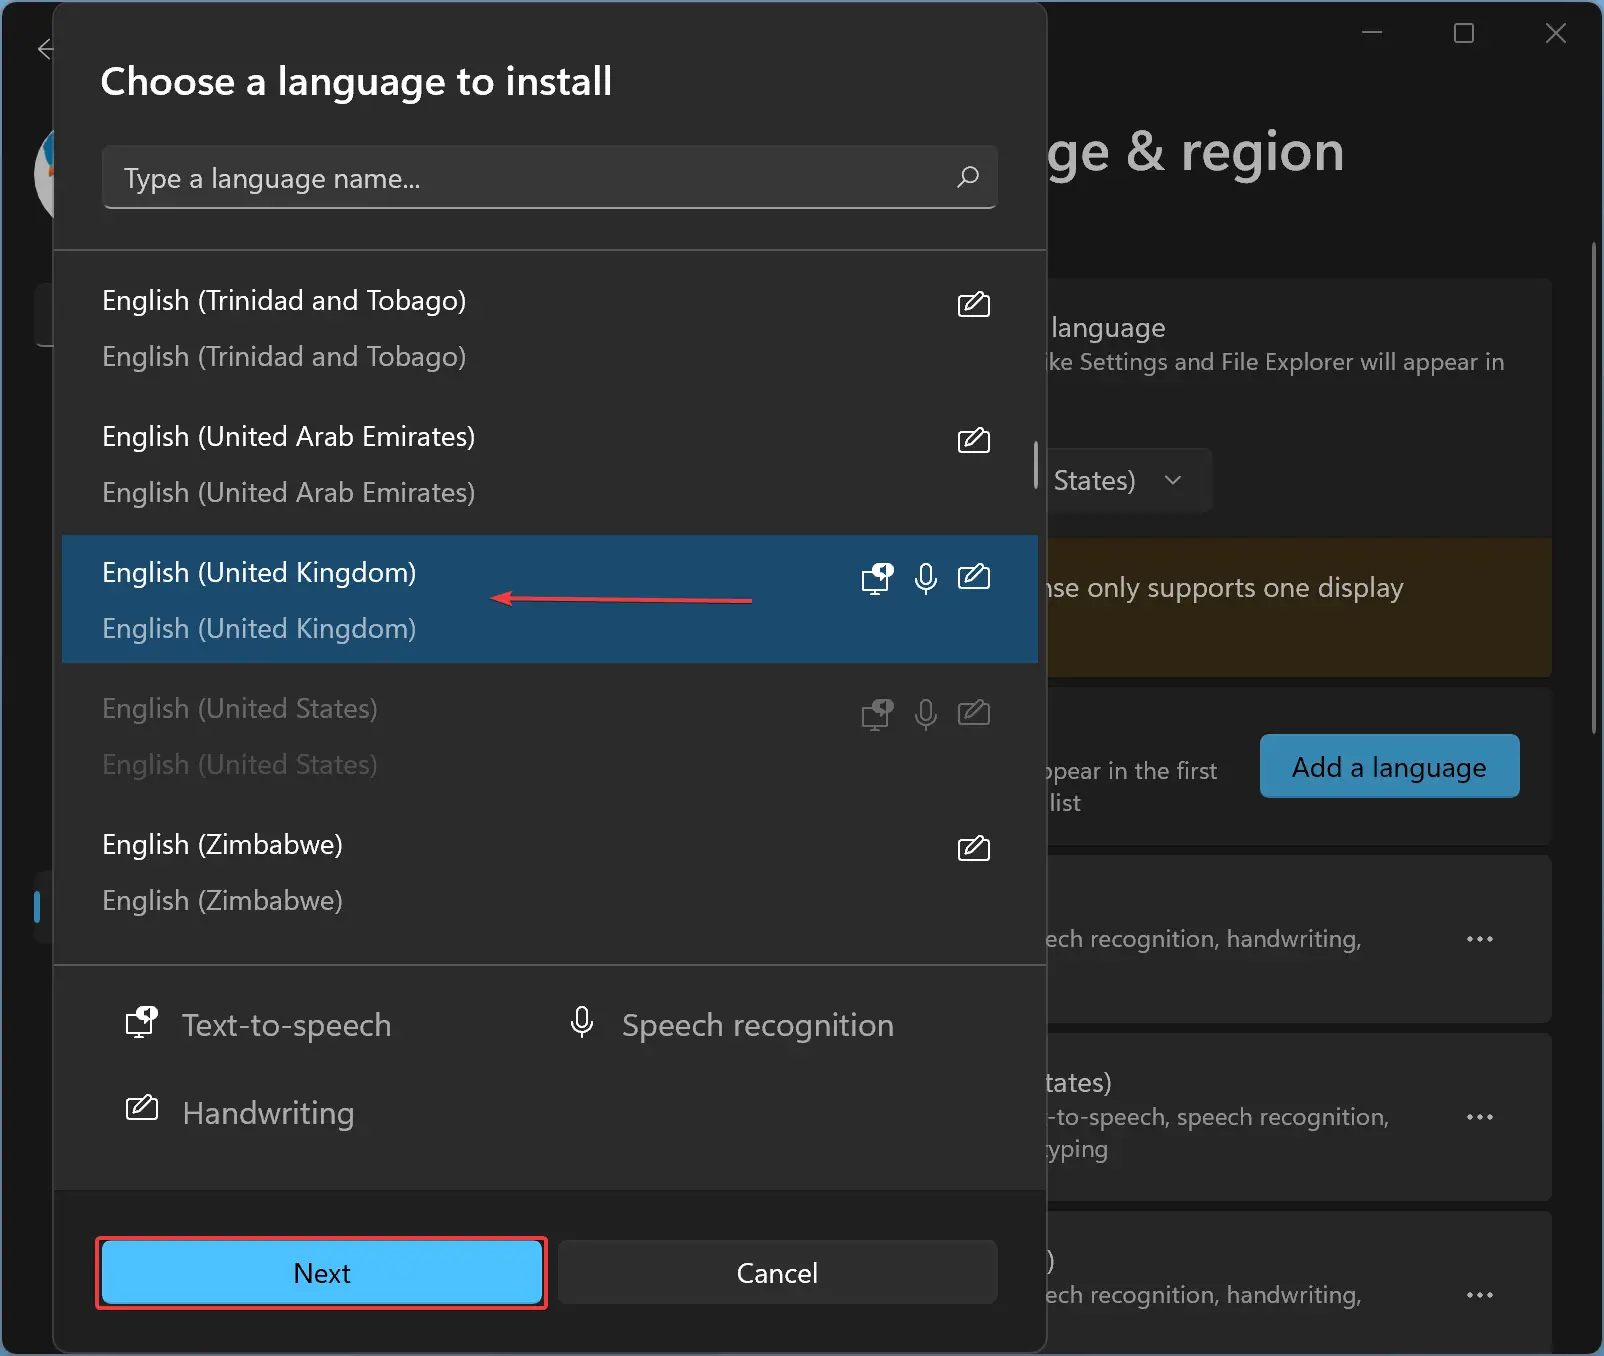
Step 6. Click the Next button.
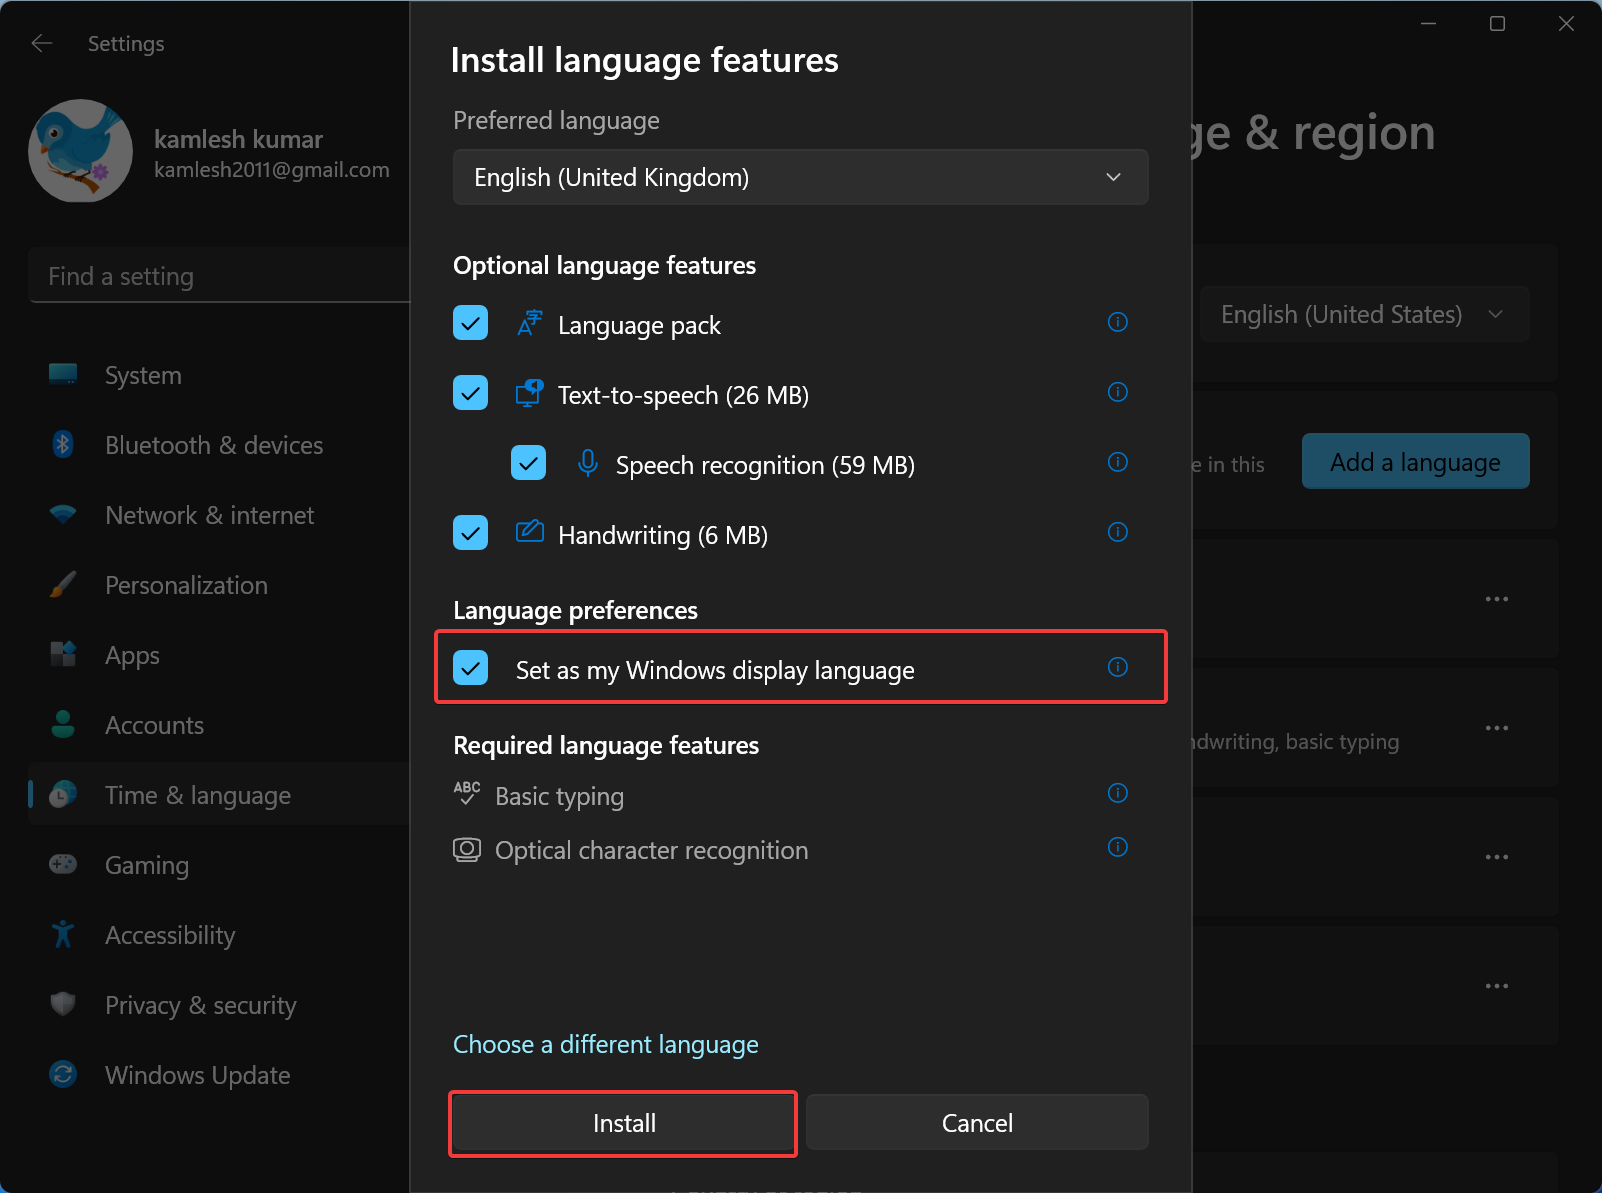
Step 7. On the next screen, check the checkbox “Set as my Windows display language” and click the Install button.
Step 8. Now, Windows will download and install your preferred language pack. When finished, sign out and log in again to see the changes.
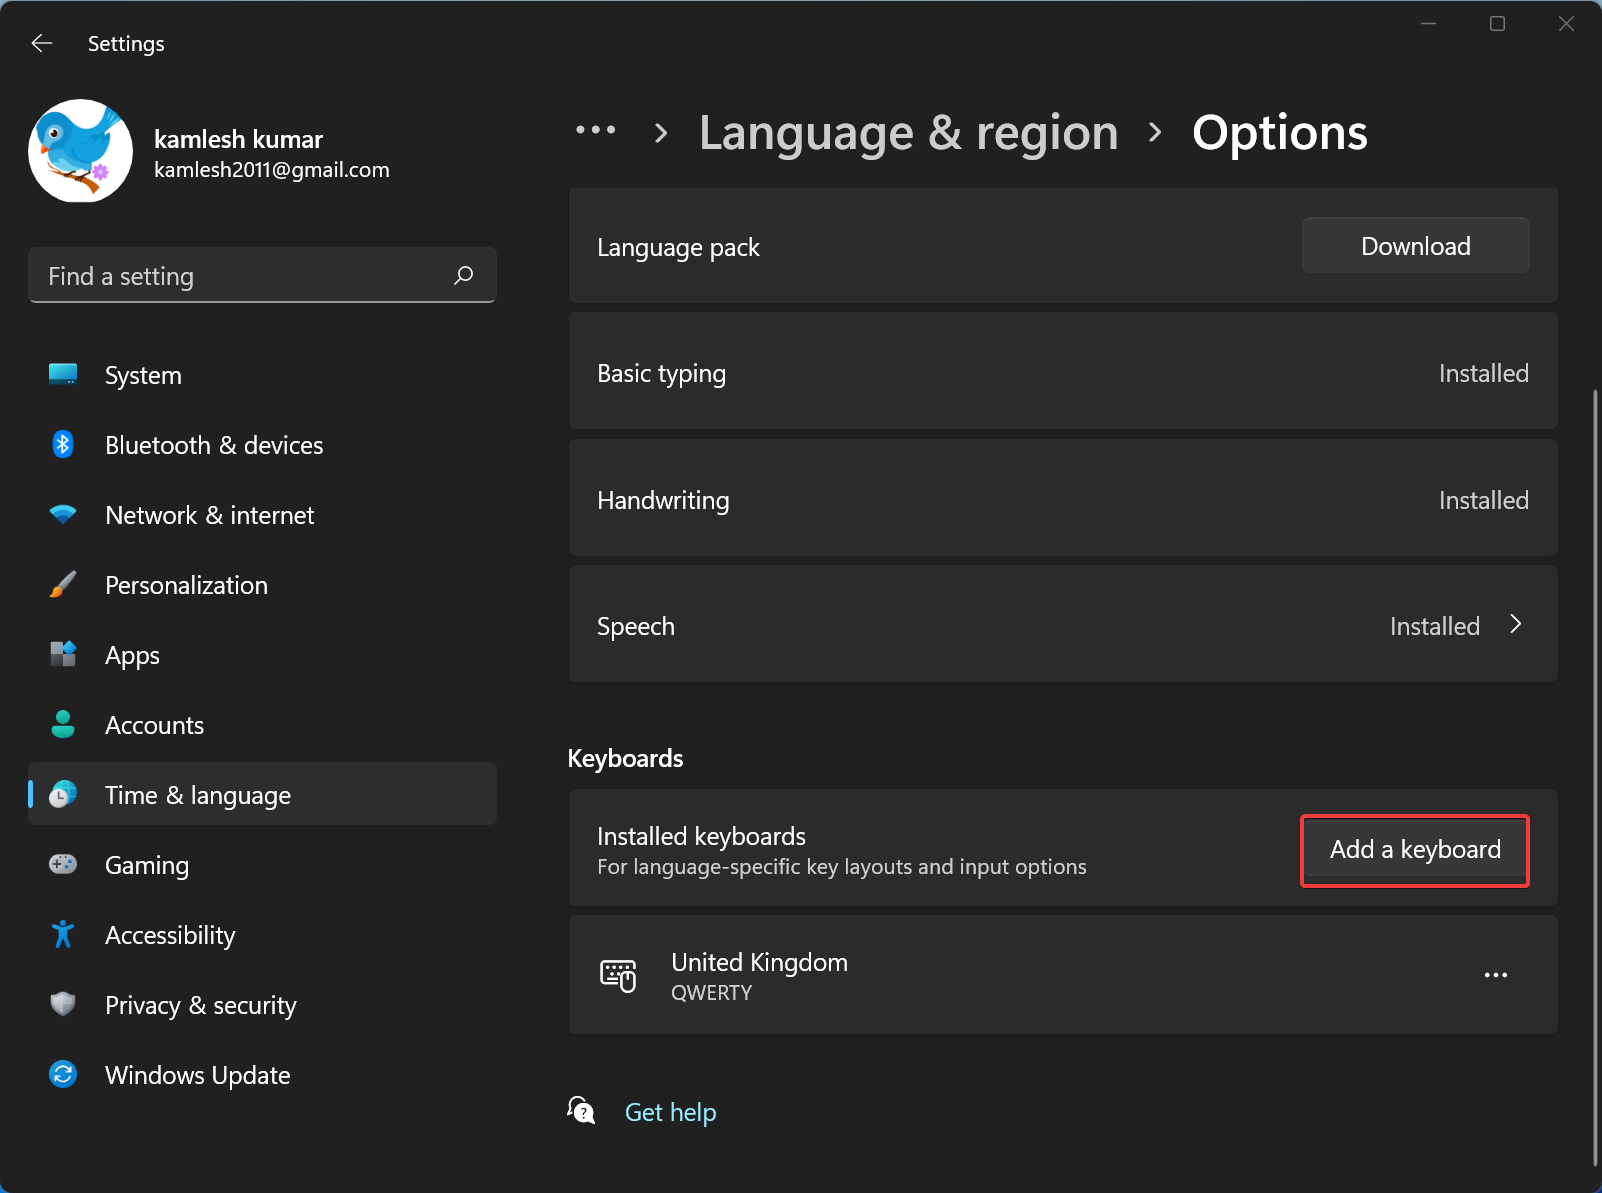
Generally, Windows should automatically install the keyboard based on your preferred language pack. If Windows cannot install the keyboard automatically, you can install it manually. To install keyboard settings for your preferred language, click on the three-dot menu and select Language options.

Then on the “Language options” settings page, click Add a keyboard button.
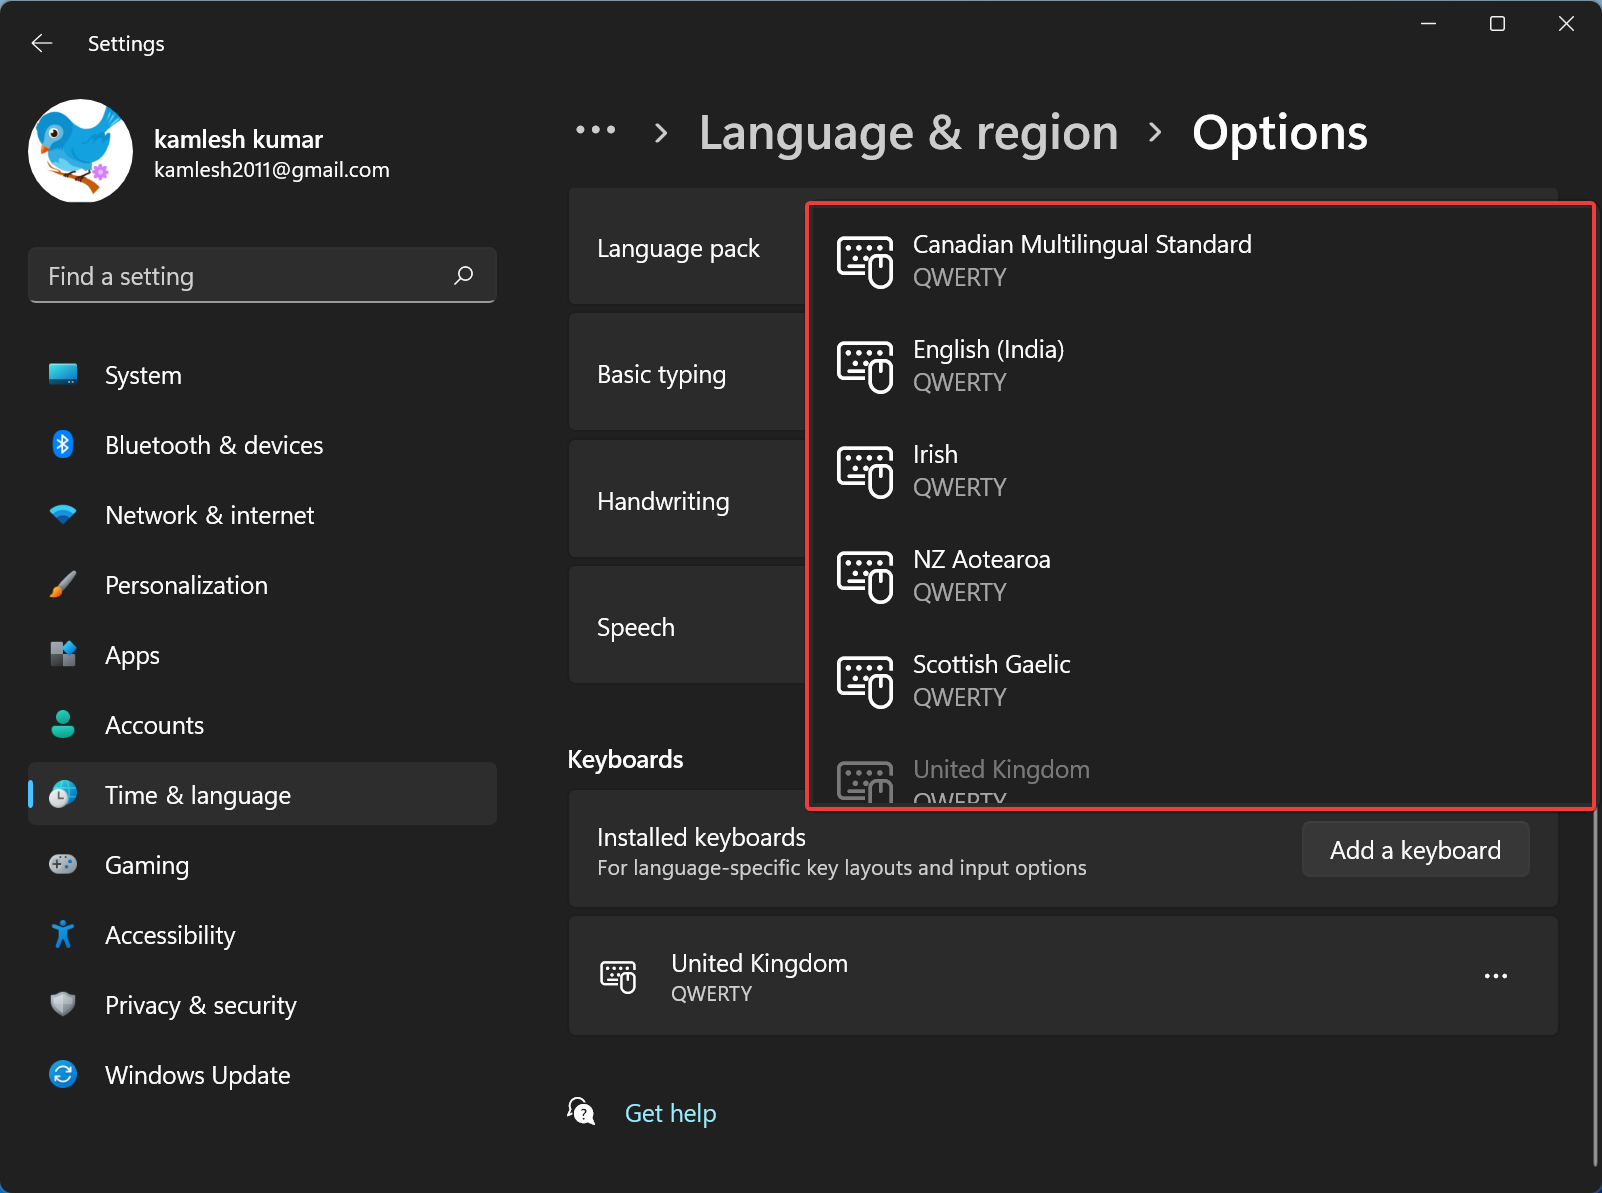
Finally, select a keyboard language that you want to use.
That’s it.
Conclusion
In conclusion, changing the display language in Windows 11 is a simple process that anyone can do with just a few clicks. With this feature, you can personalize your Windows experience and use it in your preferred language. Although some applications may not fully translate into the selected language, Microsoft continuously adds more languages to Windows 11. Therefore, users can expect more language options to be available in the future. Overall, Windows 11 brings a lot of new and exciting features to enhance the user experience, and changing the display language is just one of them.