Excel, the popular spreadsheet program, offers a wide range of functions and tools to manipulate and format data. If you have imported data or need to standardize the text format, changing uppercase to lowercase is a common task you might encounter. In this user-friendly article, we will guide you through the steps to change the uppercase text to lowercase in Excel.
How to Change Uppercase to Lowercase in Excel?
Follow these simple steps to change Uppercase to Lowercase in Excel:-
Step 1. Begin by launching Microsoft Excel and opening the spreadsheet that contains the data you want to convert. You can either create a new workbook or work with an existing one.
Step 2. Determine the specific column or range of cells that contain the uppercase text you wish to convert to lowercase. Take note of the column letter (e.g., A, B, C) or the cell range (e.g., A1:A10) for reference.
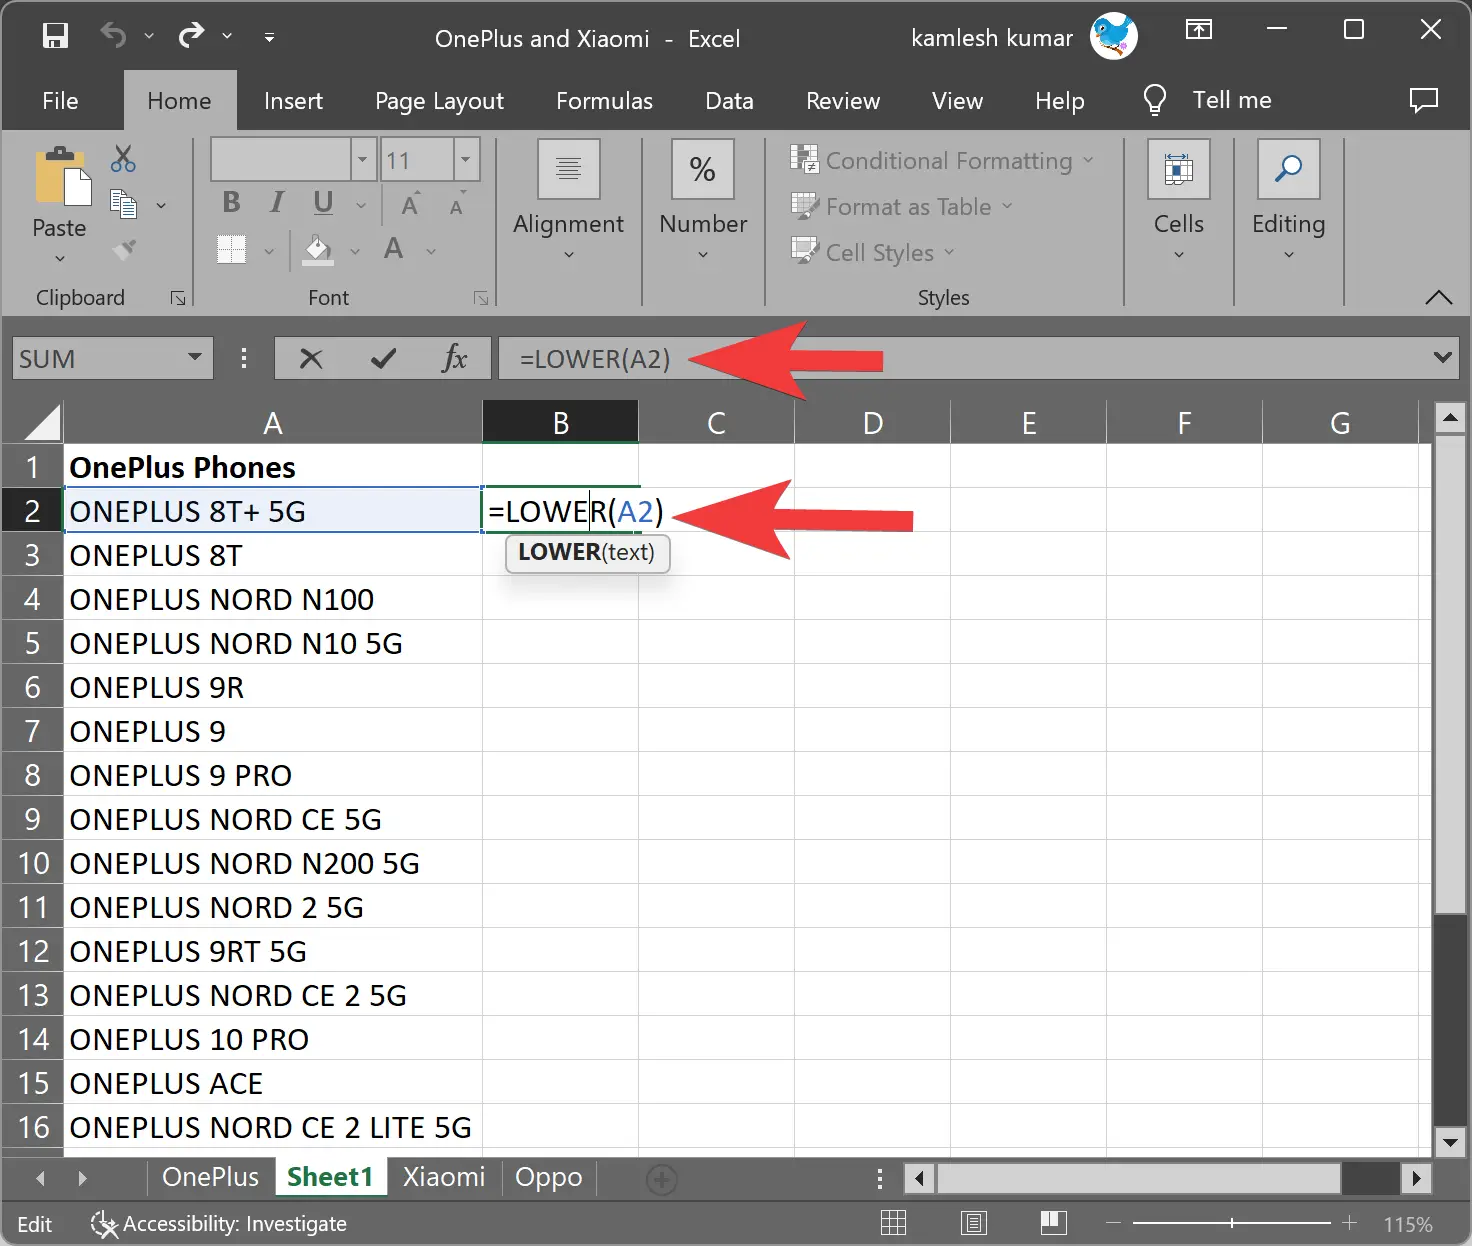
Step 3. In the first cell of the column where you want the lowercase text to appear, enter the following formula:-
=LOWER(cell_reference)
Note: Replace “cell_reference” with the cell reference of the corresponding uppercase text in the original column. For example, if the uppercase text is in cell A2, you would enter “=LOWER(A2)” in the first cell of the new column.
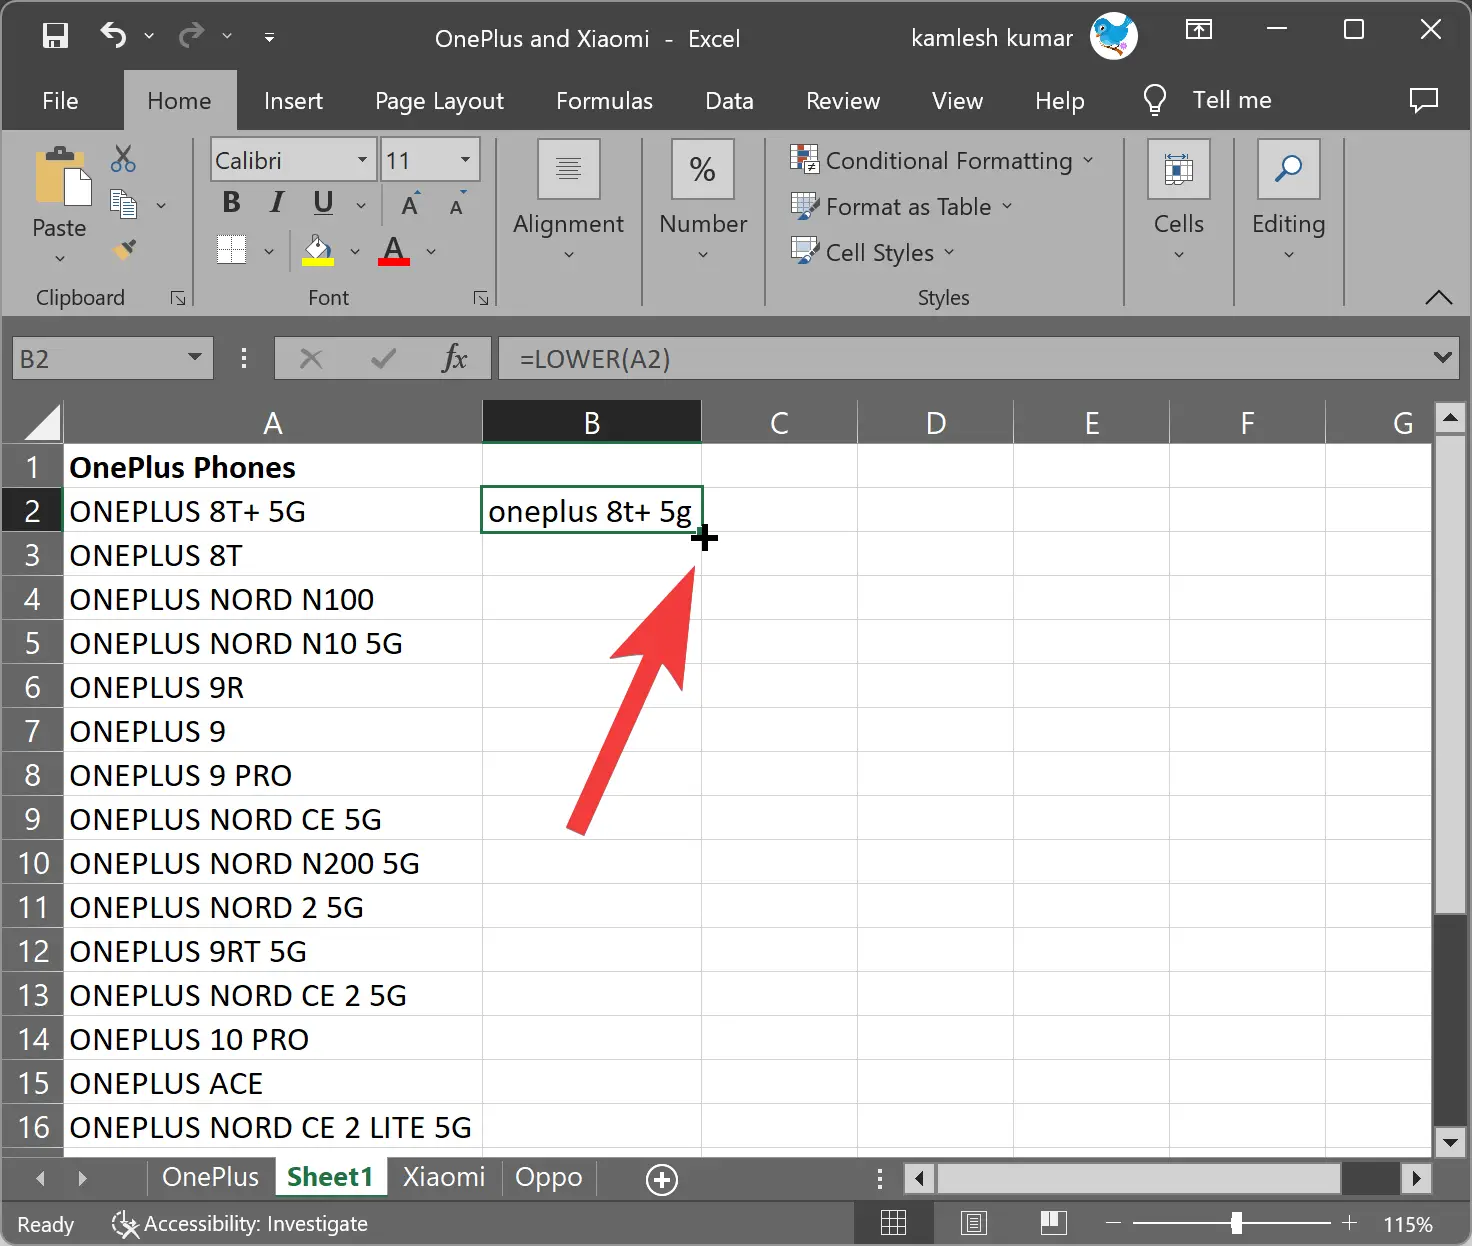
Step 4. After entering the “cell_reference,” press Enter on the keyboard. This will convert the data in cell A2 into lowercase.
Step 5. After entering the formula in the first cell, copy it to the remaining cells in the column. To do this, click on the lower-right corner of the cell with the formula (the cursor will change to a small plus sign), then drag it down to cover the range of cells you want to populate with the lowercase text.
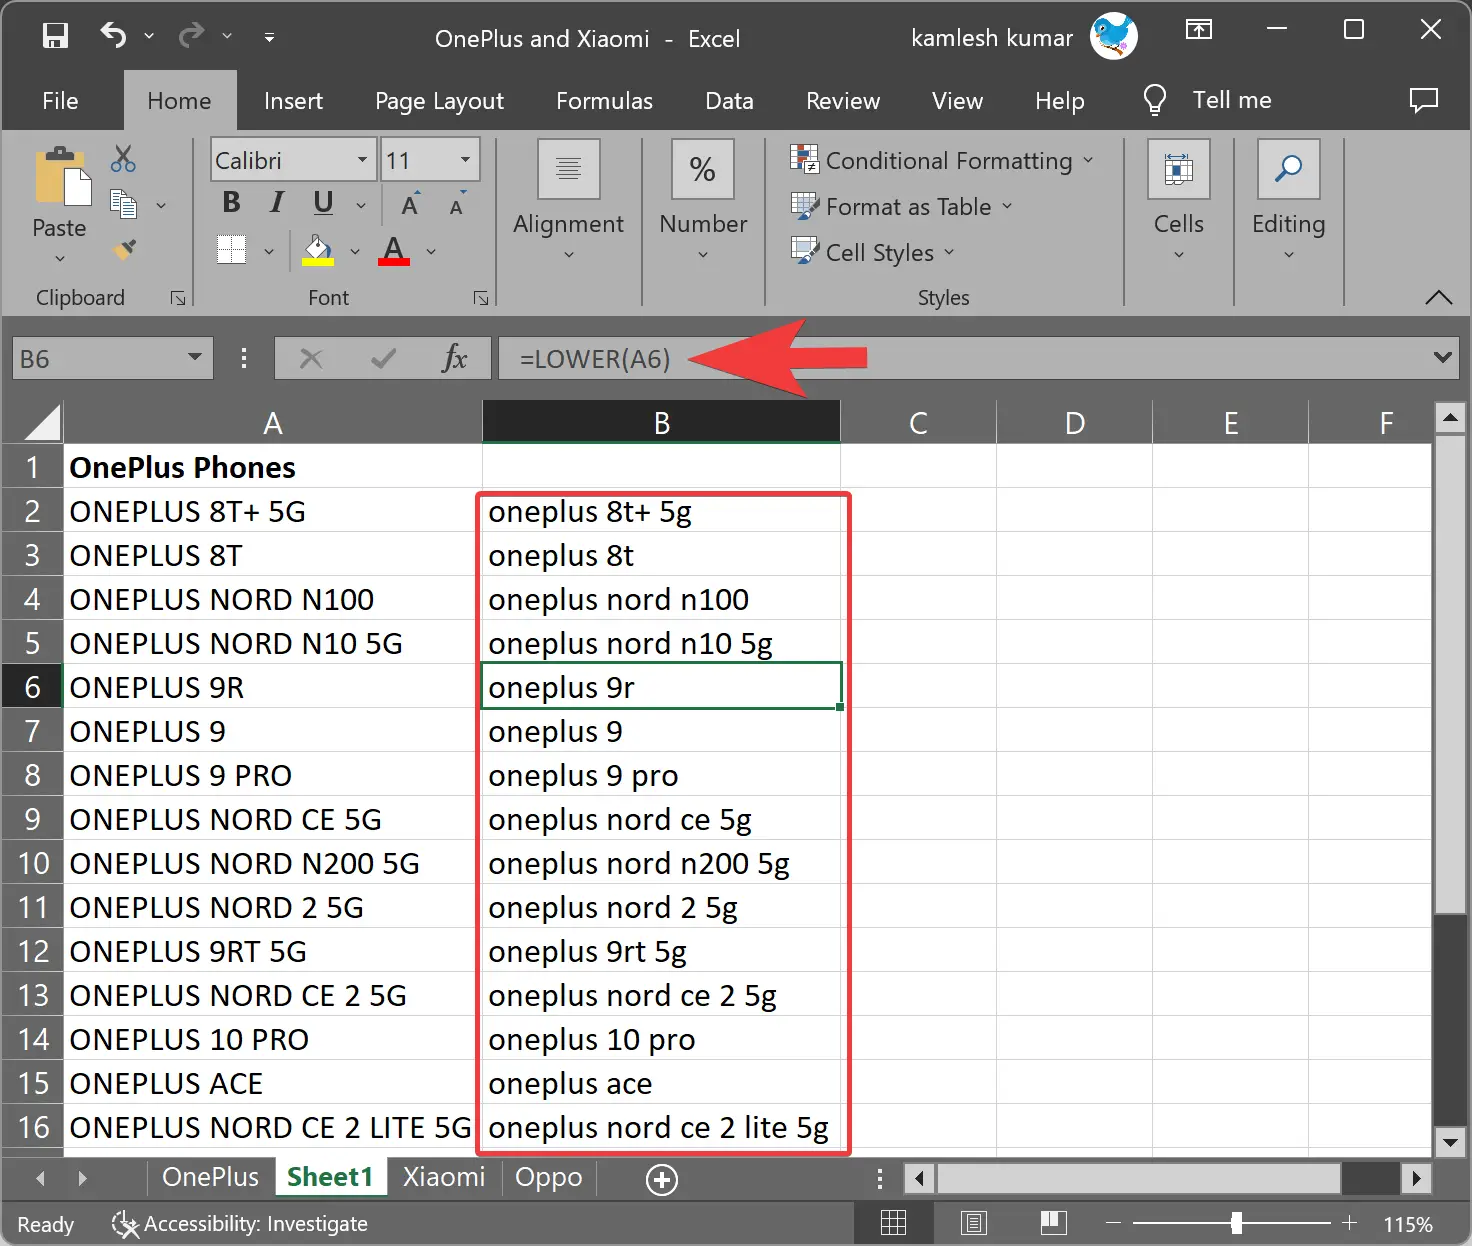
Step 6. Scroll through the selected cells or the entire column to ensure that all uppercase text has been converted to lowercase. Double-check that the formula has been applied correctly and the lowercase text is displayed as expected.
Step 7. Once you are satisfied with the lowercase conversion, save your workbook. Click on the “File” tab in the Excel ribbon and choose the “Save” or “Save As” option. Provide a name and location for your file, and click “Save.” This step ensures that your changes are preserved, preventing any accidental data loss.
Congratulations! You have successfully changed the uppercase text to lowercase in Excel. By following these user-friendly steps, you can easily standardize your data’s text format, improve readability, and maintain consistency across your spreadsheet.
Remember, Excel offers a plethora of advanced features and functions that can further enhance your data manipulation capabilities. Exploring these tools can help you become more proficient and efficient when working with spreadsheets.
With these simple steps, you can effortlessly convert uppercase text to lowercase in Excel, making your data more consistent and readable. Start applying these techniques today and unlock the full potential of Excel for your data management needs.
Conclusion
In conclusion, Excel provides a straightforward and efficient method for changing uppercase text to lowercase. By following the steps outlined in this user-friendly guide, you can seamlessly transform your data and ensure consistency across your spreadsheet. Excel’s powerful features and user-friendly interface make it an invaluable tool for data manipulation and organization. With a little practice and exploration of its advanced functions, you can unlock the full potential of Excel for your data management needs. Start converting uppercase to lowercase in Excel today and enhance the readability and consistency of your data.
Also read: How to Change Lowercase to Uppercase in Excel?
