There are at least two ways to rebuild the Icon Cache on Windows 10. If you have an issue with some of the icons or all of the icons not displaying correctly as they should, you can regenerate the icon cache. Rebuilding the icon cache should fix the issue on Windows 10 PC.
Similarly, if you notice a corrupt thumbnail in Windows 10, clearing and resetting the thumbnail cache in Windows 10 will solve the problem.
In this post, we will see how to clear and reset the thumbnail cache on Windows 10.
What is a thumbnail cache?
A Thumbnail cache is a copy of all of your documents, pictures, and video thumbnails stored in a file. Windows 10 generates and stores a copy of thumbnails for all documents, videos, and images for faster access so they can be displayed without any delay when you open a folder with one of the thumbnail-supported views. This means whenever you open a folder containing videos, documents, or pictures in thumbnail-supported view, Windows uses thumbnails saved in the thumbnail cache instead of every time generating new for them. These thumbnail caches enable Windows 10 to show thumbnails display quickly.
On Windows 10, all the thumbnail cache files are stored under the profile. You can access the same by navigating to C:\Users\UserName\AppData\Local\Microsoft\Windows\Explorer (assuming “C” is your Windows installation directory; if you have installed Windows on other than C:\ drive, then the path will change accordingly). By default, these items remain hidden, and one needs to unhide them to see them.
There are at least three ways to clear and reset the thumbnail cache on Windows 10. These are the following:-
- Manually clear and reset thumbnail cache.
- Clear thumbnail cache using Disk cleanup.
- Clear thumbnail cache using a third-party program.
- Clear thumbnail cache using Command Prompt.
Manually clear and reset thumbnail cache.
To manually clear and reset the thumbnail cache from the user profile, do the following:-
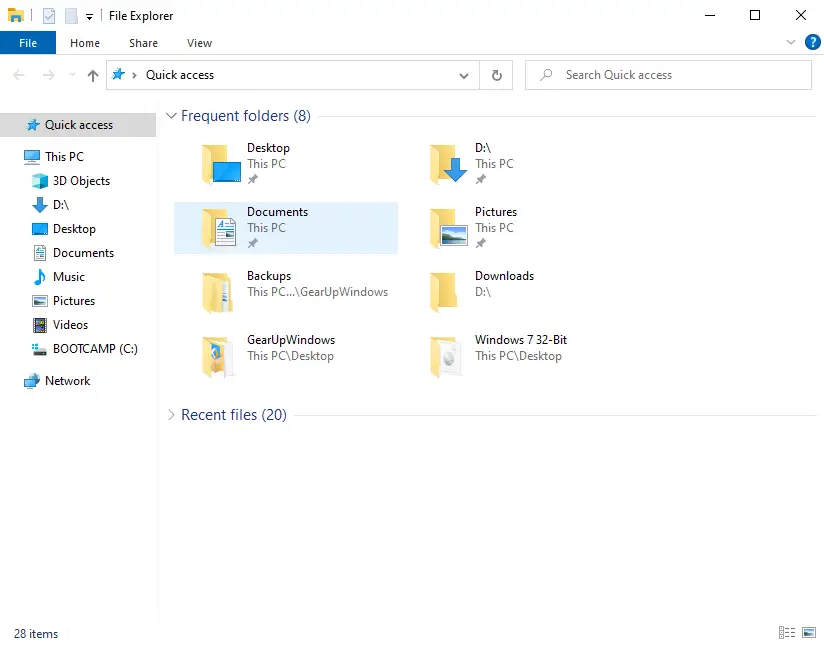
Step 1. Open the Windows Explorer by pressing Windows Logo + E keys simultaneously (Alternately, you can open ‘This PC‘ from the desktop shortcut or Start menu).
Step 2. From the “File Explorer” menu, click on the View tab.
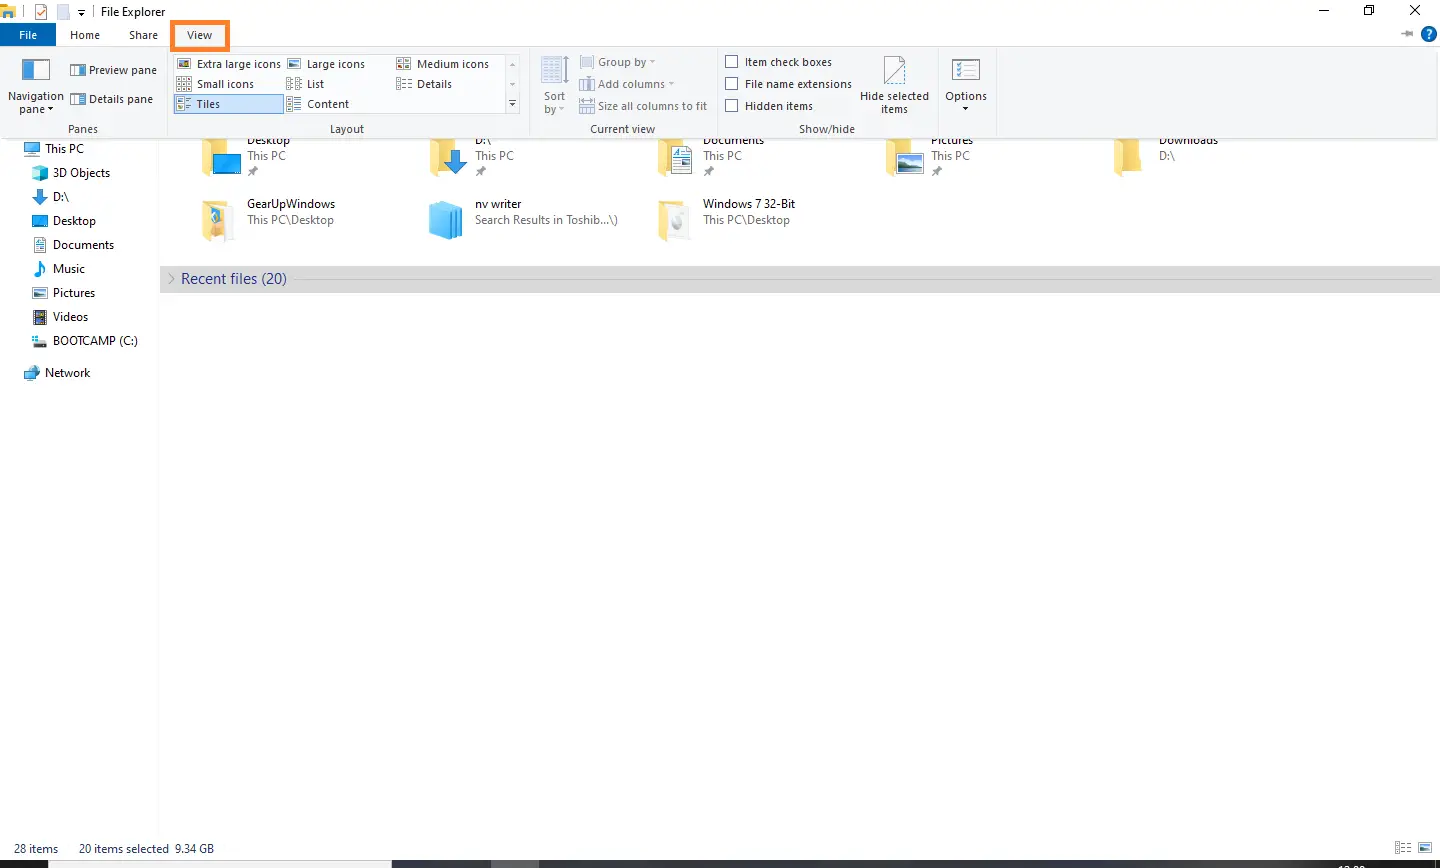
Step 3. Check Hidden items under the View tab to show hidden files and folders.
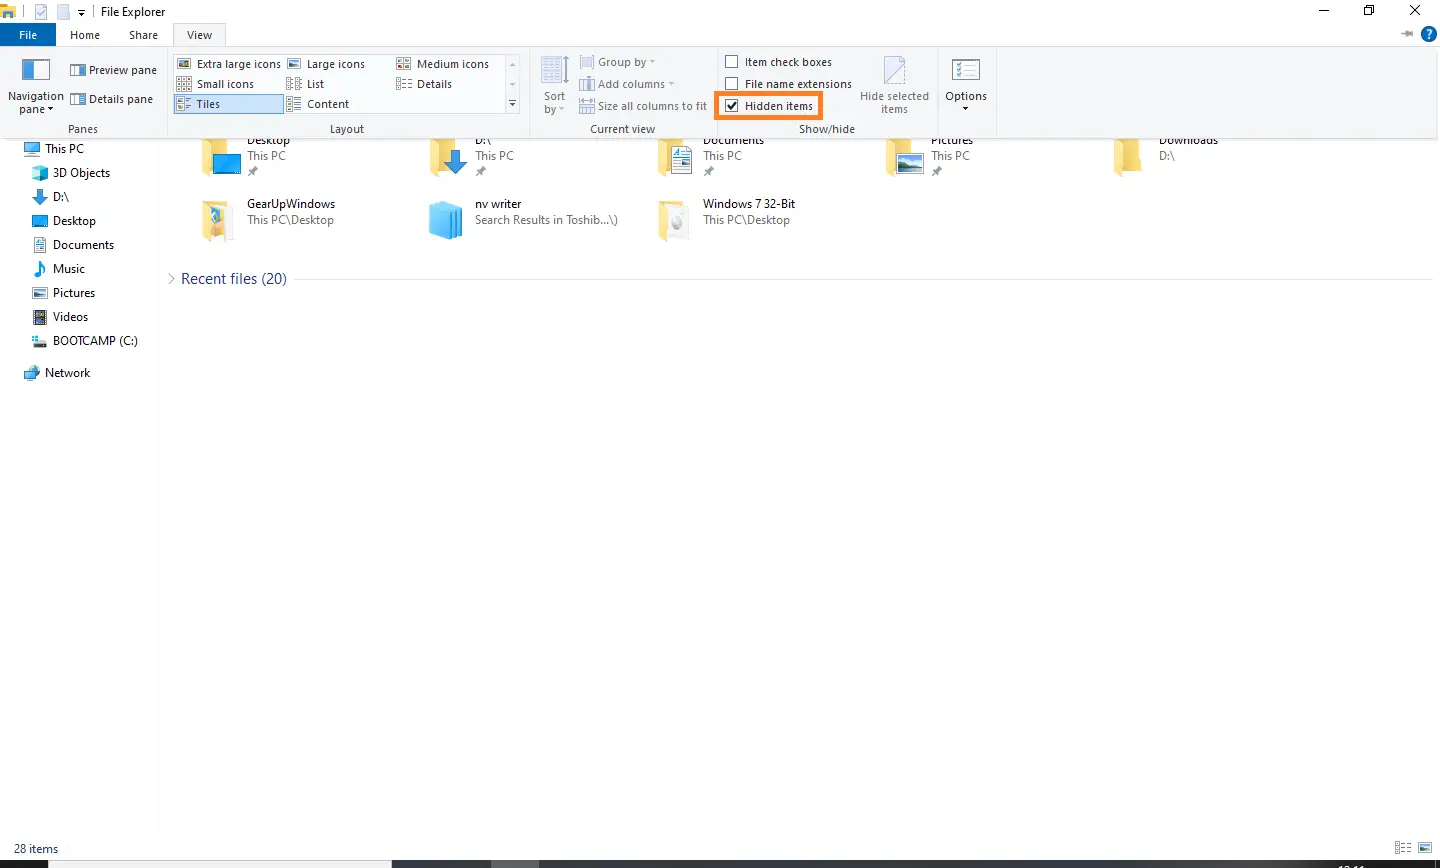
Now all the hidden files and folders will be visible. The files or folders which are slightly transparent were hidden.
Step 4. Once hidden files and folders are visible, navigate to the following path in Explorer:-
C:\Users\UserName\AppData\Local\Microsoft\Windows\Explorer
Note: Replace the UserName with your current username through which you have logged into your PC.
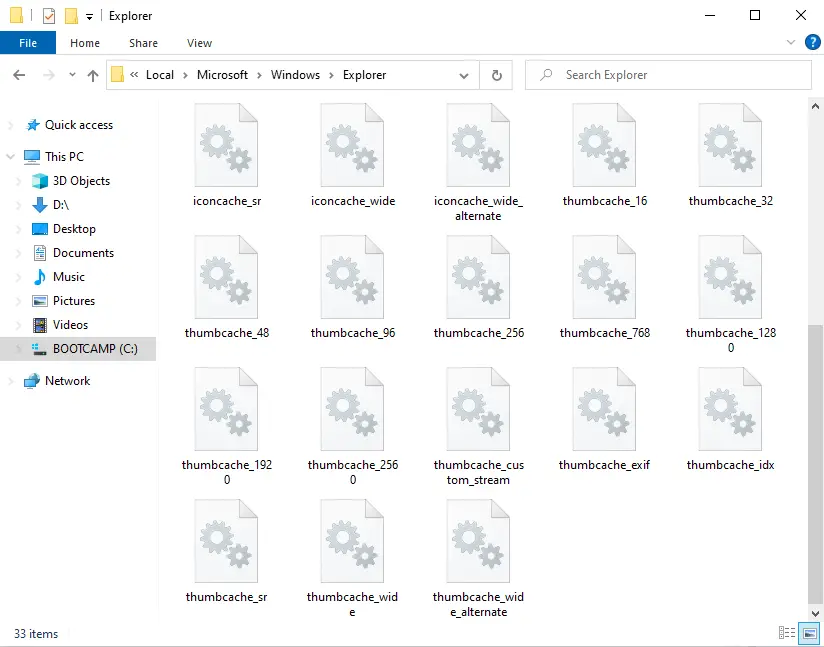
Step 5. Select and delete all the thumb cache files, and Windows will automatically regenerate them.
Now thumbnail cache issue should be fixed on your Windows 10 machine.
Clear thumbnail cache using Disk Cleanup.
Disk Cleanup is a built-in utility of Windows 10. The Thumbnail cache can be deleted through the Disk Cleanup tool also. To clear the thumbnail cache using Disk Cleanup, do the following:-
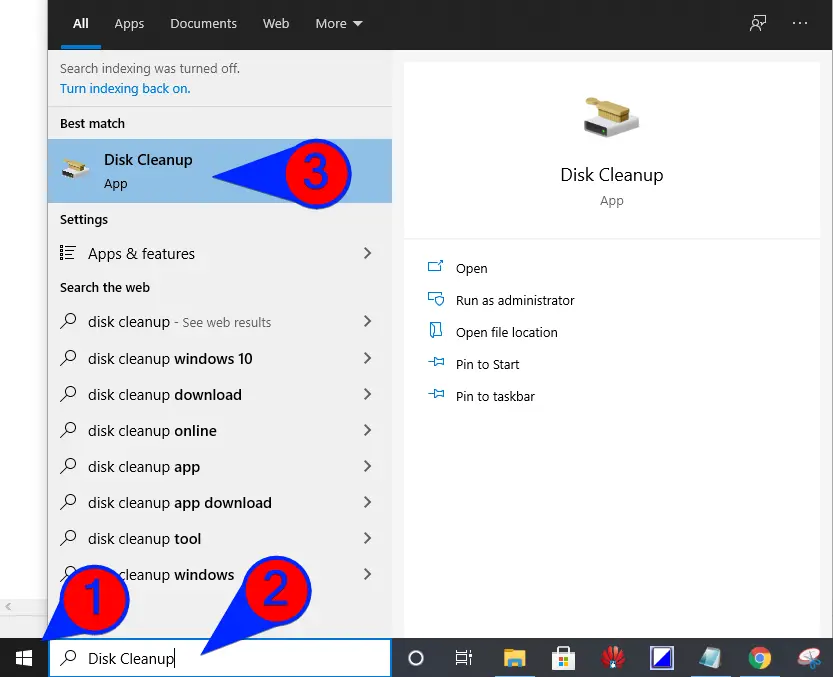
Step 1. Type Disk Cleanup in the Start menu, and from the available results, click on the Disk Cleanup app to open the same.
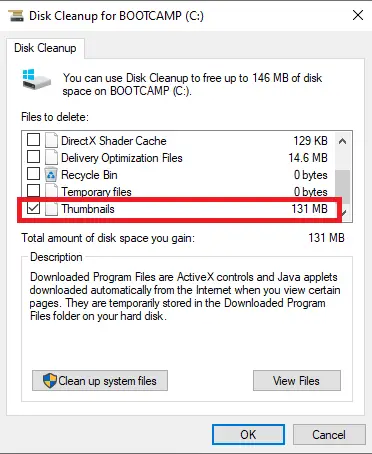
Step 2. On the Disk Cleanup window, select Thumbnails.
Clear thumbnail cache using a third-party program.
There are several free tools over the internet to find and delete thumbnail cache files. Thumbnail Database Cleaner is one of them, which is free and easy to use. You can download the latest version of Thumbnail Database Cleaner from its official webpage here.
To clear the thumbnail cache using Thumbnail Database Cleaner, do the following:-
Step 1. Install and launch the Thumbnail Database Cleaner utility.
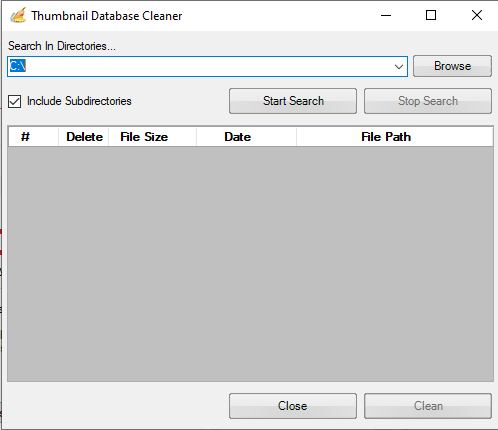
Step 2. Click on the “Start Search” button to find the thumbnail’s cache on the selected directory.
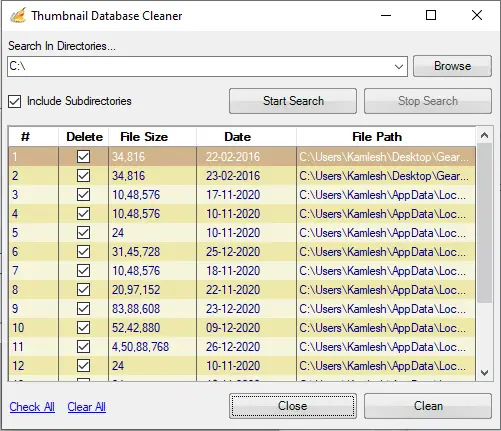
Step 3. Click on the Clean button to remove all the stored thumbnails from your Windows PC.
Clear thumbnail cache via Command Prompt.
To clear the thumbnail cache using Command Prompt perform the following steps:-
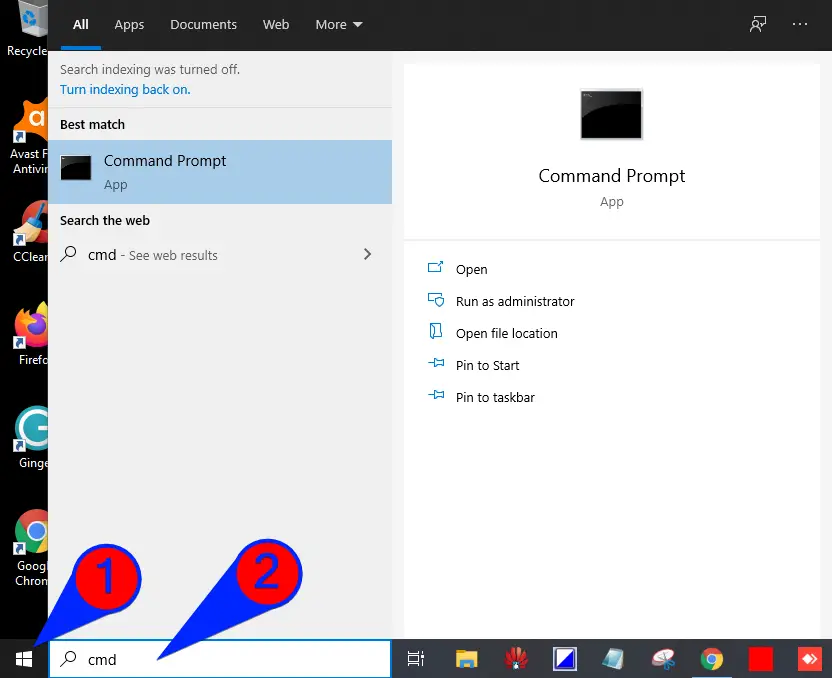
Step 1. Click on the Start button and type CMD.
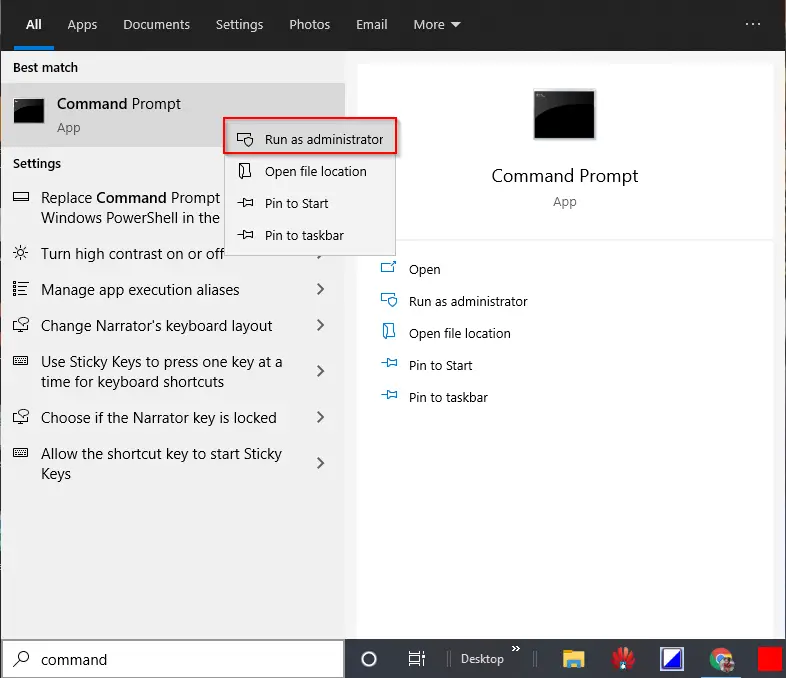
Step 2. Right-click on the Command Prompt app and select Run as administrator.
Step 3. If prompted, enter a username and password of the managed administrator account of your computer.
Step 4. Type the following commands one by one on the command prompt and press Enter from the keyboard after typing every command to execute the same:-
cd /d %userprofile%\AppData\Local\Microsoft\Windows\Explorer

attrib -h thumbcache_*.db

del thumbcache_*.db
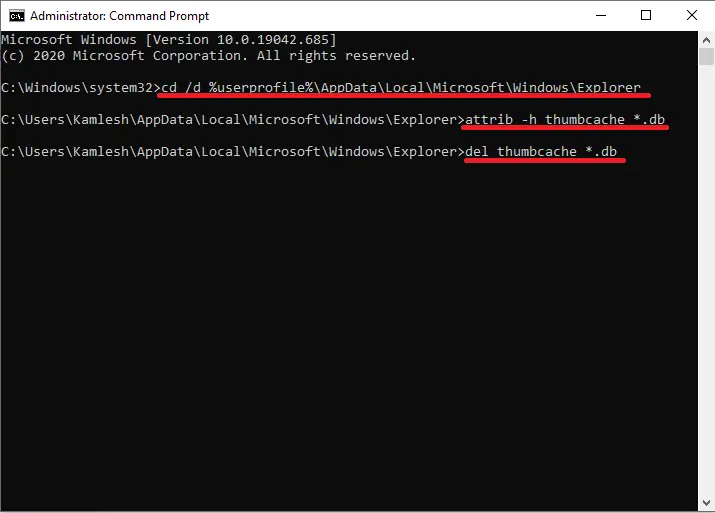
Once the commands mentioned above are executed, it will delete the thumbnail cache from your Windows 10 PC. Now restart the PC to rebuild a fresh thumbnail cache.
Conclusion
In conclusion, the thumbnail cache is a copy of all your documents, pictures, and video thumbnails stored in a file. Clearing and resetting the thumbnail cache in Windows 10 can solve issues with corrupted thumbnails and improve the speed of thumbnail display. This post has explained four ways to clear and reset the thumbnail cache in Windows 10, including manually deleting the files, using the built-in Disk Cleanup tool, using a third-party program like Thumbnail Database Cleaner, and using Command Prompt. By following any of these methods, you can delete the thumbnail cache and allow Windows 10 to regenerate the files, fixing any issues related to thumbnail display.