If you have encountered missing or broken icons on your Windows 10 PC, it could be due to a corrupt icon cache. Fortunately, rebuilding the icon cache can resolve this issue. Windows 10 stores all icons in a file called IconCache.db, which is located in the user profile folder. This folder allows Windows to quickly access icons without having to search for them each time you start your PC.
If your Windows 10 shows a white color instead of the actual icon or notices the same icons even after changing icons using a third-party tool, you can fix the issue by rebuilding the icon cache.
NOTE: None of these guides help you fix issues with thumbnails. If you are having thumbnail problems, you need to clear or reset the thumbnail cache.
In this article, we will show the steps to rebuild the icon cache on Windows 10 PC.
There are at least two methods through which you can rebuild the icon cache on Windows 10; these are the following:-
- Manually rebuild the icon cache in Windows 10
- Rebuild the icon cache via Command Prompt
Manually rebuild the icon cache in Windows 10
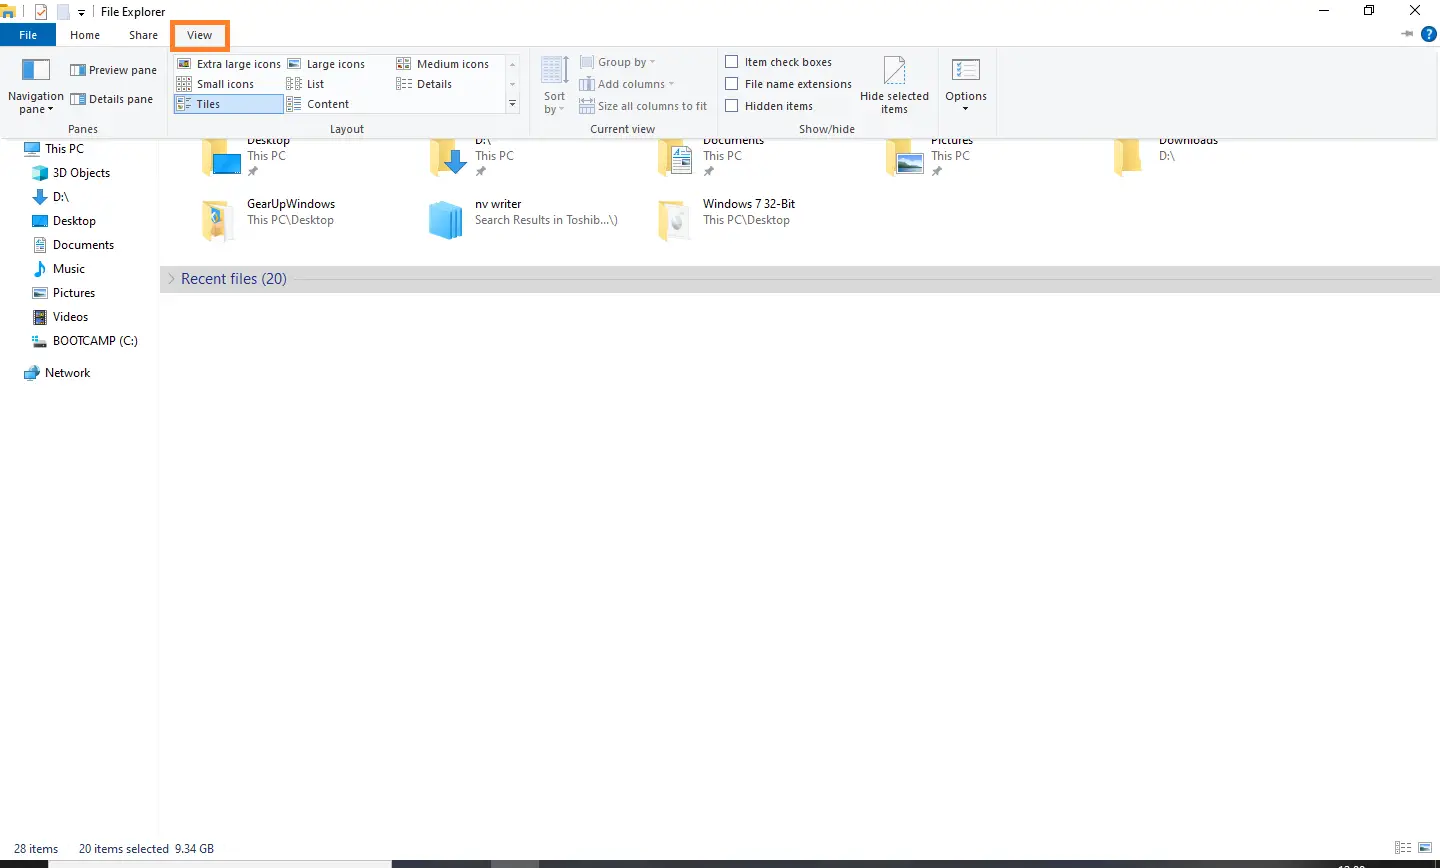
Step 2. Click the View tab from the menu.
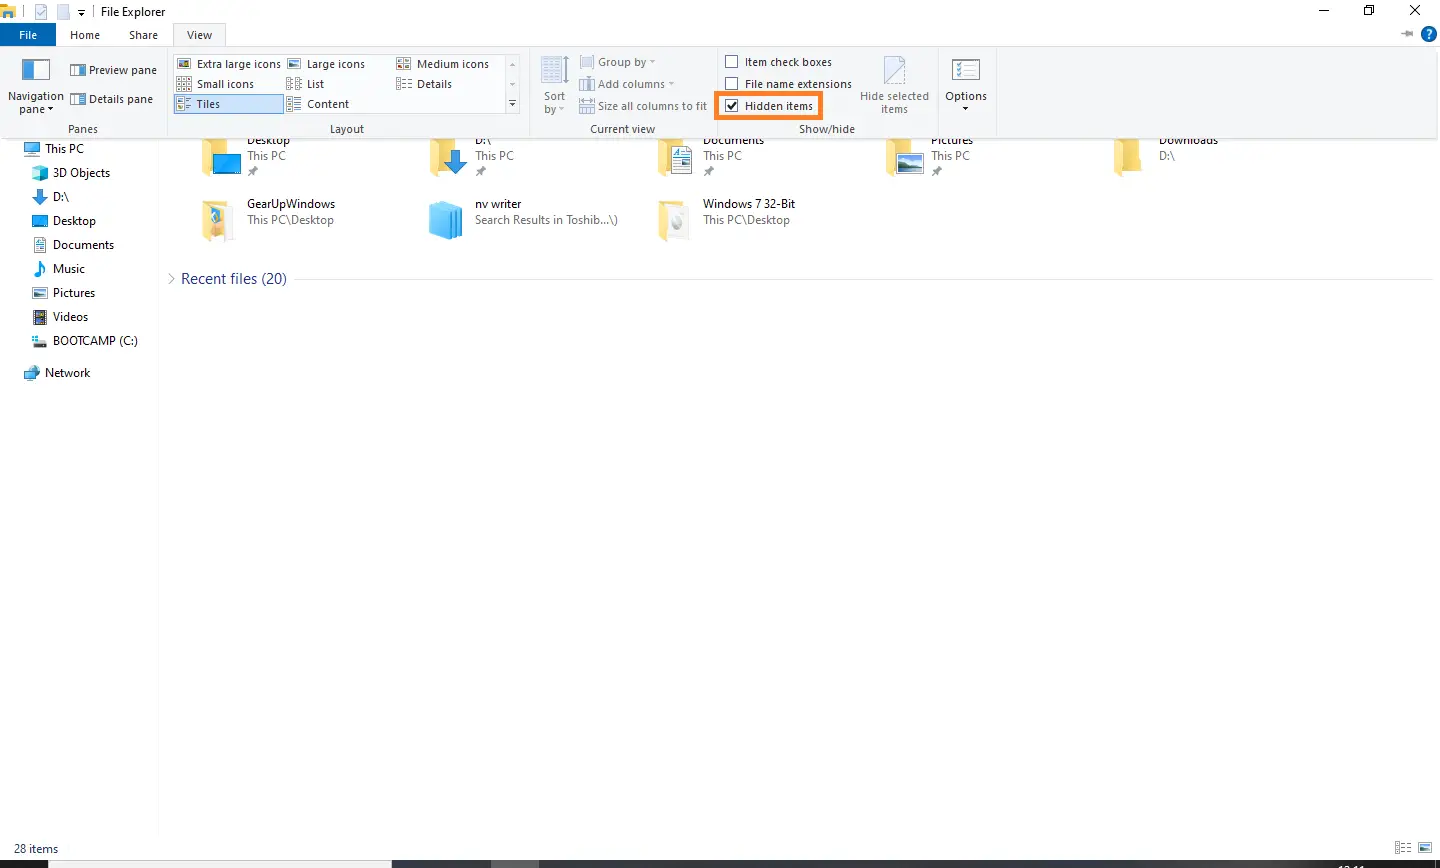
Step 3. Check Hidden items under the View tab to show hidden files and folders.
Step 4. Navigate to the following path:-
C:\Users\UserName\AppData\Local
Note: Replace UserName with your account user name on the PC. Here, “C” is the drive letter where Windows 10 is installed. If you have installed Windows 10 on another drive, change the “C” accordingly.
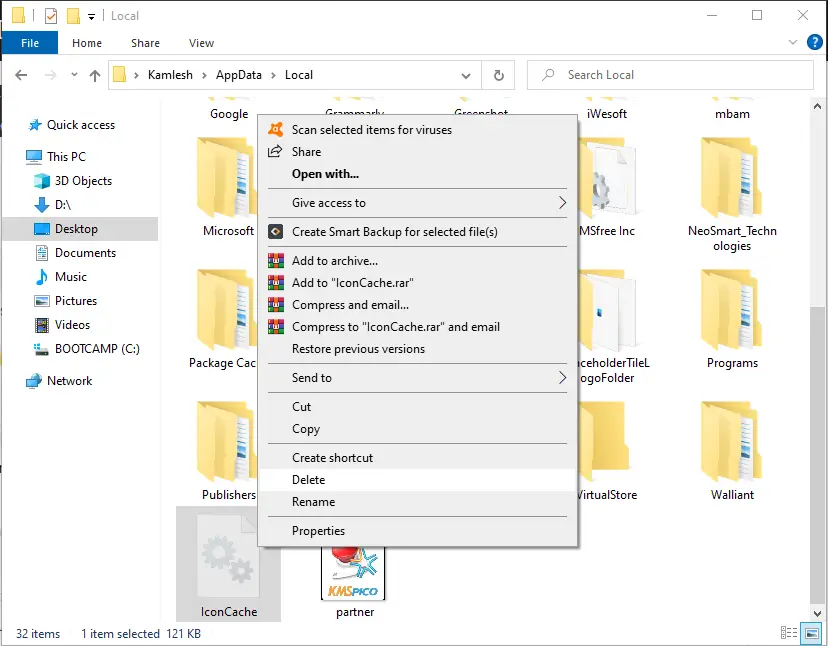
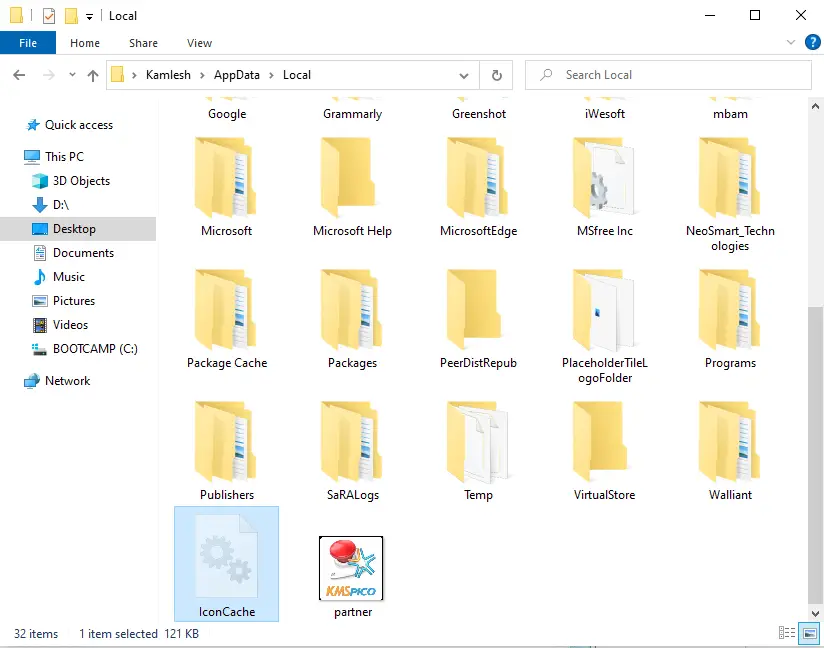 Step 5. Under the Local folder, locate the file IconCache (IconCache.db) and delete it by right-clicking and selecting the Delete option.
![]()
Now reboot your Windows 10 PC to automatically create a new IconCache file to rebuild the Icon Cache.
Rebuild the icon cache via Command Prompt
The above-mentioned is the best way to rebuild the icon cache on Windows 10; however, if you’re unable to delete the icon cache by the above-mentioned method, you can use the Command Prompt to rebuild the icon cache. To do the same, do the following:-
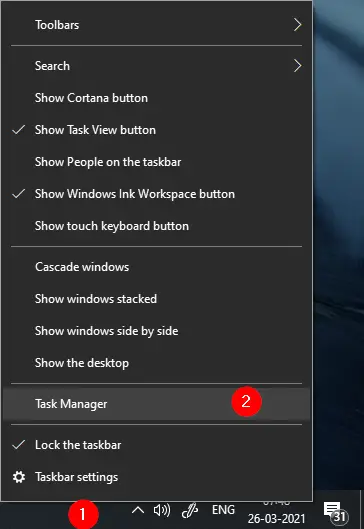
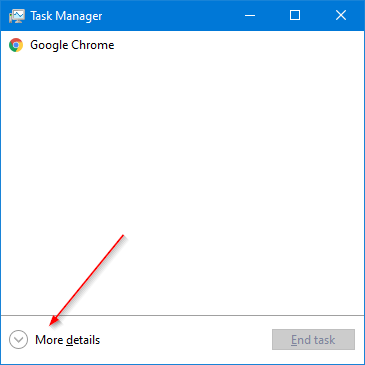
Step 1. Launch the Task Manager either by right-clicking on the taskbar and then selecting Task Manager or pressing Ctrl + Shift + Esc keyboard shortcut.
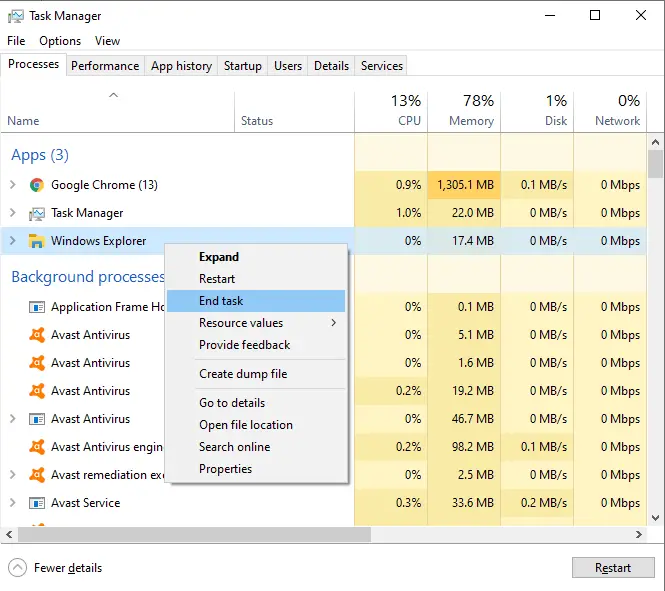
Step 3. Under the Processes tab, select and right-click the Windows Explorer entry and click End task to kill the Windows Explorer process. Once you kill Windows Explorer, the Taskbar and Start will not be visible; however, you can still access the Task Manager.
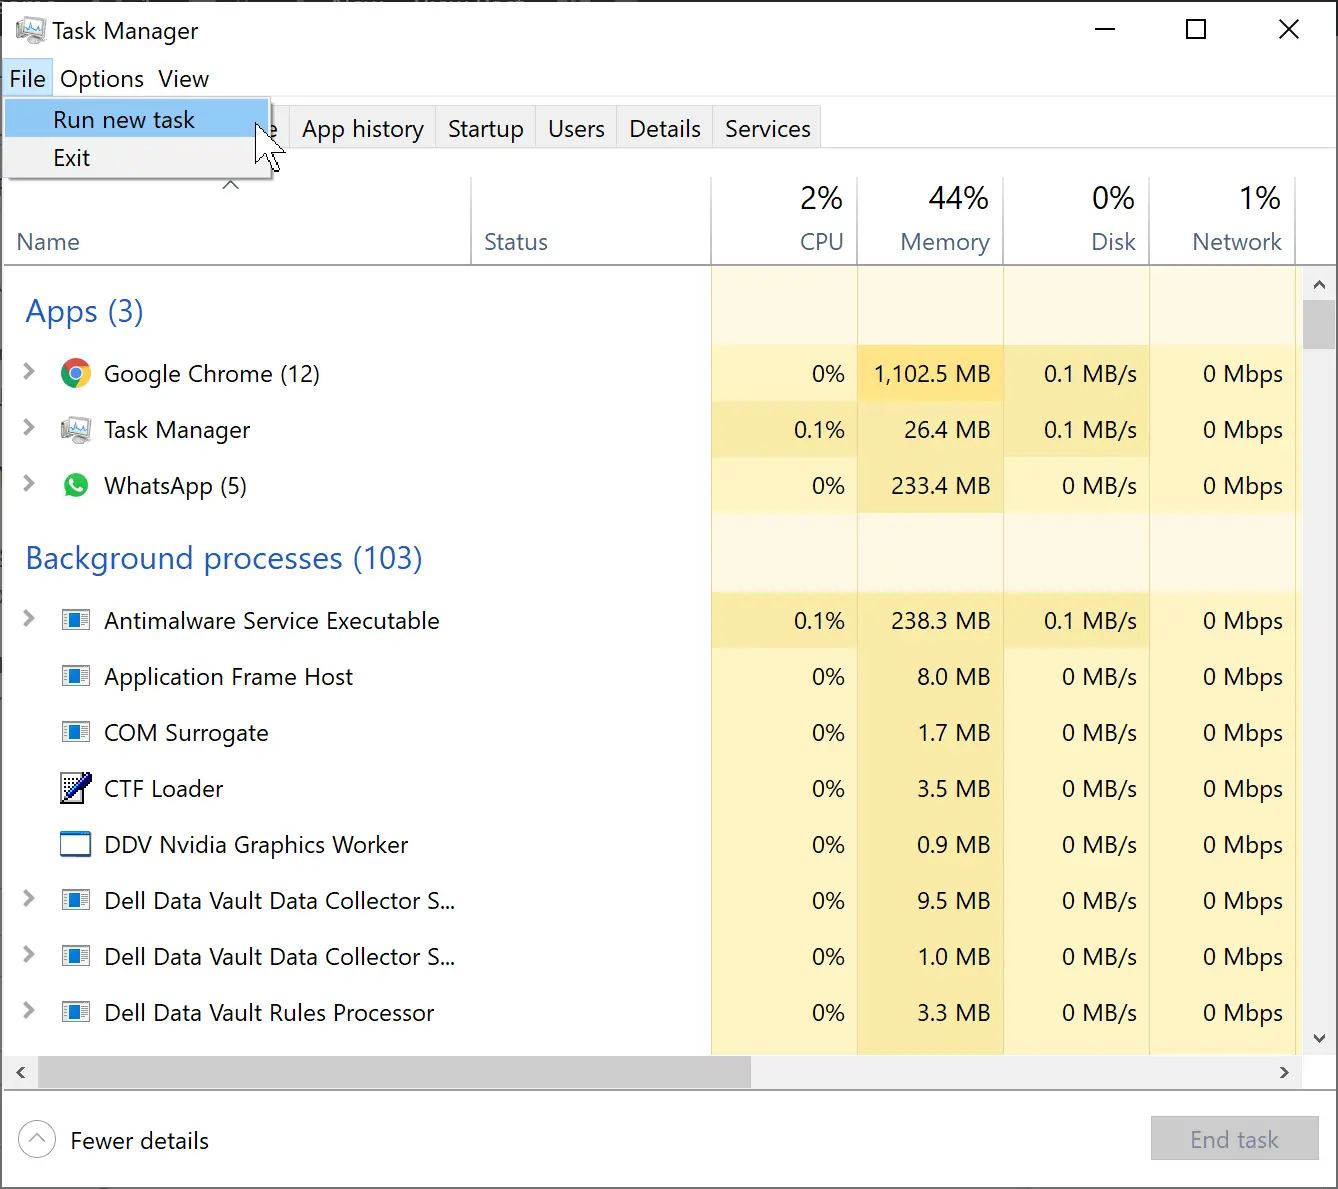
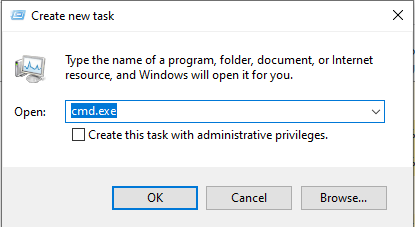
Step 4. From the Task Manager, click on the File > Run new task.
Step 5. On the newly opened “Create new task” window, type cmd.exe and click the OK button or hit Enter from the keyboard to open Command Prompt.
CD /d %userprofile%\AppData\Local
Del IconCache.db /a
Exit
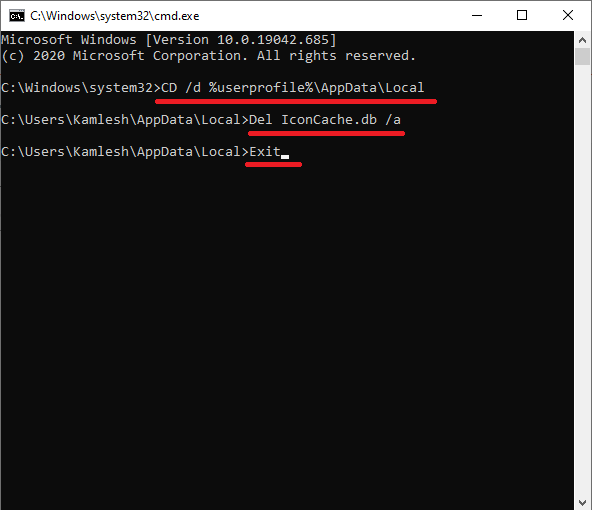
The above command will delete the IconCache.db file, which is responsible for Icon Cache.
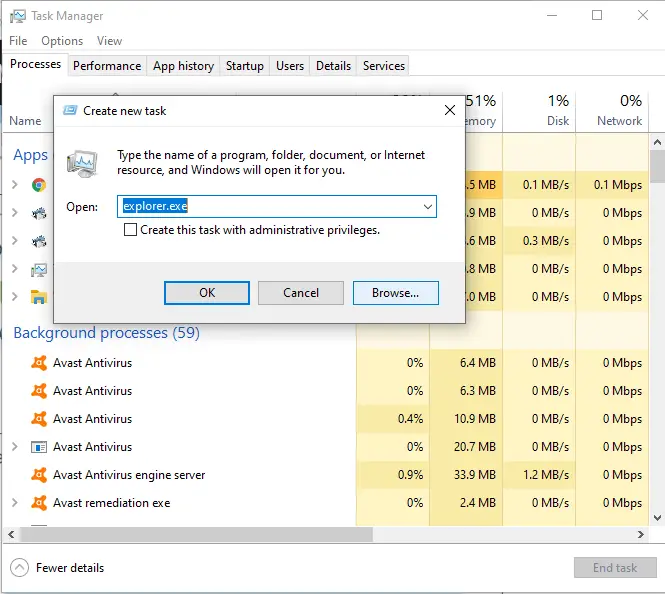
Step 7. Again, click on the File menu under Task Manager, click Run new task, enter Explorer.exe, and then click the OK button to restart File Explorer.
That’s all! You have successfully completed the steps, and now your Windows 10 should rebuild a fresh Icon Cache.
Conclusion
In conclusion, missing or broken icons on a Windows 10 PC can be due to a corrupt icon cache. Fortunately, there are two ways to rebuild the icon cache manually. The first method is to delete the IconCache file in the Local directory and then reboot the PC. The second method involves using the Command Prompt to delete the IconCache.db file and then restarting the Windows Explorer process. Rebuilding the icon cache using either method should resolve issues with missing or broken icons on your Windows 10 PC.