Using multiple monitors can be helpful for those people who work or play with their computers the whole day. For casual PC users, a single monitor is enough.
There are plenty of benefits to using multi-monitor setups. Using two or three monitors, you can organize your activities or make use of multiple open applications in a way that’s much more efficient than switching. Multiple monitors also help you multitask, such as monitoring stock prices or watching a movie on one monitor while surfing the web on another.
Fortunately, Windows 11 is capable of working with multiple displays or monitors as long as your graphic processor can handle it. If you have additional monitors that you want to extend your work to, plug them into your Windows machine and start working.
When you add additional monitors to your computer or laptop, Windows 11 automatically detects and duplicates your screen.
If the second monitor is not displaying anything, navigate to Windows Settings > System > Display. Your PC should automatically detect your monitors and show your desktop. If you don’t see the monitors, select the Multiple displays tile and click Detect.
Requirements to Connect Multiple Monitors on Windows 11 PC
All modern computers and laptops now support dual monitors. Before going with the steps, you need to make sure your computer can add two additional monitors. Once you find that the port is available on your PC to connect an extra monitor, you need to check the GPU to see if it supports multiple monitors. For that, browse the internet and search for your graphics card model. Find the details on the manufacturer page.
When you find everything is in order, complete physical connections and then proceed with the steps to get output.
How to Set up Additional Monitors in Windows 11?
When you add a monitor to your computer, Windows 11 automatically recognizes and configures it with the recommended resolution to get the most out of your displays. However, if your PC doesn’t automatically identify the additional monitor, do the following:-
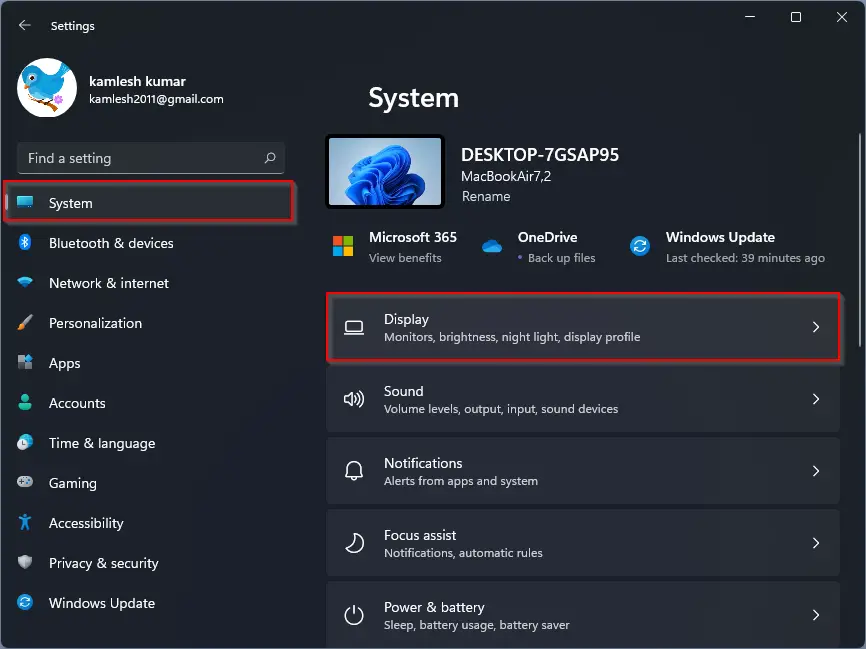
Step 1. Open the Settings app.

Step 2. Then, select System in the left sidebar of Settings.
Step 3. After that, click on the Display tab on the right sidebar.
Step 4. On the Display settings page, your PC should automatically detect connected monitors and show your desktop. If you don’t see the monitors, click the Multiple displays tile to extend it.
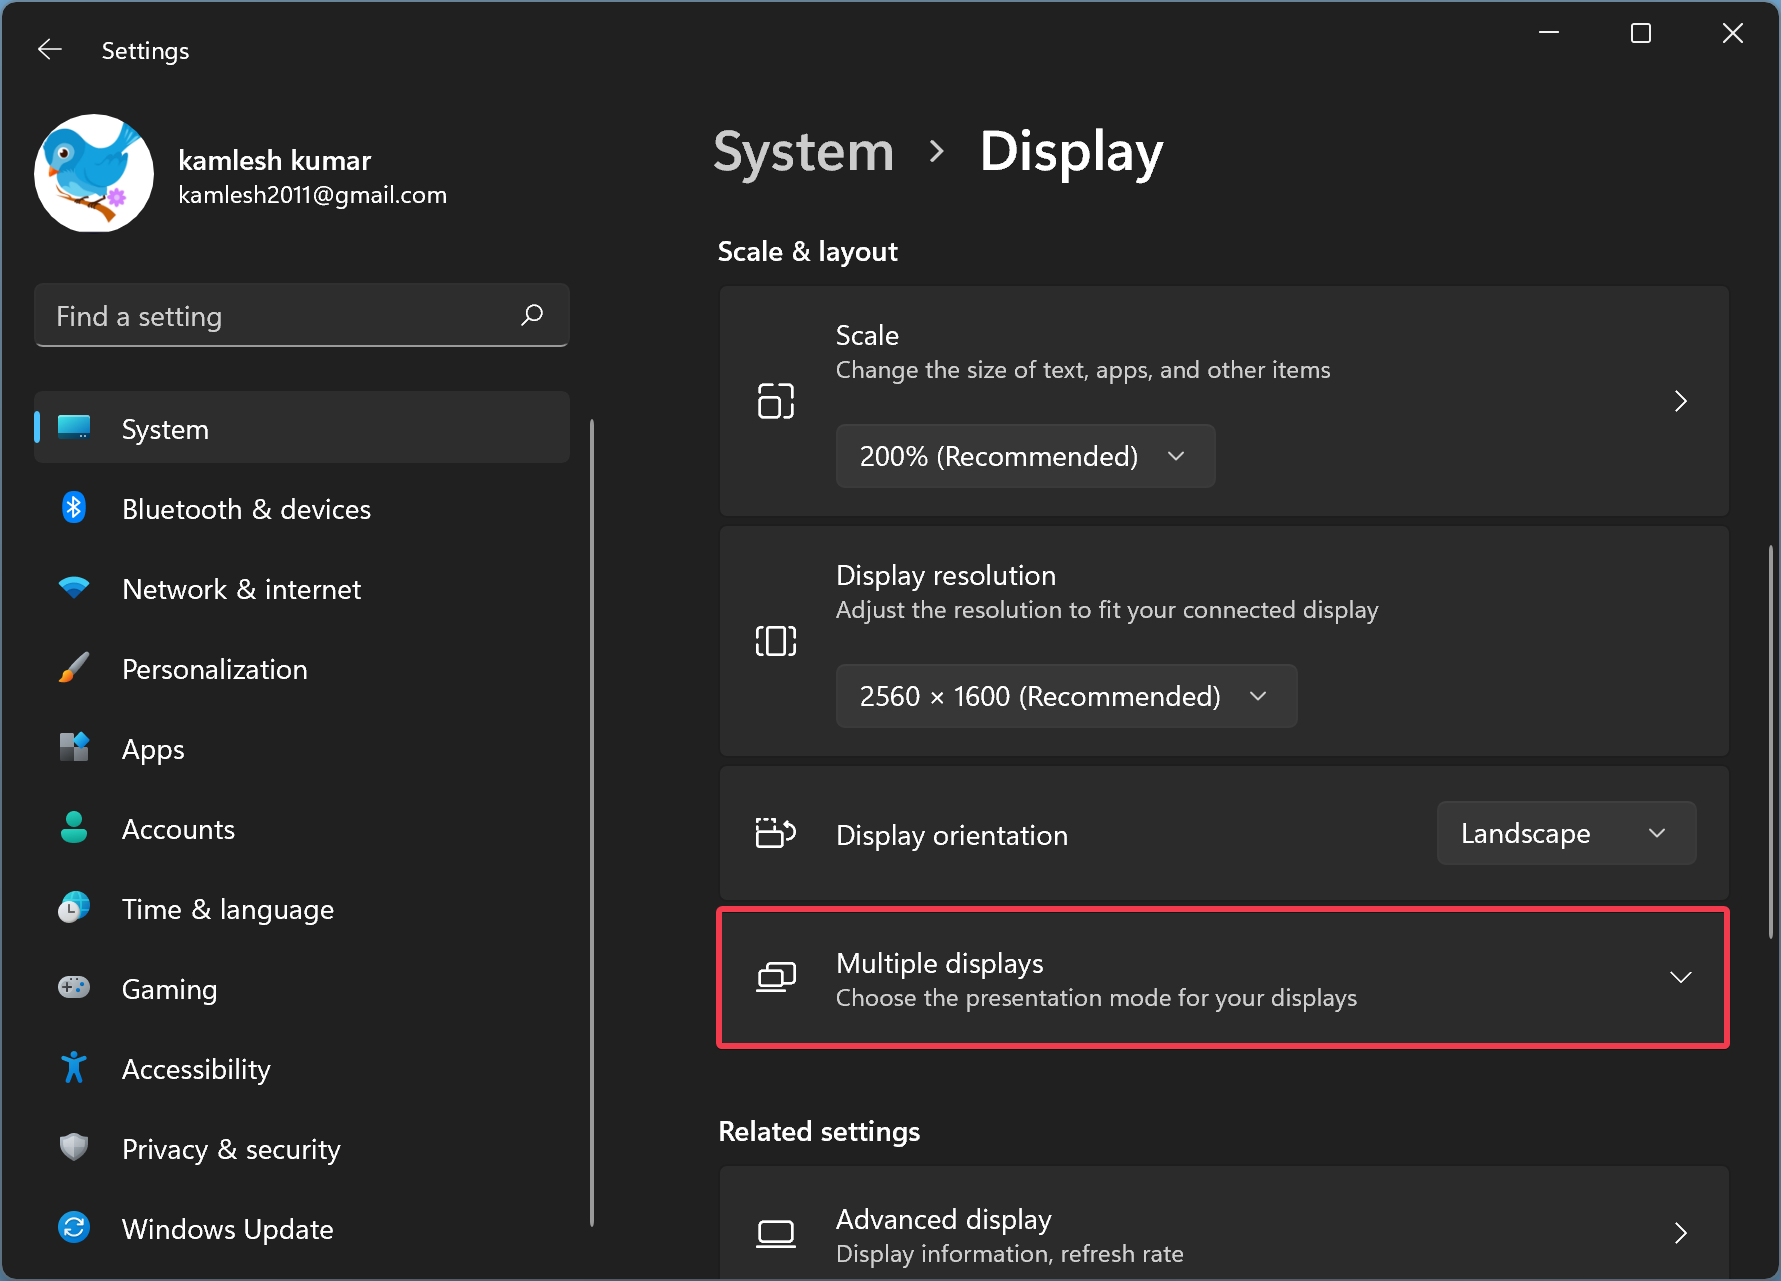
Step 5. Click the Detect button beside the “Detect other display” option.

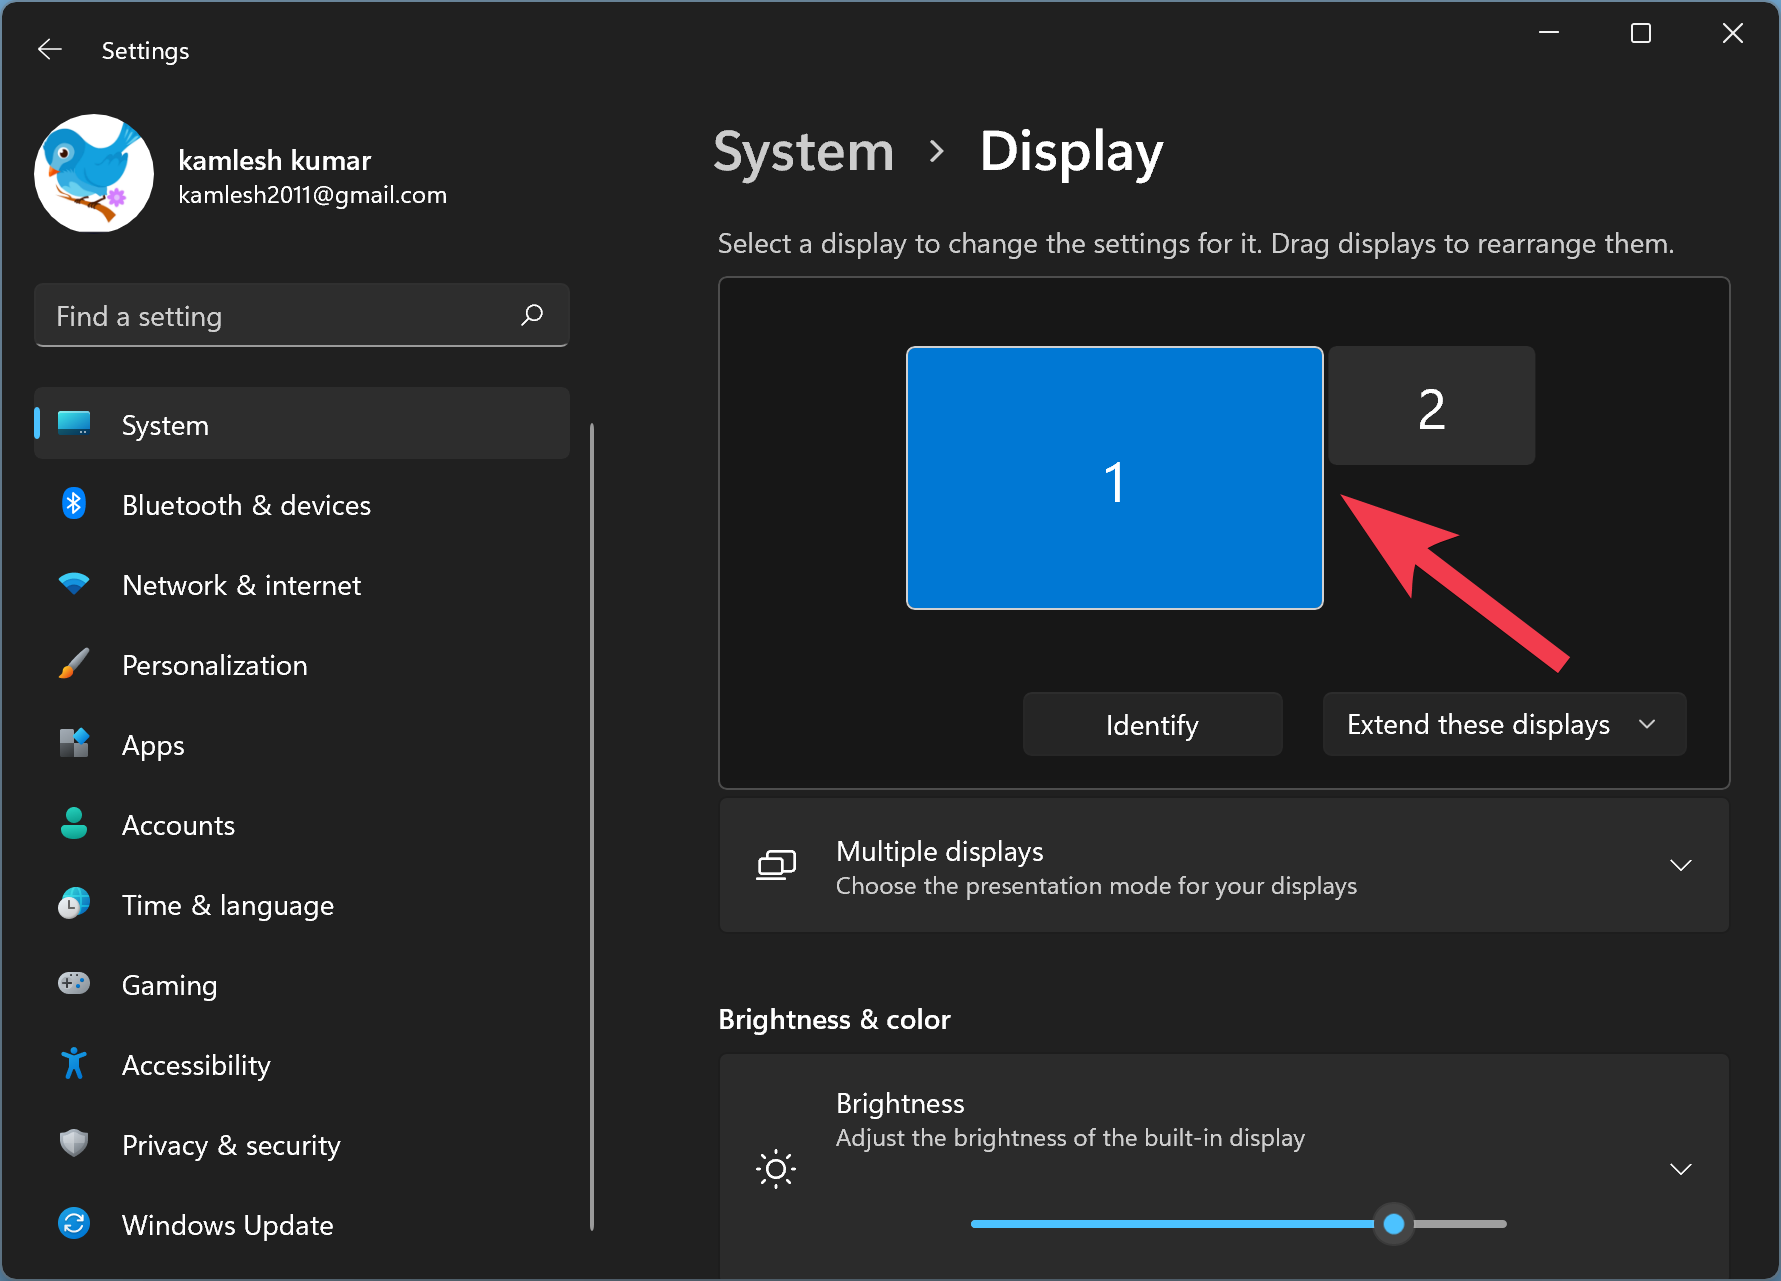
When you’re done, scroll to the top of the Display settings page. If Windows detects the second monitor, it will show up here and allow you to adjust the settings for each one.
How to Use Multiple Screens With Windows 11?
Once your Windows 11 recognizes connected monitors, do the following to get the most from that:-
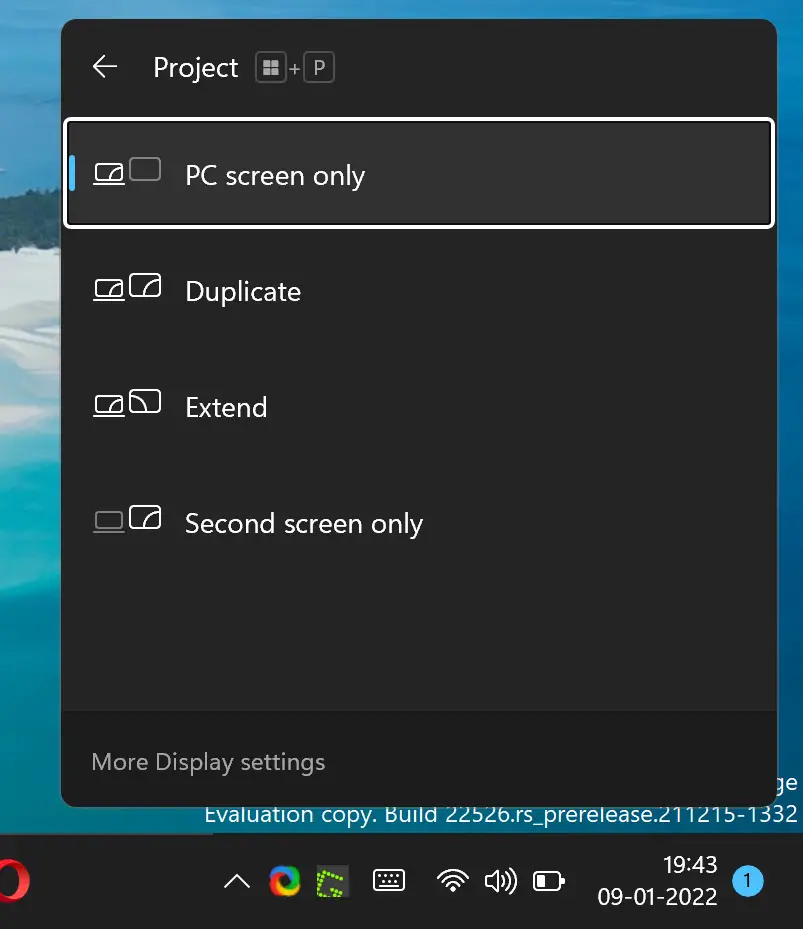
Step 1. Press Windows + P on your keyboard.
Step 2. Now, a small window will open, and you will see the following options:-
- PC screen only – This option allows you to see the desktop on the primary monitor only.
- Duplicate – This allows you to share your desktop on all your displays.
- Extend – This Allows you to see your desktop across multiple screens, and also, you can move items between the two screens.
- Second screen only – Using this option, you can see your desktop on the second monitor only.
Step 3. Click on the appropriate option to share or extend your display.
Conclusion
In conclusion, using multiple monitors can be a game-changer for productivity and multitasking. Windows 11 offers native support for multiple displays, making it easy to add and set up additional monitors. As long as your computer’s graphics processor can handle it, you can extend or duplicate your desktop and take full advantage of the added screen real estate. With the step-by-step guide provided, setting up multiple screens in Windows 11 should be a breeze.