If you want to upgrade your computer to a solid-state drive (SSD) but don’t want to start everything from scratch, here’s how to transfer your data onto your new hard drive.
To speed up your computer, you should change the traditional spinning hard disk to a solid-state drive (SSD) if you’re not already using it. SSD boots faster and programs launch instantly, and games won’t take so long to load anymore.
You can reinstall Windows from scratch or use the right tool to skip this process.
In this gearupwindows article, we will guide you to transferring Windows 11/10 installation to your new SSD.
You’ll need to connect both your SSD and old hard drive to your computer simultaneously during this process. If you’re using a laptop with only one hard drive slot, that means you’ll need an external adapter, dock, or enclosure that can connect your empty SSD to your computer over USB.
When the SSD is installed or connected to your computer, you can start cloning your old Windows installation to the new SSD. Here is how to do it.
How to Copy Windows 11 or 10 installation to an SSD?
Follow these steps to copy Windows 11 or 10 installation to an SSD:-
Step 1. Download the DiskGenius freeware tool.
Step 2. Install and launch on your computer.
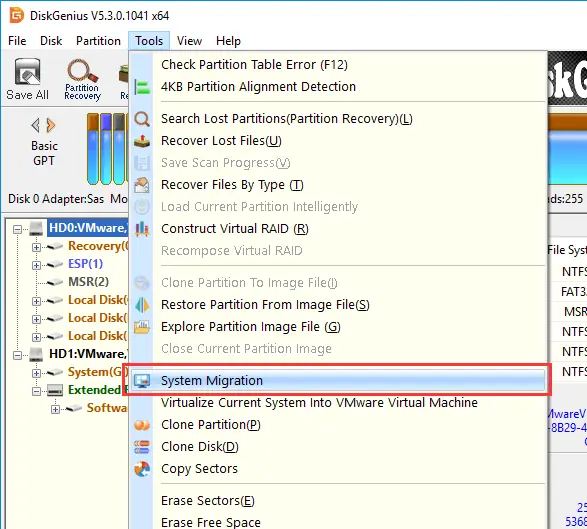
Step 3. Then choose the Tools > System Migration option.
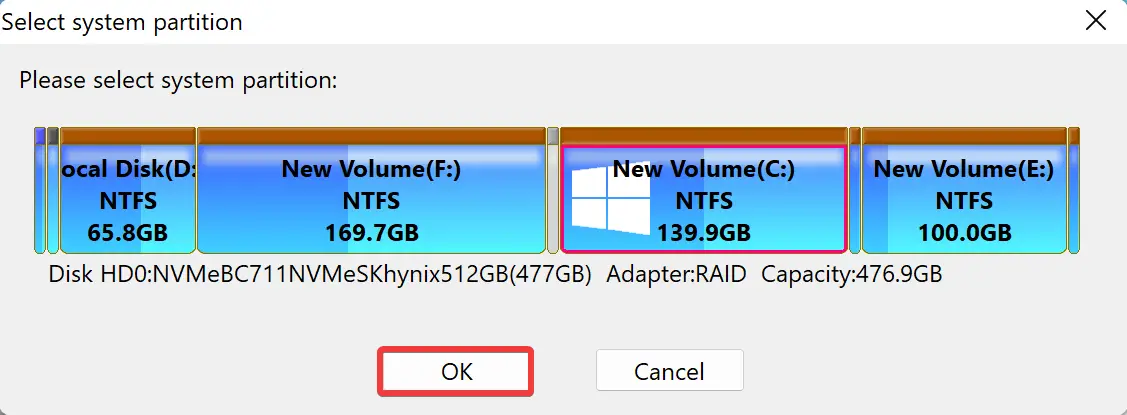
Step 4. In the pop-up window, select the drive where Windows 11/10 is installed. You can choose more partitions if your SSD storage capacity is enough to store all the data of your old HDD. Once the partition is selected, click the OK button.
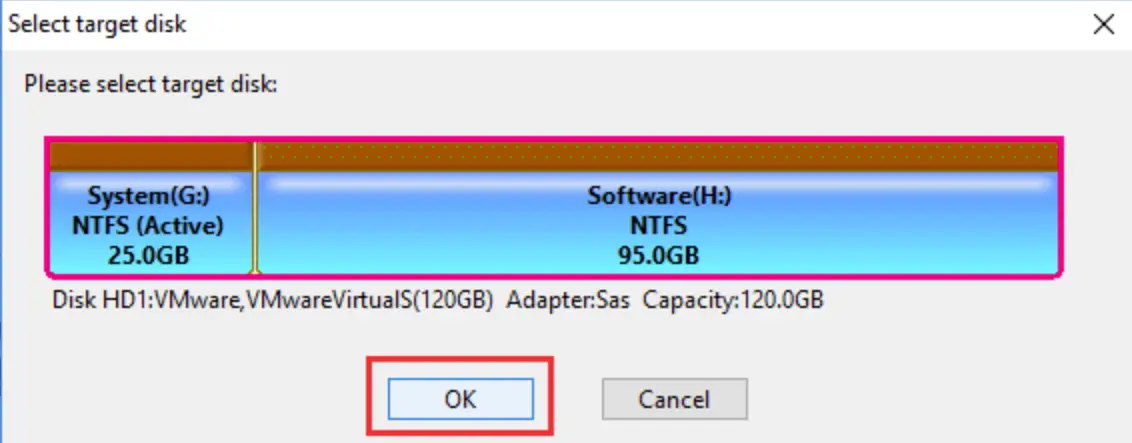
Step 5. After that, another pop-up window will appear and list all connected disks except the system disk. Choose the destination disk and click the OK button.
Step 6. The DiskGenius allows adding or removing partitions to be migrated, resizing partitions on the target disk, and configuring the boot sequence before the process. You can configure all these according to your needs.
If the source disk contains partitions unrelated to the system boot, you can choose whether to migrate them to the new disk; for example, right-click on the partition and select “Migrate to target disk.”
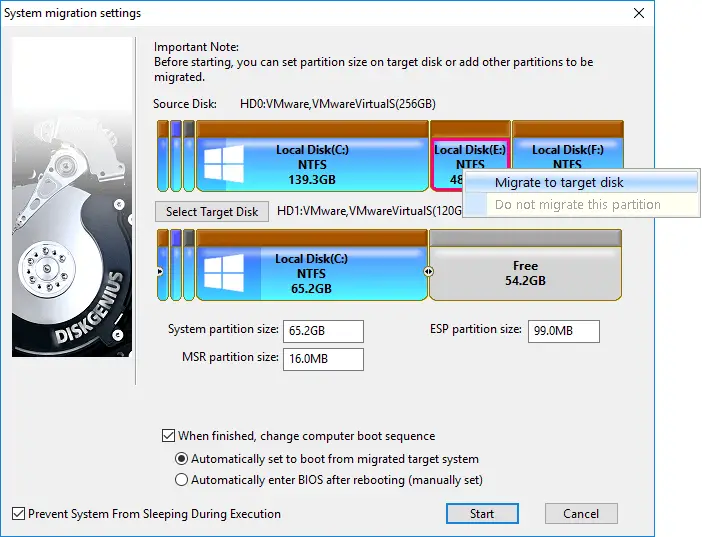
Further, if you feel the new system partition is too large or small in size, you can right-click on the partition edge and drag the mouse to resize it, as follows.
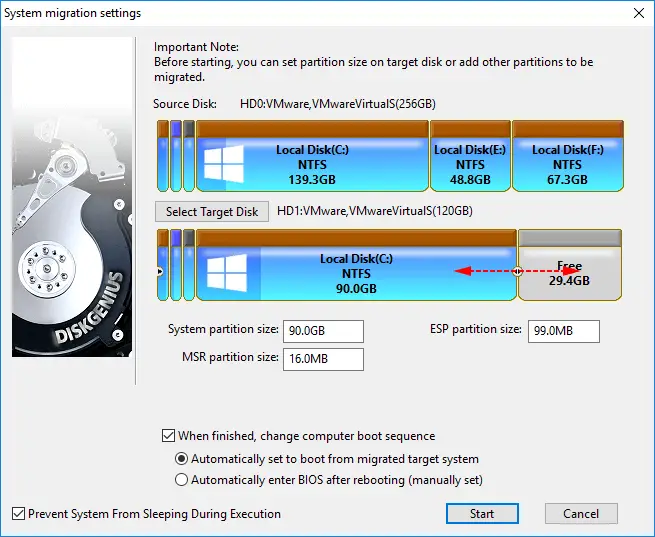
Finally, check the option “When finished, change computer boot sequence,” and you can choose whether to boot from the target disk automatically after system migration completes. Please note that these options are available for UEFI-based systems, and you’ll need to manually boot to BIOS to modify the boot sequence for MBR disks.
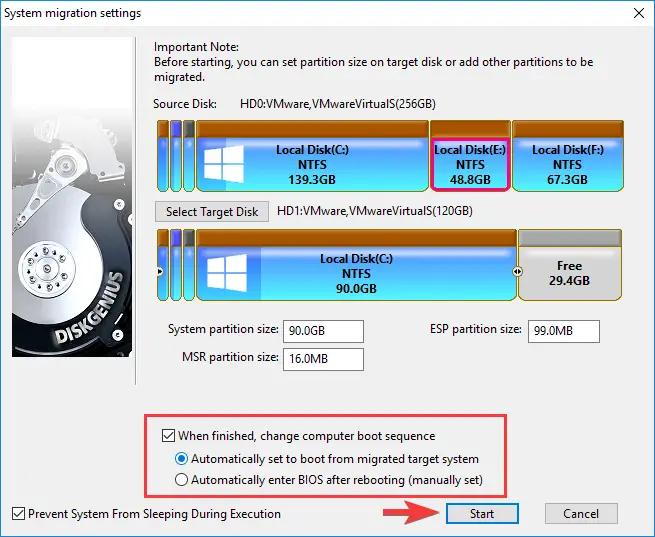
Step 6. Next, click the Start button.
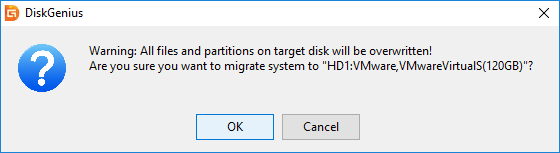
Step 7. You will see a warning message saying all files and partitions on the target disk will be overwritten. Click the OK button to continue.
Step 8. Click the Hot Migration button on the following screen.
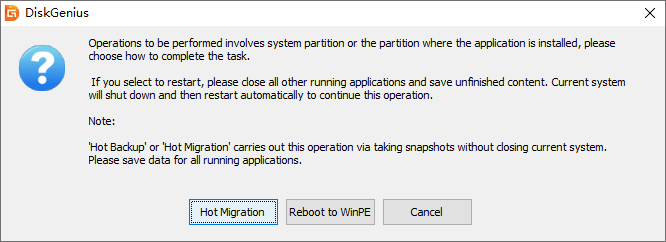
Now, wait to let DiskGenius complete the process.

Download DiskGenius
You can download DiskGenius from here.
Conclusion
In conclusion, upgrading your computer’s traditional spinning hard disk to a solid-state drive (SSD) can significantly speed up your computer’s performance. However, transferring your data from the old hard drive to the new SSD can be a daunting task. Fortunately, tools like DiskGenius can make the process easy and hassle-free. By following the steps outlined in this article, you can clone your old Windows installation to your new SSD without starting everything from scratch. Just be sure to connect both your SSD and old hard drive to your computer simultaneously during the process. With the help of DiskGenius, you can enjoy the benefits of a faster and more efficient computer without losing any of your valuable data.