Many users prefer to access their favorite apps directly from the desktop or taskbar. Creating shortcuts on the desktop or using the taskbar function can make it effortless to launch files and programs. The toolbar/taskbar function is present in all versions of Windows, including Windows 7, 8, and 10.
If you wish to add multiple programs or files to the toolbar, the most efficient approach is to create a folder with any desired name (e.g., Launcher) and include shortcuts of files, folders, or programs within it. After adding this folder as a toolbar, it will generate a menu with all your shortcuts when you click on the taskbar. This is a convenient method to access frequently used items quickly without cluttering up your desktop or taskbar.
How to create a custom toolbar to launch programs and files quickly from Windows Taskbar on Windows 10?
Follow these steps to create a custom toolbar to launch programs and files quickly from Windows Taskbar on Windows 10:-
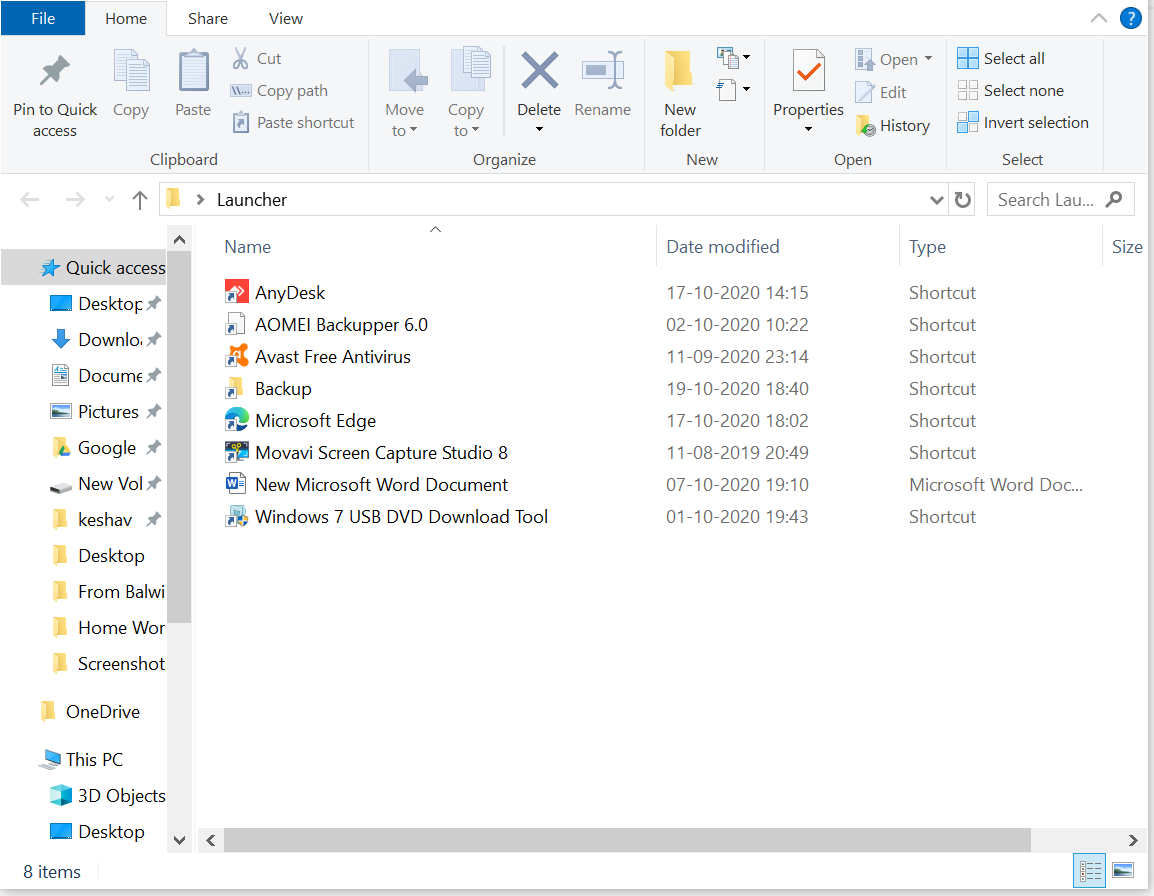
Step 1. Create a folder on your Windows 10 desktop, and rename it as Launcher.
Step 2. Put all your programs/files/folder shortcuts in this folder.
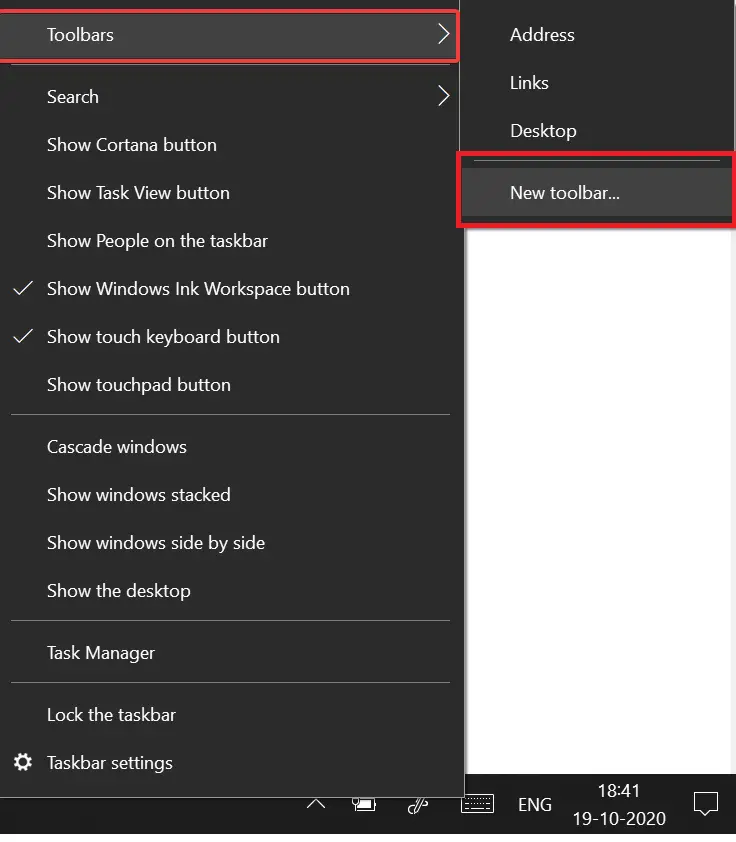
Step 4. It will prompt for folder/file location.

Step 5. Locate the newly created Launcher folder from the Desktop and click on the Select Folder button.
Step 6. Now, you can see a new Toolbar on the Taskbar with Launcher’s name.
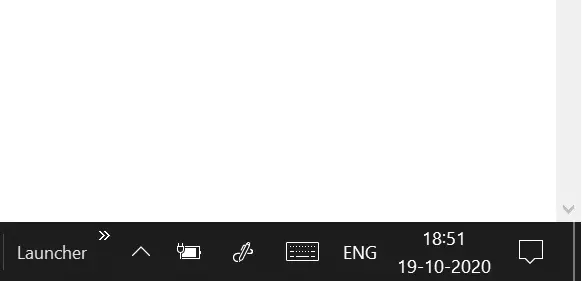
Step 7. Once you are ready with the Launcher toolbar, you can see the Launcher Toolbar on the Taskbar with the >> sign.
Step 8. Click on >> sign to open the lists of programs/files.
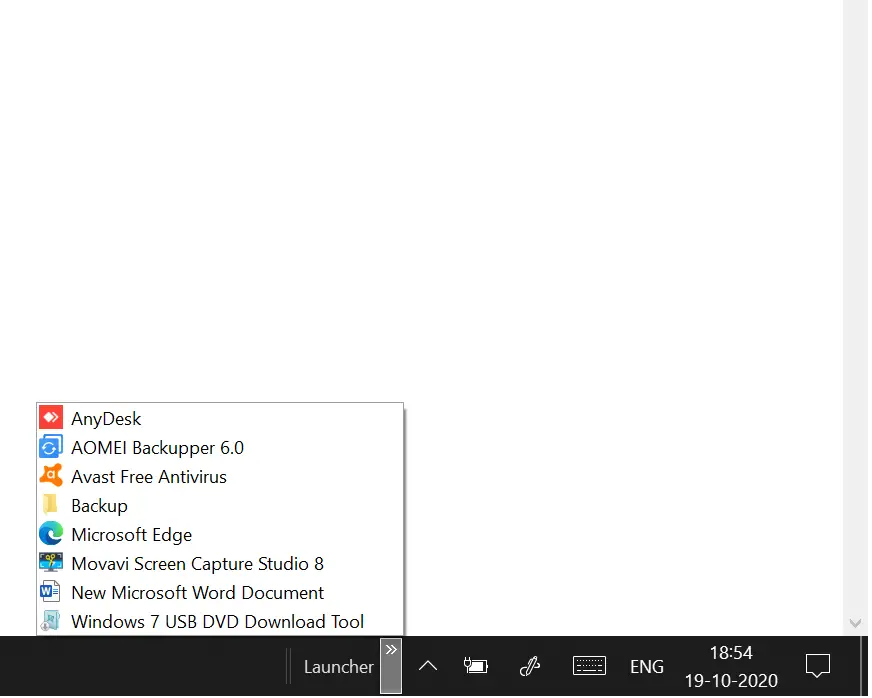
Step 9. Click from the available applications/files/folders to launch your favorite program.
Quick Tips: To remove an application from the Launcher toolbar, simply delete it from the Launcher folder on the desktop. This will remove the application from the Launcher toolbar list. On the other hand, if you want to add another application in the future, drag the application’s shortcut to the Launcher folder on the desktop, and it will be added automatically to the Launcher under Toolbar.
Conclusion
In conclusion, creating a custom toolbar on the Windows Taskbar can be a useful way to quickly access frequently used files and programs without cluttering up your desktop or taskbar. By following the steps outlined above, you can easily create a custom toolbar with your preferred shortcuts and have them readily available with a single click. Moreover, it’s effortless to remove or add any application to the Launcher toolbar by merely deleting or dragging and dropping the shortcut to the Launcher folder on the desktop. This customization feature is available in all versions of Windows, including Windows 7, 8, and 10, making it accessible to all Windows users.
For windows 11, this is the solution:
https://sandbox.silonsystems.com/dockfolders
Thanks, we have included DockFolder in a new post now.
https://gearupwindows.com/dockfolder-allow-you-to-create-your-toolbar-in-windows-11-and-10/