Microsoft PowerPoint is a versatile tool that allows you to create visually appealing presentations for various purposes, from business meetings to educational lectures. Adding custom shapes to your slides can help you convey your message more effectively and make your presentation stand out. One of the most commonly used shapes in presentations is the heart shape, which can symbolize love, passion, or any other emotional message you want to convey. In this article, we’ll guide you through the steps to create a heart shape in PowerPoint.
How to Make a Heart Shape in PowerPoint?
To create a Heart Shape in Microsoft PowerPoint, follow these steps:-
Step 1. Open PowerPoint on your computer and create a new presentation, or open an existing one where you’d like to add your heart shape.
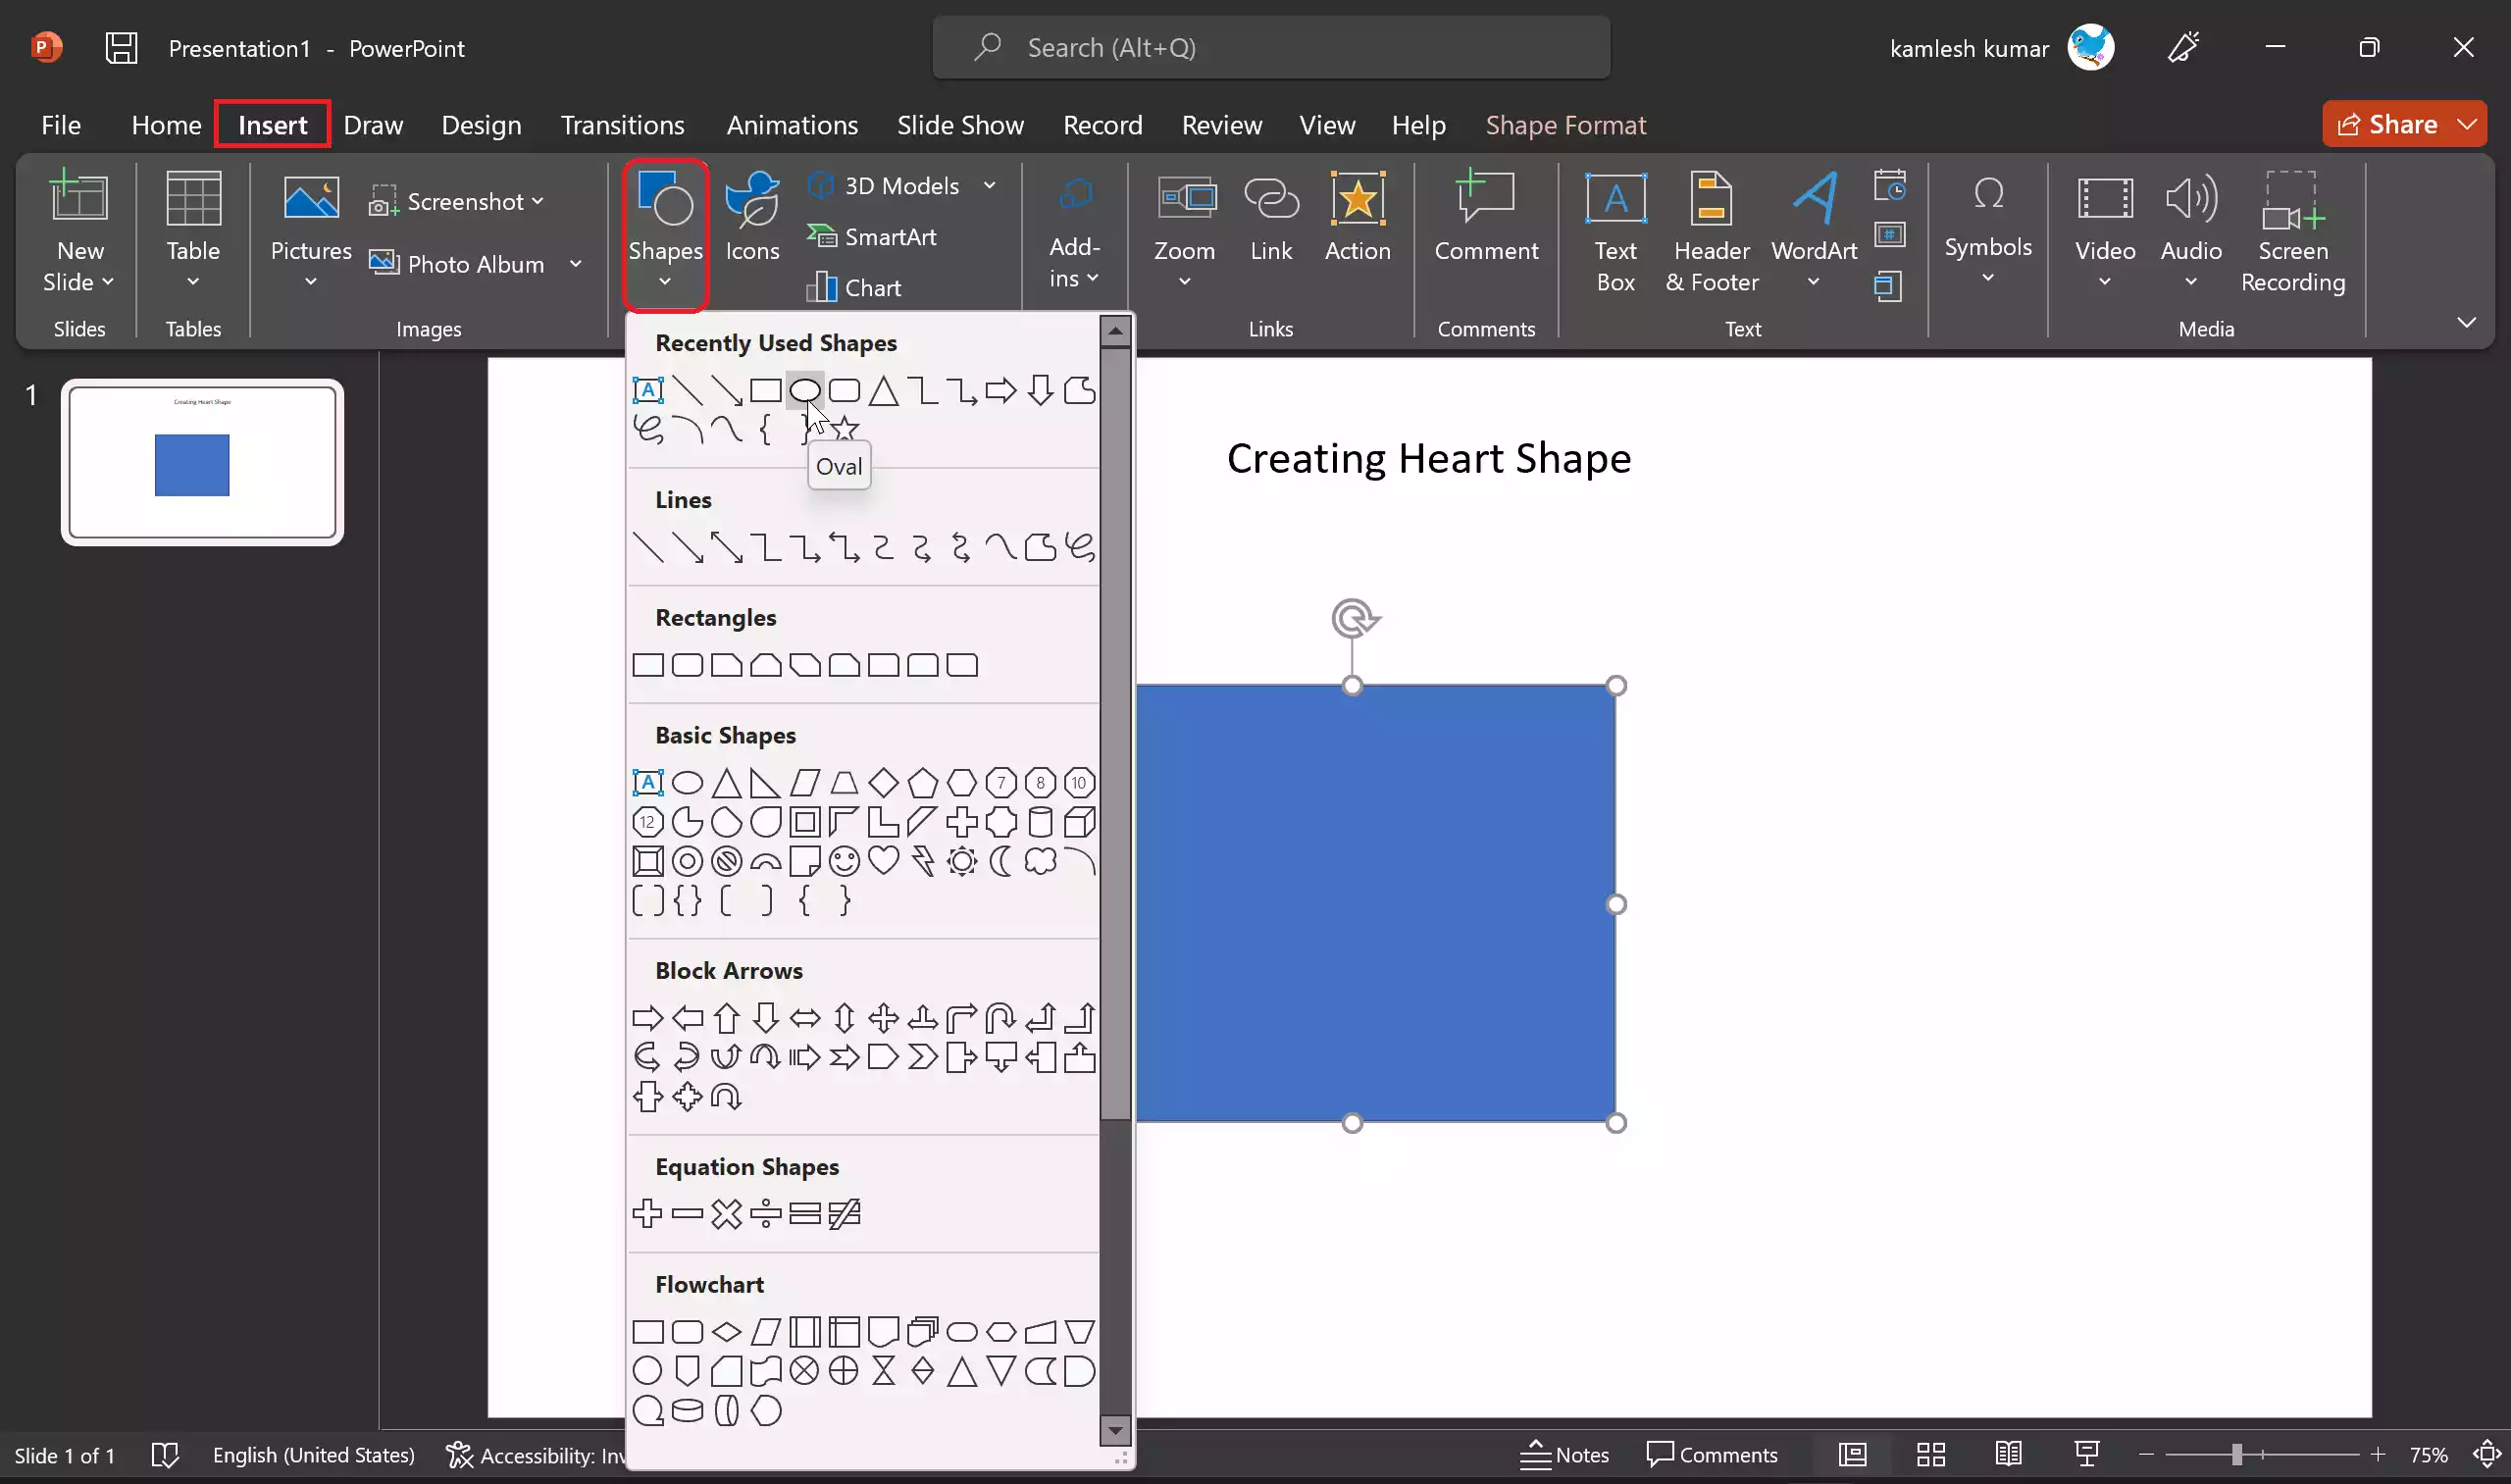
Step 2. Click on the “Insert” tab located in the PowerPoint ribbon at the top of your screen.

Step 3. Navigate to the “Shapes” option under the “Illustrations” group.
Step 4. Select the “Rectangle” shape from the available options.
Step 5. Click and drag your mouse on the slide to draw a rectangle. This will serve as the top half of your heart. Don’t worry about its size just yet; you can adjust it later.
Step 5. Return to the “Insert” tab.
Step 6. Under “Shapes,” choose the “Oval” shape (which is a circle).
Step 7. Draw a circle on the slide, making sure it aligns with the right edge of the rectangle. This circle forms the right side of your heart.
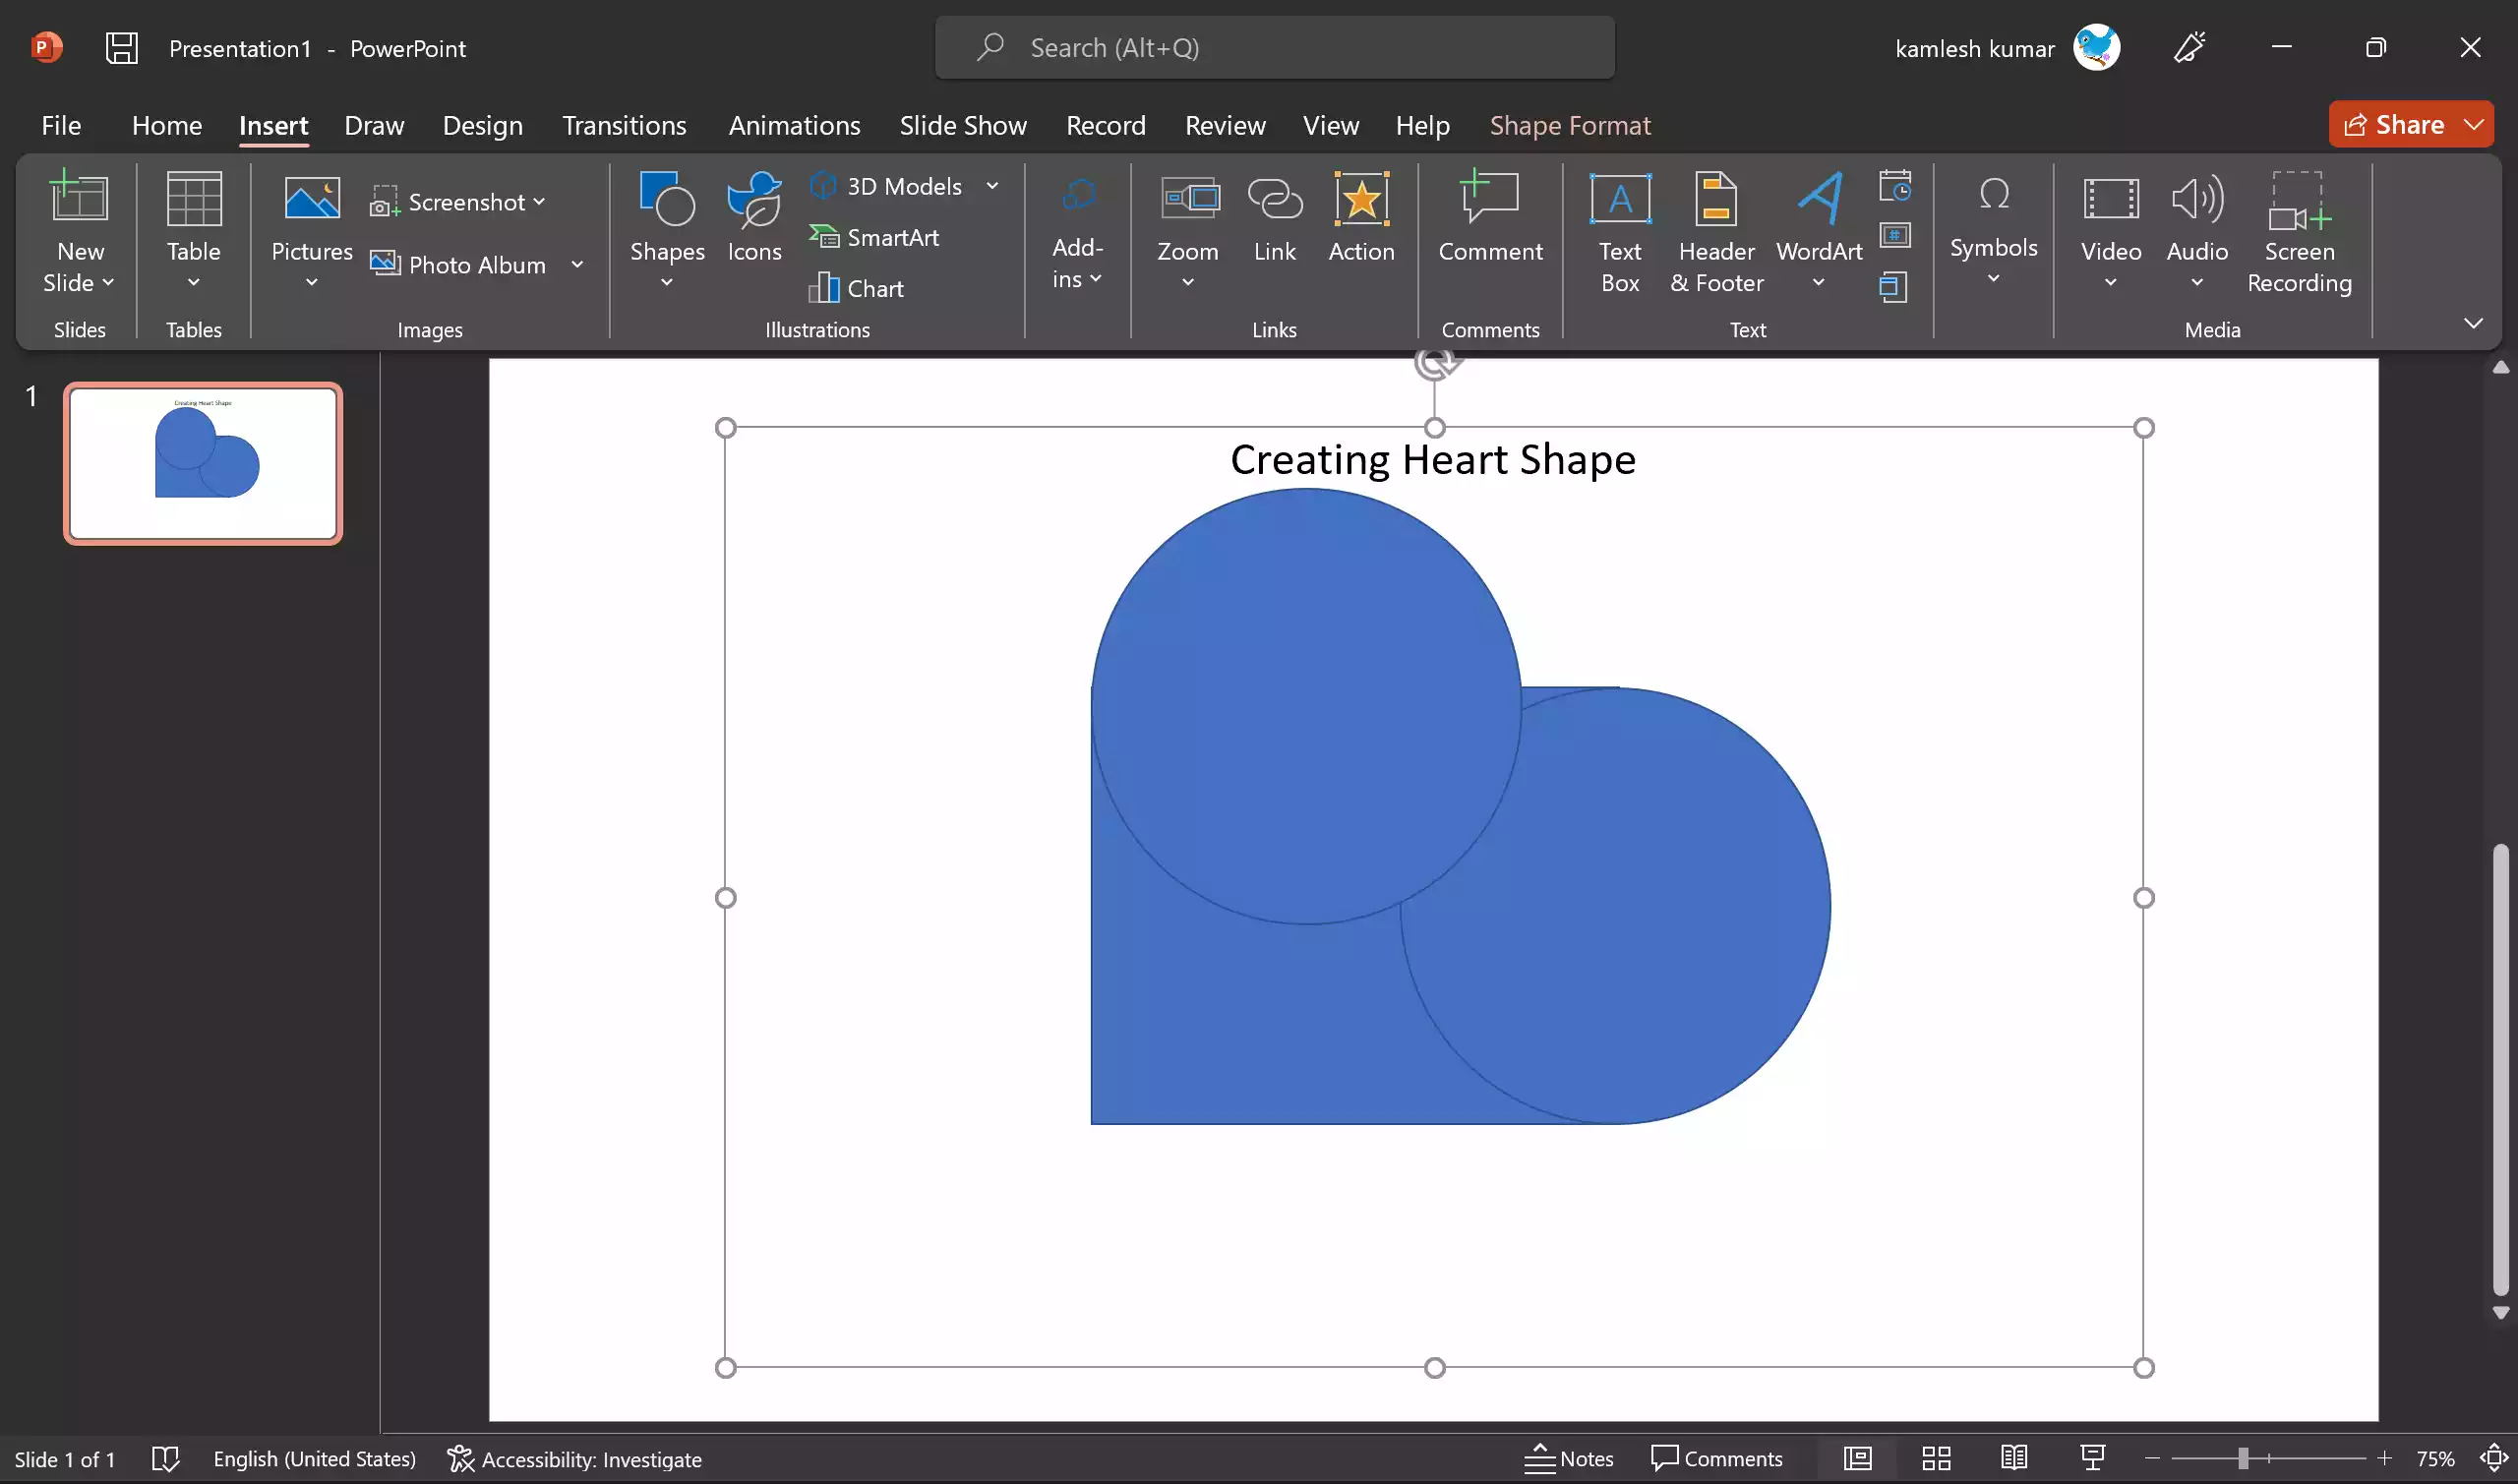
Step 8. To create the left side of the heart, press “Ctrl” + “D” on your keyboard. This duplicates the circle.
Step 9. Drag the copied circle to the opposite side of the rectangle so that the bottom part of the rectangle resembles a triangle. You’re starting to see the heart shape take form!
Step 10. Hold down the “Shift” key on your keyboard.
Step 11. Click on both circles and the rectangle to select all three shapes. They should all be highlighted.
Step 12. Navigate to the “Shape Format” tab, which should appear in the ribbon when the shapes are selected.
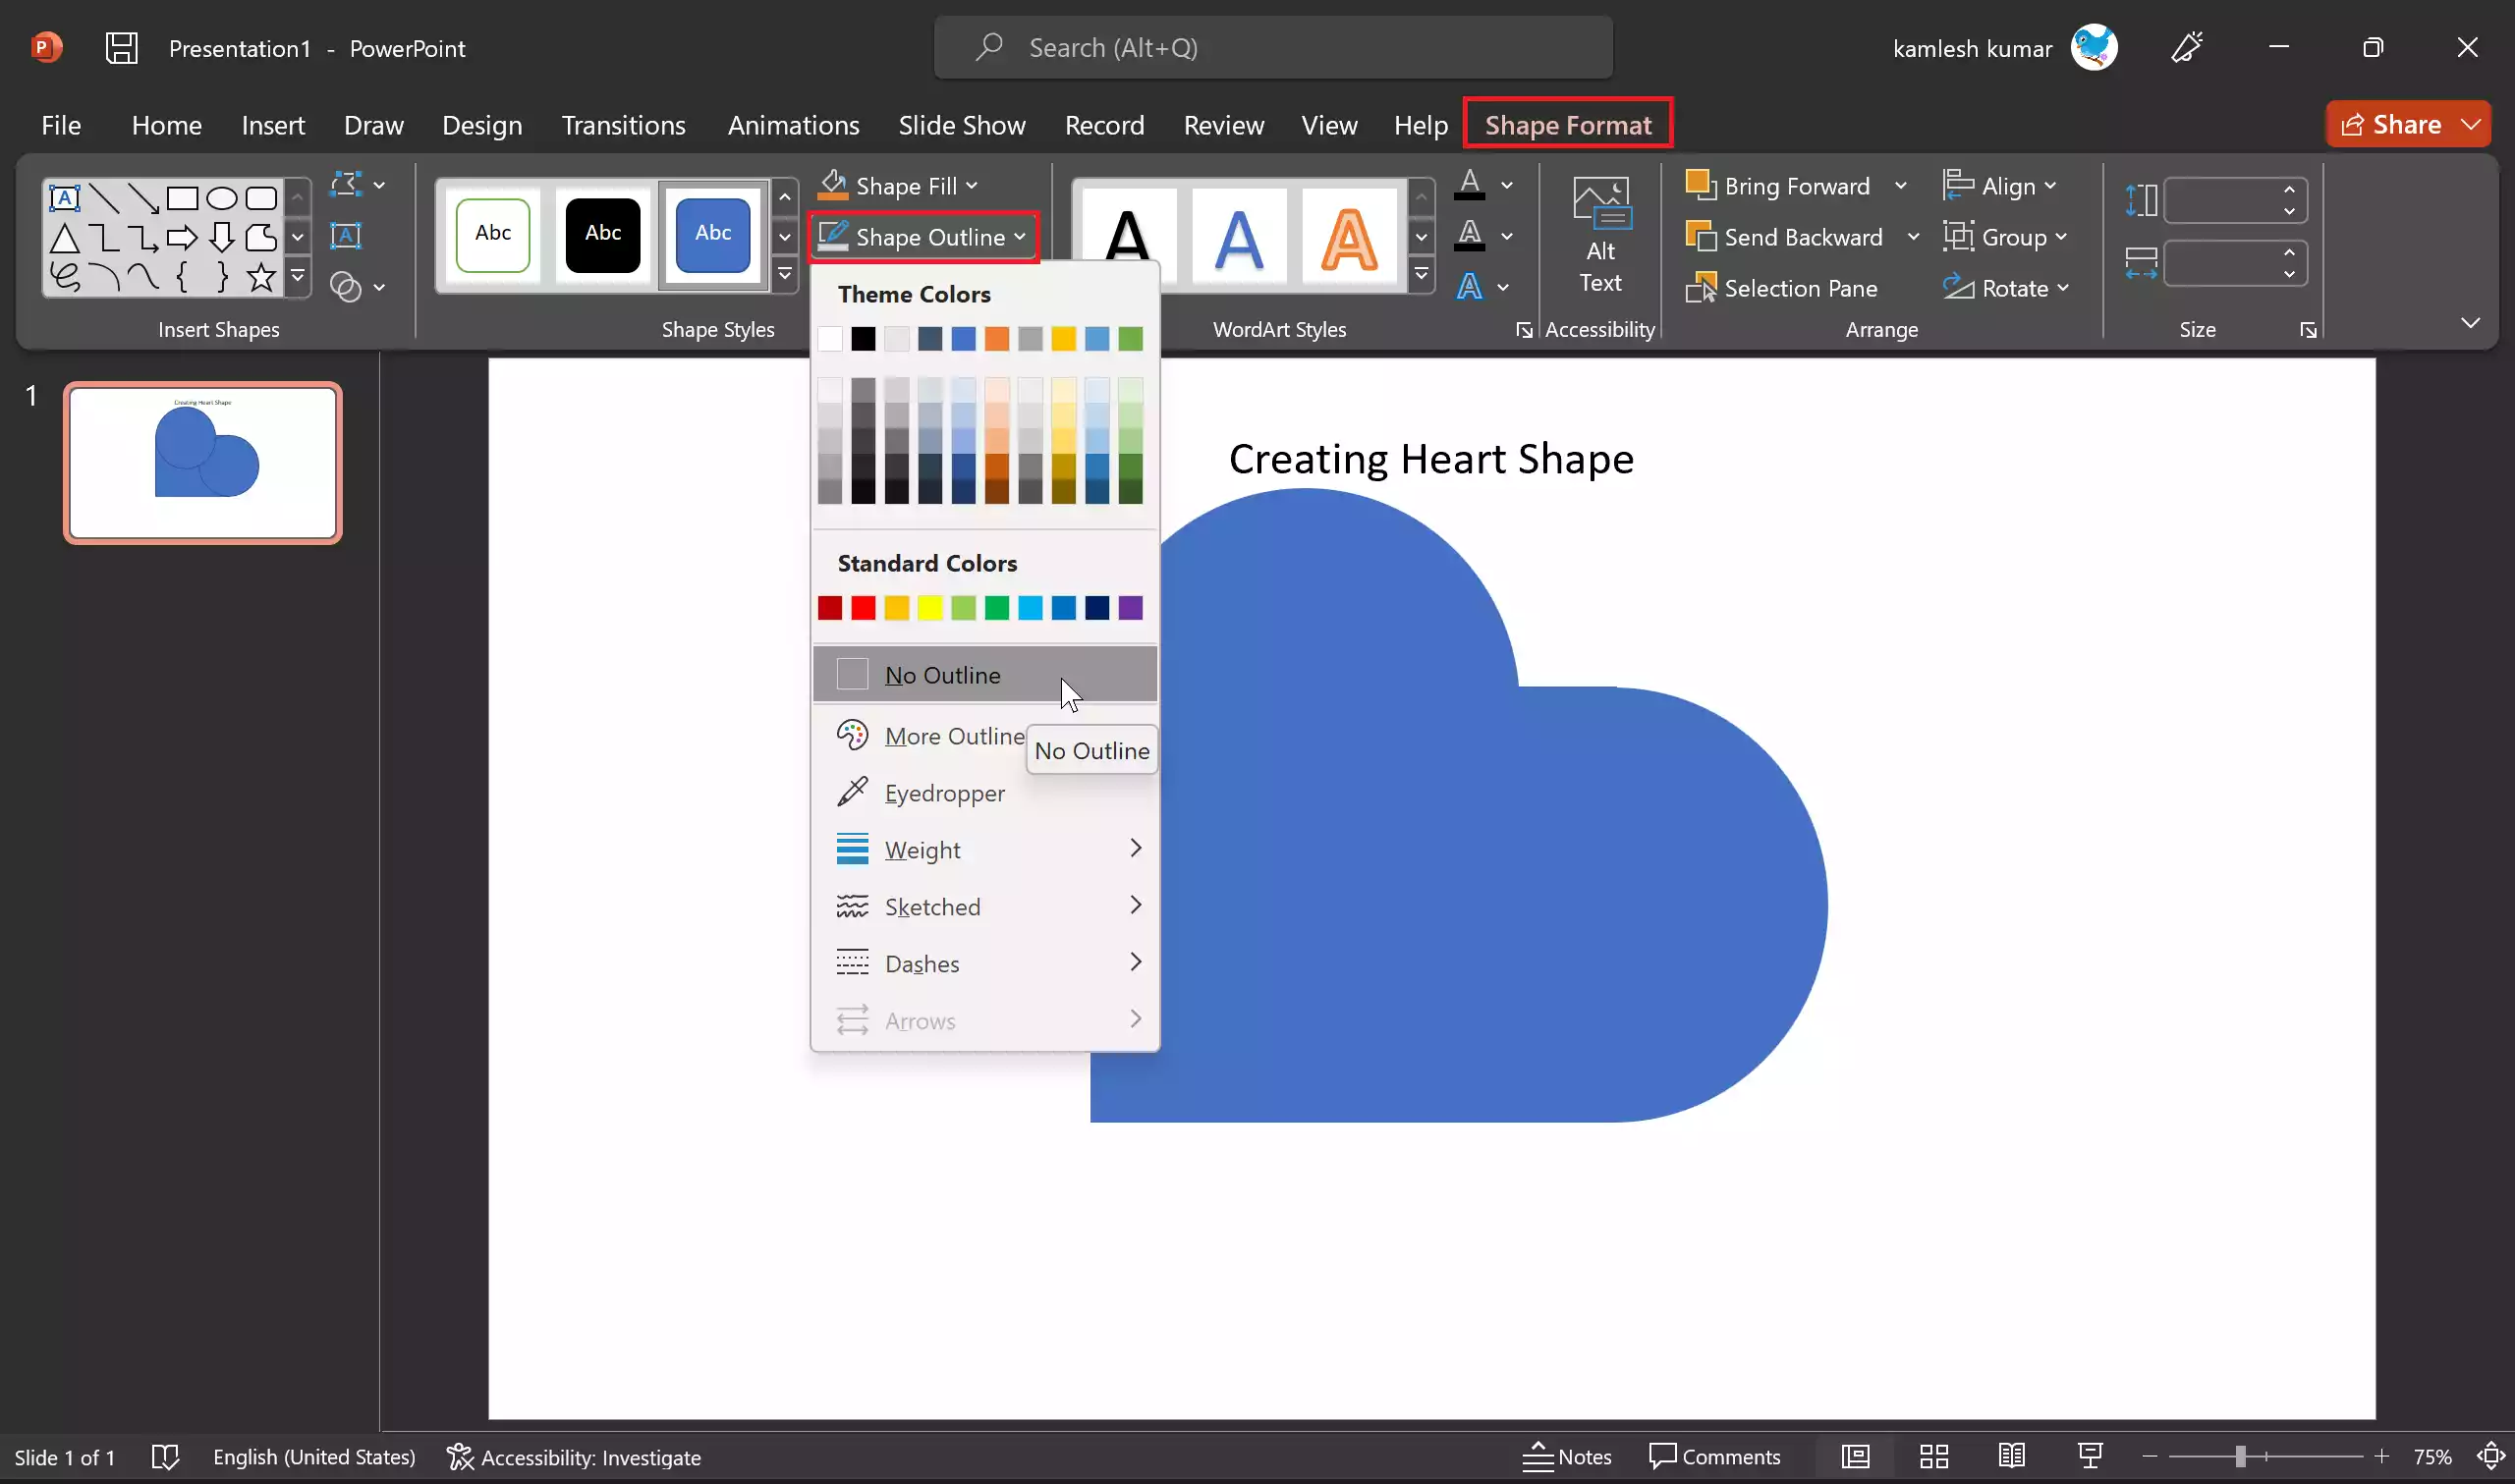
Step 13. Click on the “Shape Outline” button and select “No Outline” from the dropdown menu. This will make the outlines of your shapes disappear, leaving only the filled shapes.
Step 14. In the “Shape Format” tab, locate and click on the “Merge Shapes” button.
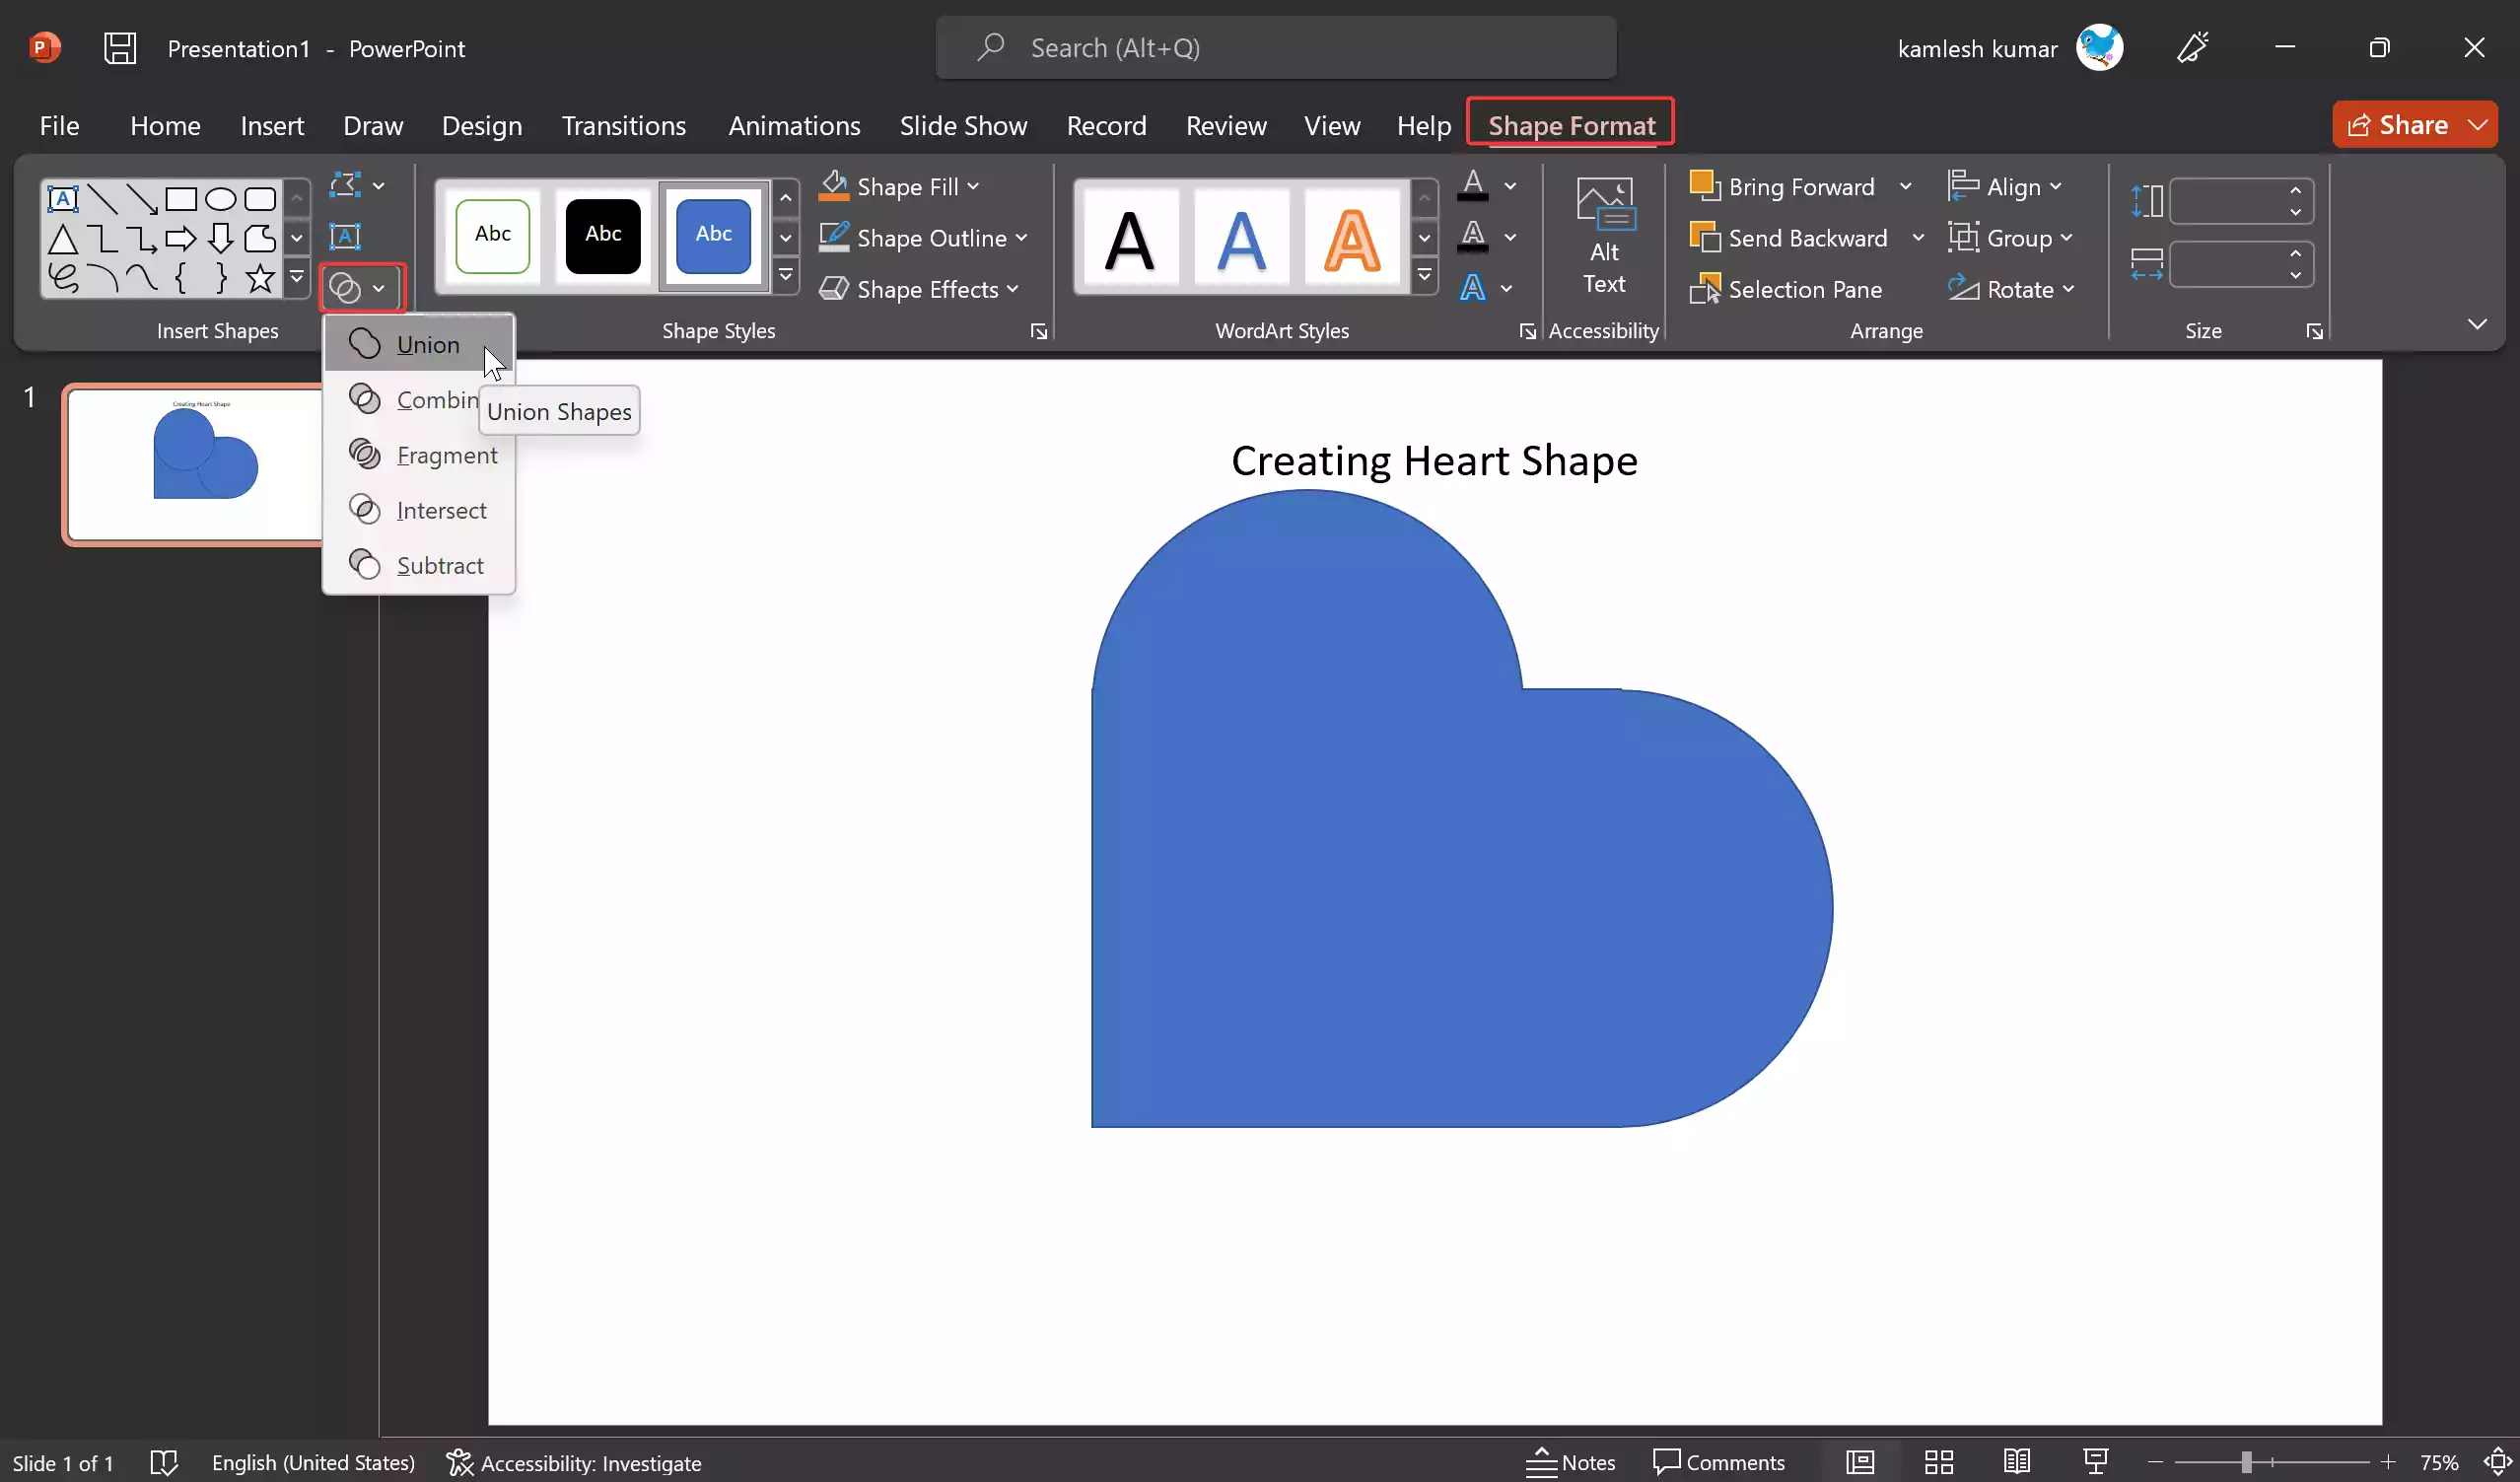
Step 15. From the dropdown menu, select “Union.” This will merge the three shapes into a cohesive heart shape.
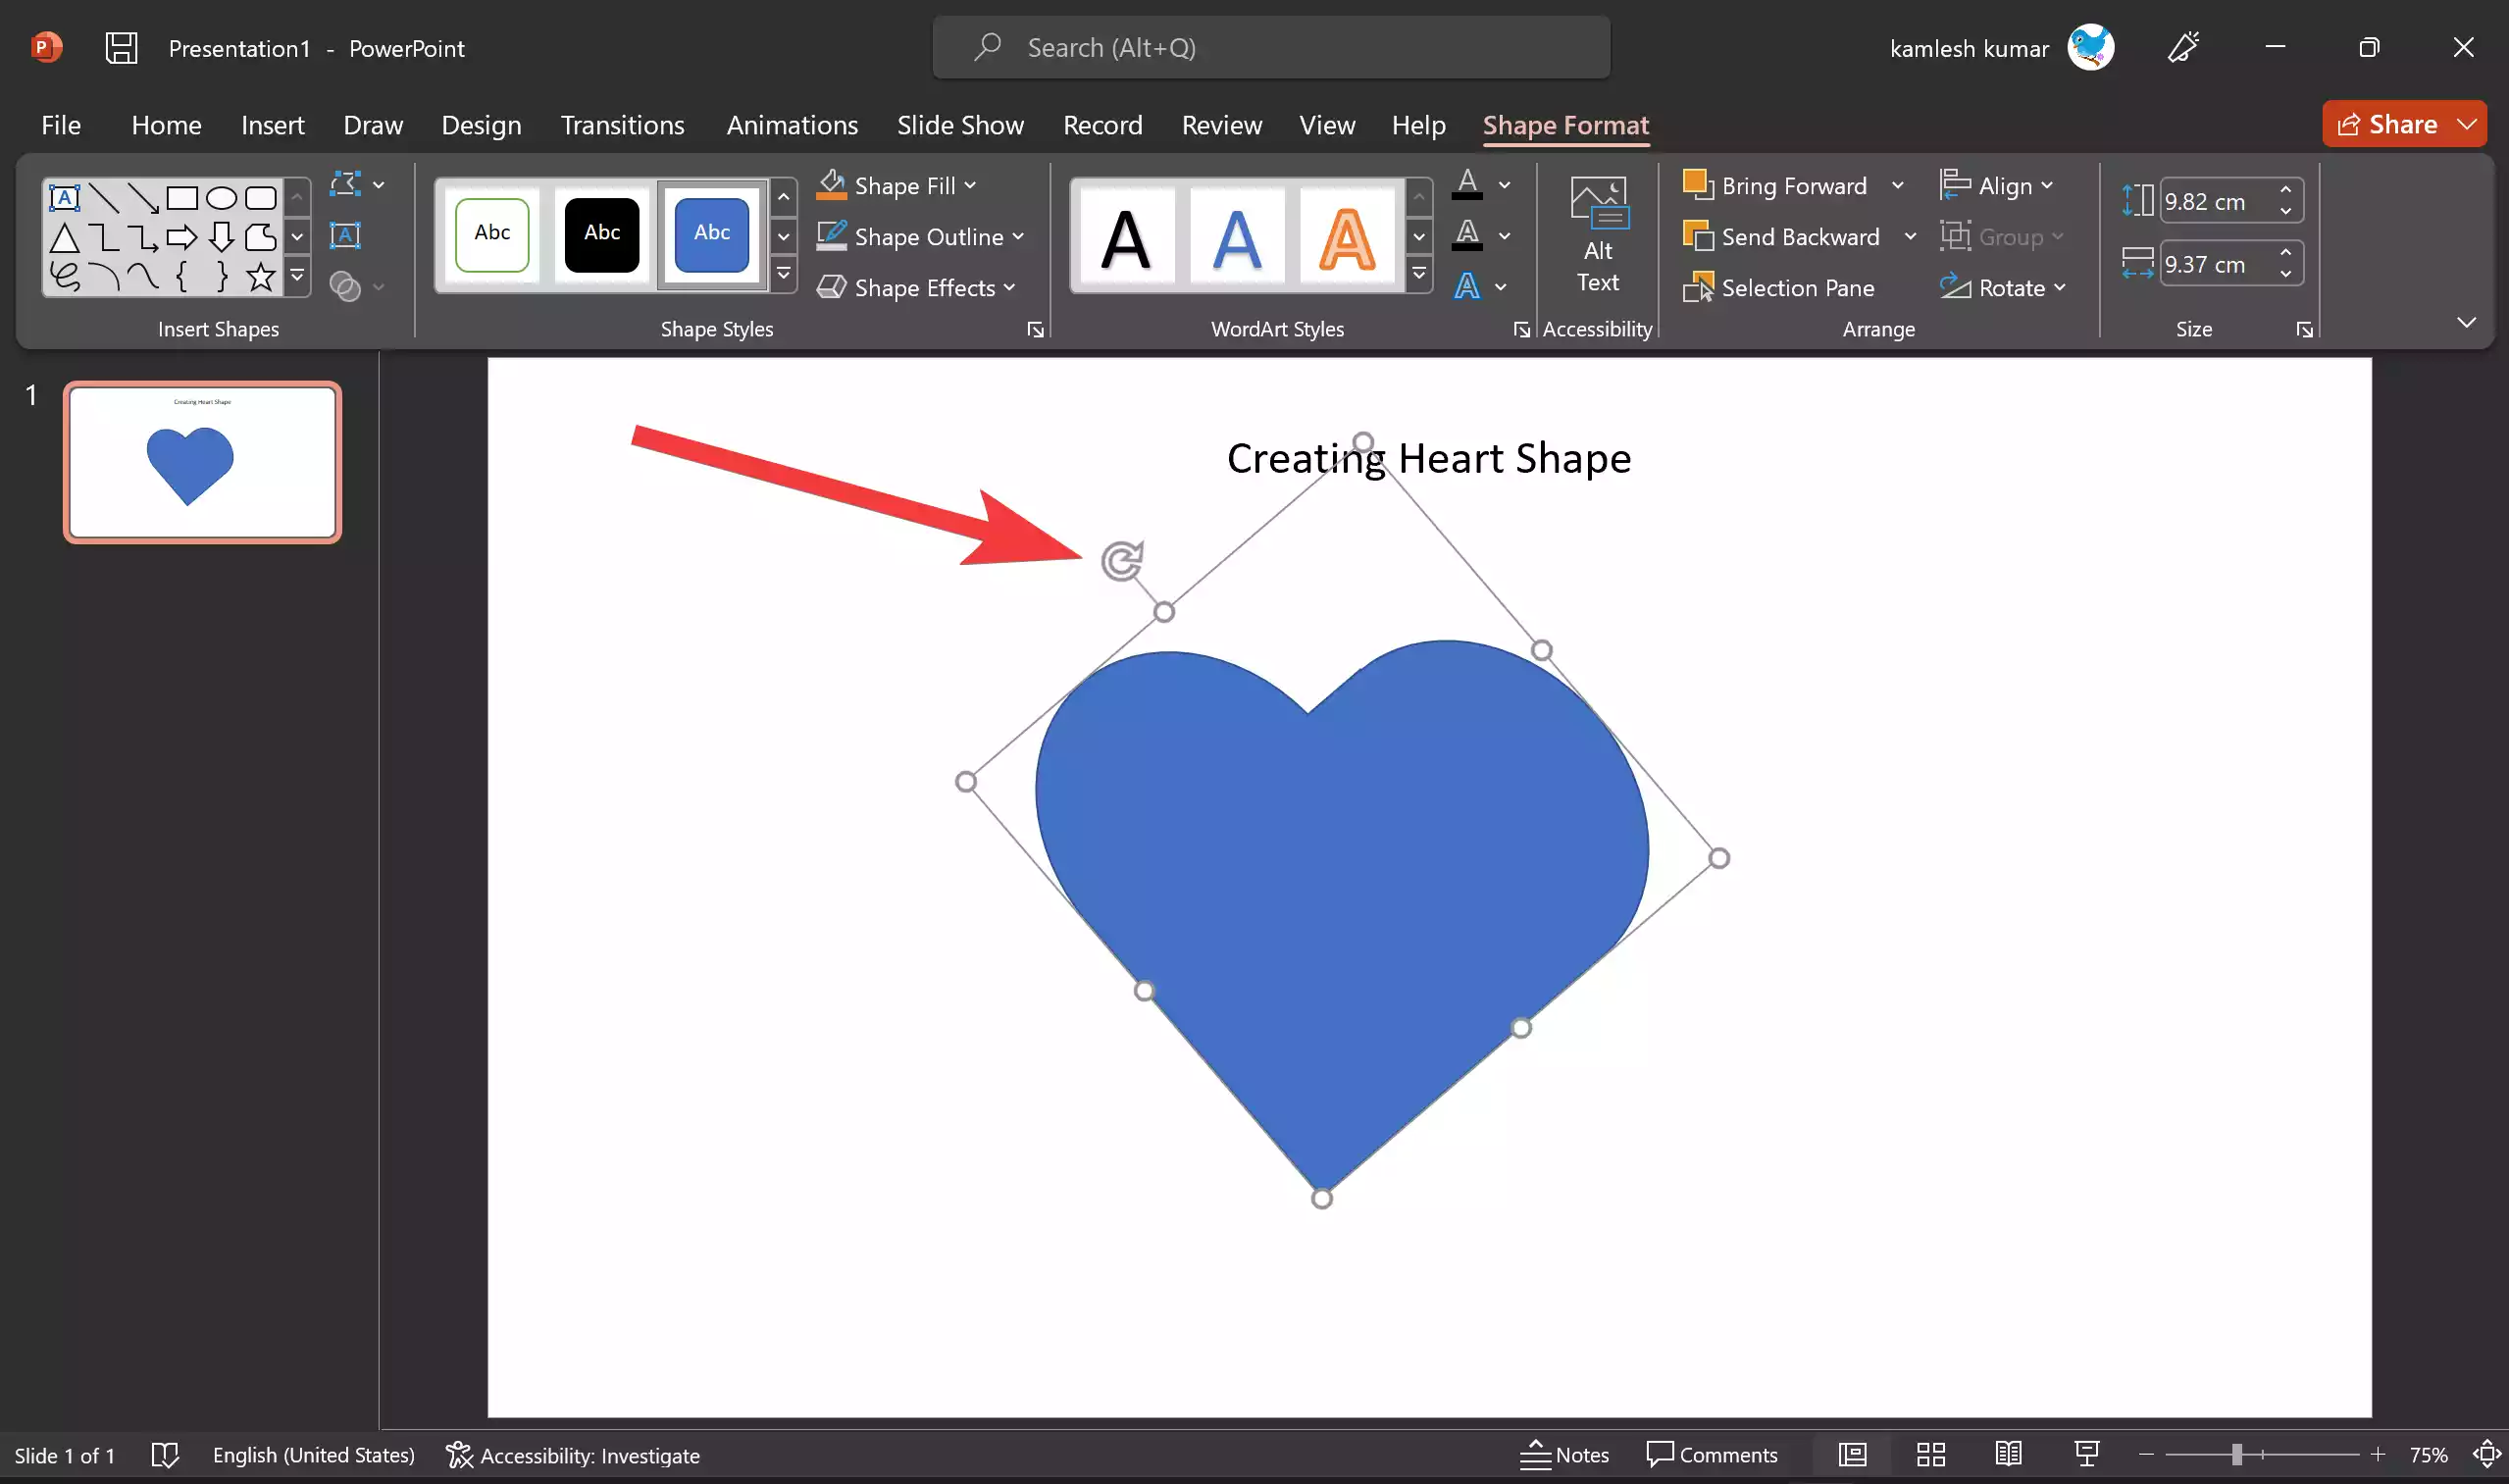
Step 16. To position the heart shape upright, click and drag the rotation handle located at the top of the heart shape. Align it until the heart appears upright and balanced.
Step 17. With your heart shape still selected, go to the “Shape Format” tab.

Step 18. Click on the “Shape Fill” button, and pick your desired color from the palette.
Step 19. You can further customize your heart by resizing it or moving it to the desired location on your slide. Use the resizing handles (small squares at the edges) to adjust its size as needed.
Step 20. Before proceeding, don’t forget to save your PowerPoint presentation to preserve your heart shape and the rest of your work.
The Heart of Your Presentation
You’ve now successfully crafted a heart shape in PowerPoint using basic shapes and simple yet effective steps. This heart can convey emotions, illustrate concepts, or simply add a touch of creativity to your slides. Remember, the flexibility of PowerPoint allows you to experiment with various colors, sizes, and arrangements, so don’t hesitate to get creative and make your heart shape uniquely yours. In your journey through PowerPoint, you’ve learned how to create a heart, a symbol of love and passion, and you’re ready to add a dash of sentiment to your next presentation.