Microsoft Store apps on Windows 11 offer a plethora of functionalities, but sometimes finding and launching them quickly can be a hassle. In this gearupwindows guide, we will explore simple yet effective methods to create desktop shortcuts for Microsoft Store apps, providing you with convenient access to your favorite applications right from your Desktop.
How to Create Desktop Shortcuts for Microsoft Store Apps on Windows 11?
There are at least two known methods using which you can create desktop shortcuts for Microsoft Store apps on Windows 11. Both are easy to use and you can follow either procedure according to your convenience.
Method 1: Create desktop shortcuts from the Start menu
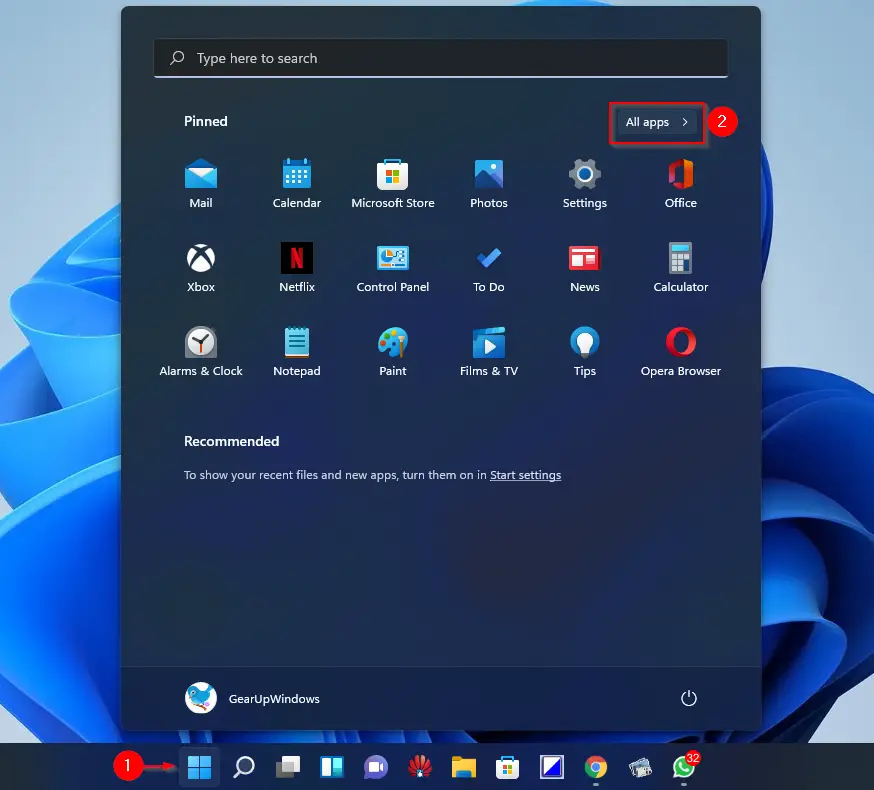
Step 1. First, click on the Windows icon in the taskbar to open the Start menu.
Step 2. Then, click on “All apps” to view a comprehensive list of installed applications.
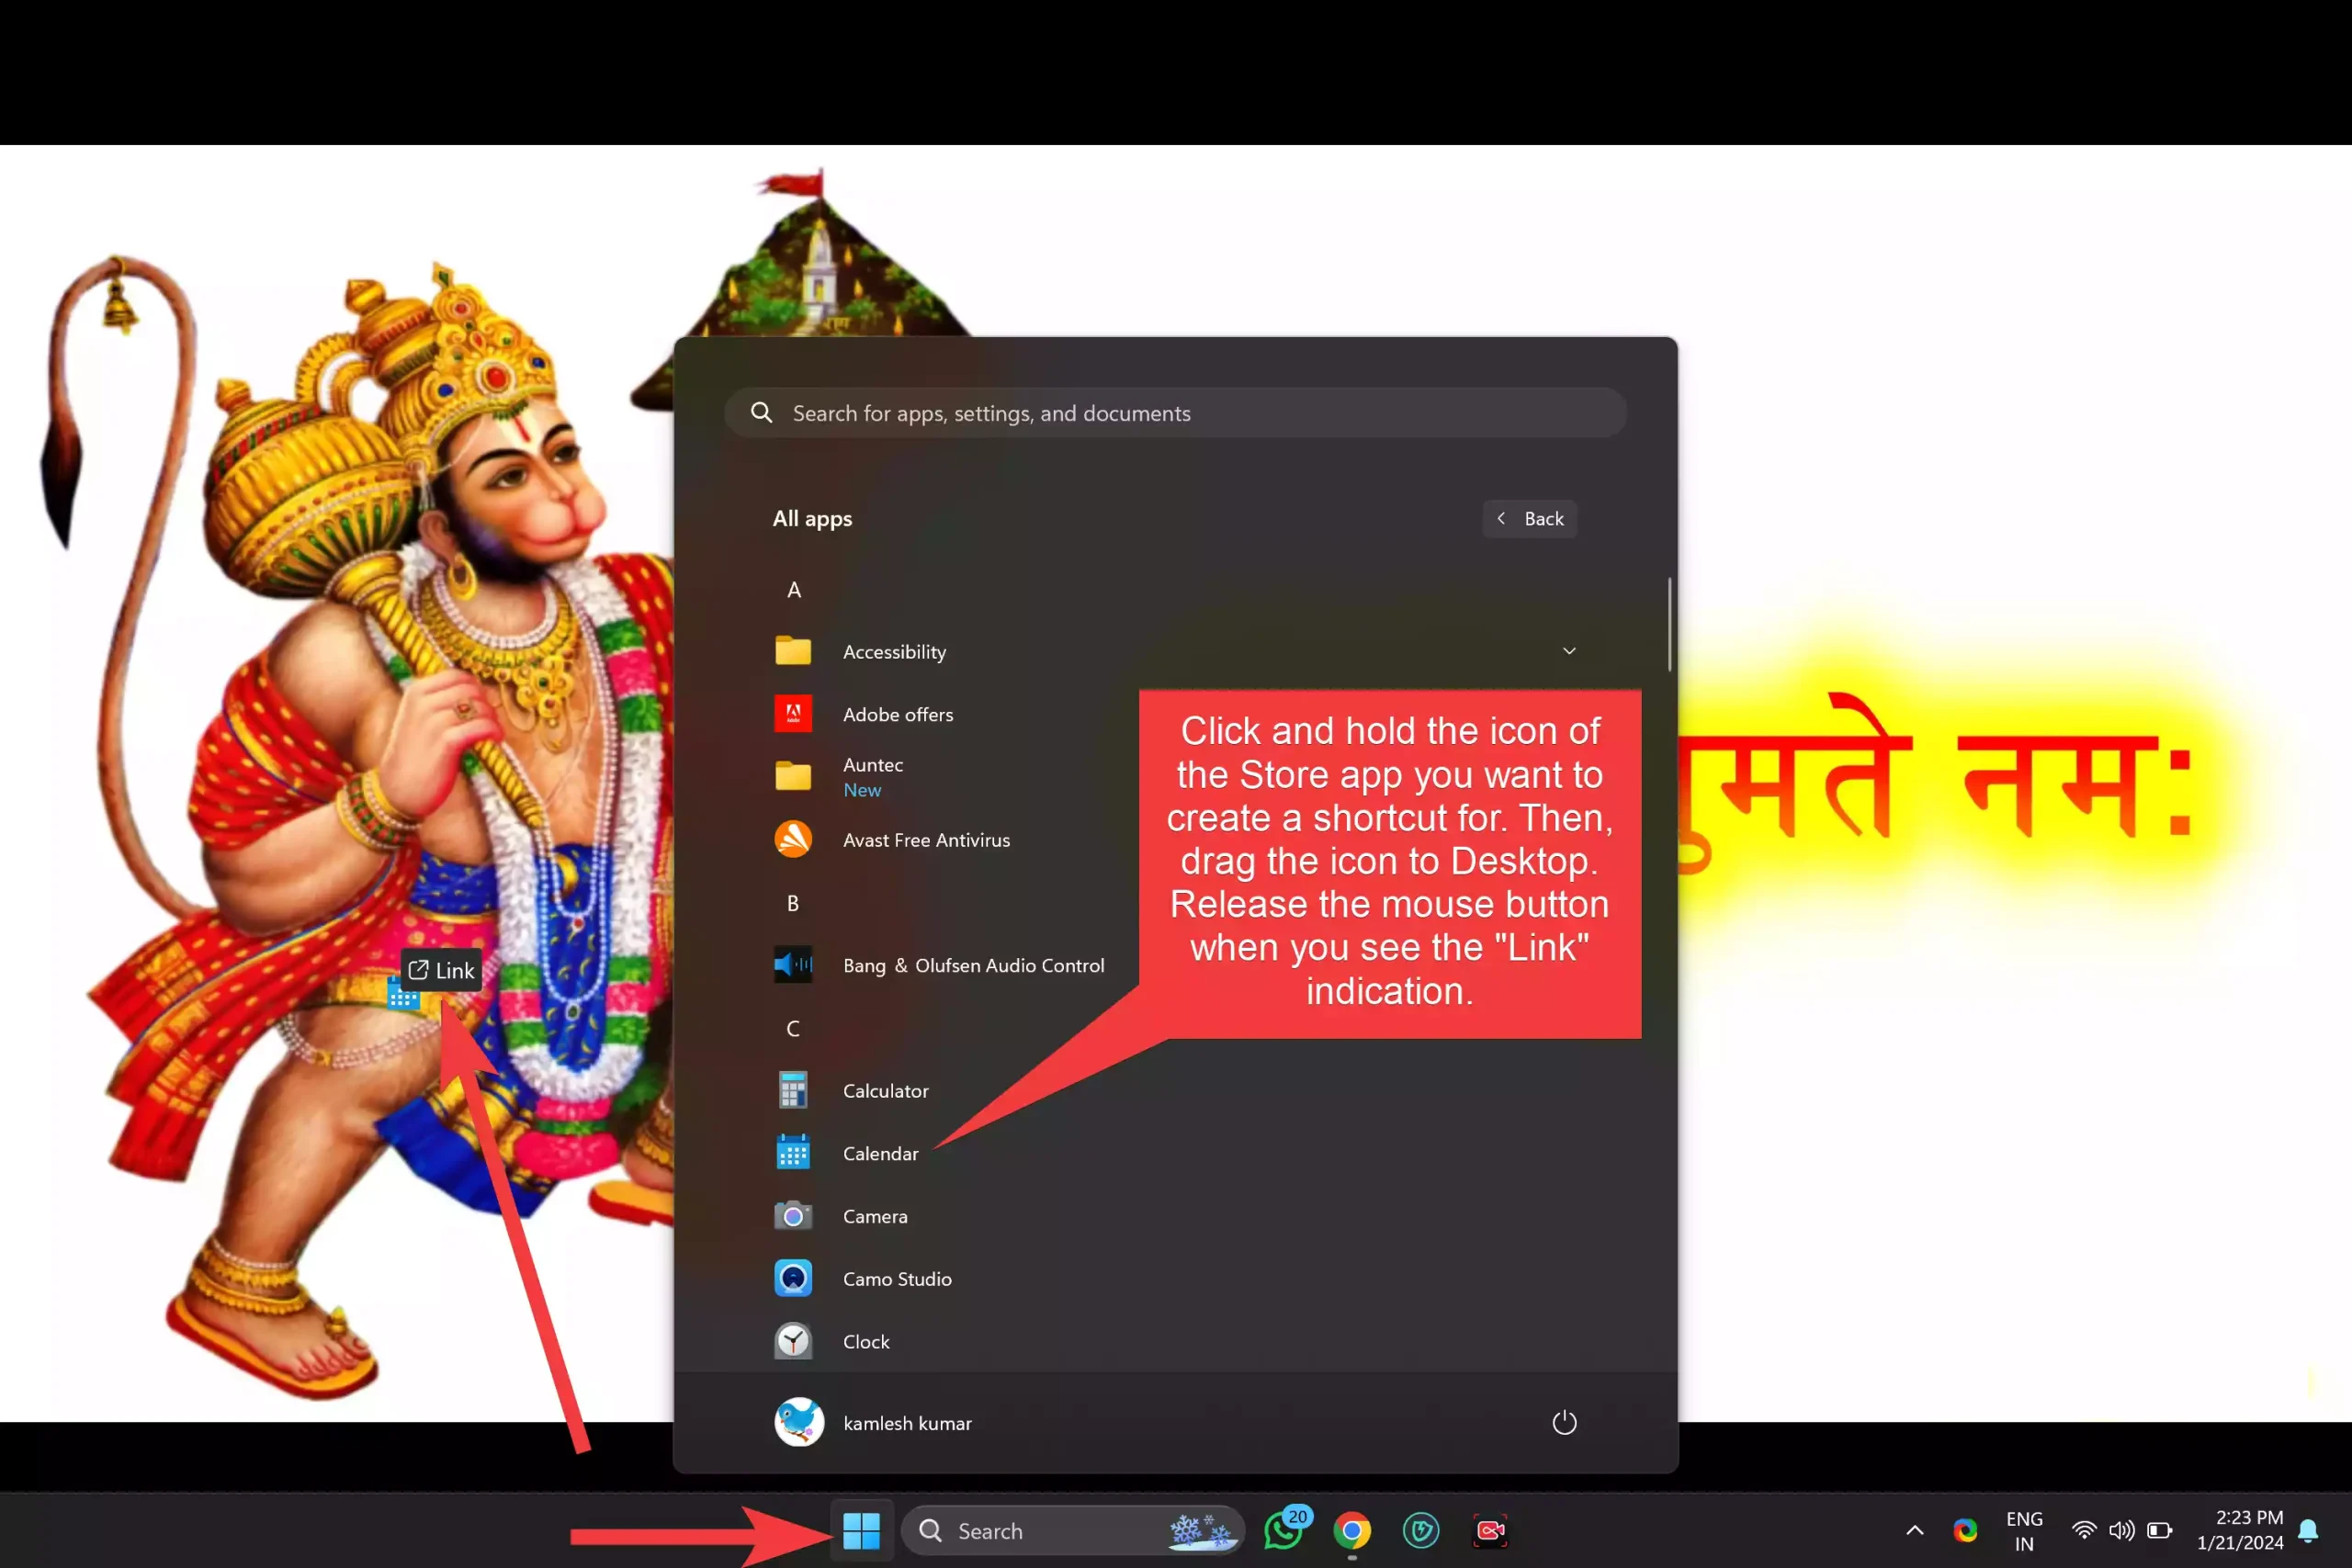
Step 3. Scroll through the list and find the Microsoft Store app.
Step 4. Click and hold the icon of the app you want to create a shortcut for. Then, drag the icon to your Desktop. Release the mouse button when you see the “Link” indication.
Once you complete the steps mentioned above, a shortcut to your specific Microsoft Store app is created on the desktop. You need to repeat the above-mentioned steps for more apps.
Method 2: Create desktop shortcuts from the Apps folder
Step 1. First, press Windows + E on your keyboard to open File Explorer. Alternatively, open the Run dialog box using the Windows + R keys on the keyboard.
Step 2. In the File Explorer address bar, type `shell:appsfolder` and press Enter to open the Applications folder. Or, in the Run box, type `shell:appsfolder` and press Enter to open the Applications folder.
Step 3. Now, locate the Microsoft Store app in the Applications folder.
Step 4. Click and hold the icon of the app you want to create a shortcut for and then drag the icon to your Desktop.
Step 5. Release the mouse button when you see the “Create link in Desktop” indication.
Alternative Method: Right-click and ‘Create shortcut’
Step 1. Open the Start menu or File Explorer and navigate to the Microsoft Store app.
Step 2. Right-click on the icon of the app you want to create a shortcut for.
Step 3. From the context menu, choose “Create shortcut.”
Conclusion
Creating desktop shortcuts for Microsoft Store apps on Windows 11 is a simple yet effective way to optimize your workflow. By following these user-friendly methods, you can save time and access your frequently used applications with just a click from your Desktop. Whether you prefer the drag-and-drop method from the Start menu or the Apps folder, or the right-click option, these techniques provide you with the flexibility to tailor your desktop for enhanced efficiency in accessing your favorite Microsoft Store apps.
