In a world where internet connectivity is essential for various applications and services, managing the priority of internet connections becomes crucial. Windows 11 offers users the flexibility to manually set internet priorities for programs, ensuring a seamless and optimized online experience. In this gearupwindows guide, we will explore two methods to achieve this: using Windows PowerShell and leveraging the Network Connections interface.
How to Set Internet Priority for Programs on Windows 11 using Windows PowerShell?
To set internet priority for programs on Windows 11 through Windows PowerShell, follow these steps:-
Step 1. Begin by opening Terminal or Windows PowerShell with administrative privileges. This ensures that you have the necessary permissions to make changes to network settings.
Step 2. Execute the command `Get-NetIPinterface` to display a list of all network adapters along with their respective information. Identify the connection name that you want to prioritize and note down the corresponding `ifIndex` and `InterfaceMetric`.
Step 3. Now, use the command `Set-NetIPInterface -interfaceIndex “current-ifIndex” -InterfaceMetric “current-InterfaceMetric”` to set the desired priority. Replace “current-ifIndex” and “current-InterfaceMetric” with the values obtained in the previous step. You should receive a success message confirming that the change has been made.
How to Set Internet Priority for Programs on Windows 11 using Network Connections?
To set internet priority for programs on Windows 11 using Network Connections, follow these steps:-
Step 1. Press Windows+R to open the Run prompt, type `ncpa.cpl`, and click OK to access the Network Connections interface.
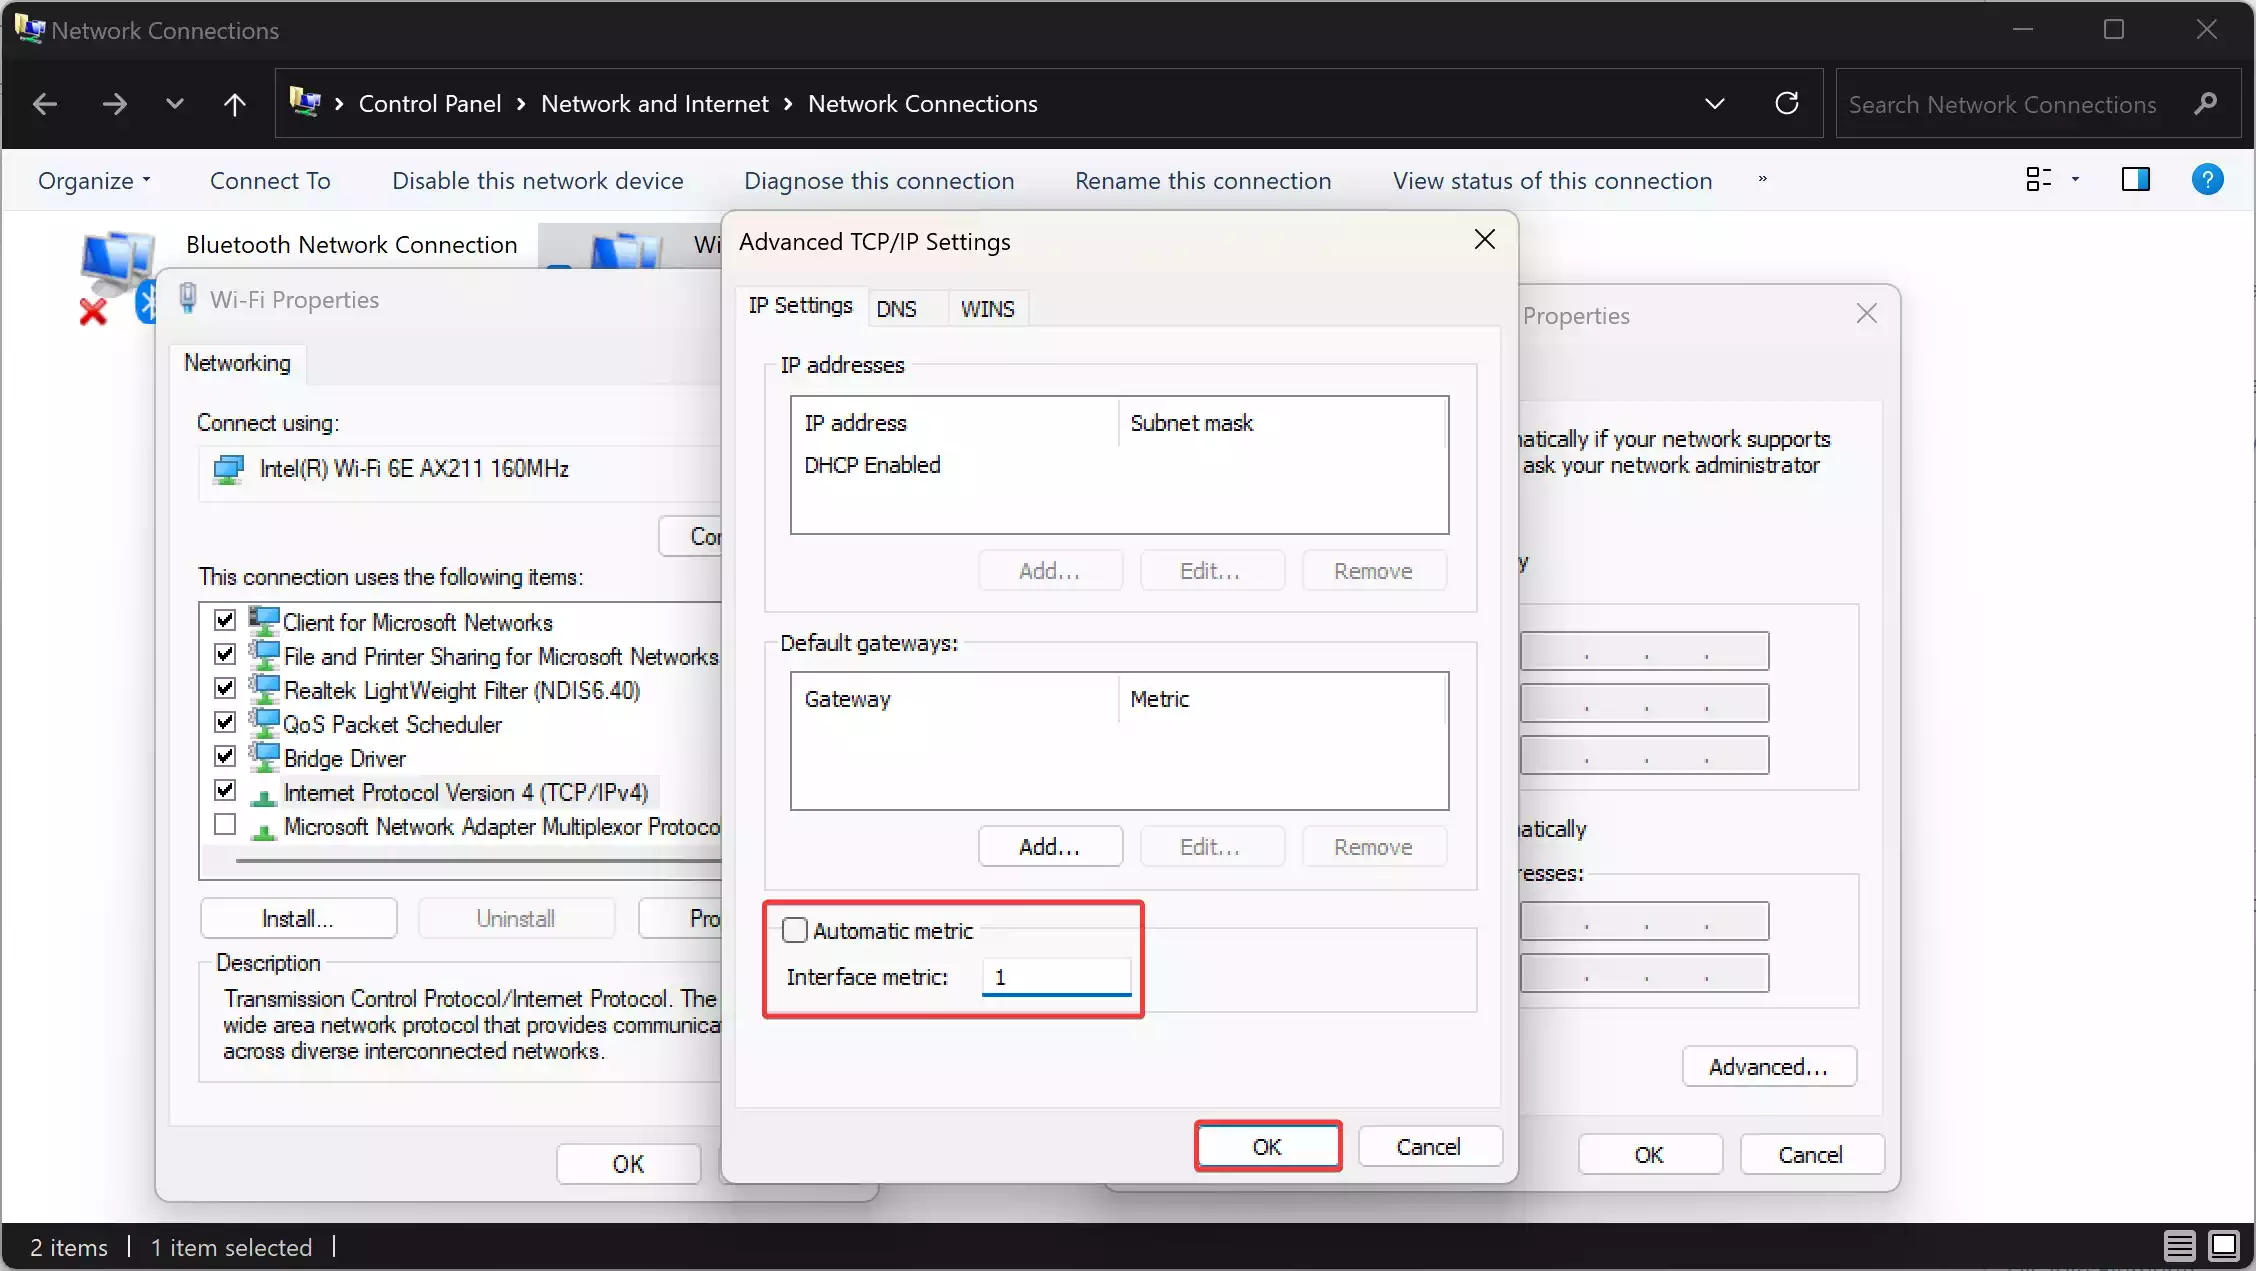
Step 2. Locate the network adapter you want to prioritize, right-click on it, and choose Properties from the context menu. Within the adapter properties, double-click on Internet Protocol Version 4 (TCP/IPv4).

Step 3. Click on the Advanced button and uncheck the Automatic metric checkbox. Enter a priority number in the Interface metric field. This value will determine the priority of the selected network adapter. Click OK to save the changes.
Step 4. Revert Changes (Optional): If necessary, you can revert the changes by checking the Automatic metric checkbox again.
Conclusion
By following either of these methods, users can customize internet priorities for programs on Windows 11. This level of control ensures that specific applications or services use preferred network connections over others. Whether prioritizing Ethernet over Wi-Fi or vice versa, these steps empower users to tailor their network configurations according to their preferences and requirements. Ultimately, setting internet priorities enhances the overall efficiency and reliability of internet connectivity on Windows 11.
You might also be interested in a free giveaway of Ashampoo WinOptimizer 2024 for a cleaner and faster PC.
