Have you recently upgraded from Windows 10 to Windows 11 and are missing titles? On Windows 11, Microsoft has removed the tiles concept. But what if you want to see standard tiles and live tiles on Windows 11 Start menu? Is any way to get it back? Yes, it is possible to get back tiles (not live tiles) on a Windows 11 computer, but you have to go through many steps. Don’t worry. I will try to make the steps easy to follow.
“Live Tiles Anywhere” for Windows 11
Most of us were happy with the “Live Tiles” of the Windows 10 Start Menu, but on Windows 11, Microsoft didn’t implement it. But the idea behind the “Live Tiles” is still alive, and the “Live Tiles Anywhere” app is a live example. If you have used Windows 10, you remember “Tiles” were square-shaped, contained a picture or a number, and showed notifications previews from apps. It looked gorgeous, and all Windows users were happy with the changes.
Unluckily, these “Tiles” are no more in Windows 11, but one developer has created a modified version of it that is called “Live Tiles Anywhere.” As the name suggests, you can use it anywhere you like. You can use it on the Start Menu as well as Desktop Widgets.
How to Install ‘Live Tiles Anywhere’ on Windows 11?
Step 1. First, navigate the Microsoft store to download Live Tiles Anywhere.
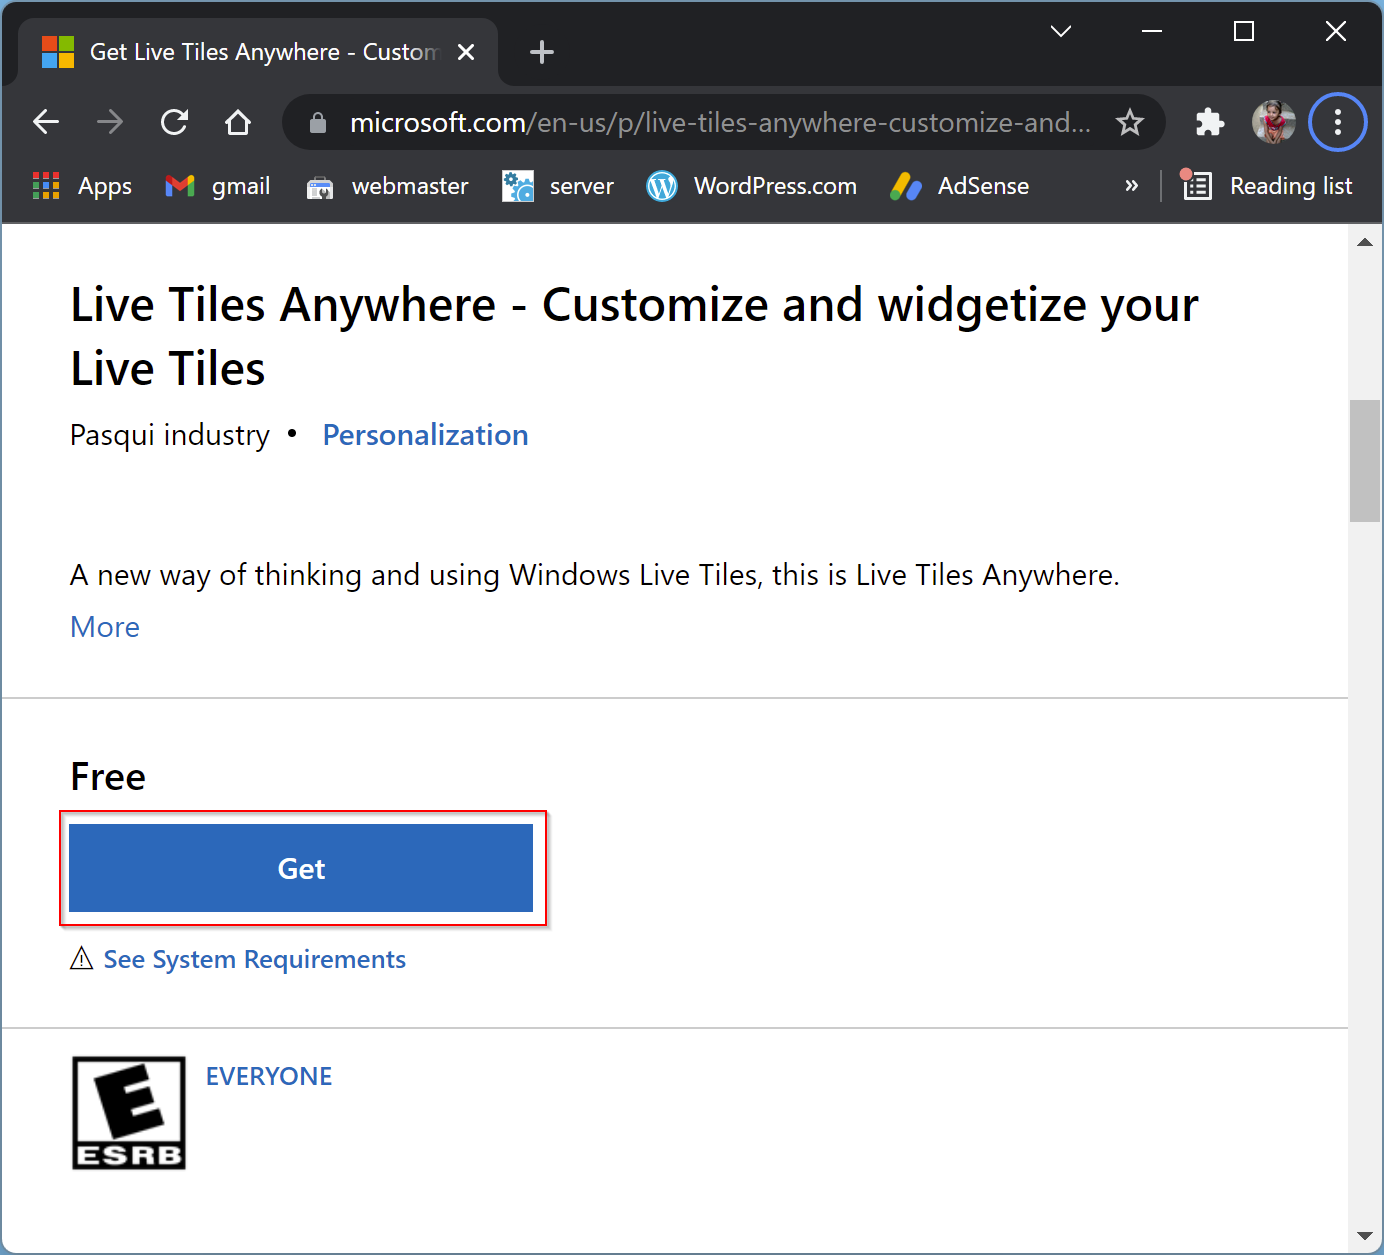
Step 2. Click the Get button.
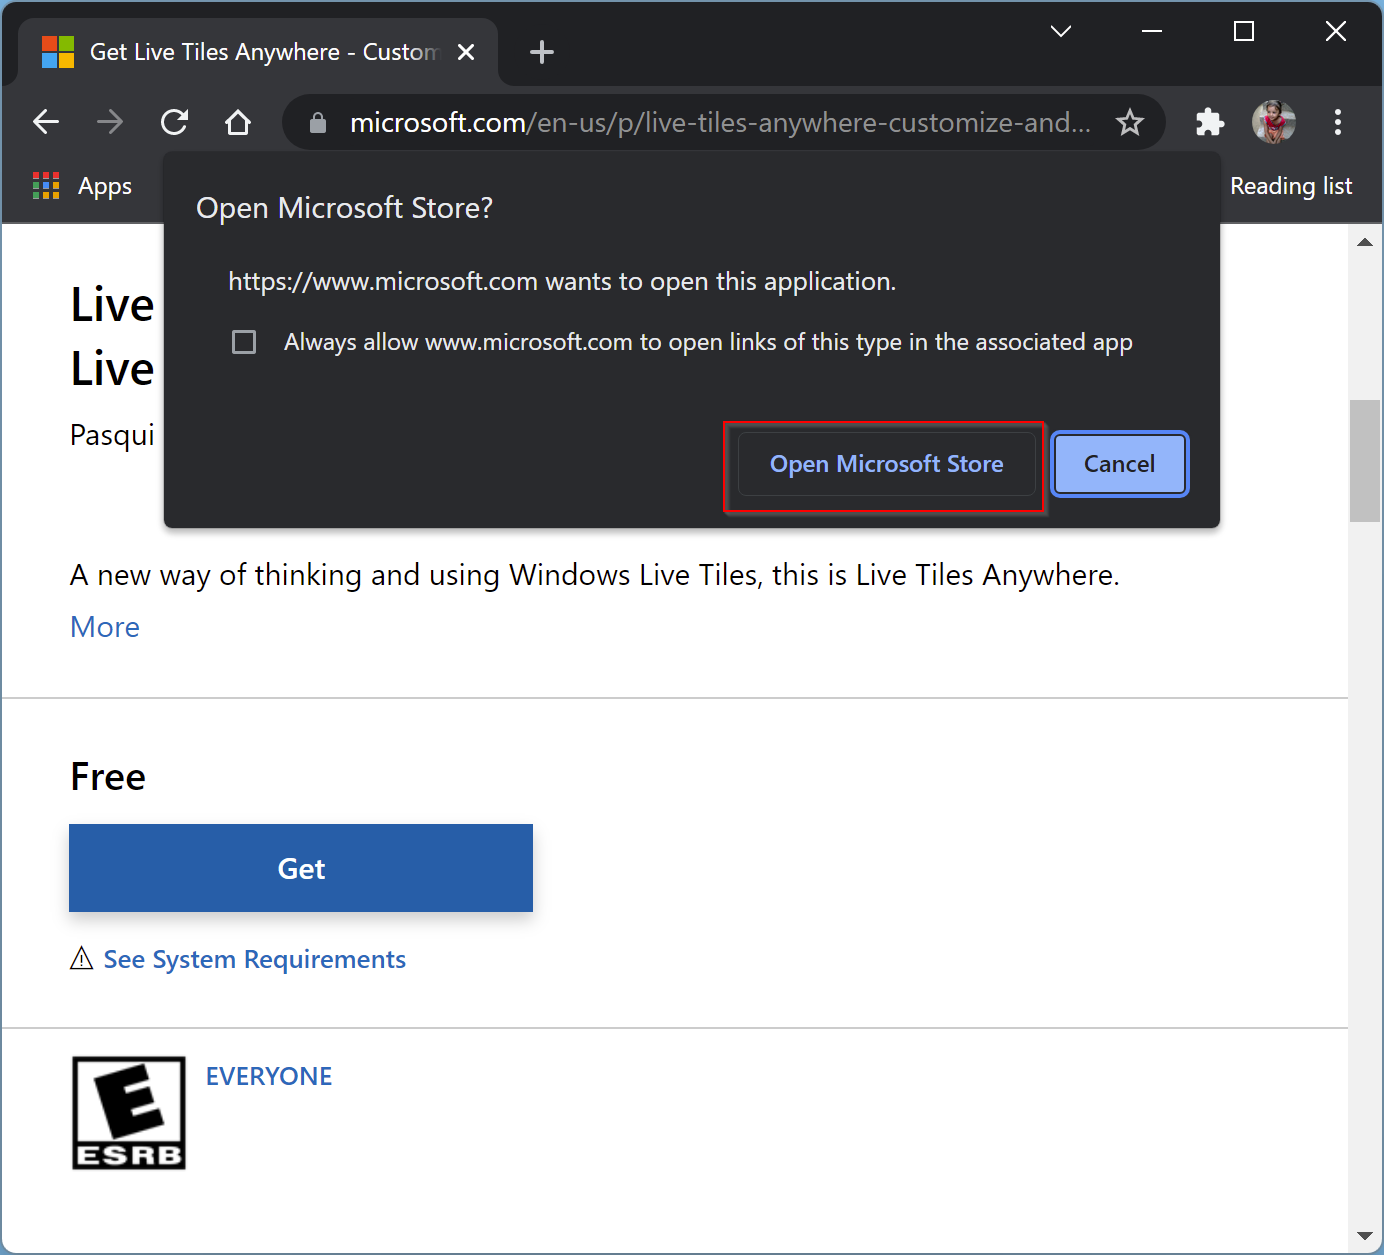
Step 3. When the browser prompts, click the button Open Microsoft Store.
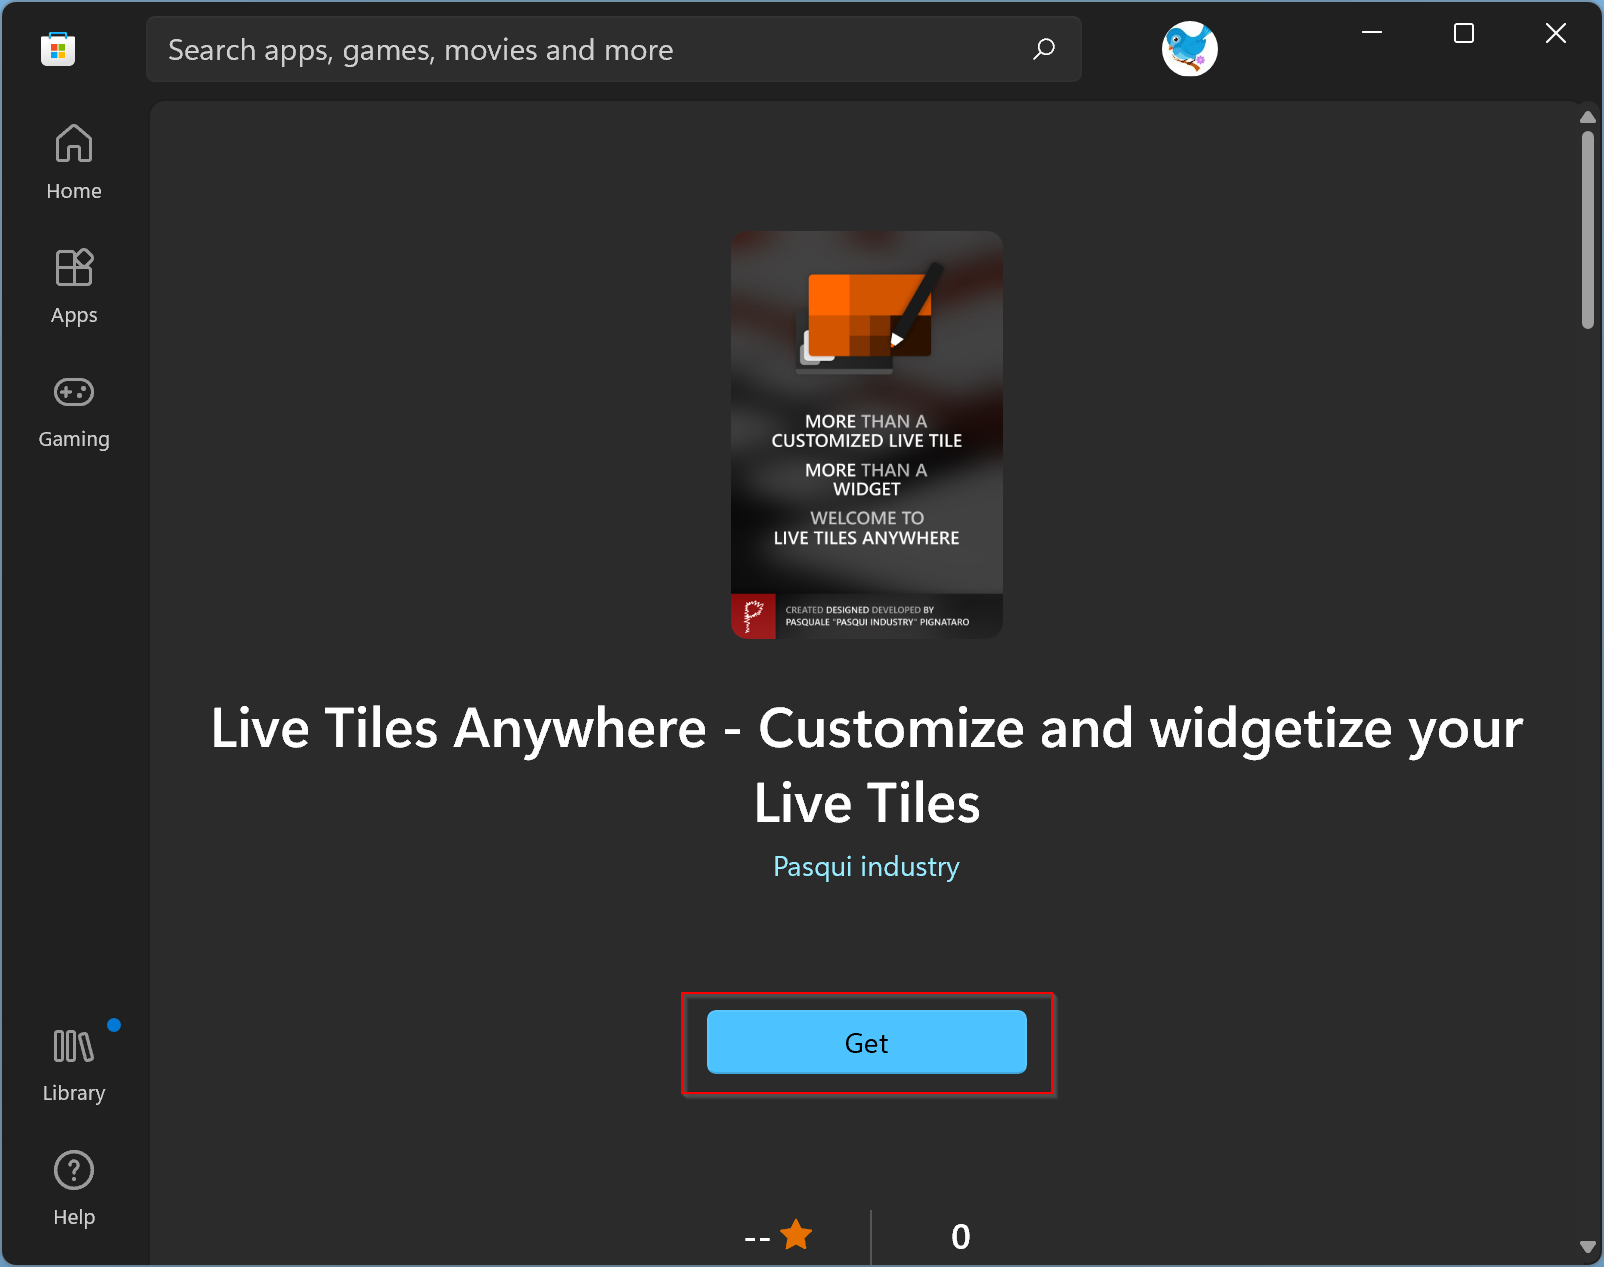
Step 4. After that “Microsoft Store” app will open and search “Live Tiles Anywhere” for you. Click the Get button.
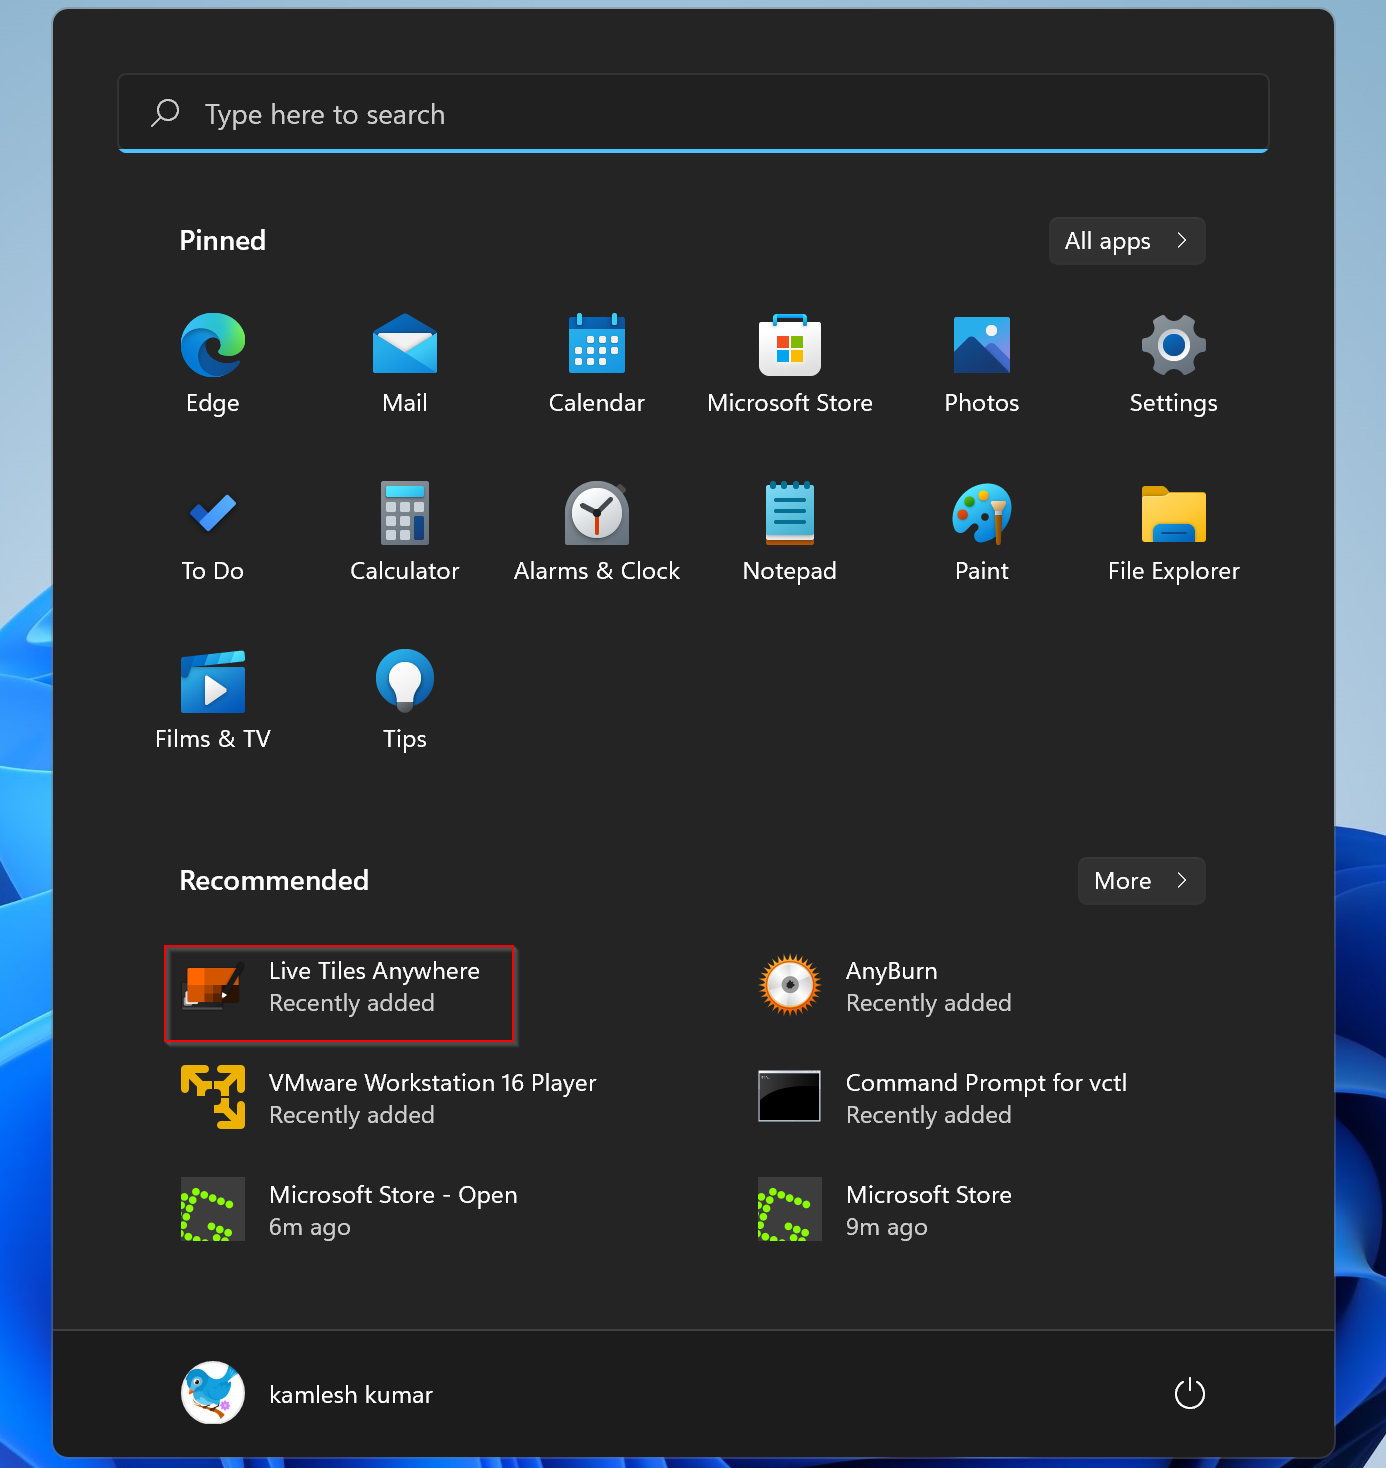
Step 5. When you’re done, the app is downloaded and installed automatically on your Windows 11 machine. In place of the “Get” button, now the “Open” button will appear.

You can close the Microsoft Store window now.
How to Create Live Tiles Anywhere on Windows 11?
Step 1. Once the “Live Tiles Anywhere” app is installed on your computer, launch it from the Start menu by clicking on the Start button and selecting the app name.
Step 2. When “Live Tiles Anywhere” opens up, select the CUSTOM TILES tab on the top of the screen, then click on Create a new custom tile button.

Step 3. After doing that, the “Tile Editor” window opens up. Click on Element to execute in the left panel.
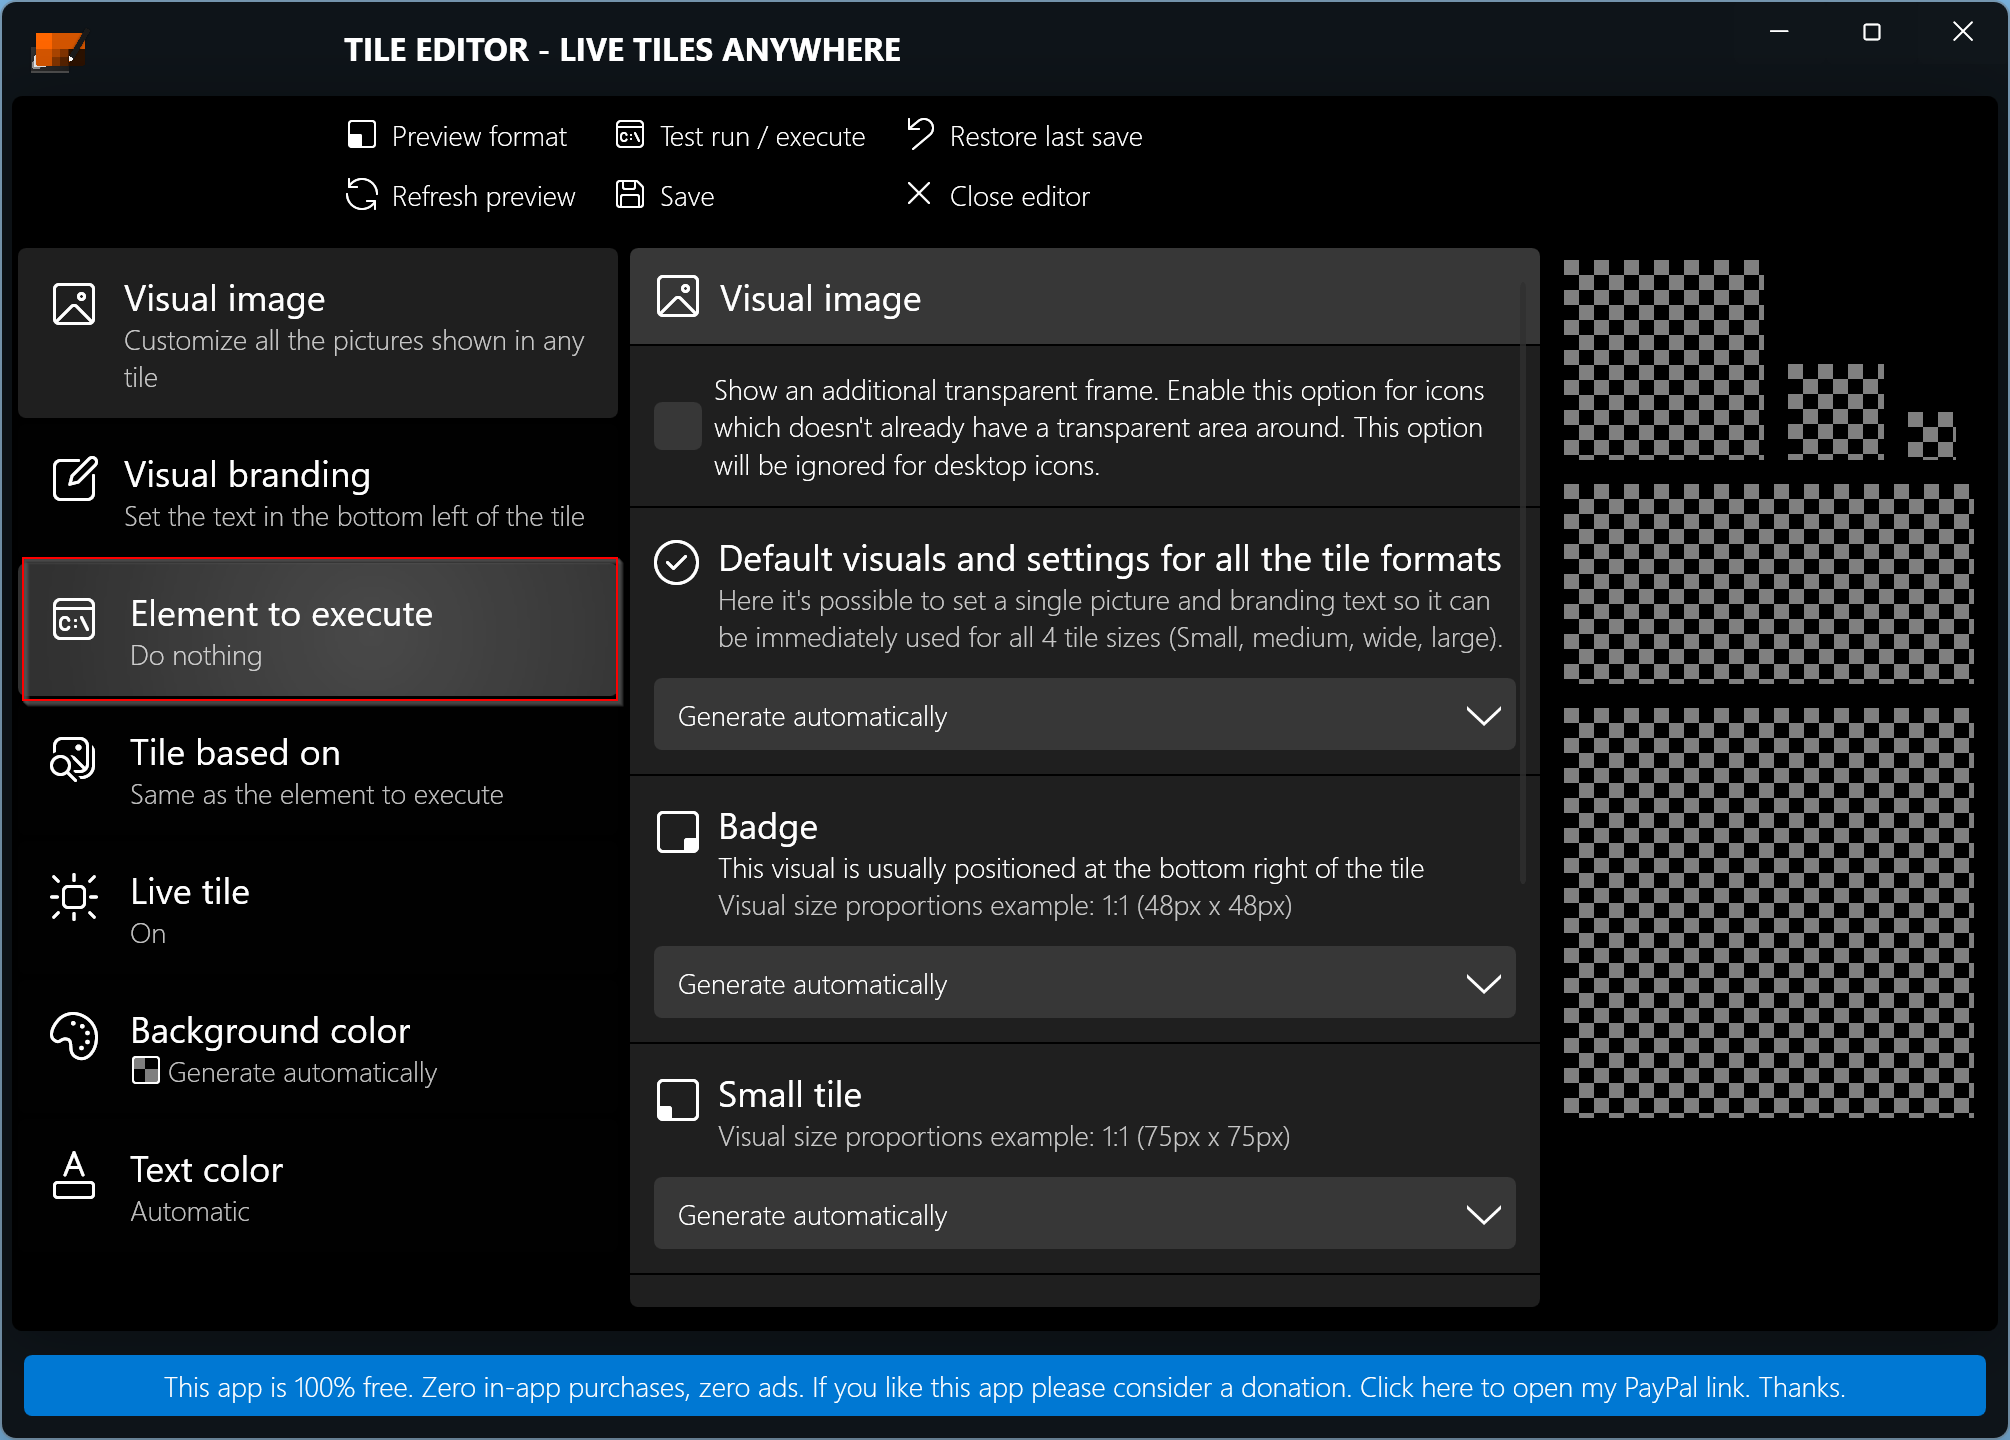
Step 4. Click on the drop-down menu in the middle pane and select Installed apps in the list.
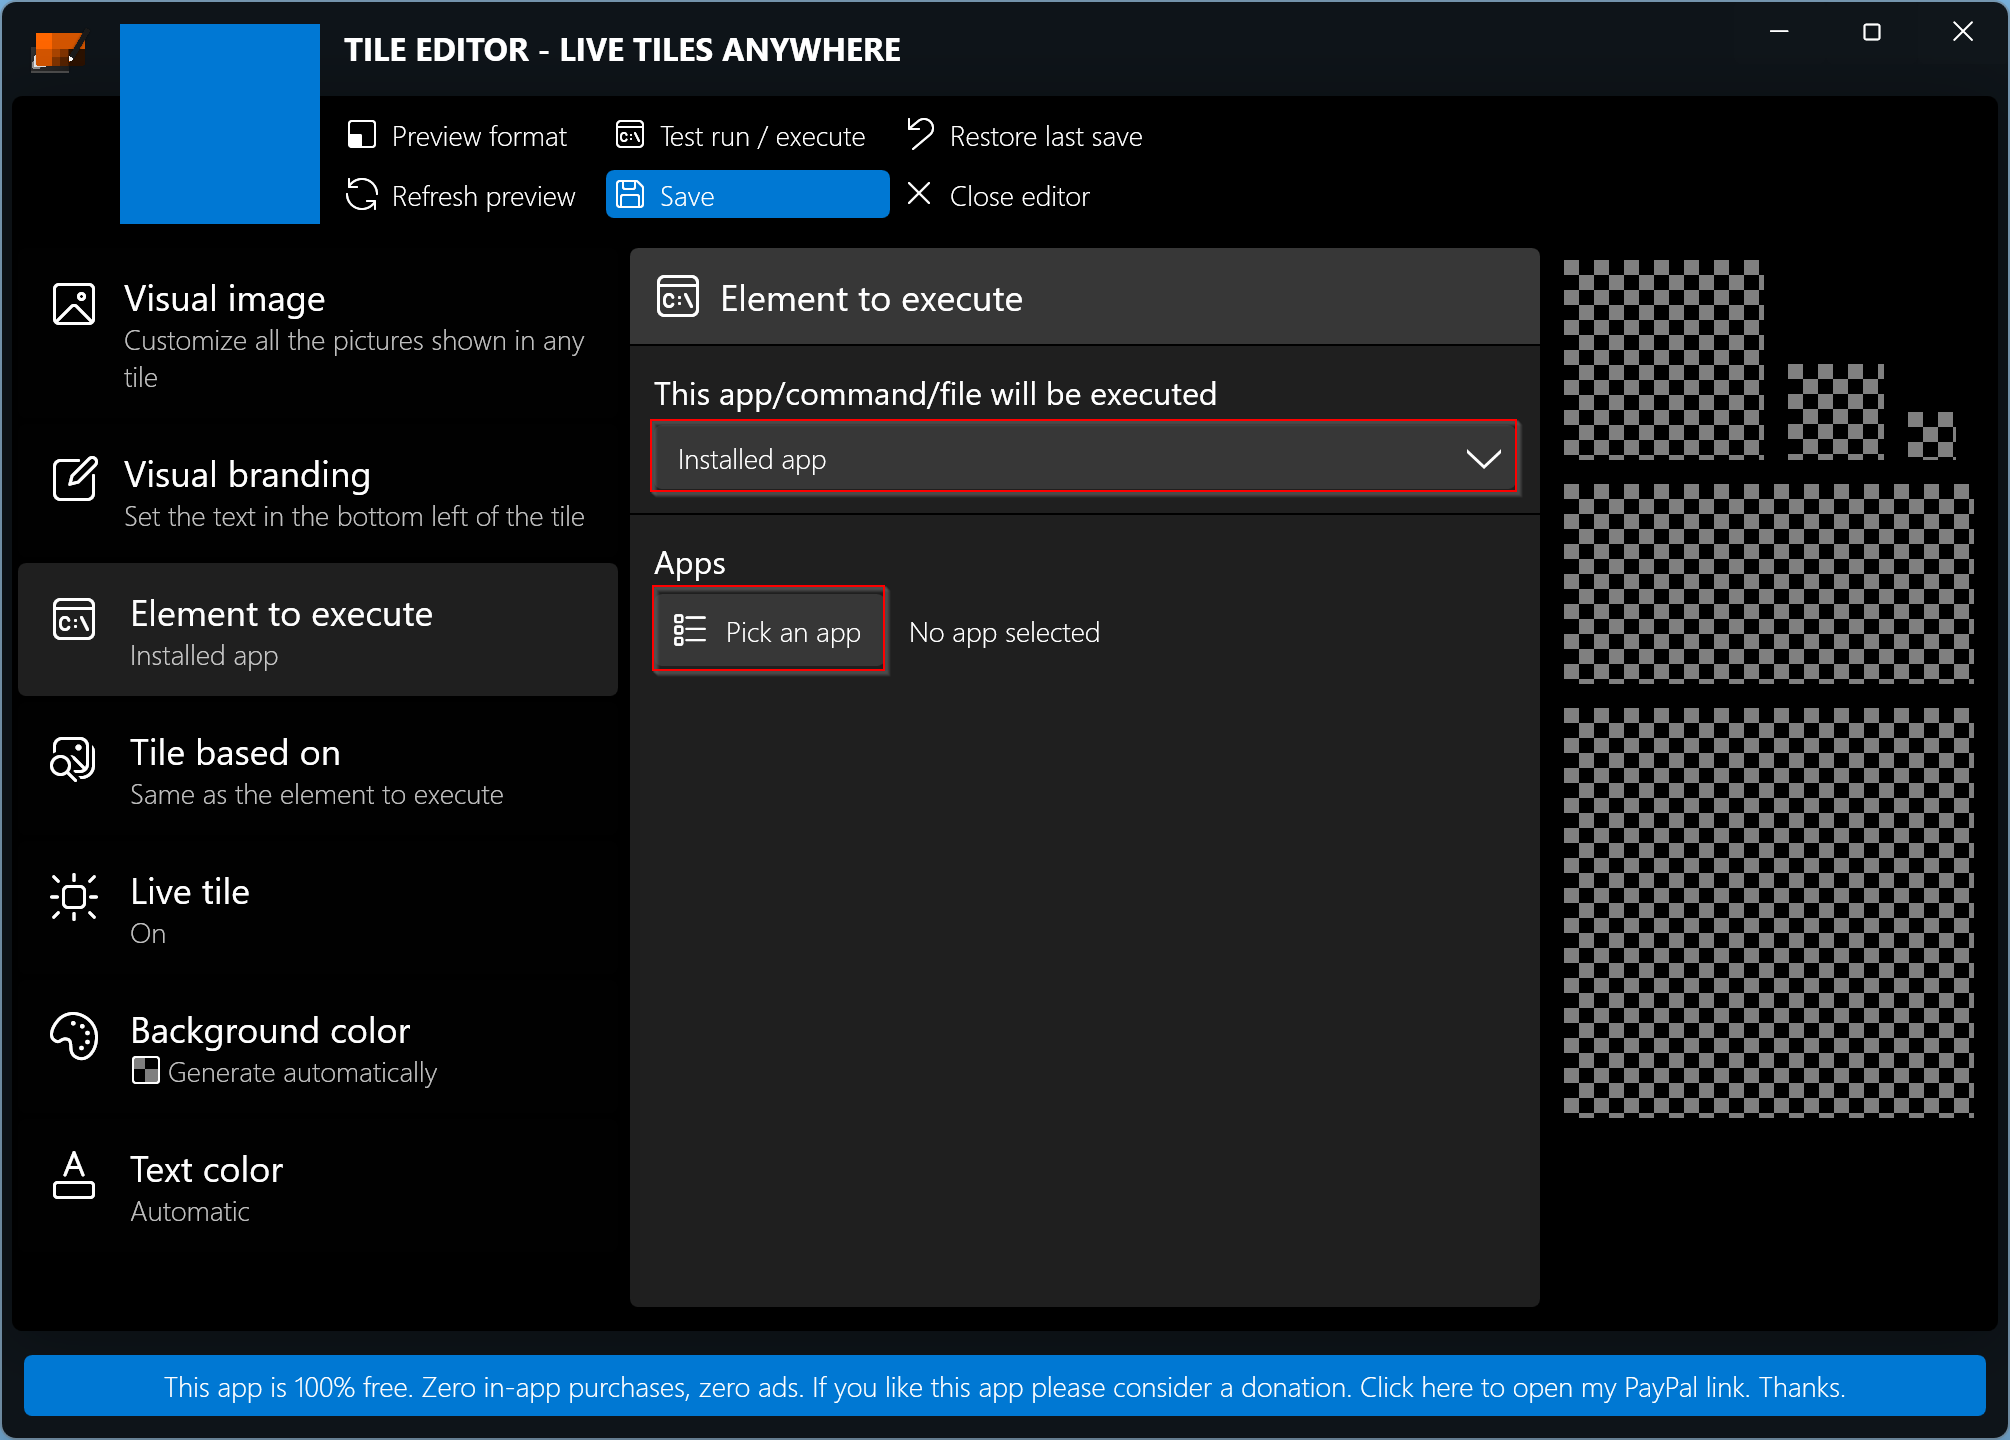
Step 5. After that, click on the Pick an app button under the Apps section.
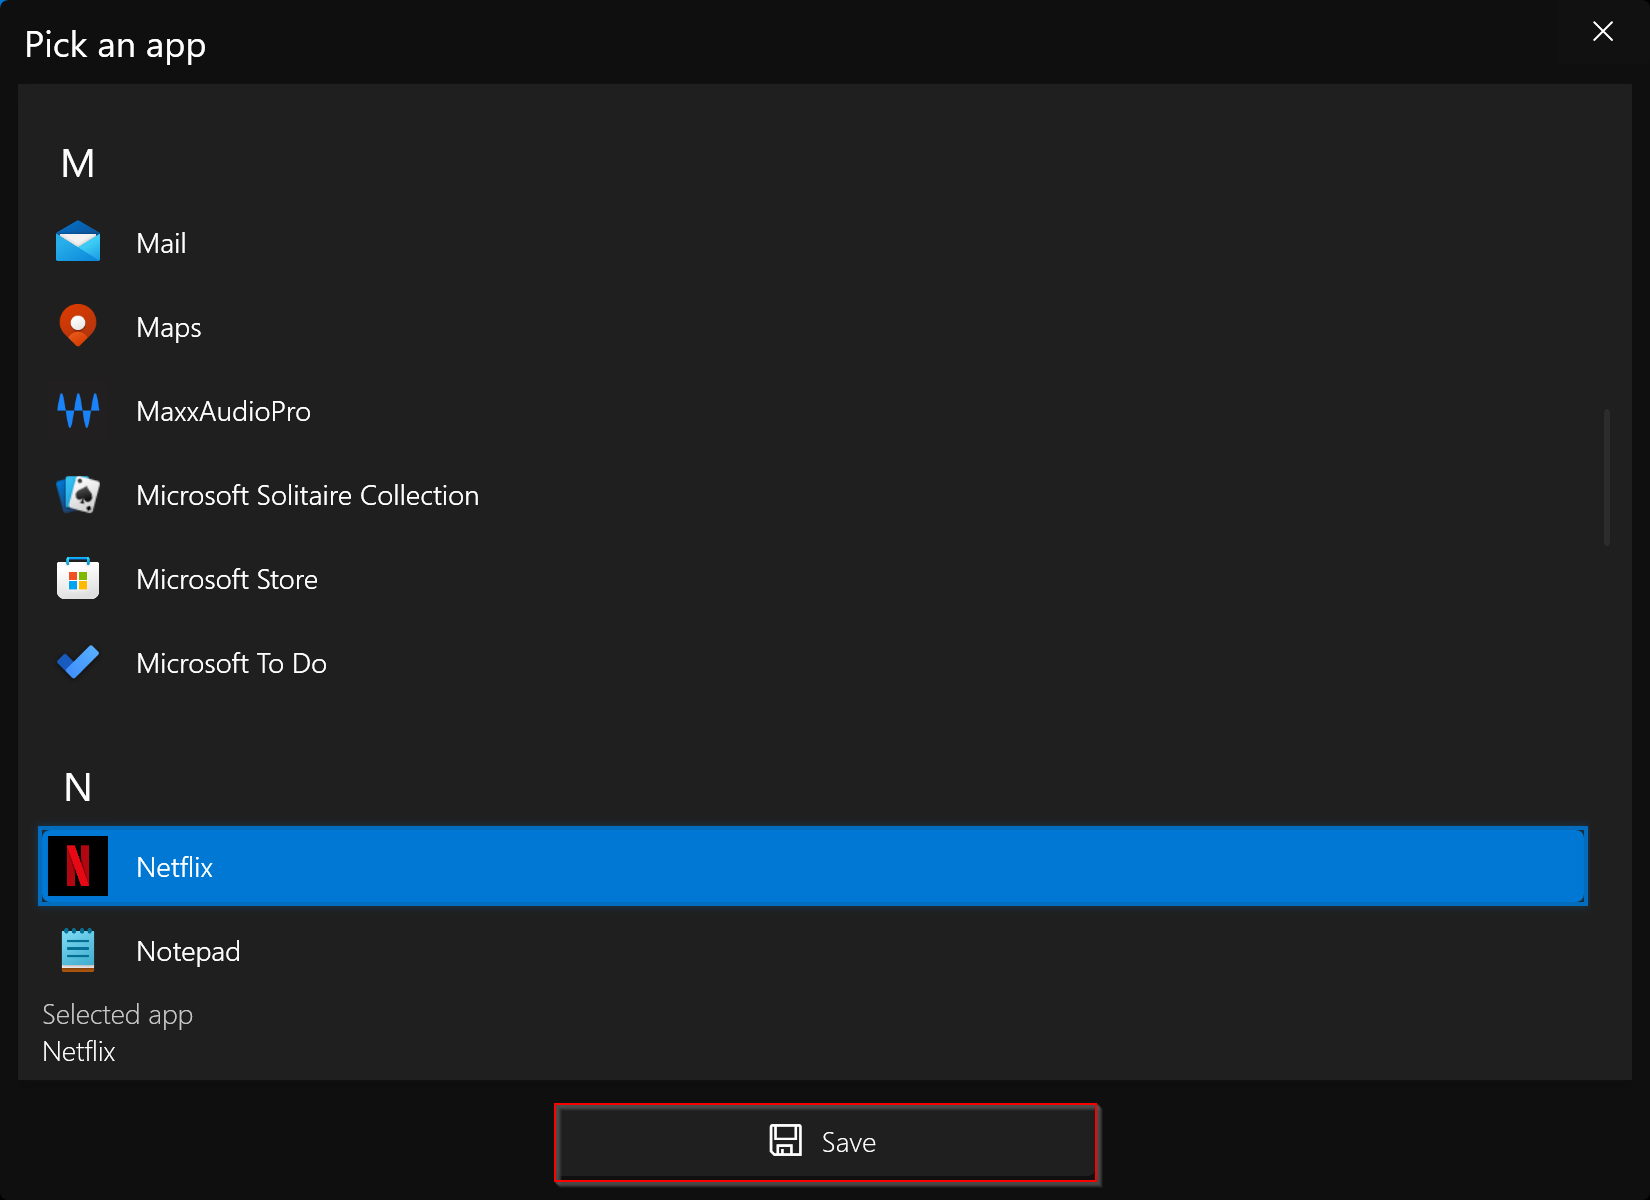
Step 6. In the “Pick an app” window, select an app from the list for your first Live Tile and click on the Save button.
There are a few other customization options available here, such as visual image, visual branding, background color, text color, etc., that you can look through.
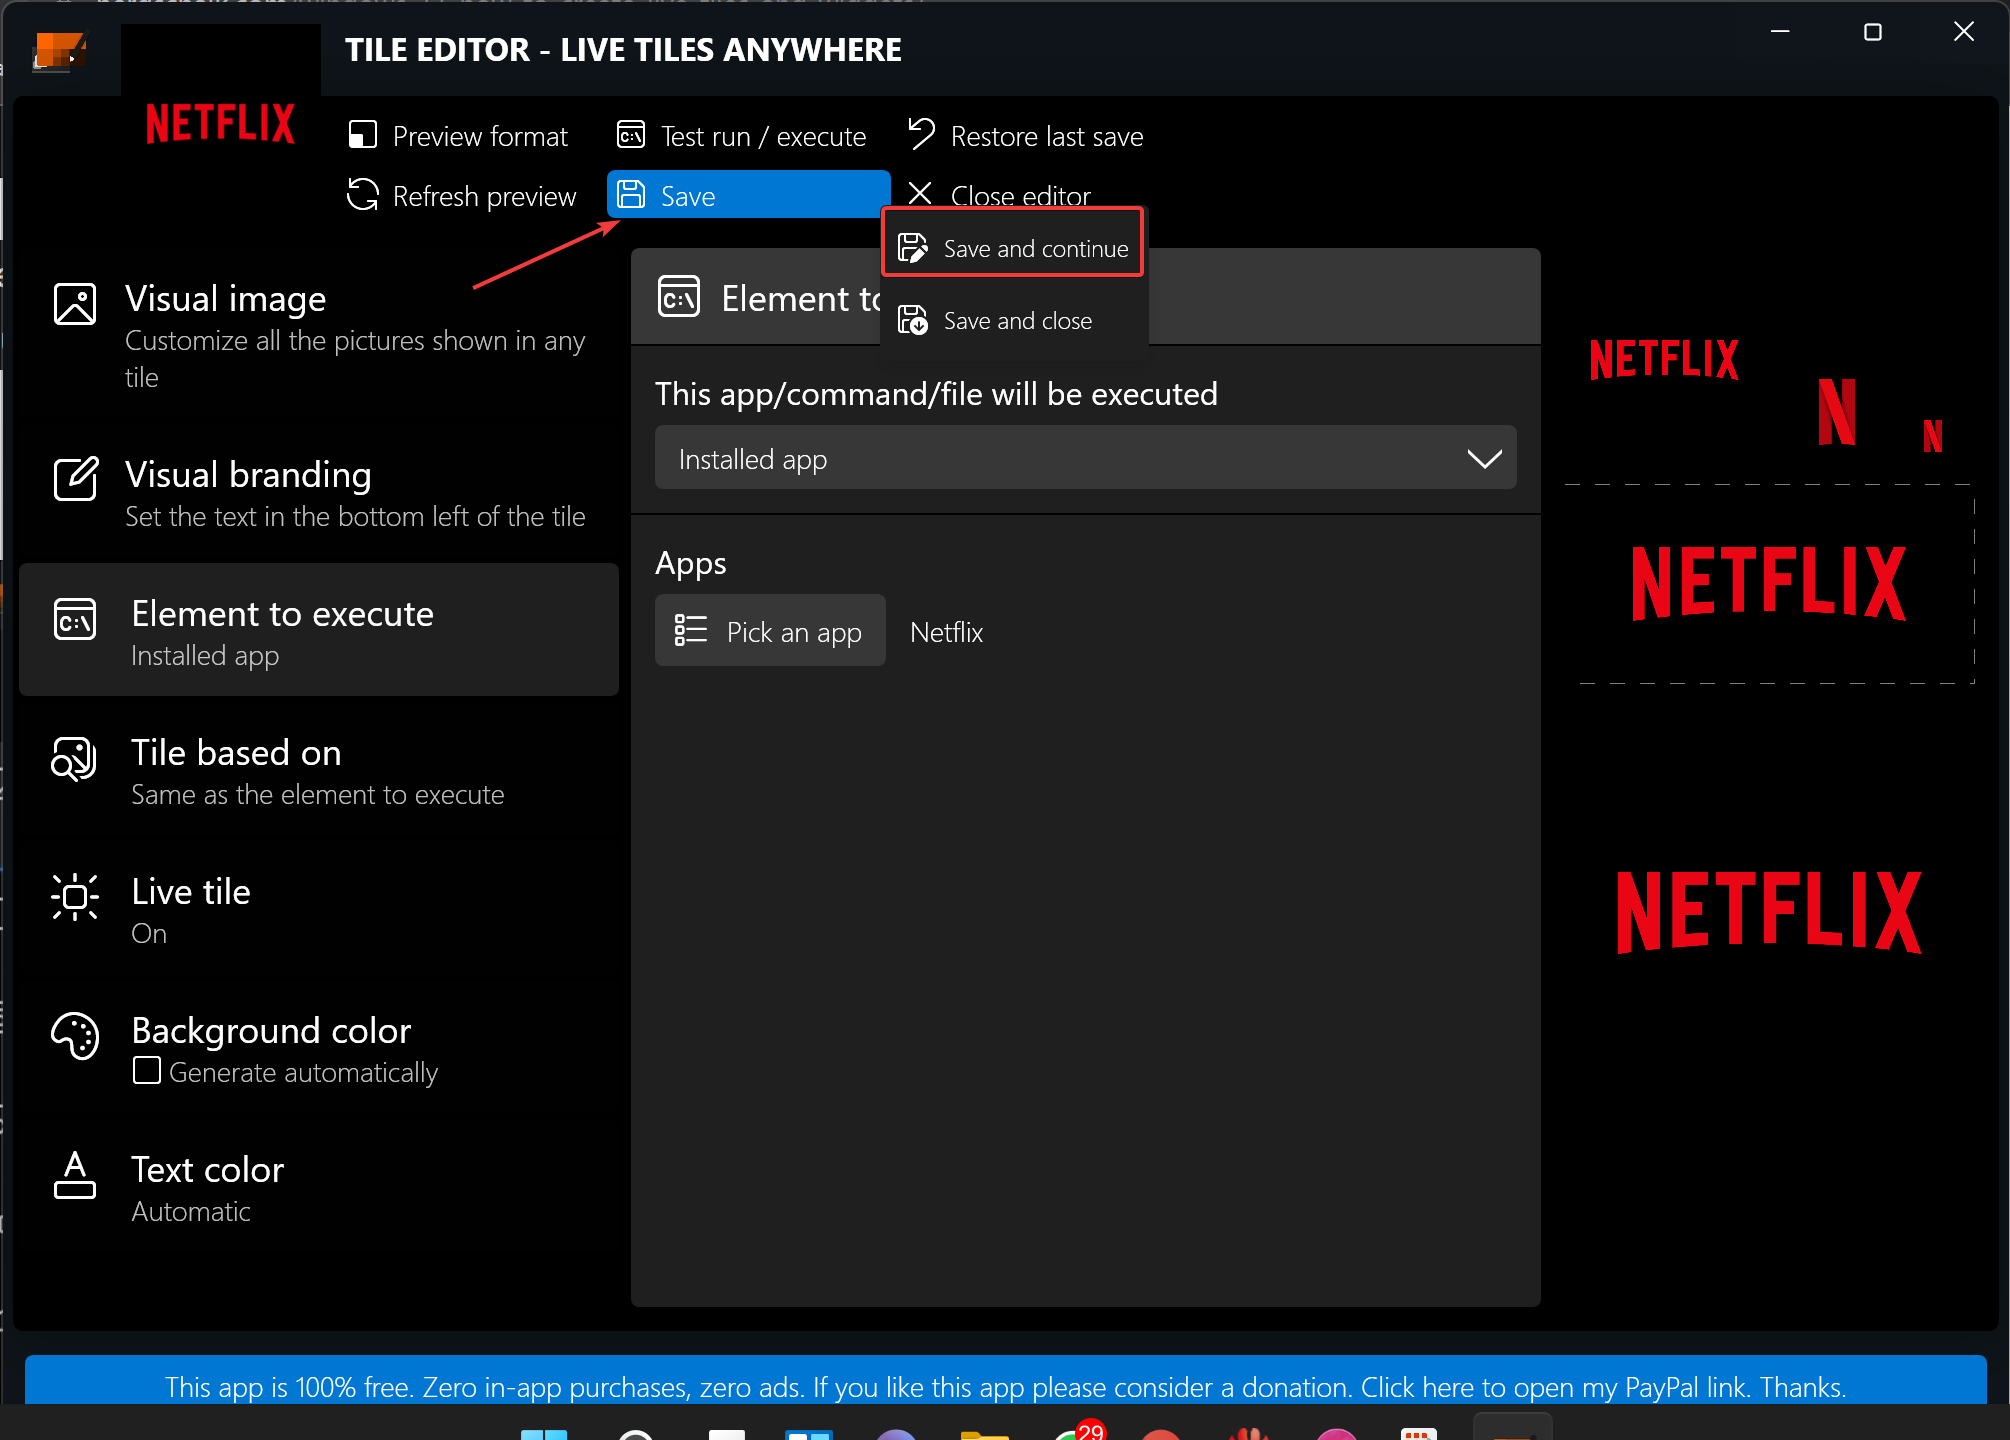
Step 7. Now, click the Save button on the toolbar and then select the Save and continue option.
Step 8. After that, under the “CUSTOM TILES” tab, right-click the tile you have created and select “Pin to the Start menu.”
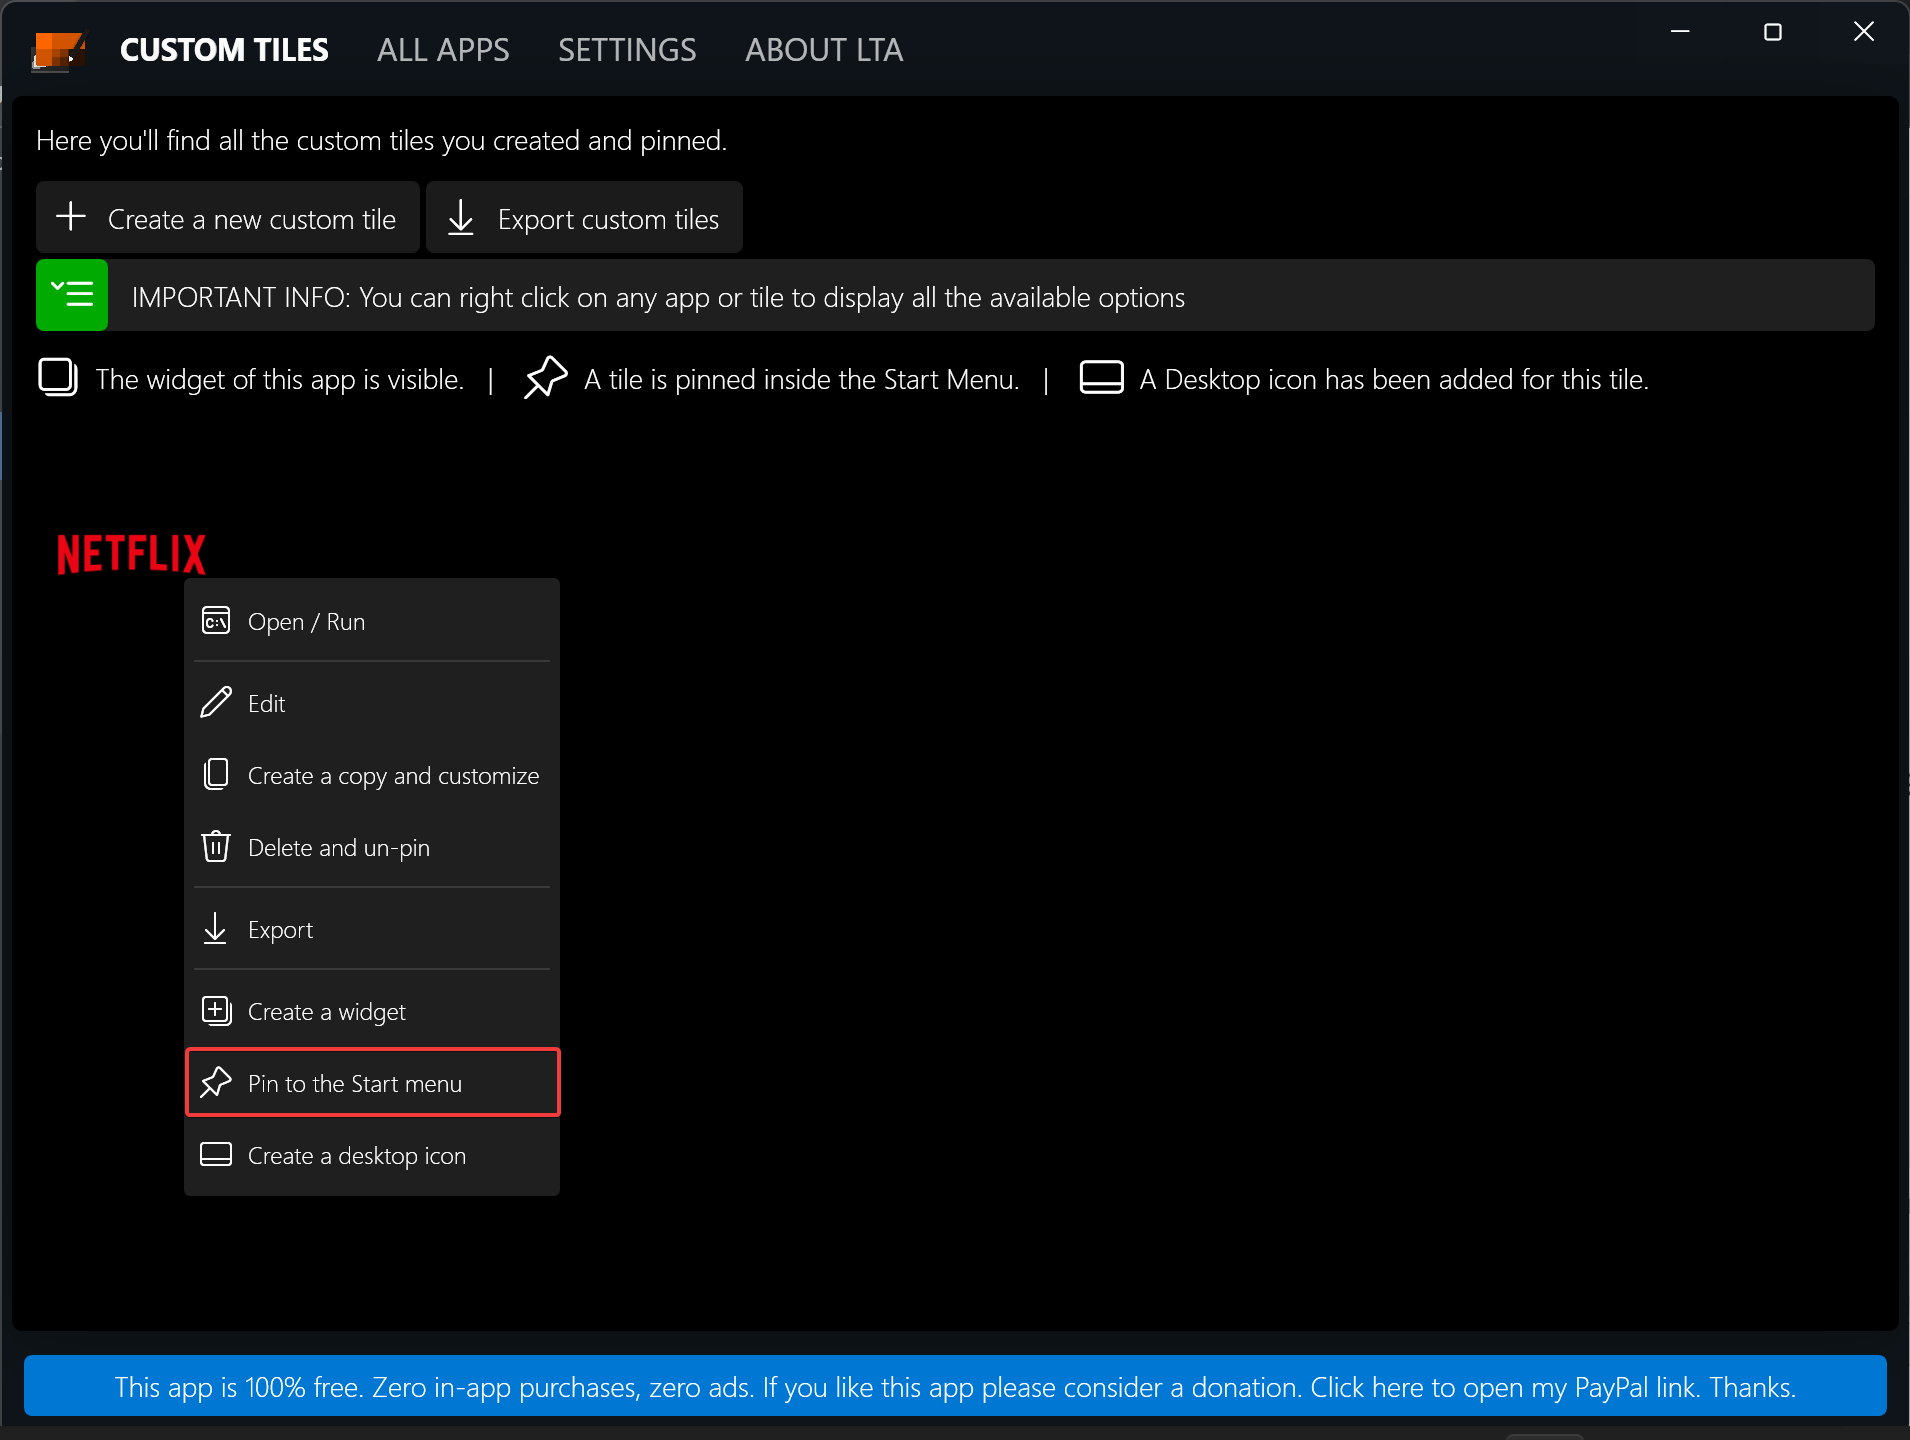
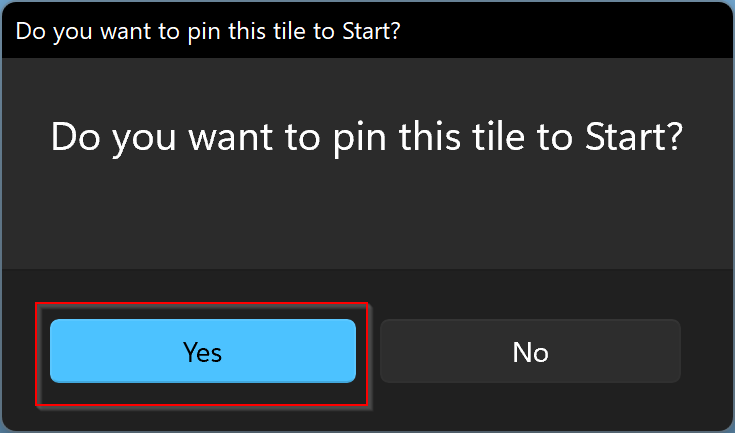
Step 9. When prompted, click Yes.
Currently, the app isn’t optimized to show live tiles in the Windows 11 Start Menu. It will just show an icon of the app. We are expecting the developer will add “live tile” support in the next release.
How to Use Tiles as Widgets on Windows 11?
Once you created a custom live tile or want to use built-in app tiles as Widgets on Windows 11 desktop, do the following:-
Step 1. Open the “Live Tiles Anywhere” app and navigate to the “ALL APPS” tab.
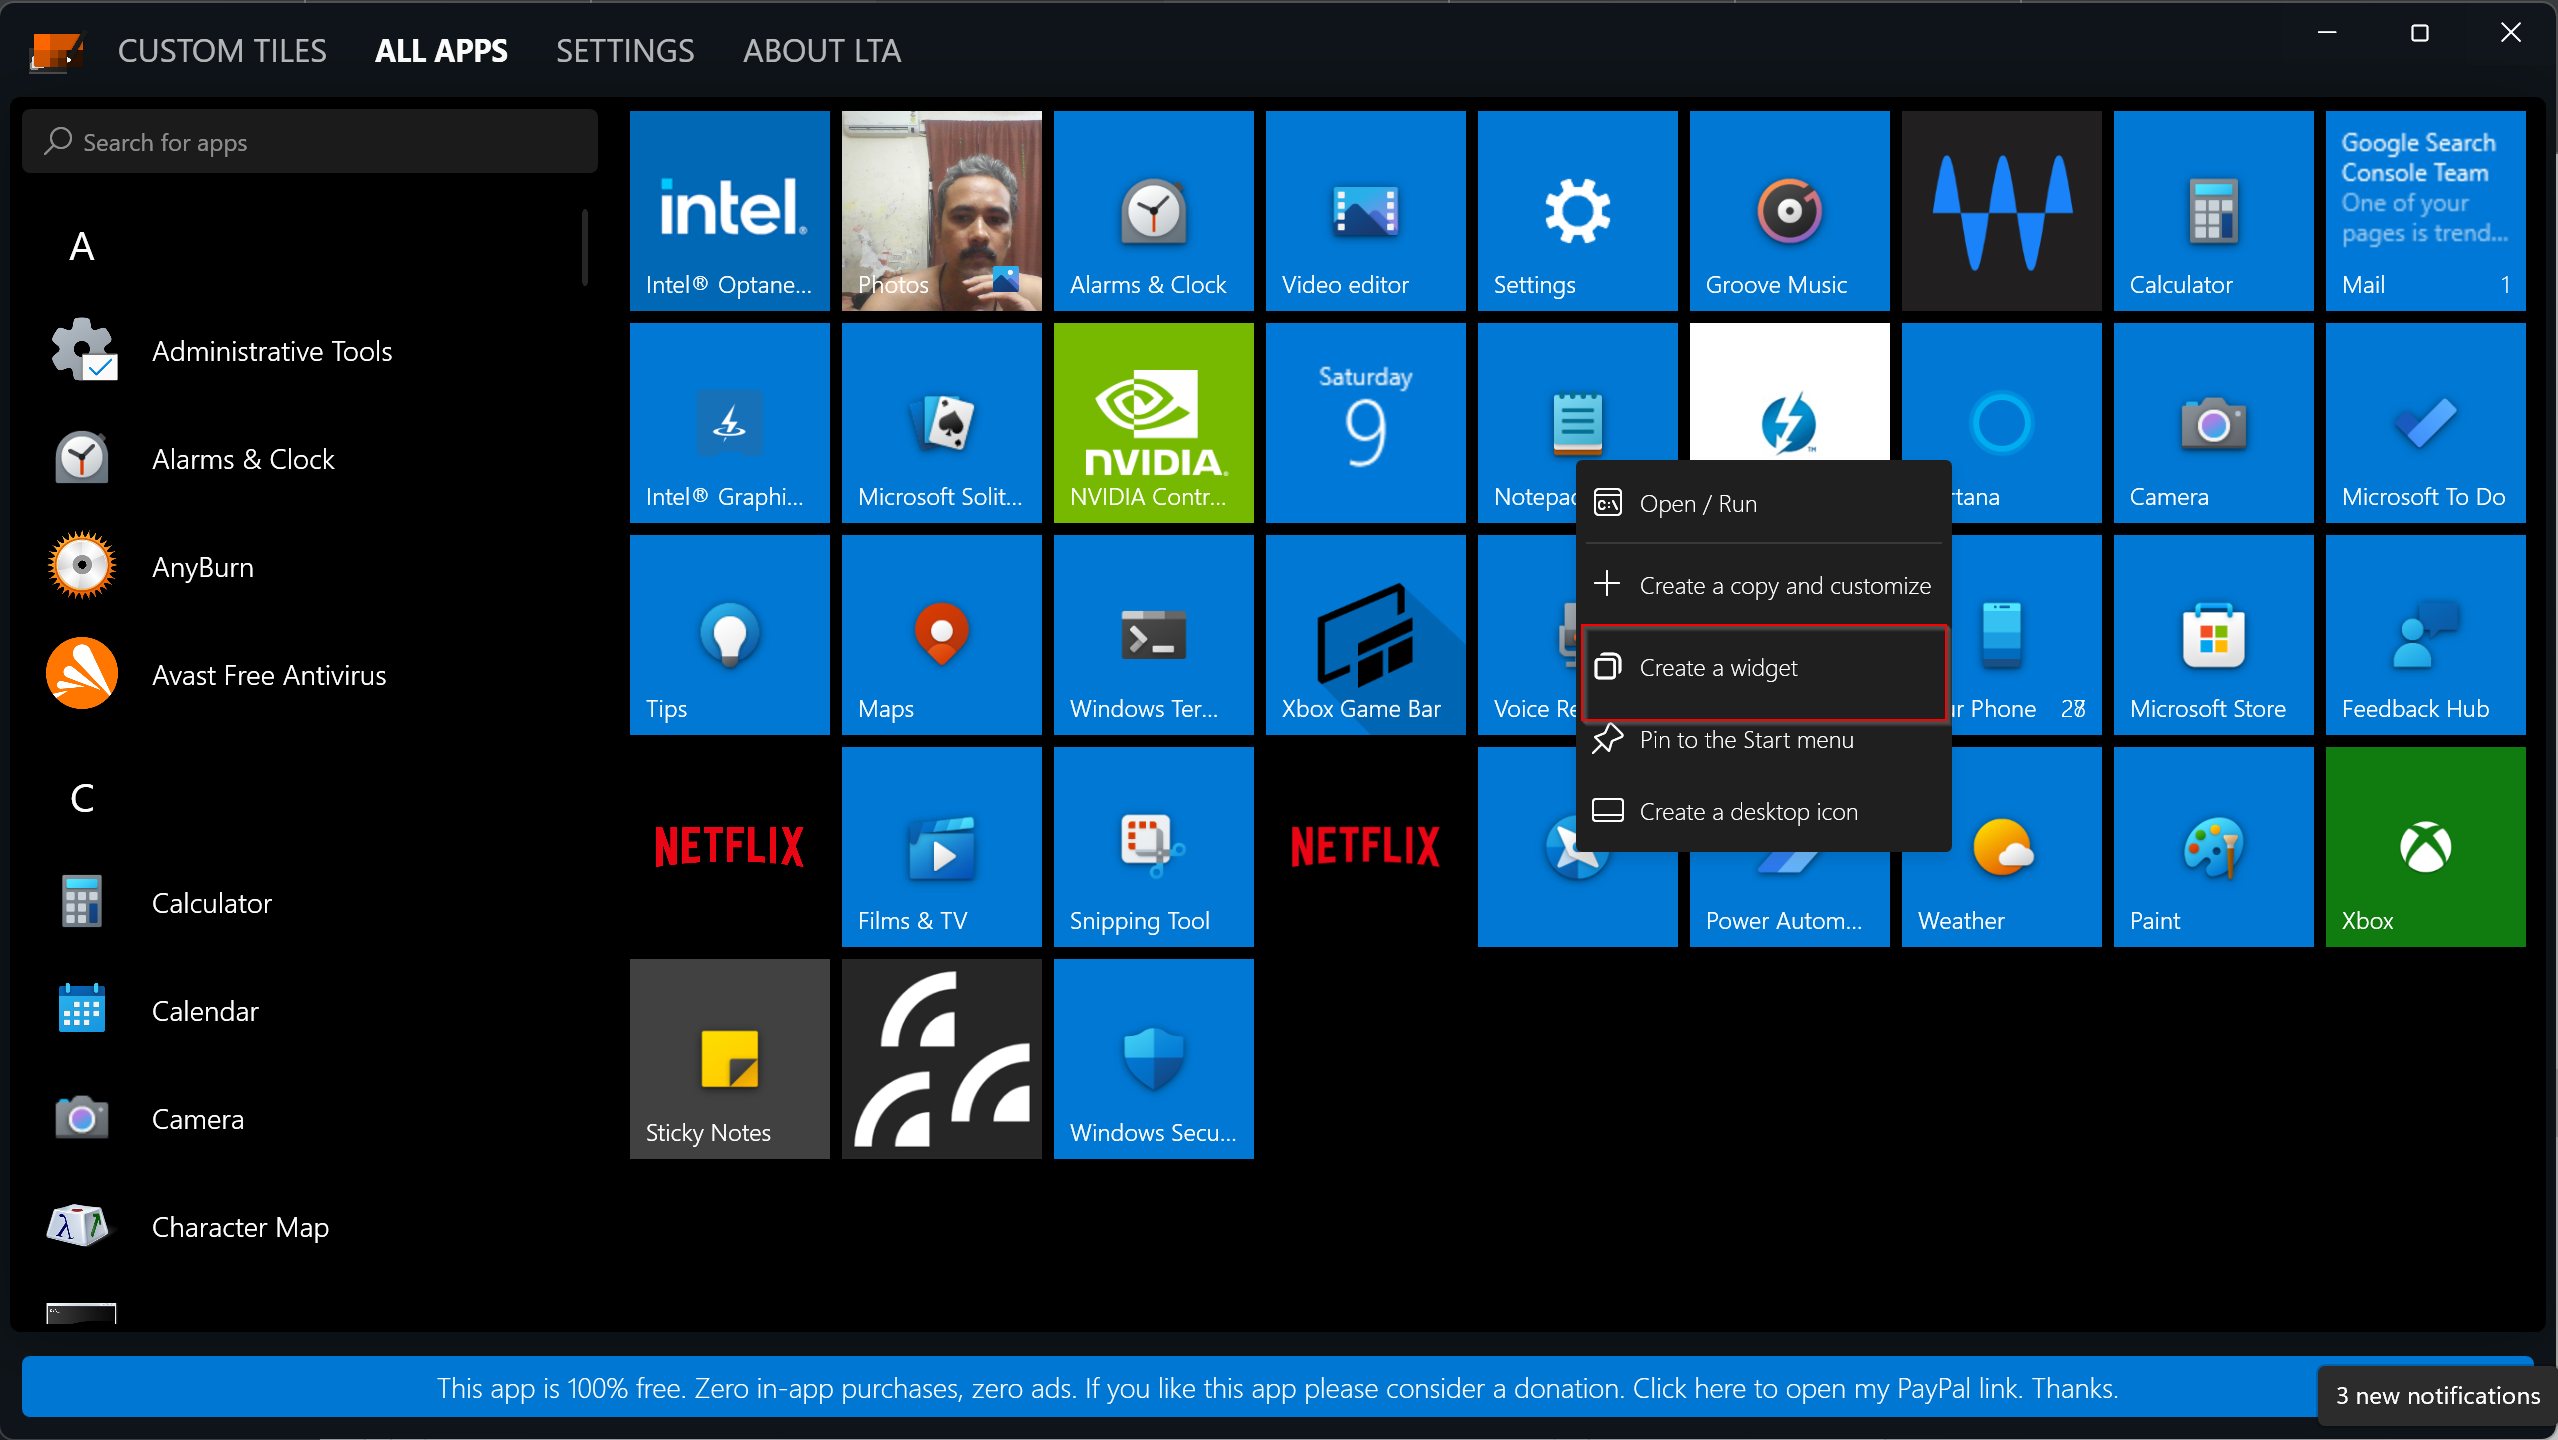
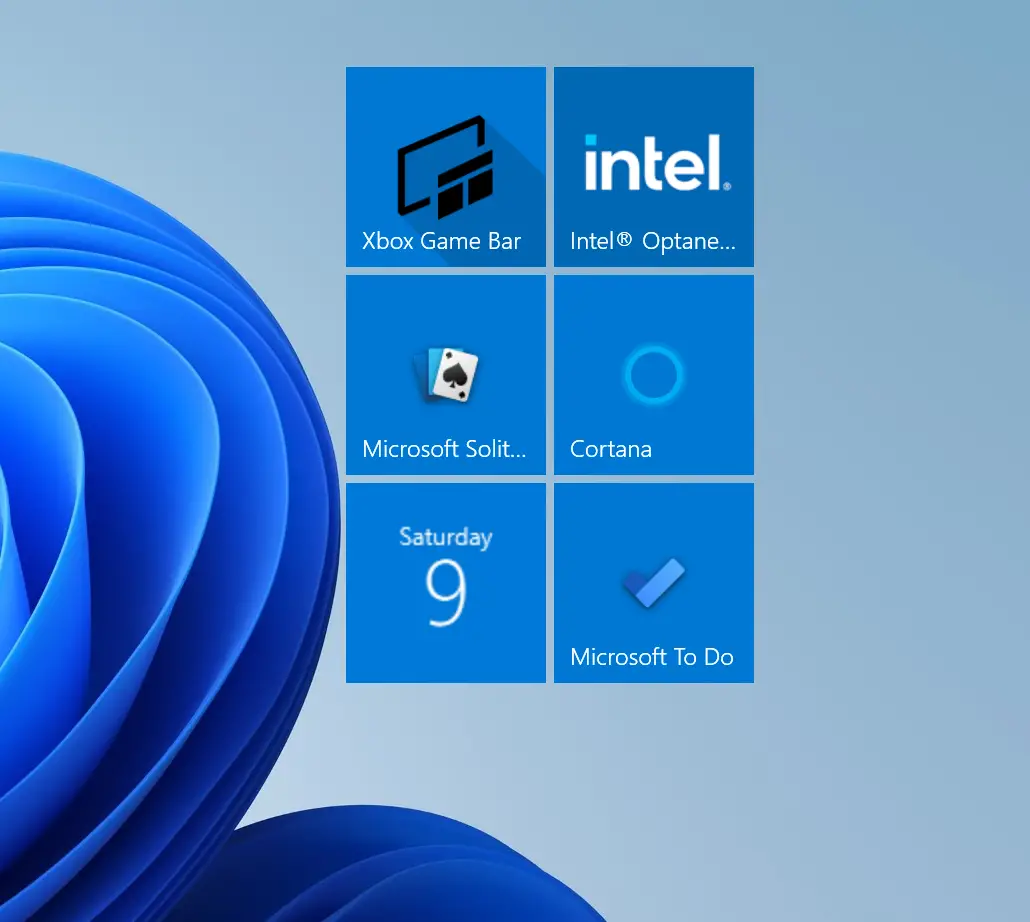
The above step will directly put the widget on the desktop. You can arrange them on the desktop in any area where you want to see them.
Conclusion
In conclusion, if you are missing the tiles feature on your Windows 11 computer, you can use the “Live Tiles Anywhere” app to get it back. Although Microsoft has removed the tiles concept in Windows 11, this app allows you to create custom tiles and use them on the Start menu or as desktop widgets. By following the simple steps outlined in this article, you can easily install and use the “Live Tiles Anywhere” app on your Windows 11 computer. While the app doesn’t currently support live tiles in the Start menu, we hope the developer will add this feature in the future. With this app, you can enjoy the look and functionality of the Windows 10 tiles on your Windows 11 computer.