Deleting a drive partition on your Windows 11/10 computer can be a useful task if you want to free up space or create a new partition. However, it is essential to note that deleting a partition will delete all data stored on it permanently, so it is crucial to back up any important files before proceeding.
The process of deleting a partition in Windows 11/10 is relatively simple and can be completed in just a few steps. In this guide, we will walk you through the steps required to delete a partition in Windows 11/10 using the built-in Command Prompt, Settings app, Computer Management, and PowerShell. Whether you are an experienced user or a beginner, this guide will provide you with a detailed step-by-step process to delete a partition on your Windows 11/10 computer. So let’s get started.
How to Delete a Partition on Windows 11 from Settings?
Are you running out of storage on your Windows 11 computer and need to delete a partition to free up some space? Follow these simple steps to delete a drive partition on Windows 11.
Step 1. First, open the Settings app on your Windows 11 computer. You can do this by clicking on the Start button and then selecting Settings from the menu. Alternatively, use the Windows + I keyboard shortcut to open Windows 11 Settings.
Step 2. Then, click on System in the left sidebar.
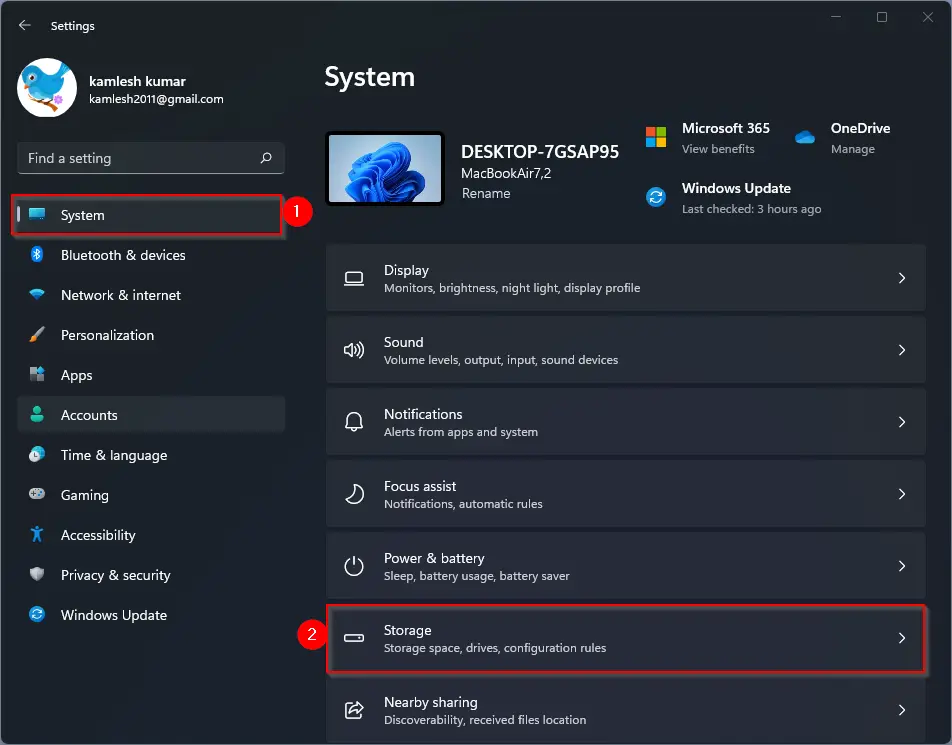
Step 3. Next, click the Storage option on the right sidebar in the Settings app. This will open the Storage settings.
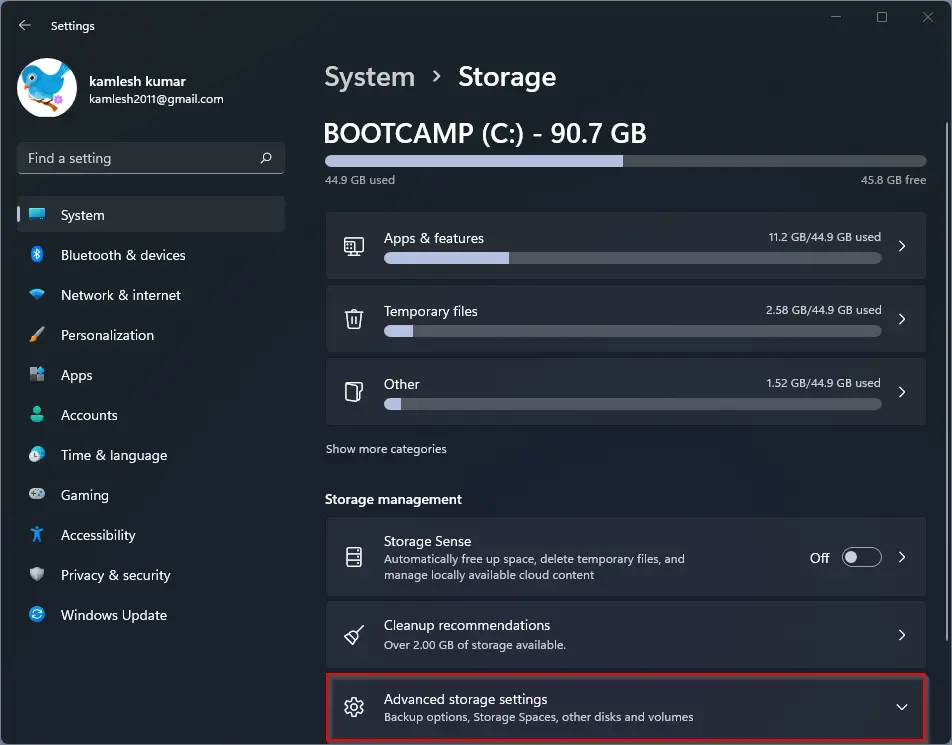
Step 4. Under the “Storage management” section, click the “Advanced storage settings” option to expand it.
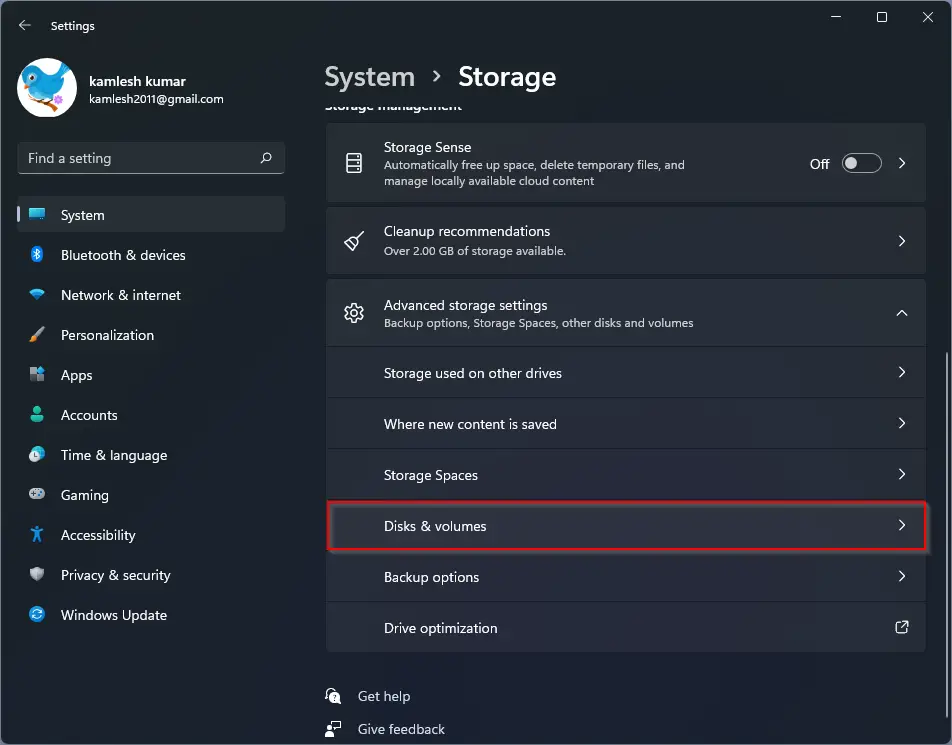
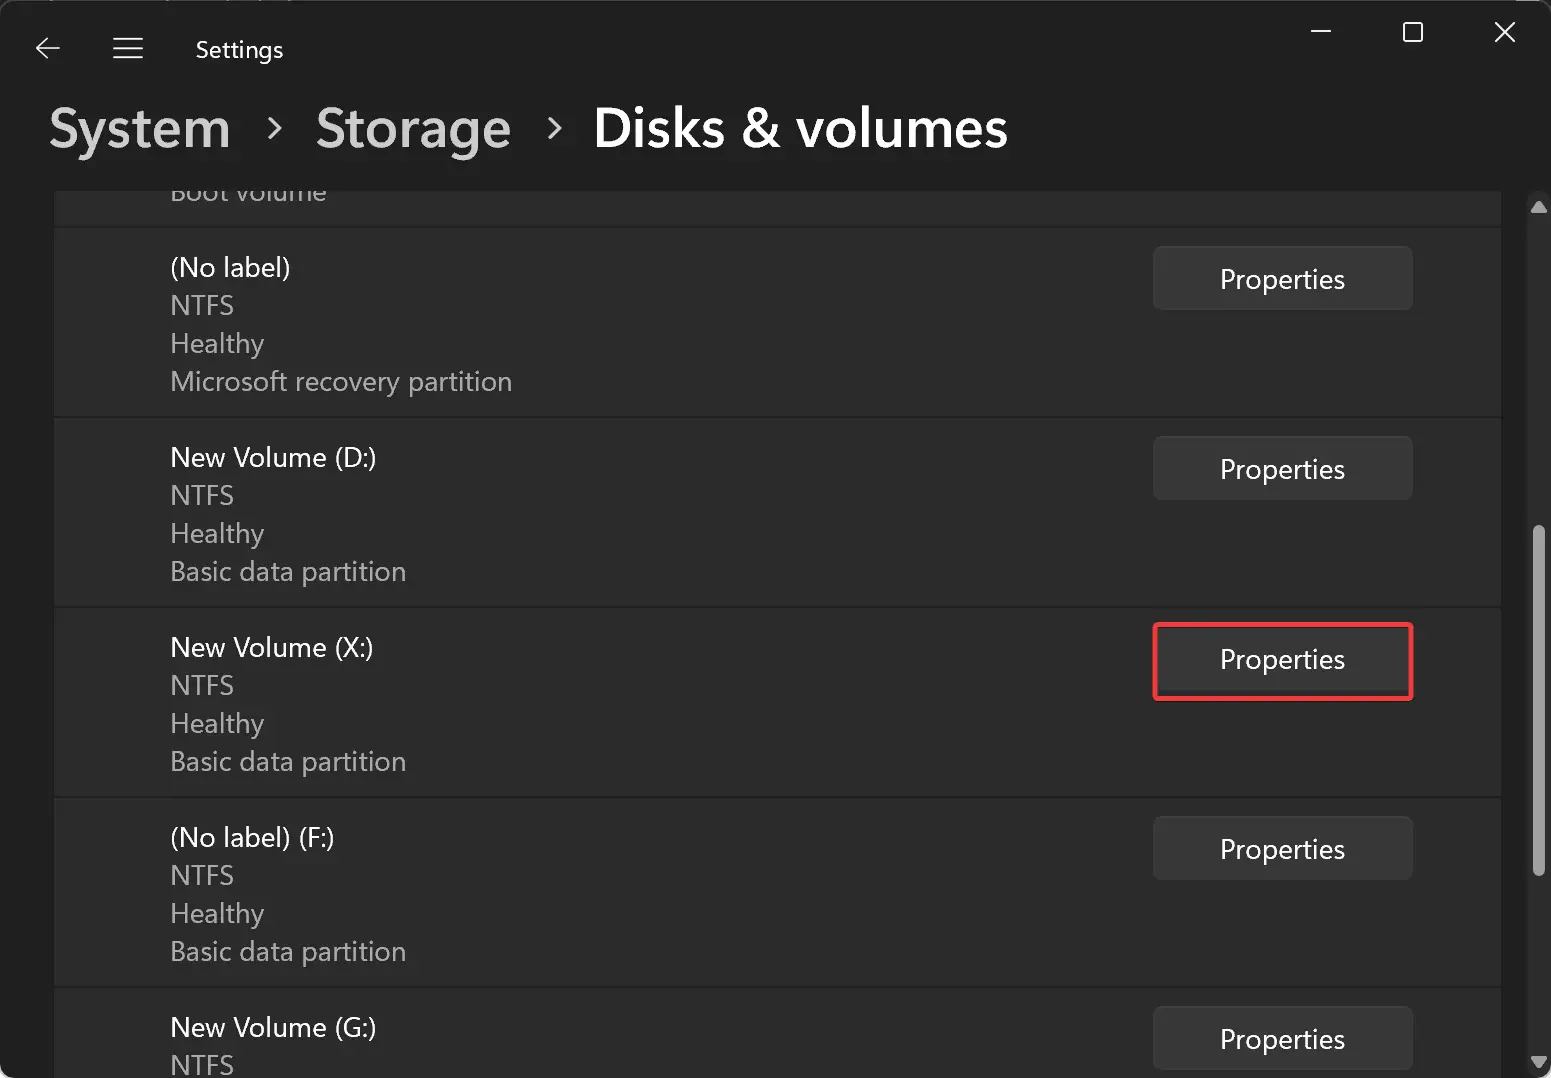
Step 5. Click on the “Disks & volumes” setting. This will display a list of all the drive partitions on your computer.
Step 6. Select the drive partition that you want to delete and click on the “Properties” button.
Step 7. Under the “Format” section, click on the “Delete” button. This will prompt you to confirm the deletion of the partition.
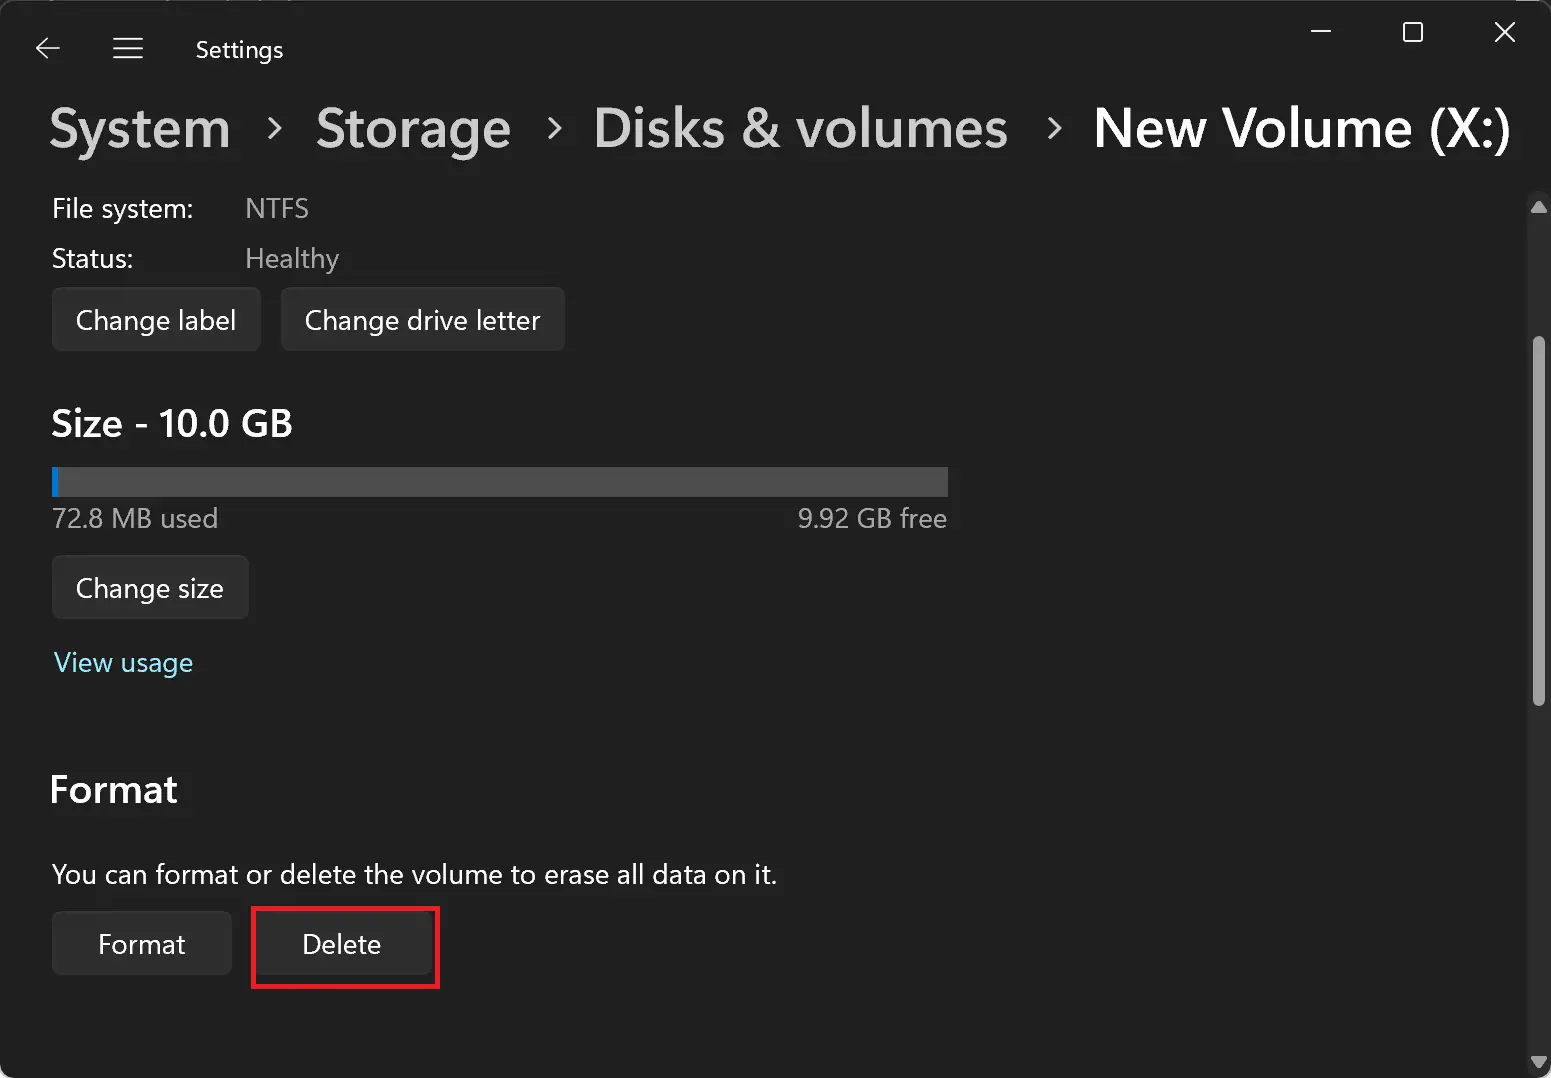
Step 8. Once you confirm the deletion, Windows 11 will remove the partition and all data associated with it from your computer.
How to Delete a Partition on Windows 11 or 10 from Computer Management?
If you want to remove a partition from your Windows system, you can do so easily using the Computer Management tool. Here are the simple steps that you can follow:-
Step 1. To start with, click on the Start button.
Step 2. Now, search for “Computer Management” and click on the top result that appears to open the app.
Step 3. In the Computer Management window, select the “Disk Management” option in the left sidebar. Locate the partition that you want to delete from the list of available drives.
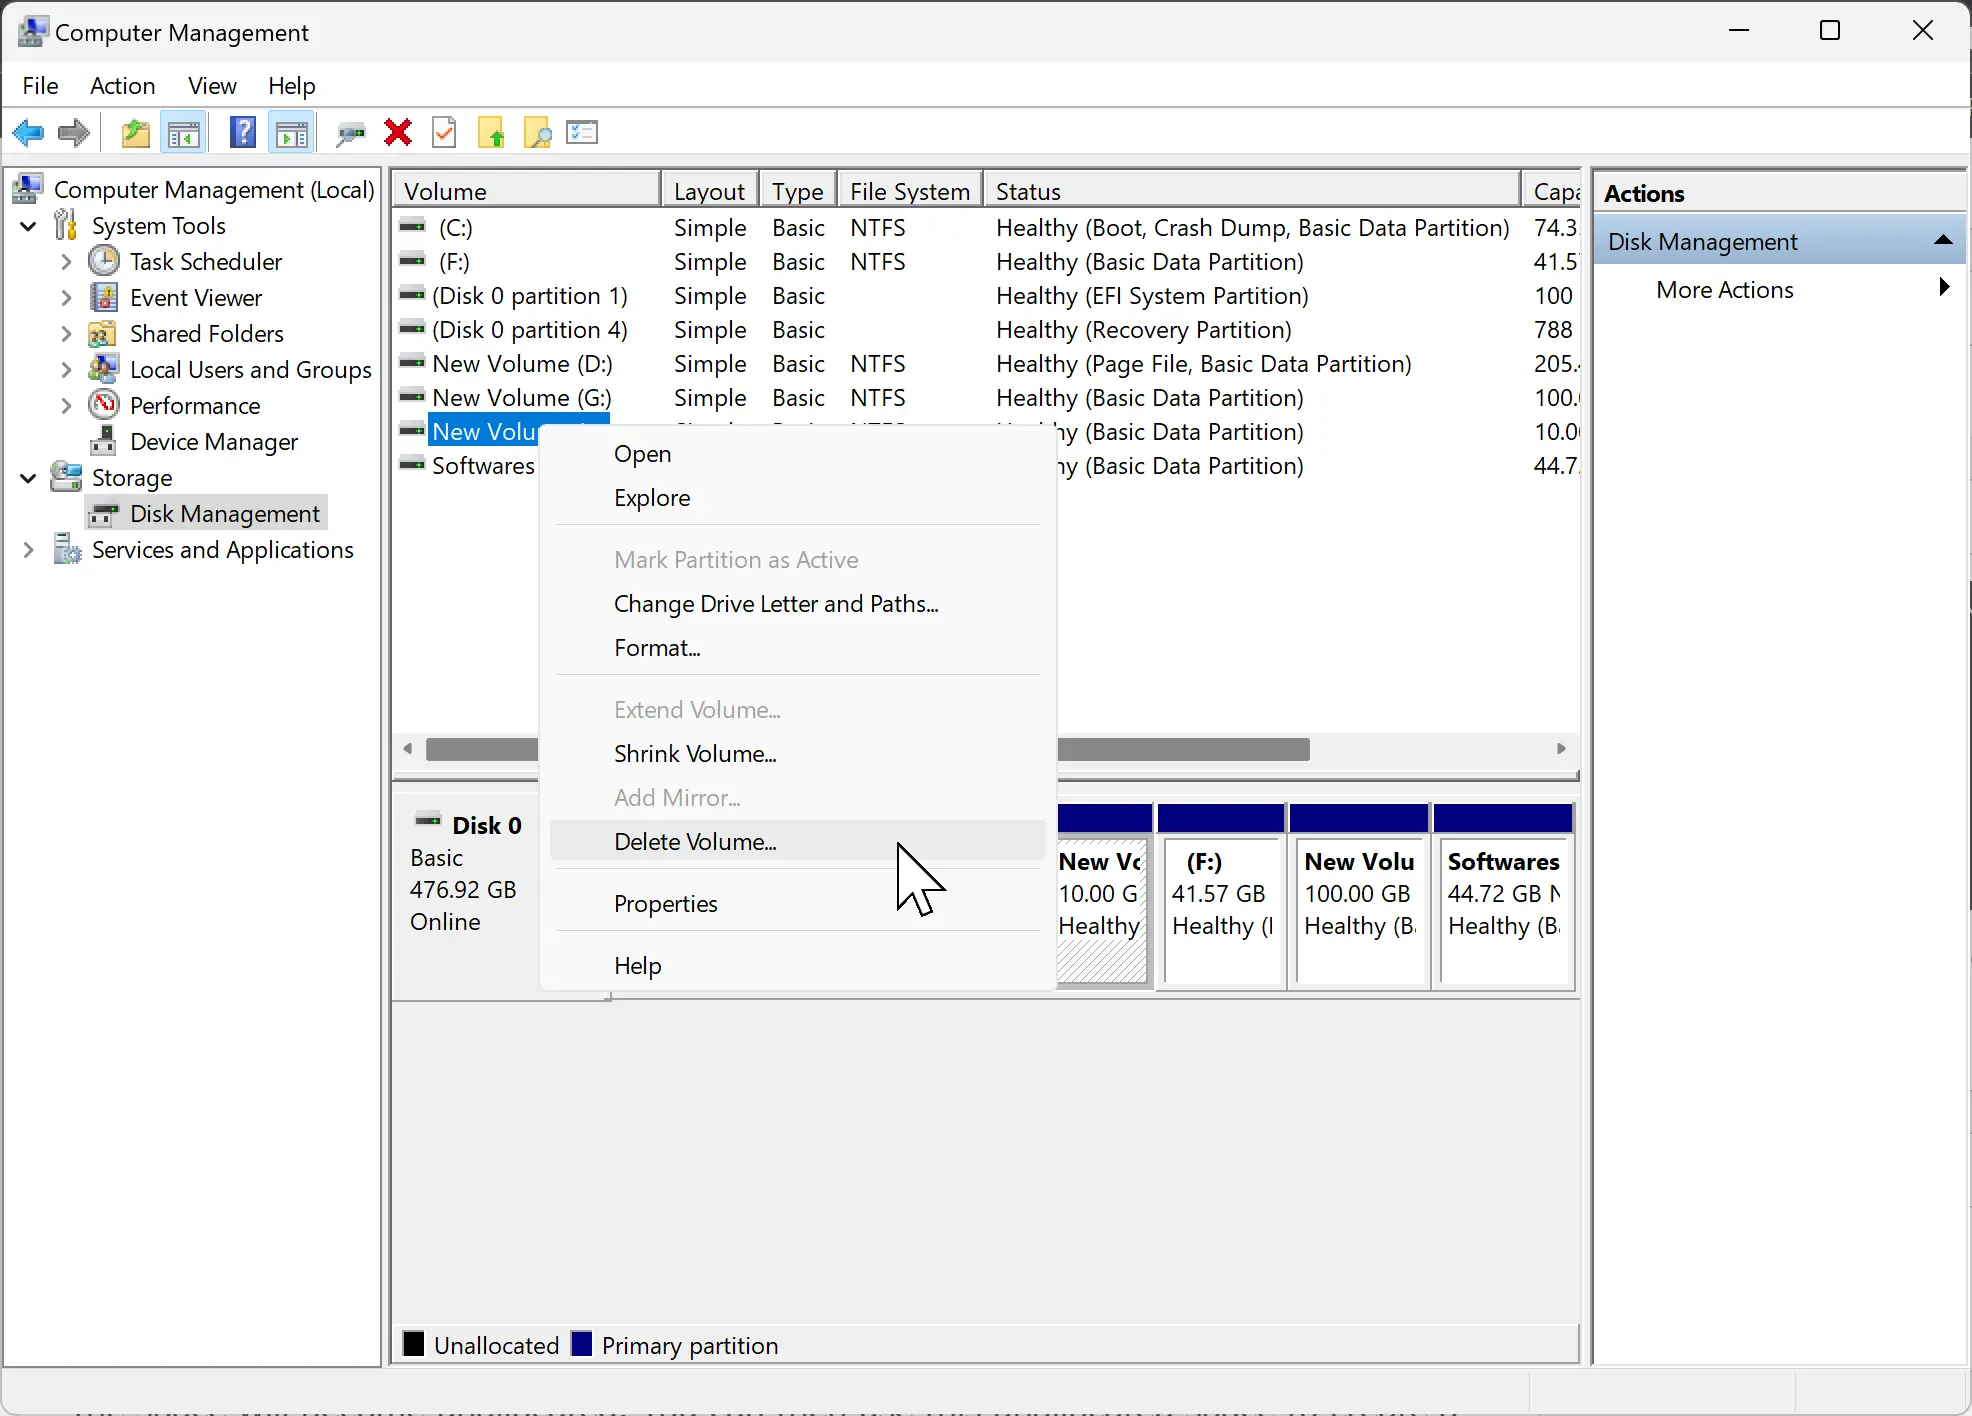
Step 4. Next, right-click on the partition and select the “Delete Volume” option from the context menu.
Step 5. When prompted to confirm the action, click on the “Yes” button.
Once you complete the above steps, the partition will be removed from the drive, and the space will become unallocated. You can then use this unallocated space to create a new partition or extend the size of an existing partition. With these simple steps, you can easily manage your drive partitions and keep your system organized.
How to Delete a Partition on Windows 11 or 10 using Command Prompt?
If you want to delete a partition on Windows 11/10 using the Command Prompt, you can follow these steps:-
Step 1. Firstly, open the Start menu.
Step 2. Next, type “Command Prompt” in the search bar and right-click on the top result. Then, select the “Run as administrator” option.
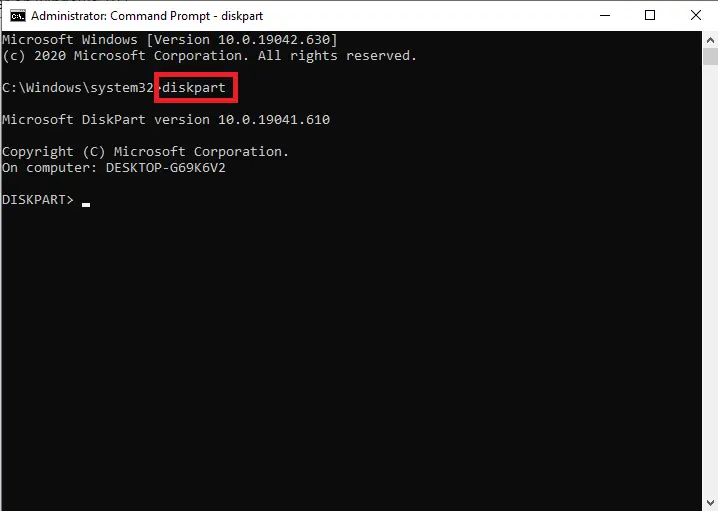
Step 3. Type “diskpart” in the Command Prompt and press Enter to launch the diskpart tool.
Step 4. To list all available volumes, type “list volume” and press Enter.

Step 5. To select the partition that you want to delete, type “select volume X” and press Enter. You need to replace “X” with the number of the partition you want to delete.
For example, if you want to delete Volume 4, your command should select volume 4.
Step 6. Lastly, type “delete volume,” and press Enter to delete the selected partition.
After these steps, the diskpart tool will remove the partition from your drive on Windows 11/10.
How to Delete a Partition on Windows 11 or 10 through PowerShell?
If you want to remove a partition from your Windows 11 system using PowerShell, it’s easy. Follow these simple steps to delete a partition using PowerShell:-
Step1. Open the Start menu.
Step 2. Search for PowerShell and right-click the top result.
Step 3. On the PowerShell entry, right-click and select the “Run as administrator” option to open PowerShell with administrative privileges.
Step 4. Type the following command to list all the available volumes on your system and press Enter:-
Get-Volume
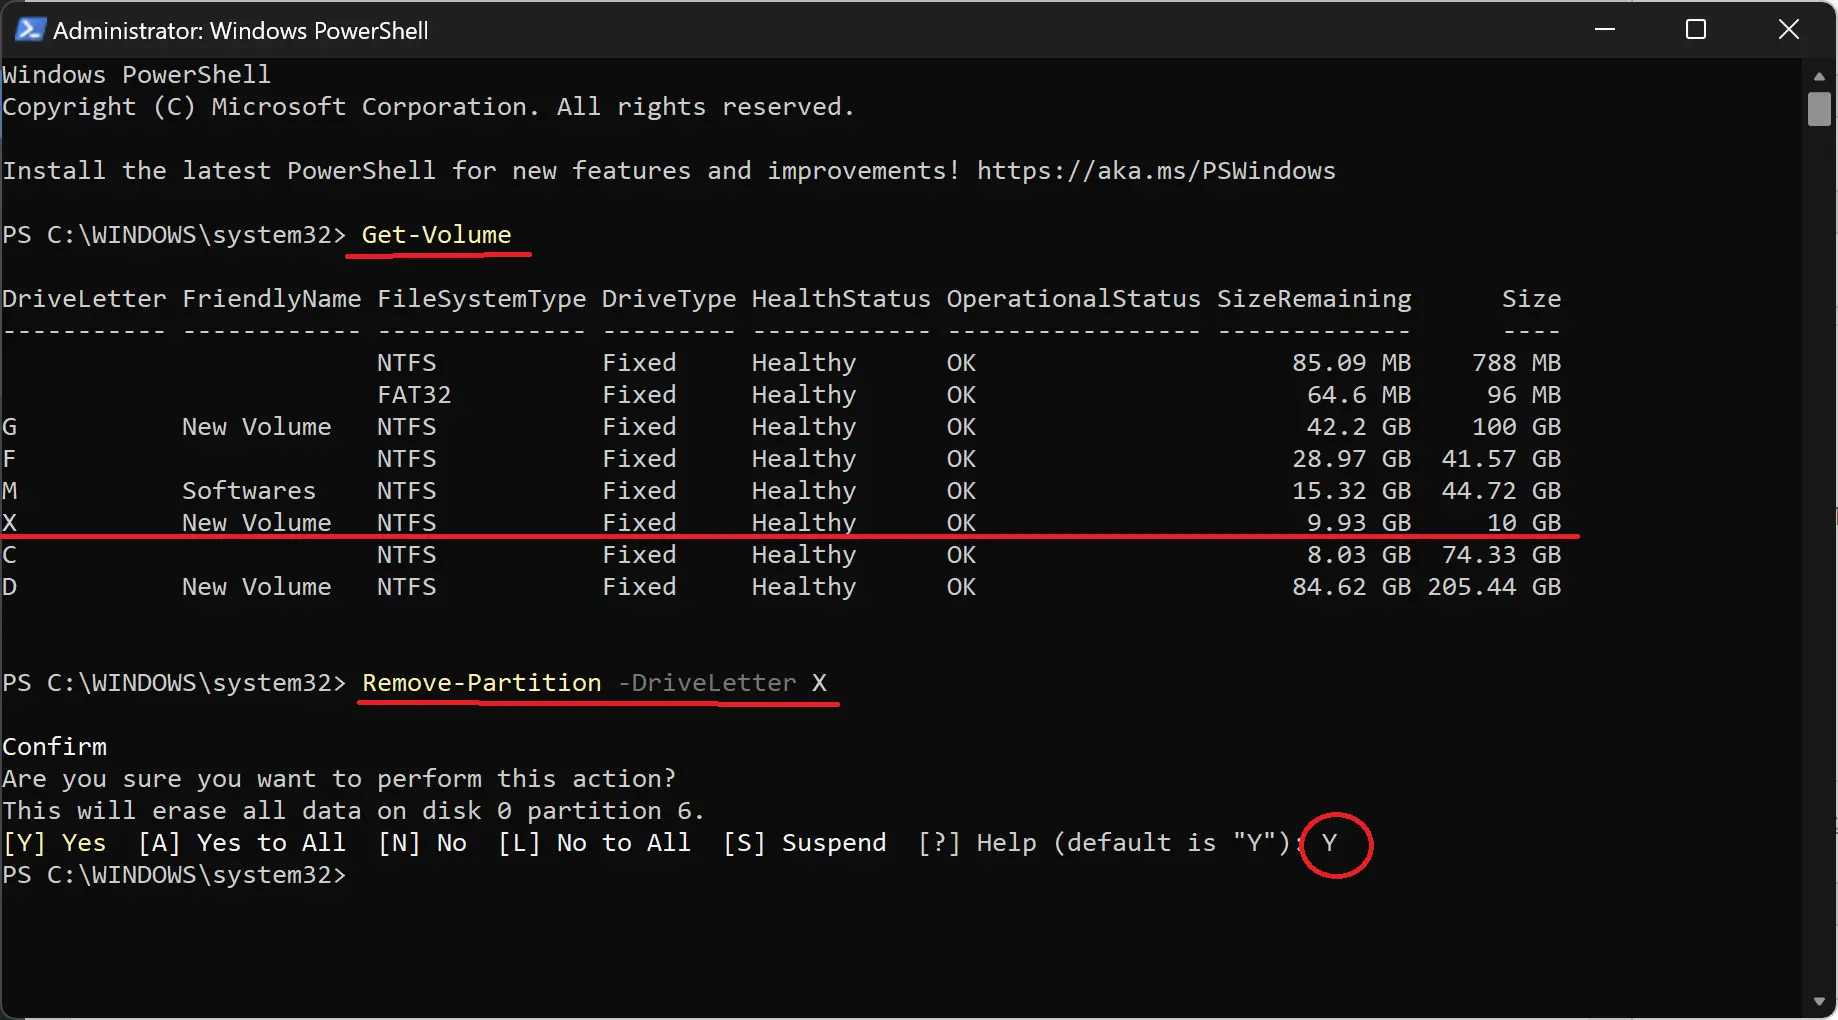
Step 5. Identify the partition you want to delete and note its drive letter.
Step 6. Type the following command to remove the partition and press Enter:
Remove-Partition -DriveLetter X
Note: In the command, replace “X” with the drive letter of the partition that you want to delete.
Step 7. Confirm the action by pressing “Y” and hitting Enter.
After these steps, PowerShell will delete the partition and all the data within it from your Windows 11/10 system. It’s important to note that you should be careful when using PowerShell, as it allows you to perform powerful actions that can have unintended consequences if not used correctly.