System Restore Points are an essential feature of the Windows operating system, allowing users to restore their computer to a previous state in case of system errors or other issues. However, these restore points can take up a significant amount of space on your hard drive over time. If you are running low on disk space, it may be necessary to delete some of these restore points to free up storage. In this article, we will show you how to delete all System Restore Points except for the most recent one in Windows 11, ensuring that you have a safety net while also freeing up valuable disk space.
Deleting old System Restore Points is a straightforward process that can be accomplished in just a few steps. By removing all but the most recent restore point, you can ensure that you have a reliable backup in case of any issues while also maximizing your available storage space. Whether you are running low on disk space or simply looking to optimize your computer’s performance, deleting old System Restore Points is an effective solution that can help you achieve your goals. So, let’s dive into the steps required to delete old restore points in Windows 11.
Are you running low on disk space on your Windows 11 computer? Do you have a large number of System Restore Points taking up valuable storage space? If so, it may be time to clean up your computer and delete old restore points. By removing all but the most recent restore point, you can free up space on your hard drive and ensure that you have a reliable backup in case of system errors or other issues.
In this article, we’ll show you how to delete all restore points except the most recent one using the Disk Cleanup tool in Windows 11. It’s a simple process that can be accomplished in just a few steps. Follow along below to get started!
How to Delete all System Restore Points except Most Recent in Windows 11?
Follow these steps to delete all System Restore Points except most recent in Windows 11:-
Step 1. To begin, click the Start button and search for “Disk Cleanup.” Then, select the Disk Cleanup app from the list of search results to open it.
Step 2. Once the Disk Cleanup app opens, click on the OK button.
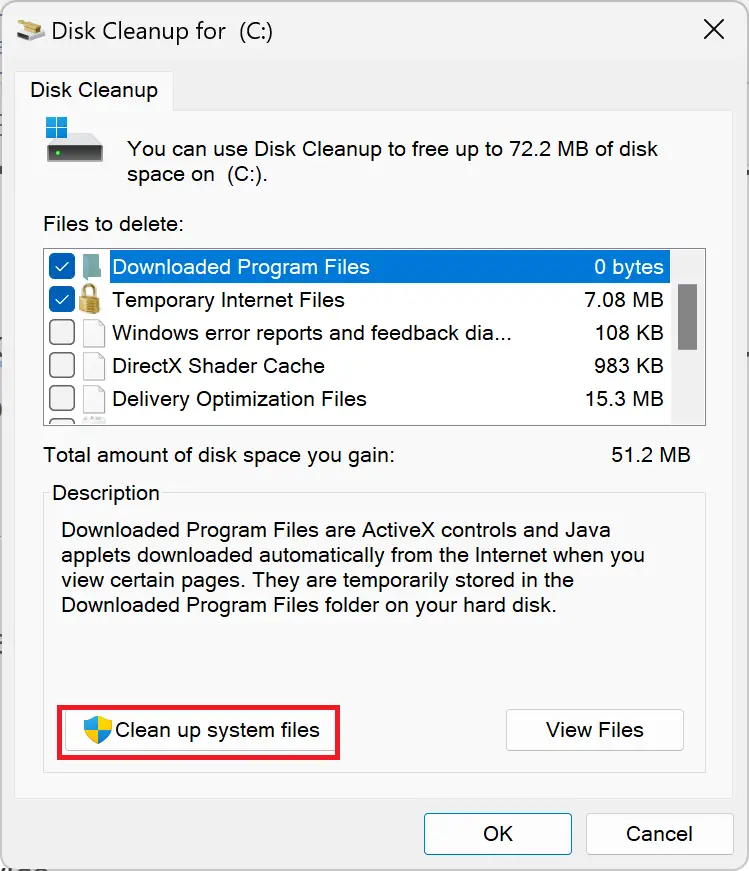
Step 3. Then, click the “Clean up system files” button.
Step 4. Click OK.
Now, Windows will scan your device for all system files. This may take a few moments, depending on the size of your hard drive and the number of files on your device.
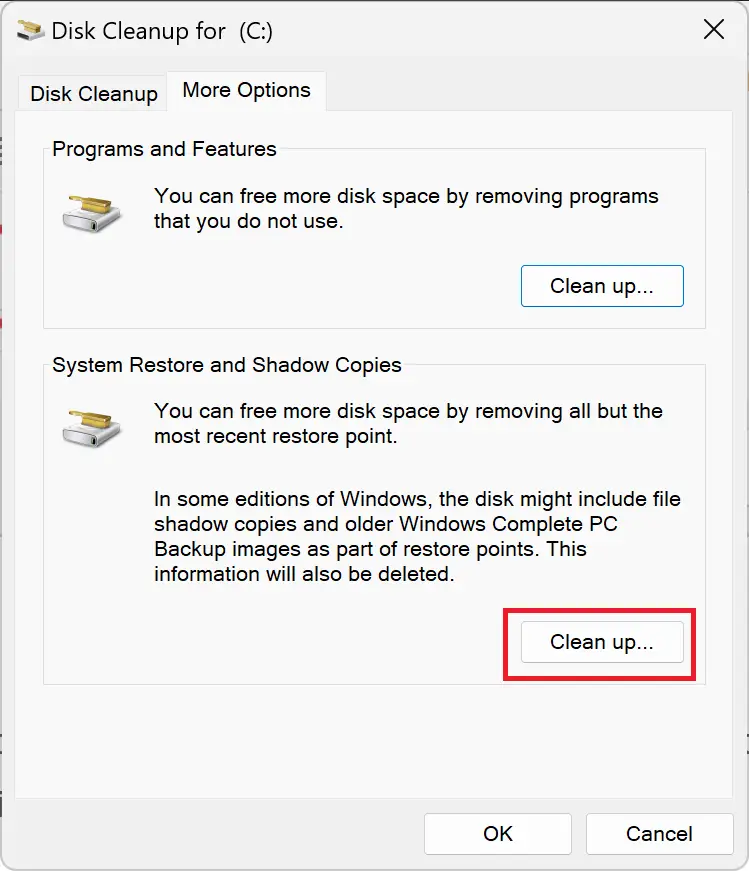
Step 5. Now, switch to the More Options tab and click the “Clean up” button under the “System Restore and Shadow Copies” section.
Step 6. A message will appear asking if you want to delete all but the most recent restore point. Click the “Delete” button to confirm.
Step 7. Another message will appear asking if you are sure you want to perform this action. Click the “Delete Files” button to confirm.
That’s it. The Disk Cleanup tool will now delete all restore points except the most recent one.
Congratulations! You have successfully deleted all restore points except the most recent one using the Disk Cleanup tool in Windows 11. By following these steps, you have freed up valuable storage space on your hard drive and ensured that you have a reliable backup in case of system errors or other issues.