Windows 11 comes with various built-in features and updates to enhance user experience. One of these features is automatic map updates, which can be helpful for many users. However, some individuals may prefer to have more control over their system updates, including map updates. If you’re one of those users who want to disable automatic map updates in Windows 11, this user-friendly guide will walk you through the process.
How to Disable Automatic Map Updates in Windows 11?
Method 1: Disable Automatic Map Updates using Windows 11 Settings App
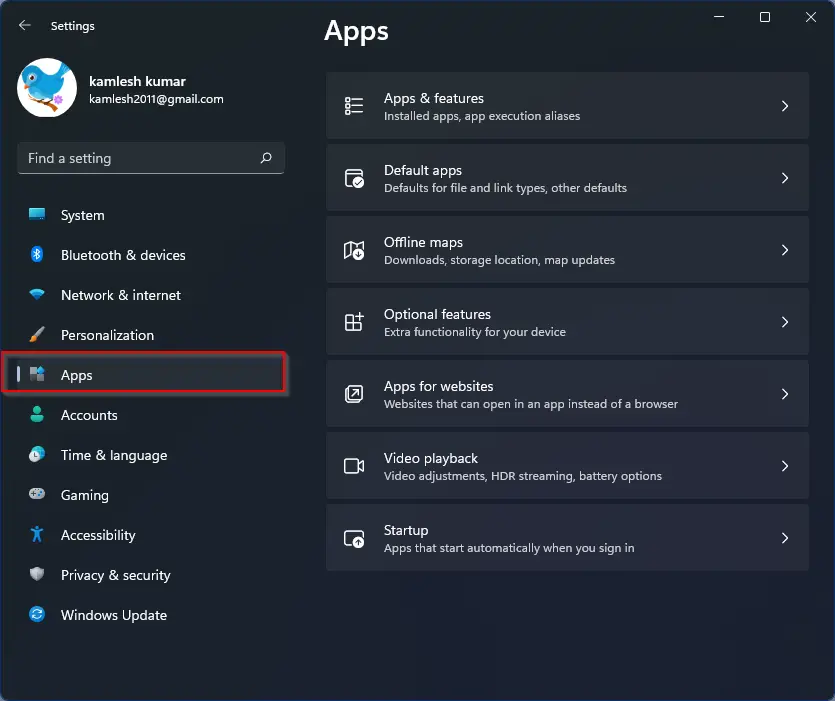
Step 1. To begin, click on the “Start” button located in the taskbar, which is typically found at the bottom center of your screen. From the Start menu, click on the “Settings” icon, which resembles a gear. Alternatively, you can also use Windows Key + I on your keyboard to open the Windows 11 Settings app.
Step 2. Once you’re in the Settings menu, locate and click on the “Apps” option.
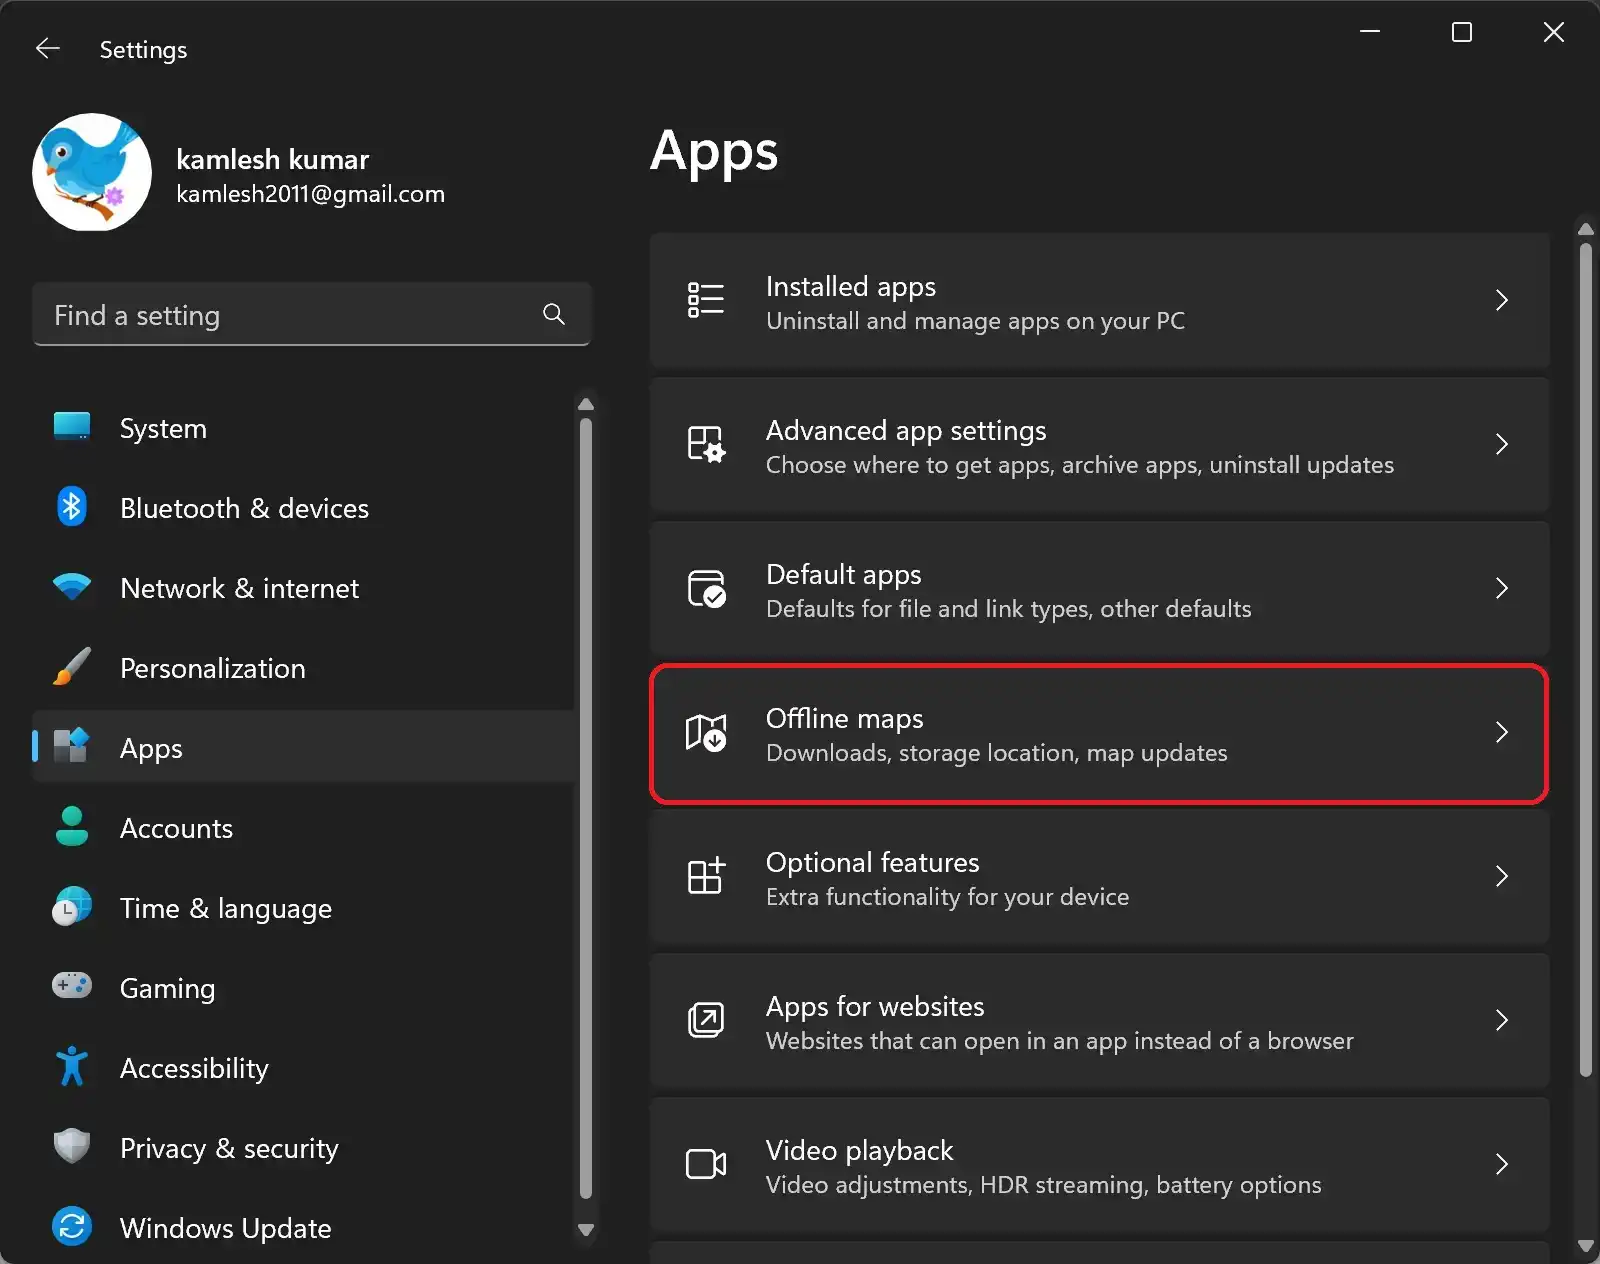
Step 3. Within the Apps settings, you will find several options related to apps. Look for the “Offline maps” tile and click on it. This will open the map’s settings for managing maps.
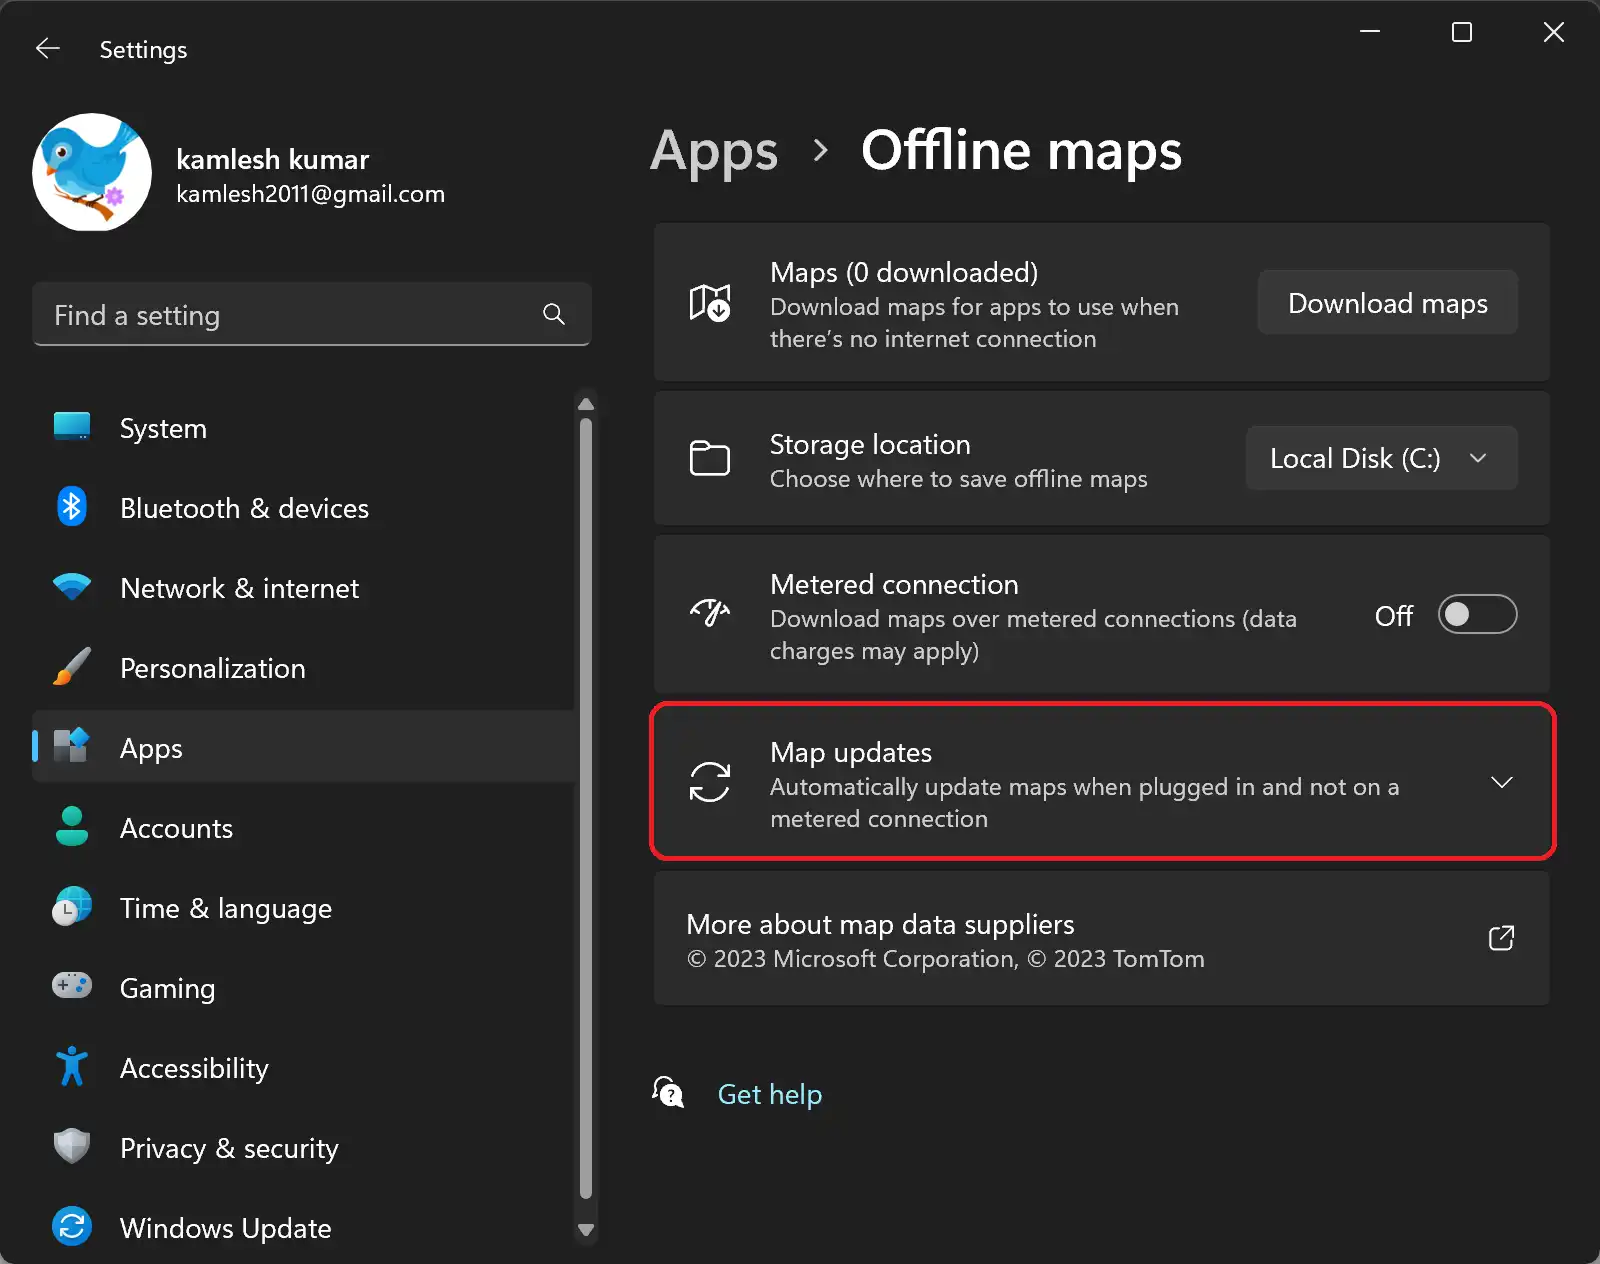
Step 4. In the Offline maps settings, you will find a section called “Map updates.” Click on the “Map updates” tile within that section.
Step 5. Once you’re in the Map updates section, click on Map updates to expand the details.
Step 6. After expanding the details of the Map updates, you will see a checkbox “Update automatically when plugged in and on Wi-Fi.” Uncheck this option to disable the automatic update for the Maps app.

Method 2: Turn Off Automatic Map Updates in Windows 11 using Local Group Policy Editor
Step 1. To begin, open Local Group Policy Editor.
Step 2. Then, navigate to the following path in the left sidebar:-
Computer Configuration > Administrative Templates > Windows Components > Maps
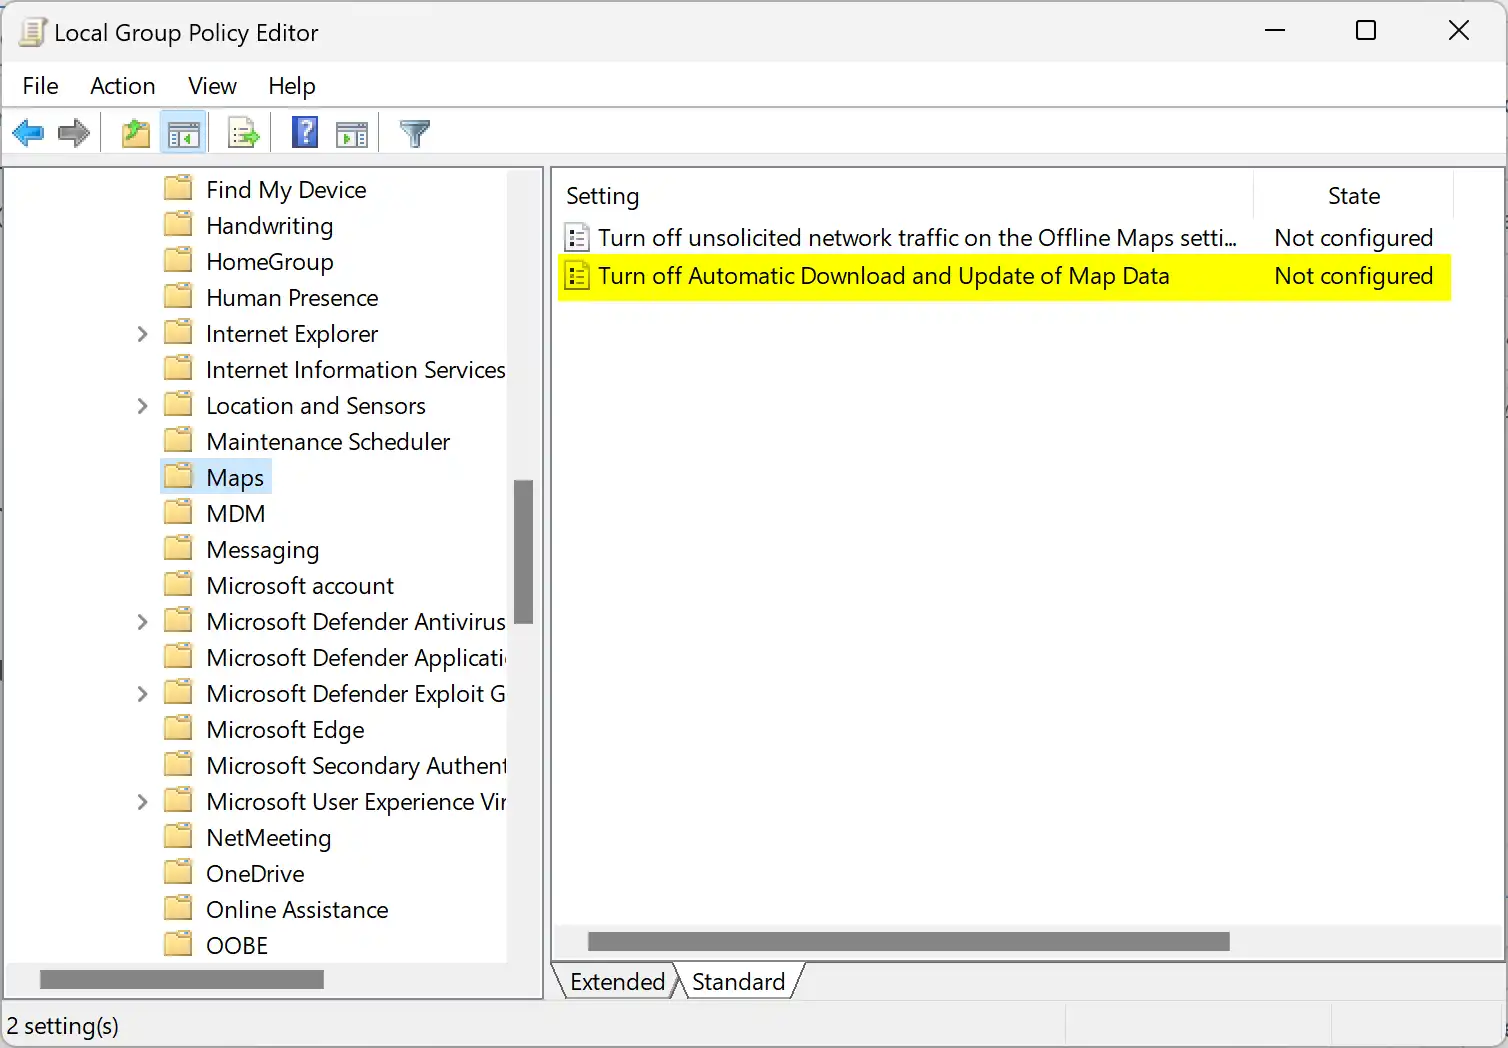
Step 3. Next, double-click the “Turn off Automatic Download and Update of Map Data” policy in the right pane.
Step 4. Select the Enabled option.
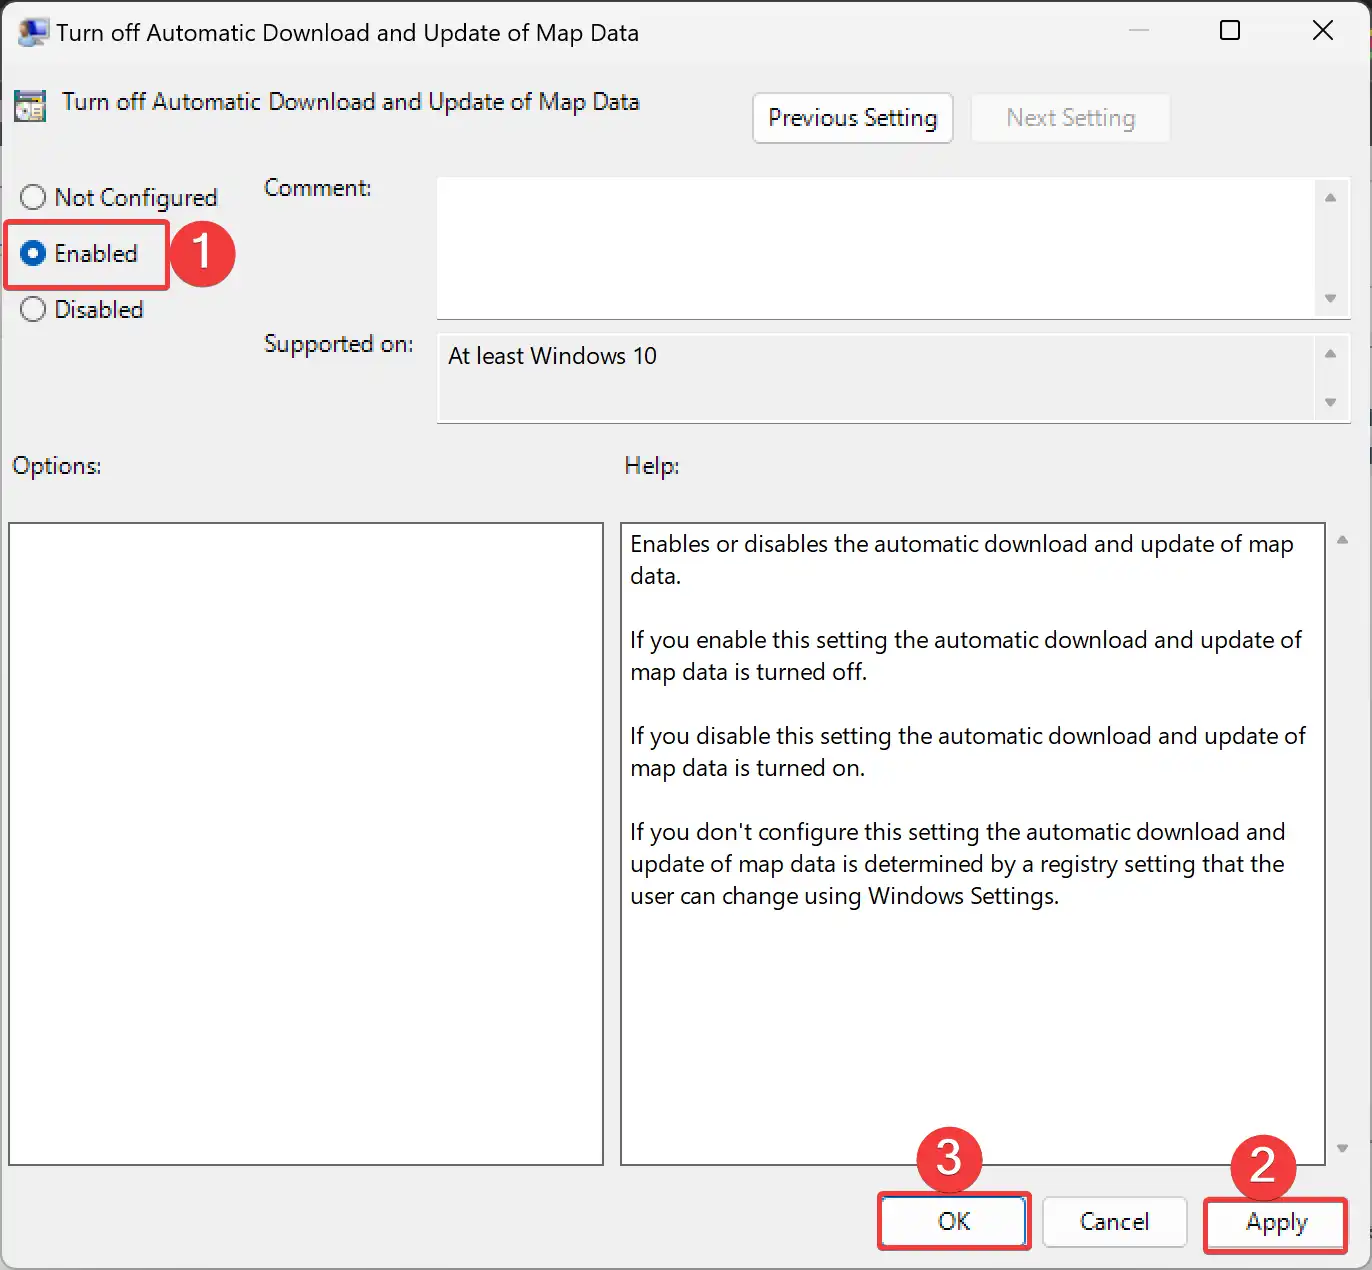
Step 5. Click Apply and then the OK button.
Step 6. Restart your computer to apply the changes.
Once you complete the above steps, you’ll see that the “Update automatically when plugged in and on Wi-Fi” option is greyed out under the “Maps update” section in the Settings app.
Method 3: Turn Off Automatic Map Updates in Windows 11 using Registry Editor
Step 1. First, open Registry Editor.
Step 2. Next, browse to the following key in the left sidebar of Registry Editor:-
HKEY_LOCAL_MACHINE\SOFTWARE\Policies\Microsoft\Windows
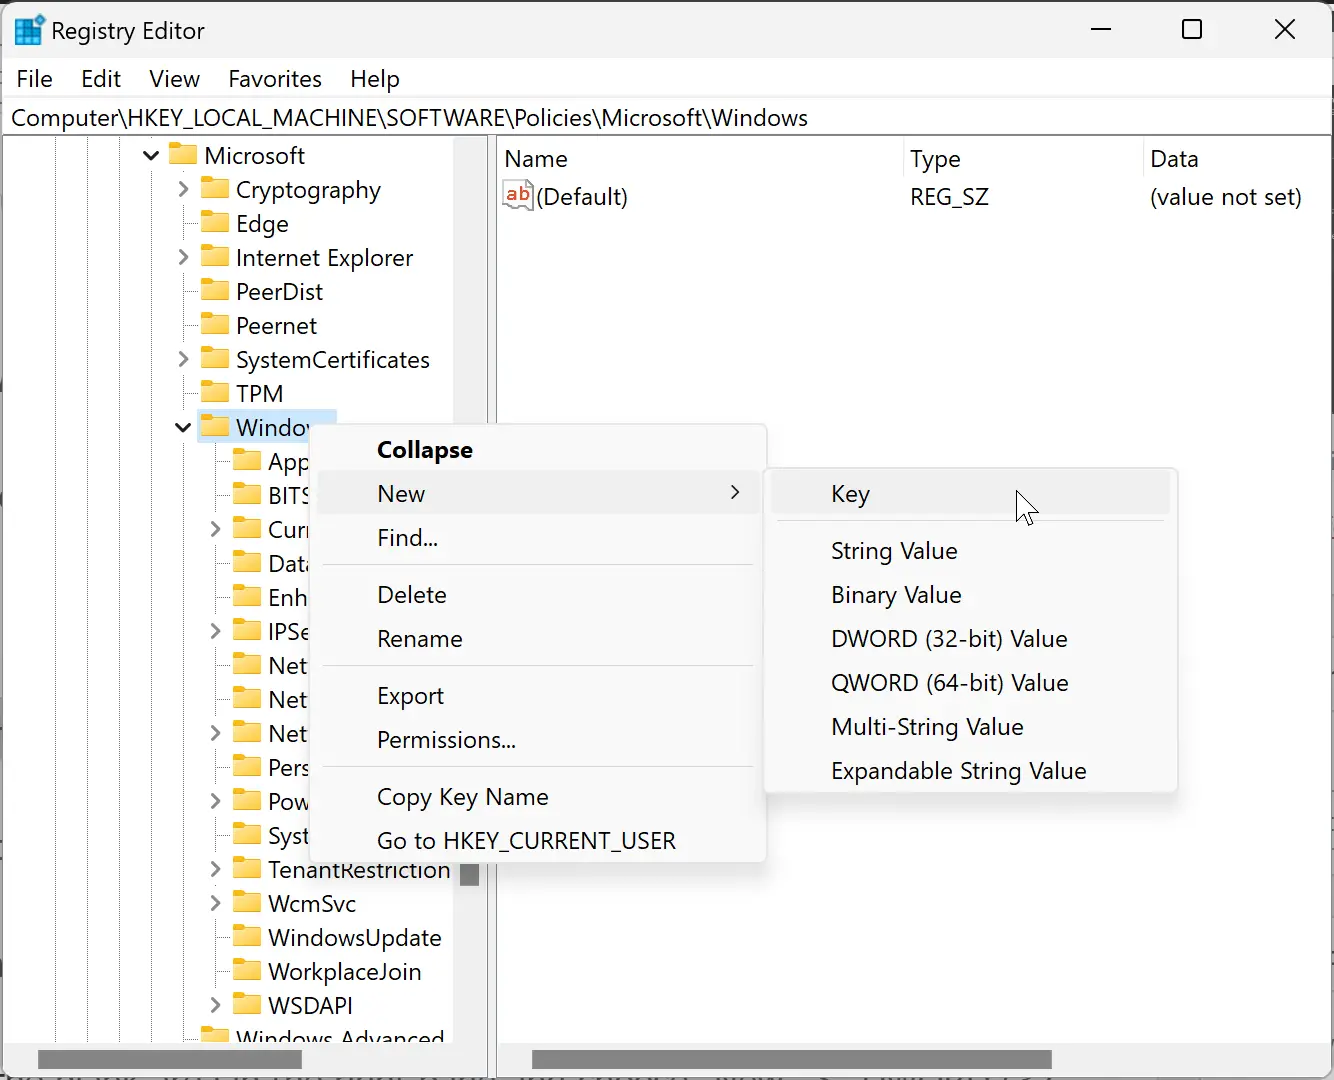
Step 3. Right-click the Windows key in the left sidebar and choose New > Key.
Step 4. Name the new key Maps.
Step 5. Select the Maps folder, right-click the blank area in the right pane, and pick New > DWORD (32-bit) Value.
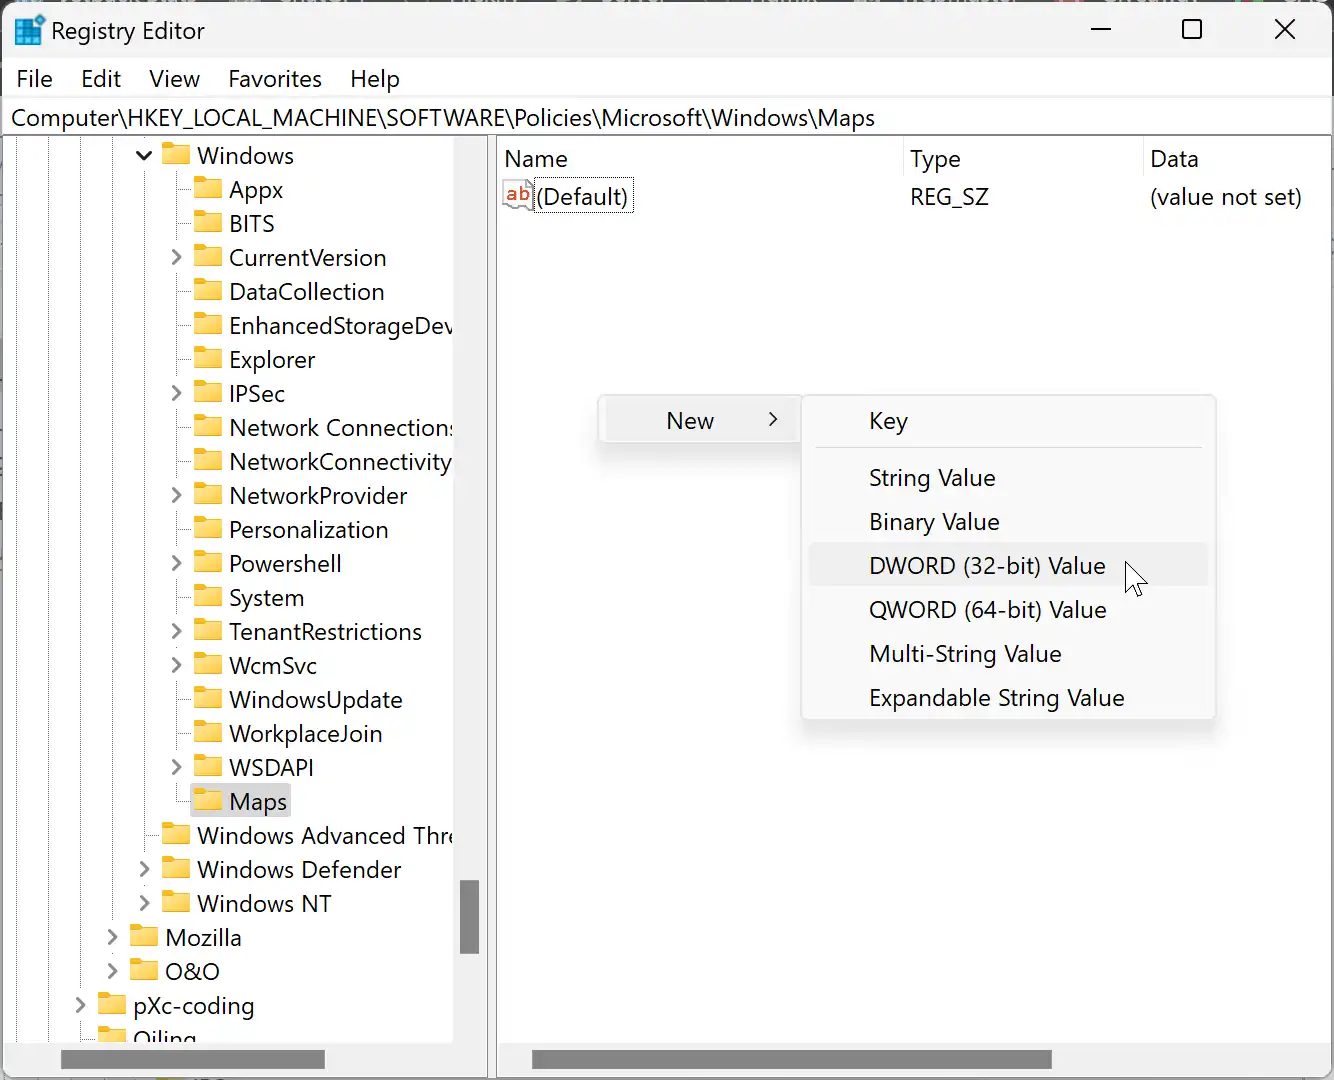
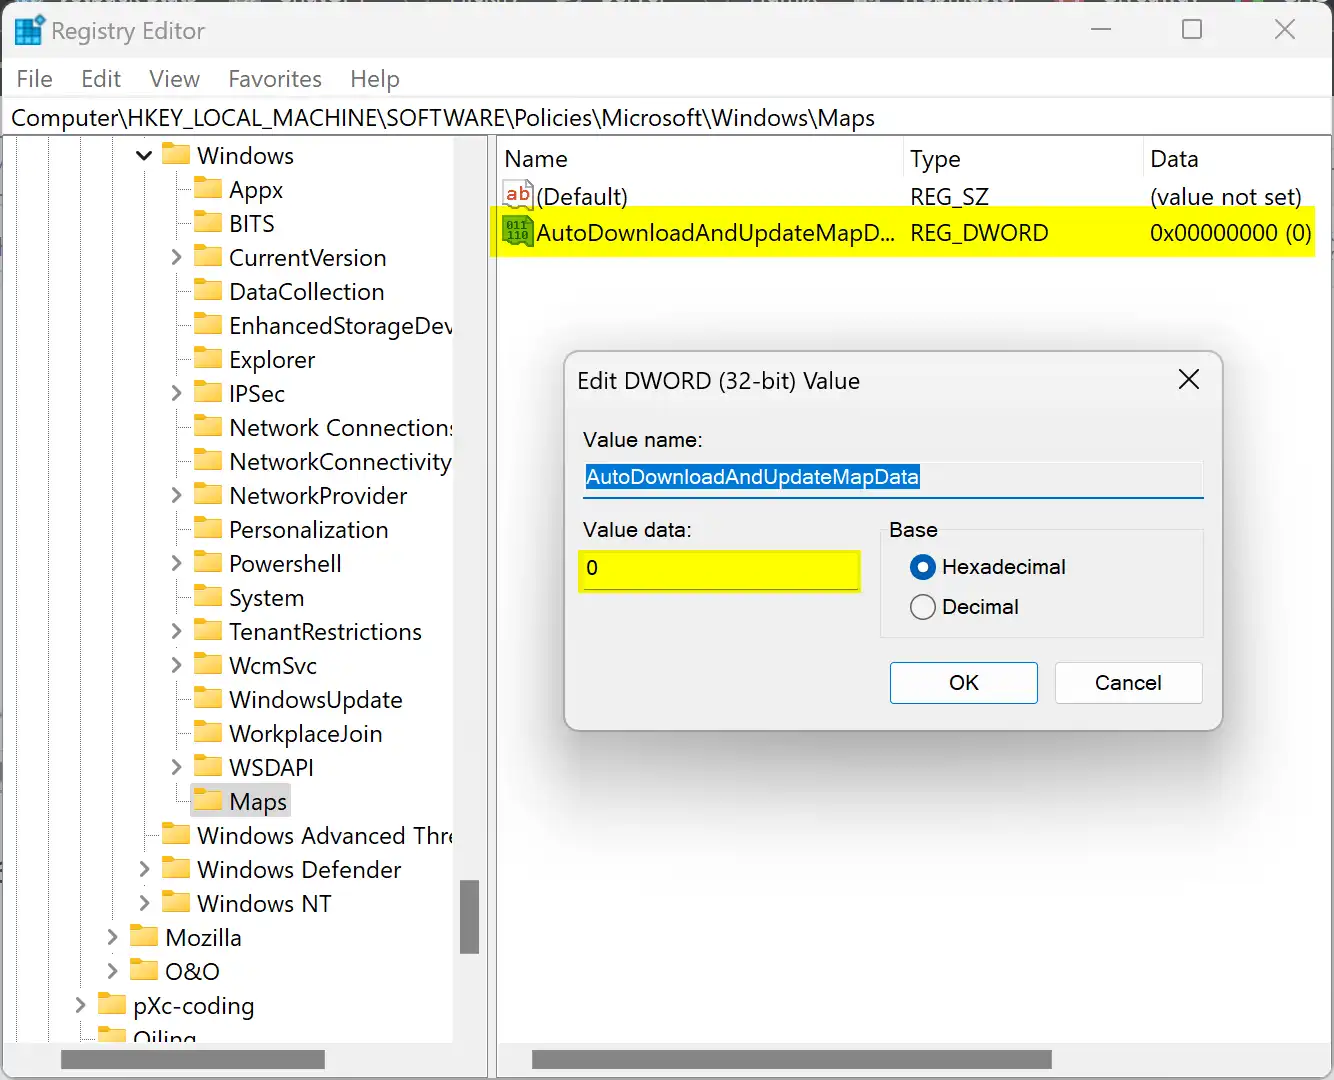
Step 6. Name the newly created REG_DWORD AutoDownloadAndUpdateMapData, and leave the default data value 0.
Step 7. Close Registry Editor and reboot your system to apply the changes.
Conclusion
In conclusion, Windows 11 offers automatic map updates as a built-in feature to enhance user experience. While this can be beneficial for many users, some individuals may prefer more control over their system updates, including map updates. By following the methods outlined in this user-friendly guide, you can easily disable automatic map updates in Windows 11.
Method 1 involves accessing the Windows 11 Settings app, navigating to the Apps settings, and disabling the “Update automatically when plugged in and on Wi-Fi” option under Offline maps.
Method 2 utilizes the Local Group Policy Editor to enable the “Turn off Automatic Download and Update of Map Data” policy under Windows Components > Maps.
Method 3 involves using the Registry Editor to create a new key and DWORD value that disables automatic map updates.
By choosing any of these methods, you can regain control over your system updates and tailor your Windows 11 experience according to your preferences. Remember to periodically check for updates manually to ensure your system stays secure and up to date.
