Like its predecessors, Windows 11 also comes with a built-in firewall that Windows Defender manages. This firewall protects your computer from malware attacks and all sorts of malicious applications when you connect to the internet. It uses predefined rules to protect your computer from harmful applications.
Some third-party antivirus also comes with its own firewall. When you install it, the Windows firewall automatically gets disabled. If you stop the antivirus or uninstall it from your PC, the firewall will activate and start protecting your computer. That’s the beauty of Windows Firewall.
However, if you cannot open the internet or there is any problem on your PC, and you suspect that the firewall may be the leading cause, you may disable it. In this gearupwindows guide, we will explain how to enable and disable Windows Firewall according to your needs.
How to Permanently Disable the Windows 11 Firewall?
If you have purchased a third-party firewall or, due to some reason, you want to disable the Windows 11 firewall permanently, do the following:-
Step 1. First, open the Settings app by pressing the Windows + I keys or any other method you regularly use.
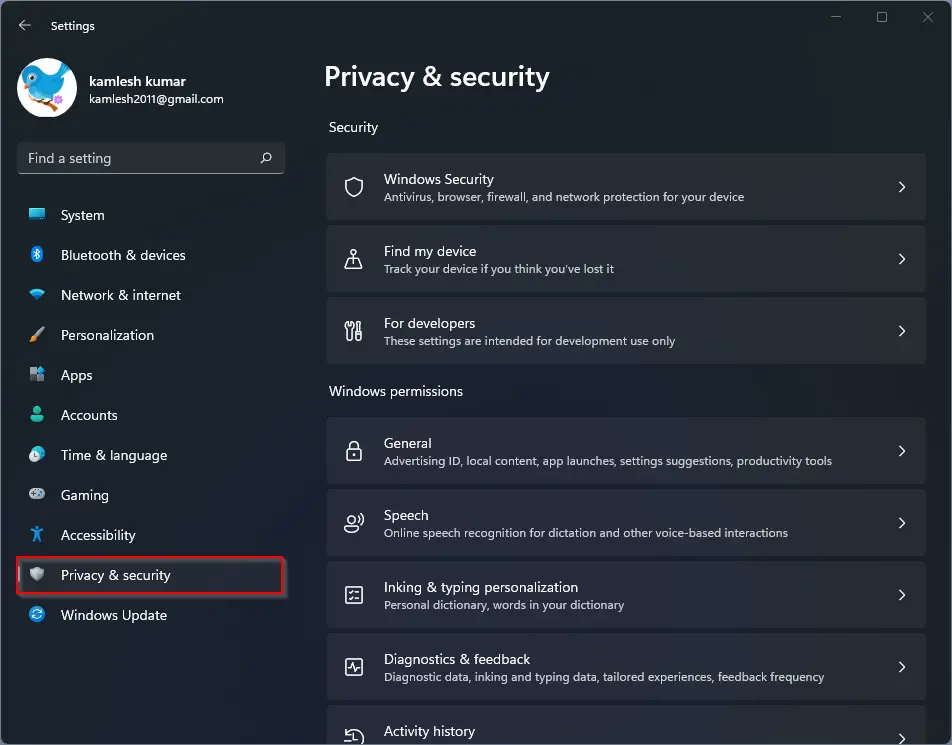
Step 2. Then, click the Privacy & Security category from the left sidebar.
Step 3. After that, select the Windows Security tile present to the right of the screen.
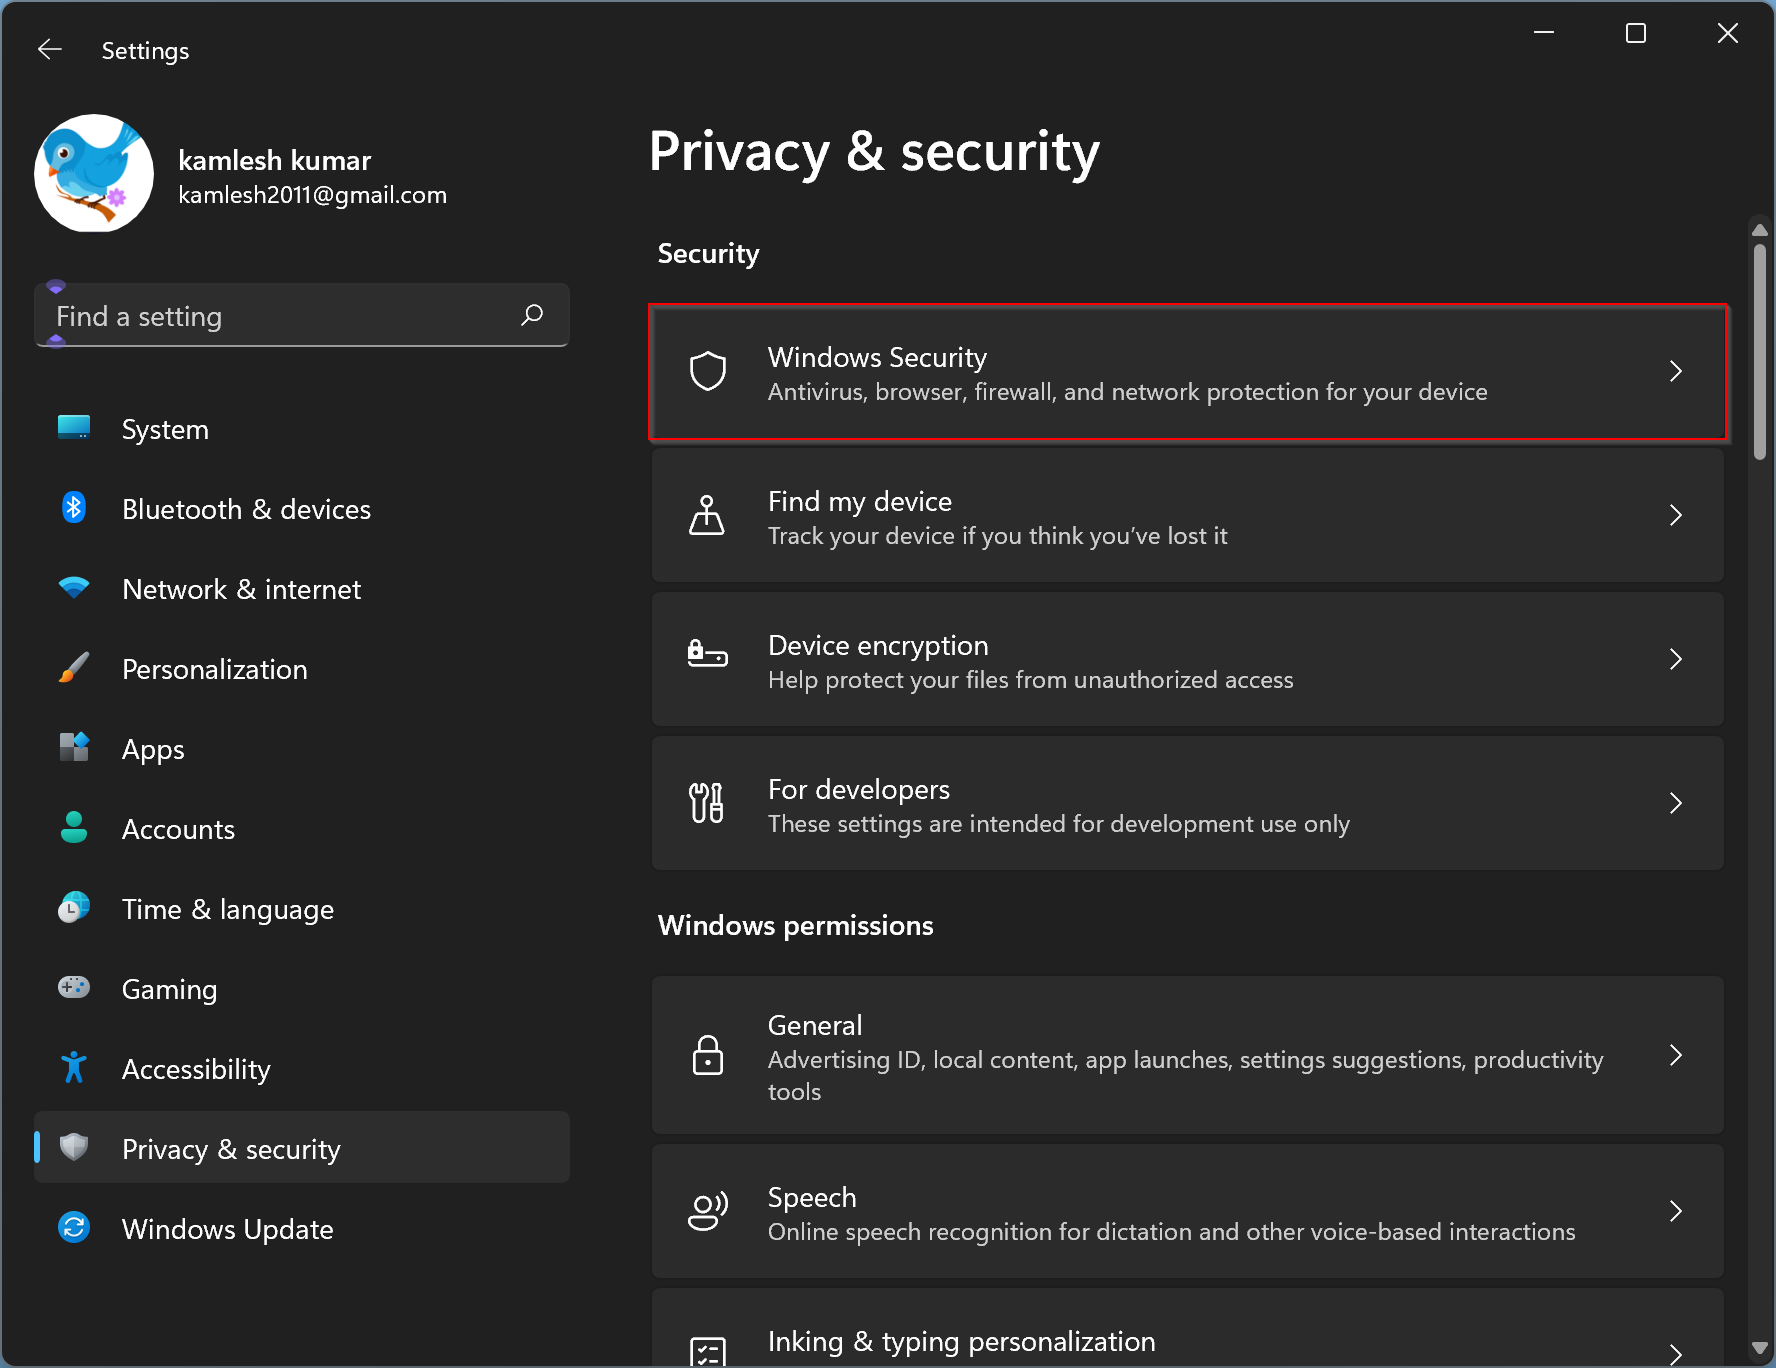
Step 4. Next, click on the Open Windows Security button in the Windows Security settings pane.
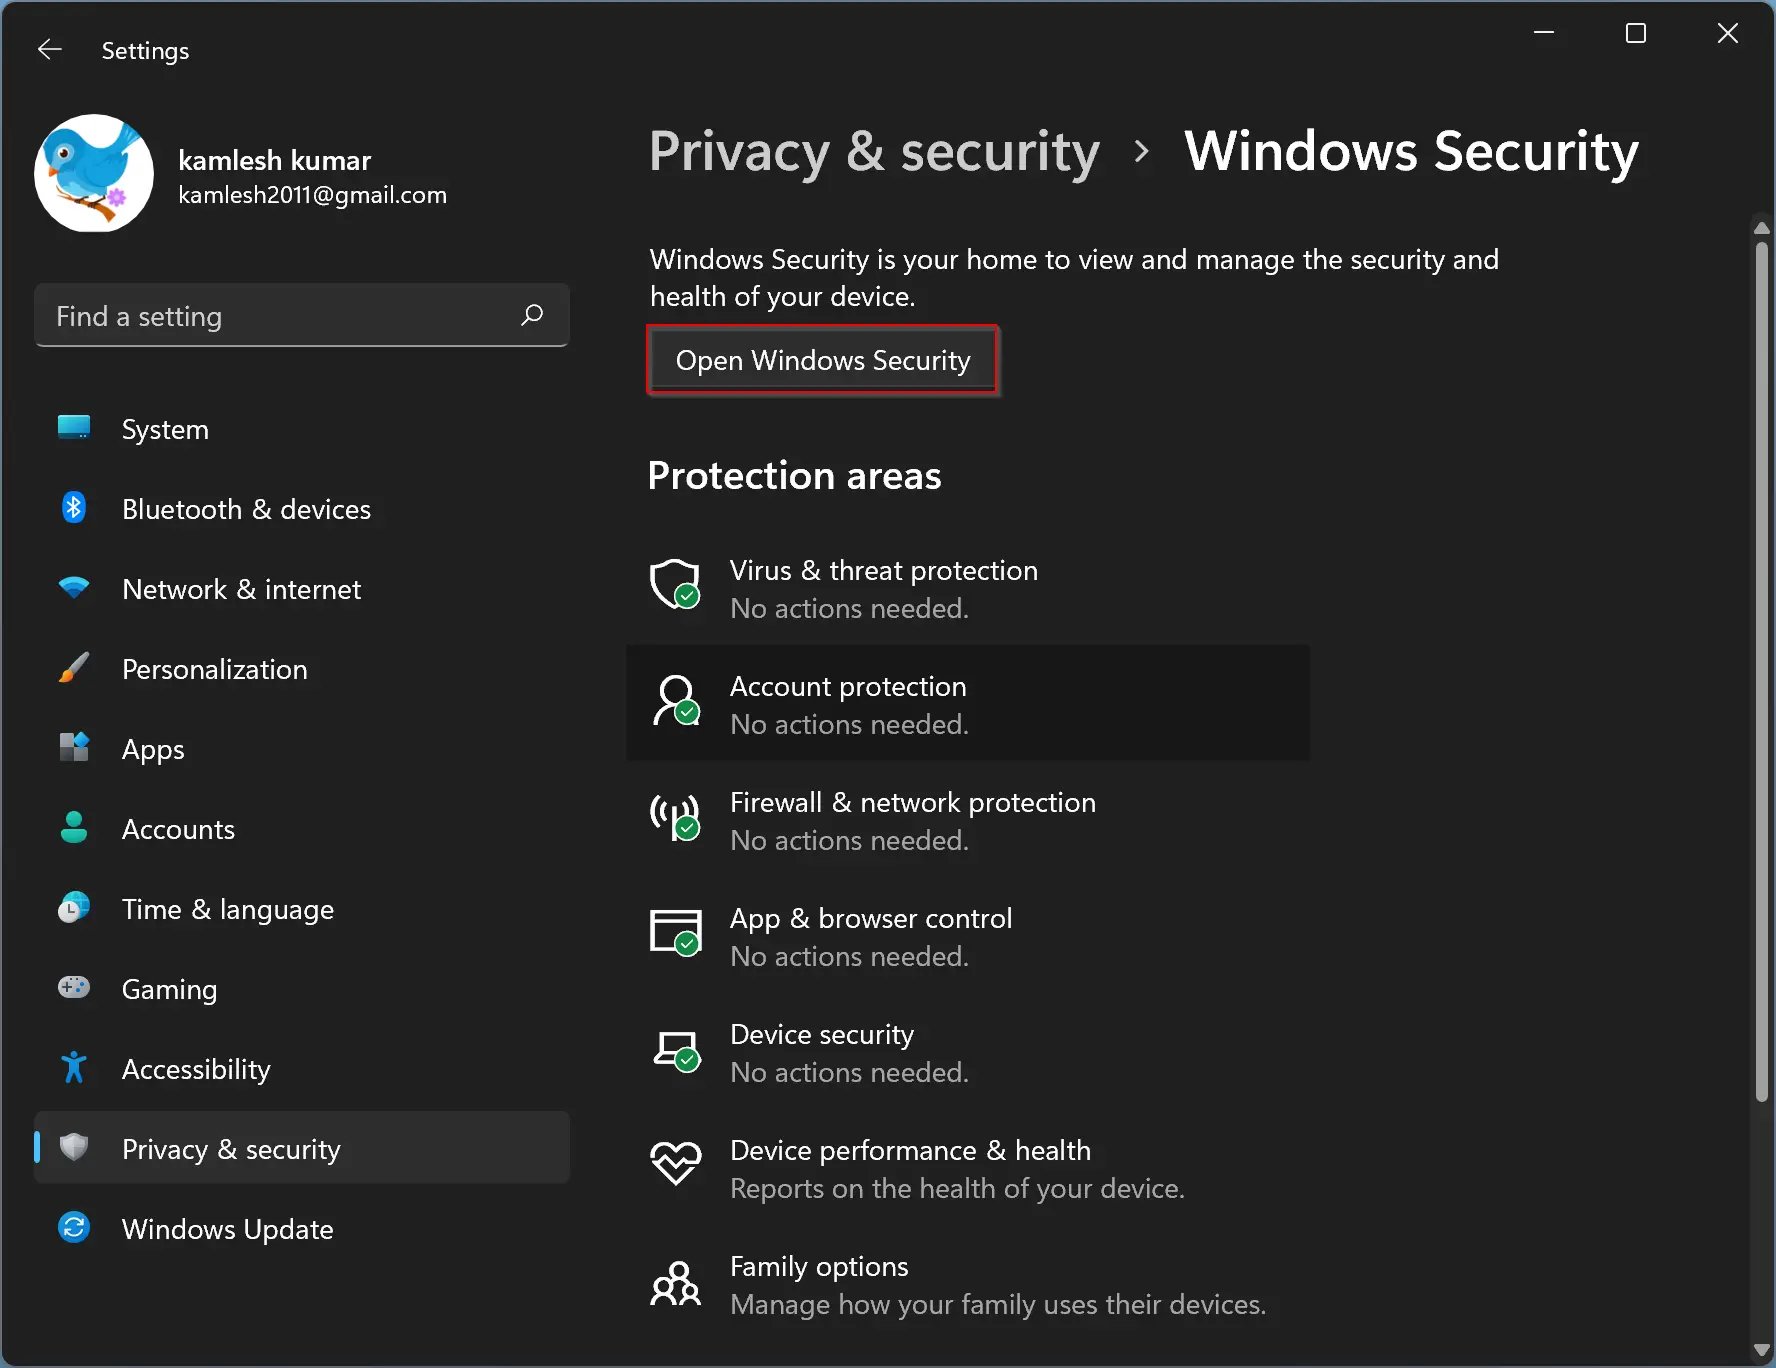
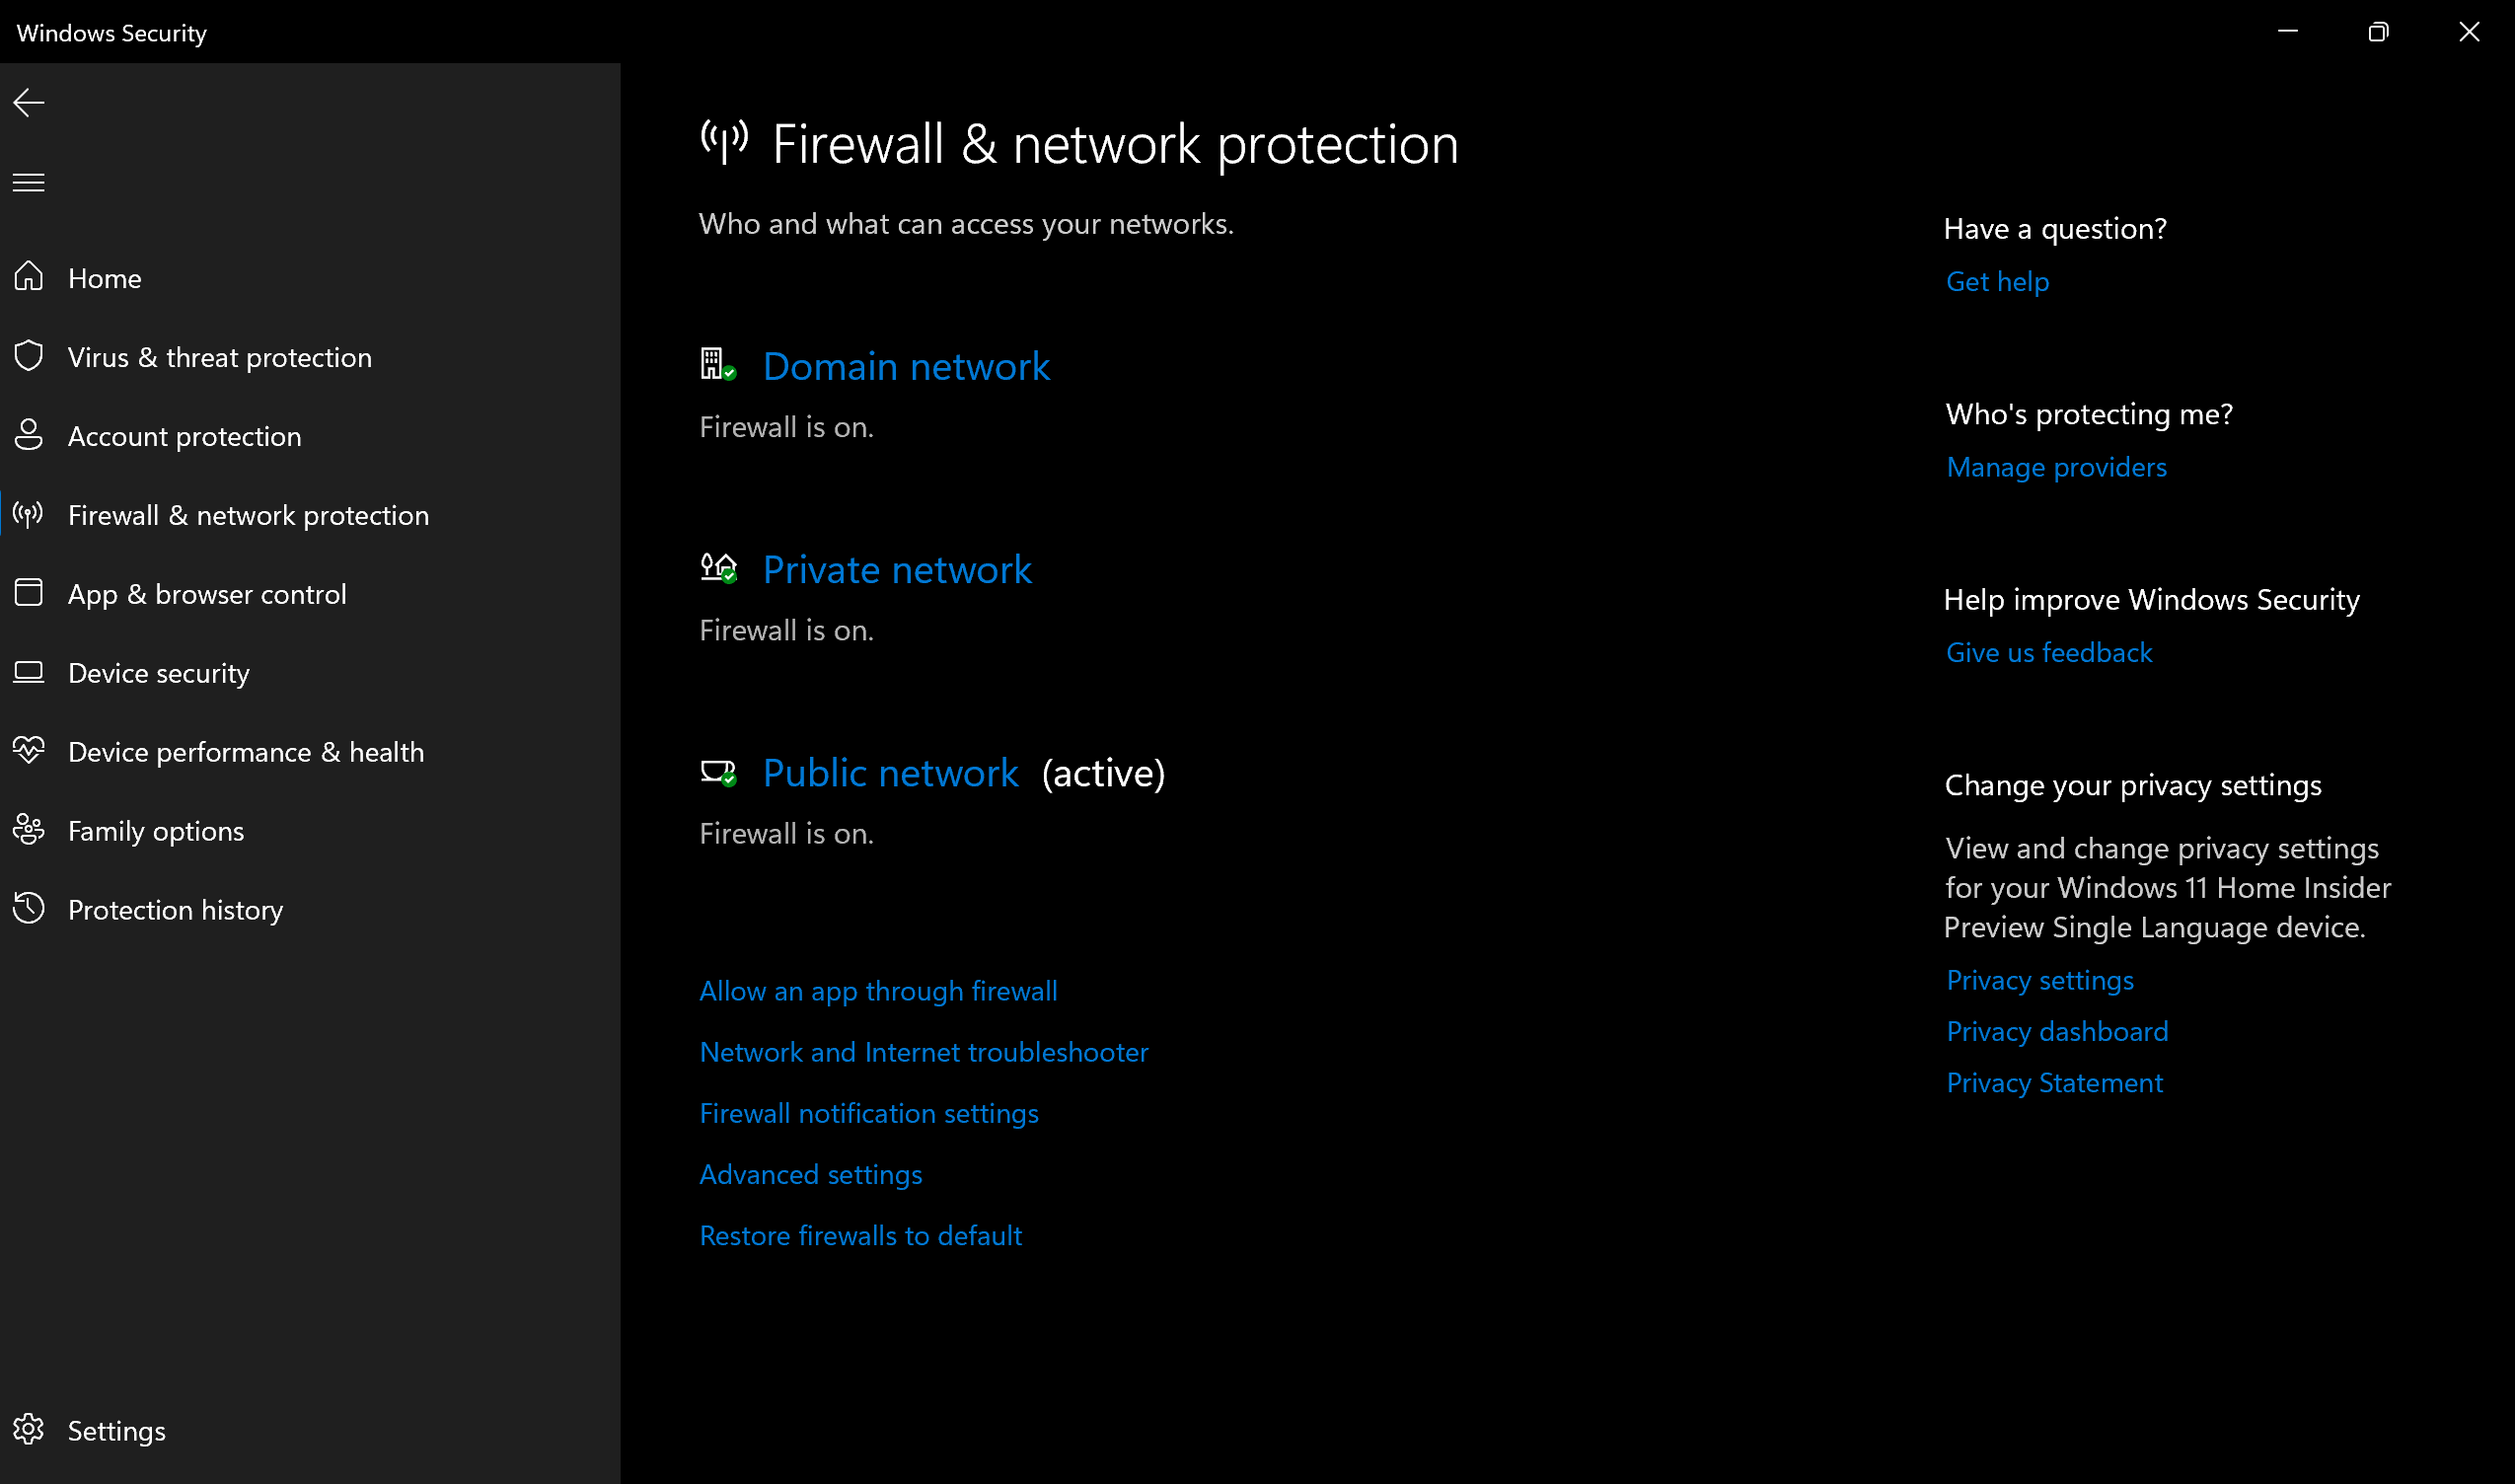
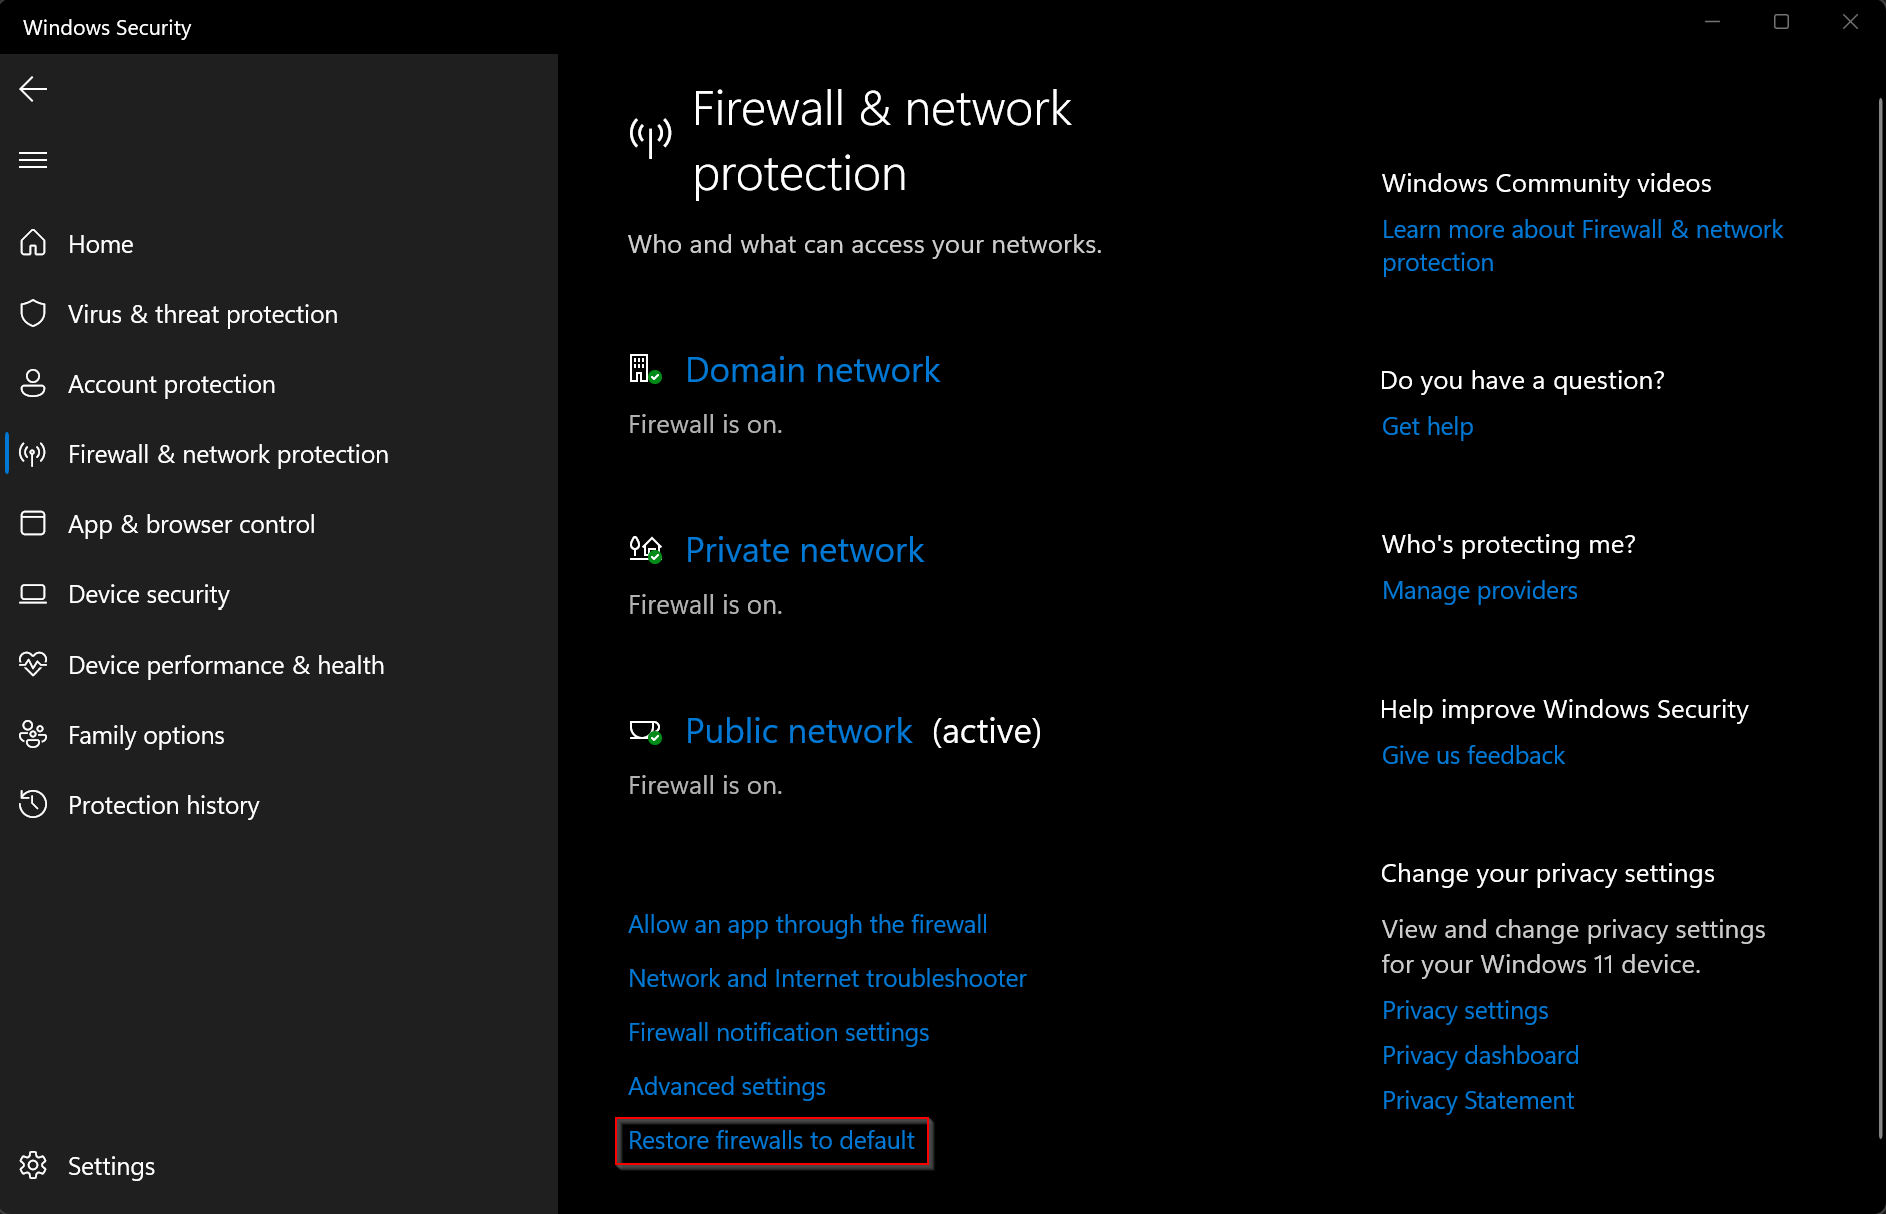
Step 5. When you’re done, the “Windows Security” window will open. Click on the Firewall & network protection option in this window.
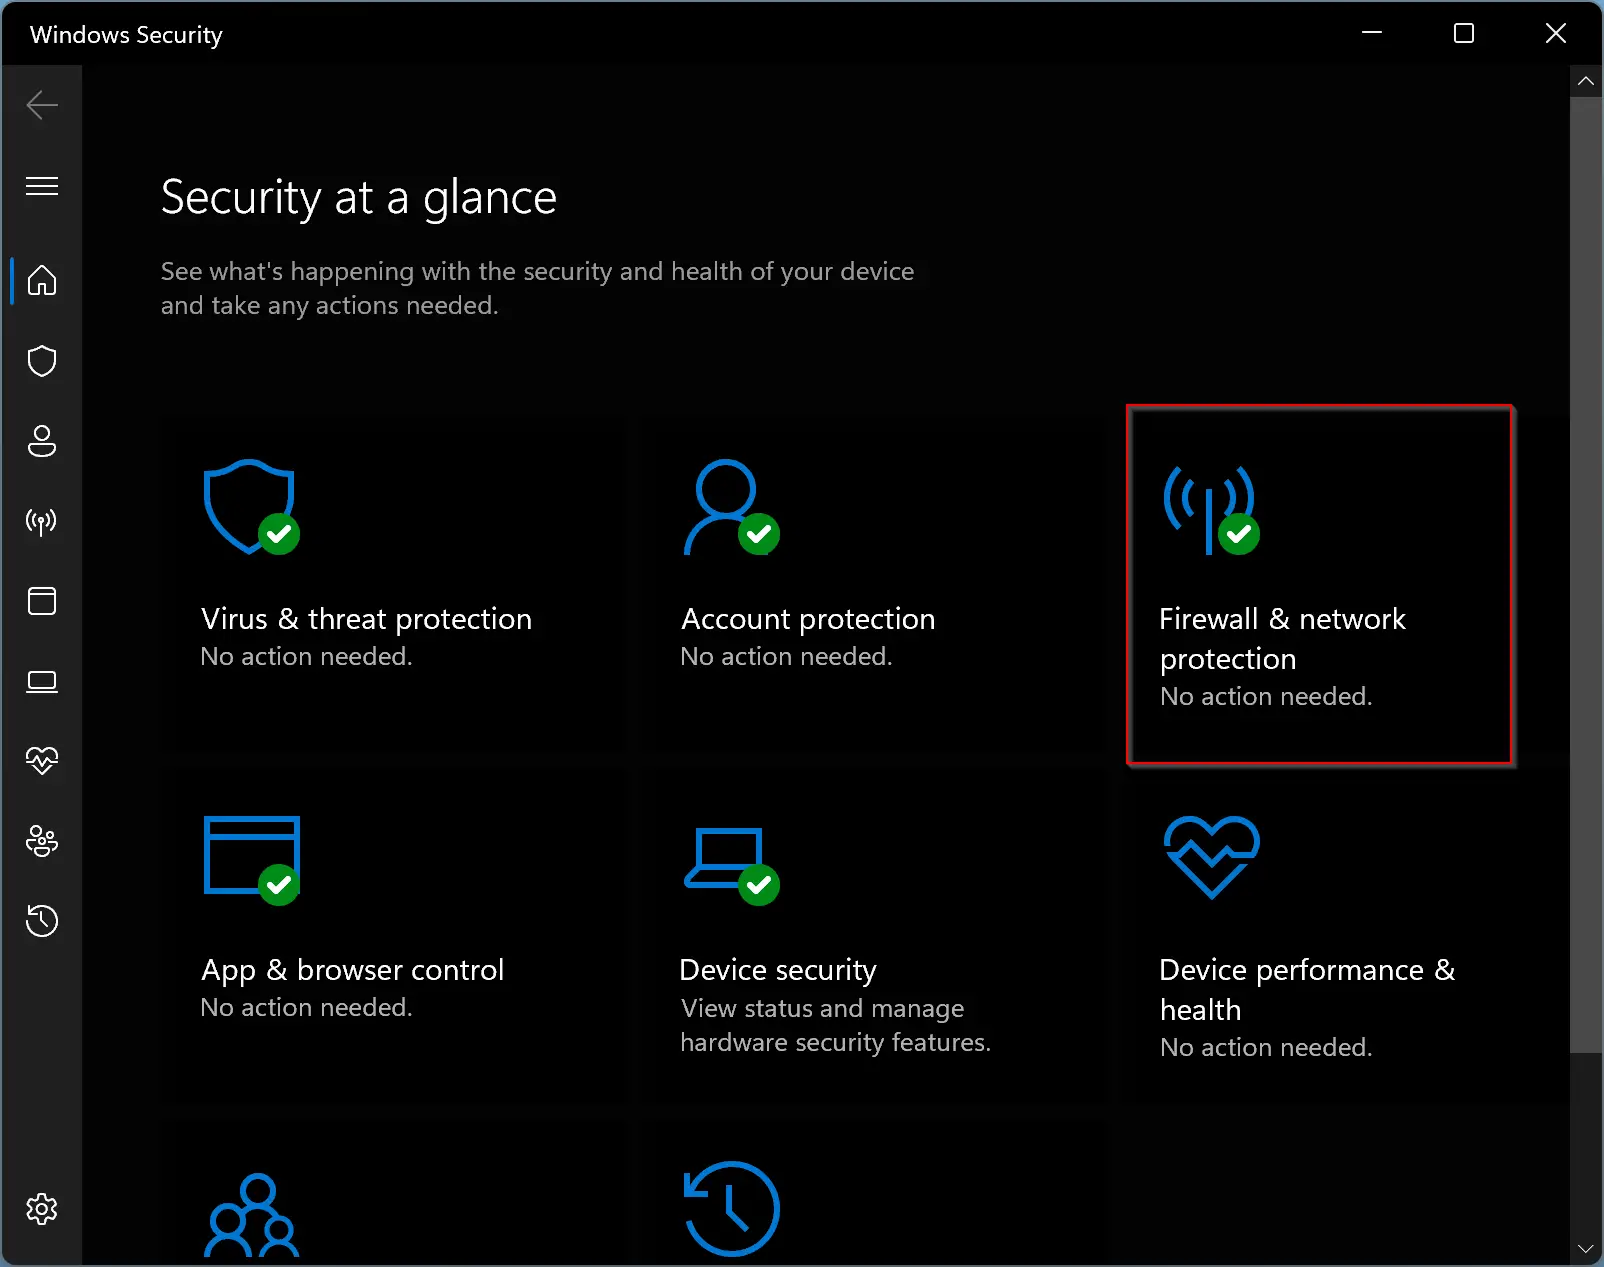
Step 6. On the next screen, you can view all the settings related to Windows Defender Firewall.
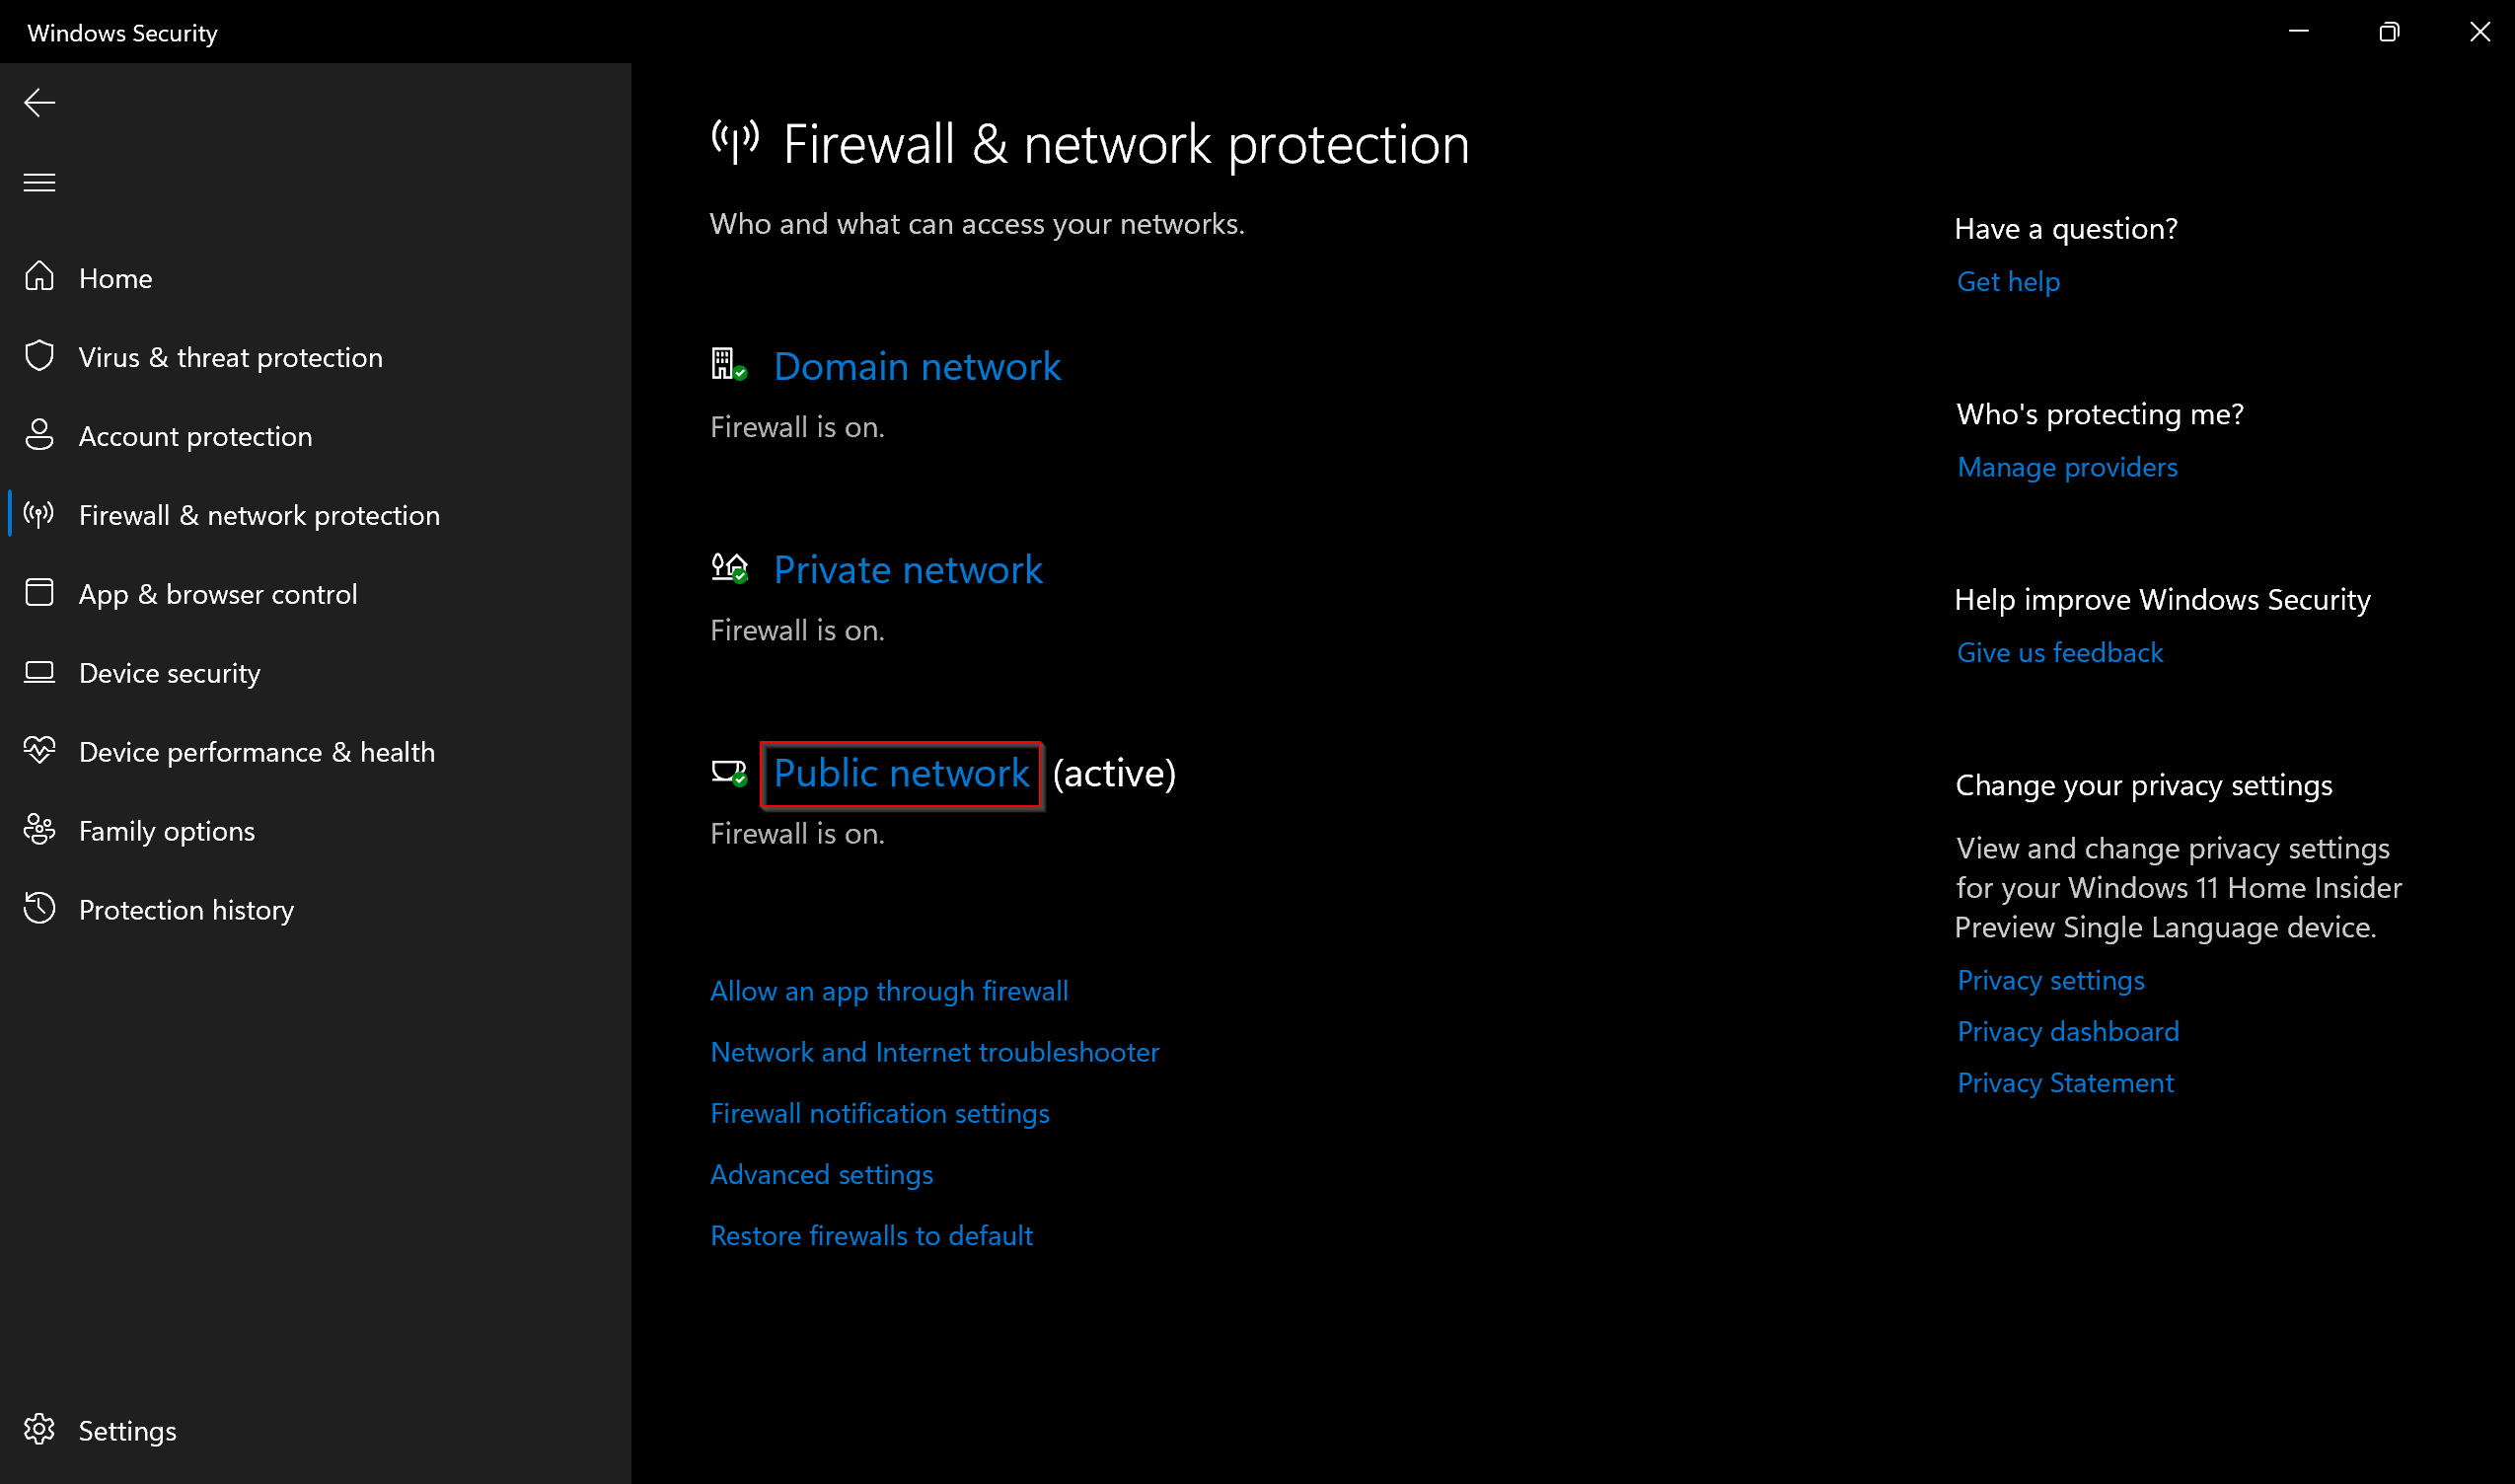
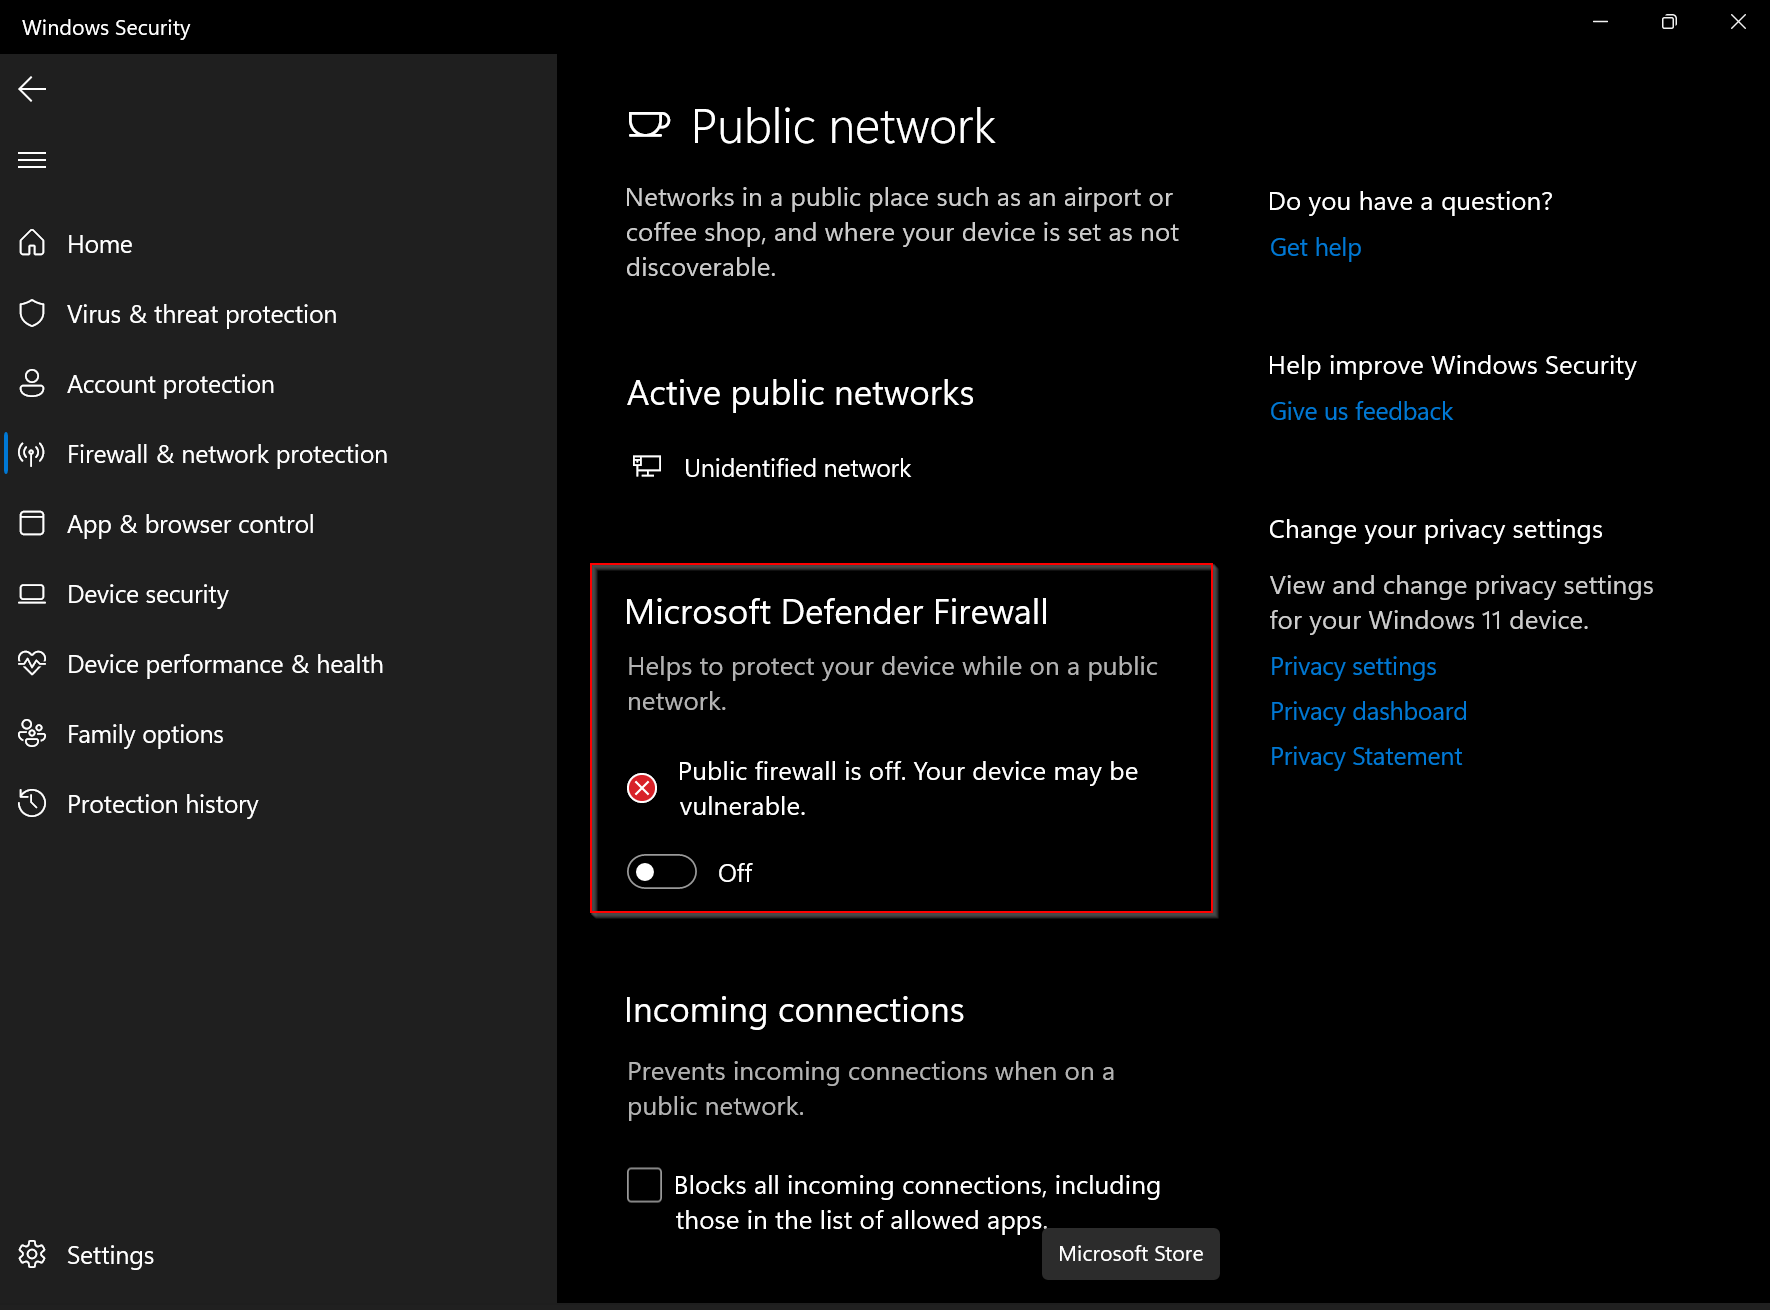
Here, click the link Public network.
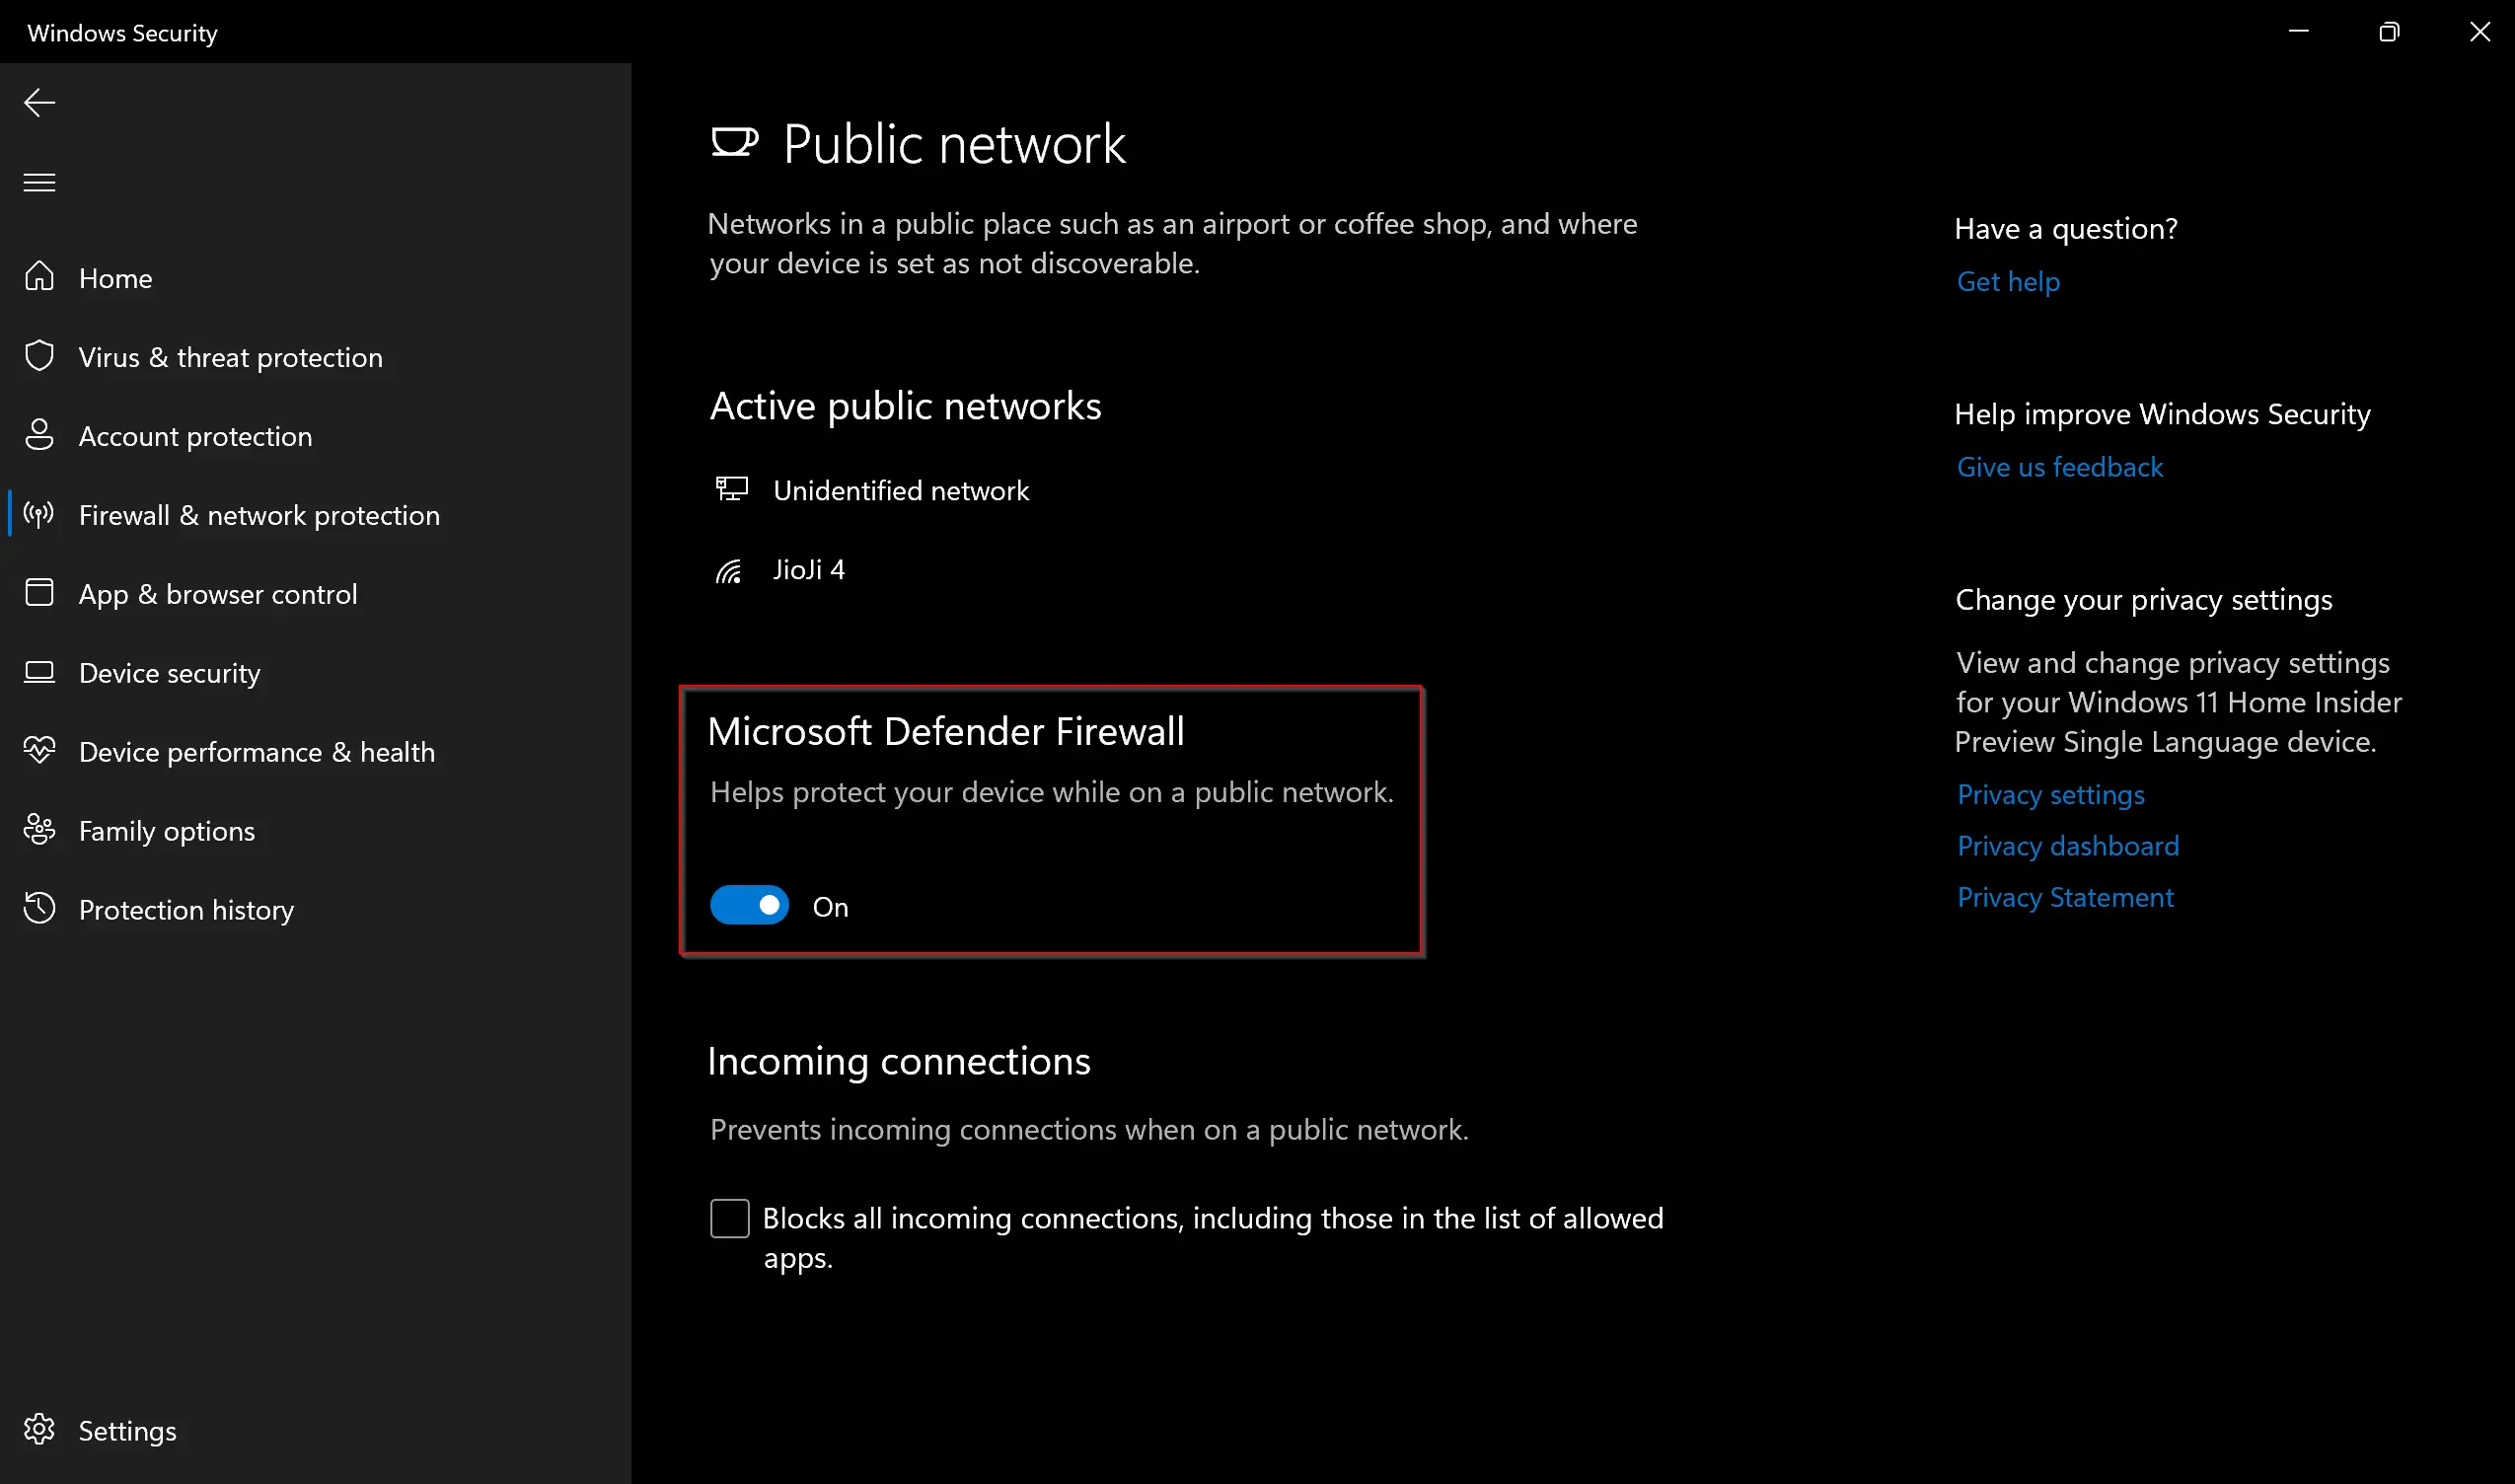
Step 7. Toggle the “Microsoft Defender Firewall” switch to the Off position.
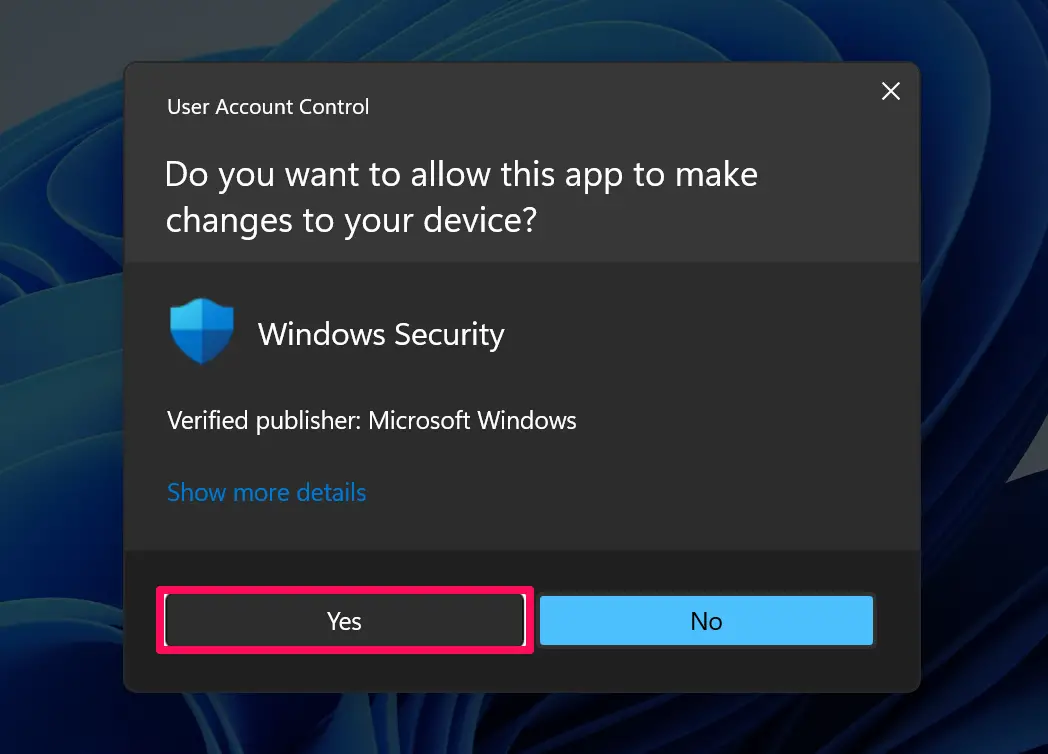
Step 8. When Windows prompts with the “User Account Control” dialog, click the Yes button.
That’s it. Windows 11 Firewall is disabled permanently until you manually turn it On.
How to Disable Windows 11 Firewall for Individual Apps?
If you want to disable the Windows 11 Firewall for individual apps or want to permit some of the apps on the firewall, do the following:-
Step 1. First, open the Settings app by pressing the Windows + I keys or any other method you regularly use.
Step 2. Then click the Privacy & Security category from the left sidebar.
Step 3. After that, select the Windows Security tile present to the right of the screen.
Step 4. Next, click on the Open Windows Security button in the Windows Security settings pane.
Step 5. When you’re done, the “Windows Security” window will open. Click on the Firewall & network protection option in this window.
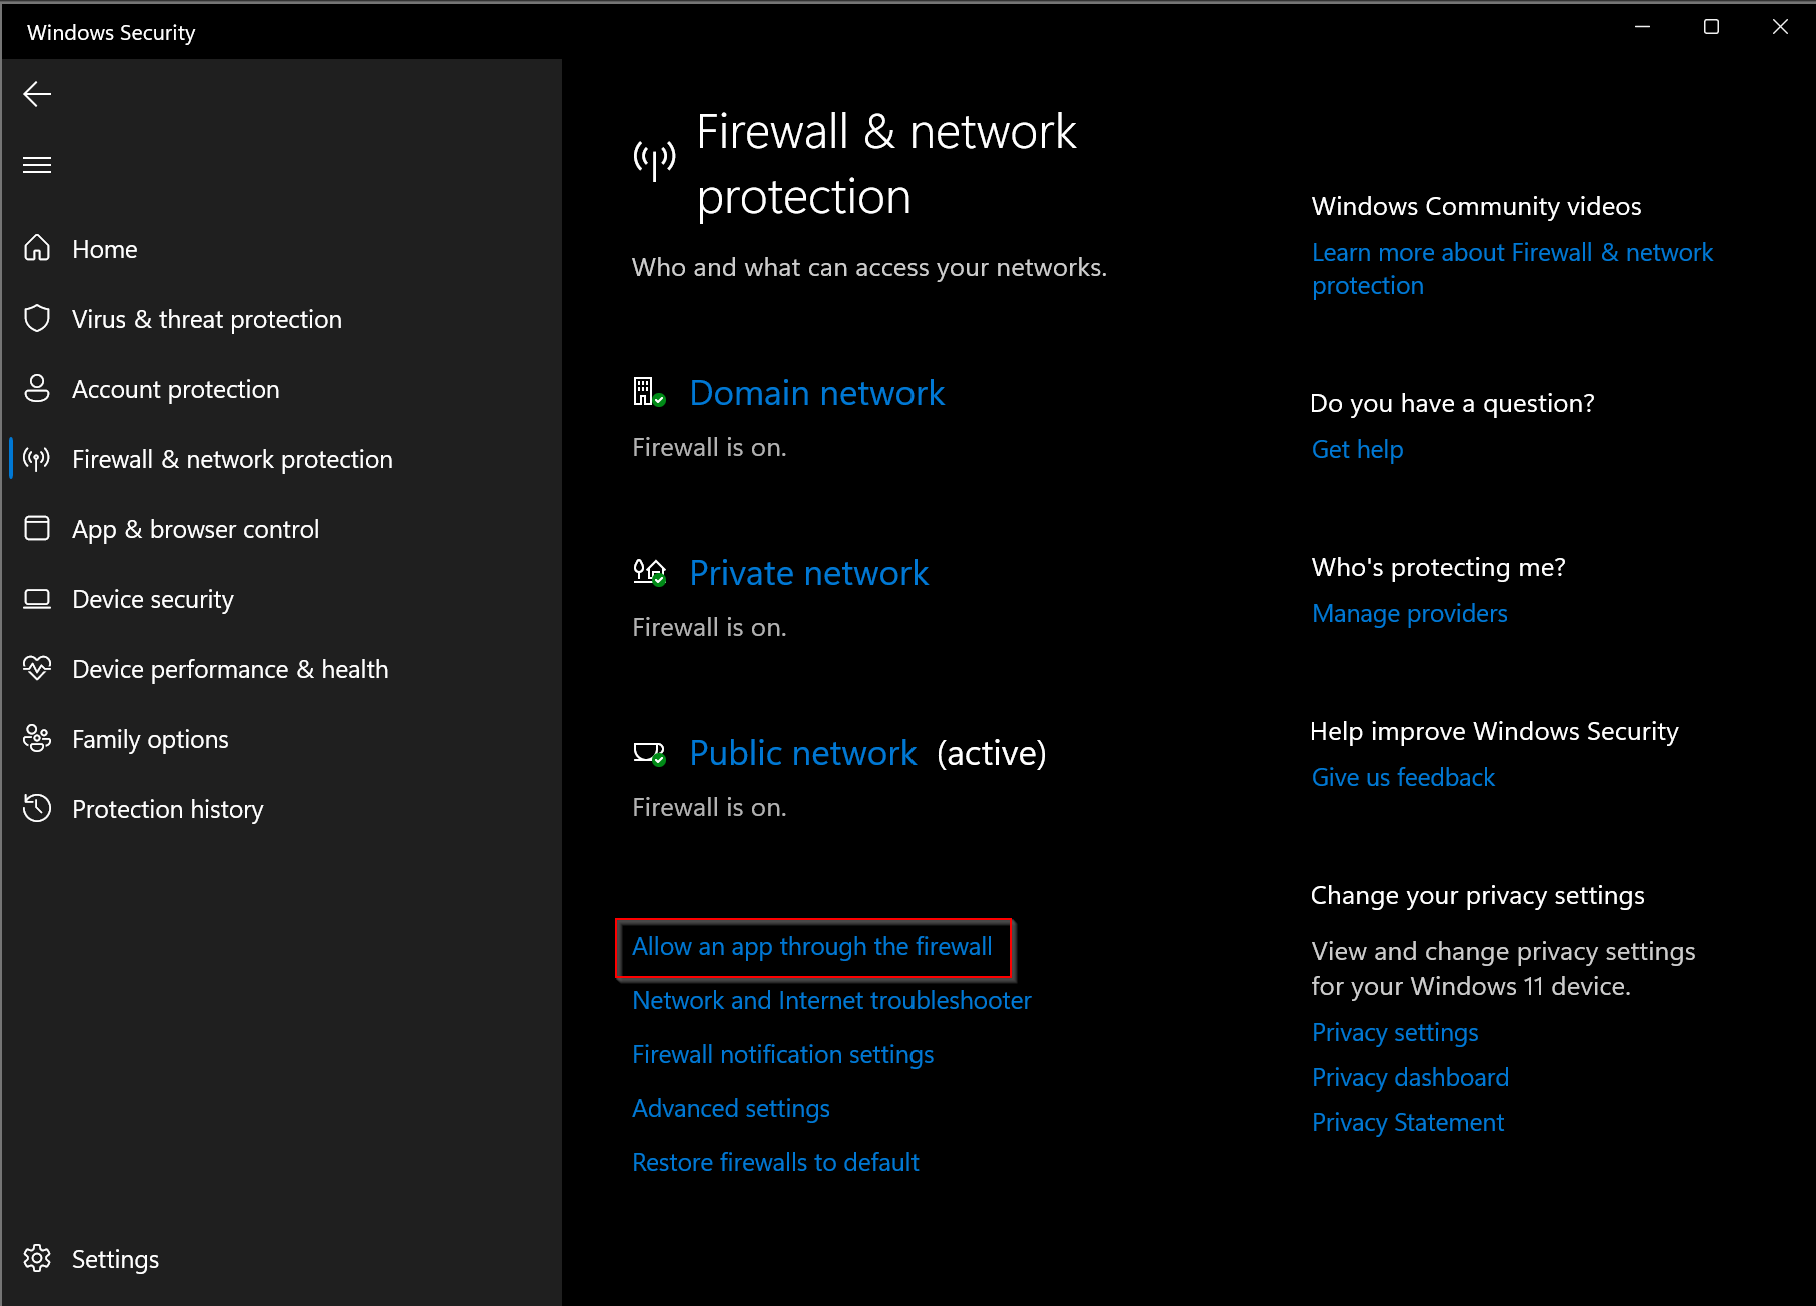
Step 6. On the next screen, you can view all the settings related to Windows Defender Firewall.
Here, click the link Allow an app through the firewall.
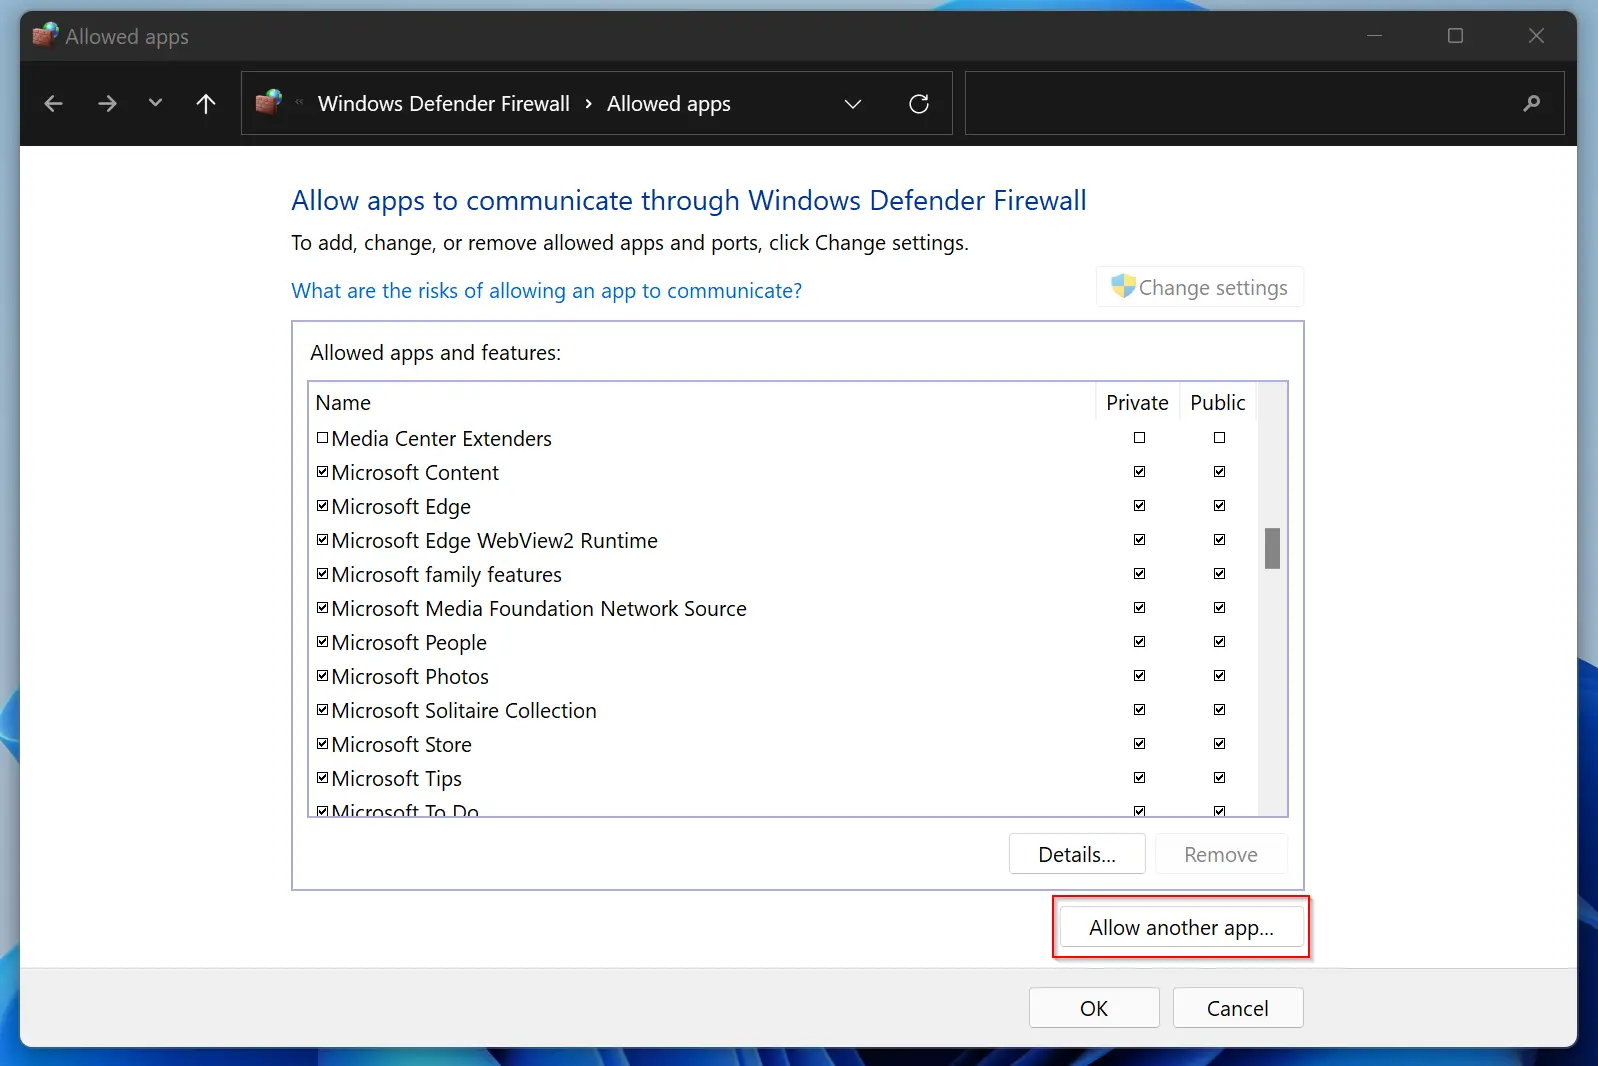
Step 7. After that “Allowed apps” window will open. On this screen, click the button Change settings.
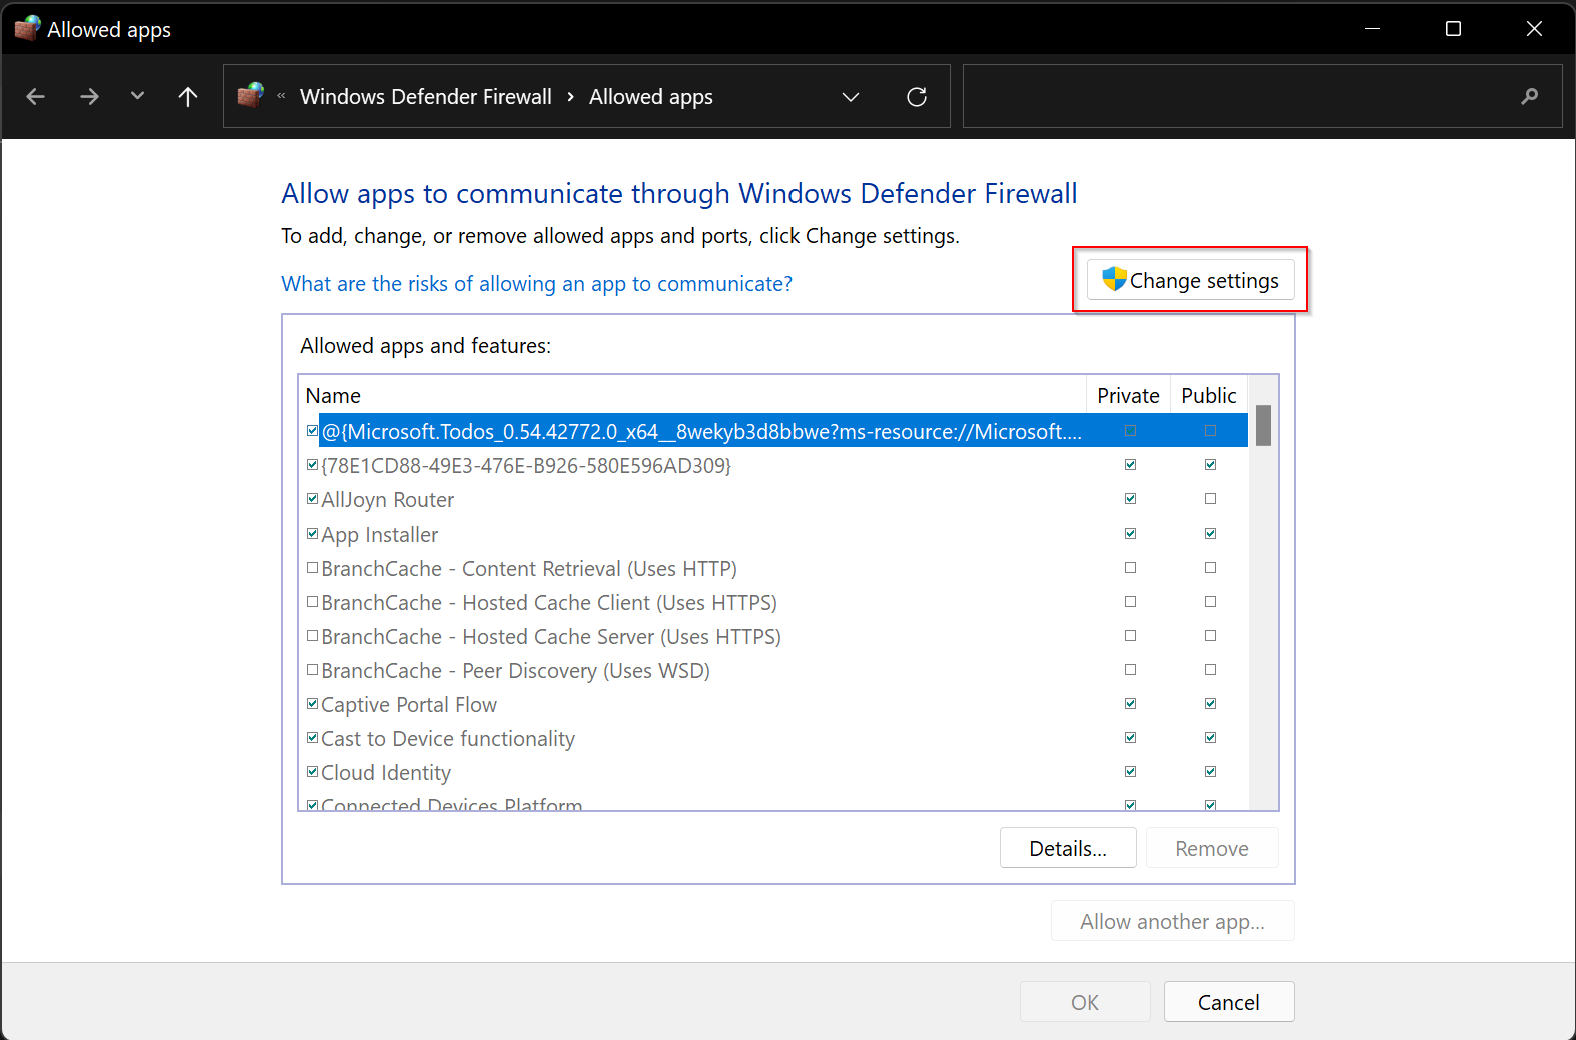
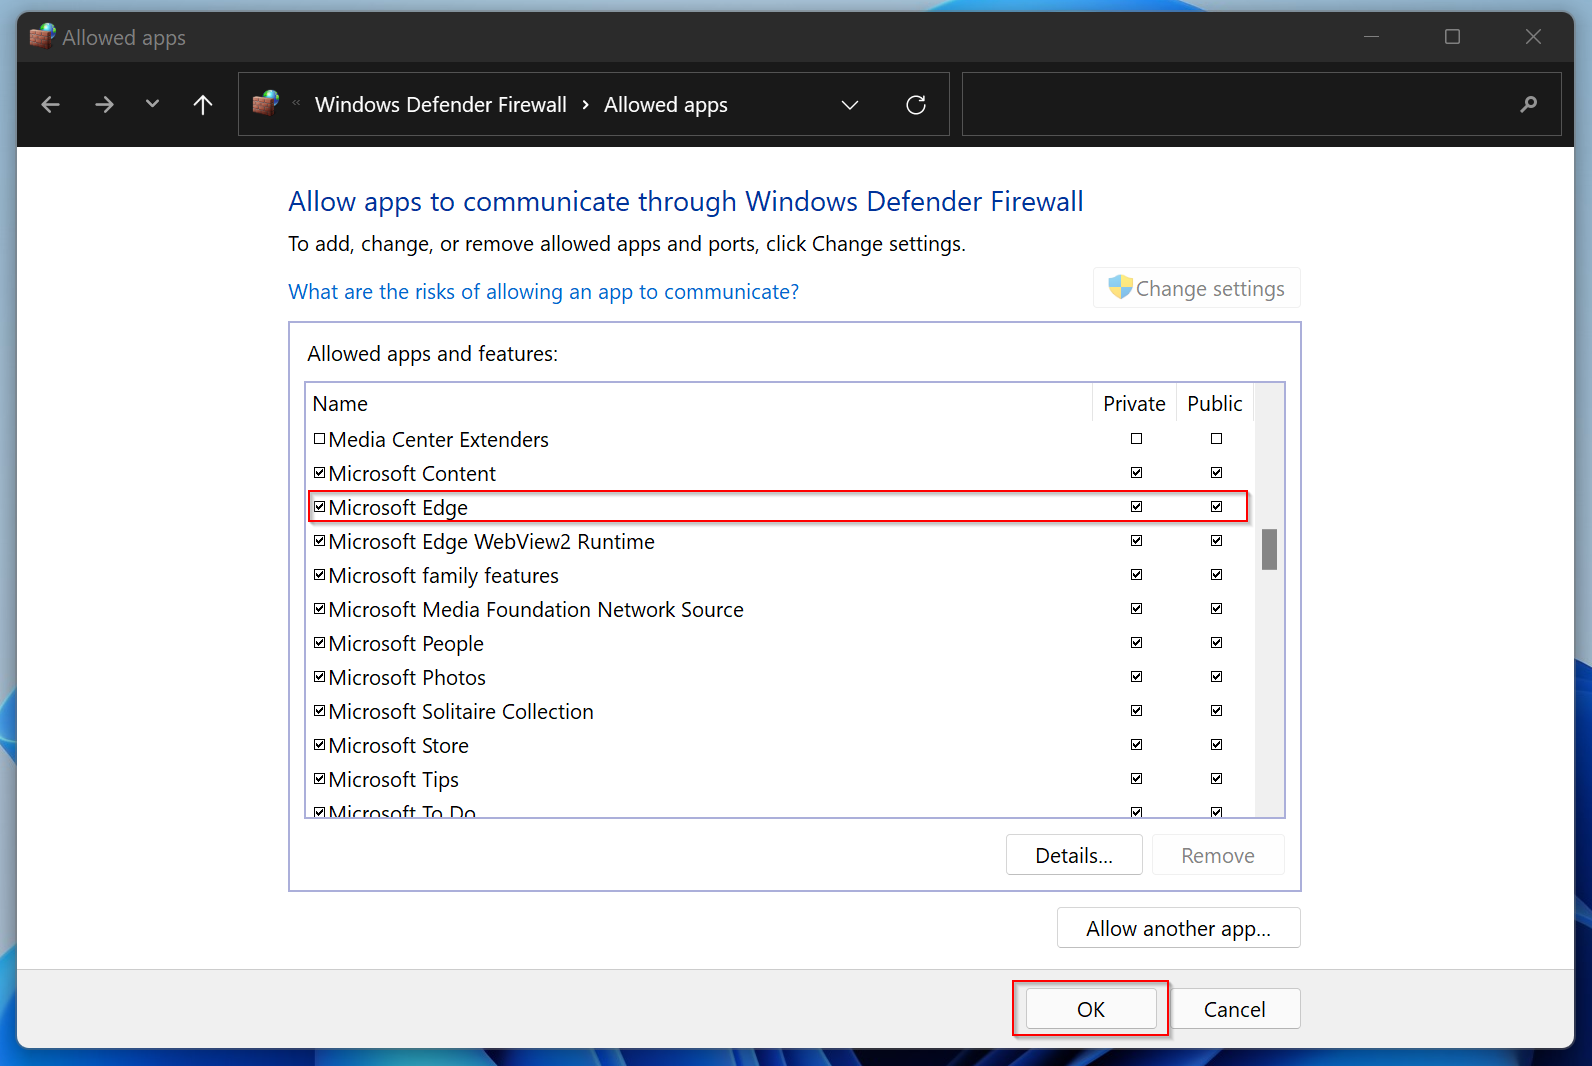
Step 8. Then, click on the checkbox(s) beside the apps or feature names on the list to allow the app access to the internet for your default profile. Check or uncheck the respective checkboxes if you also wish to enable it for only the “Private” or “Public” profile or both. When you’re done, click the OK button.
Step 9. If an application or program is not listed here and you want to allow or disallow it through the firewall, click the Allow another app button at the bottom of the screen.
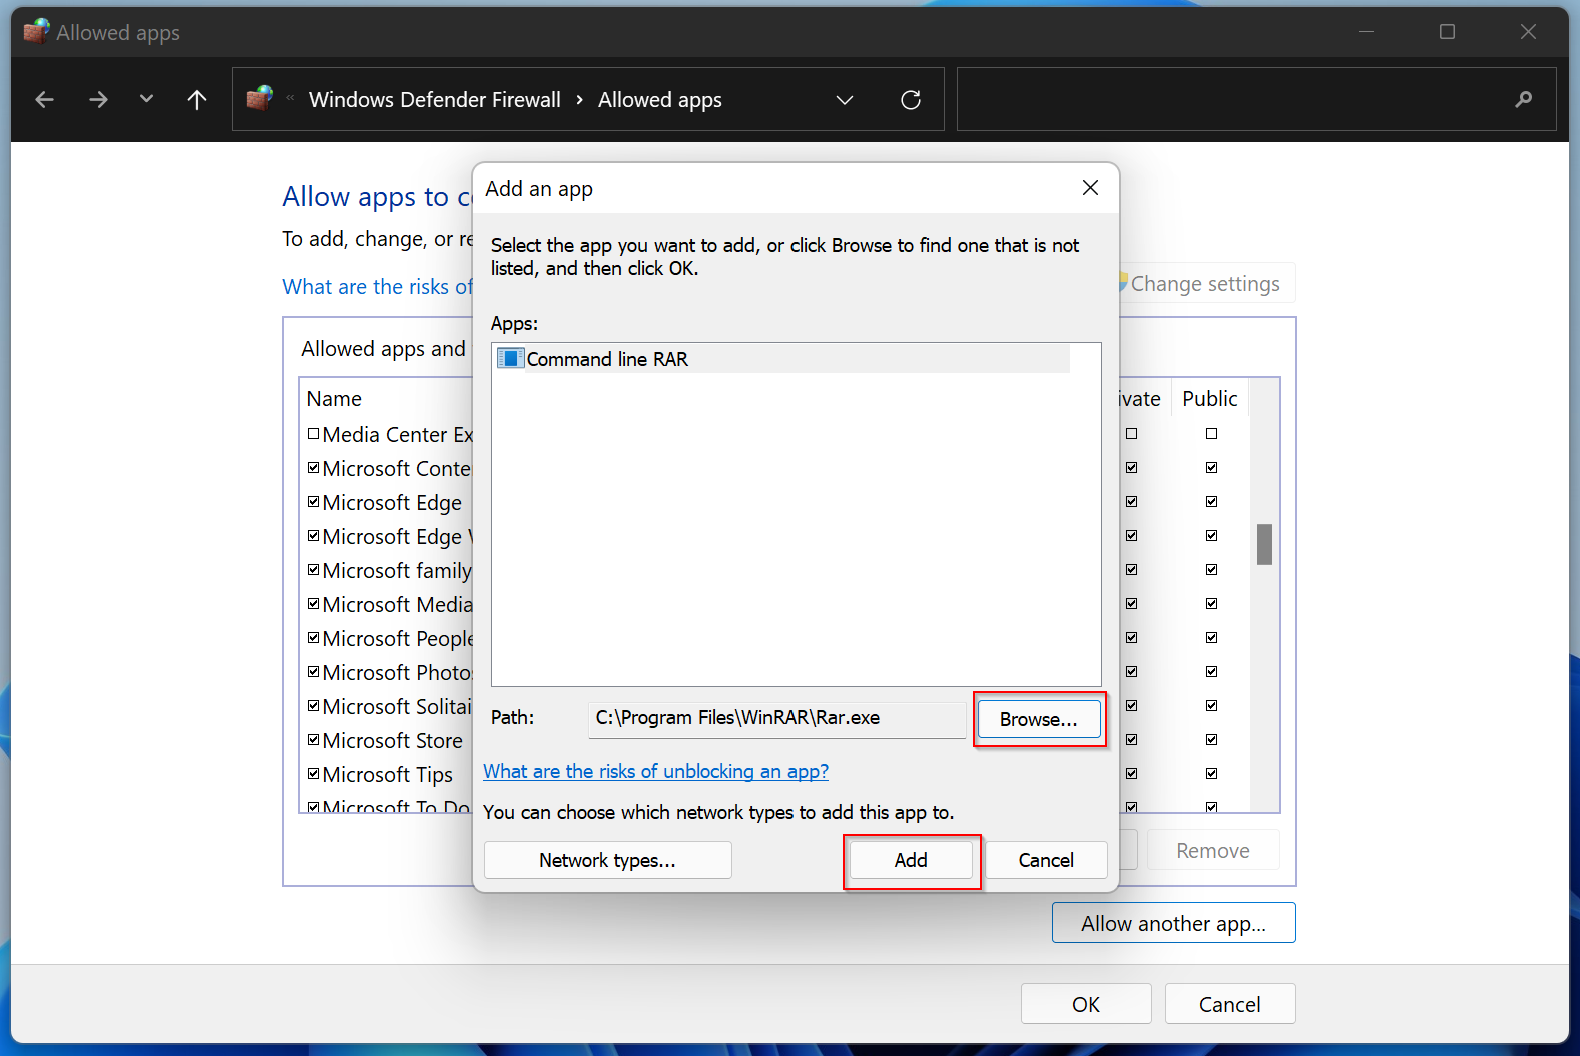
Step 10. In the pop-up “Add an app” window, click the Browse button and select the executable file you want to allow or disallow in the firewall. Then click the Add button.
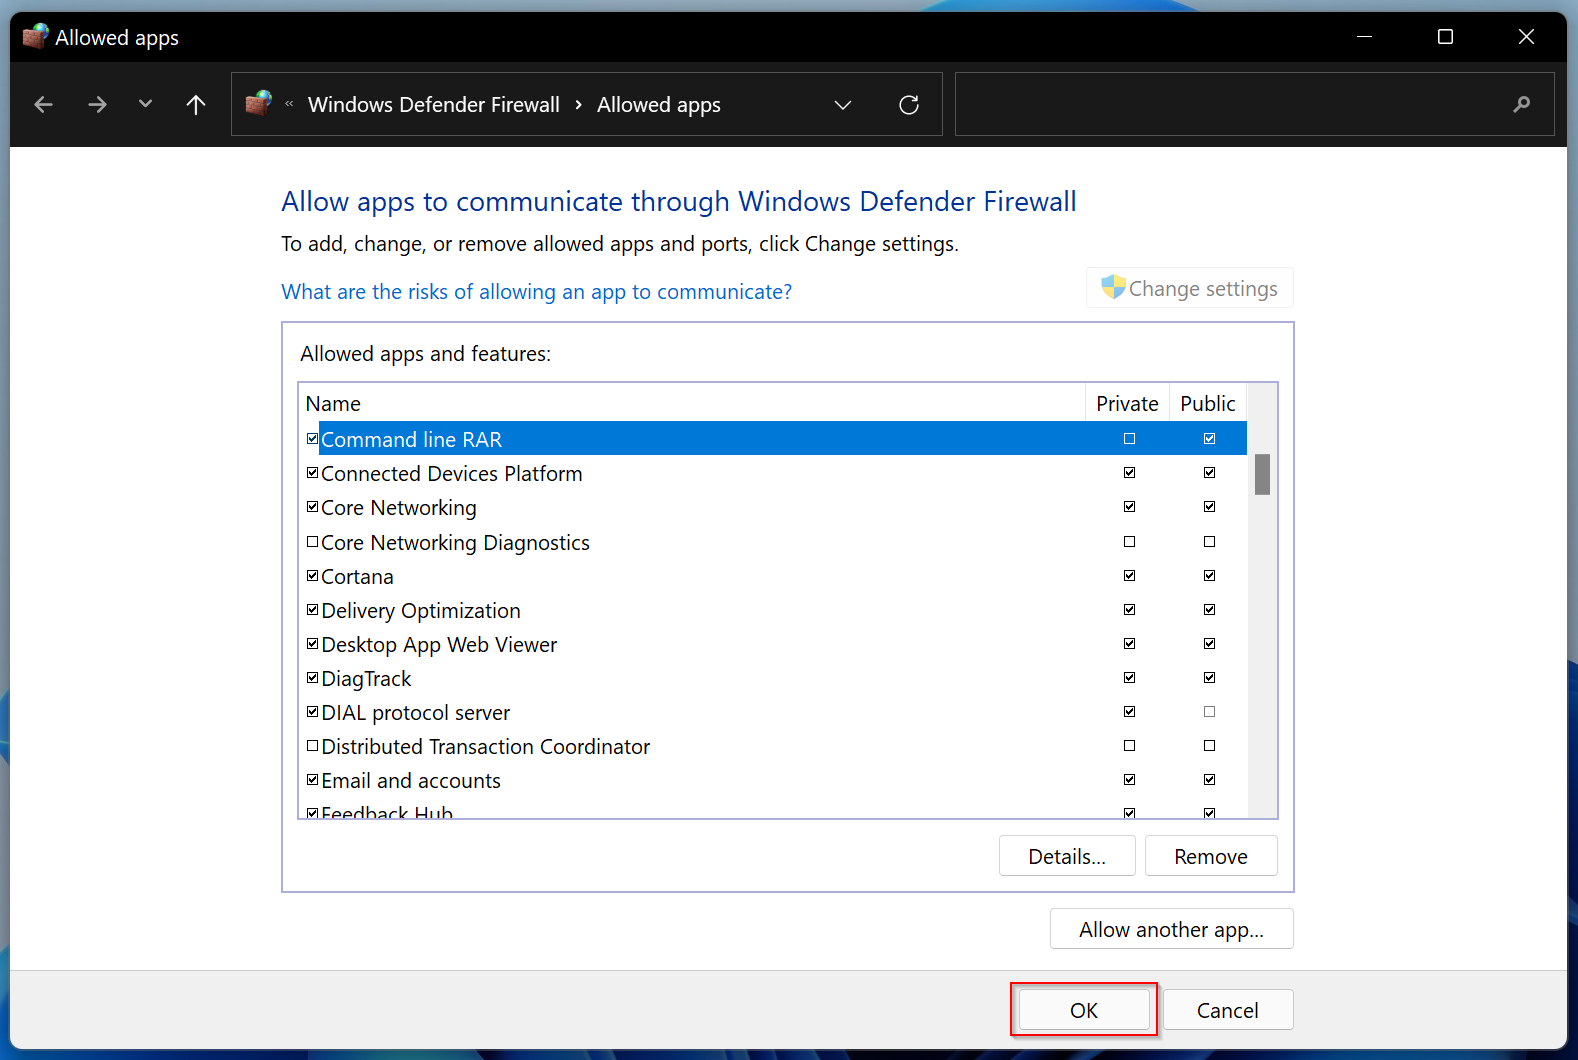
Step 11. Then, click on the checkbox beside that program in the list to allow or disallow access to the internet. Check or uncheck the respective checkboxes if you also wish to enable it for only the “Private” or “Public” profile or both. When you’re done, click the OK button.
How to Restore Windows 11 Firewall Settings to Default?
If you have made several changes and you are messed up with that and want to restore the default settings of the firewall, do the following:-
Step 1. First, open the Settings app by pressing the Windows + I keys or any other method you regularly use.
Step 2. Then, click the Privacy & Security category from the left sidebar.
Step 3. After that, select the Windows Security tile present to the right of the screen.
Step 4. Next, click on the Open Windows Security button in the Windows Security settings pane.
Step 5. When you’re done, the “Windows Security” window will open. Click on the Firewall & network protection option in this window.
Step 6. On the next screen, you can view all the settings related to Windows Defender Firewall.
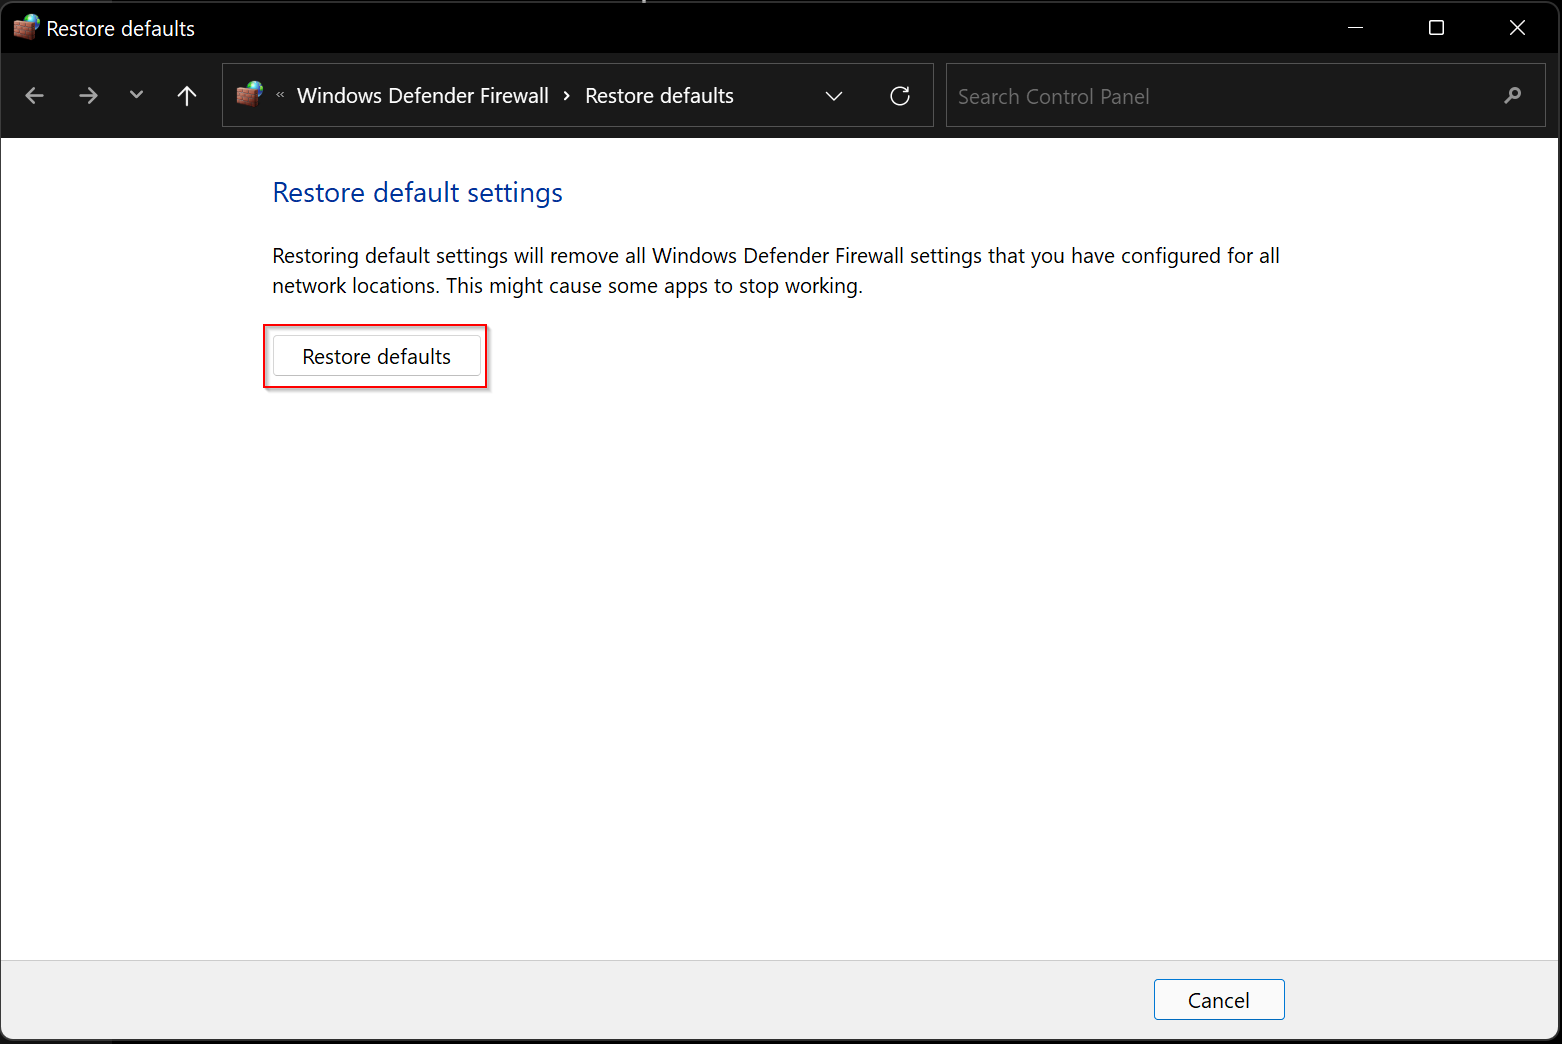
Here, click the link Restore firewalls to default.
Step 7. After that, a new window will open. There, click the Restore defaults button.
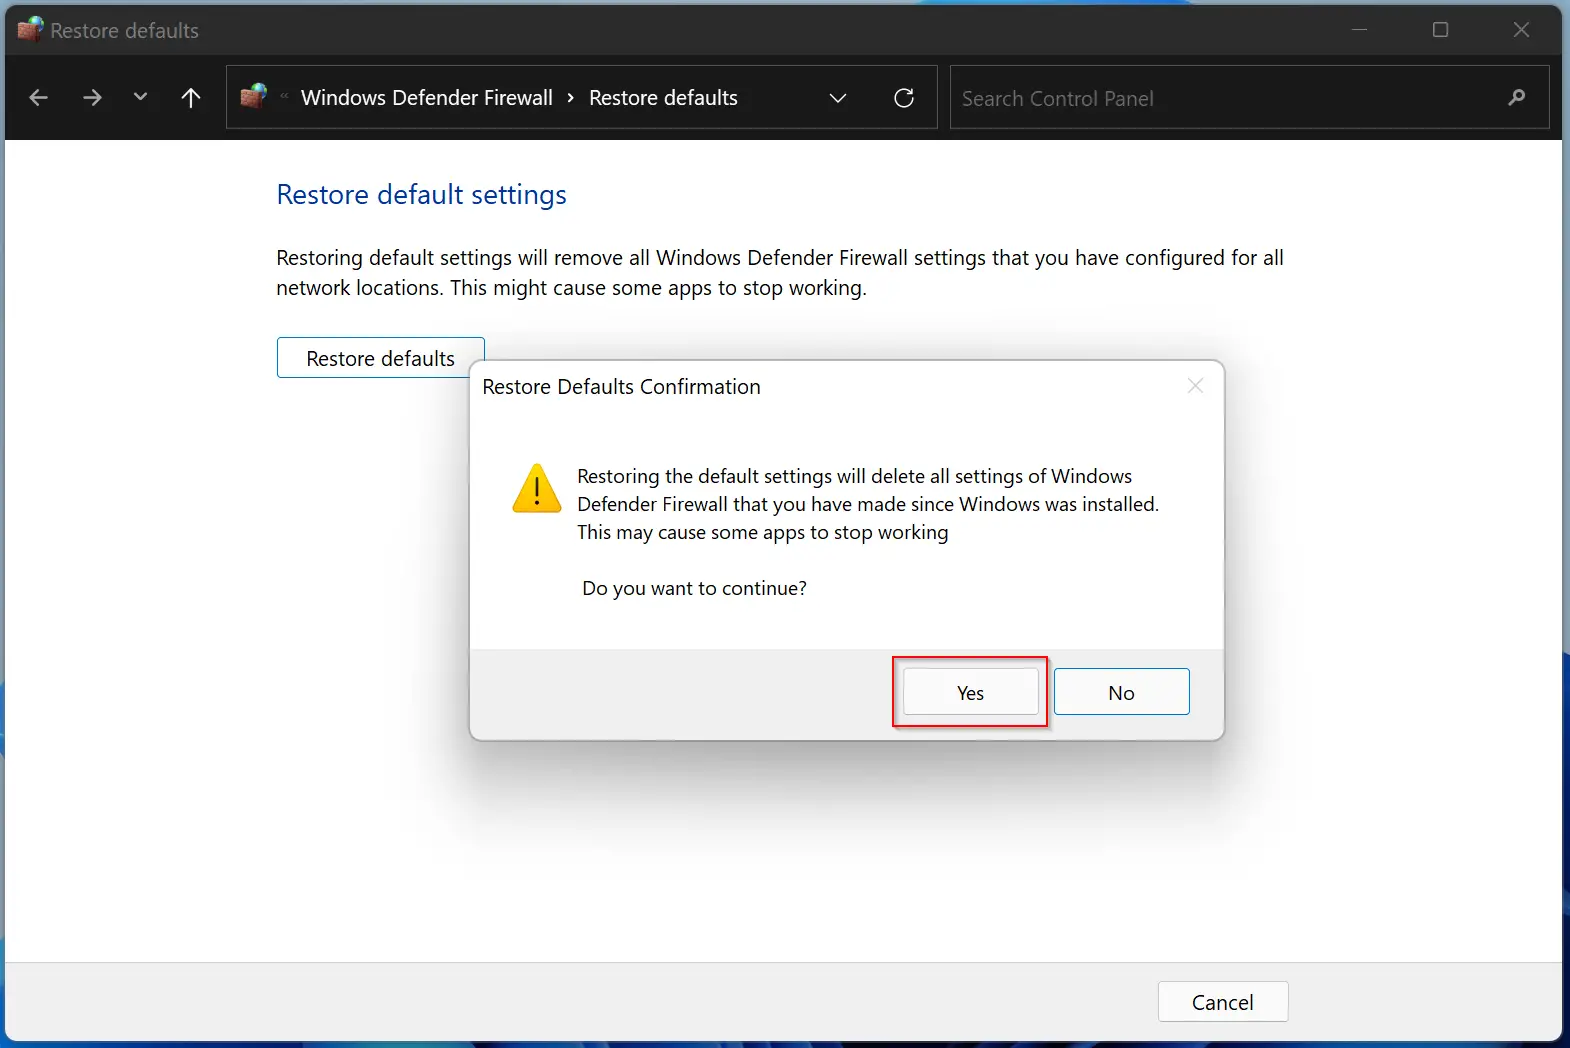
Step 8. Finally, click the Yes button on the “Restore Default Confirmation” dialog.
That’s it. Now the Windows 11 Firewall is restored to default.
Conclusion
In conclusion, Windows 11 comes with a built-in firewall that helps protect your computer from malware and malicious applications when you connect to the internet. If you purchase a third-party firewall or for some other reason, you may want to disable the Windows 11 Firewall. You can do so permanently or selectively for individual apps by following the steps outlined in this guide. Additionally, if you’ve made several changes to your firewall settings and want to restore them to the default settings, you can easily do so by following the steps provided. Overall, Windows 11 Firewall provides robust protection for your computer, but it’s always essential to know how to manage it to suit your needs.
