A modern tool, Quick Settings on Windows 11, lets users easily customize common operating system settings such as volume, brightness, Wi-Fi, Bluetooth, and Focus Assist. The Quick Settings section is next to the Media Playback section, which appears when Edge or another compatible app is playing music or videos. Pressing the Windows+A you can access Quick Settings.
With Quick Settings, you can access your Internet settings quickly, such as Airplane mode, Bluetooth, Volume, Night Light, Focus Assist, Accessibility, or anything similar. With the Notification Center and Quick Settings flyouts, users can manage essential features (Wi-Fi, Bluetooth, Airplane mode, etc.) and check missed notifications.
Although these features are useful, they allow users to make unwanted system changes and add unnecessary distractions. Windows 11 22H2 includes new policies for disabling Taskbar flyouts using the Group Policy Editor or Registry Editor, regardless of the reason.
This gearupwindows article explains how to add or remove Quick Settings Icons and Notification Options in Windows 11.
How to Turn Off Quick Settings Flyout with Group Policy Editor on Windows 11?
Follow these steps to disable Quick Settings flyout using Local Group Policy Editor:-
Step 1. Open Local Group Policy Editor first.
Step 2. Next, navigate to the following path in the left side pane:-
User Configuration > Administrative Templates > Start Menu and Taskbar
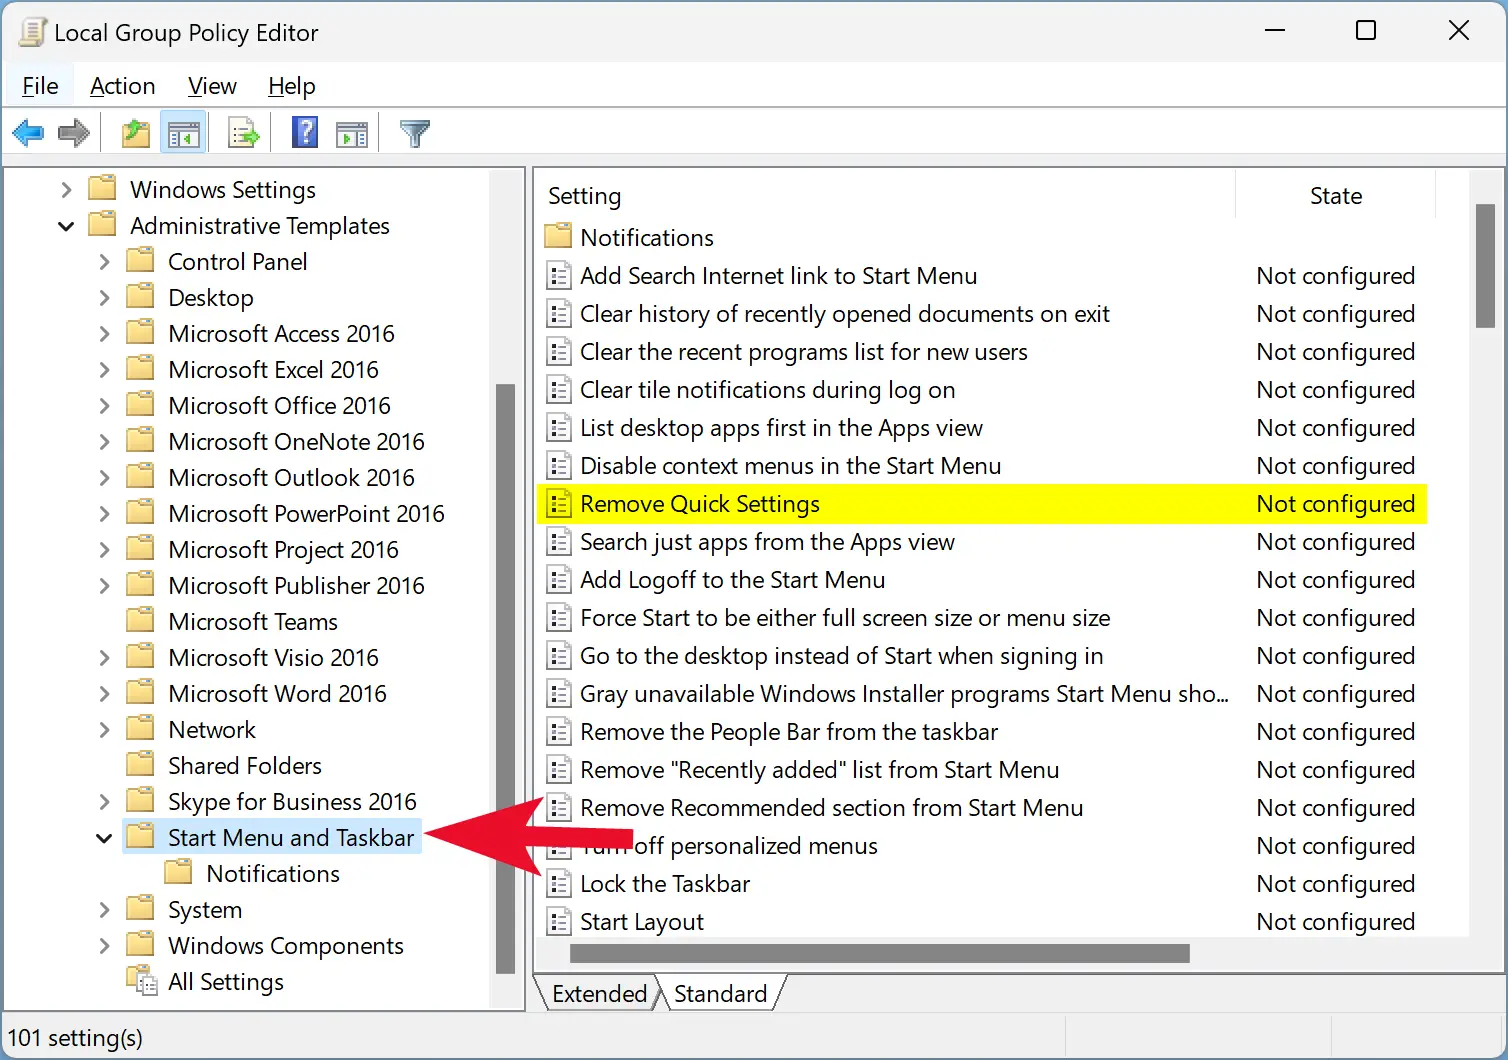
Step 3. On the right side pane, double-click on the “Remove Quick Settings” setting.
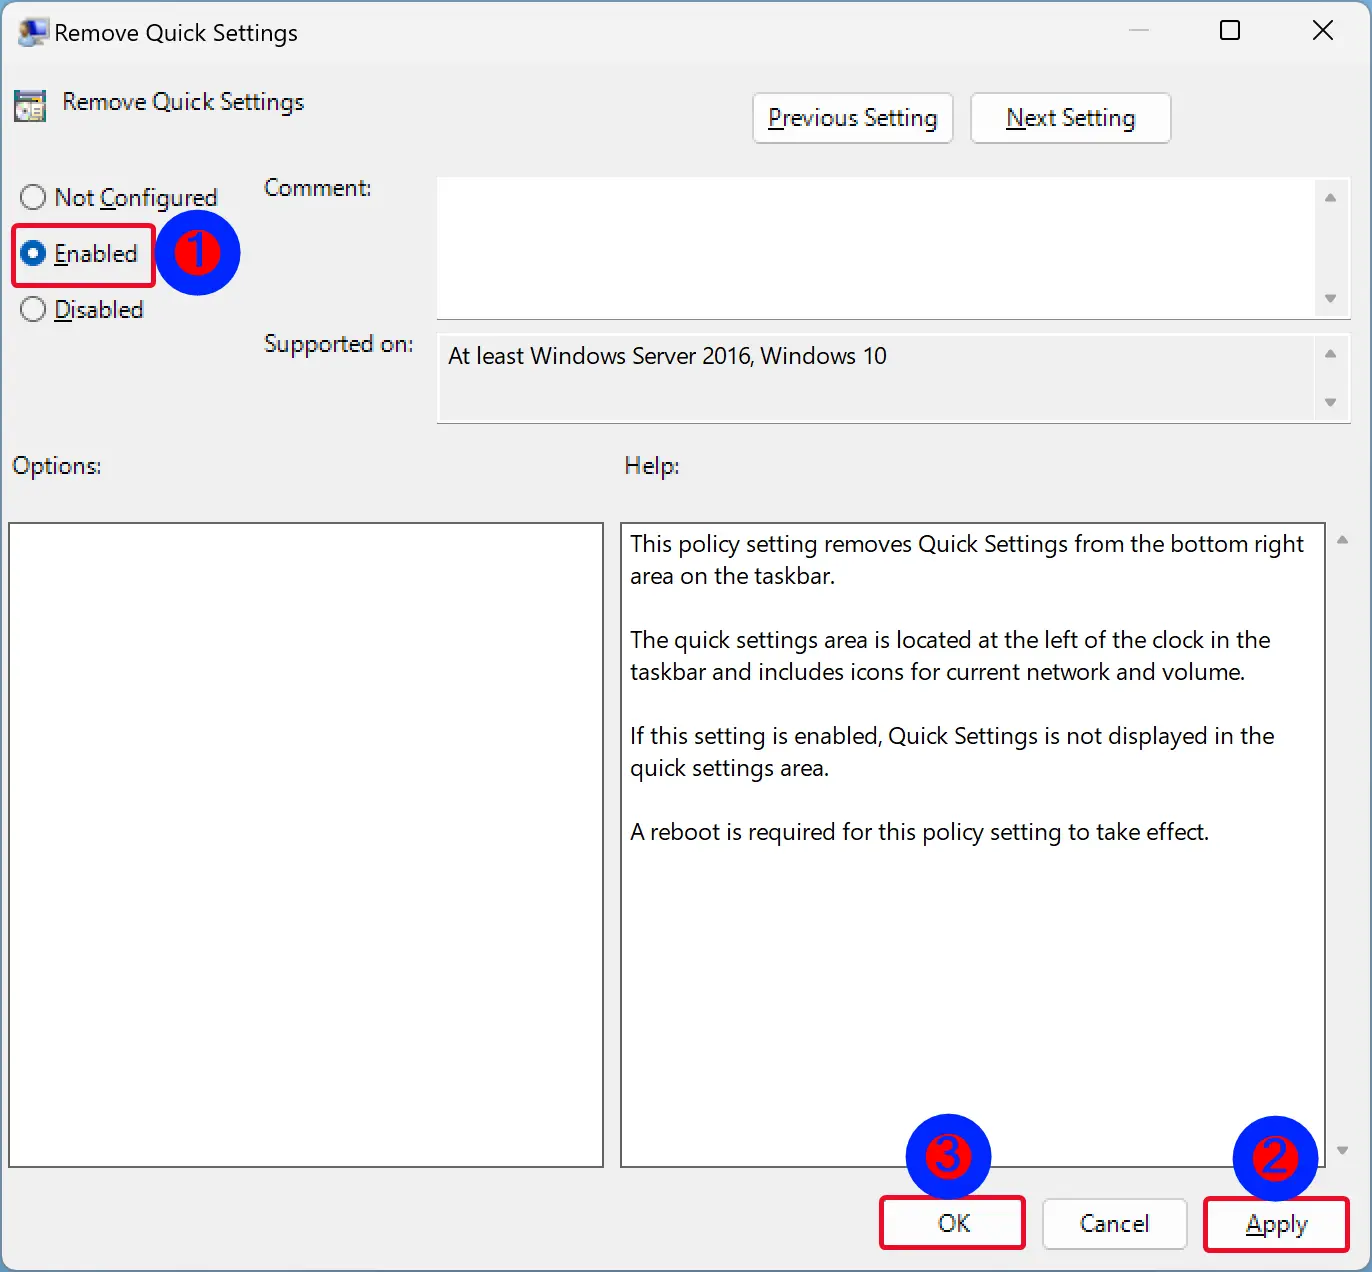
Step 4. Select the Enabled option.
Step 5. Click Apply.
Step 6. Click OK.
Step 7. Finally, restart your PC to apply the changes.
When you are done with the steps, you will no longer be able to open the Quick Settings flyout when you press the Windows+A keyboard shortcut or click on the time and date section in the system tray.
To enable Quick Settings in Windows 11, repeat the above steps and select the Not Configured option in step 4.
How to Disable Quick Settings Flyout with Registry Editor on Windows 11?
Follow these steps to disable Quick Settings flyout using Registry Editor:-
Step 1. Open Registry Editor first.
Step 2. Next, navigate to the following key in the left side pane:-
HKEY_LOCAL_MACHINE\SOFTWARE\Policies\Microsoft\Windows
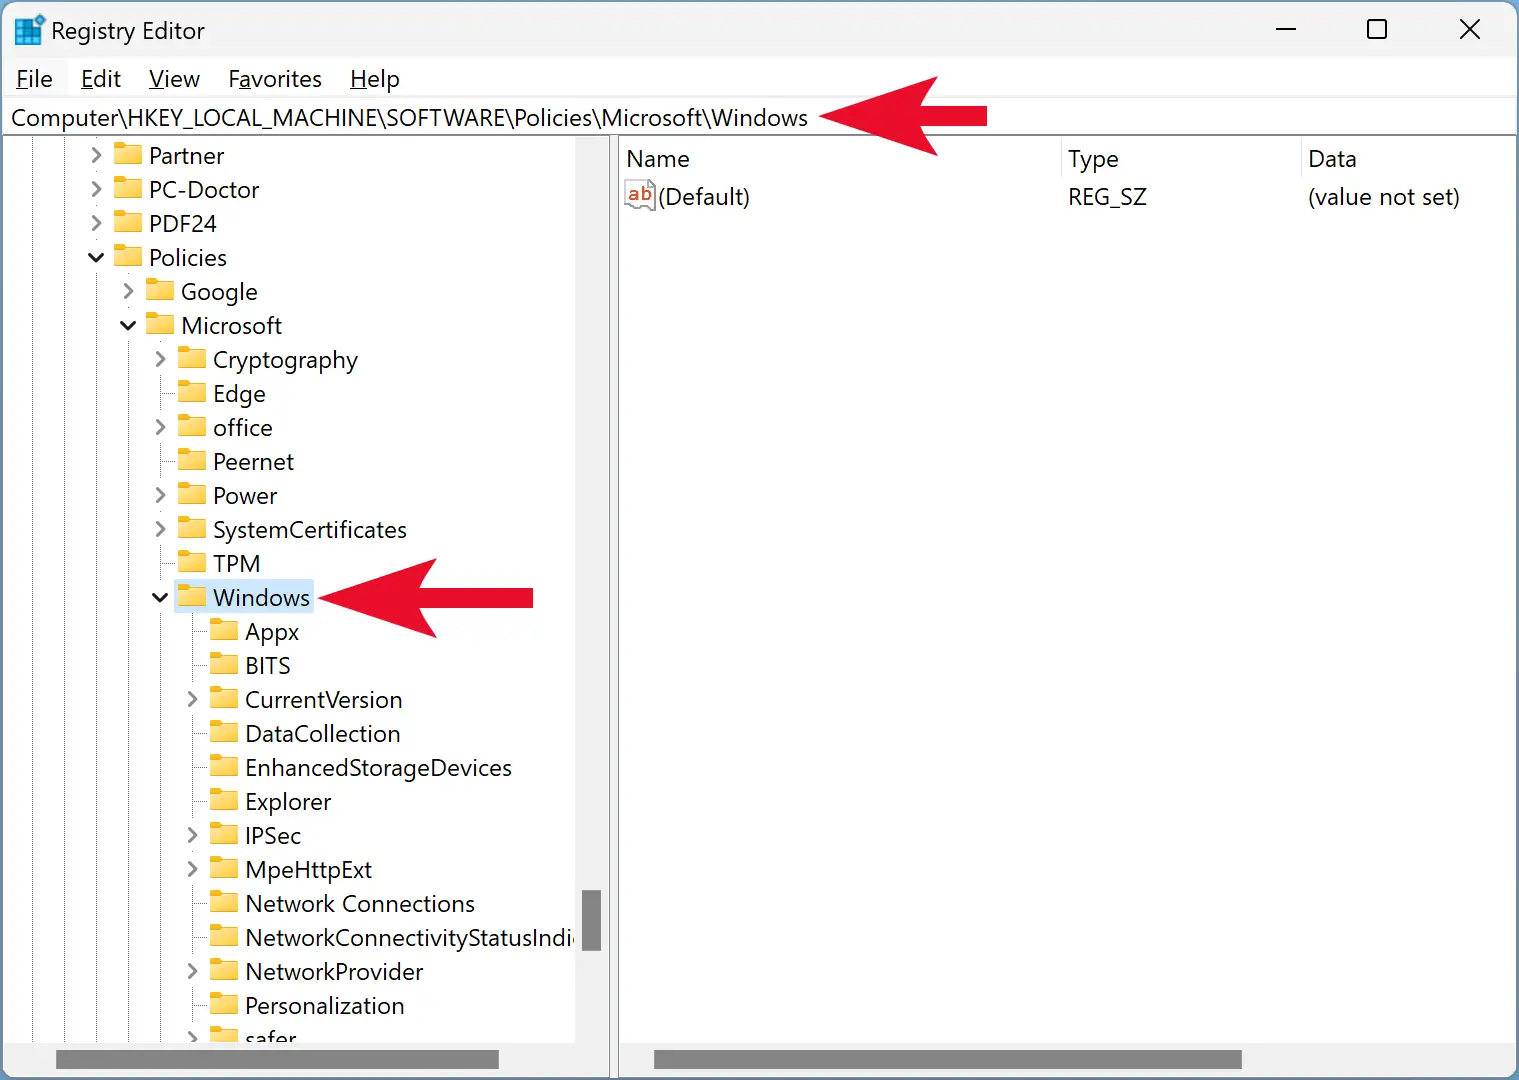
Step 3. Then, right-click on the Windows key and select New > Key.
Quick Note: Skip steps 3 & 4 if the Explorer key is already present under the Windows key.
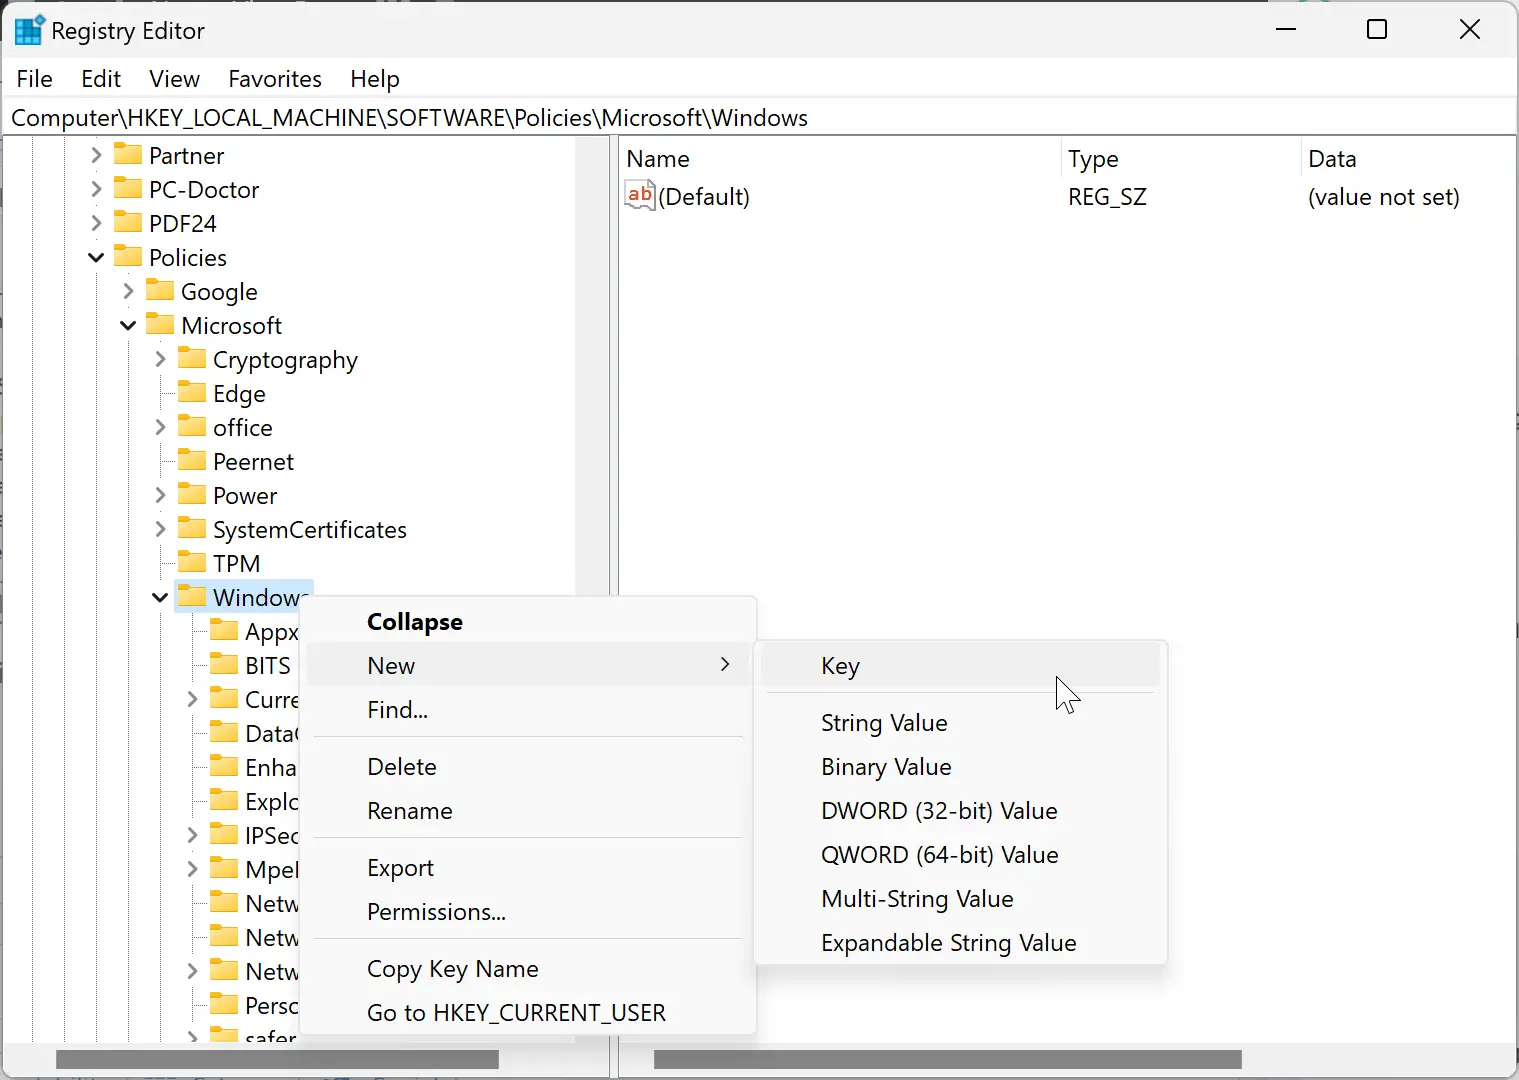
Step 4. Name the newly created key as Explorer.
Step 5. Now, right-click on the Explorer key and choose New > DWORD (32-bit) Value.

Step 6. Name the newly created REG_DWORD as DisableControlCenter.
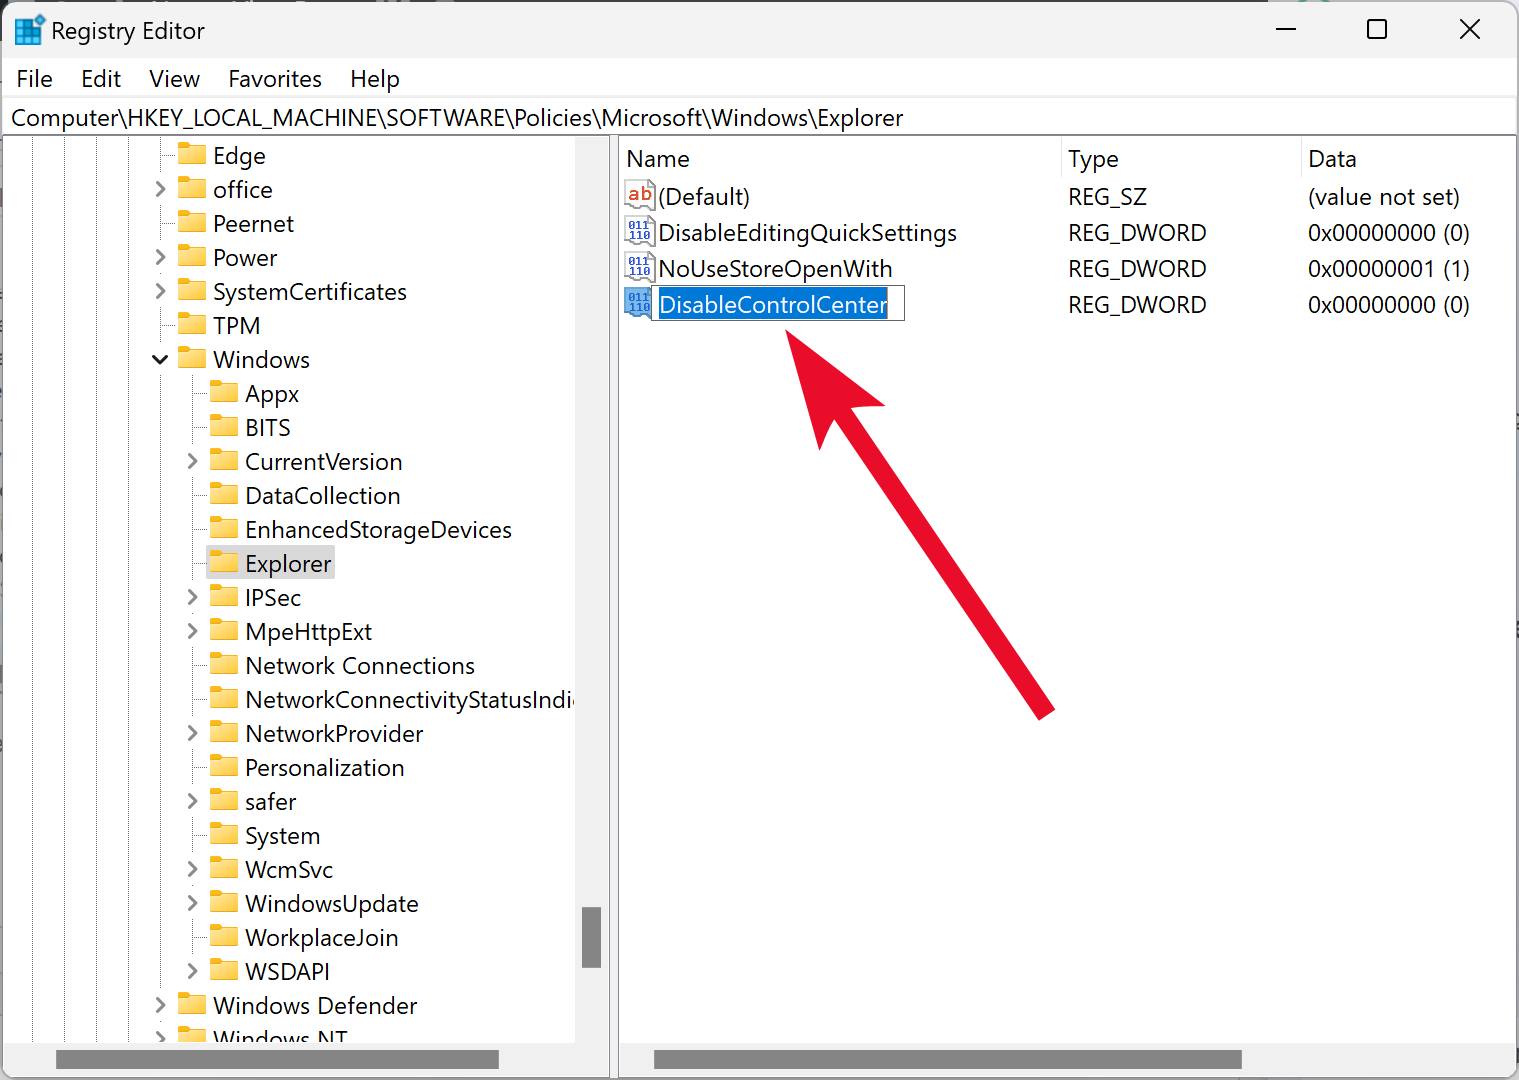
Step 7. Next, double-click on the DisableControlCenter REG_DWORD and set its “Value data” to 1.
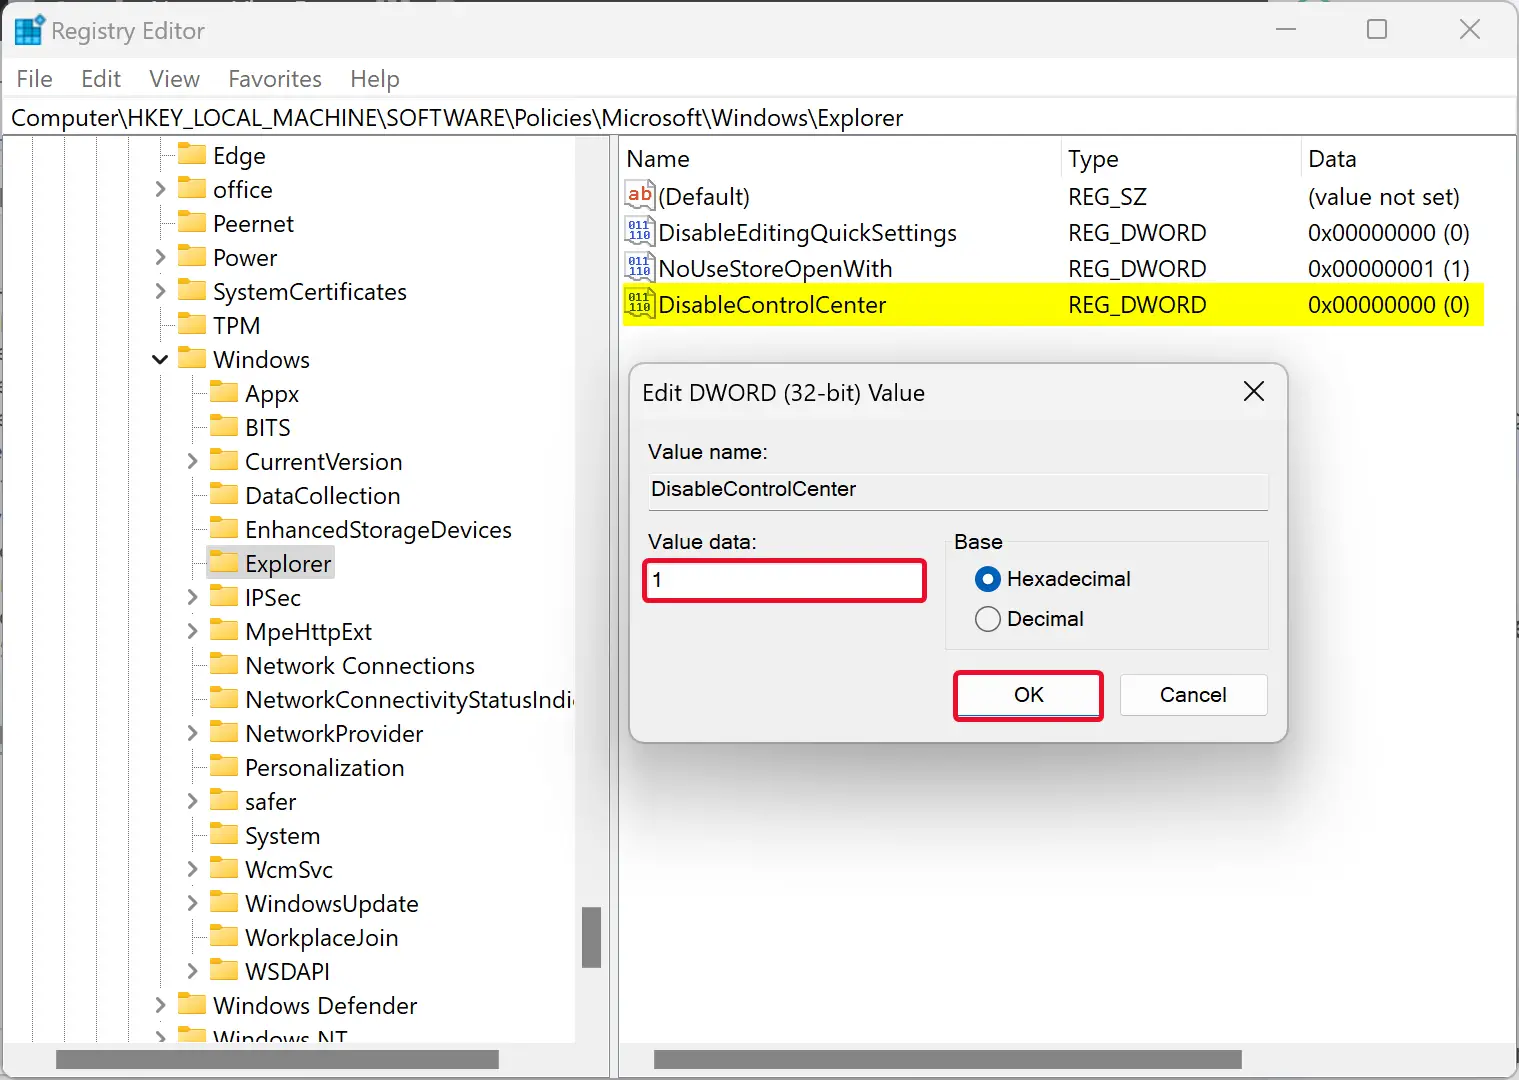
Step 8. Click OK.
Step 9. At last, reboot your PC to apply the changes.
You will no longer be able to use Quick Settings in Windows 11 after completing the above steps.
To turn on the Quick Settings again, navigate to the following key on the left side of Registry Editor:-
HKEY_LOCAL_MACHINE\SOFTWARE\Policies\Microsoft\Windows\Explorer
On the right side of the Explorer key, right-click on the DisableControlCenter REG_DWORD and choose the Delete option in the pop-up menu. When prompted, click the Yes button. Finally, reboot your PC to apply the changes.
How to Disable Notification Center Flyout using Group Policy Editor on Windows 11?
Disabling Notification Center Flyout with Group Policy Editor on Windows 11 is as easy as following these steps:-
Step 1. Open Local Group Policy Editor first.
Step 2. Next, navigate to the following path in the left side pane:-
User Configuration > Administrative Templates > Start Menu and Taskbar
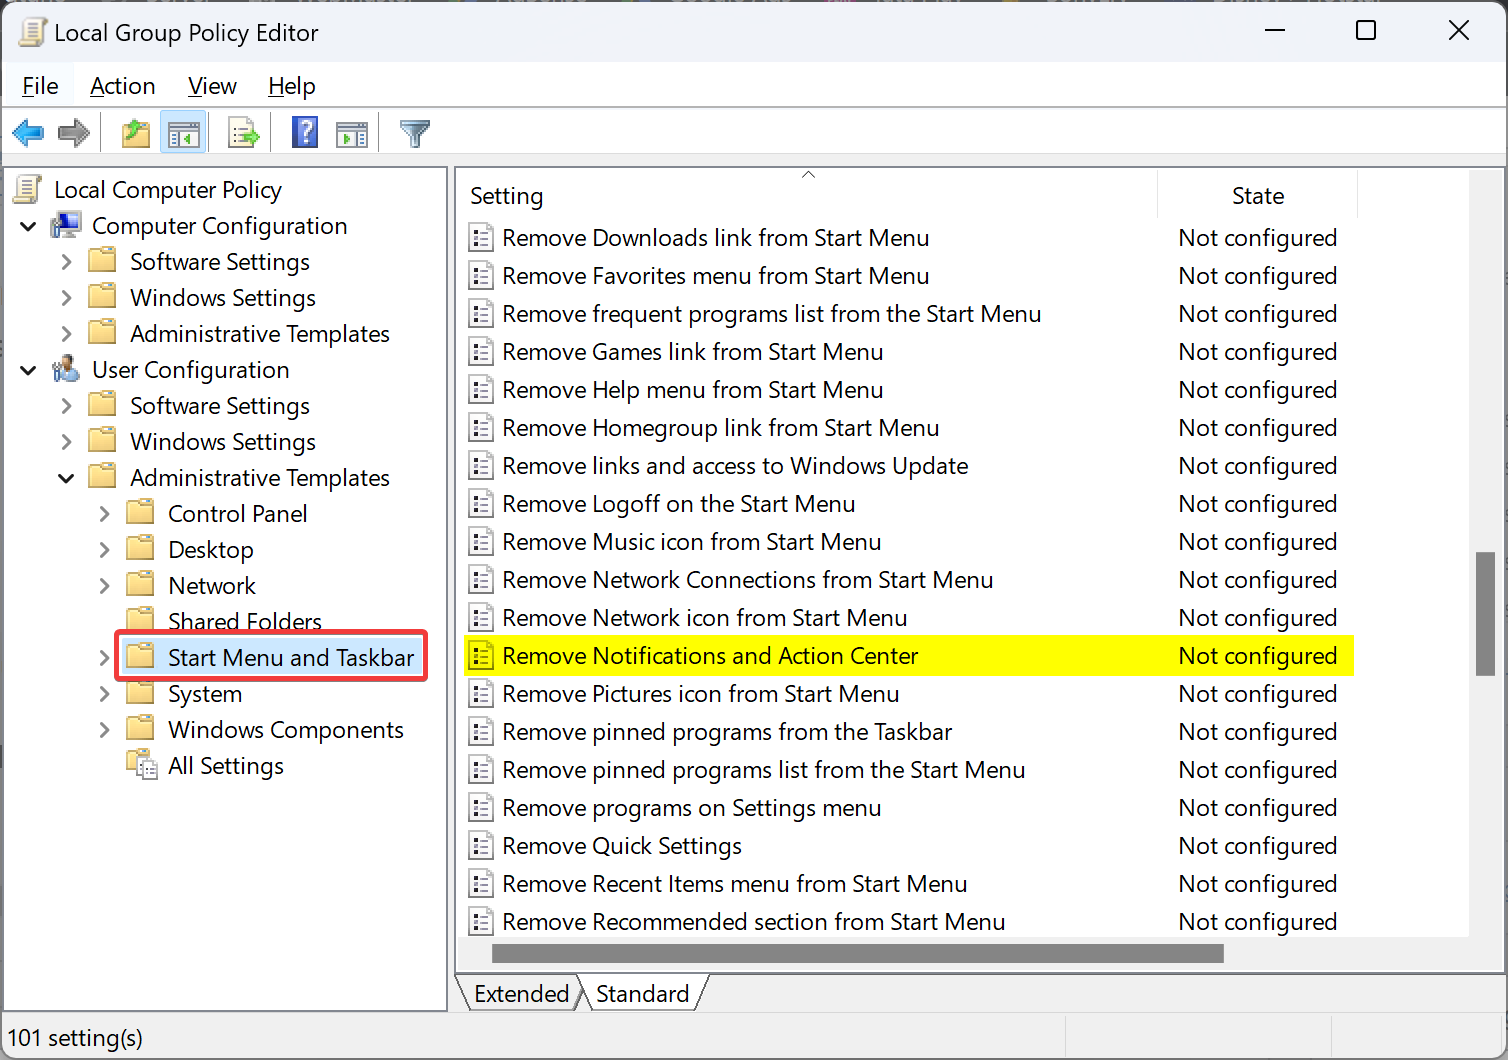
Step 3. On the right side, double-click the “Remove Notifications and Action Center” setting.
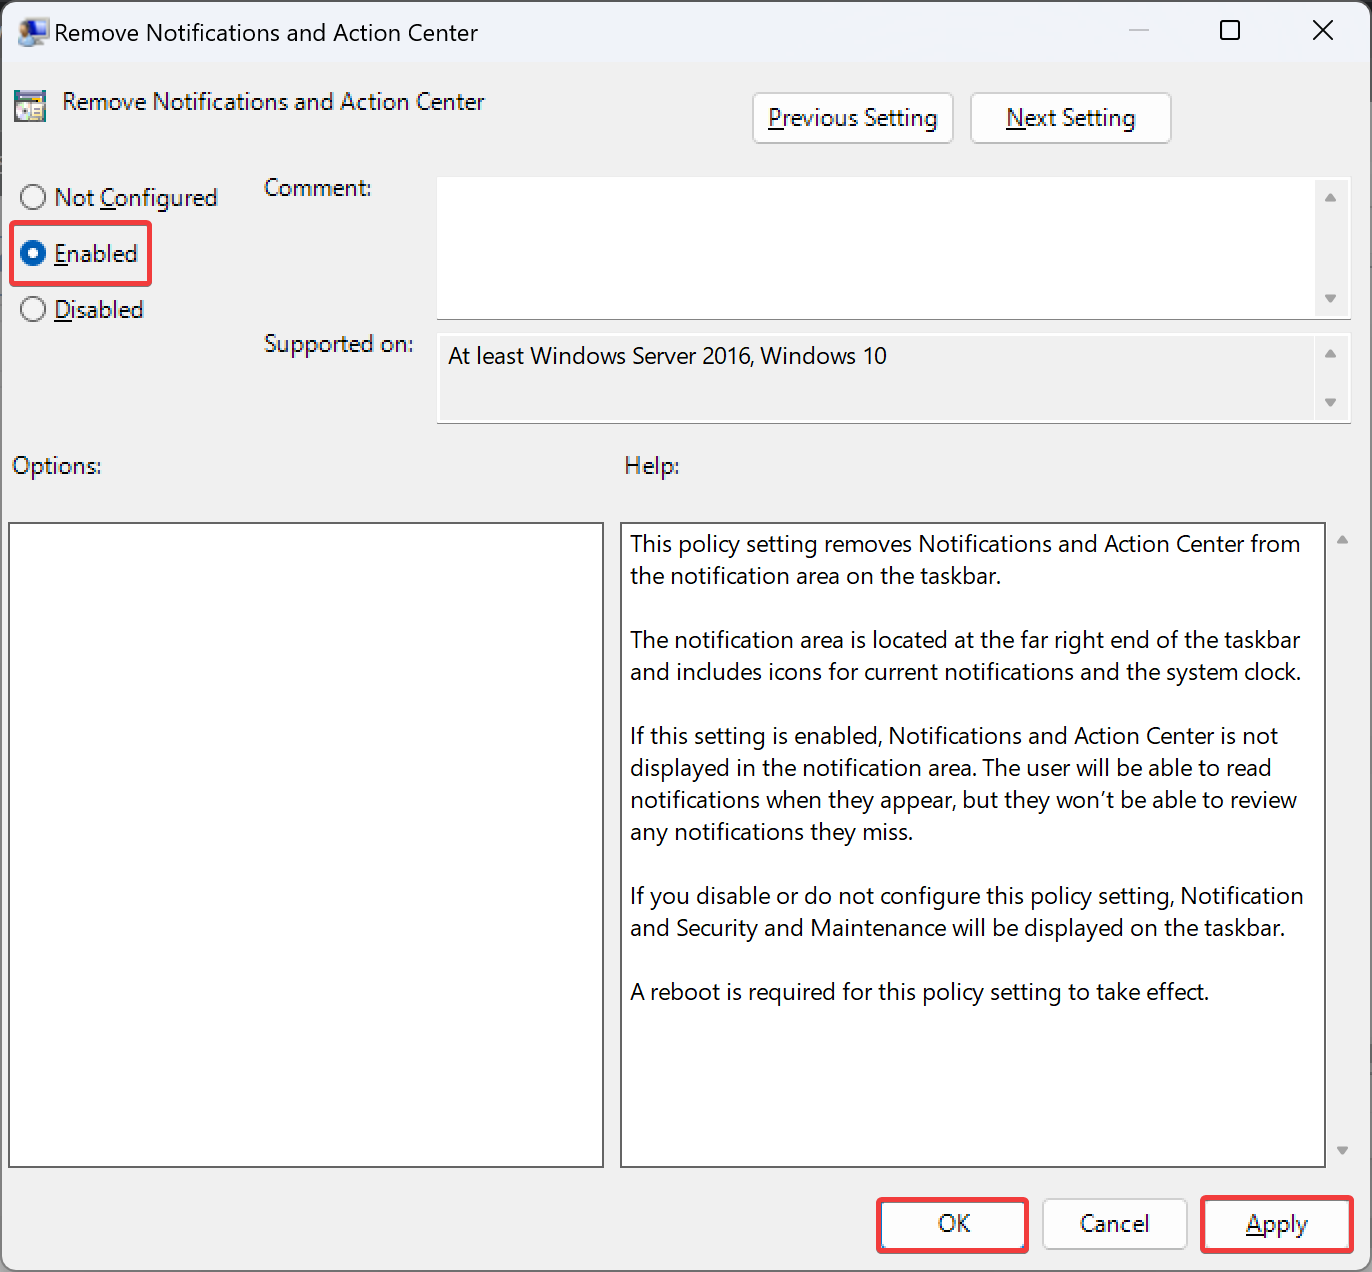
Step 4. Select Enabled.
Step 5. Click Apply.
Step 6. Click OK.
Step 7. Reboot your PC to apply the changes.
The Notification flyout will no longer open when you press Windows+N or click the time and system section in the system tray.
To undo the changes, repeat the above steps and select the Not Configured option in step 4 above.
How to Turn Off Notification Center Flyout through Registry Editor on Windows 11?
Following these steps, you can disable Notification flyout using Registry Editor on Windows 11:-
Step 1. Open Registry Editor first.
Step 2. Next, copy and paste the following into the Registry Editor address bar, and press Enter on the keyboard:-
HKEY_CURRENT_USER\Software\Policies\Microsoft\Windows
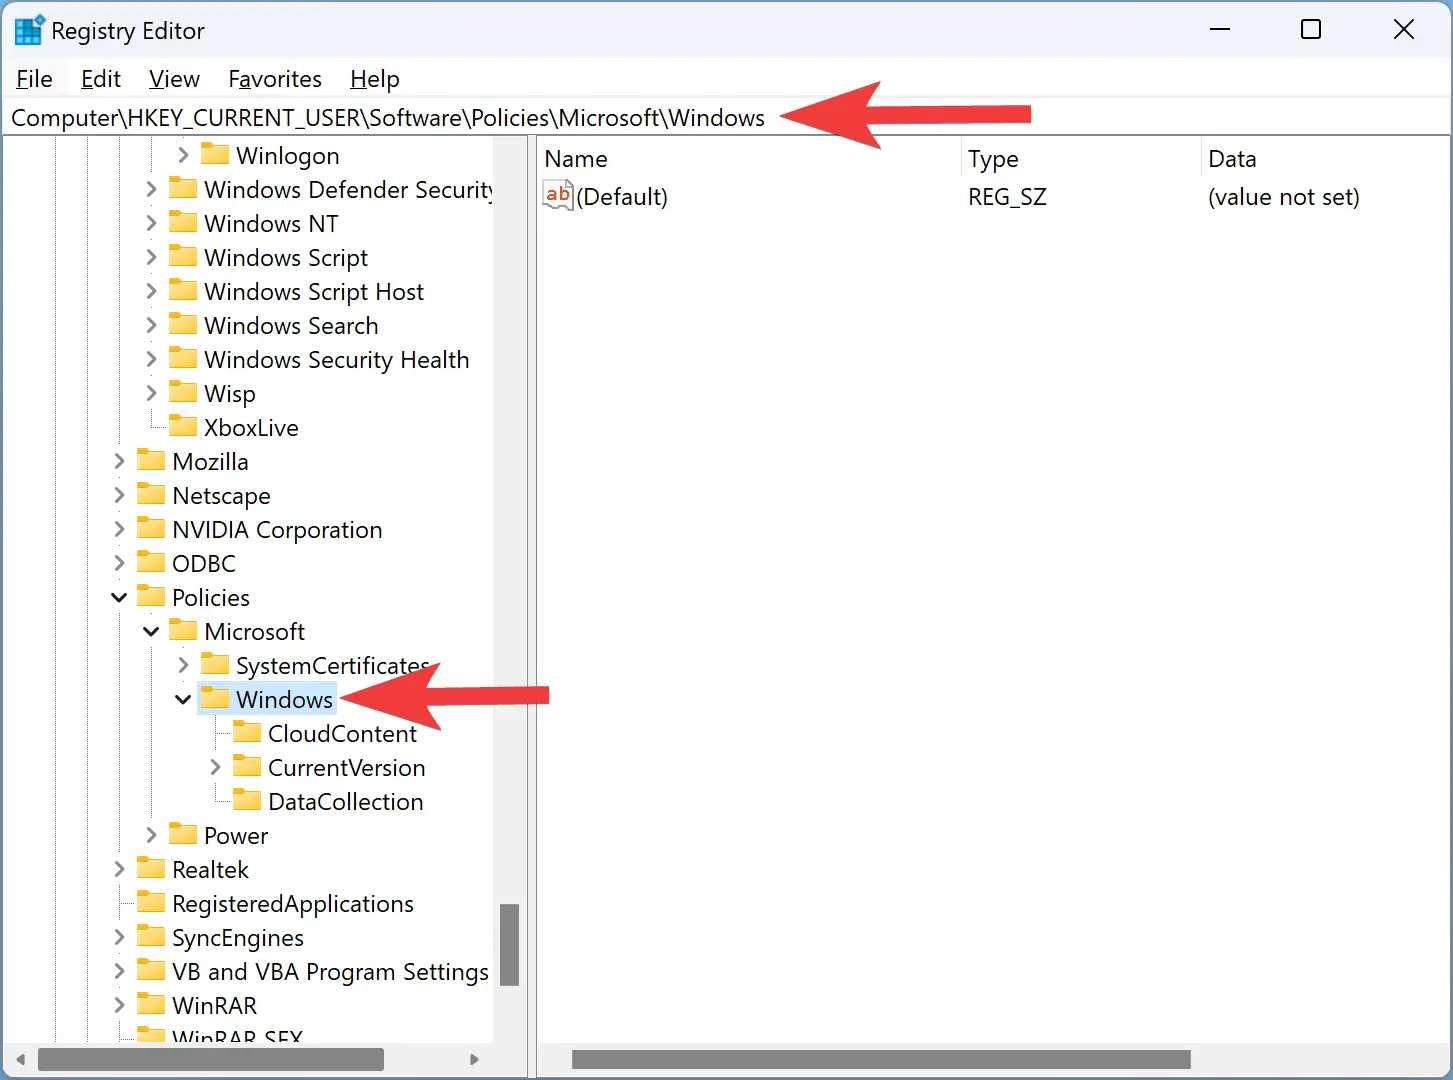
Step 3. Then, right-click the Windows key and select New > Key.
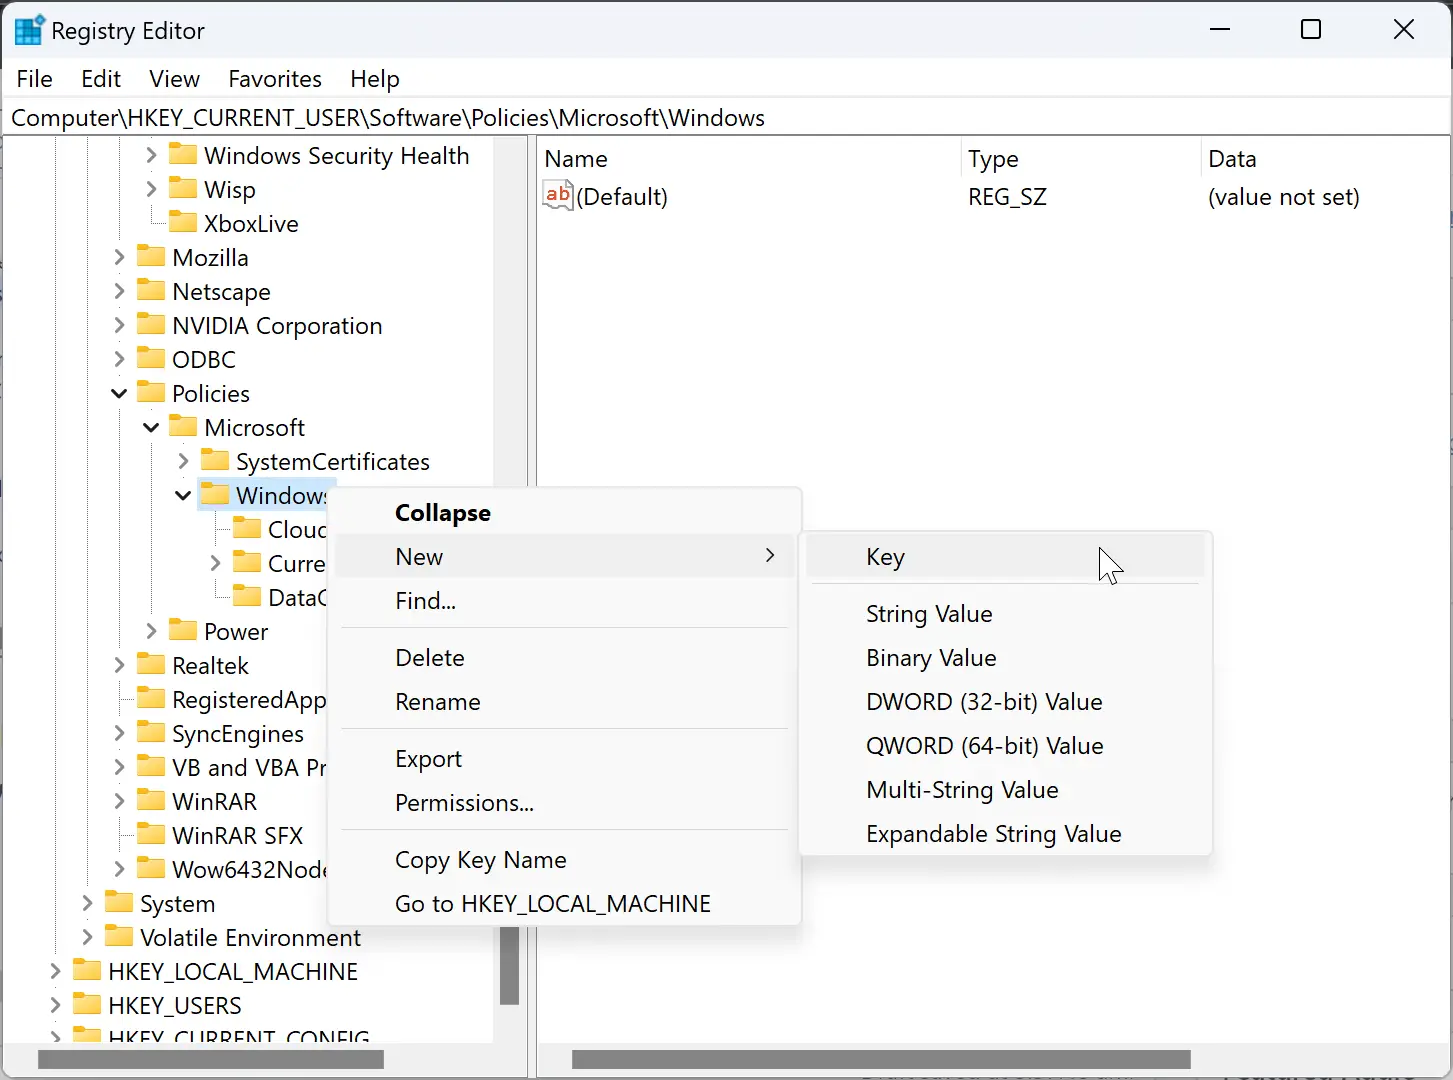
Step 4. Name the key Explorer.
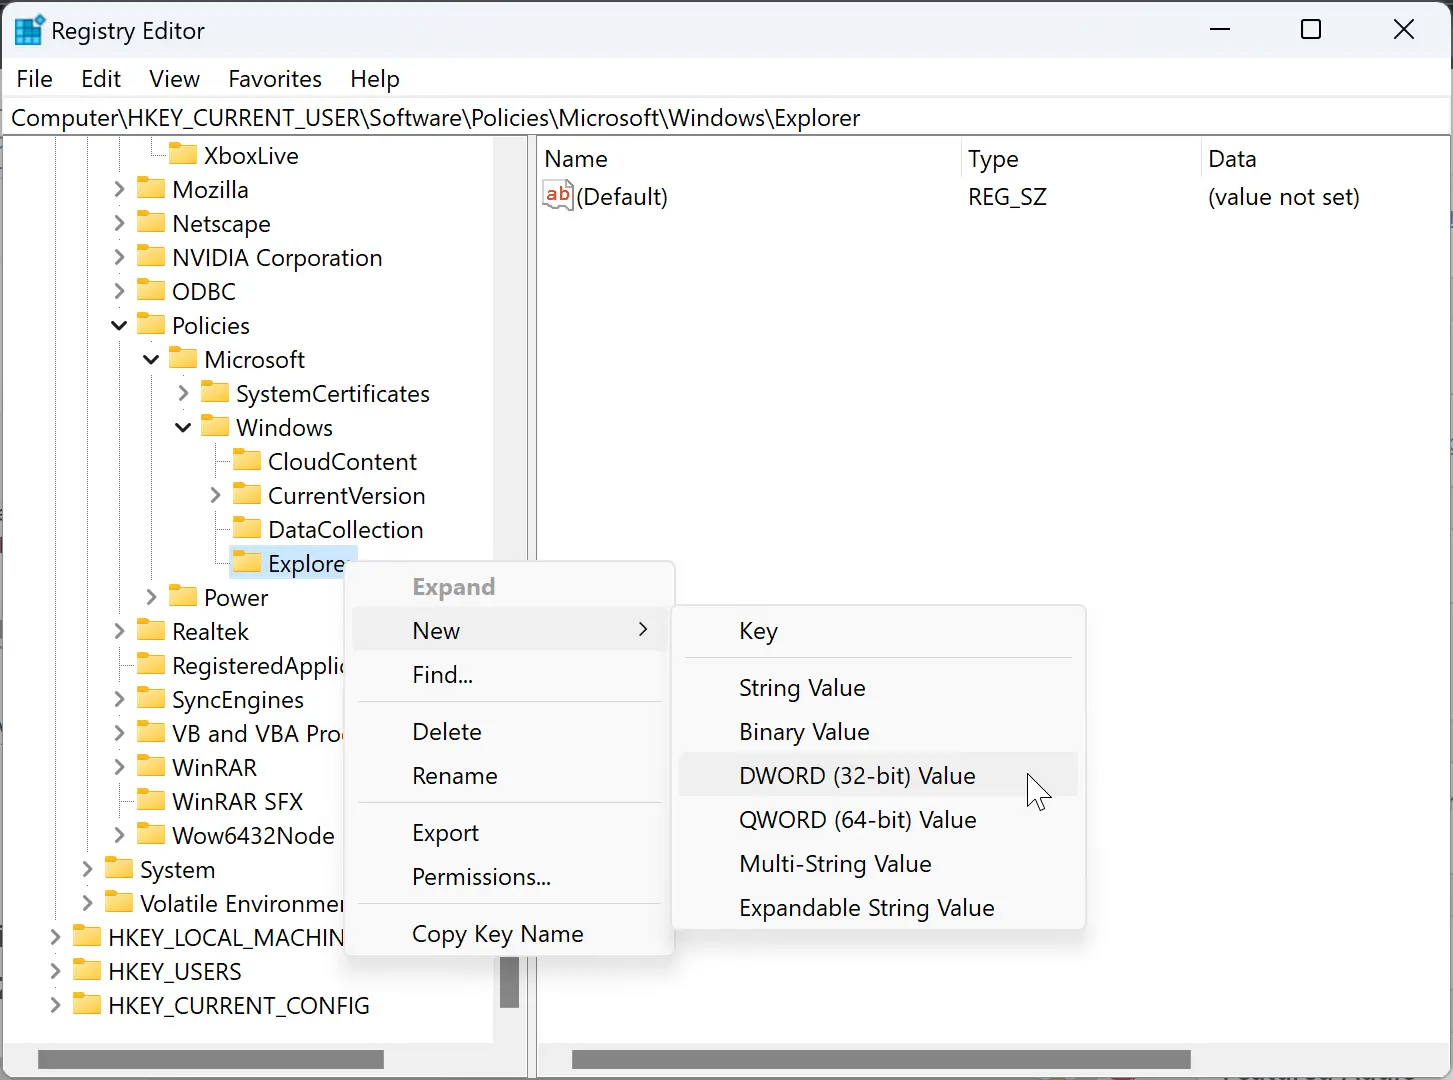
Step 5. Now, right-click the Explorer key and select New > DWORD (32-bit) Value.
Step 6. Name the DWORD DisableNotificationCenter.
Step 7. Now, double-click the DisableNotificationCenter REG_DWORD and set the “Value data” to 1.
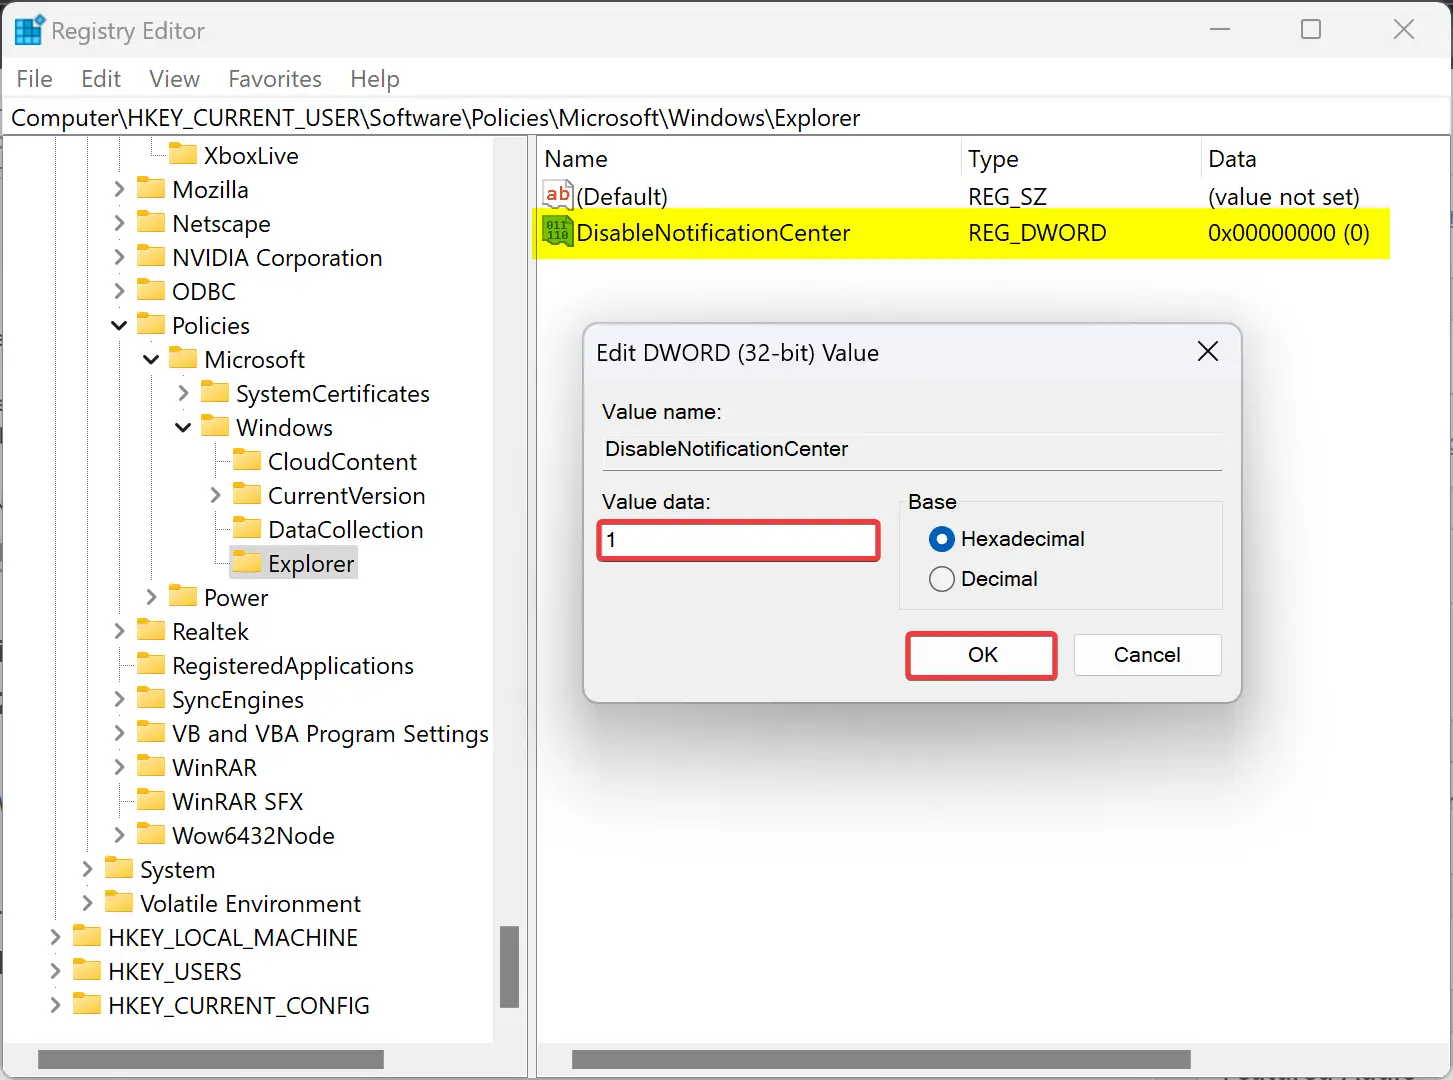
Step 8. Click OK.
Step 9. At last, reboot your PC to apply the changes.
If you press Windows+N or click the time and system section in the system tray, the Notification flyout will no longer appear.
In order to revert the changes, in step No. 7, change the “Value data” from 1 to 0. Or you can right-click the DisableNotificationCenter REG_DWORD and select the Delete option from the context menu.
Conclusion
In conclusion, Quick Settings on Windows 11 is a useful feature that allows users to access common operating system settings quickly. However, these features can sometimes cause unwanted system changes and distractions. Luckily, Windows 11 22H2 includes new policies for disabling Taskbar flyouts using the Group Policy Editor or Registry Editor. This article explains how to disable Quick Settings and Notification Center flyouts using both methods. By following the above steps, users can turn off these features and avoid unwanted system changes or distractions.
