In the ever-evolving landscape of cybersecurity, users are often faced with the dilemma of choosing the right combination of security tools to protect their Windows devices. While third-party antivirus solutions offer robust protection, Microsoft Defender Antivirus provides an additional layer of security through its Periodic Scanning feature. This guide will walk you through the steps to enable and disable Periodic Scanning on Windows 11 and 10, ensuring a comprehensive defense against malware threats.
How to Enable or Disable Defender Antivirus Periodic Scanning on Windows 11 or 10?
Enabling Periodic Scanning on Windows 11 and 10
Follow these steps to turn on periodic scanning on Windows 11 or 10:-
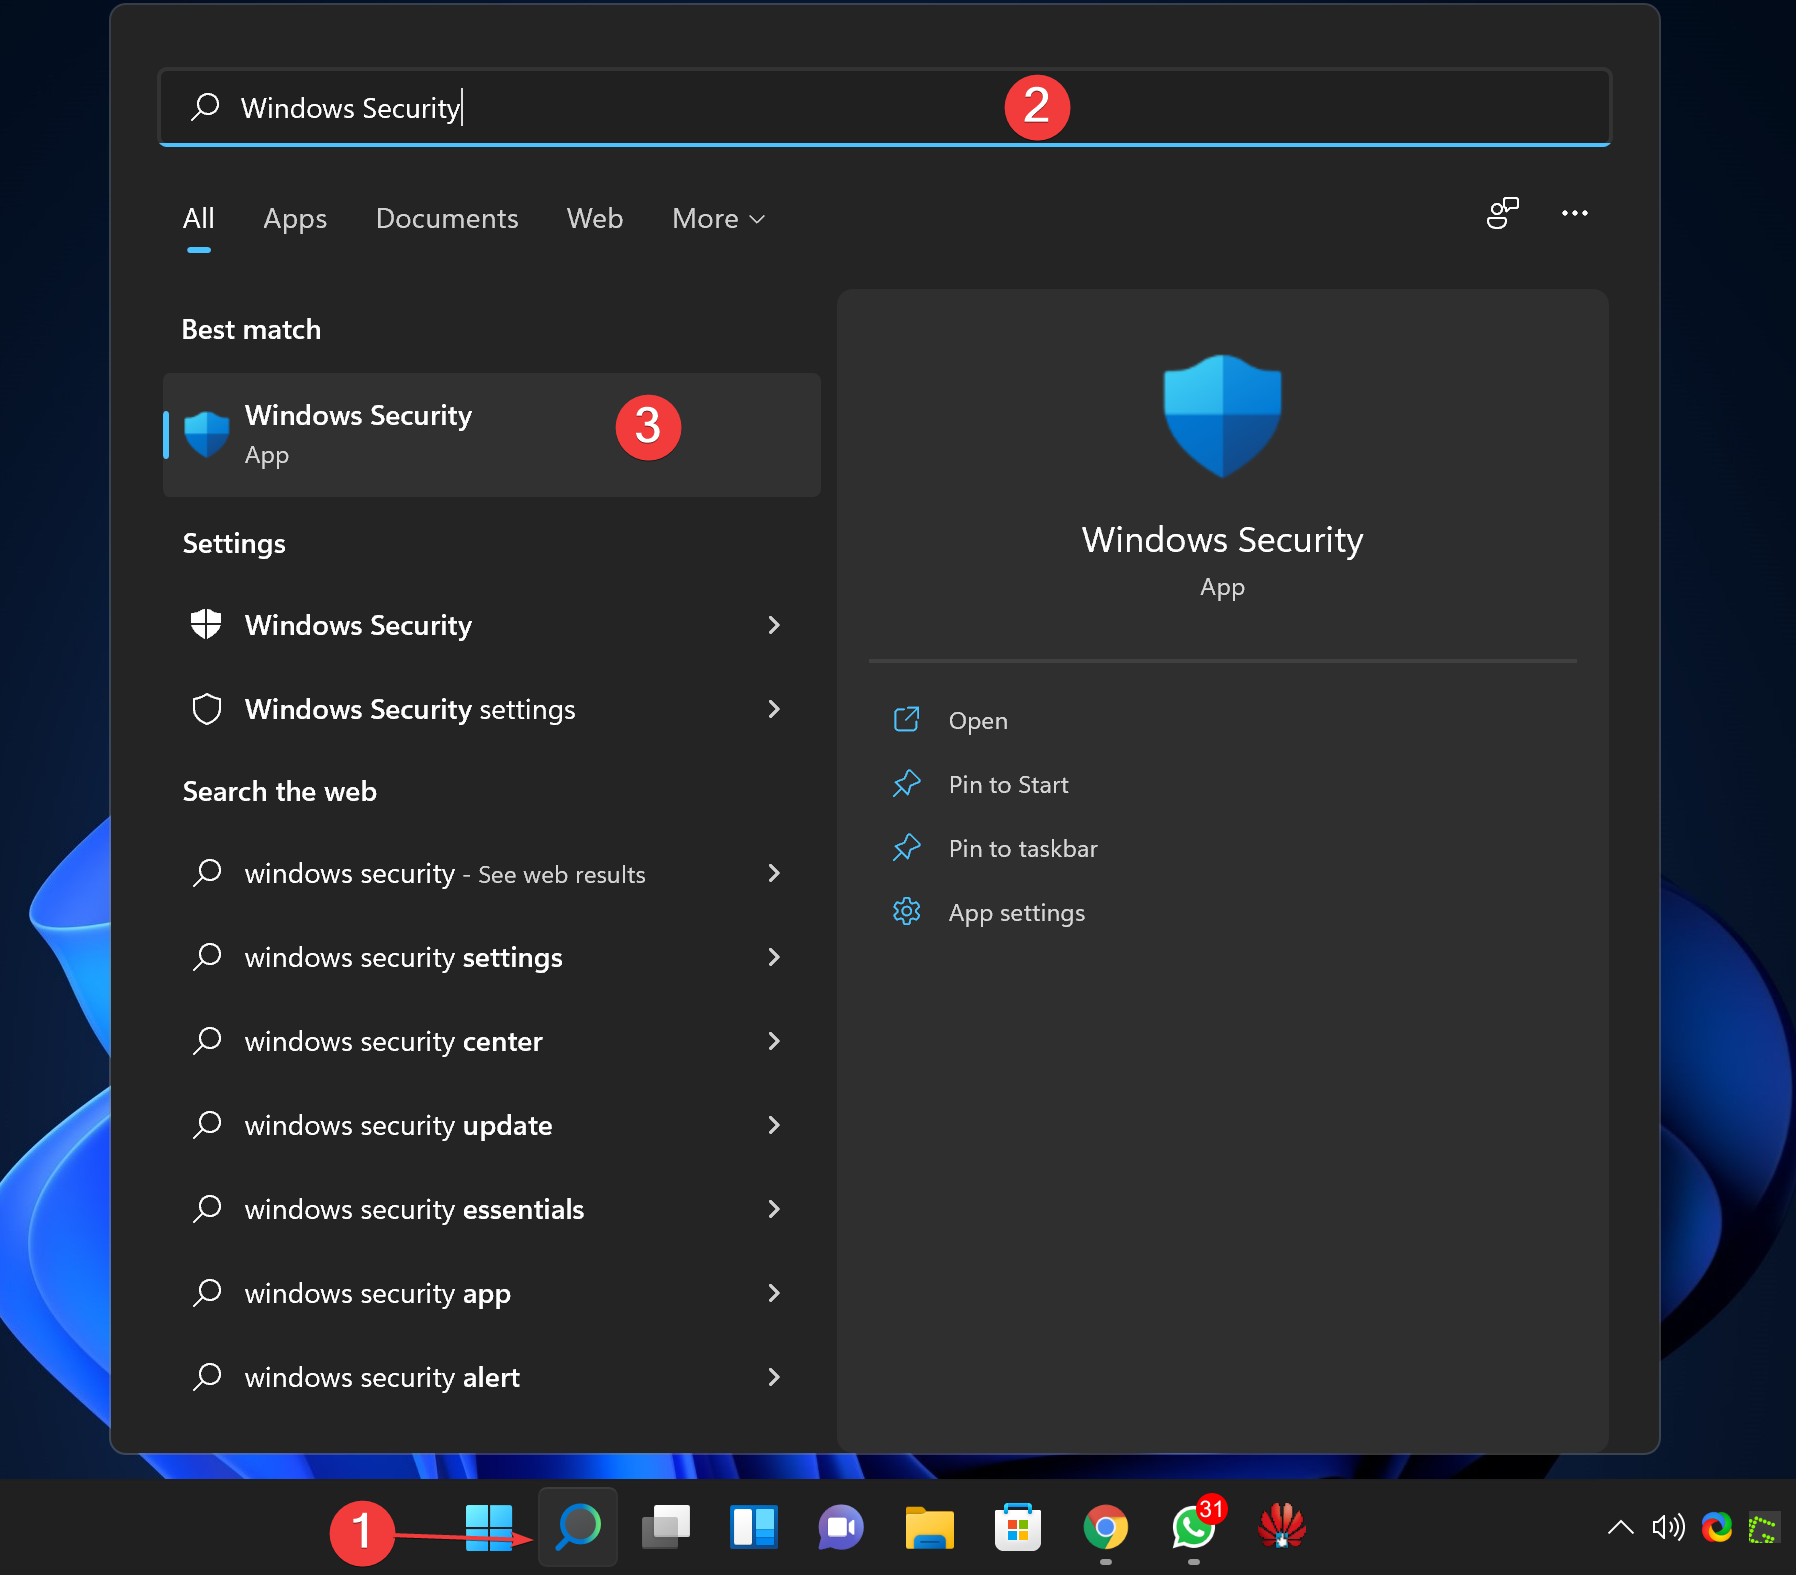
Step 1. On your Windows device, open the Windows Security application. You can do this by searching for “Windows Security” in the Start menu.
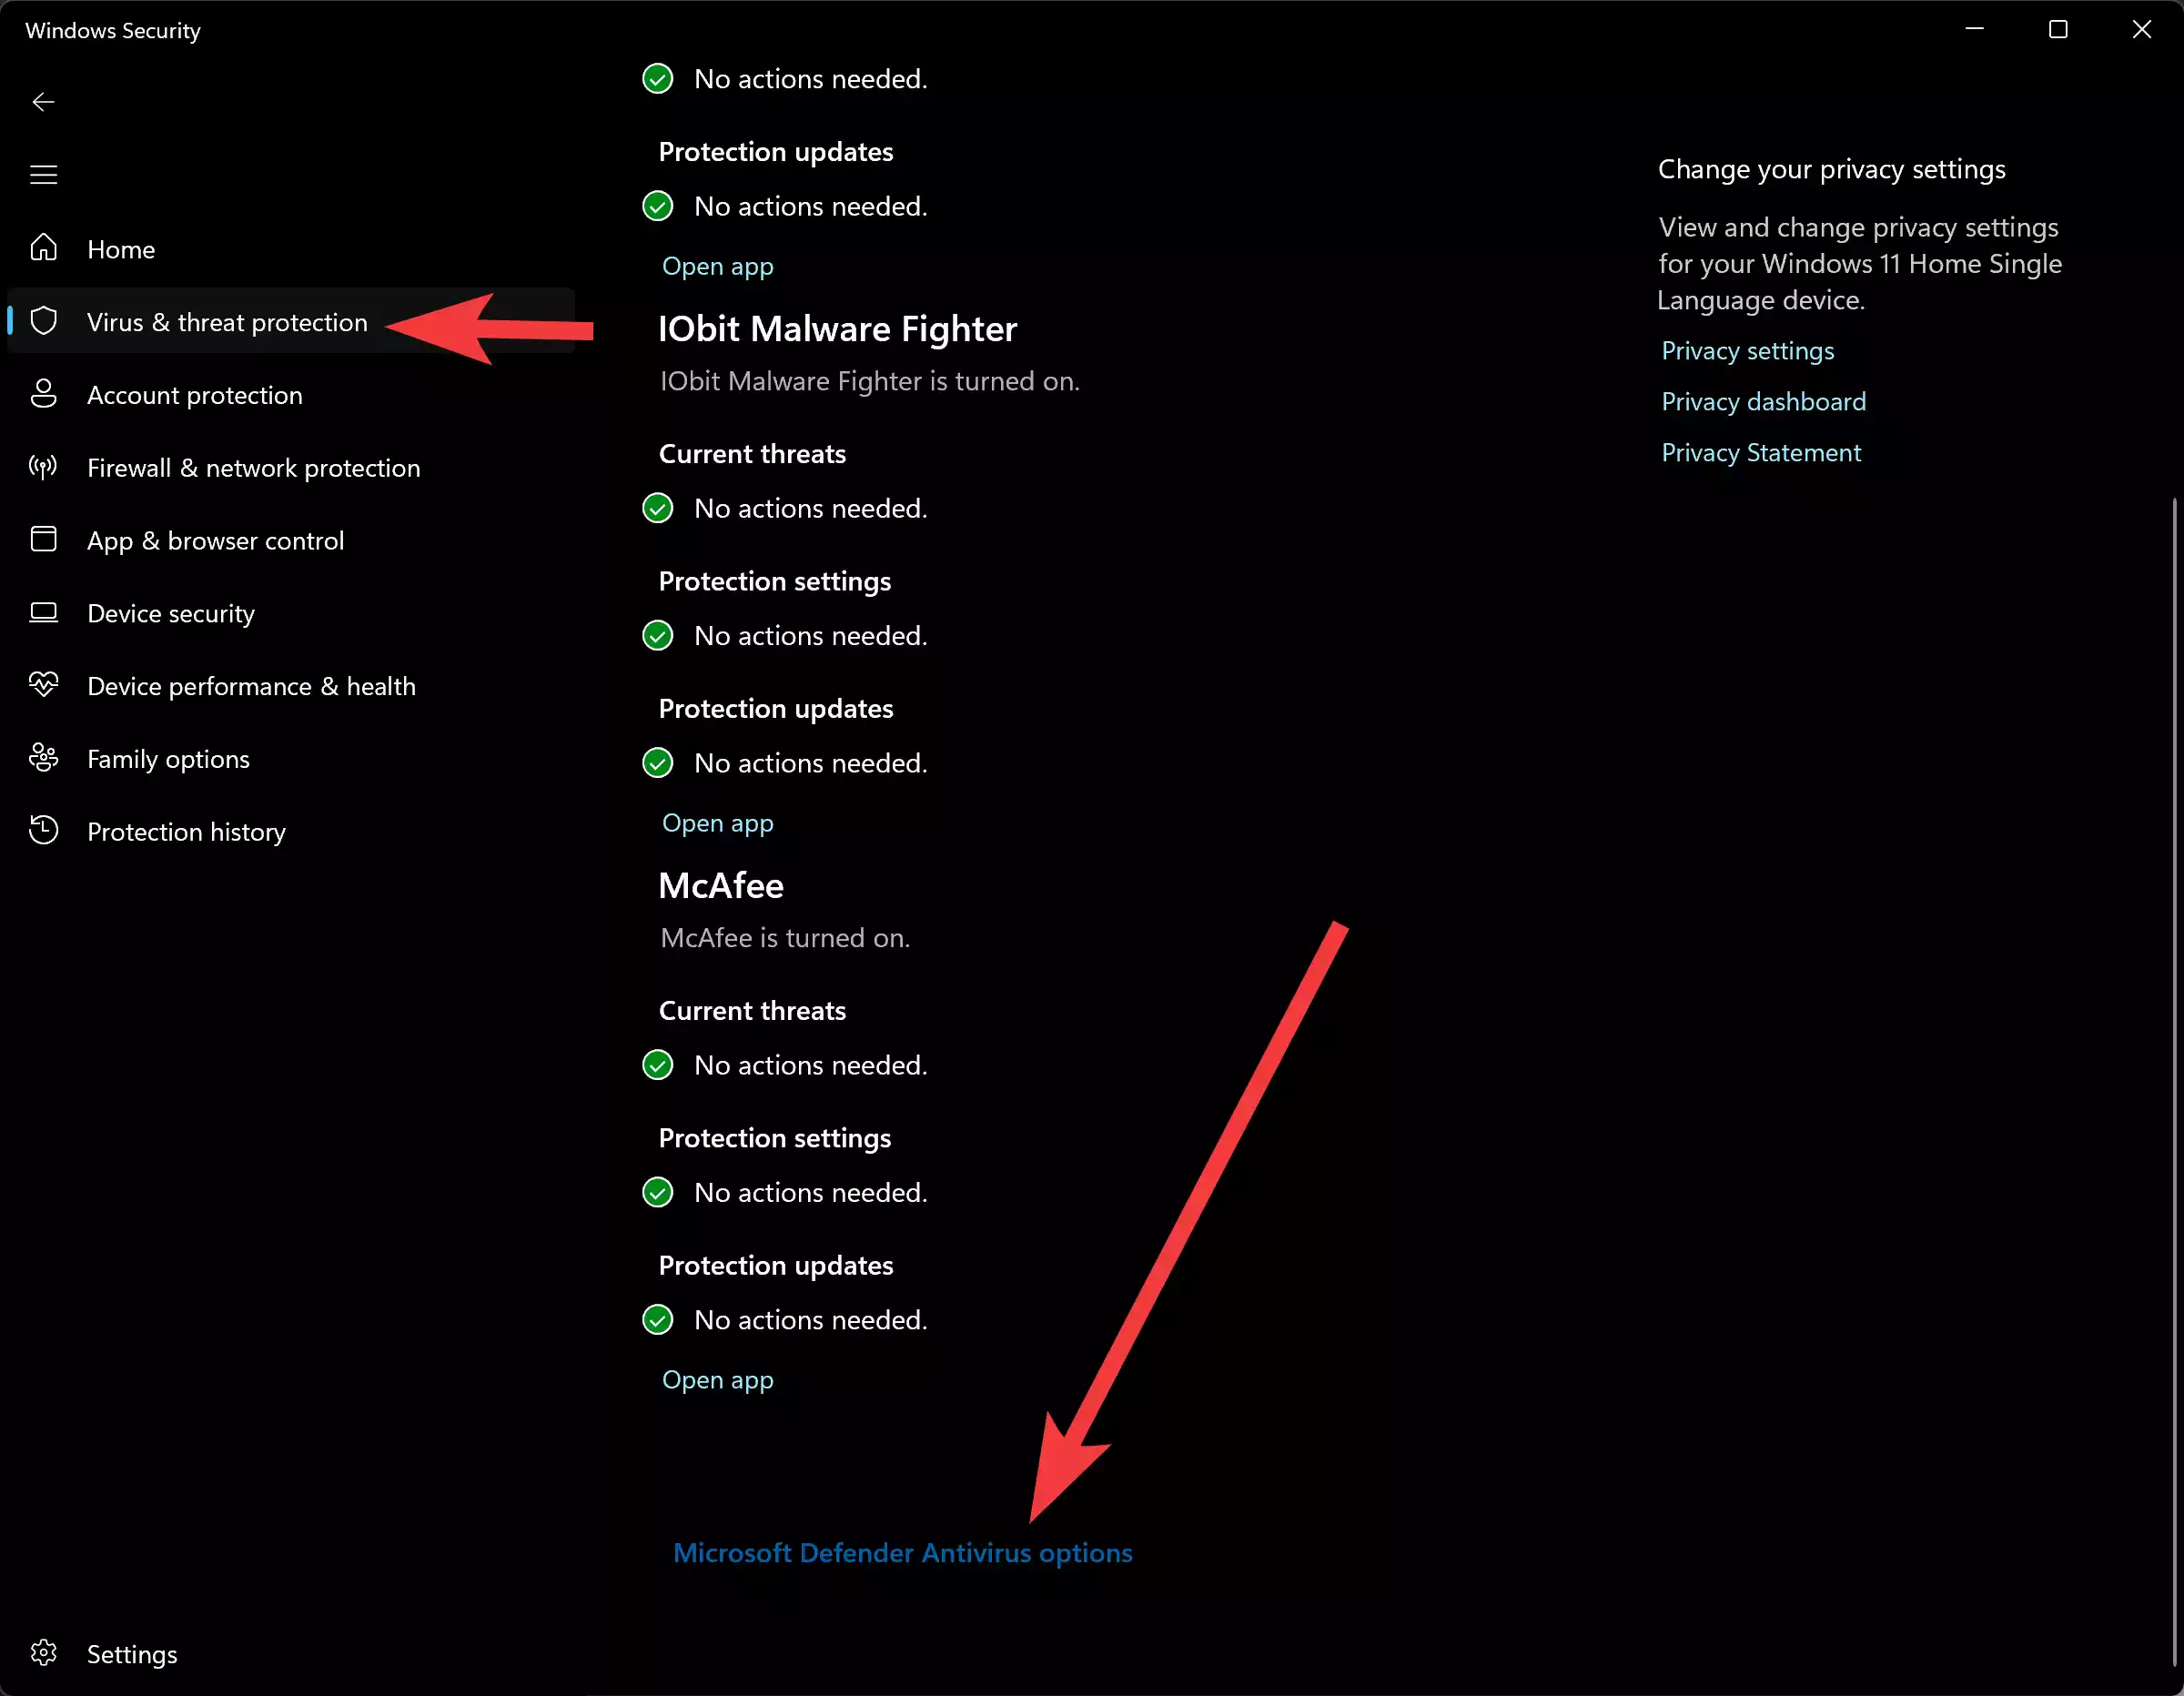
Step 2. Within Windows Security, select the “Virus & Threat Protection” tab from the left-hand menu. This section is your hub for managing antivirus settings.
Step 3. Click on the “Microsoft Defender Antivirus options” link. This will lead you to the settings specific to Microsoft Defender Antivirus.
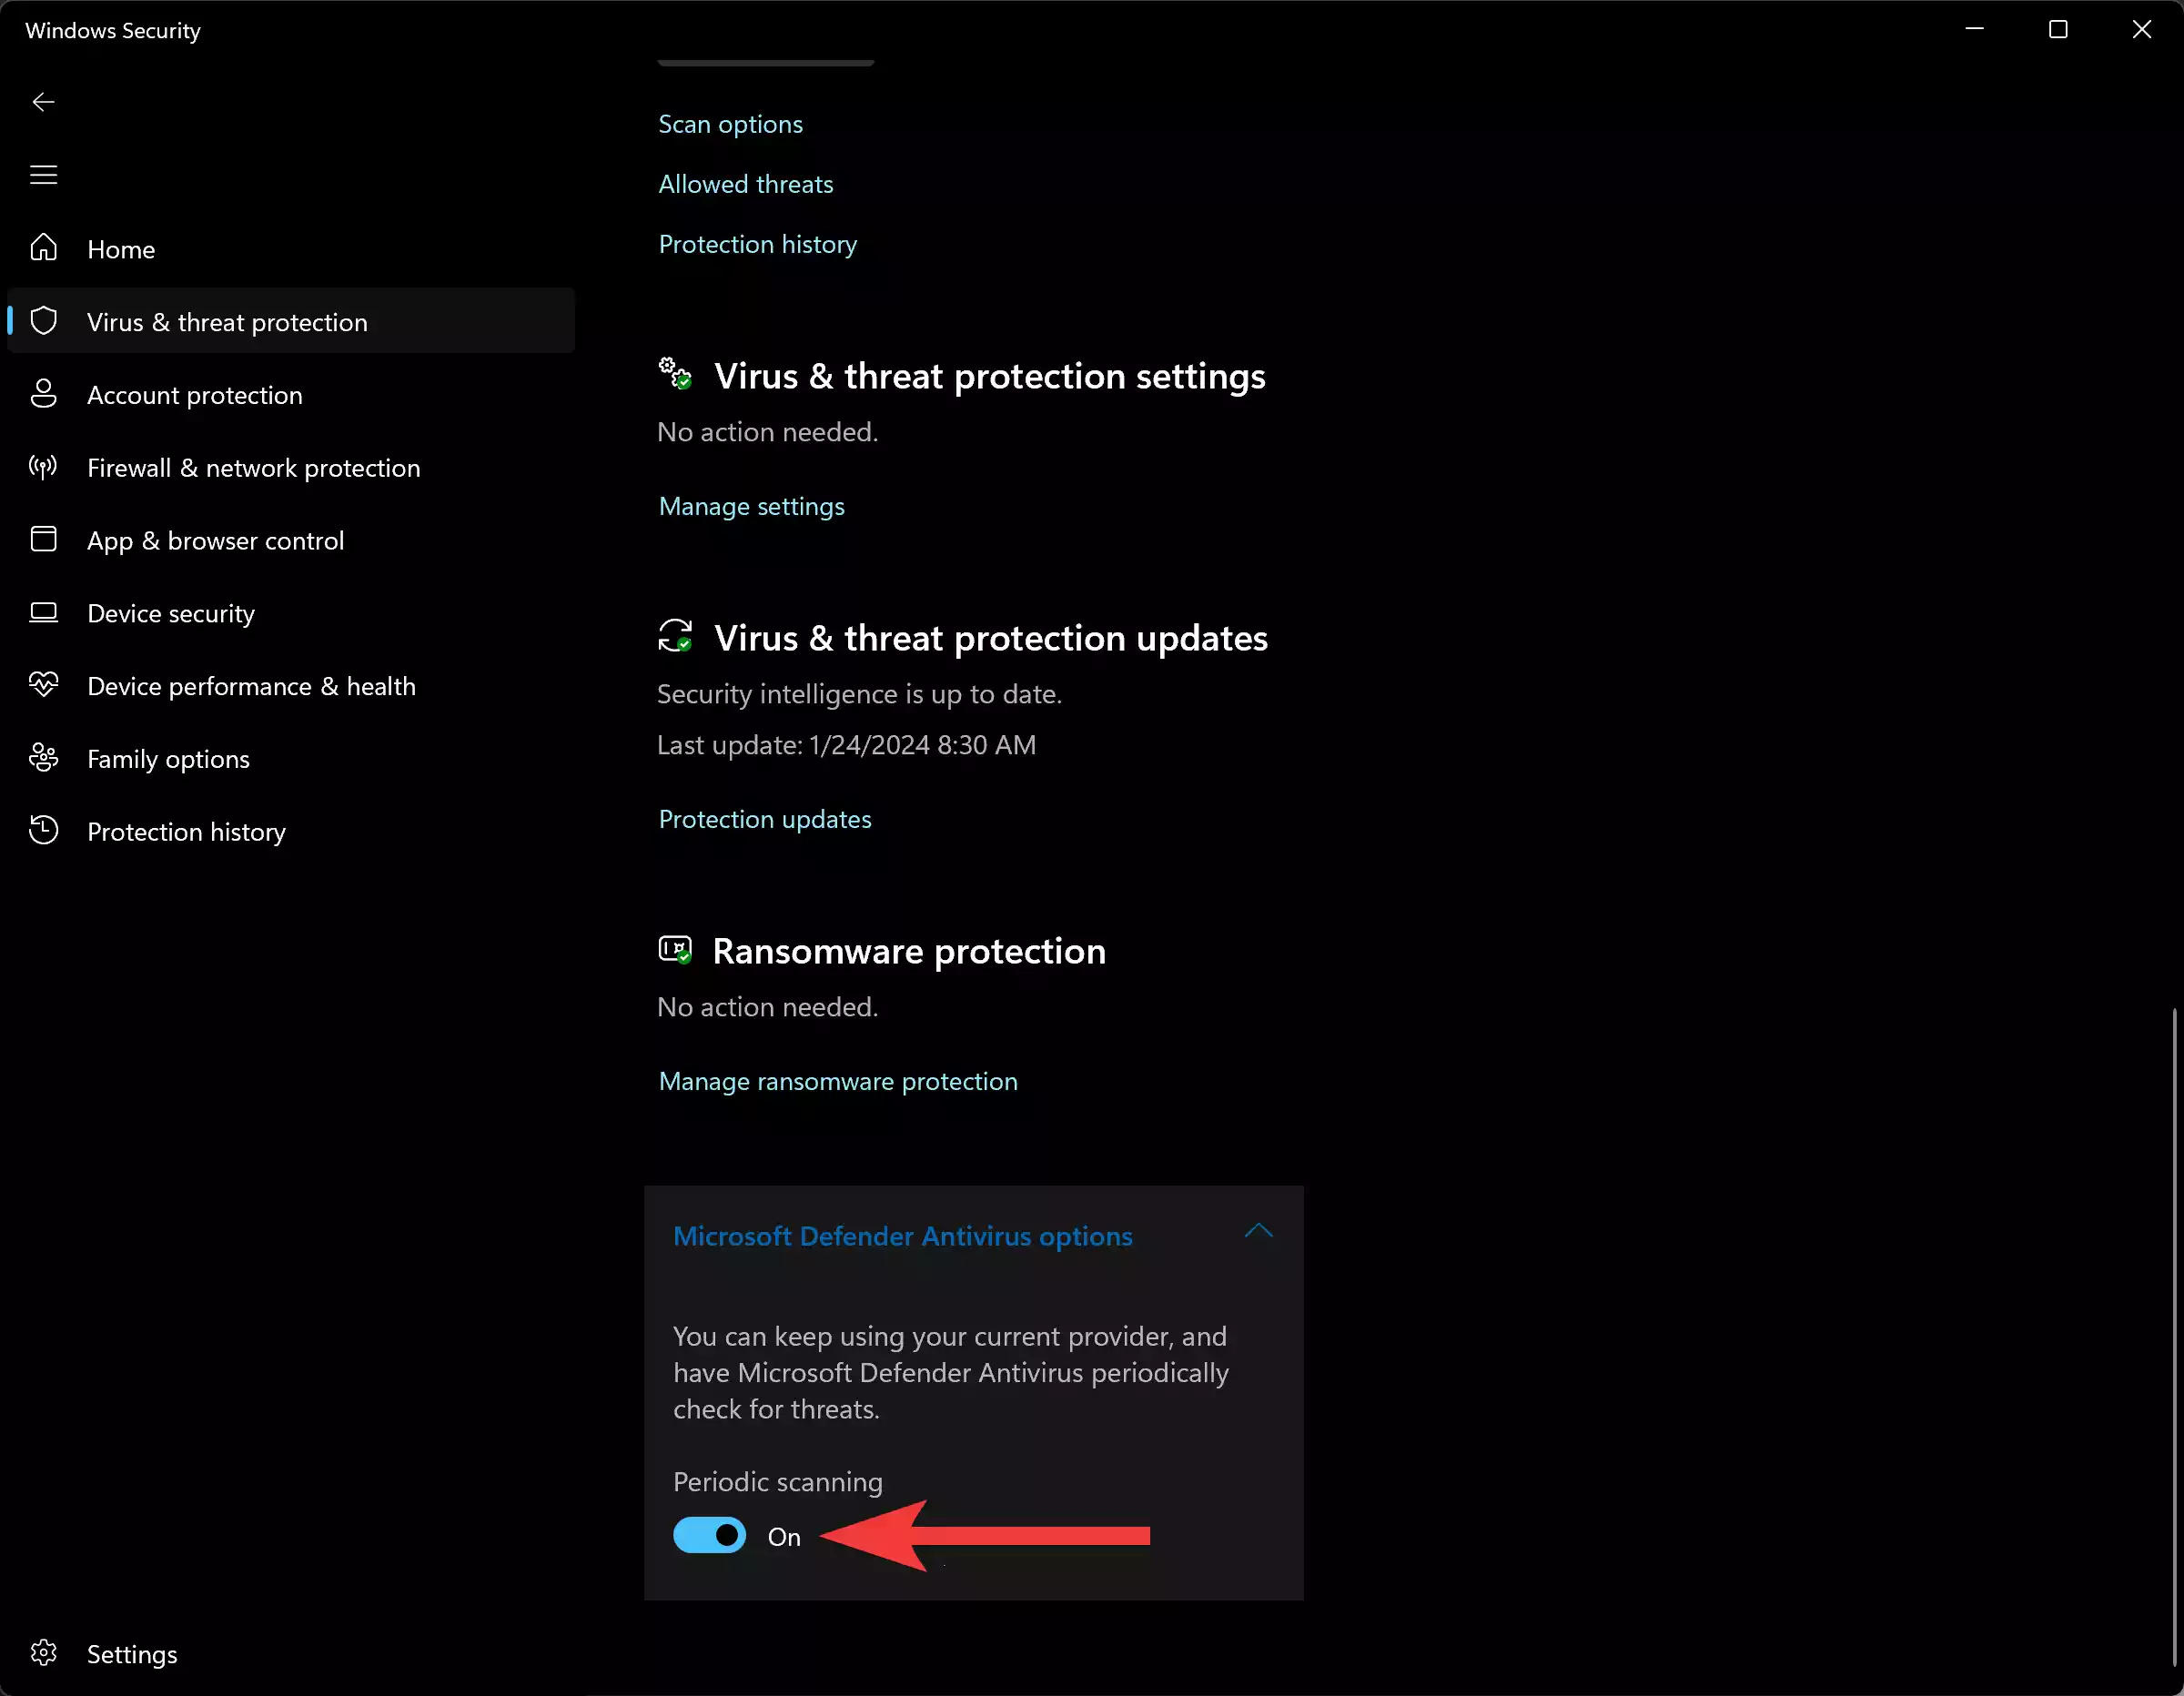
Step 4. Look for the “Periodic scanning” option and turn on the toggle switch. Enabling this feature ensures that Microsoft Defender Antivirus will conduct periodic scans, even if you have a third-party antivirus installed.
Step 5. Windows 11 and 10 utilize the Automatic Maintenance feature to schedule periodic scans at optimal times, minimizing the impact on system performance and battery life. The scans are intelligently timed to not disrupt your daily activities.
Notification of Threats: Once Periodic Scanning is enabled, Microsoft Defender Antivirus will automatically detect and remove any threats it finds. Users will receive notifications in the Action Center, allowing them to review details of the identified threats within the antivirus software. Additional actions can be taken as needed to enhance security further.
Disabling Periodic Scanning on Windows 11 and 10
Follow these steps to turn off periodic scanning on Windows 11 or 10:-
Step 1. Open the Windows Security application on your device.
Step 2. Select the “Virus & Threat Protection” tab from the left-hand menu.
Step 3. Click on the “Microsoft Defender Antivirus options” link on the right sidebar.
Step 4. Locate the “Periodic scanning” option and turn off the toggle switch. This action will disable Microsoft Defender Antivirus from conducting periodic scans while using a third-party security solution.
Conclusion
Enabling Periodic Scanning on Windows 11 and 10 is a strategic move to fortify your device’s defenses against potential threats. By combining the strengths of third-party antivirus solutions with the additional security layer provided by Microsoft Defender Antivirus, users can create a robust shield against malware. Regularly updating antivirus definitions and staying vigilant will contribute to a safer computing experience in today’s digital landscape.
