Windows 11/10 includes a feature known as Memory Compression. It makes better use of available memory on all systems by reducing physical memory utilization. Furthermore, it improves the speed of writing to and reading from disk when this feature is enabled on your computer.
Memory compression helps improve the overall user experience; however, additional CPU resources may be required during compressing and decompressing the data in RAM, which may slow CPU processing on some systems.
Memory Compression is faster than a traditional paging file, but it uses more CPU resources. If you notice your PC is slow, you should try enabling and disabling Memory Compression.
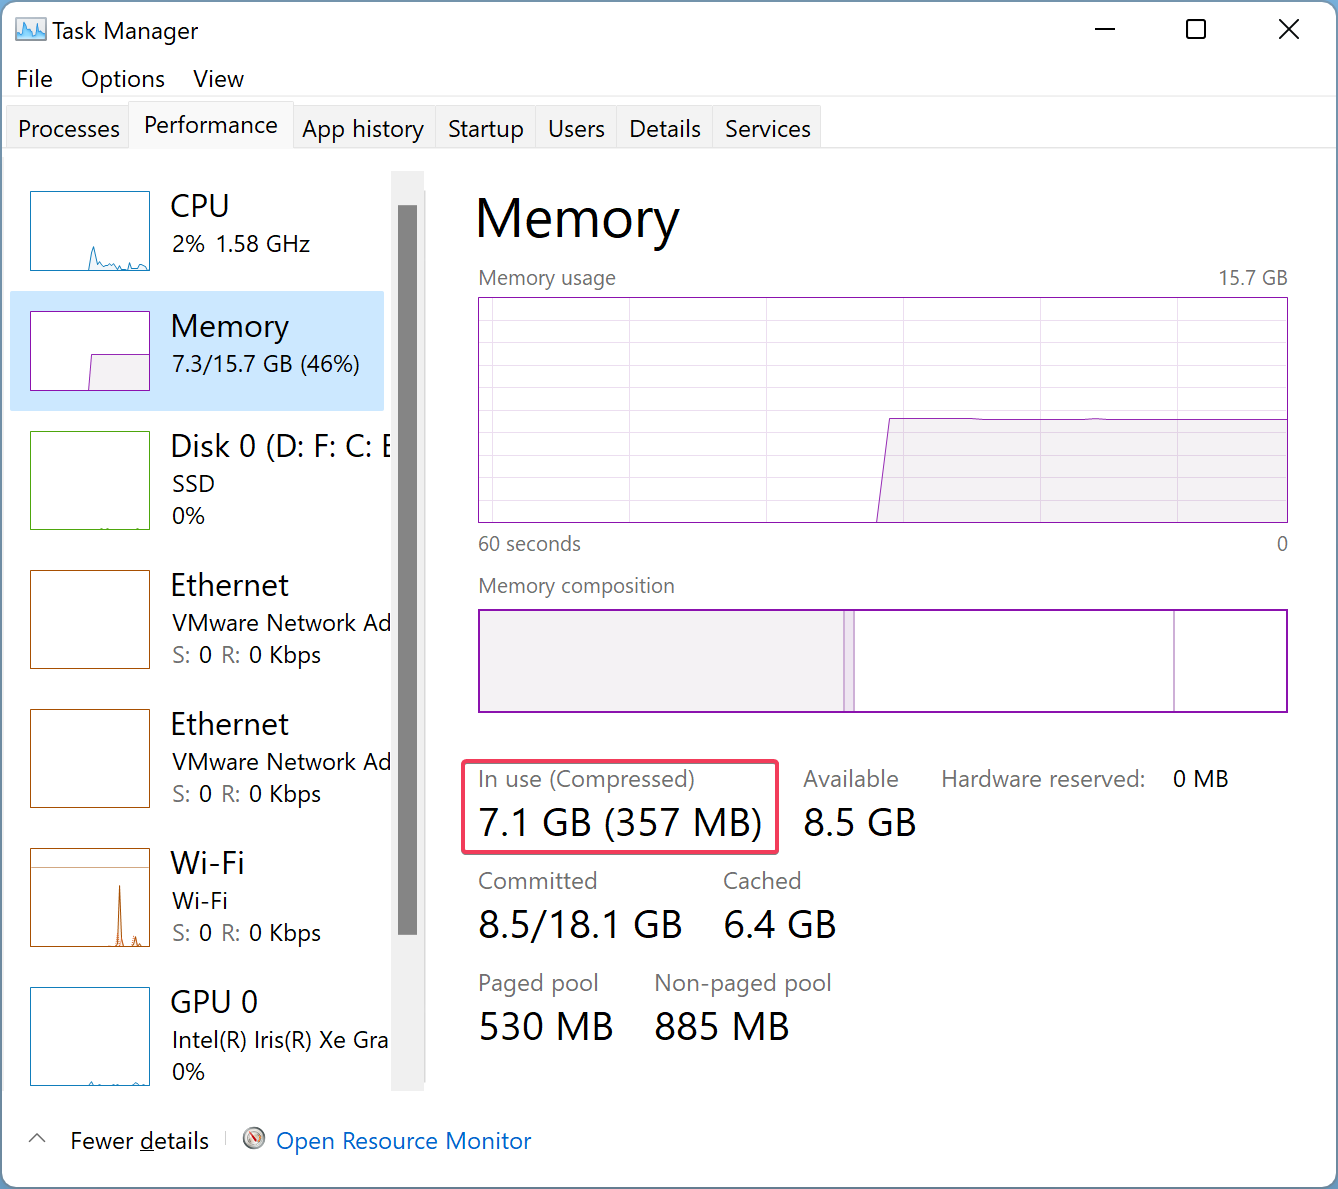
How to View Amount of Compressed Memory in Windows 11/10?
Open the Task Manager by pressing Ctrl + Shift + Esc and navigate to the Performance tab. Click Memory in the left sidebar, and on the right sidebar, you can see how much memory is compressed.
How to See if Memory Compression is Enabled or Disabled?
To view if Memory Compression is enabled or disabled on your Windows 11/10, do the following:-
Step 1. First, open Windows PowerShell with elevated rights.
Step 2. Then, on the prompt of Windows PowerShell, type the following and hit Enter from the keyboard:-
Get-MMAgent
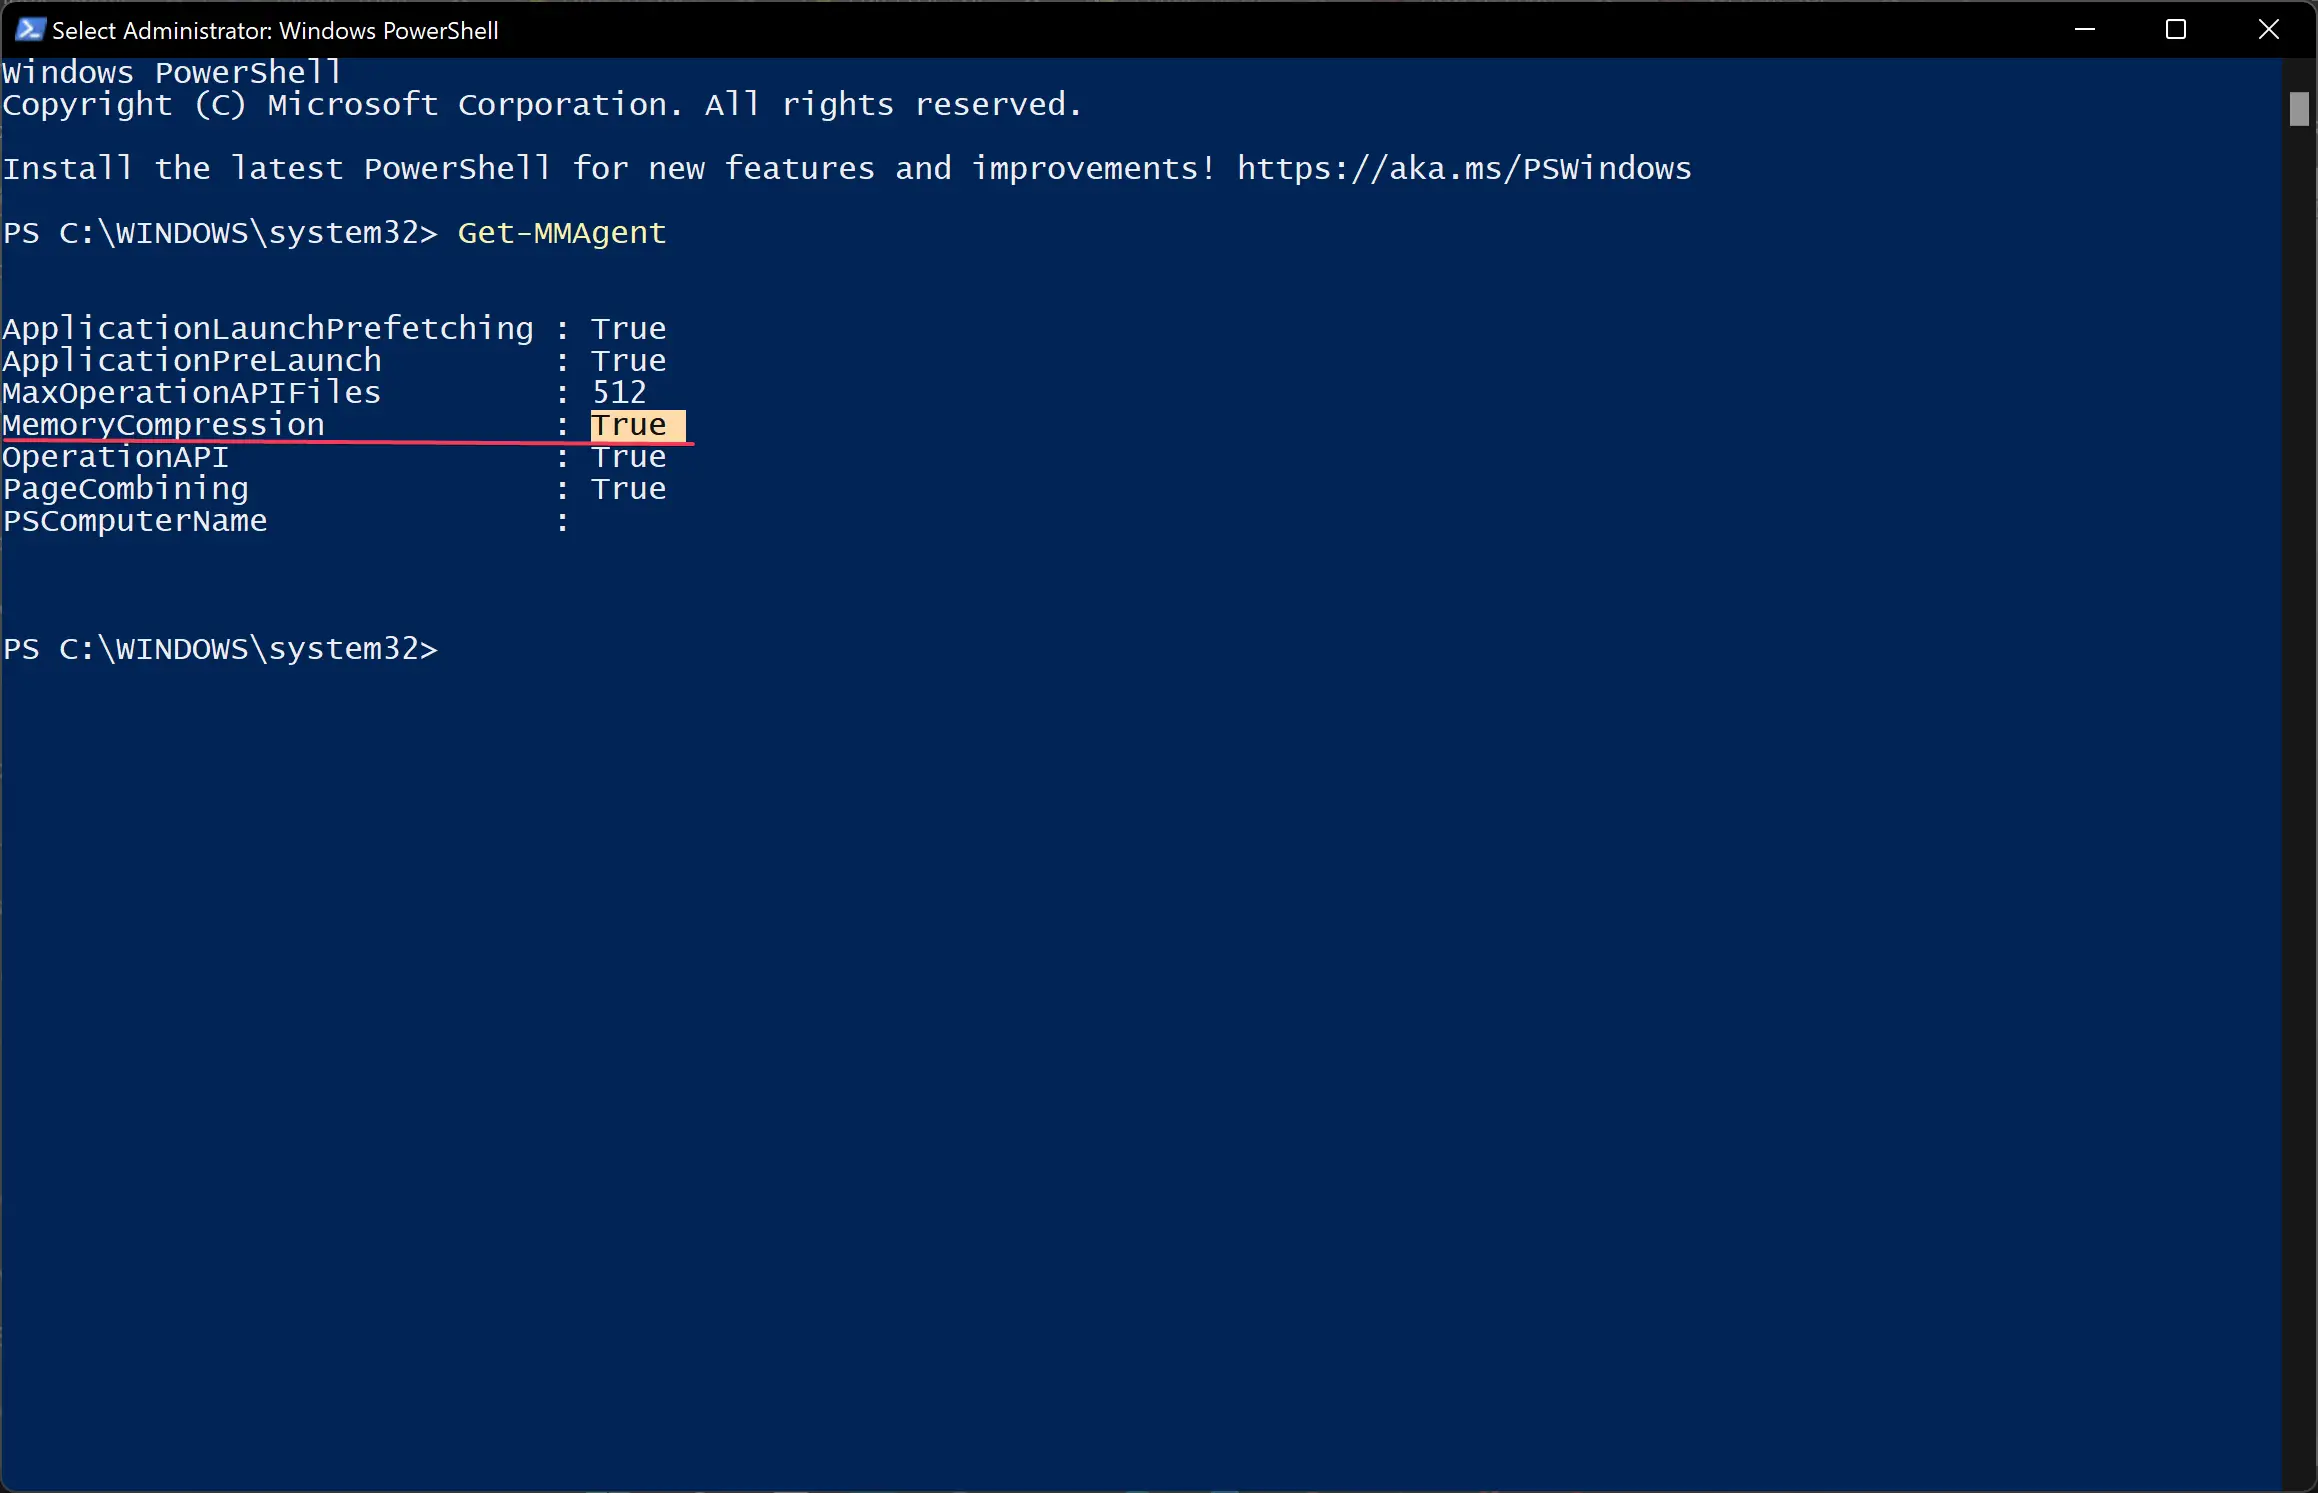
Besides the MemoryCompression field, you can see True for enabled or False for disabled.
How to Turn on Memory Compression in Windows 11/10?
Memory compression features may help low-end systems with little system memory. It compresses the system’s memory by reducing the number of read/write requests and frees up RAM without enacting traditional paging.
To enable Memory Compression in Windows 11/10, do the following steps:-
Step 1. First, open Windows PowerShell with elevated rights.
Step 2. Then, on the prompt of Windows PowerShell, type the following and hit Enter from the keyboard:-
Enable-MMAgent -mc
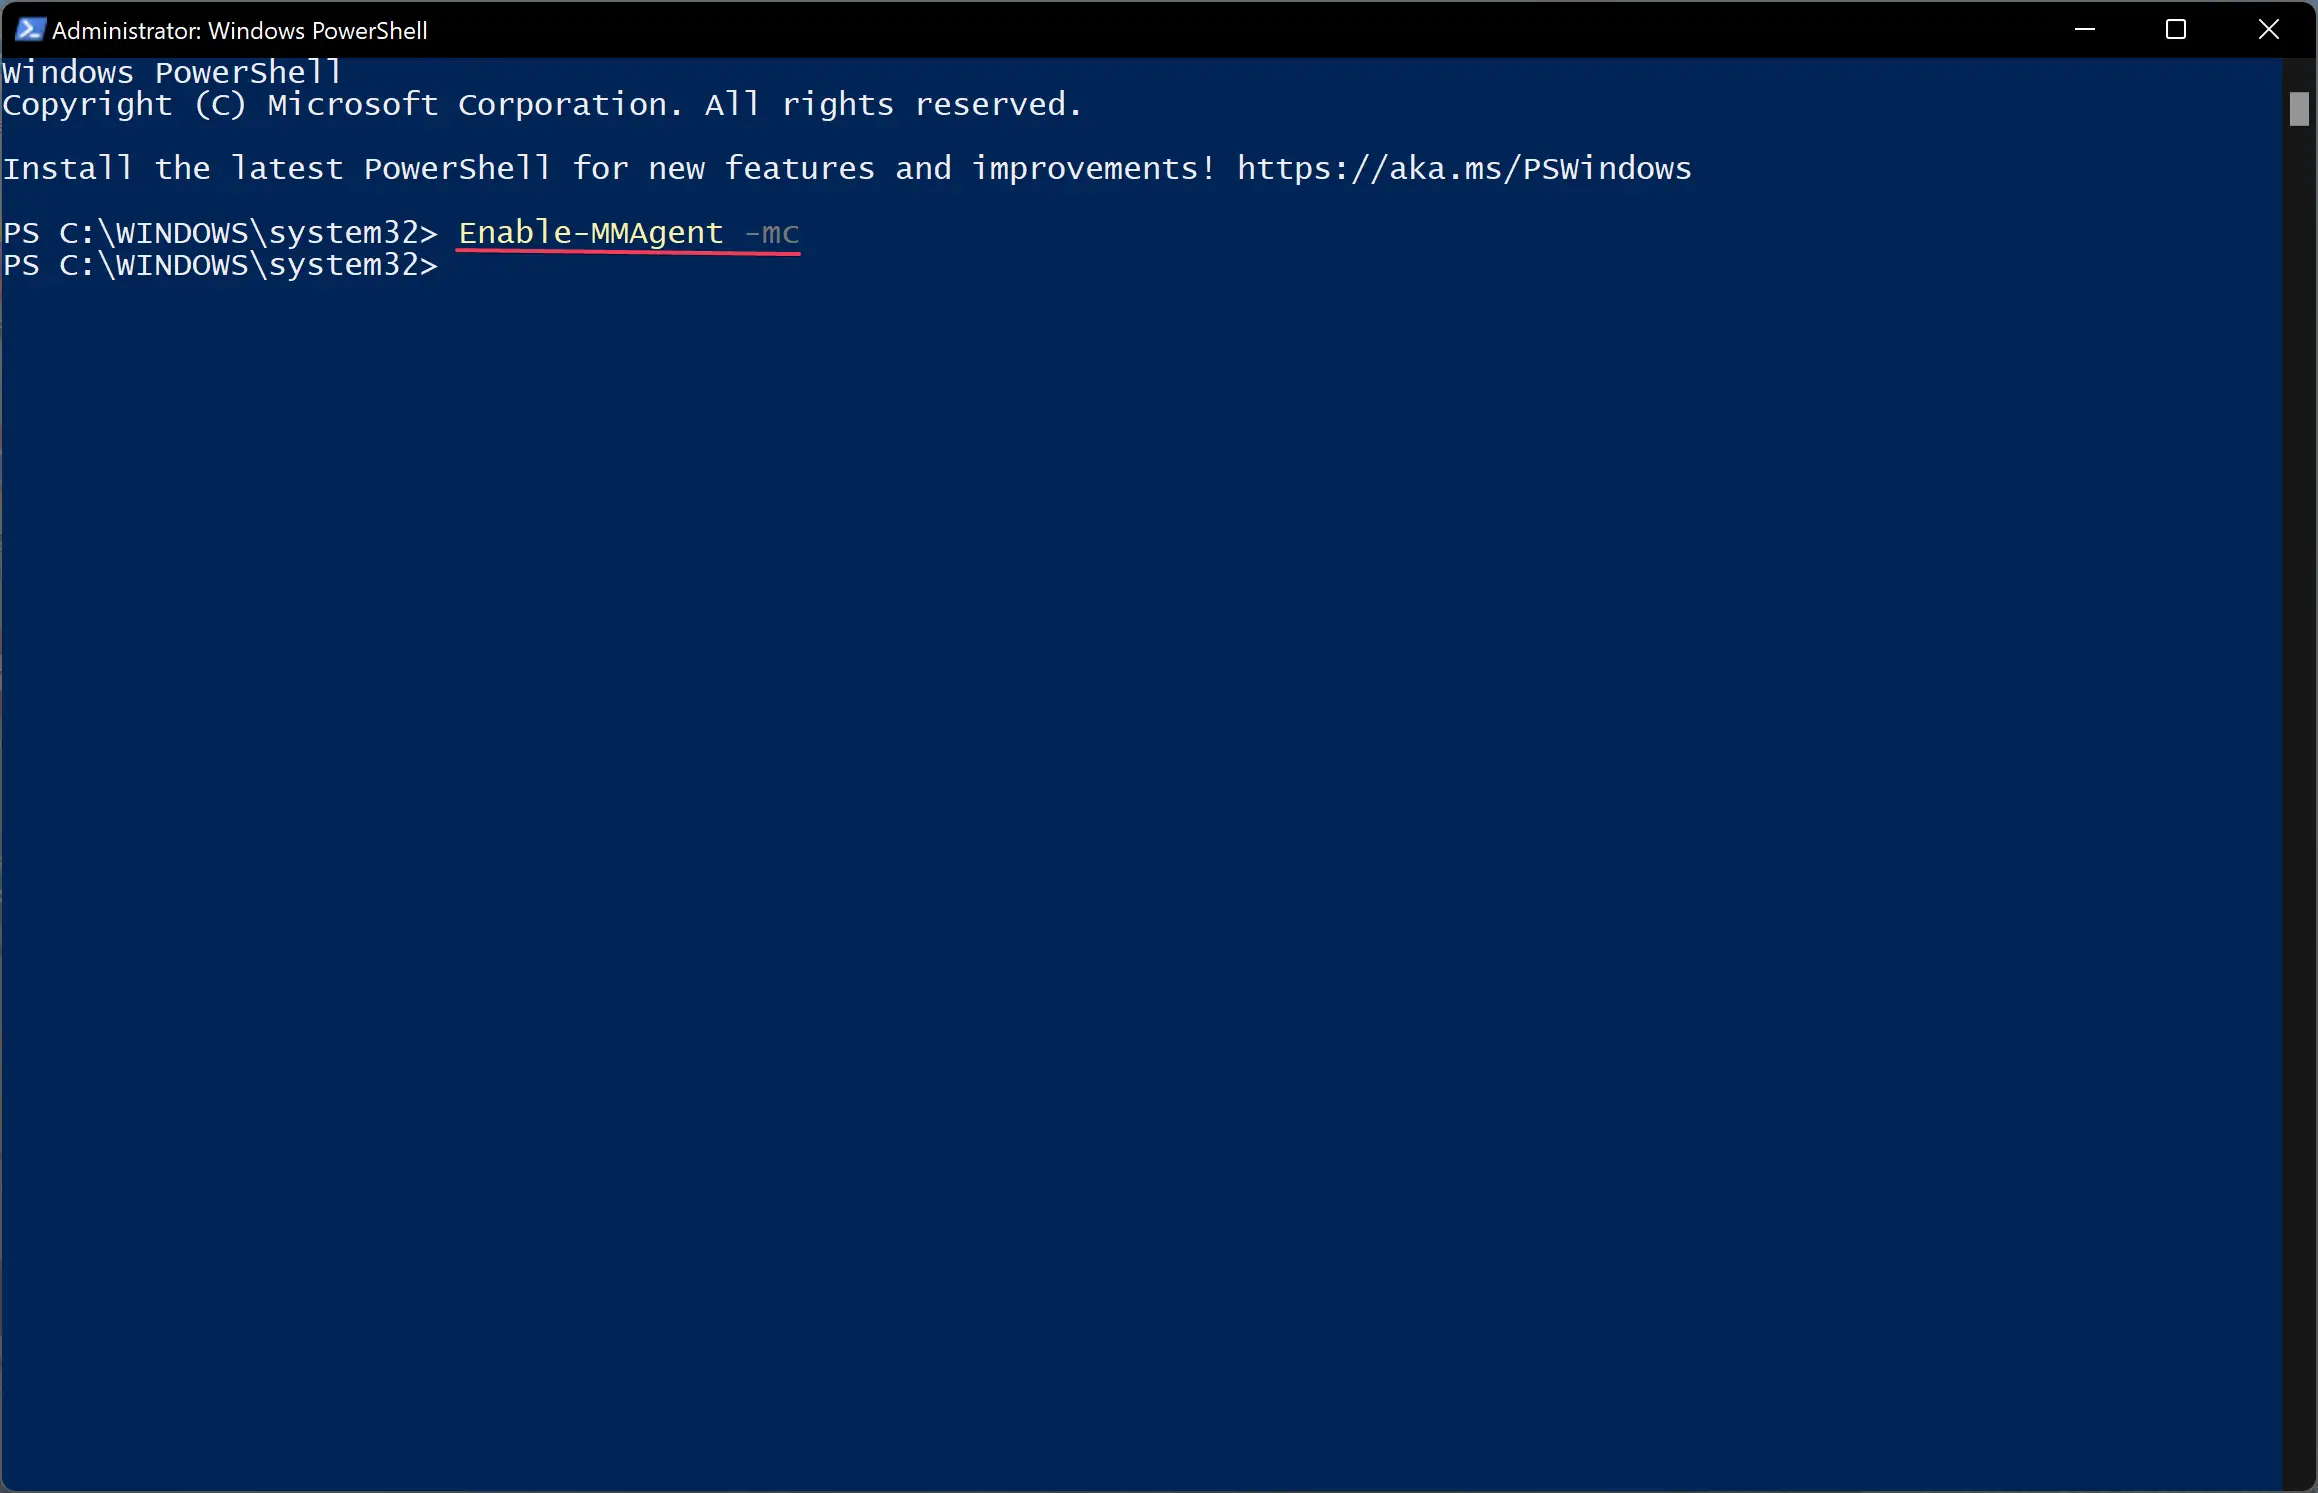
Step 3. Reboot your computer to apply the changes.
How to Turn off Memory Compression in Windows 11/10?
To disable Memory Compression in Windows 11/10, do the following recommended steps:-
Step 1. First, open Windows PowerShell with elevated rights.
Step 2. Then, on the prompt of Windows PowerShell, type the following and hit Enter from the keyboard:-
Disable-MMAgent -mc
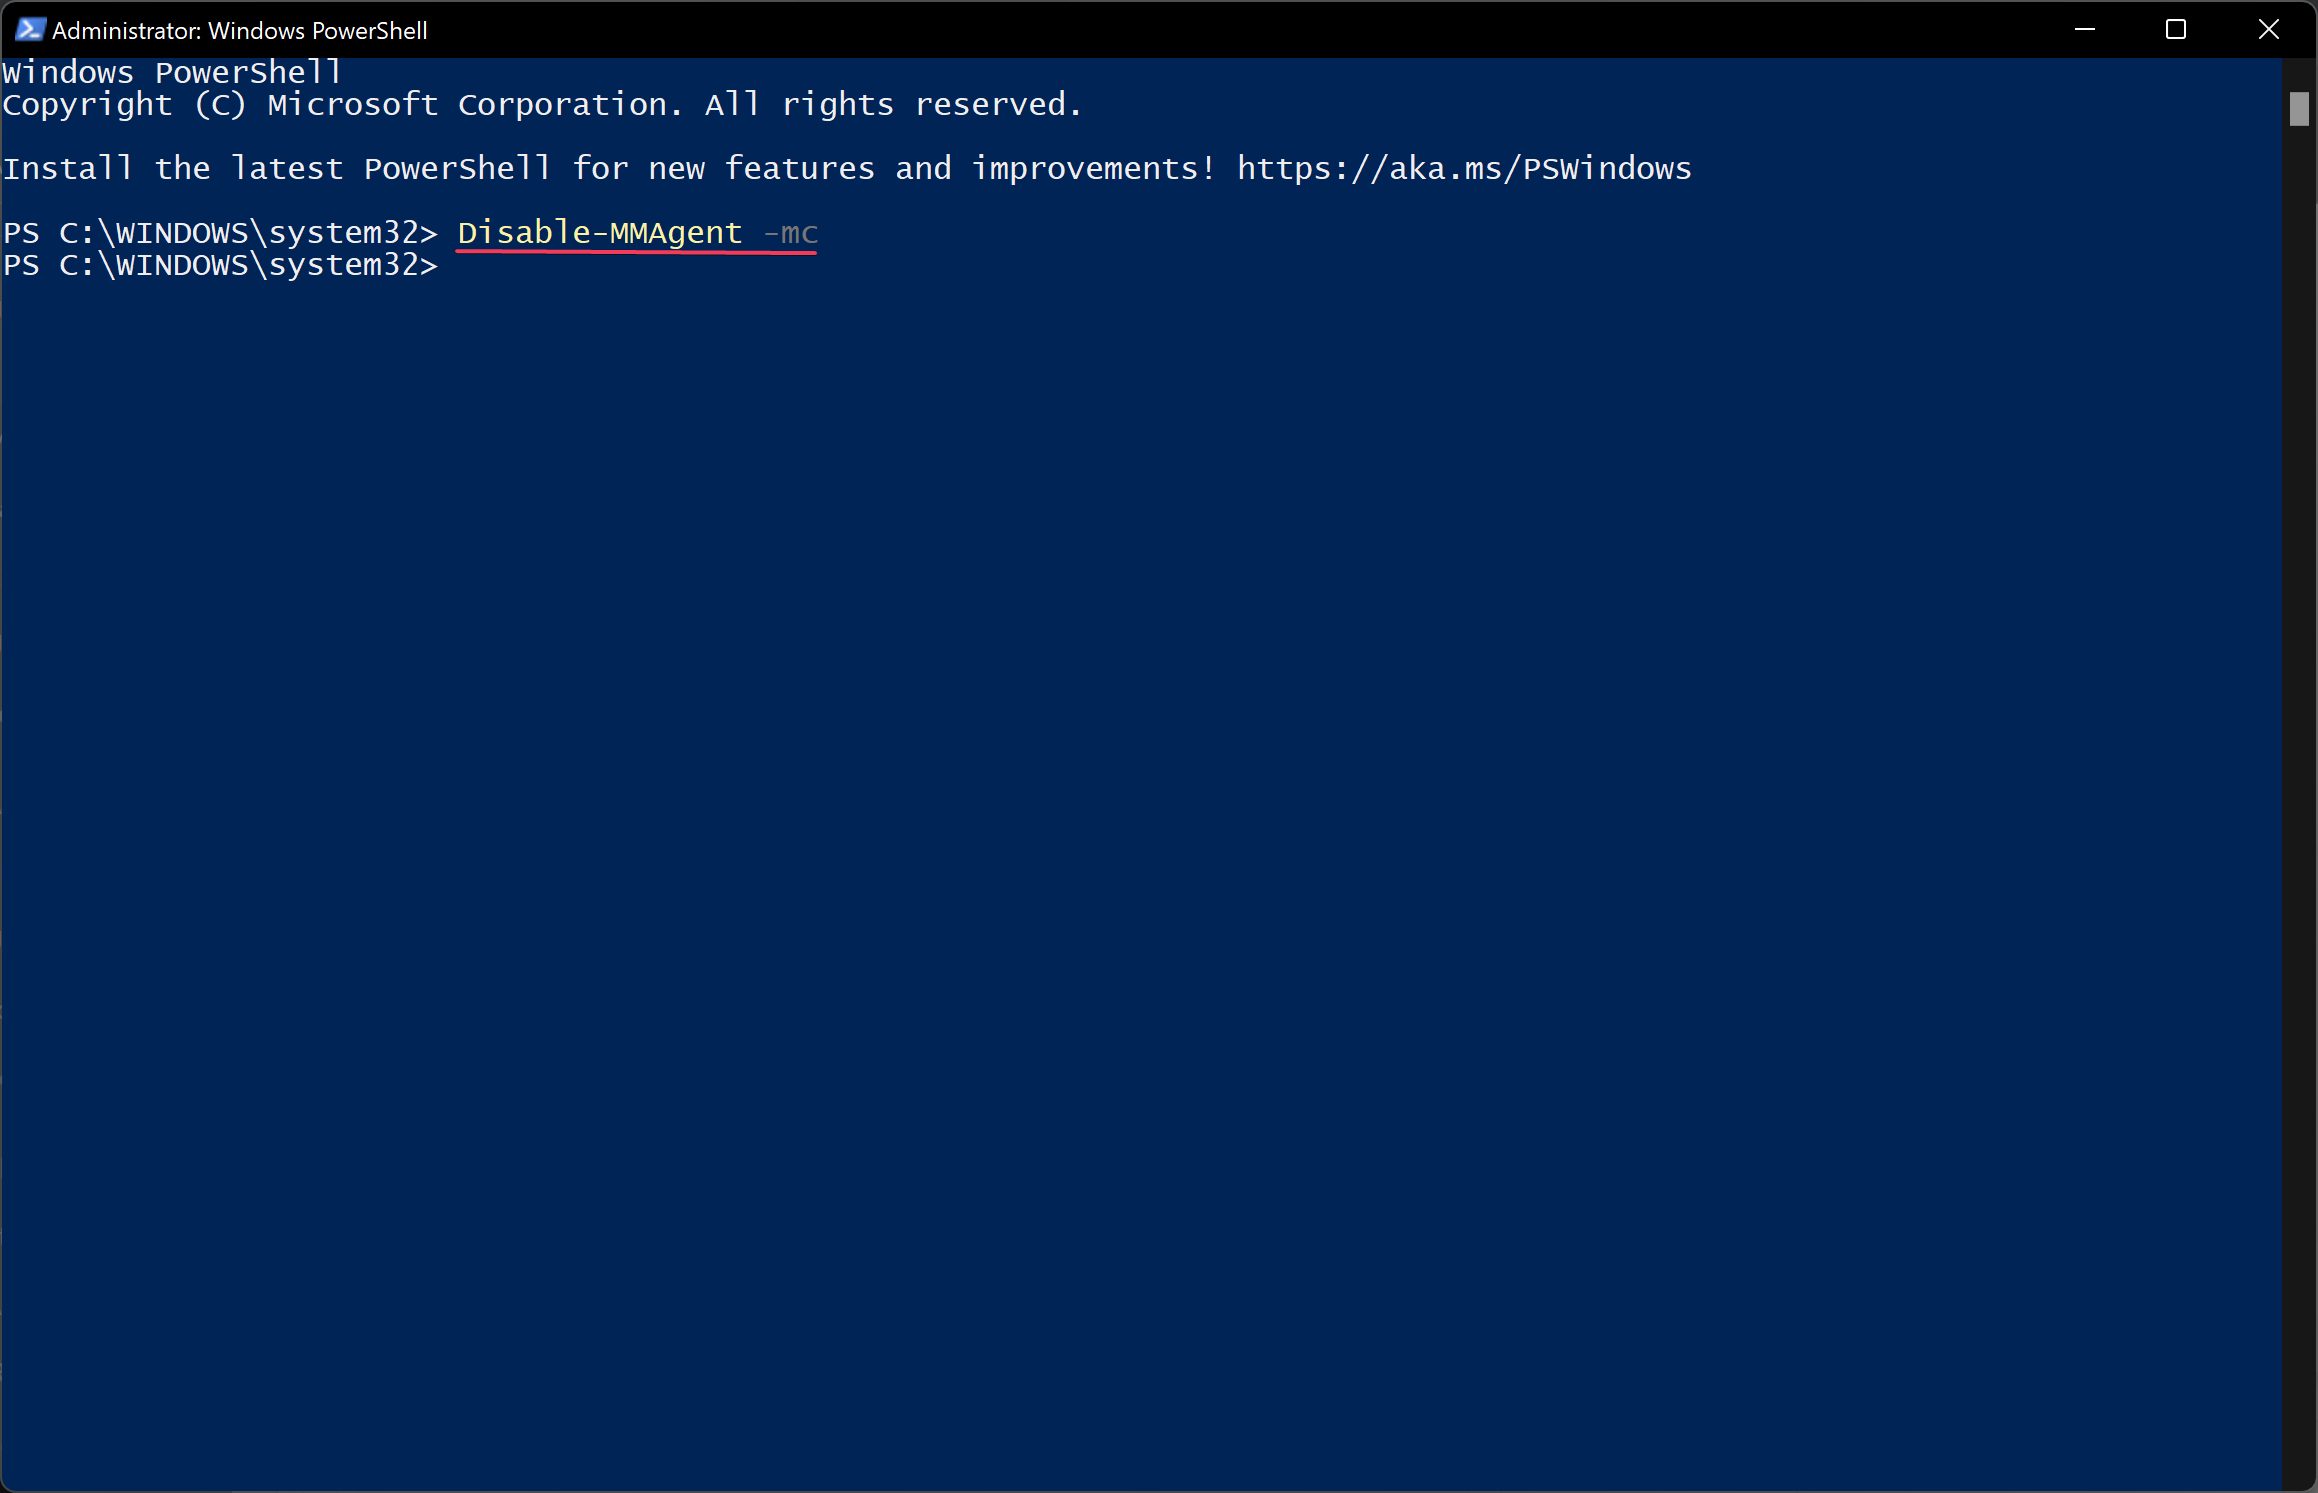
Step 3. Finally, restart your computer to apply the changes.
Conclusion
In conclusion, Memory Compression is a useful feature available in Windows 11/10 that helps reduce physical memory utilization and improves disk read/write speed, thereby enhancing the overall user experience. Although it may use additional CPU resources for compressing and decompressing data in RAM, which can slow CPU processing on some systems, it is still faster than traditional paging files. Users can view the amount of compressed memory, check whether Memory Compression is enabled or disabled, and turn it on or off using Windows PowerShell with elevated rights. If you have a low-end system with limited memory, enabling Memory Compression may help improve performance. However, if you experience slow performance, you can try disabling Memory Compression to see if it makes a difference.