Mono audio is a unique Accessibility feature of Windows 10 that ensures that even if a listener has an issue with one ear or one audio channel, he should never miss a word or sound of audio playing in a stereo headset or multichannel speakers. Generally, when we listen to audio, it comes with distinct left and right channels. In such a condition, the listener receives a different audio stream from both channels with different sounds.
Most audio we listen to is in “stereo,” which means different things are played through both the left and right speakers. However, if you need, you can combine the output with listening to the music with just one earbud with your PC but still hear both the left and right audio tracks. It’s also beneficial if you have trouble hearing through one ear.
In this gearupwindows article, you will learn about enabling and disabling Mono Audio in Windows 10.
How to Turn On Mono Audio in Windows 10 Settings?
To enable Mono Audio in Windows 10 Settings, use these steps:-
Step 1. Open Settings.
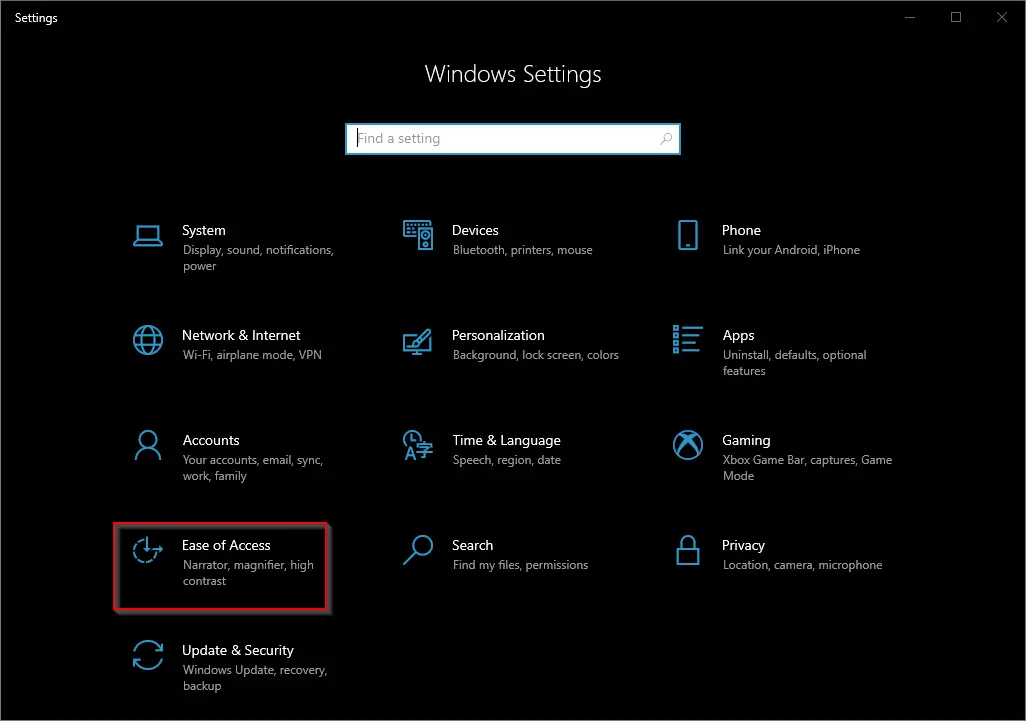
Step 2. Click on Ease of Access.
Step 3. Select Audio in the left sidebar.
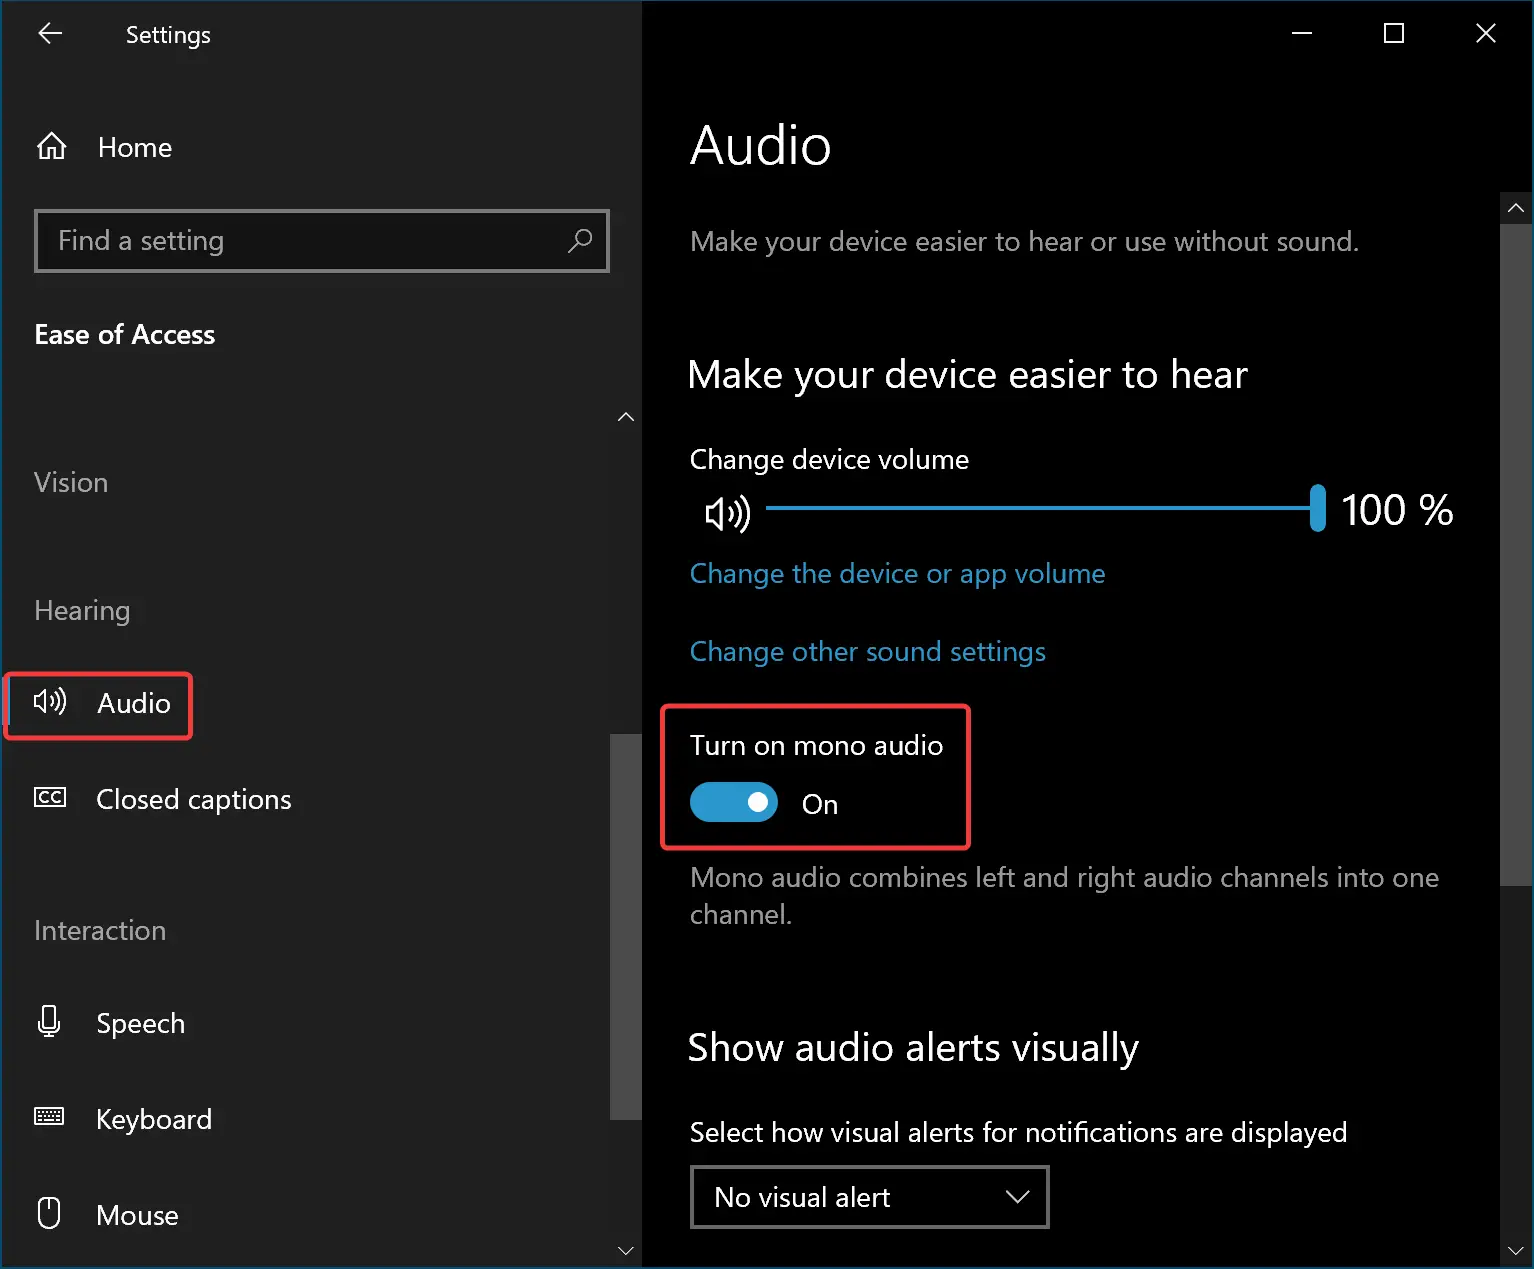
Step 4. Turn On the toggle switch Turn on mono audio.
Once you complete the above steps, Mono Audio will be enabled on your Windows 10 machine.
How to Turn Off Mono Audio in Windows 10 Settings?
To disable the Mono Audio in Windows 10 Settings, use these steps:-
Step 1. Open Settings.
Step 2. Click on Ease of Access.
Step 3. Select Audio in the left sidebar.
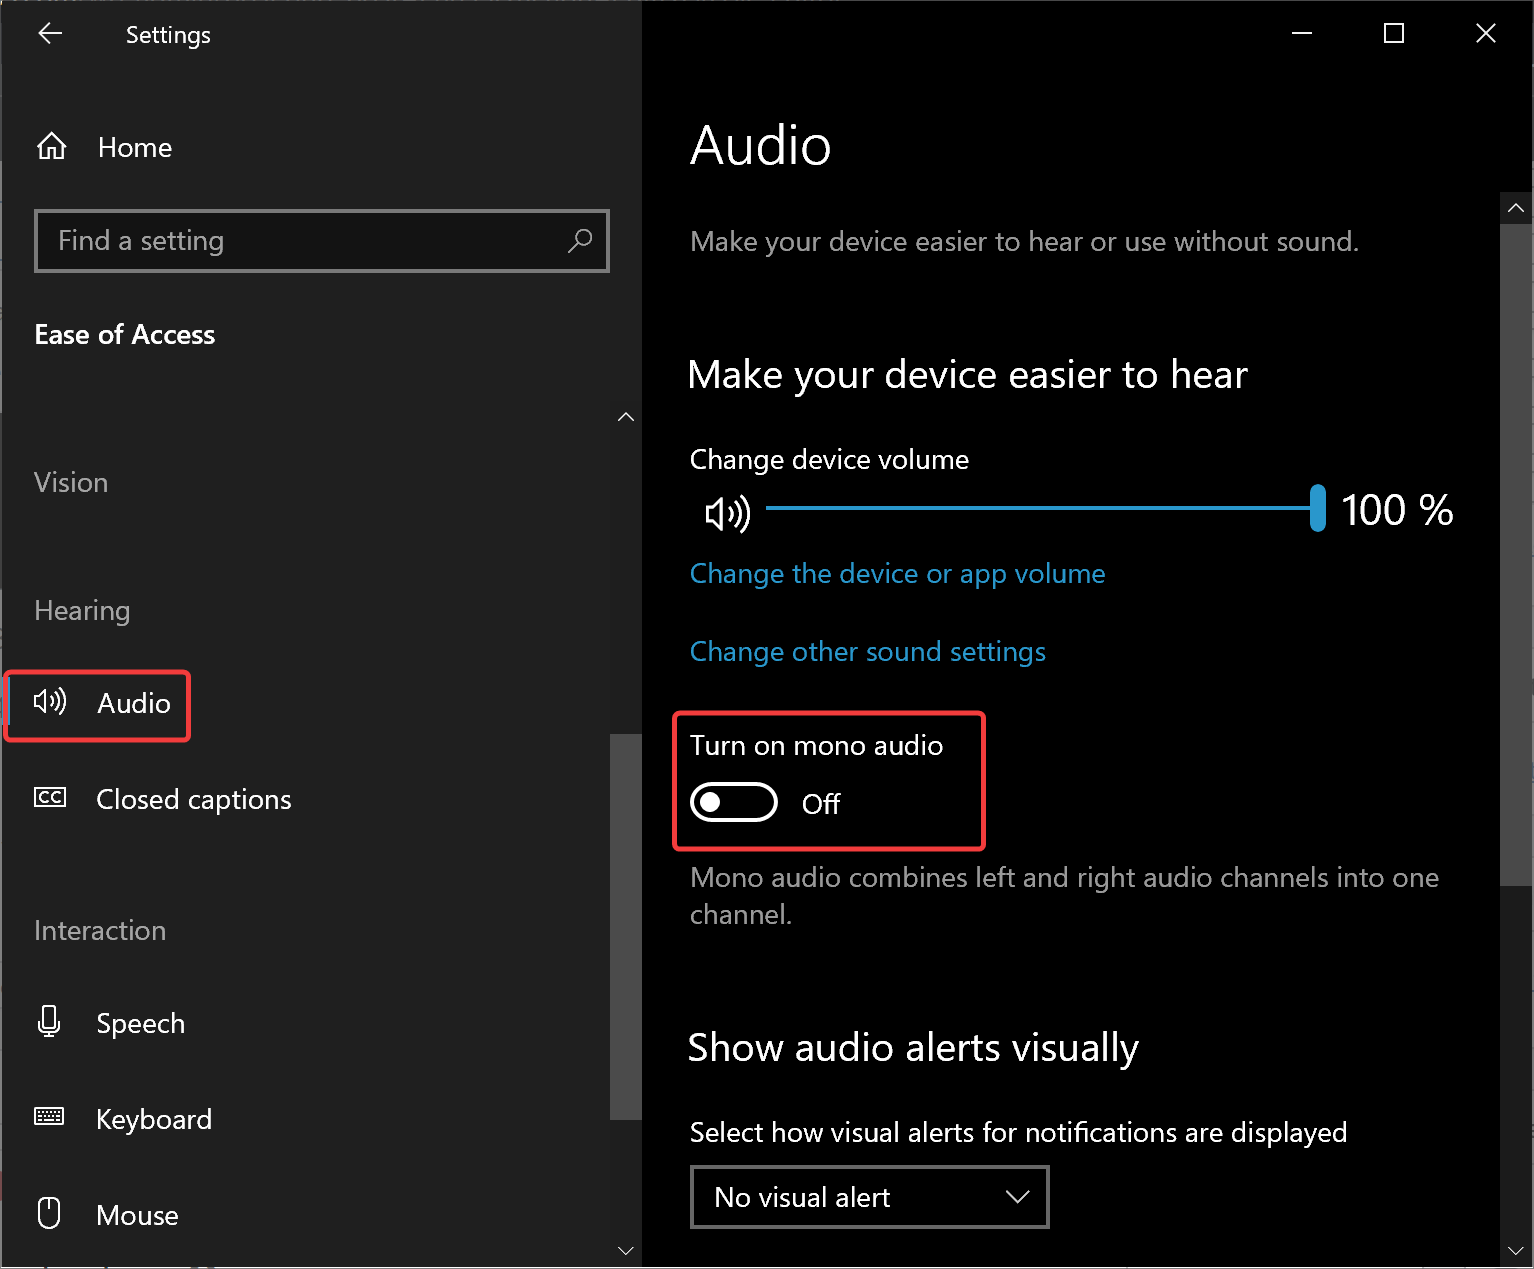
Step 4. Turn Off the toggle switch Turn on mono audio under the “Make your device easier to hear” section.
Once you complete the above steps, Mono Audio will be disabled on your Windows 10 machine.
How to Enable or Disable Mono Audio in Windows 10 using Registry Editor?
To turn on or off Mono Audio in Windows 10 via Registry Editor, do these steps:-
Step 1. Open Registry Editor.
Step 2. Browse or navigate to the following key in the left sidebar of Registry Editor:-
HKEY_CURRENT_USER\Software\Microsoft\Multimedia\Audio

Step 3. Right-click on the Audio key and choose New > DWORD (32-bit) Value.
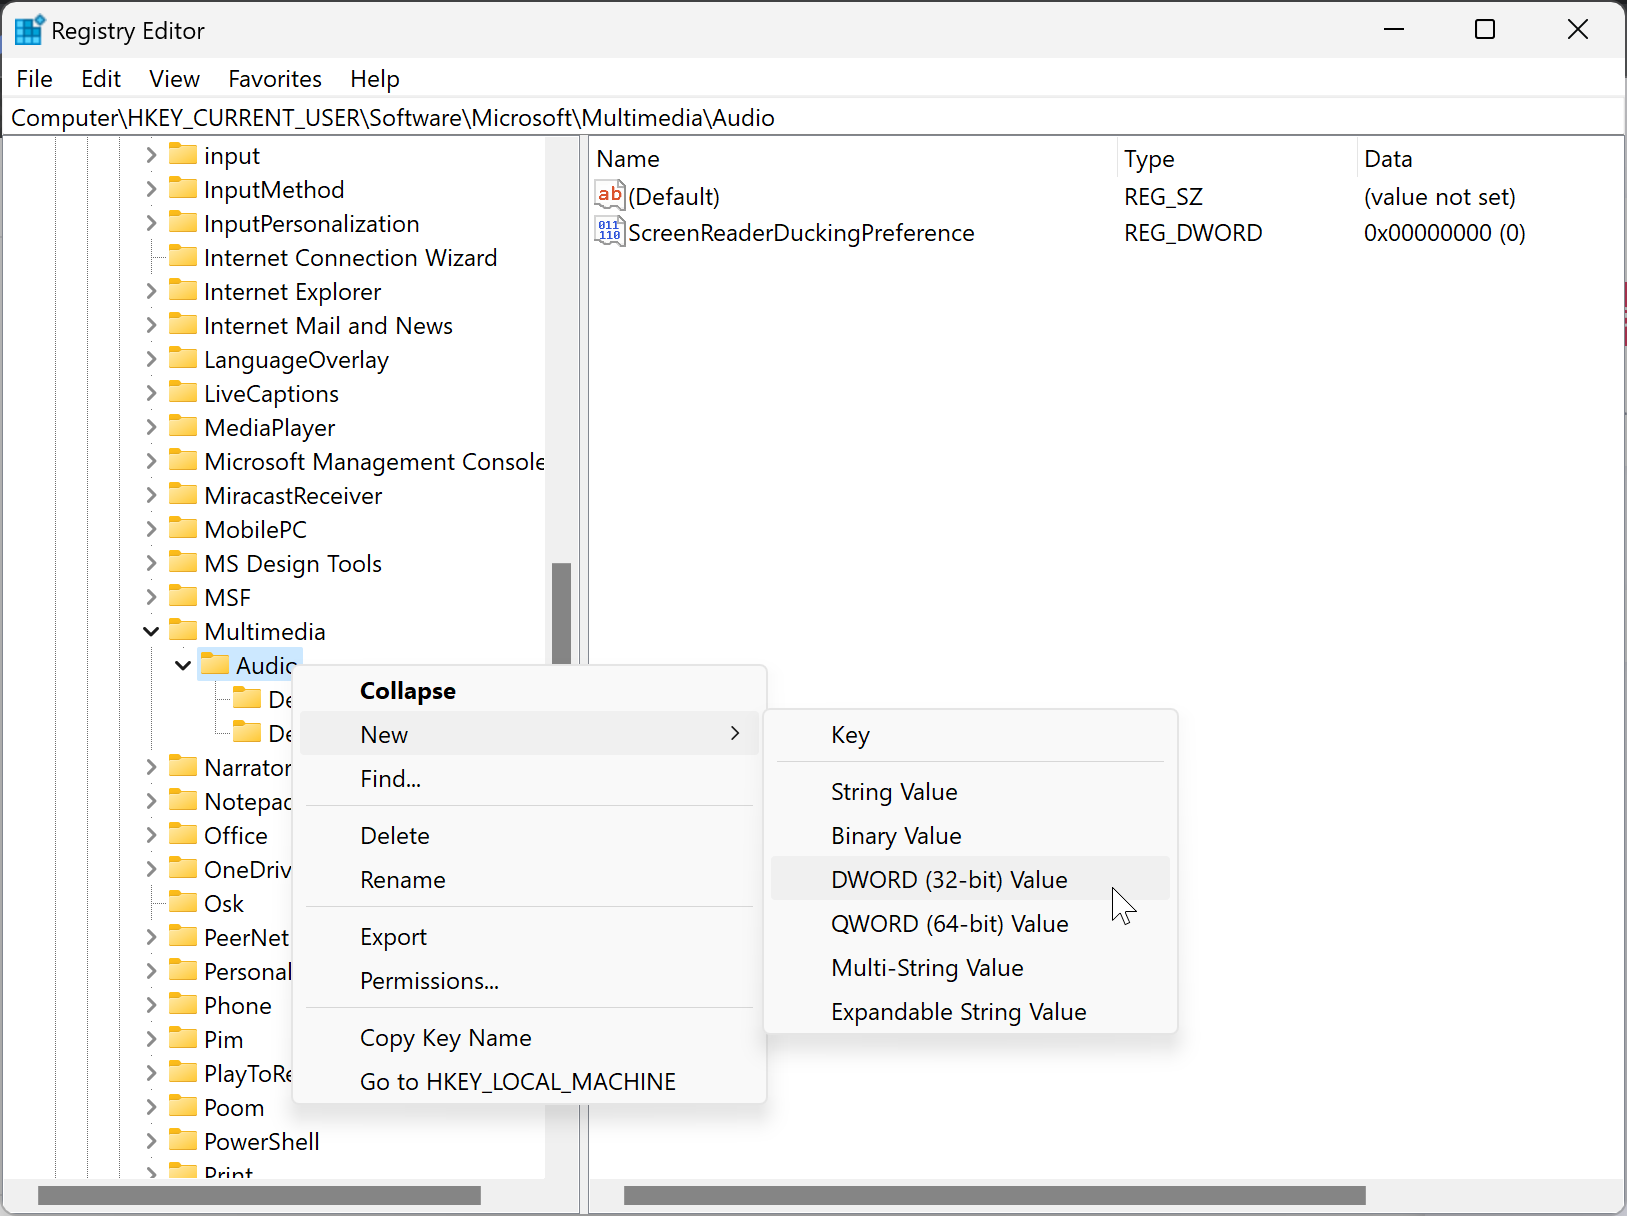
Step 4. Set the name to AccessibilityMonoMixState.
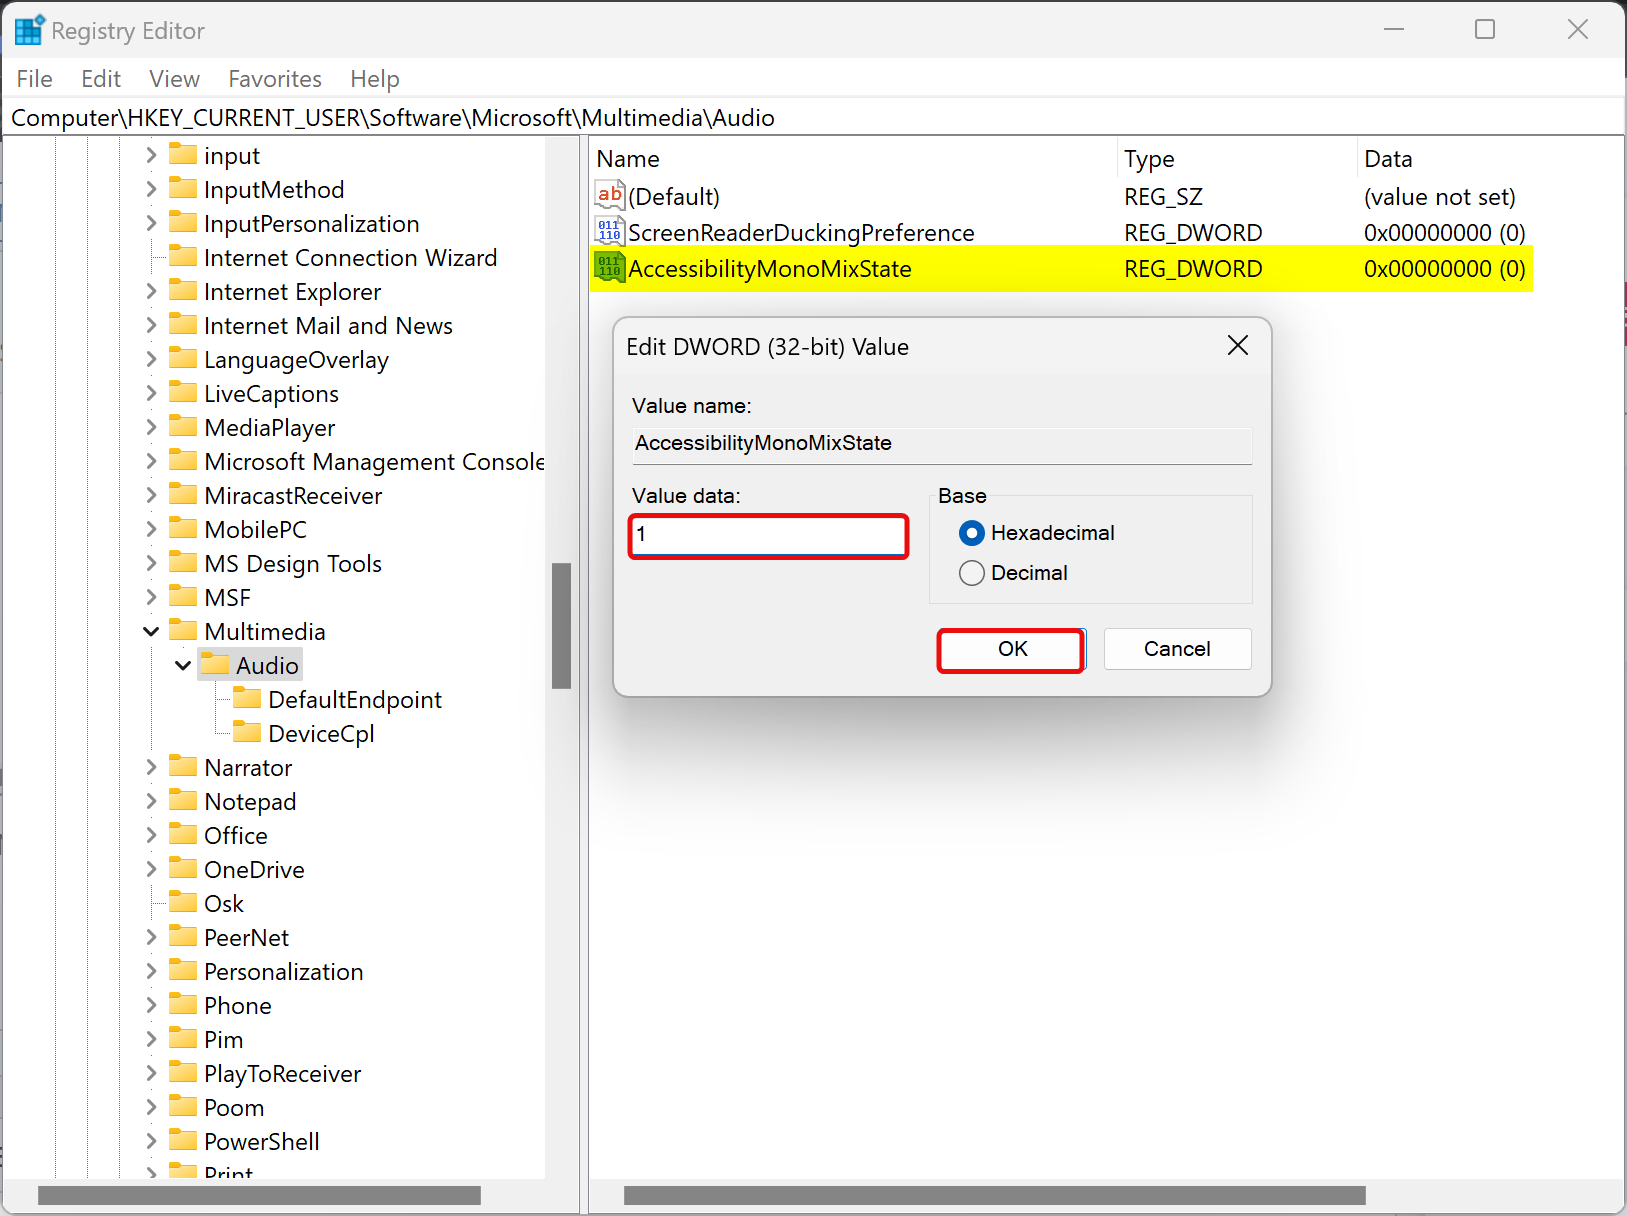
Step 5. Double-click on the AccessibilityMonoMixState REG_DWORD and set its “Value data” to 1 to enable Mono Audio.
Note: To disable Mono Audio, set the “Value data” to 0.
Step 6. Click OK.
Step 7. Reboot your computer to apply the changes.
Once you complete the above steps, you should be able to enable or disable Mono Audio on your Windows 10 PC.
Conclusion
In conclusion, Mono Audio is a very useful accessibility feature for those who may have hearing difficulties in one ear or one audio channel. By enabling Mono Audio in Windows 10, users can ensure that they do not miss any audio playing through their stereo headset or multichannel speakers. In this article, we have provided you with easy-to-follow steps on how to turn on or off Mono Audio in Windows 10 using both the Settings app and the Registry Editor. We hope that this guide helps you make the necessary changes to your audio settings and improve your audio listening experience on your Windows 10 machine.