User Account Control (UAC) is a security feature in Windows 11 that helps prevent unauthorized changes to your computer. It works by notifying you when a program or application tries to make changes that require administrator privileges. While UAC is an important security measure, it can sometimes be annoying, especially if you are using the built-in Administrator account.
The built-in Administrator account is a powerful account that has full access to your computer. By default, it is disabled in Windows 11, but if you have enabled it, you may want to disable UAC for that account. In this guide, we will show you how to enable or disable UAC for the built-in Administrator account in Windows 11, so you can make changes to your computer without being prompted for permission every time.
Windows 11 allows users to configure UAC for a built-in Administrator account through two methods: Security Policy and Registry Editor. We will review both these methods, and you can use either according to your preferences.
How to Enable or Disable UAC for Administrator Account using Security Policy?
Here are the steps to enable or disable UAC for the built-in Administrator account in Windows 11:-
Step 1. Press the Windows + R to open the Run dialog box.
Step 2. Then, type “secpol.msc” (without quotes) and press Enter.
Step 3. In the Local Security Policy window, go to Security Settings > Local Policies > Security Options.
Step 4. Scroll to the right pane and locate the policy “User Account Control: Admin Approval Mode for the Built-in Administrator account.”
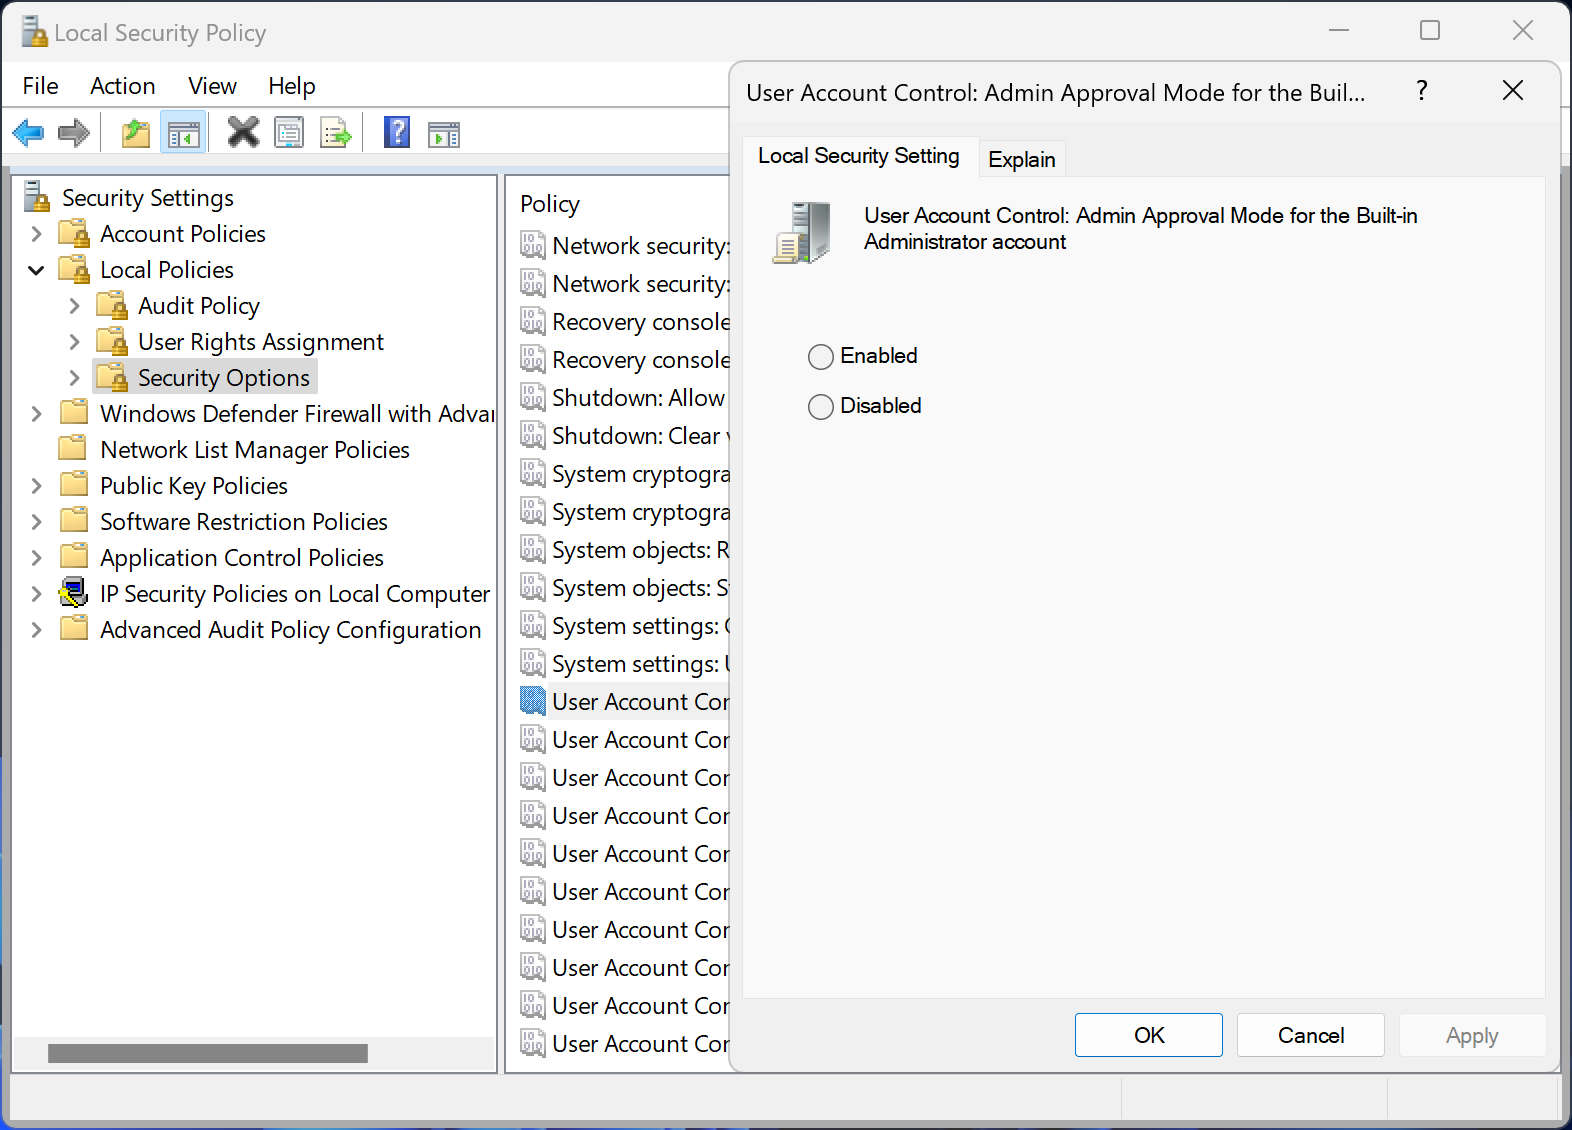
Step 5. Double-click the policy to open its properties.
Step 6. Select the “Enabled” option to enable UAC for the built-in Administrator account or select “Disabled” to disable UAC.
Step 7. Click Apply and then OK to save the changes.
Note:- Disabling UAC for the built-in Administrator account can be a security risk, as it allows programs to change your computer without your knowledge or consent. It is recommended that you only disable UAC if you know what you are doing and are confident that the programs you are using are safe.
How to Enable or Disable UAC for Administrator Account using Registry Editor?
Here are the steps to enable or disable UAC for the built-in Administrator account in Windows 11 using the registry editor:-
Step 1. Press the Windows + R to open the Run dialog box.
Step 2. Type “regedit” (without quotes) and press Enter.
Step 3. In the Registry Editor window, navigate to the following path:-
HKEY_LOCAL_MACHINE\SOFTWARE\Microsoft\Windows\CurrentVersion\Policies\System
Step 4. Right-click on the System folder and select New > DWORD (32-bit) Value.
Step 5. Name the new REG_DWORD “FilterAdministratorToken” (without quotes) and press Enter.
Step 6. Now, double-click on the “FilterAdministratorToken” REG_DWORD to open its properties.
Step 7. In the “Value data” field, set the value to “0” to disable UAC for the built-in Administrator account or “1” to enable UAC.
Step 8. Click OK to save the changes.
Note:- Modifying the registry can be dangerous, as it can cause your computer to become unstable or even unusable. It is recommended that you only make changes to the registry if you know what you are doing and if you have created a backup of your registry before making any changes.