If you frequently make changes in your Windows 11/10 configuration or install/uninstall software, it is high time to back up your Windows registry automatically.
What is Windows Registry?
The Windows Registry is a central hierarchical database used in Windows 11/10 to store information necessary to configure the system for one or more users, applications, and hardware devices. The Registry contains those pieces of information that Windows continually takes as a reference during operation, such as profiles for each user, the applications installed on the computer and the types of documents that each can create, property sheet settings for folders and application icons, what hardware exists on the system, and the ports that are being used.
That means that if you make some mistake while editing the registry or a third-party application alters the registry, you will be unable to find which part has been modified. Unfortunately, it will be difficult for you to troubleshoot your Windows at a later stage. Even a wrong modification of the Windows Registry may damage Windows installation, and your PC may be unbootable. Hence, it is already recommended to make a whole registry backup while changing anything on your system, including adding or removing hardware and installing or uninstalling third-party software.
How to Backup Registry Automatically in Windows 11 or 10 using Task Scheduler?
Windows Registry is an integral part of an operating system, and it is always recommended to make a backup before making any changes. So, if something goes wrong, you can restore your Windows Registry to its previous working state. Although it is possible to create a backup of the Windows Registry manually, we recommend scheduling your PC to generate a backup of the Registry automatically.
Step 1. First, click on the Search button at the taskbar and then type Task Scheduler.
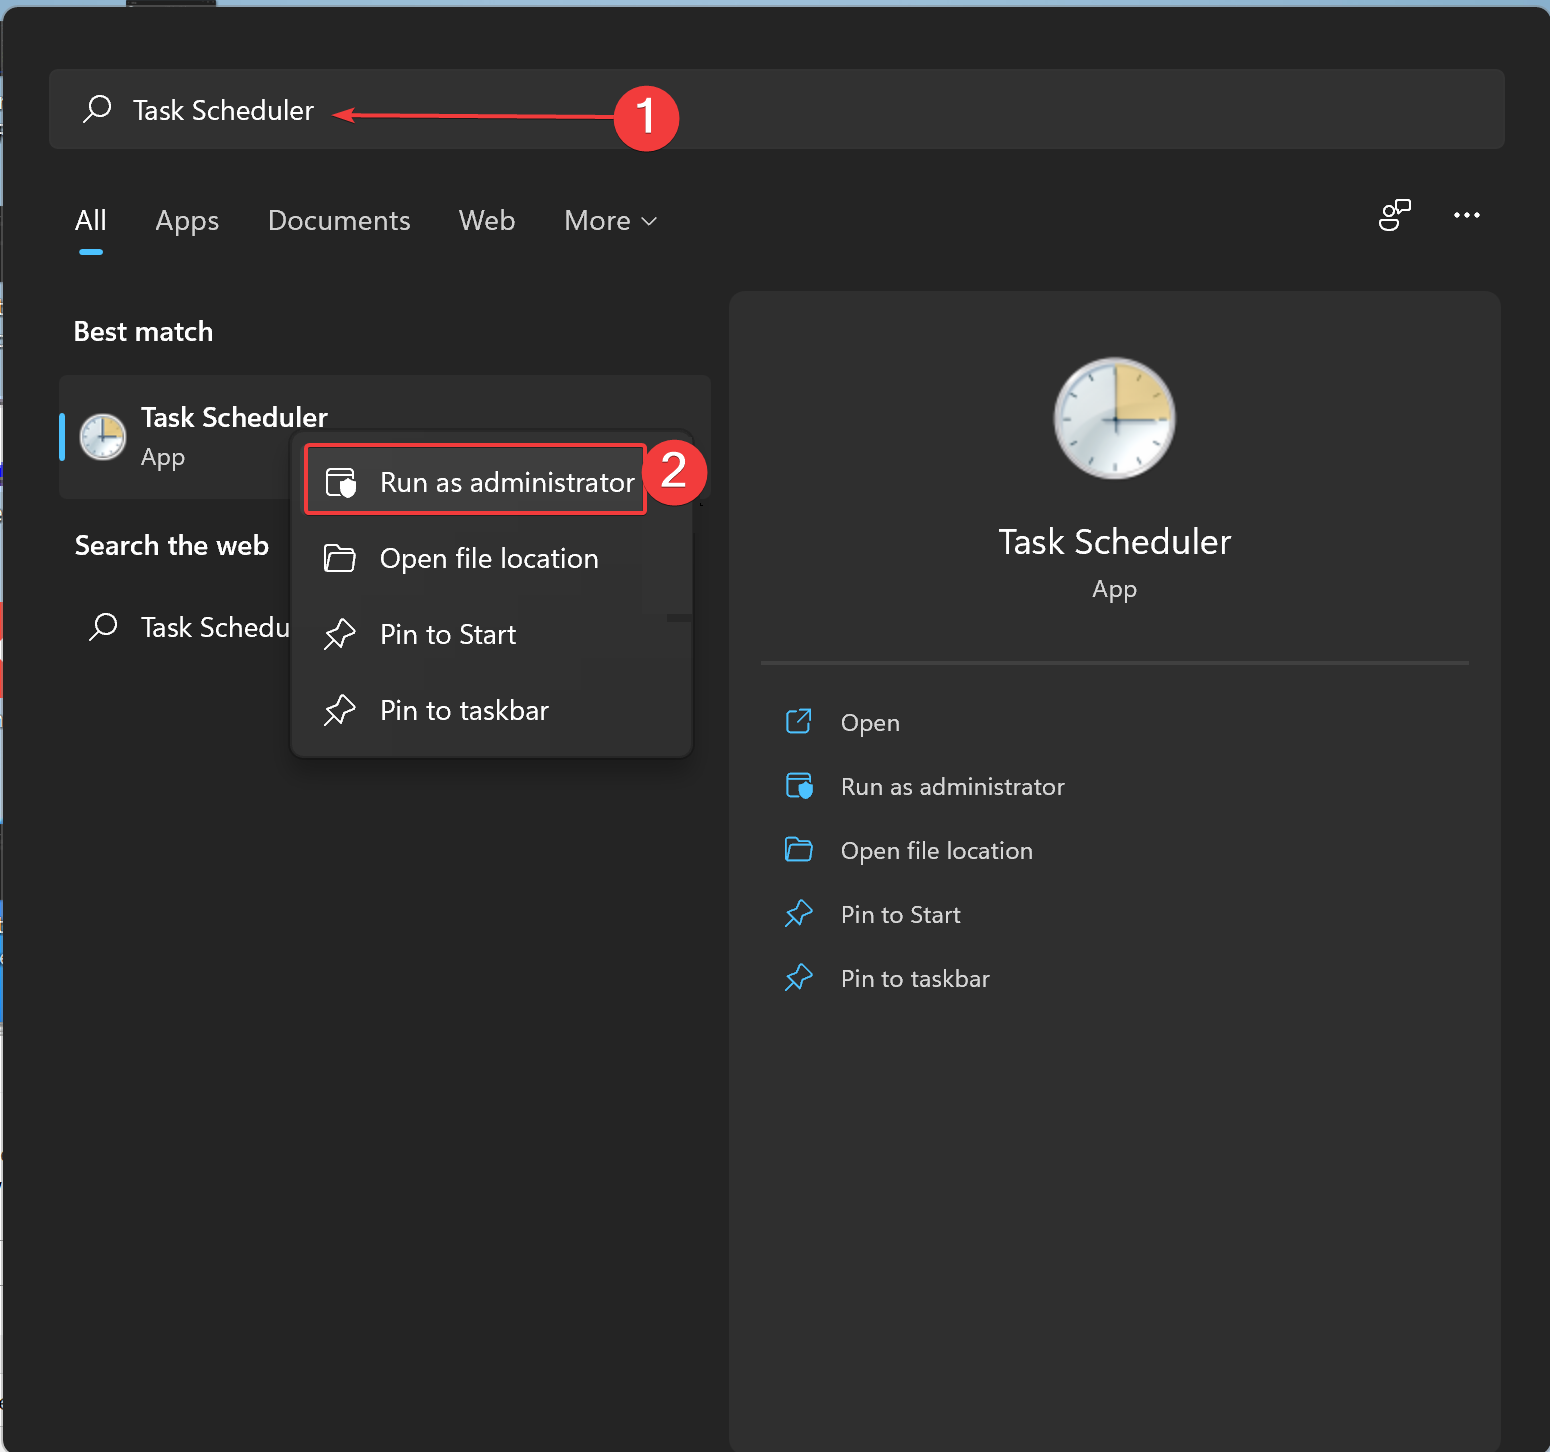
Step 2. Then, right-click on the Task Scheduler app and select the Run as administrator option to open it with elevated rights.
Sten 3. When the Task Scheduler window opens, navigate to “Task Scheduler Library > Microsoft > Windows > Registry” in the left sidebar.
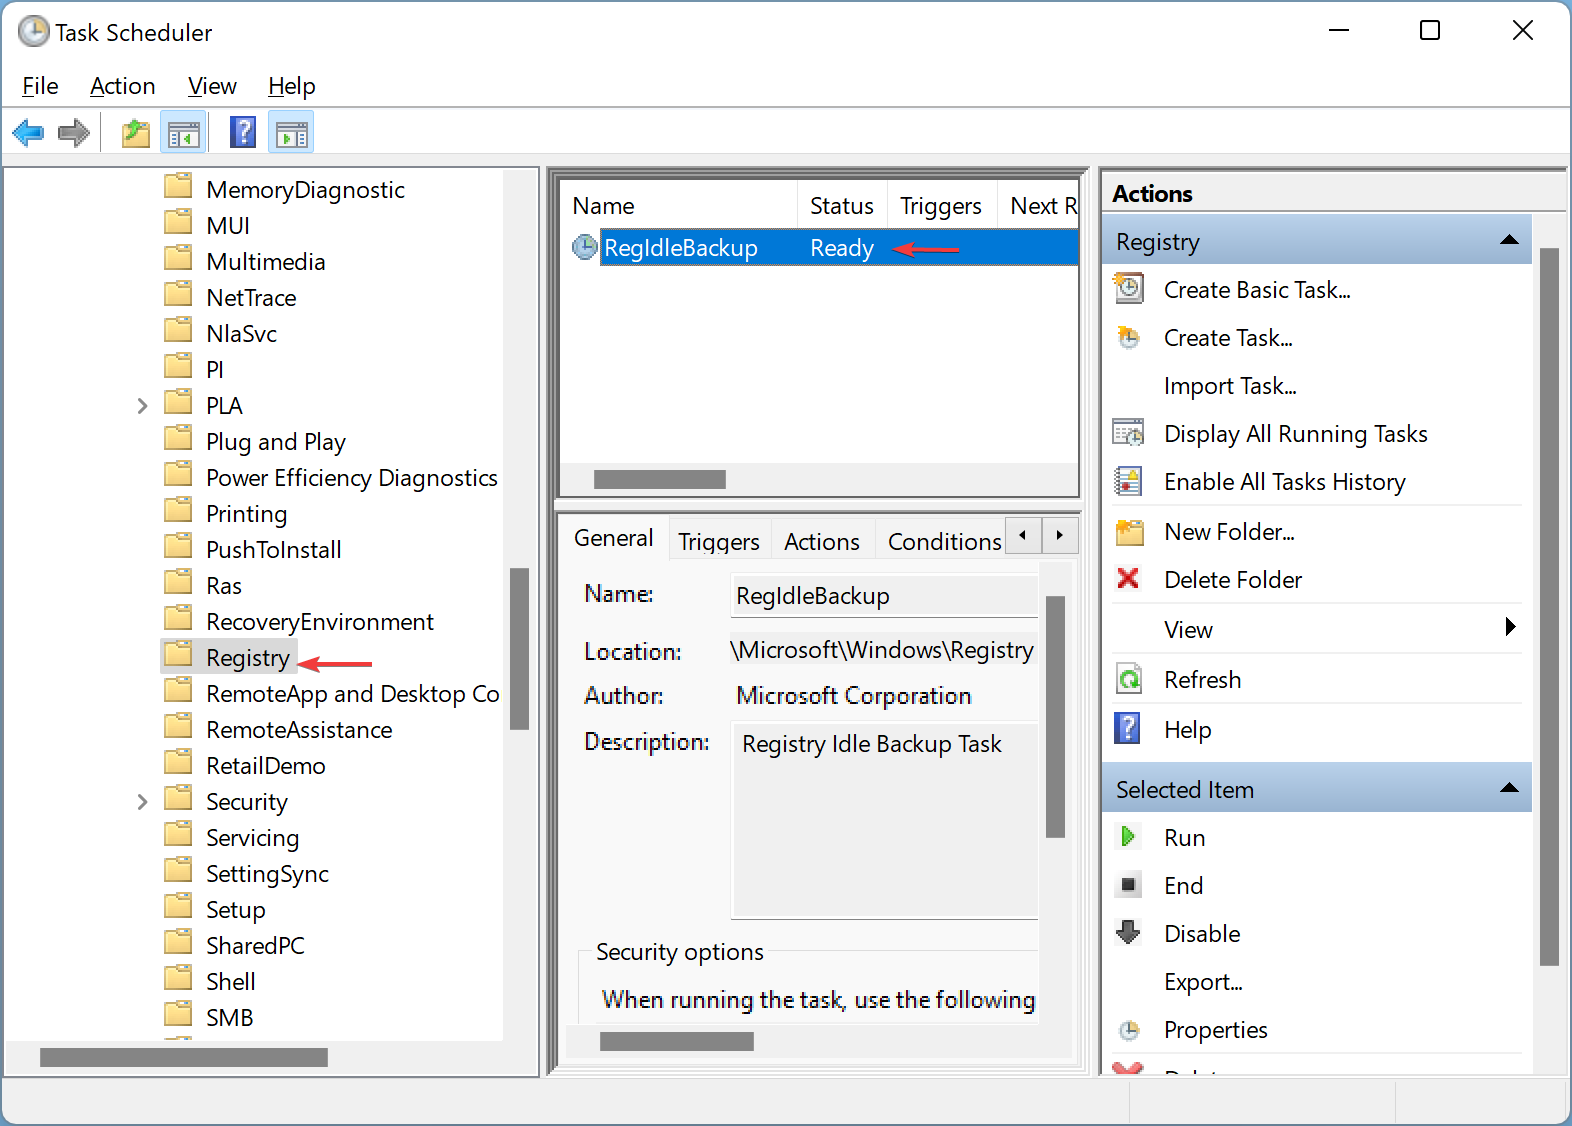
Step 4. After that, double-click on the RegIdleBackup option in the middle pane to open the “RegIdleBackup Properties” window.
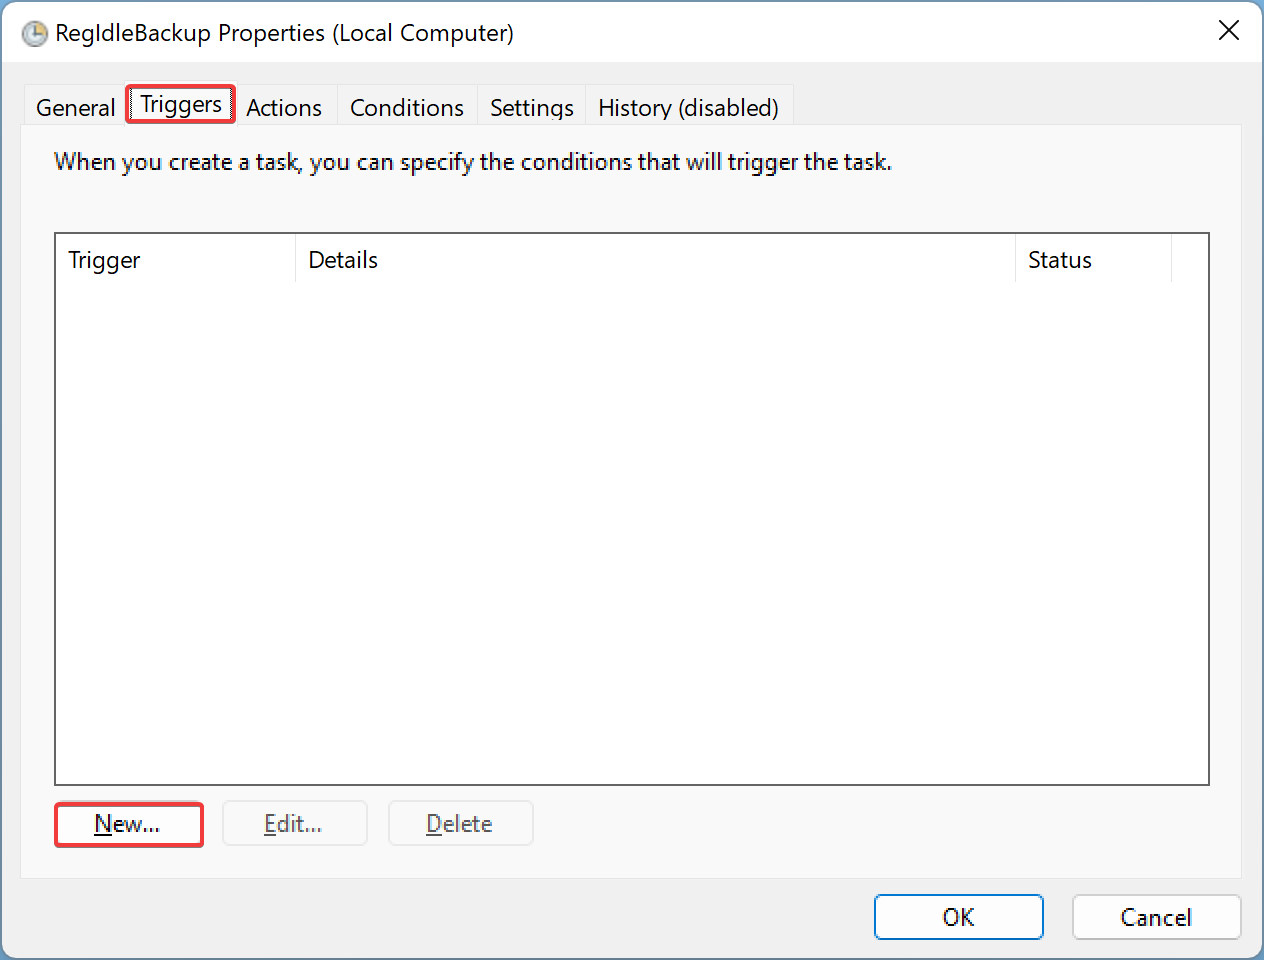
Step 5. In the “RegIdleBackup Properties” window, choose the Triggers tab in the menu and then hit the New button.
Step 6. Next, select the desired trigger from the dropdown menu of “Begin the task” in the New Trigger window. You may choose the following trigger:-
- On a schedule – This allows you to schedule a task daily, monthly, weekly, and yearly basis at any particular time.
- At log on – This option allows you to automatically perform the task when you log in from the selected user’s account.
- At startup – The task will be launched with Windows startup.
- On idle – When this option is selected, the task will be executed when your system is lying idle for a specific time.
- On an event – This allows you to schedule the task when a specific event occurs.
- At task creation/modification – The task will happen once created or modified.
- On connection to user session – The task will occur when the remote computer is connected.
- On disconnect from user session – Task will occur when the remote computer is disconnected.
- On workstation lock – The scheduled task will be executed once the user locks the device.
- On workstation unlock – The task will be performed once the user opens the device.
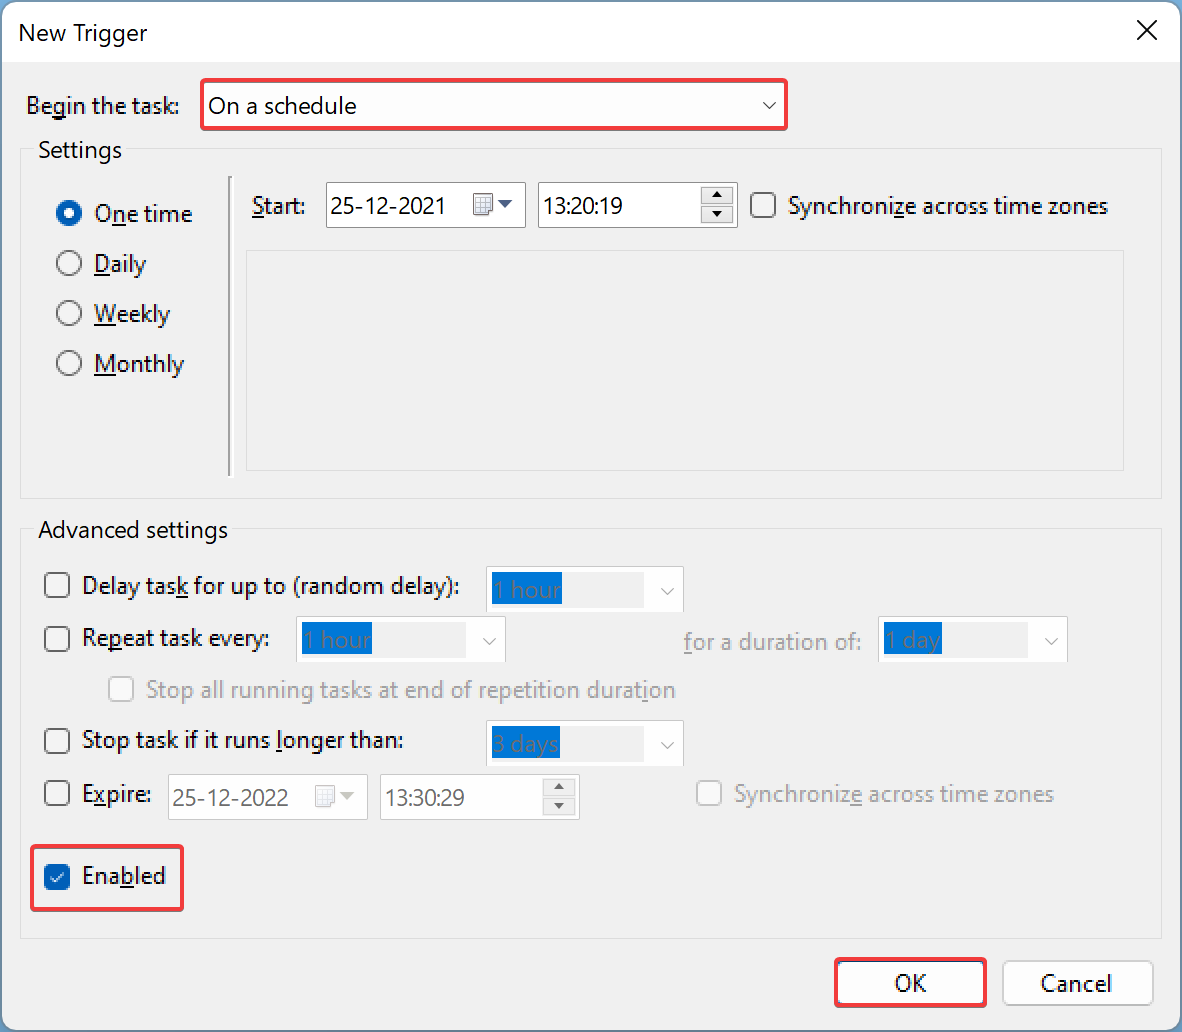
Ensure the Enabled option is checked at the bottom and click the OK button.
Note: If you need, you can configure other options on the screen; that is optional.
That’s it. Now, Windows Registry will be backed up automatically on your PC at the scheduled time.
Once the registry is auto-backed up, by default, it will be stored in the “C:\Windows\System32\Config\RegBack” folder.
How to Turn on Automatic Registry Backup in Windows 11 or 10 using Registry Editor?
Starting with the Windows 10 April 2018 Update (version 1803), Microsoft has stopped backing up the registry automatically to the RegBack folder. Microsoft encourages users to use a system restore point in the event of registry corruption. That means when you navigate to the “C:\Windows\System32\config\RegBack” folder, you’ll find it empty.
If you want, you can enable the automatic registry backup using Windows 11/10 Registry Editor. So, Windows will automatically back up your entire registry within the RegBack folder. You might need to wait a few days before an automatic registry backup happens because its exact scheduling isn’t entirely clear.
To enable automatic registry backup in Windows 11 or 10 using Registry Editor, do these steps:-
Step 1. Open Registry Editor.
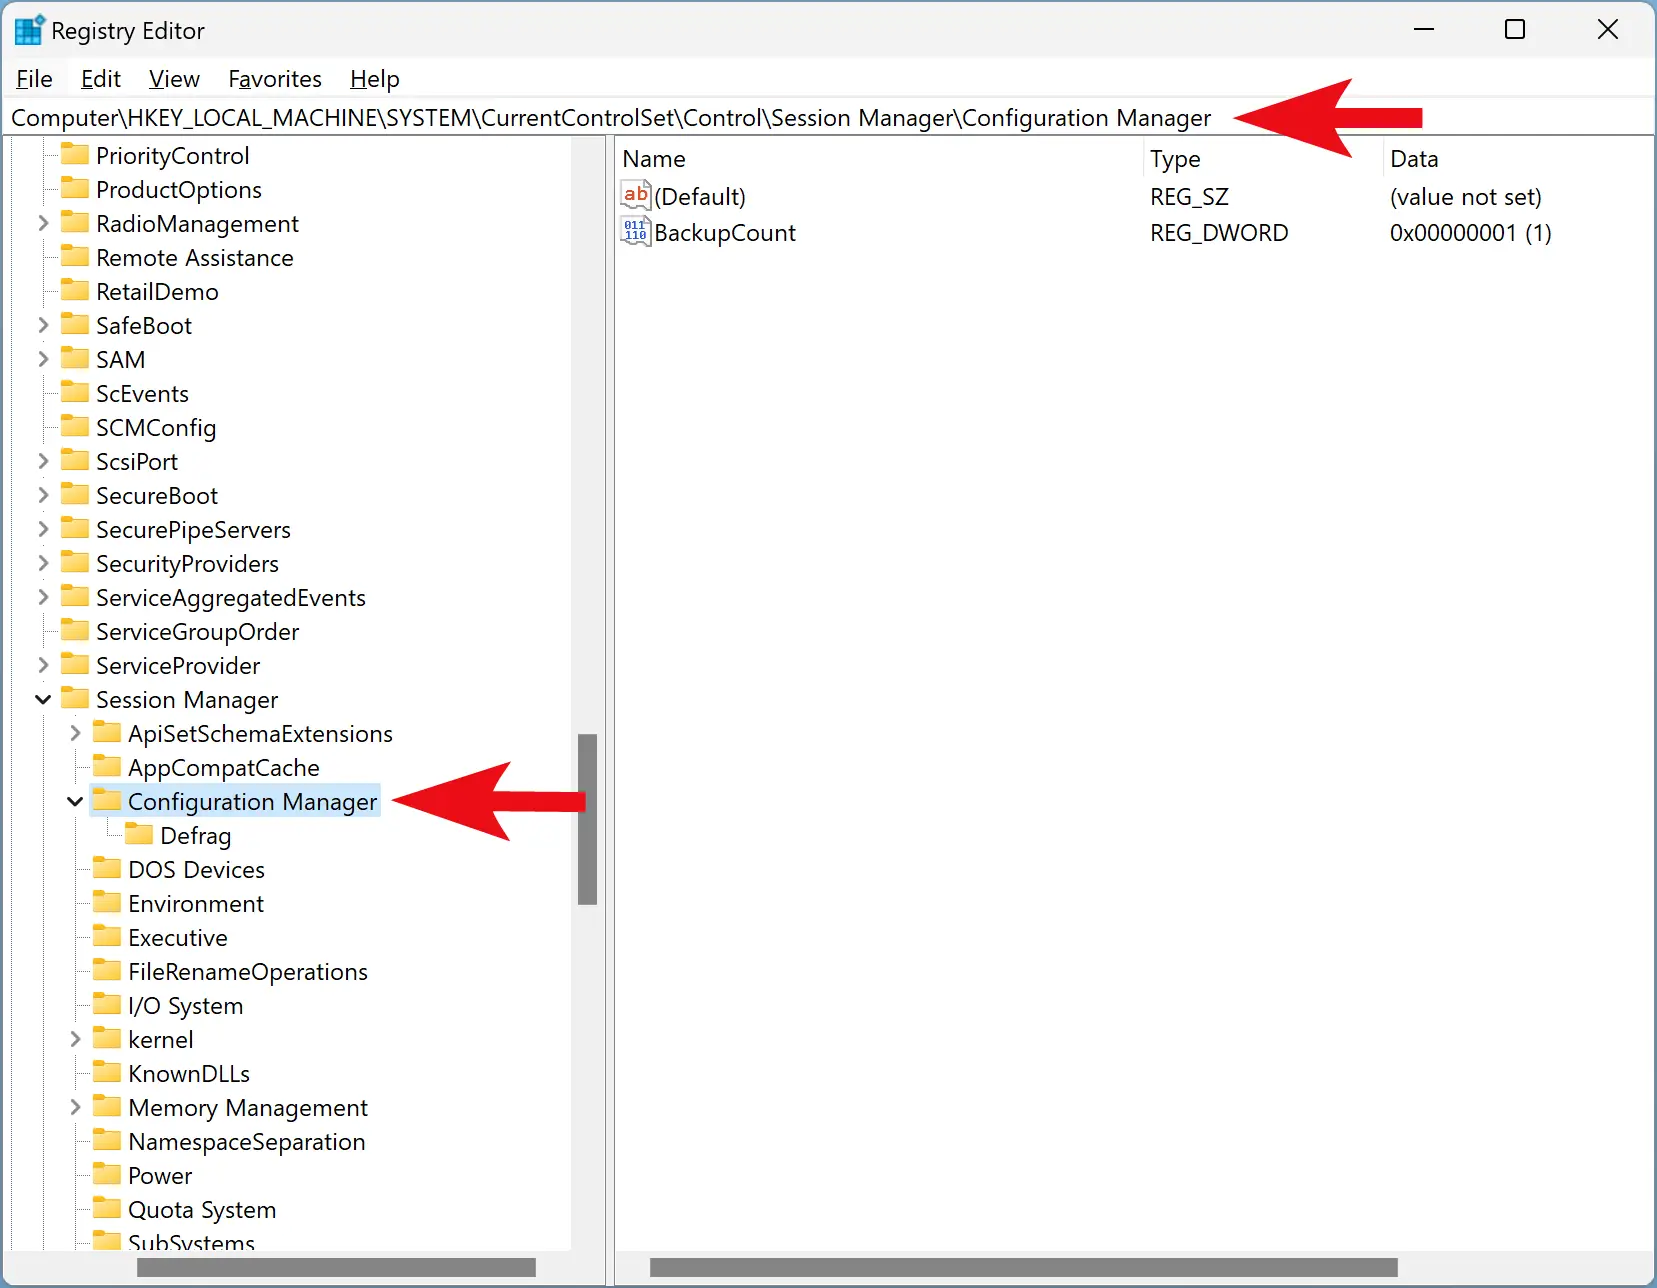
Step 2. Browse or navigate to the following path in the left sidebar of the Registry Editor window:-
HKEY_LOCAL_MACHINE\SYSTEM\CurrentControlSet\Control\Session Manager\Configuration Manager
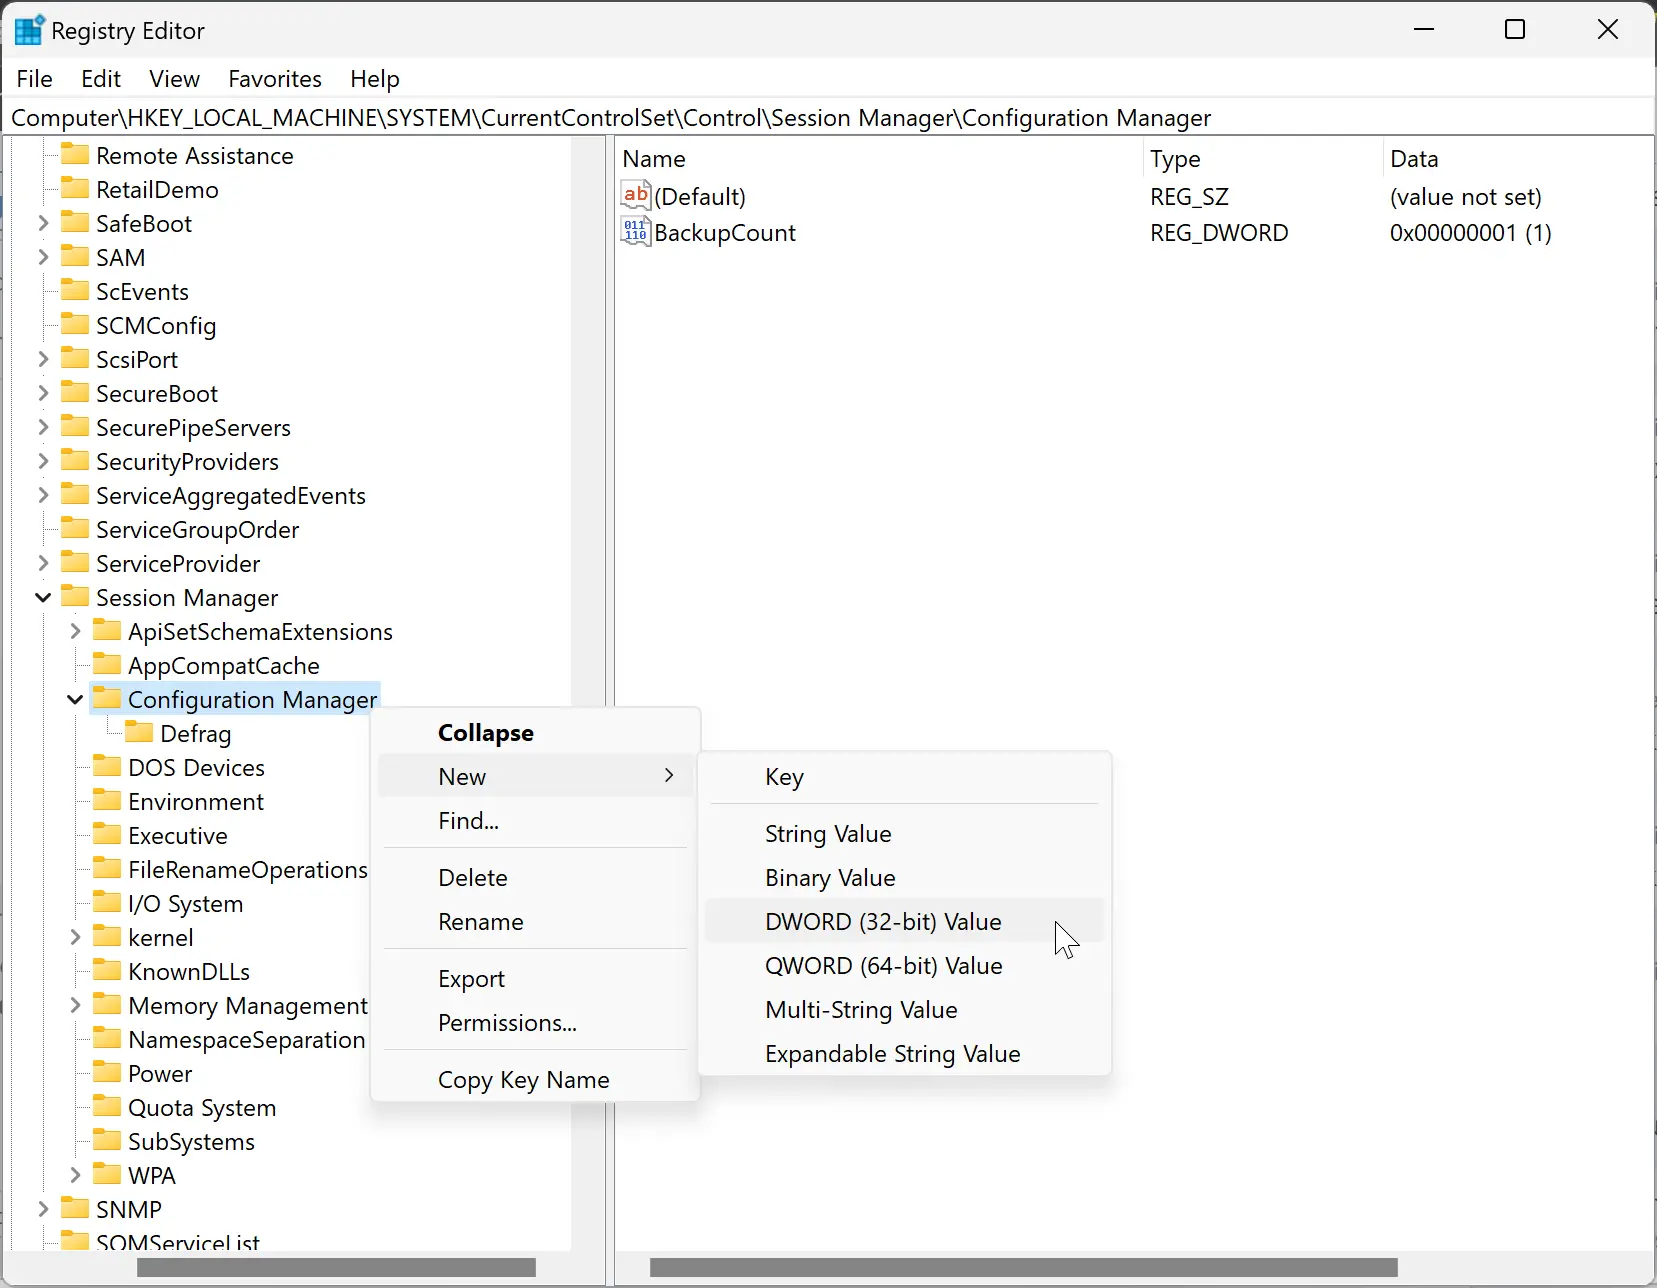
Step 3. Then, right-click on the Configuration Manager folder and select New > DWORD (32-bit) Value.
Step 4. Name the newly created REG_DWORD as EnablePeriodicBackup.
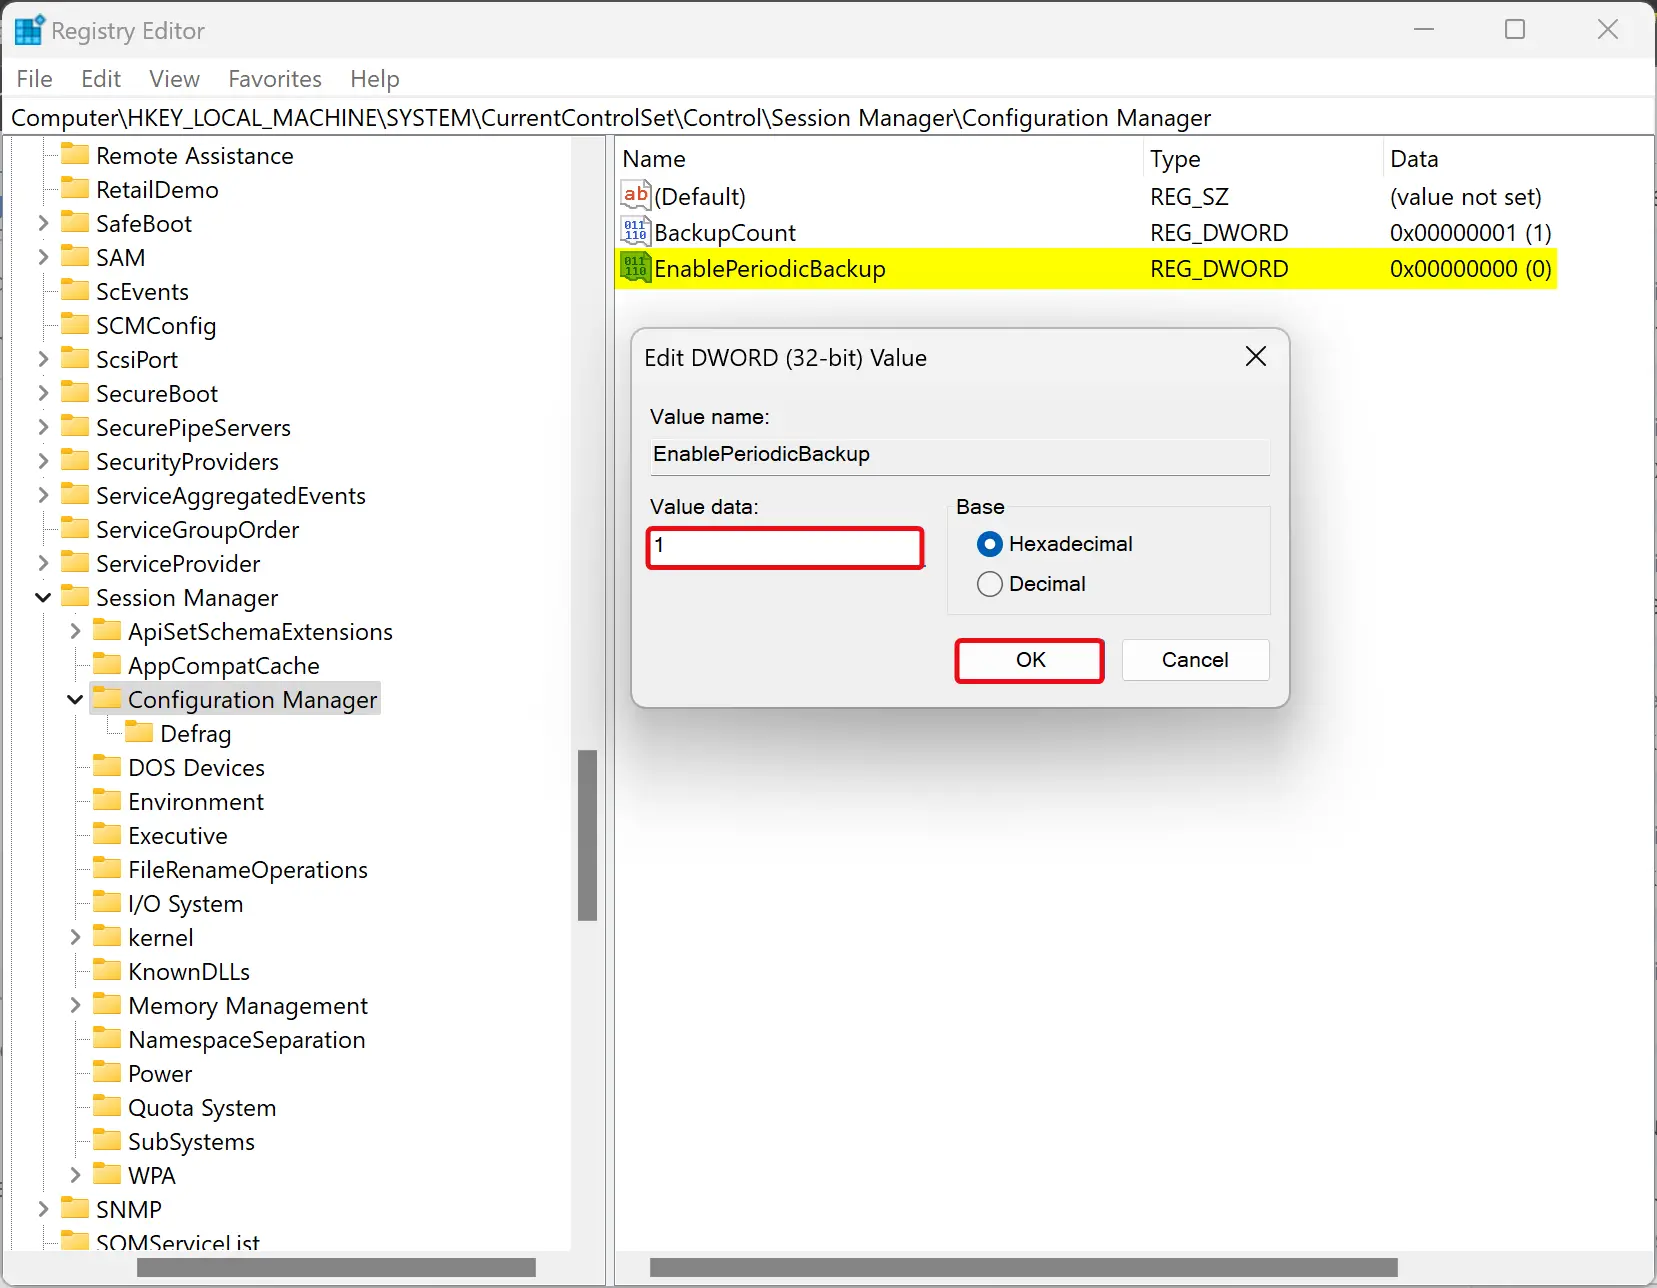
Step 5. Next, double-click on EnablePeriodicBackup REG_DWORD and set its “Value data” to 1.
Step 6. Click OK.
Step 7. Reboot your PC to let Windows 11/10 will automatically backup the registry in the RegBack folder.
The above registry tweak also creates a RegIdleBackup task to manage subsequent backups; if you want to create backups of the registry manually, open Task Scheduler and navigate to Microsoft\Windows\Registry. Right-click on the RegIdleBackup task and select Run. This action will immediately save your registry backup to the Windows\System32\config\RegBack folder. Here, you’ll find Default, SAM, Security, Software, and System hive files.
Conclusion
In conclusion, backing up your Windows Registry is an essential task that should not be ignored, especially if you frequently make changes to your system’s configuration or install/uninstall software. A backup will allow you to restore the Registry to its previous working state in case of any issues. While it is possible to create a backup manually, scheduling your PC to generate a backup automatically is recommended. You can use the Task Scheduler or Registry Editor to turn on automatic registry backup in Windows 11/10. By following the steps outlined above, you can ensure that your Windows Registry is always backed up and secure.