Windows 10 comes with a lightweight, isolated environment feature that is only available for Windows 10 Pro and Windows 10 Enterprise starting with version 1903 (build 18305). This isolated environment feature is called “Windows Sandbox.”
The Sandbox is just like a virtual machine that uses Microsoft’s hypervisor and hardware virtualization to run a separate kernel and isolate a Windows Sandbox session from the host. Basically, this tiny application of Windows 10 (around 100MB in size) installs and runs untrusted classic applications isolated from the main installation.
According to Microsoft, Windows Sandbox is efficient because it uses an integrated kernel scheduler, smart memory management, and virtual graphics, and it’s disposable. The best part of the Windows Sandbox is that the sandbox gets deleted once you finish using the app. This means that every time you run the Windows Sandbox feature, you’ll start with a clean install of Windows 10.
In simple words, running Windows Sandbox is just like running another copy of Windows 10 on a virtual machine. The only difference is that the feature is built-in to Windows 10, and changes are not saved when you exit the Sandbox.
However, the feature is currently available in Pro and Enterprise editions of Windows 10 only. This means that PC users running Windows 10 Home Edition will have to use third-party sandbox software like Sandboxie to get the sandbox environment.
With the default settings, the Windows Sandbox feature remains turned off. If you wish to enable the feature or you would like to disable the feature after using it for a while, you can do so through Windows Features.
This post will help you to enable and disable the Windows Sandbox feature on Windows 10.
How to turn on the ‘Windows Sandbox’ feature on Windows 10?
Windows Sandbox features present in version 1903 and later in Windows 10 Pro and Enterprise editions only for your information. To run the Windows Sandbox feature requires at least 4 GB of RAM, 1 GB of free disk space, and virtualization capabilities enabled in BIOS. Please refer to the computer manual or contact the motherboard and processor manufacturer to check if your system supports virtualization.
Step 1. Click on the Start button and type Appwiz.cpl.
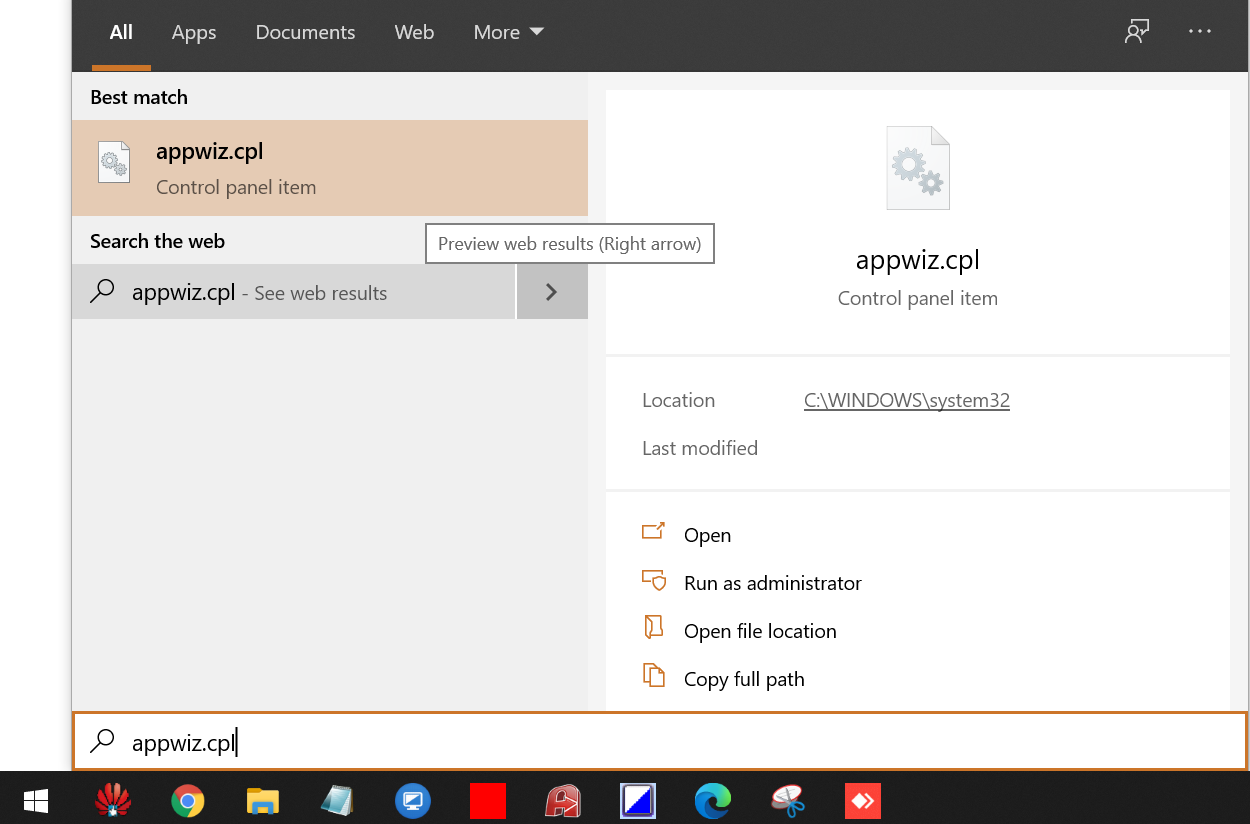
Step 2. From the available search results, click on the Appwiz.cpl to open the “Programs and Features” window.
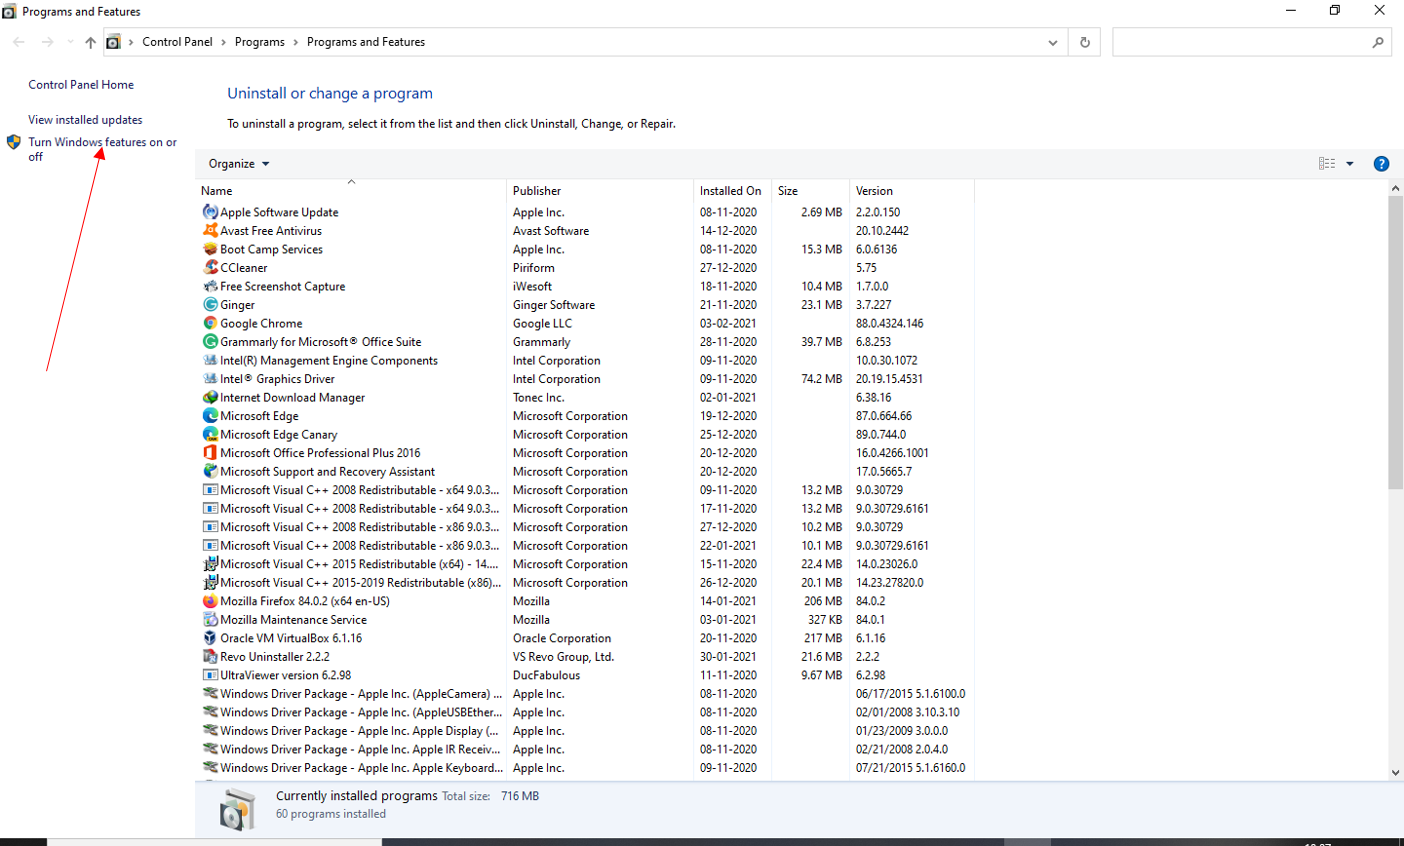
Step 3. From the left side pane, click on “Turn Windows features on or off,” as shown in the above image.
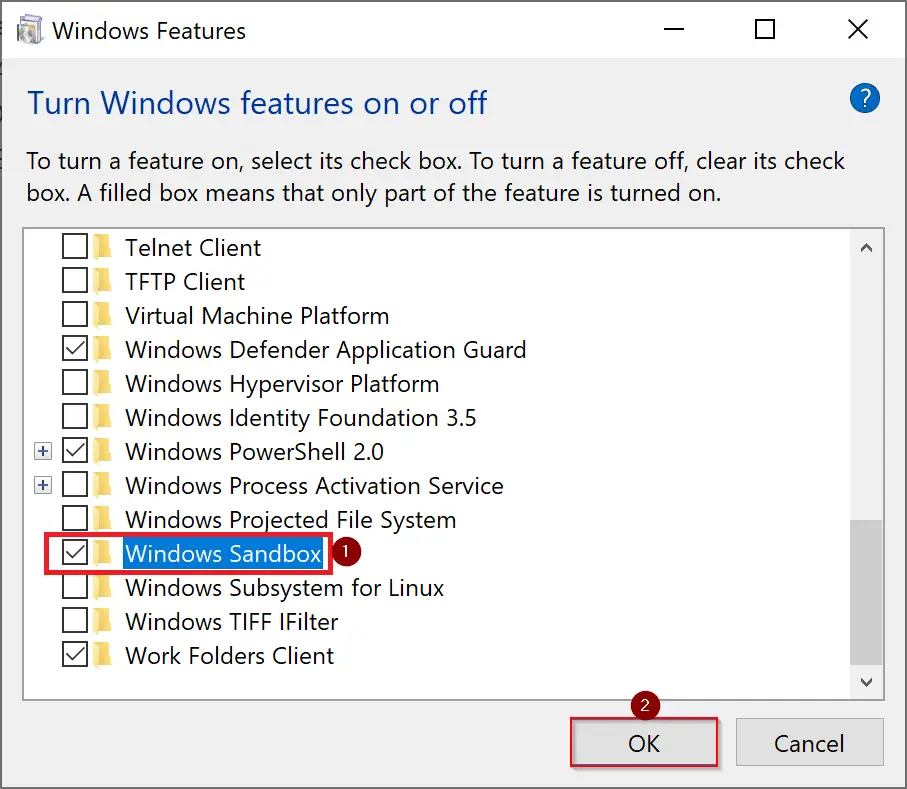
Step 4. “Windows Features” window is opened. Checkmark on “Windows Sandbox” and click the OK button.
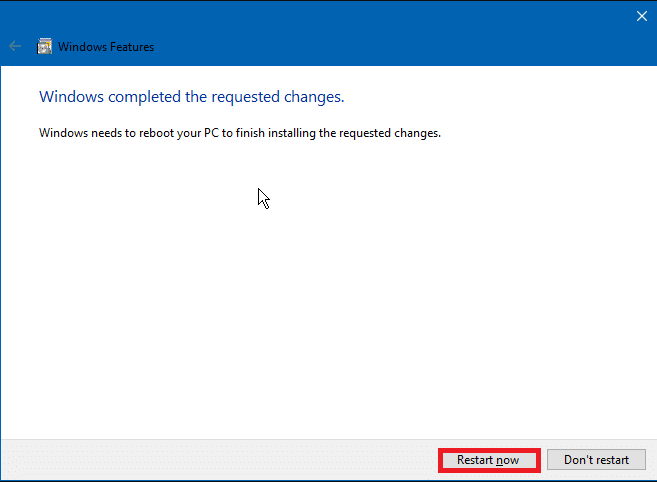
Step 5. On the next upcoming window, click on the “Restart now” button to restart your PC.
Once you have completed the above steps, your Windows 10 PC will successfully enable the “Windows Sandbox” feature.
To turn off the “Windows Sandbox” feature on Windows 10 PC, repeat the above steps. In step 4, uncheck the Windows Sandbox.
That’s all!
Also Read:
How to Enable Windows Sandbox Feature in Windows 10 Home Edition?