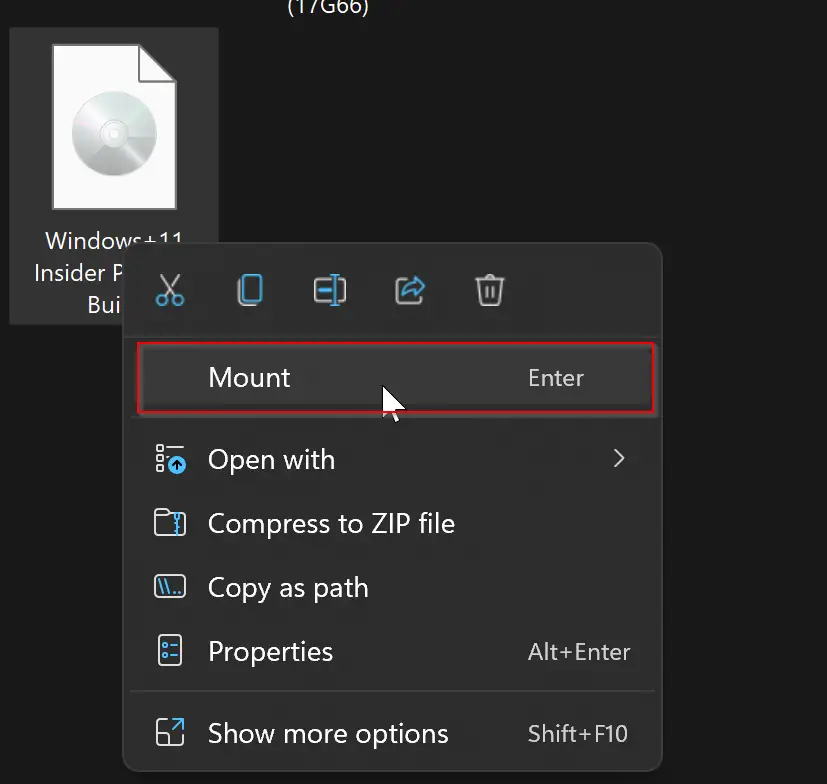
Starting with Windows 7, Microsoft included a built-in option to mount ISO files. Windows 11 also comes with a built-in option to mount an IOS file. But, after prolonged usage, this mount option may be missing when you perform a right-click on the ISO file on Windows 11. This happens because some of the third-party applications override the extension and add themself. When you double-click an ISO image file, it will not mount; instead, it will open with some other program associated with it.
Sometimes it is necessary to mount an ISO file in a virtual drive. For instance, certain games require a physical CD/DVD to be mounted to play the game. To supplement the need for a physical CD/DVD to play the game, you can use a virtual CD-ROM.
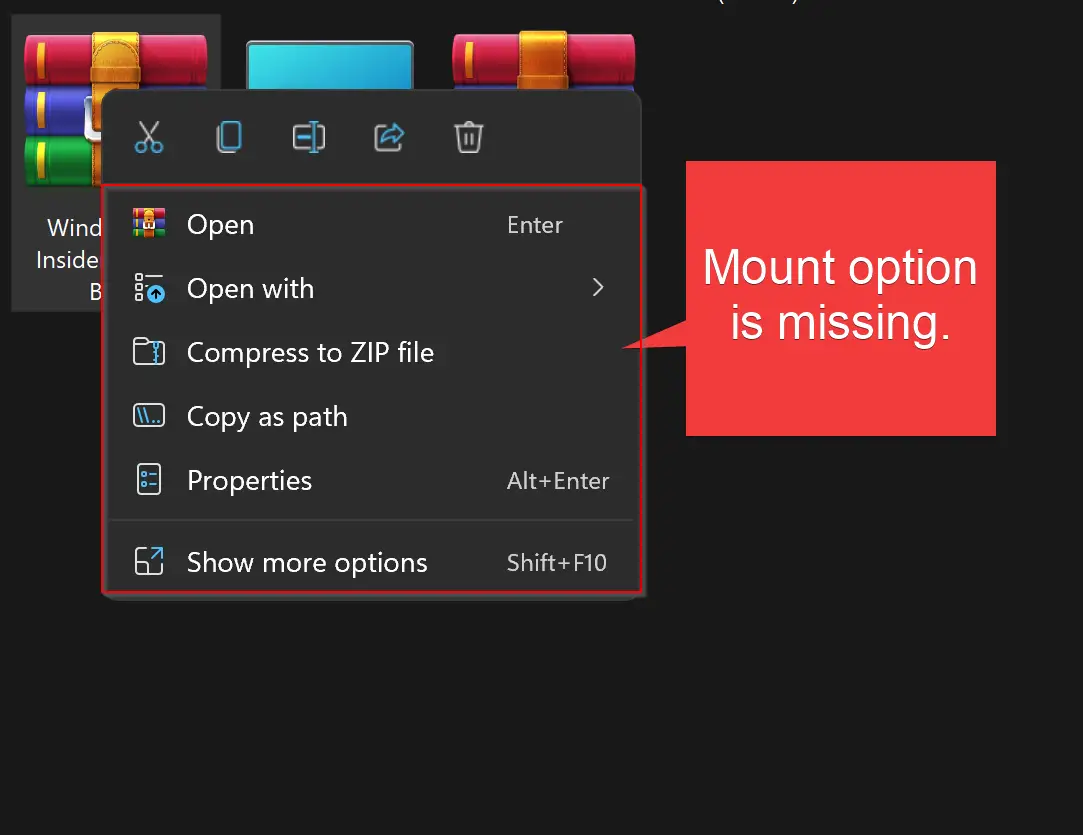
The reasons may be many, and the whole thing is that the mount option is missing on your Windows 11 computer that you want to fix or restore. In this gearupwindows article, we will guide you with at least two ways through which you can restore the missing mount option on Windows 11.
How to Fix the Missing Mount Option in Windows 11 using the Properties dialog?
To restore the missing mount option in Windows 11 context menu, do the following:-
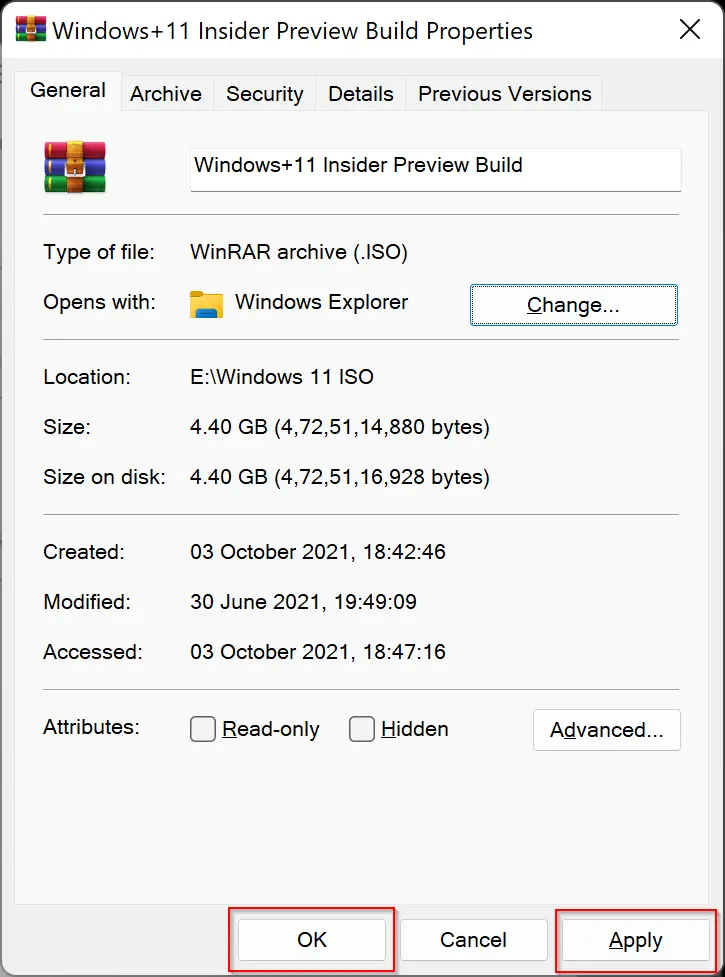
Step 1. Right-click the ISO file and select the Properties to open the “Properties” dialog box.
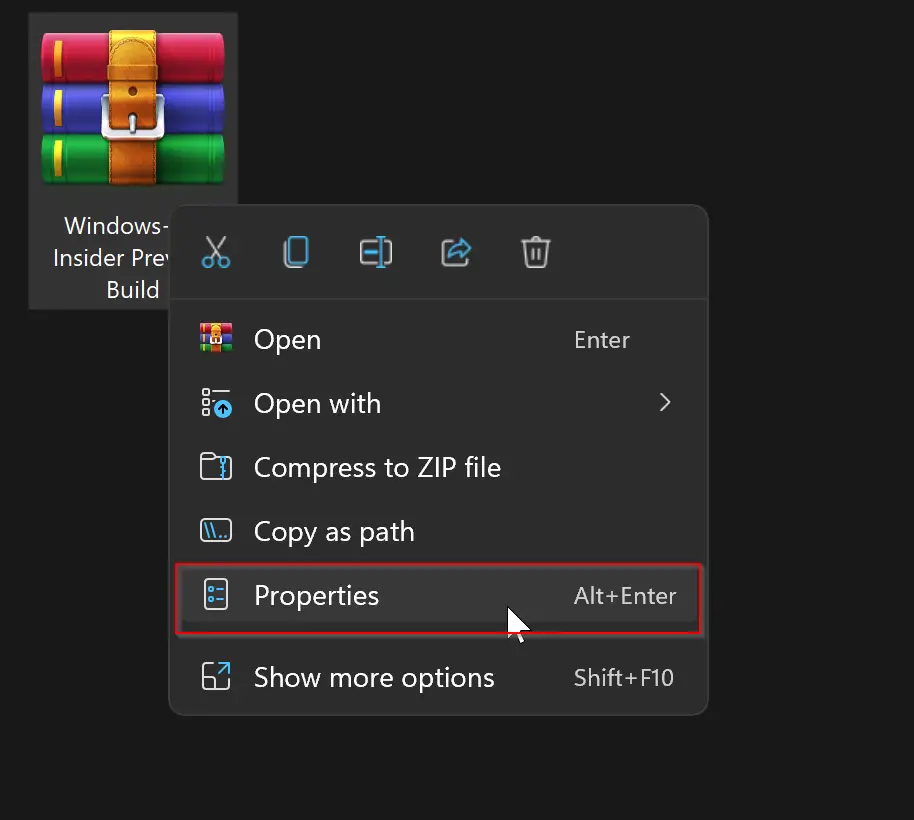
Step 2. In the Properties window that opens, select the General tab and then click the Change button beside the “Open with” option.
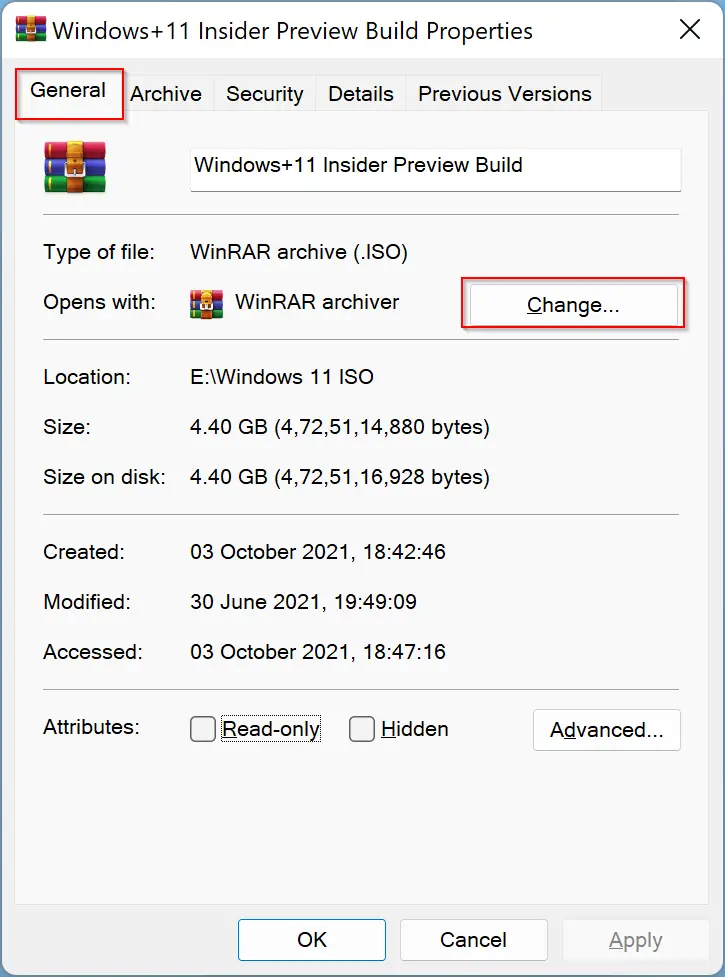
Step 3. When Windows prompts how do you want to open .ISO files from now on, select the Windows Explorer option and then click OK. If you don’t find the “Windows Explorer,” then click the “More apps” link to find it.
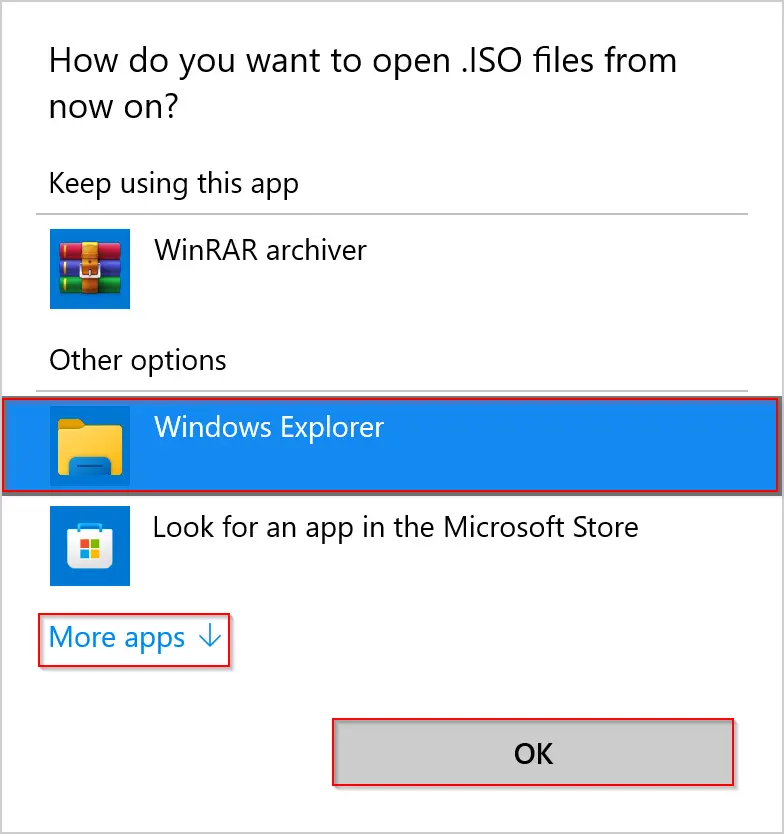
Step 4. When you’re done, click the Apply and then OK button to save the changes.
Next time, when you double-click on an ISO file, it will automatically mount on a virtual optical drive. Also, when you right-click on the ISO file, it will show the Mount option on the context menu.
How to Restore the Missing Mount Option in Windows 11 from Context Menu?
Step 1. Right-click on the ISO file and then select “Open with”> “Choose another app.”
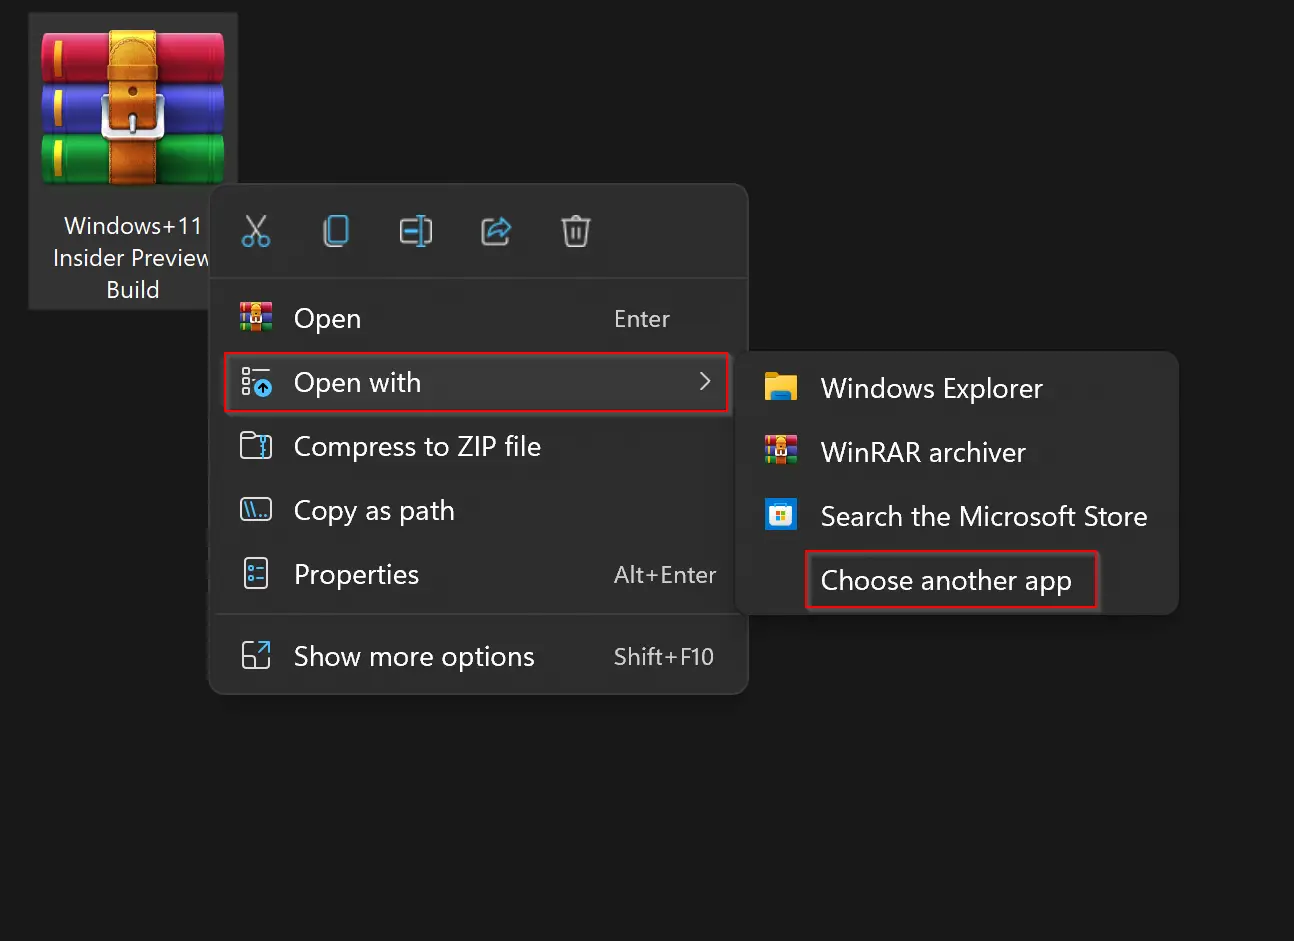
Step 2. When Windows prompts how do you want to open .ISO files from now on, select the Windows Explorer option and then click OK. If you don’t find the “Windows Explorer,” then click the “More apps” link to see it.
Step 3. When you’re done, click the Apply and then OK button to save the changes.
Next time, when you double-click on an ISO file, it will automatically mount on a virtual optical drive. Also, when you right-click on the ISO file, it will show the “Mount” option on the context menu.
Windows 11 also has inbuilt supports .IMG files. If you cannot mount it to a virtual optical drive, the above similar steps will fix the issues.
Good luck!
Conclusion
In conclusion, mounting ISO files is an essential feature in Windows 11, especially for games and software that require a physical CD/DVD. However, due to third-party applications overriding the extension, the mount option may disappear from the context menu, making it challenging to mount ISO files. Fortunately, there are two ways to restore the missing mount option: through the Properties dialog and the context menu. Both methods involve selecting the Windows Explorer option as the default program to open ISO files. Once done, the mount option will reappear in the context menu, and the ISO file will mount automatically in a virtual optical drive. Additionally, the same steps can be applied to .IMG files if they cannot be mounted. With these simple solutions, users can easily restore the missing mount option and continue enjoying their games and software.
Thank You so much, this helped !!!
Very helpful! I was trying to figure out how to make that option show. Thank you!