Although Windows 11 allows you to share a folder with someone else in your network, you can map it to a drive letter in File Explorer if you want to share a folder more professionally. After that, it will appear like a local drive, and you or someone else in your network can quickly access it in the future.
To be able to map a network drive on Windows 11, you’ll first need to turn on “Network discovery” on your PC. In this gearupwindows article, we will guide you through enabling Network discovery, mapping a network drive as well disconnecting a network drive from your computer.
How to Turn On Network Discovery on Windows 11?
To enable the network discovery on Windows 11, use the following steps:-
Step 1. First, open Settings.
Step 2. When the Settings window appears, select Network & internet on the left side.
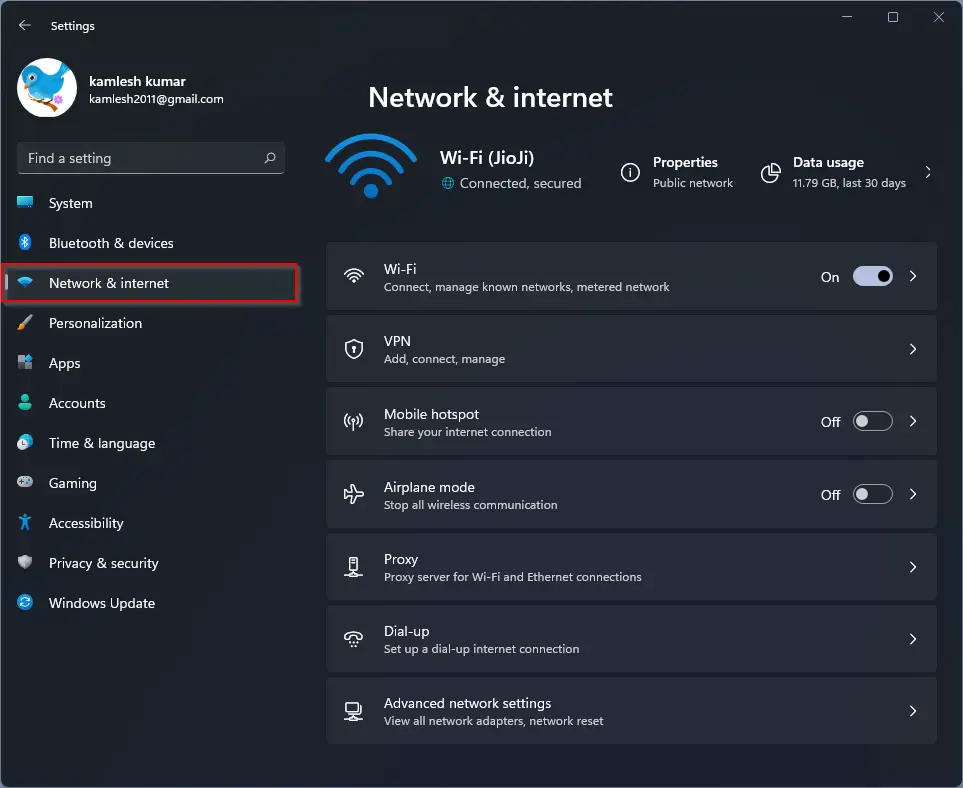
Step 3. Then, click Advanced network settings on the right-side pane.
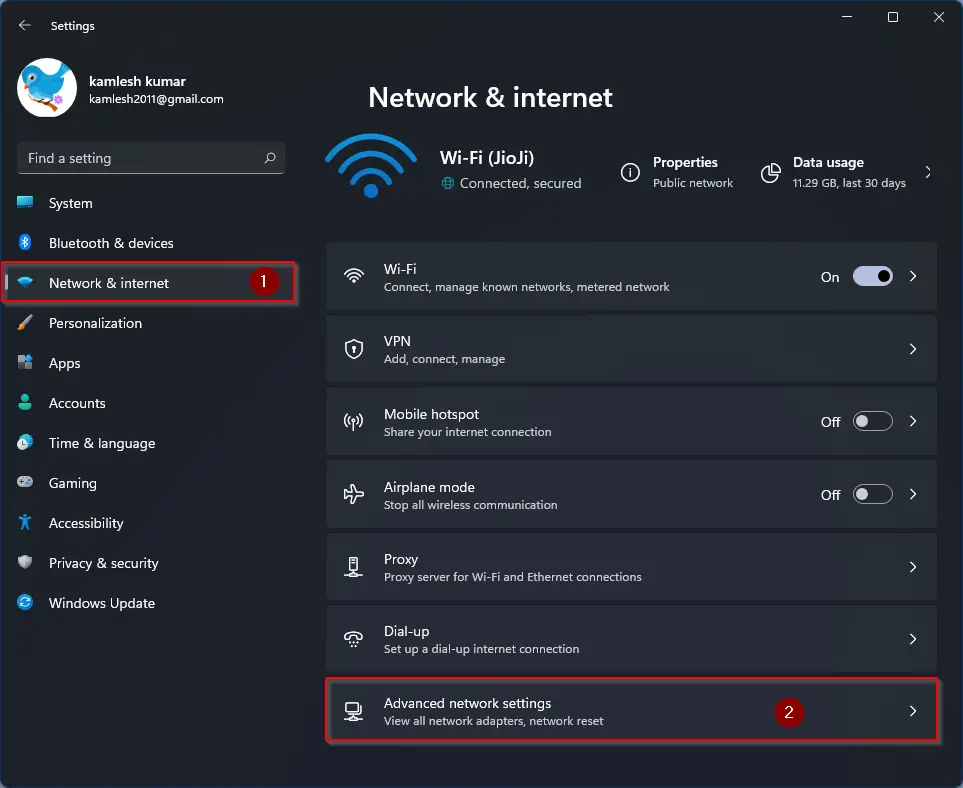
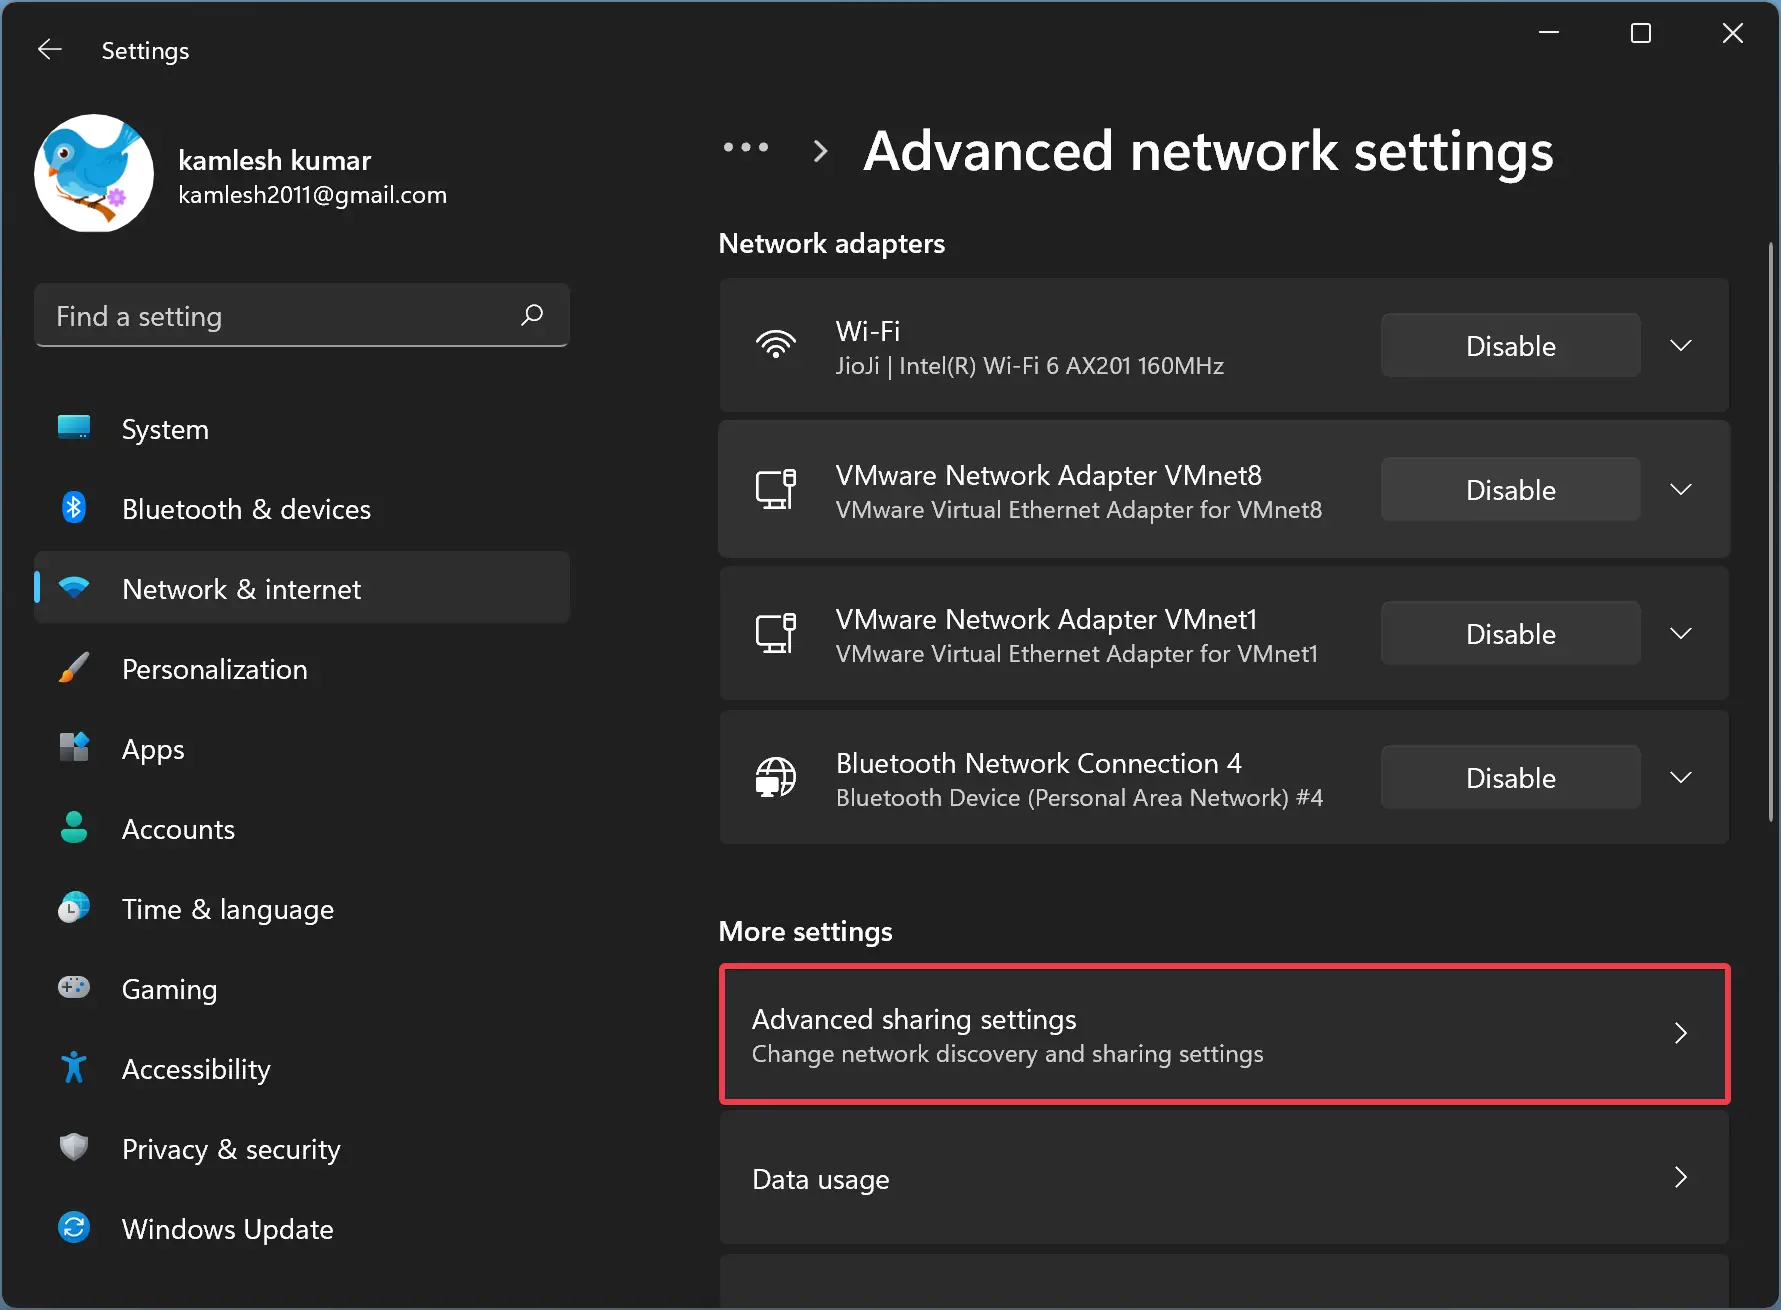
Step 4. On the “Advanced network settings” page, select the Advanced sharing settings tile.
Step 5. In the following screen, expand your Private or Public profile according to your needs. Turn On the toggle switch beside Network discovery. Also, check the option “Set up network connected devices automatically.
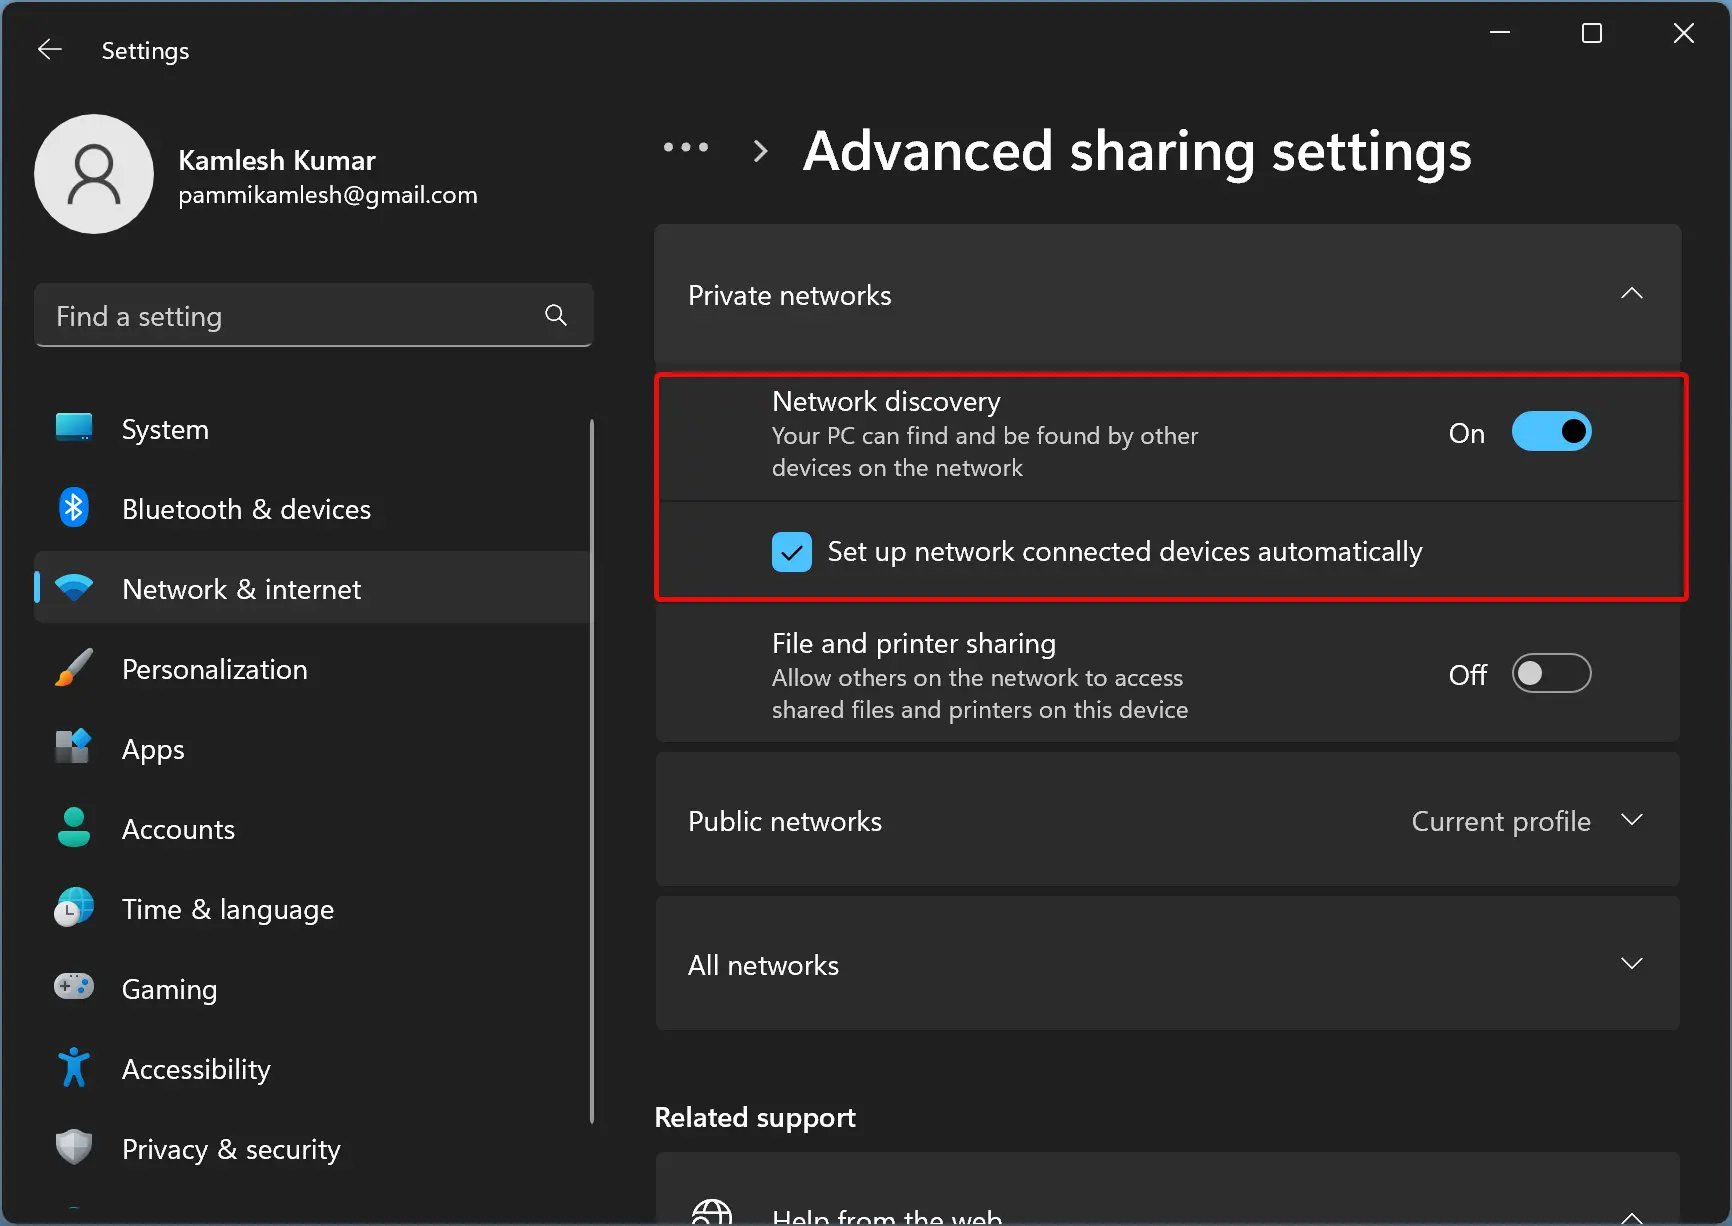
Once you complete the above steps, network discovery is enabled on your Windows 11 PC.
How to Map a Network Drive on Windows 11?
To map a network drive on Windows 11 in your network, do the following process:-
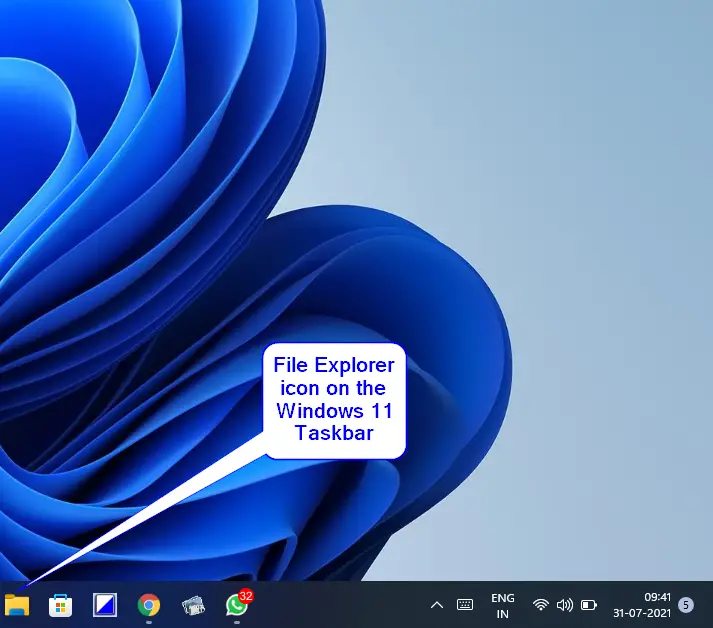
Step 1. First, open File Explorer by pressing the Windows + E keys from the keyboard by clicking on its icon at the taskbar. Alternatively, right-click the Start button and select File Explorer.
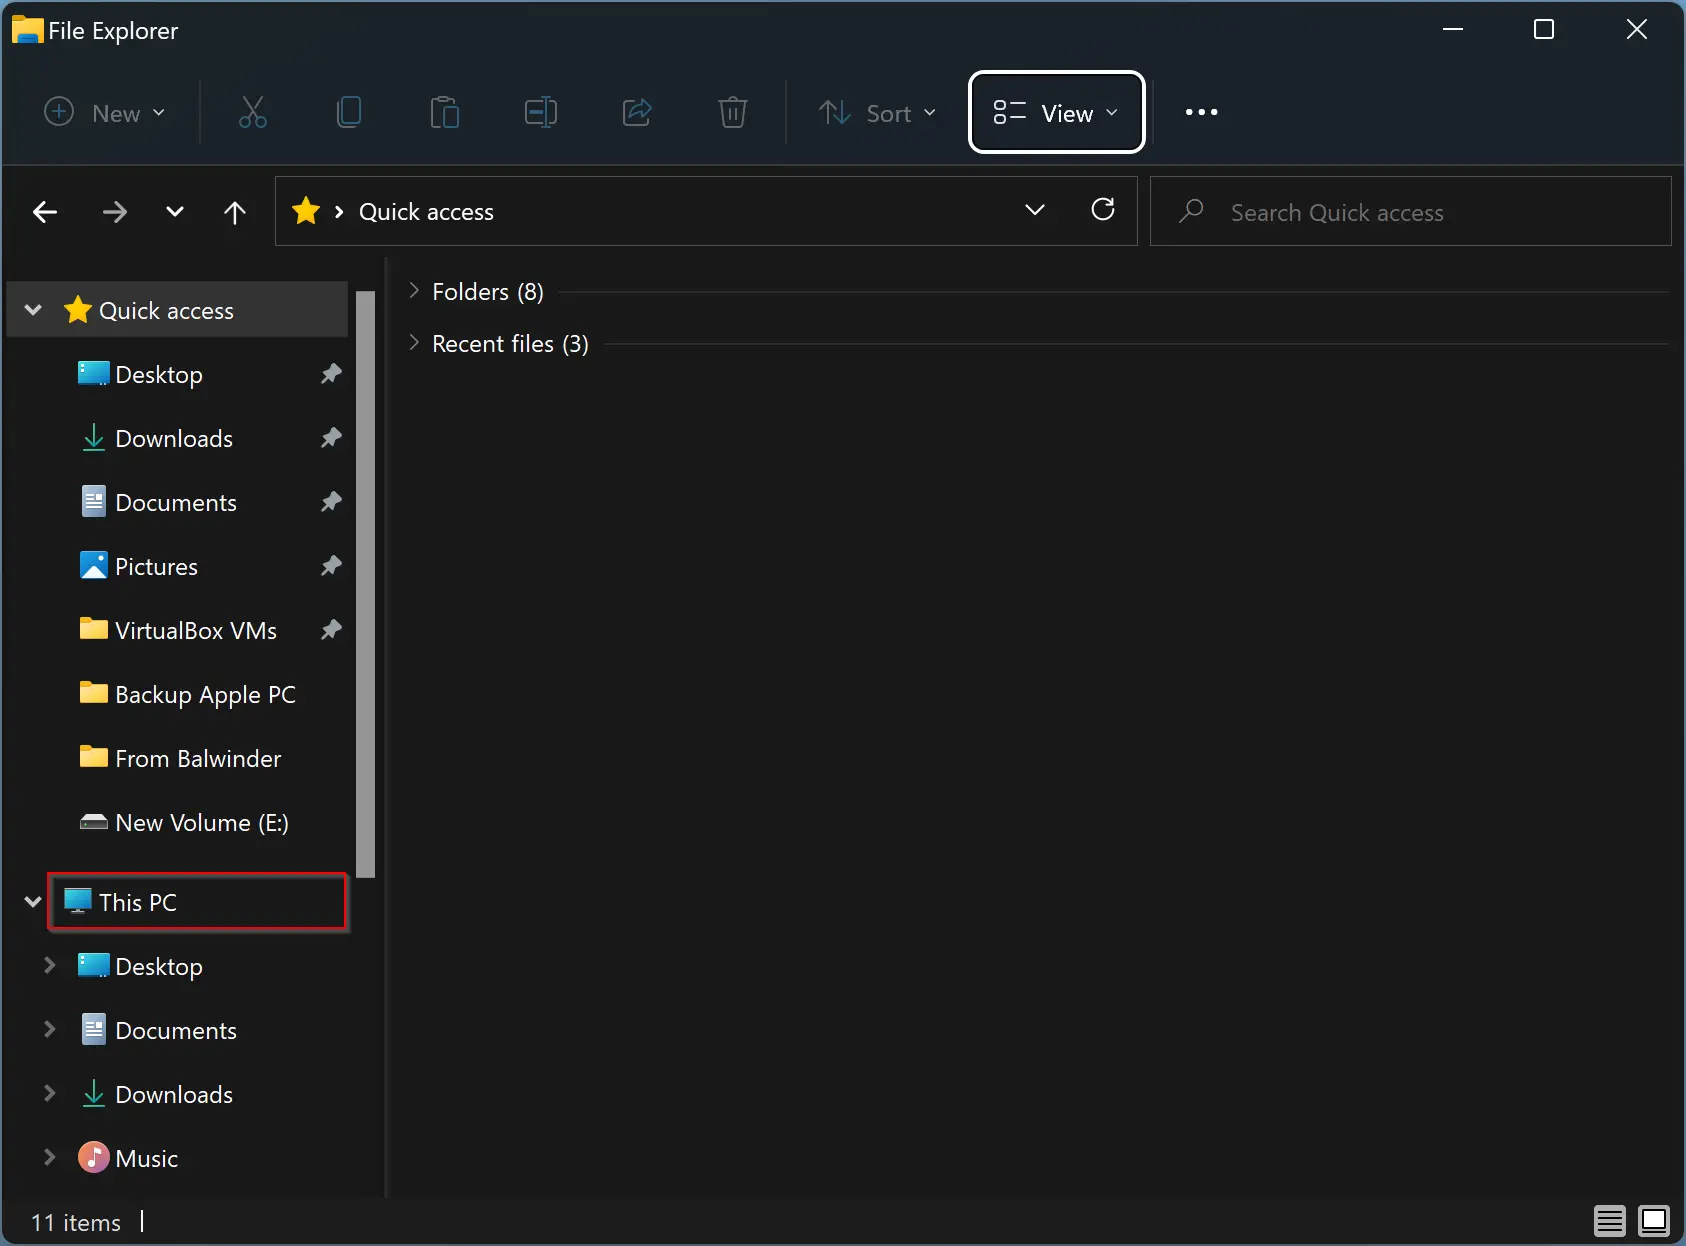
Step 2. When File Explorer opens, click This PC from the left sidebar.
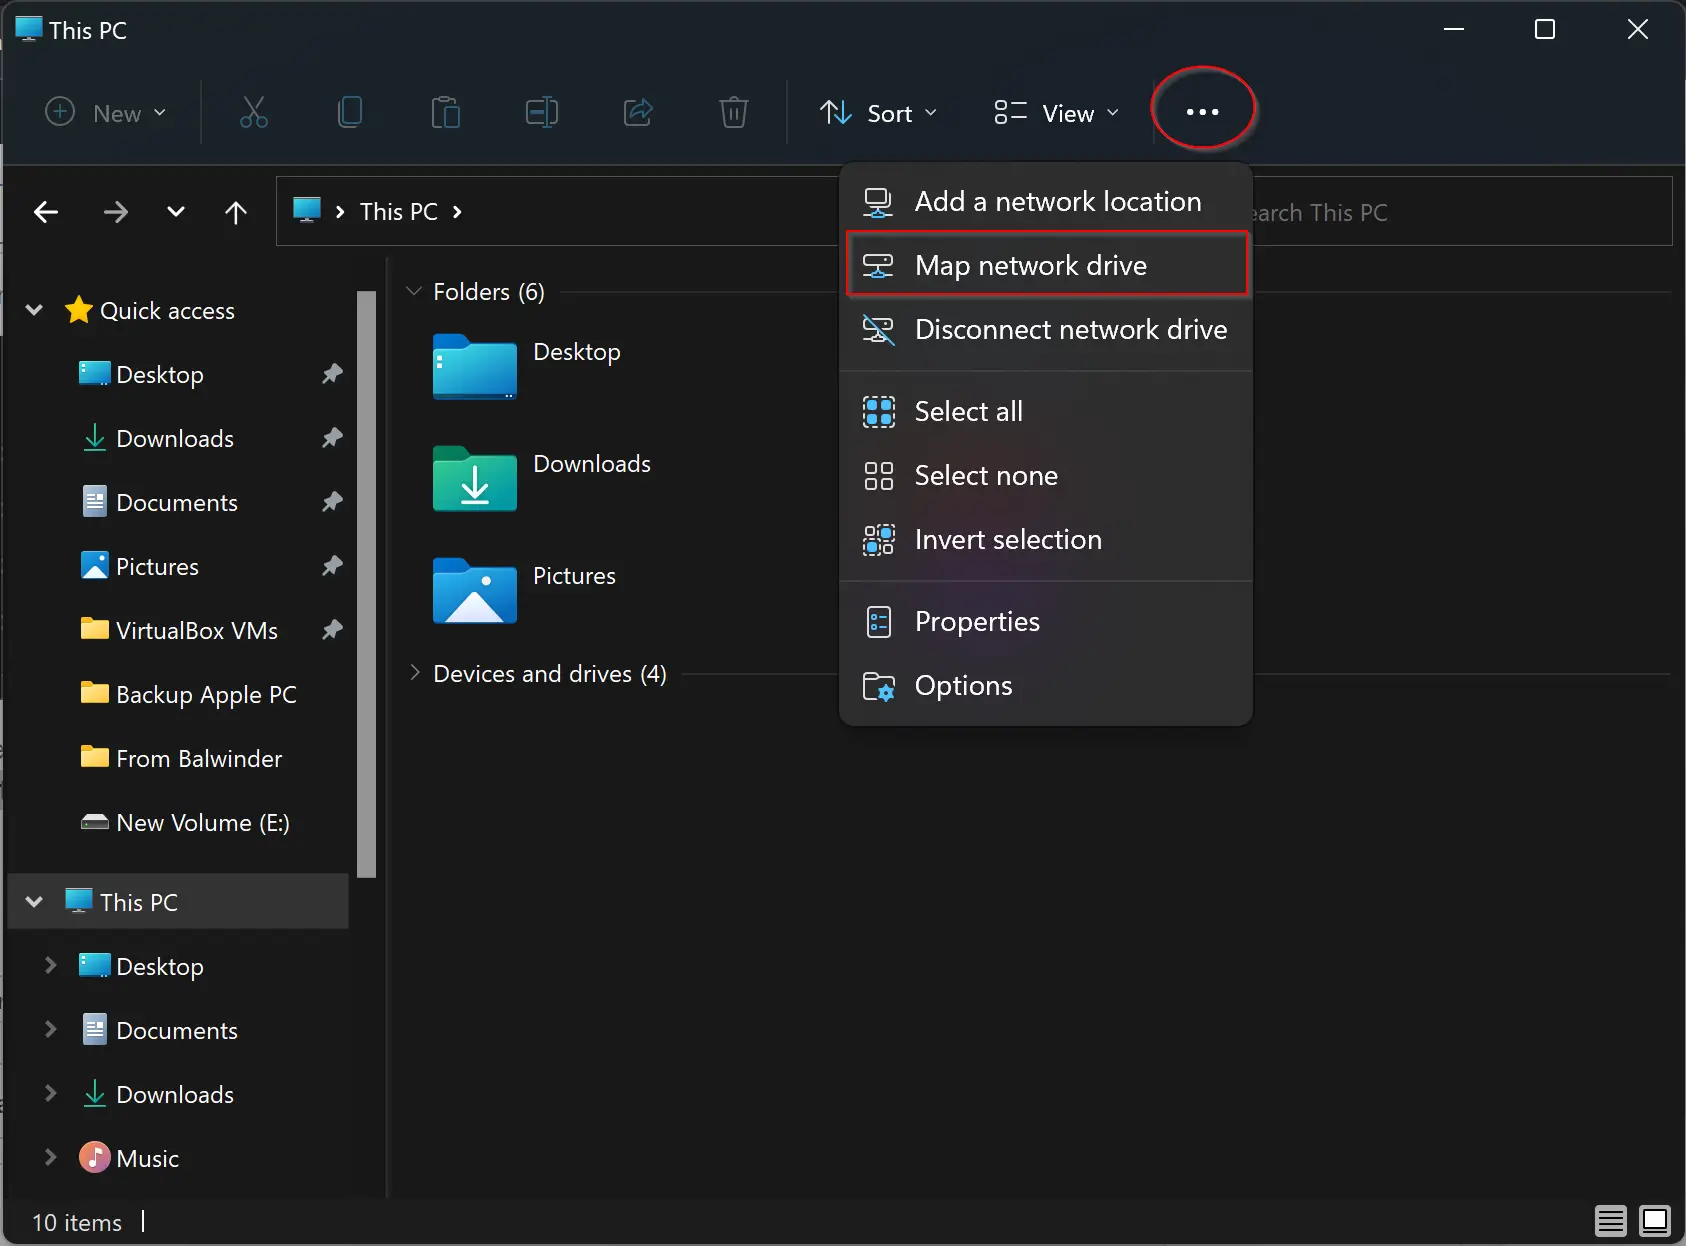
Step 3. In the “This PC” window, select the ellipses button (three dots) in the toolbar and then click Map network drive in the menu that appears.
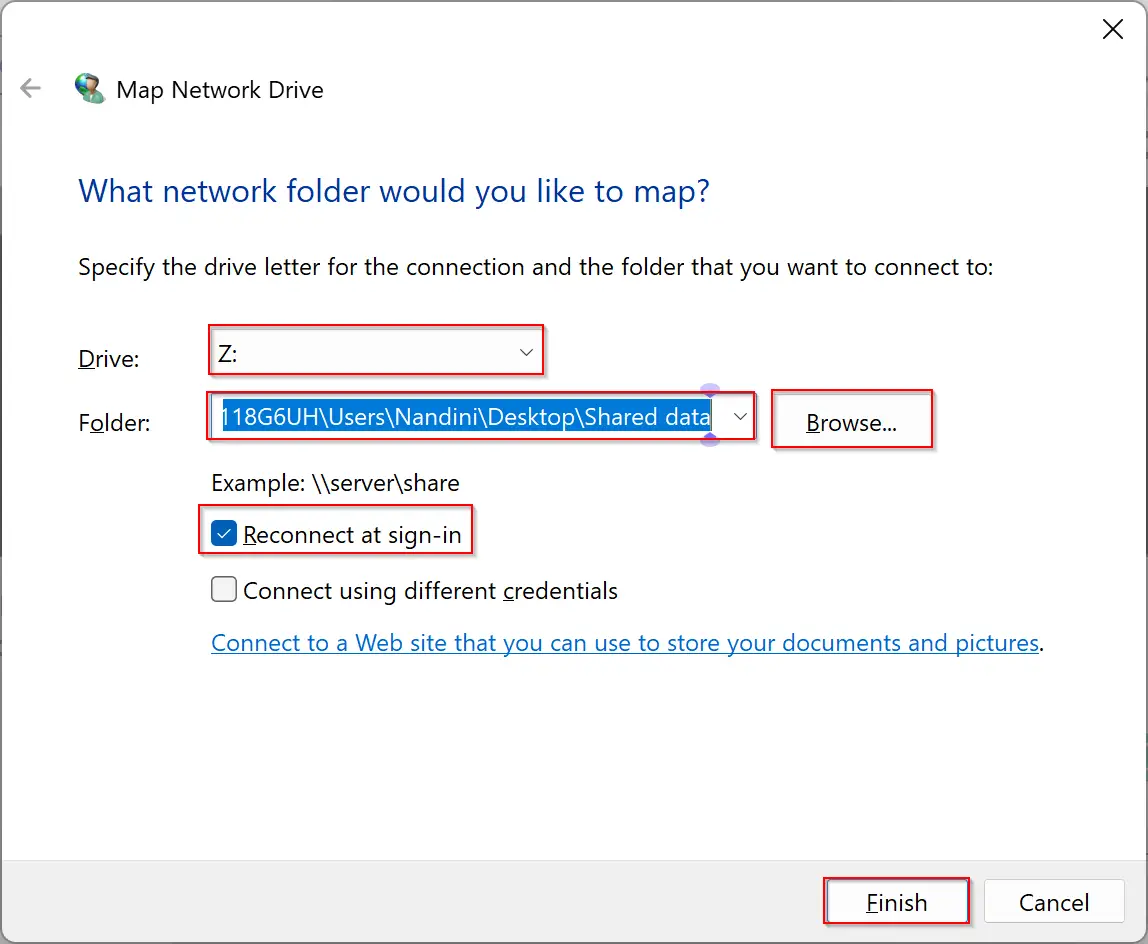
Step 4. After that, in the “Map Network Drive” window, select any free letter from the drop-down menu of “Drive,” and then beside the “Folder,” enter the full address of the shared folder/drive. When you’re done, click the Finish button.
If you don’t remember the shared folder path on your local network, click the Browse button and select from the available shared folder. Next, according to your needs, you can check or uncheck the option “Reconnect at sign-in.” If you choose the option “Reconnect at sign-in,” when you start your PC, it will automatically reconnect to these resources, which means you don’t have to repeat the steps.
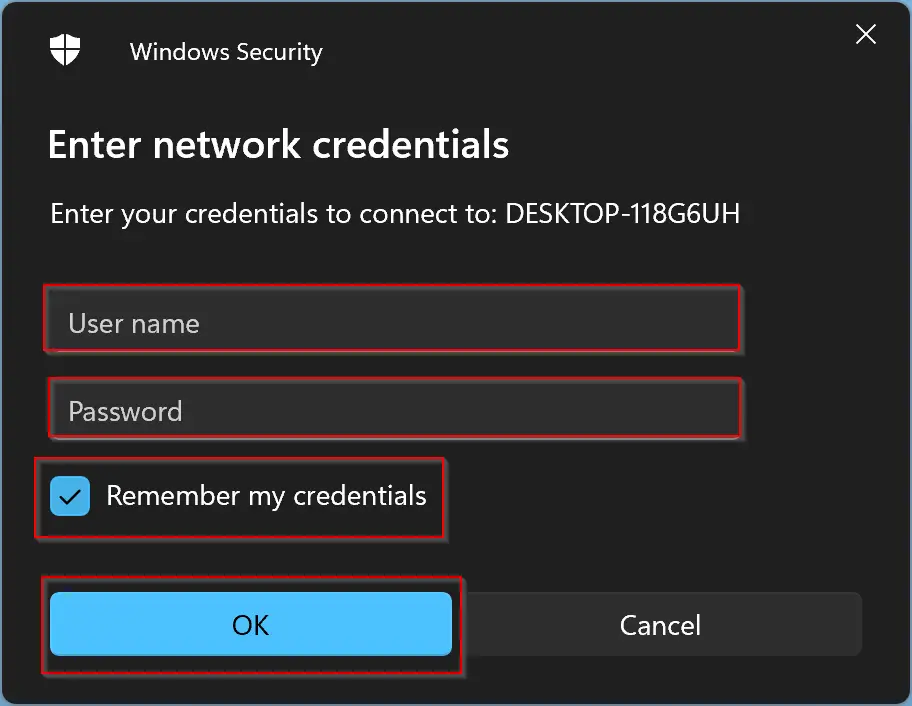
Step 5. After that, Windows 11 will attempt to connect to the network drive, and you’ll see a “Windows Security” window. Enter the user name and password required to access the folder/drive. Further, if you want Windows always to remember this username and password for the shared resources, check the checkbox Remember my credentials. Finally, click the OK button.
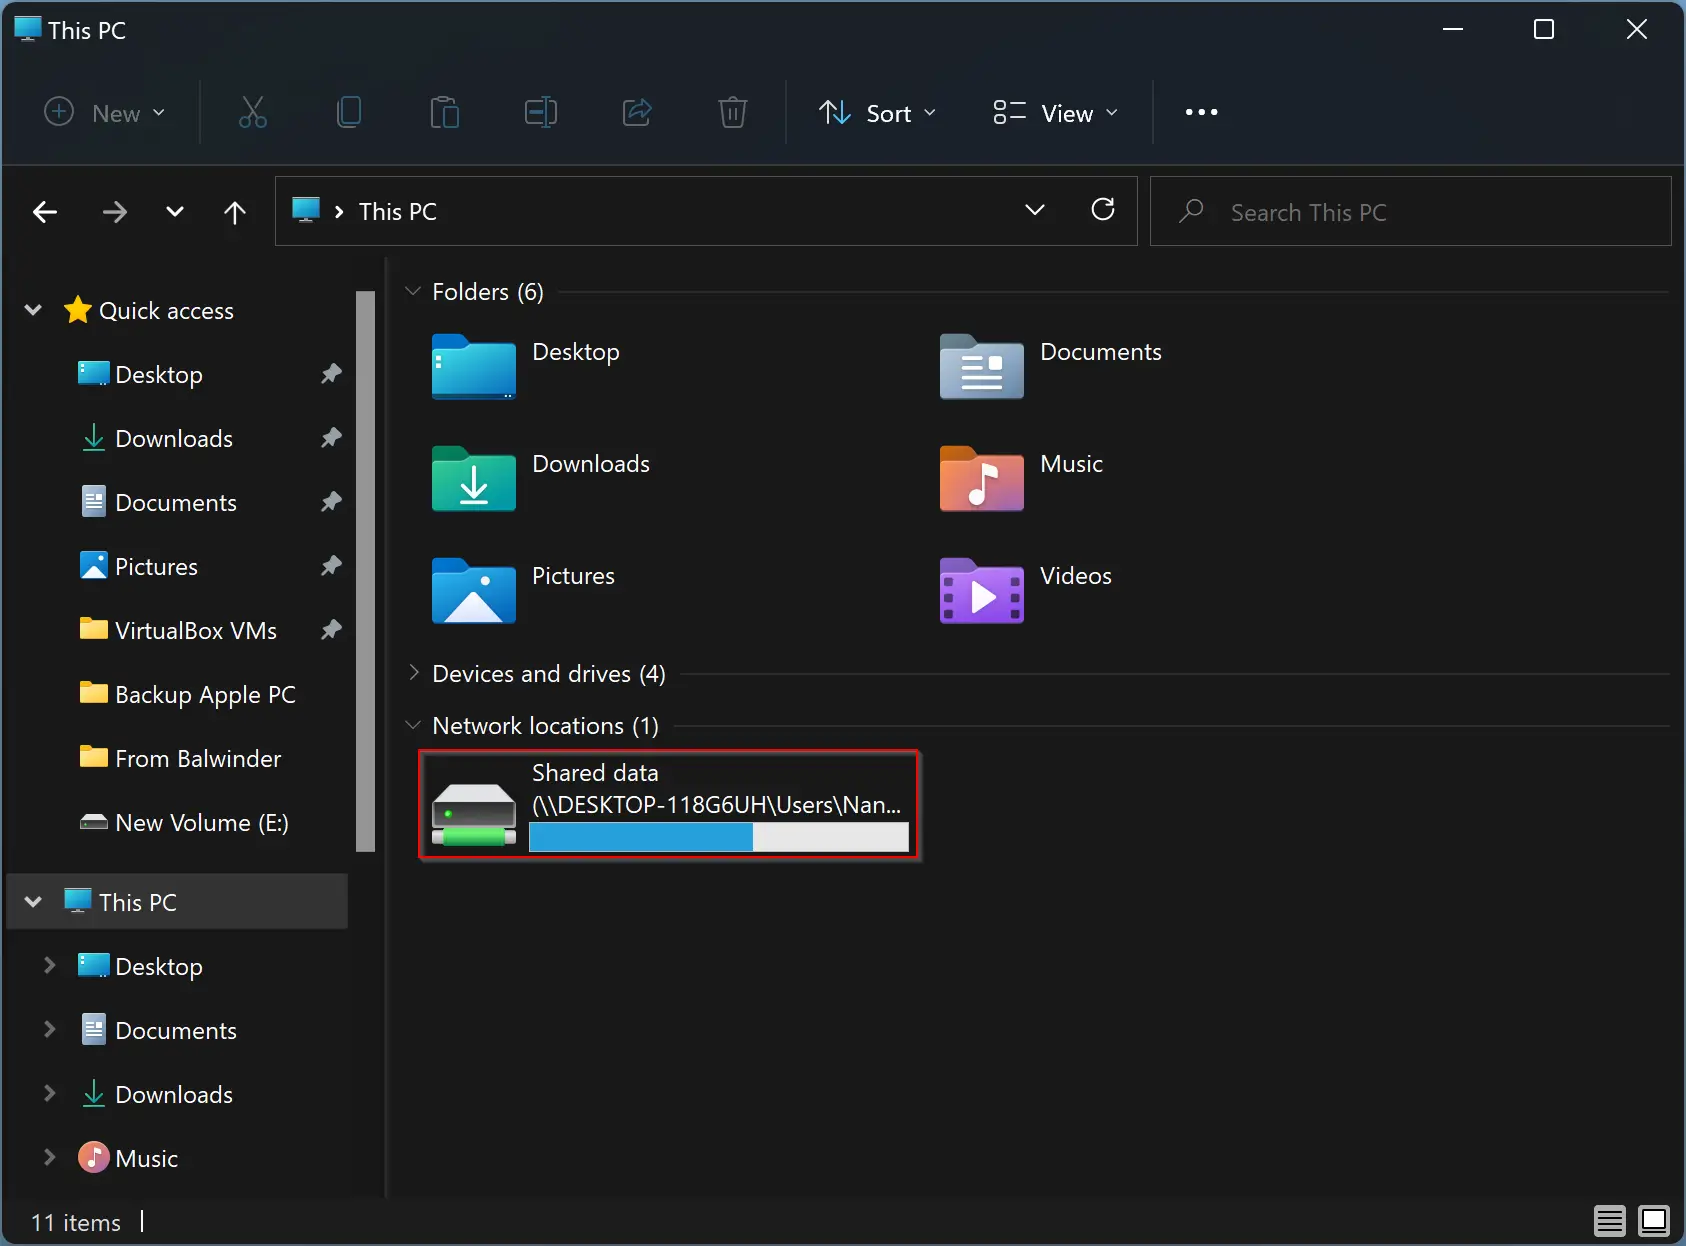
After completing the above steps, Windows 11 will connect to the drive and map it to the drive letter you selected. To access this folder in the future, open File Explorer at “This PC“ to see the mapped drive listed under “Network locations.”
How to Disconnect a Mapped Network Drive in Windows 11?
Due to some reason, you don’t need to access the shared folder, or access is removed by the administrator of that folder/drive, and you want to disconnect a mapped network drive, do the following:-
Step 1. First, open File Explorer.
Step 2. When File Explorer opens, click This PC from the left sidebar.

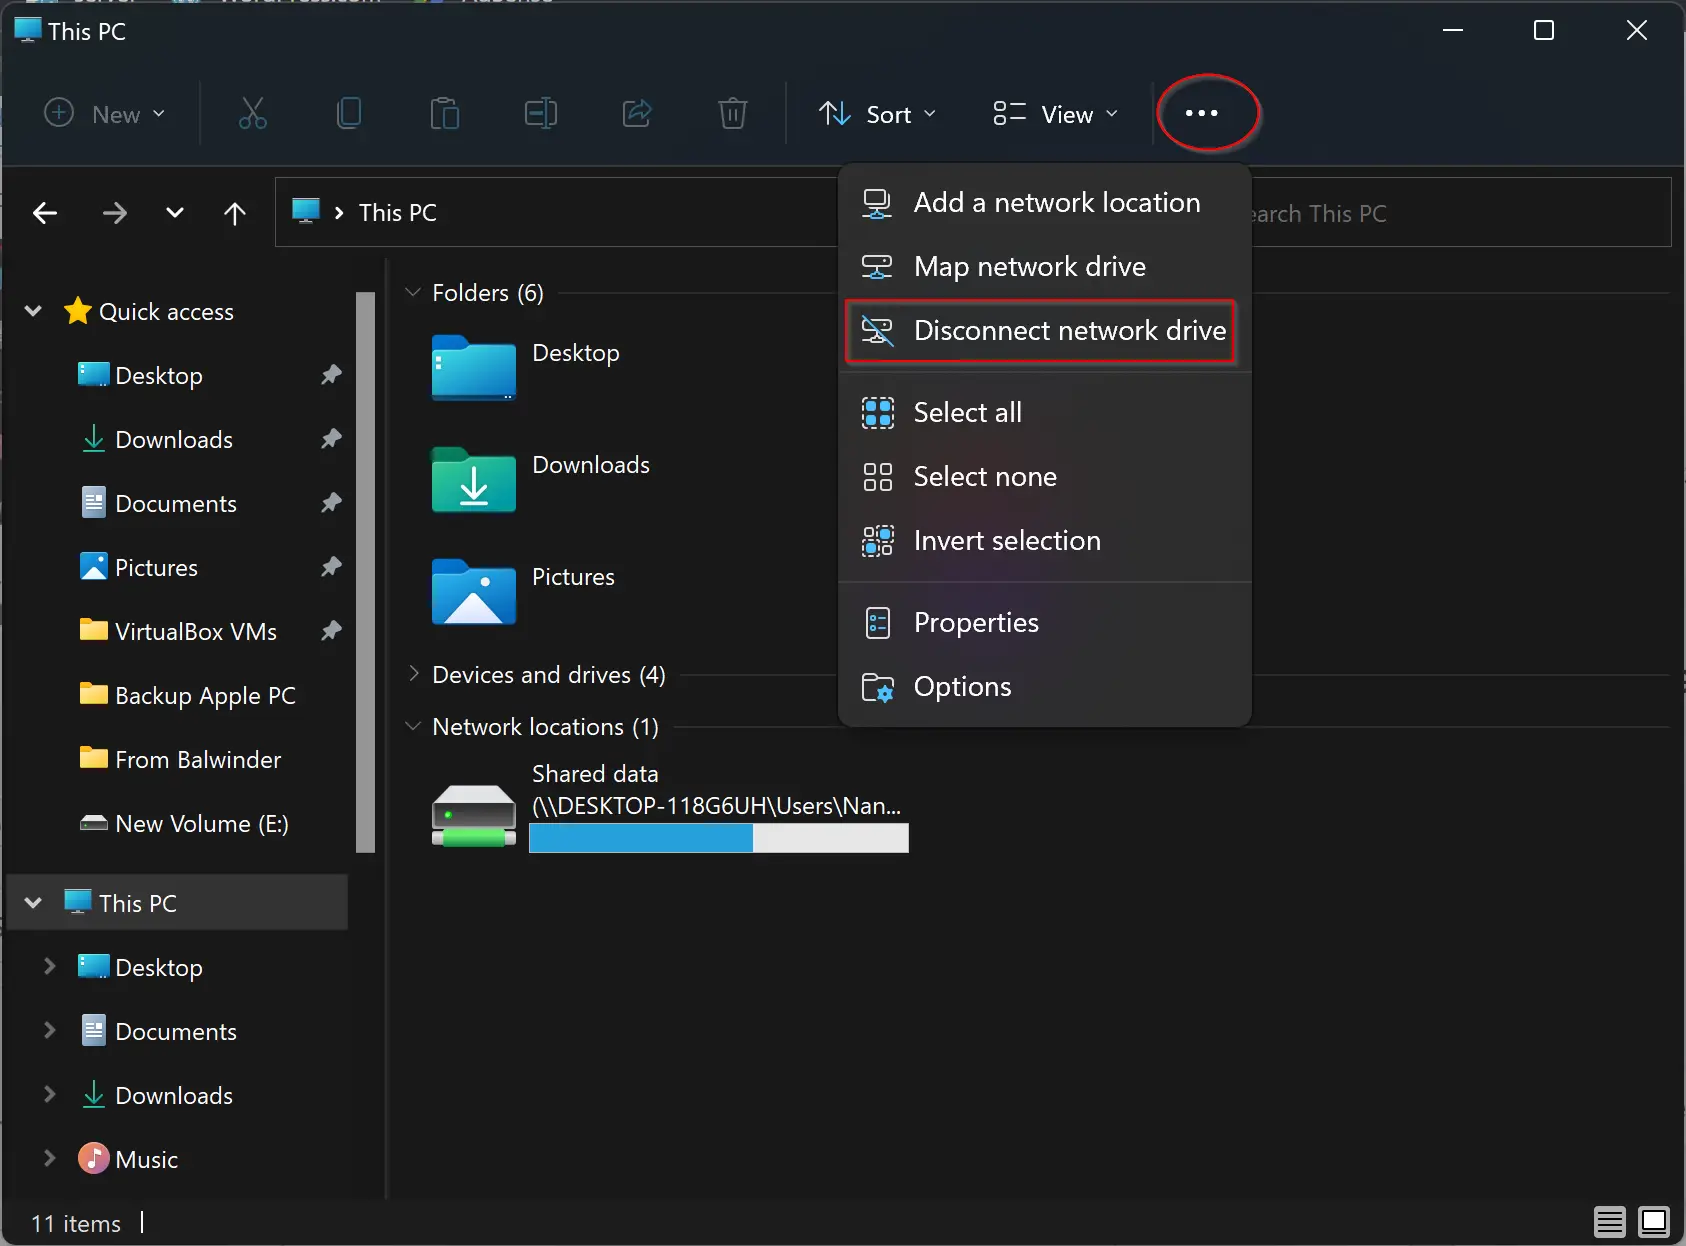
Step 3. In the “This PC” window, select the ellipses button (three dots) in the toolbar and then click Disconnect network drive in the menu that appears.
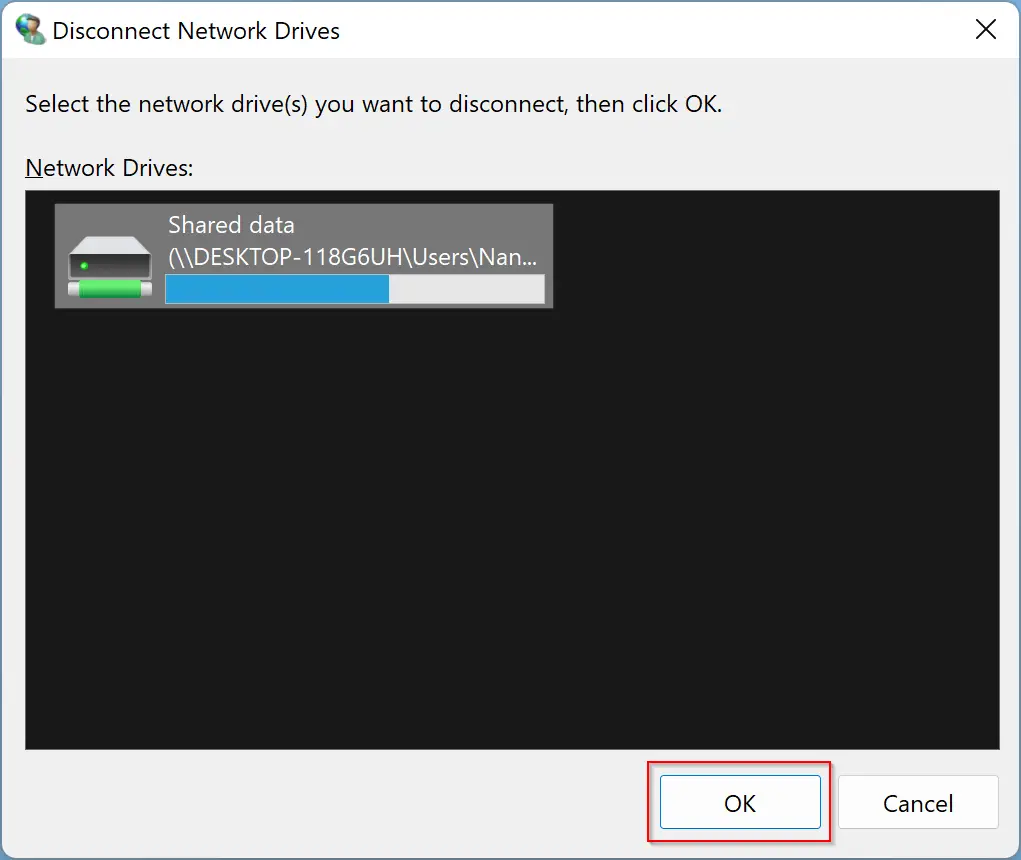
Step 4. In the “Disconnect Network Drive” window that appears, select the shared drive and click the OK button at the bottom of the screen.
Alternately, locate the mapped drive in the “This PC” window and then right-click it. Select Show more options in the menu.
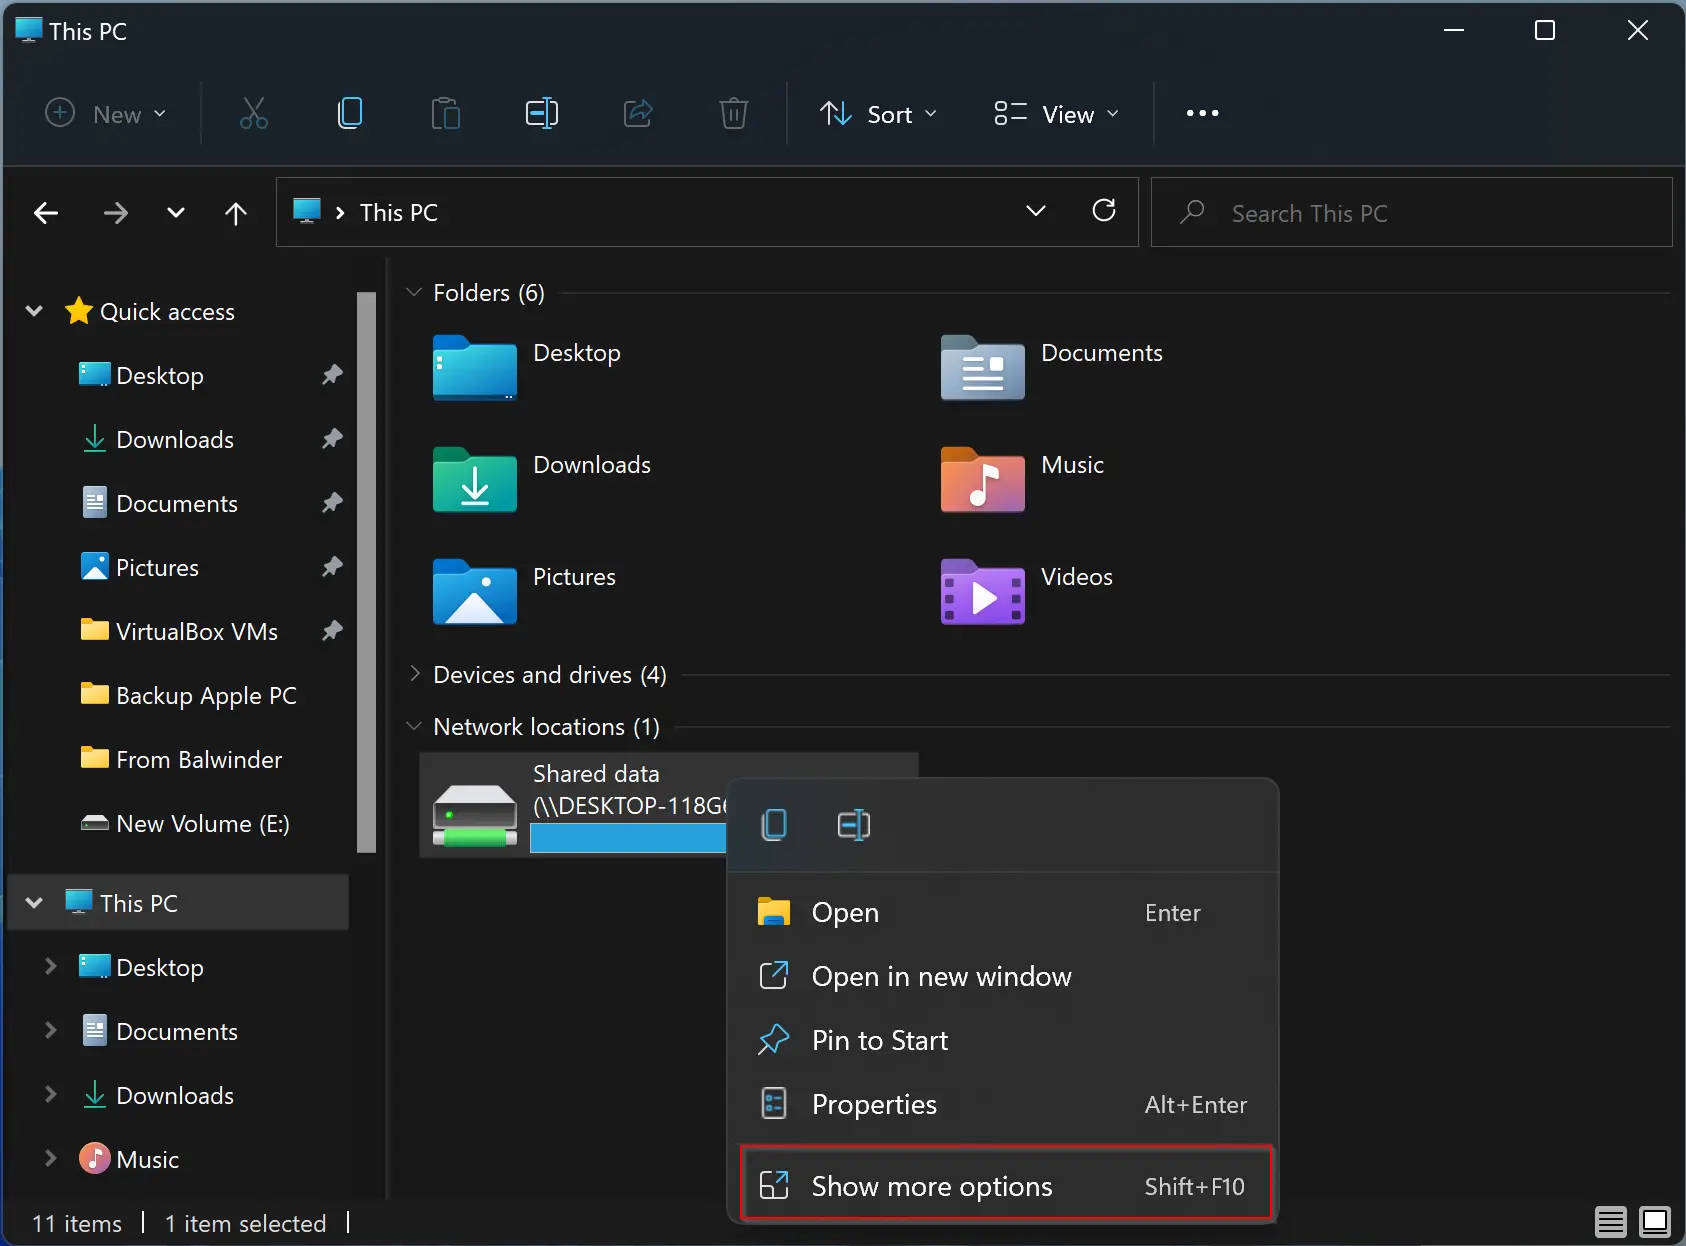
After that, a classic menu will appear. Select Disconnect in that menu.
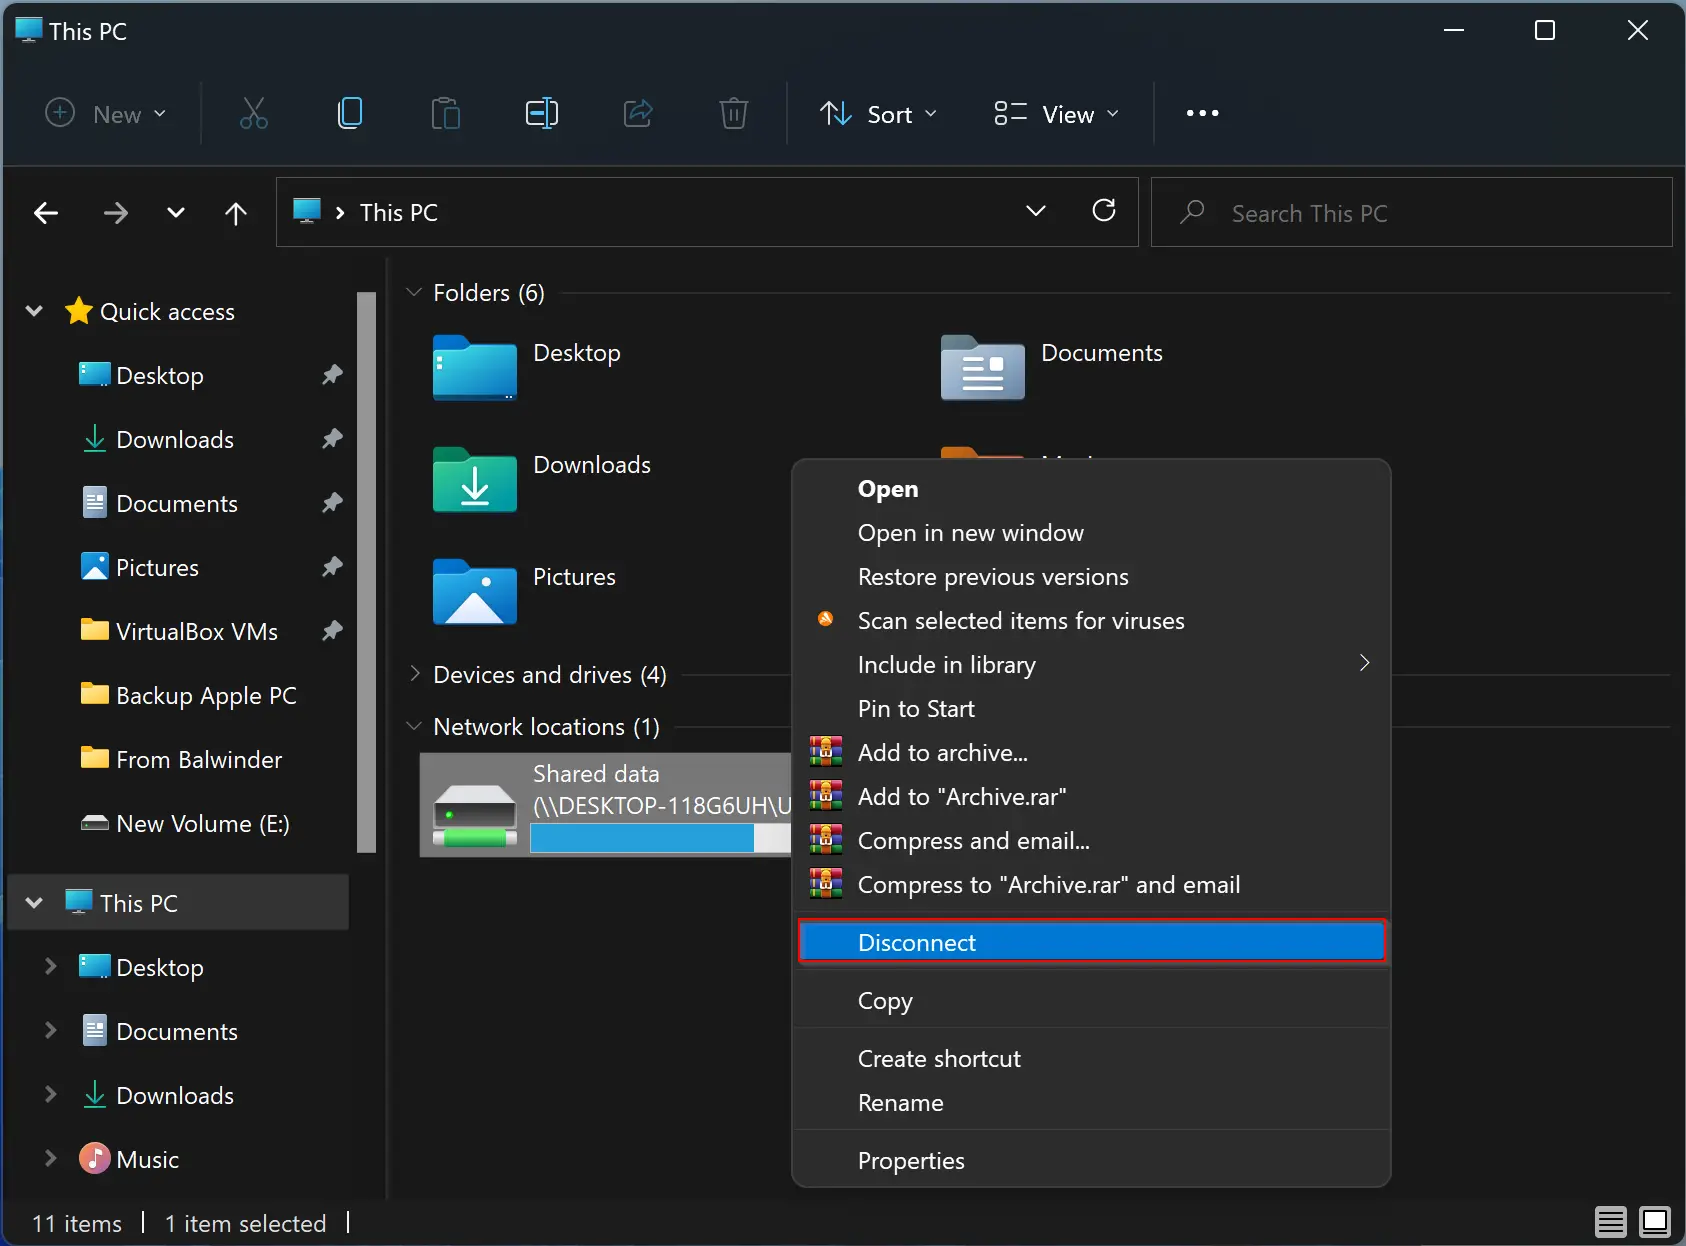
That’s it! Now the mapped drive is removed, and Windows will forget the password and path. After that, it will not appear anymore in “This PC.” If you want to map that drive/folder again, you need to repeat the steps.
Conclusion
In conclusion, mapping a network drive on Windows 11 is a convenient way to share folders with others in your network. It makes accessing shared resources easy and professional-looking. However, before you can map a network drive, you need to turn on “Network discovery” on your PC. This article has provided step-by-step instructions on how to turn on network discovery, map a network drive, and disconnect a mapped network drive on Windows 11. By following these instructions, you can easily map and manage network drives on your Windows 11 PC.