If you’re a gamer or work with graphics-intensive software, you may have encountered performance issues on your Windows 10 or 11 PC due to low VRAM. Dedicated Video RAM, or VRAM, is a critical component of your computer’s graphics card, as it stores data related to graphical processing. Fortunately, there are a few ways to increase VRAM in Windows 10 and 11, which we’ll cover in this article.
How to Increase Dedicated Video RAM (VRAM) in Windows 10 and 11?
Method 1: BIOS Settings
The most common way to increase VRAM is through your computer’s BIOS settings. To access these settings, restart your computer and press the appropriate key to enter the BIOS (usually F2, F10, or Delete). Look for an option that allows you to adjust the VRAM settings. The exact wording may vary depending on your computer’s manufacturer, but it should be something like “Video Memory Size,” “Graphics Settings,” or “Advanced Chipset Features.”
Once you’ve located the VRAM settings, increase the allocated amount as needed. Keep in mind that the maximum amount of VRAM you can allocate may be limited by your computer’s hardware.
Method 2: Registry Editor
Another way to increase VRAM in Windows 10 and 11 is through the Registry Editor. Before proceeding, we recommend creating a system restore point in case anything goes wrong.
Step 1. Press the Windows key + R to open the Run dialog box.
Step 2. Type “regedit” and press Enter to open the Registry Editor.
Step 3. Navigate to the following key in the left sidebar of Registry Editor:-
HKEY_LOCAL_MACHINE\Software\Intel
Step 4. Right-click on the Intel folder and select “New” > “Key.”
Step 5. Name the new key “GMM” and press Enter.
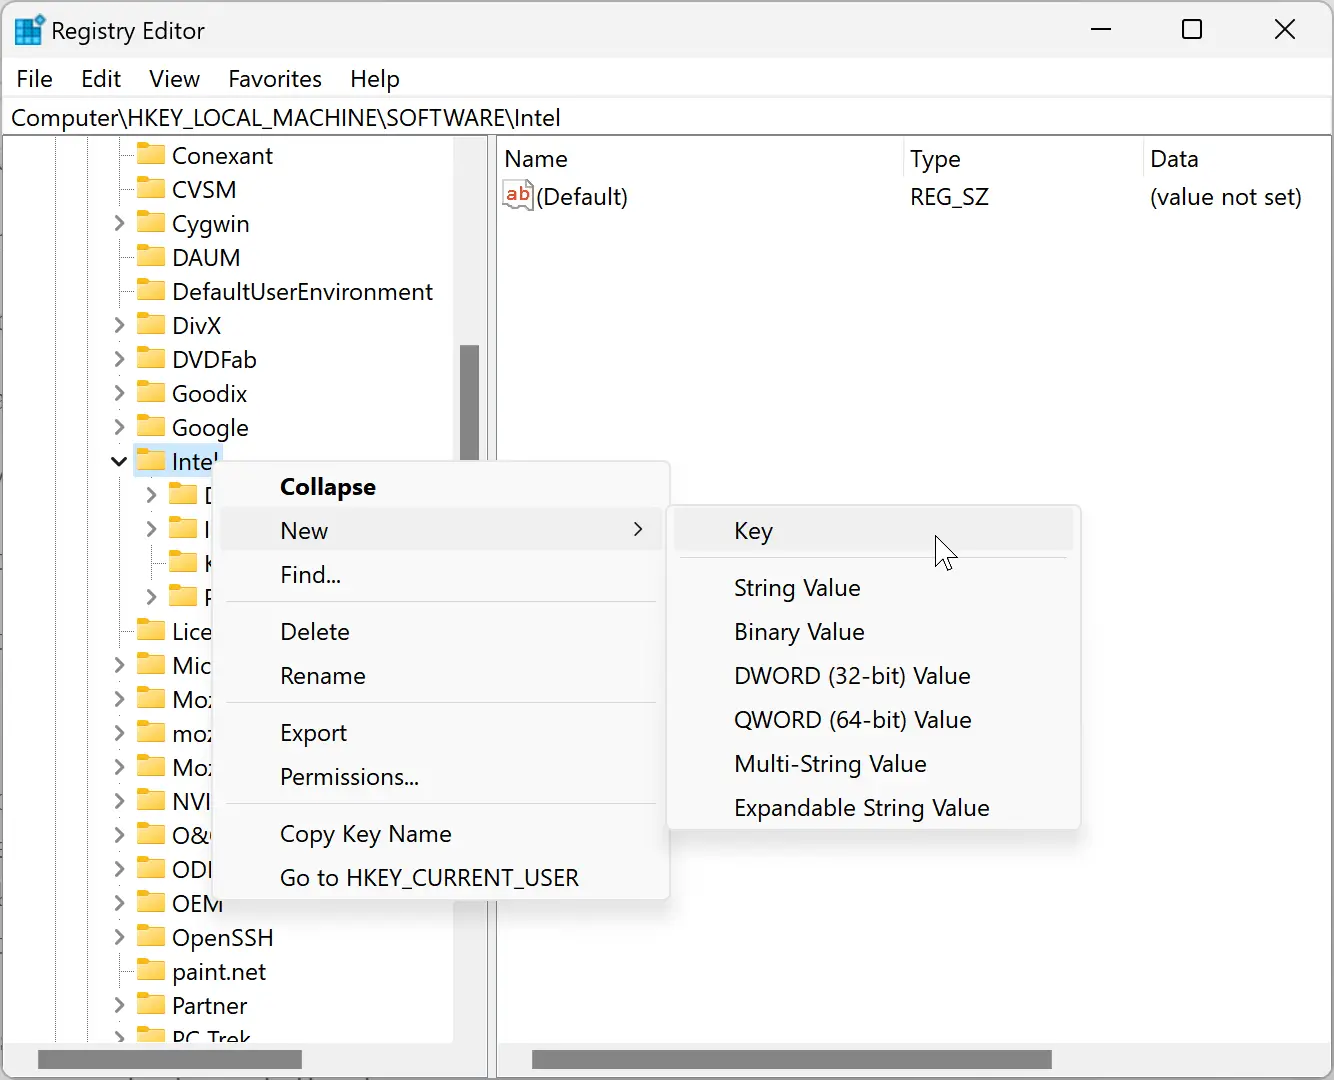
Step 6. Right-click on the GMM folder and select “New” > “DWORD (32-bit) Value.”
Step 7. Name the new value “DedicatedSegmentSize” and press Enter.
Step 8. Double-click on the DedicatedSegmentSize REG_DWORD and set the Value data to the amount of VRAM you want to allocate (in megabytes). For example, if you want to allocate 1GB of VRAM, set the value data to 1024.
Step 9. Click OK to save the changes.
Step 10. Restart your computer to apply the changes.
Method 3: Graphics Control Panel
If you have an NVIDIA or AMD graphics card, you can also adjust VRAM settings through the graphics control panel.
For NVIDIA:
Step 1. Right-click on the desktop and select “NVIDIA Control Panel.”
Step 2. Click on “System Information” in the bottom left corner.
Step 3. Look for the “Dedicated video memory” entry under the “Display” tab.
For AMD:
Step 1. Right-click on the desktop and select “AMD Radeon Software.”
Step 2. Click on the “System” tab.
Step 3. Look for the “Graphics” section and click on “Advanced.”
Step 4. Look for the “Dedicated Video Memory” entry.
If the amount of allocated VRAM is lower than what you need, you can adjust it through the control panel settings.
Conclusion
In conclusion, increasing VRAM in Windows 10 and 11 can be done through various methods such as BIOS settings, Registry Editor, and graphics control panel. It is important to note that VRAM allocation is limited by your computer’s hardware, so make sure to check your system specifications before making any changes. With these methods, you can optimize your computer’s graphics performance and enjoy a smoother and more responsive experience.