Microsoft Excel is a powerful spreadsheet application used for various tasks, from data analysis to creating visual reports. While it primarily deals with numbers and text, there are occasions when you may want to insert images directly into a cell. This can be especially useful when you want to add visual context to your data or enhance the appearance of your spreadsheet. In this gearupwindows article, we will guide you through the process of inserting pictures into Excel cells.
How to Insert a Picture Into a Cell in Excel?
To insert a picture into a cell in Microsoft Excel, follow these steps:-
Step 1. Before you can insert a picture into a cell, open Microsoft Excel and create a new worksheet. Ensure you have your spreadsheet ready with the cells where you want to insert images.
Step 2. Identify the cell where you want to insert the picture. You can select any cell in your worksheet. The picture will be inserted over this cell.
Step 3. To insert a picture into a cell in Excel, click on the cell where you want to insert the picture and then go to the “Insert” tab on the Excel ribbon.
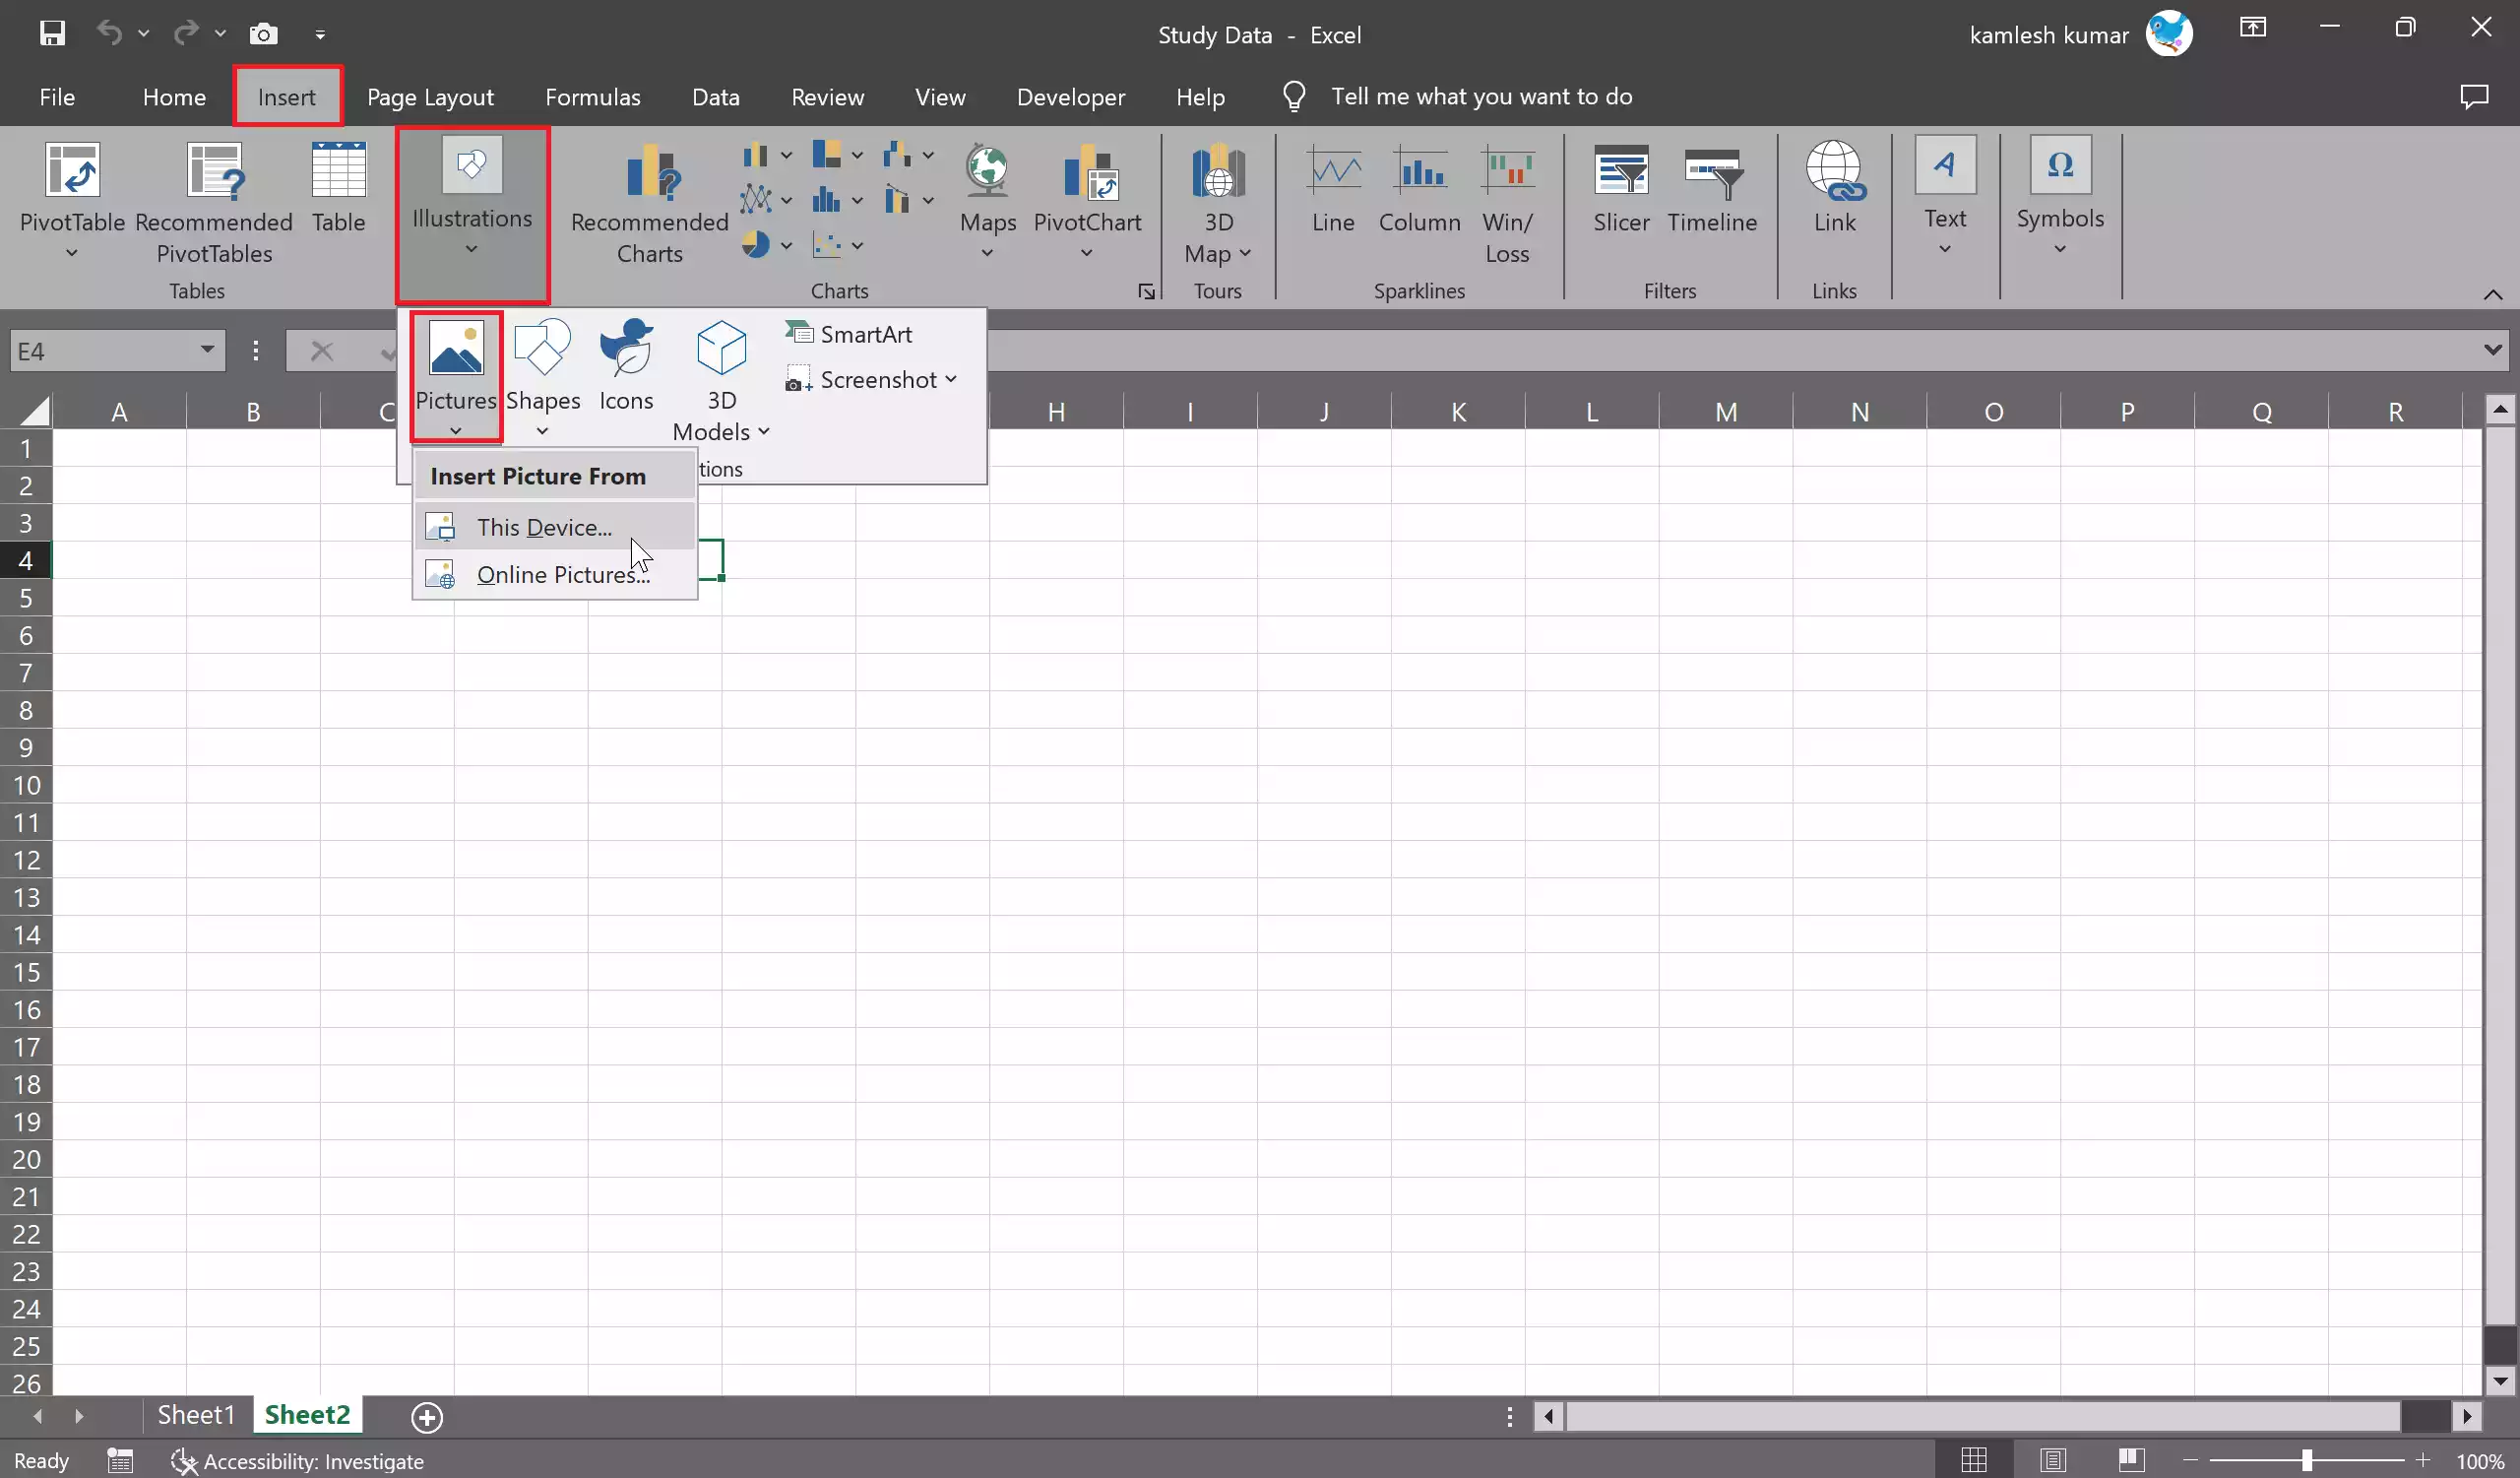
Step 4. In the “Illustrations” group, select “Pictures” > “This Device.” This will open the “Insert Picture” dialog box.
Note: Select “Online Pictures” in case you want to use images from Bing stores.
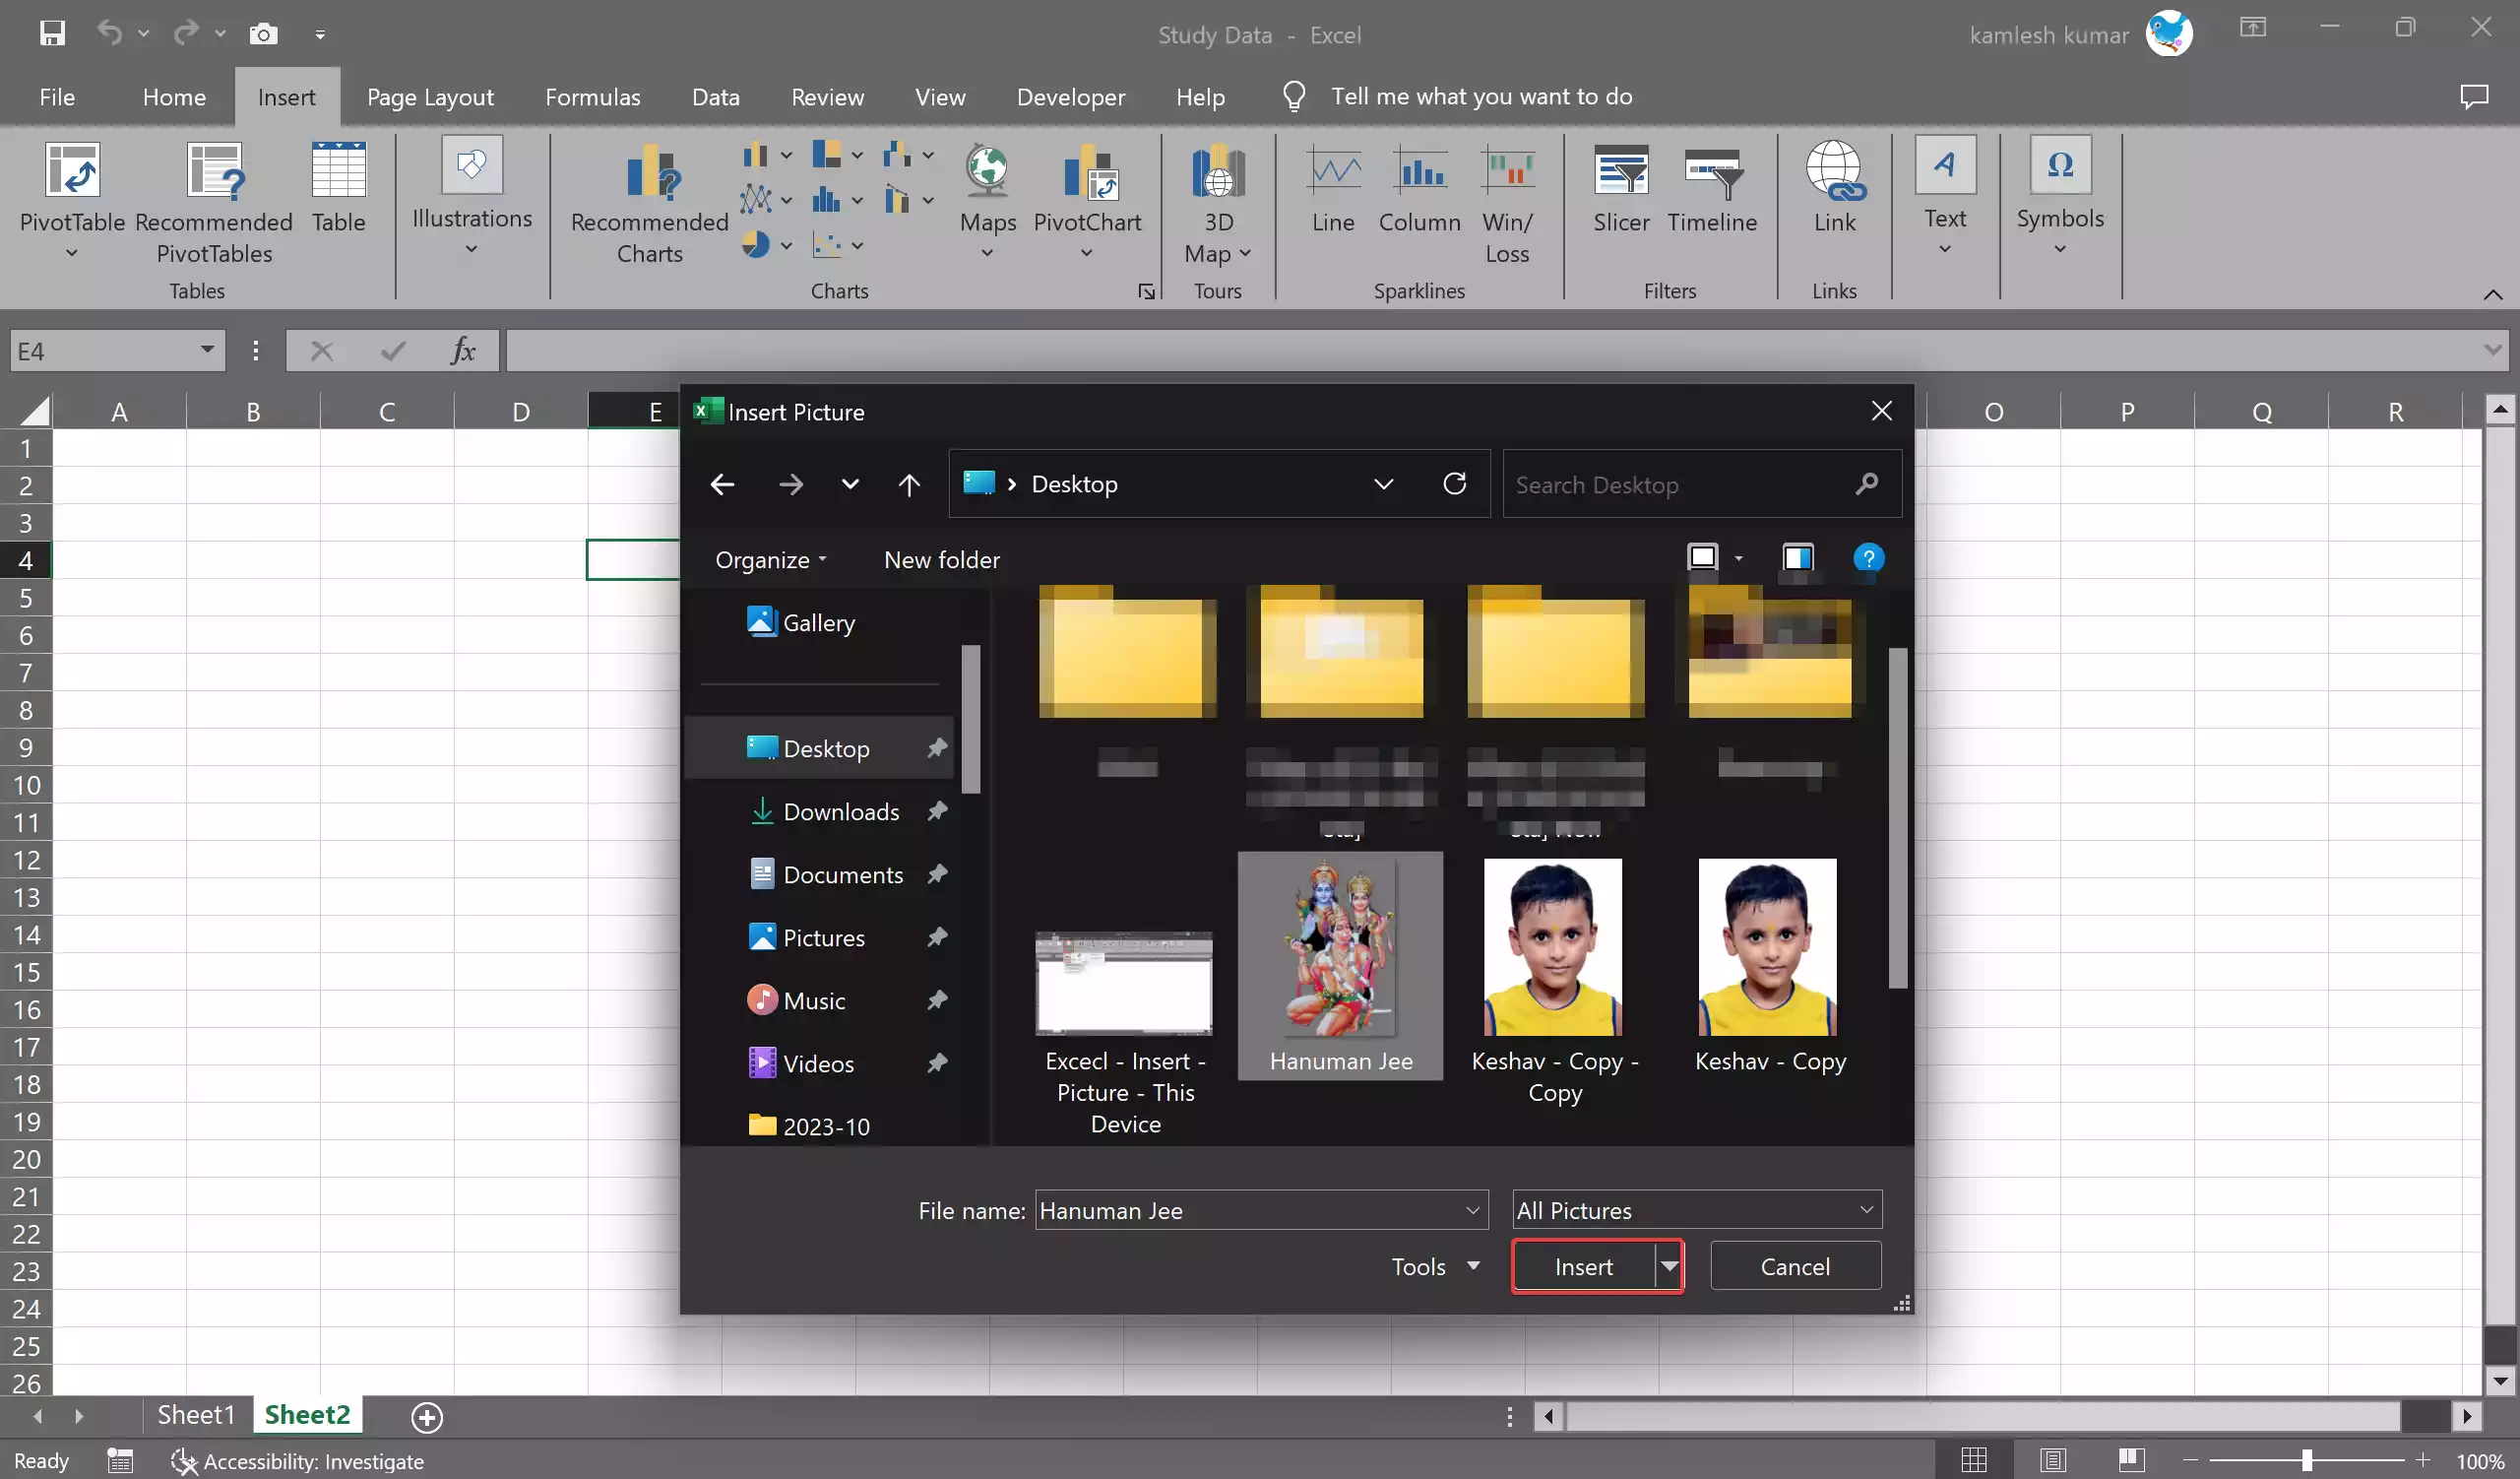
Step 5. Navigate to the location of your image, select it, and click “Insert.” The image will be inserted into the cell you selected.
Step 6. Once the picture is inserted into the cell, you may want to resize or reposition it:
– Click on the picture to select it. You will see handles around the edges of the image.
– To resize, click and drag one of the handles.
– To move the picture within the cell, click and drag it to the desired position.
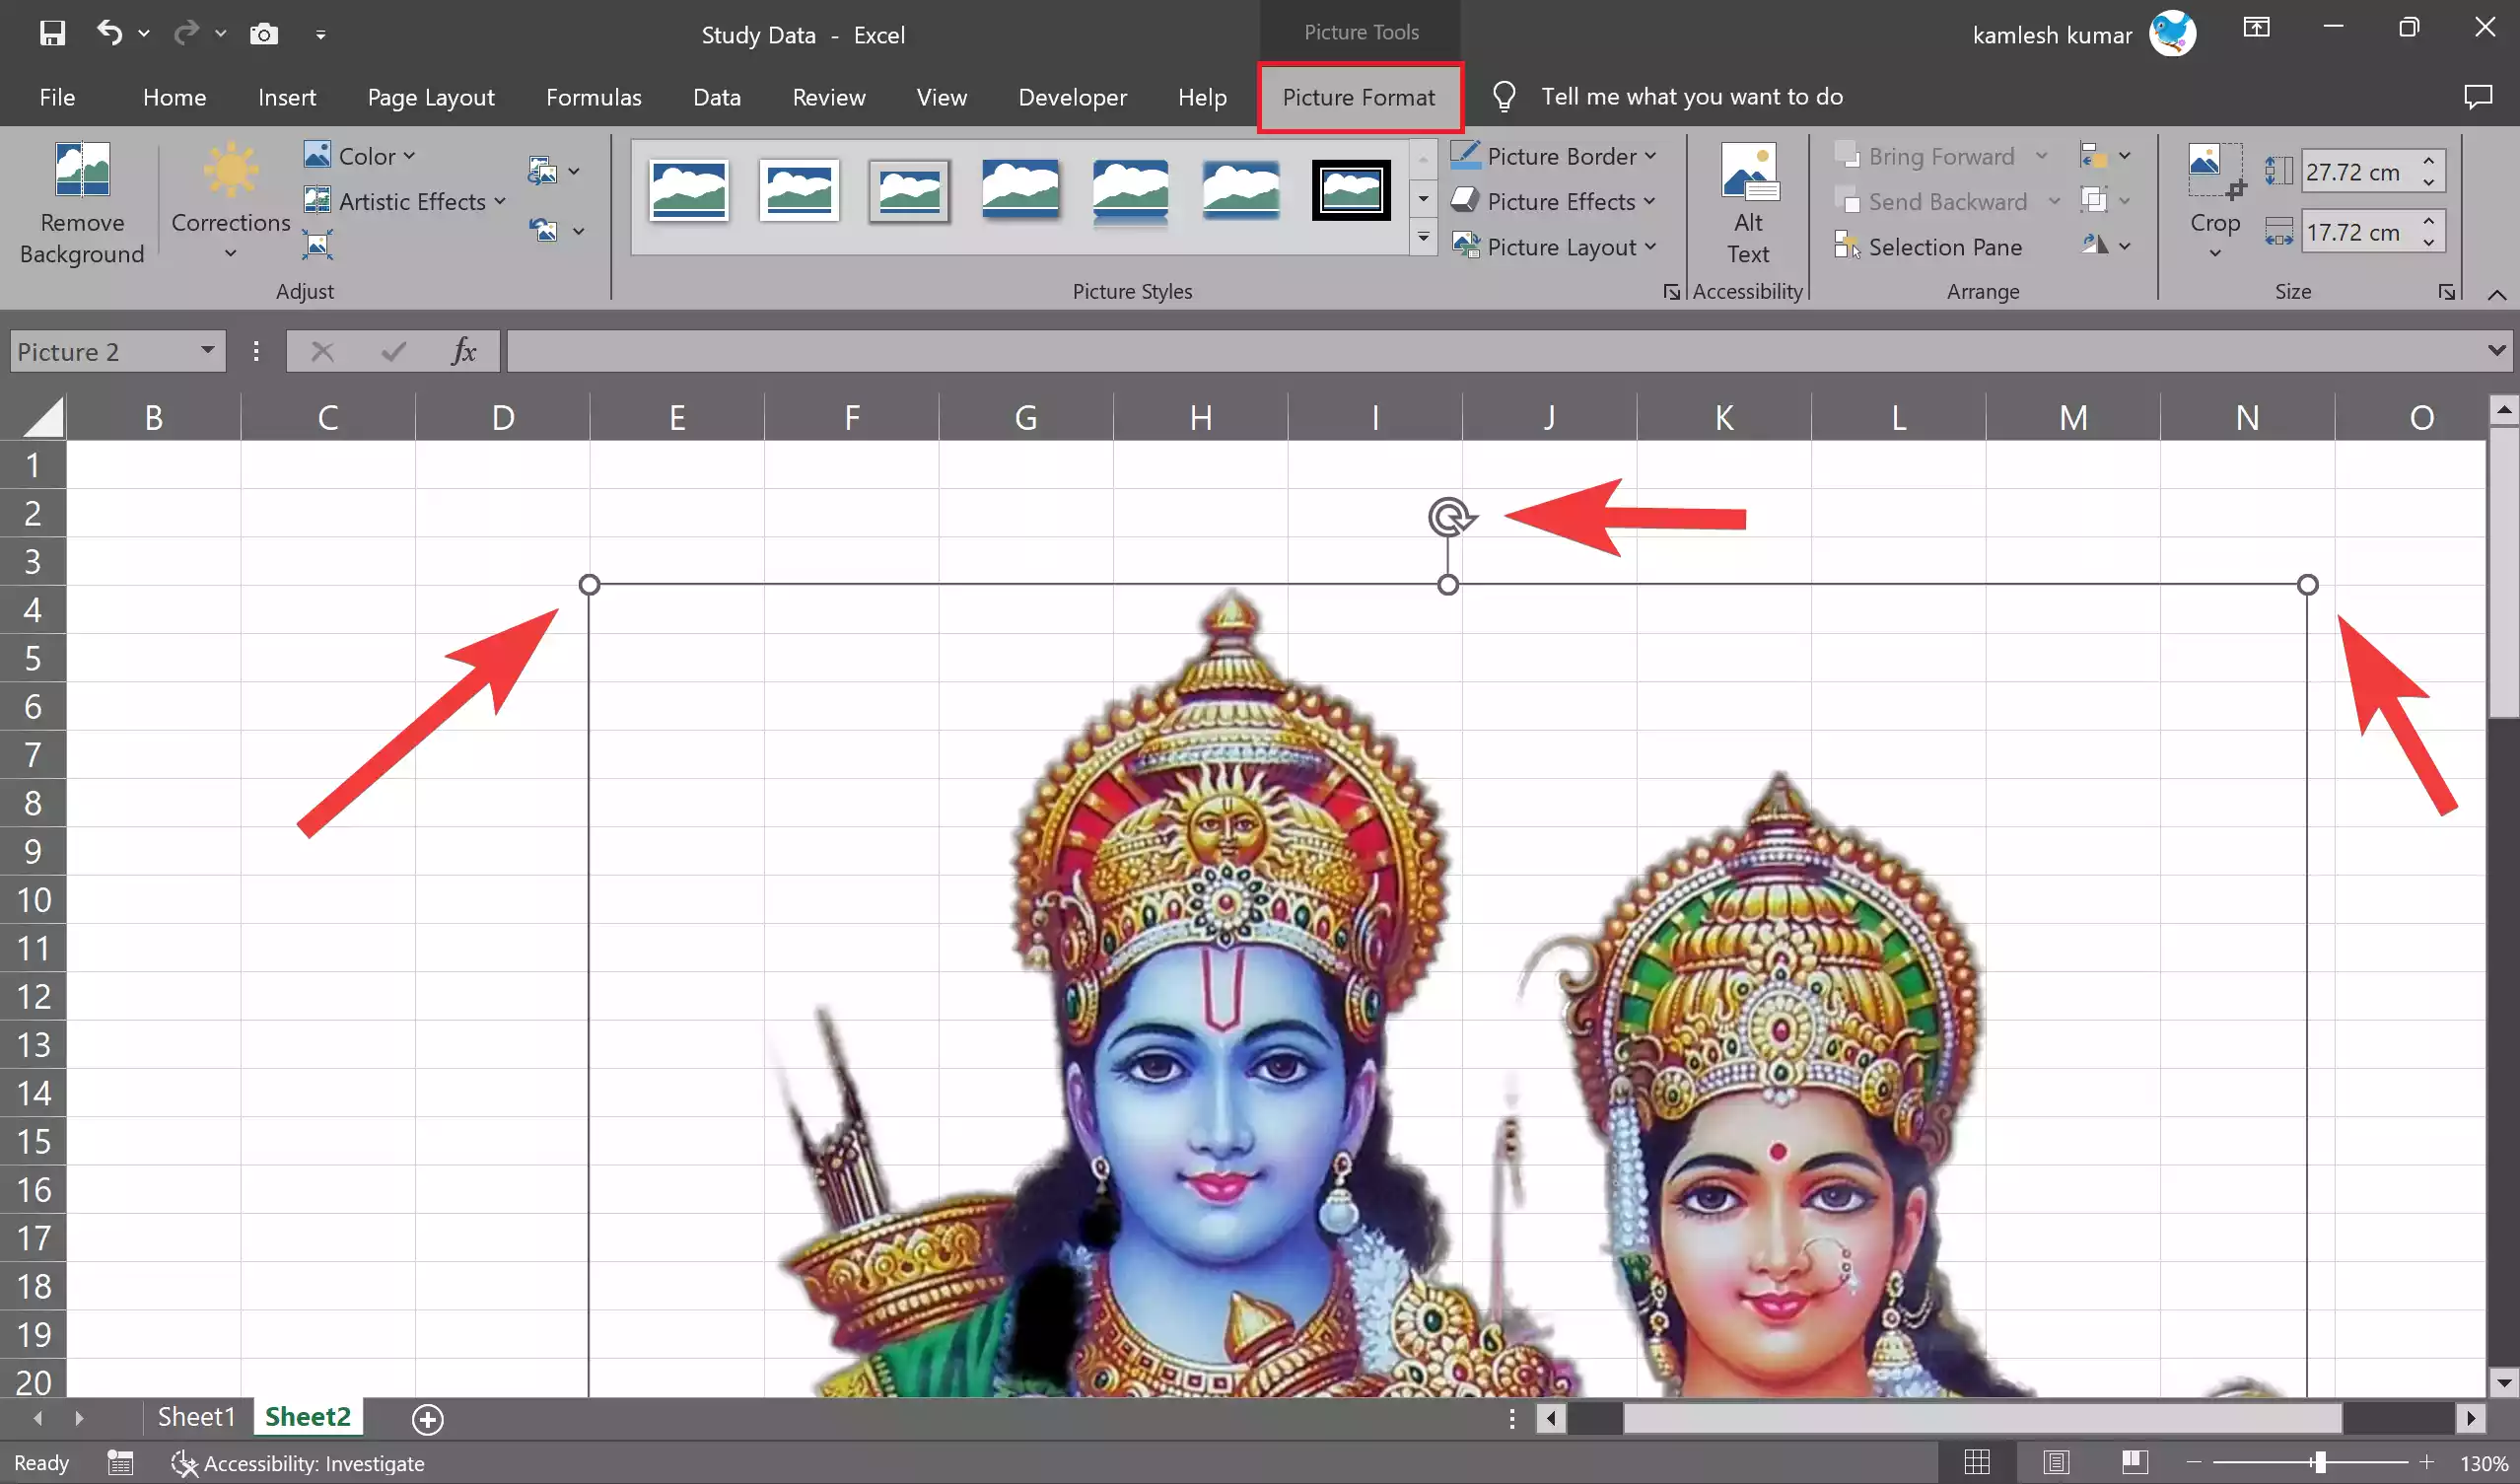
You can also use the Picture Format tab, which appears when the picture is selected, to fine-tune the picture’s appearance, such as adjusting its size, adding borders, or changing its alignment.
Step 7. Excel provides various options for managing how the picture interacts with cells. You can set how text flows around the image, add alt text for accessibility, and more. To access these options:-
– Select the picture.
– Go to the Picture Format tab, which appears when the picture is selected.
– In the “Accessibility” group, you can adjust alt text.
Step 8. You can also copy and paste pictures into Excel cells:-
– Copy the picture from another application (e.g., your web browser or an image editor) using the copy command (Ctrl+C or Command+C).
– Go to the Excel cell where you want to insert the picture and paste it (Ctrl+V or Command+V).
The picture will be pasted into the cell, and you can resize and reposition it as needed.
Step 9. Once you have inserted the pictures into your Excel cells and made all the necessary adjustments, make sure to save your worksheet by going to “File” and selecting “Save” or “Save As.” This will preserve your changes and ensure that the pictures are embedded in your Excel file.
Conclusion
In conclusion, inserting pictures into Excel cells is a straightforward process that can enhance the visual appeal and usefulness of your spreadsheets. Whether you’re using Excel for business reports, data presentations, or any other purpose, incorporating images can help convey information more effectively. By following the steps outlined in this article, you can easily insert, resize, and manage pictures in your Excel cells.
Also Read: How to Use the IMAGE Function in Microsoft Excel?
