Microsoft Excel is a powerful spreadsheet application known for its versatility when it comes to handling data and calculations. One lesser-known but incredibly useful feature is the `IMAGE` function, which allows you to insert images directly into your Excel worksheet. In this gearupwindows article, we will walk you through the process of using the `IMAGE` function in a user-friendly manner.
What is the IMAGE Function?
The `IMAGE` function is a new feature introduced in recent versions of Microsoft Excel, primarily in Microsoft 365 or Excel 2019 and later. It enables you to insert images dynamically into your spreadsheet based on a URL. This can be helpful in scenarios where you want to display live data, such as stock charts, product images, or any picture hosted online, directly within your Excel workbook.
Supported Image File Extensions by the `IMAGE` function in Microsoft Excel
The `IMAGE` function in Microsoft Excel supports several common image file extensions, including:-
1. JPEG (JPG): This is one of the most widely used image formats, and Excel can display JPEG images using the `IMAGE` function.
2. PNG: Portable Network Graphics (PNG) is another common image format that Excel can handle with the `IMAGE` function. PNG images are known for their lossless compression and support for transparent backgrounds.
3. GIF: Graphics Interchange Format (GIF) images are supported by the `IMAGE` function. GIFs can be used for simple animations as well.
4. BMP: Bitmap (BMP) images are supported. These are generally larger in file size and have no compression, making them less efficient for Excel use.
5. TIFF (TIF): Tagged Image File Format (TIFF) images can also be displayed in Excel using the `IMAGE` function. TIFF images are often used for high-quality, uncompressed images.
6. SVG: Scalable Vector Graphics (SVG) is supported in some versions of Excel, such as Excel 2019 and Microsoft 365. SVG images are vector graphics and can be scaled without loss of quality.
How to Use the IMAGE Function in Microsoft Excel?
Let’s break down the process of using the `IMAGE` function in Excel into easy-to-follow steps:-
Step 1. Begin by opening Microsoft Excel on your computer. Ensure that you are using Excel 2019 or later, as the `IMAGE` function is not available in older versions.
Step 2. You can either create a new workbook or open an existing one, depending on your needs. The `IMAGE` function can be used in any worksheet.
Step 3. Choose the cell where you want to insert the image. Click on the cell to select it. This is where the image will be displayed.
Step 4. In the selected cell, type the following formula:-
=IMAGE("URL")
Replace `”URL“` with the web address (URL) of the image you want to insert. For example, if you want to insert an image from a website, the formula might look like this:-
=IMAGE("https://i0.wp.com/gearupwindows.com/wp-content/uploads/2021/08/Fliqlo-Screensaver.png")
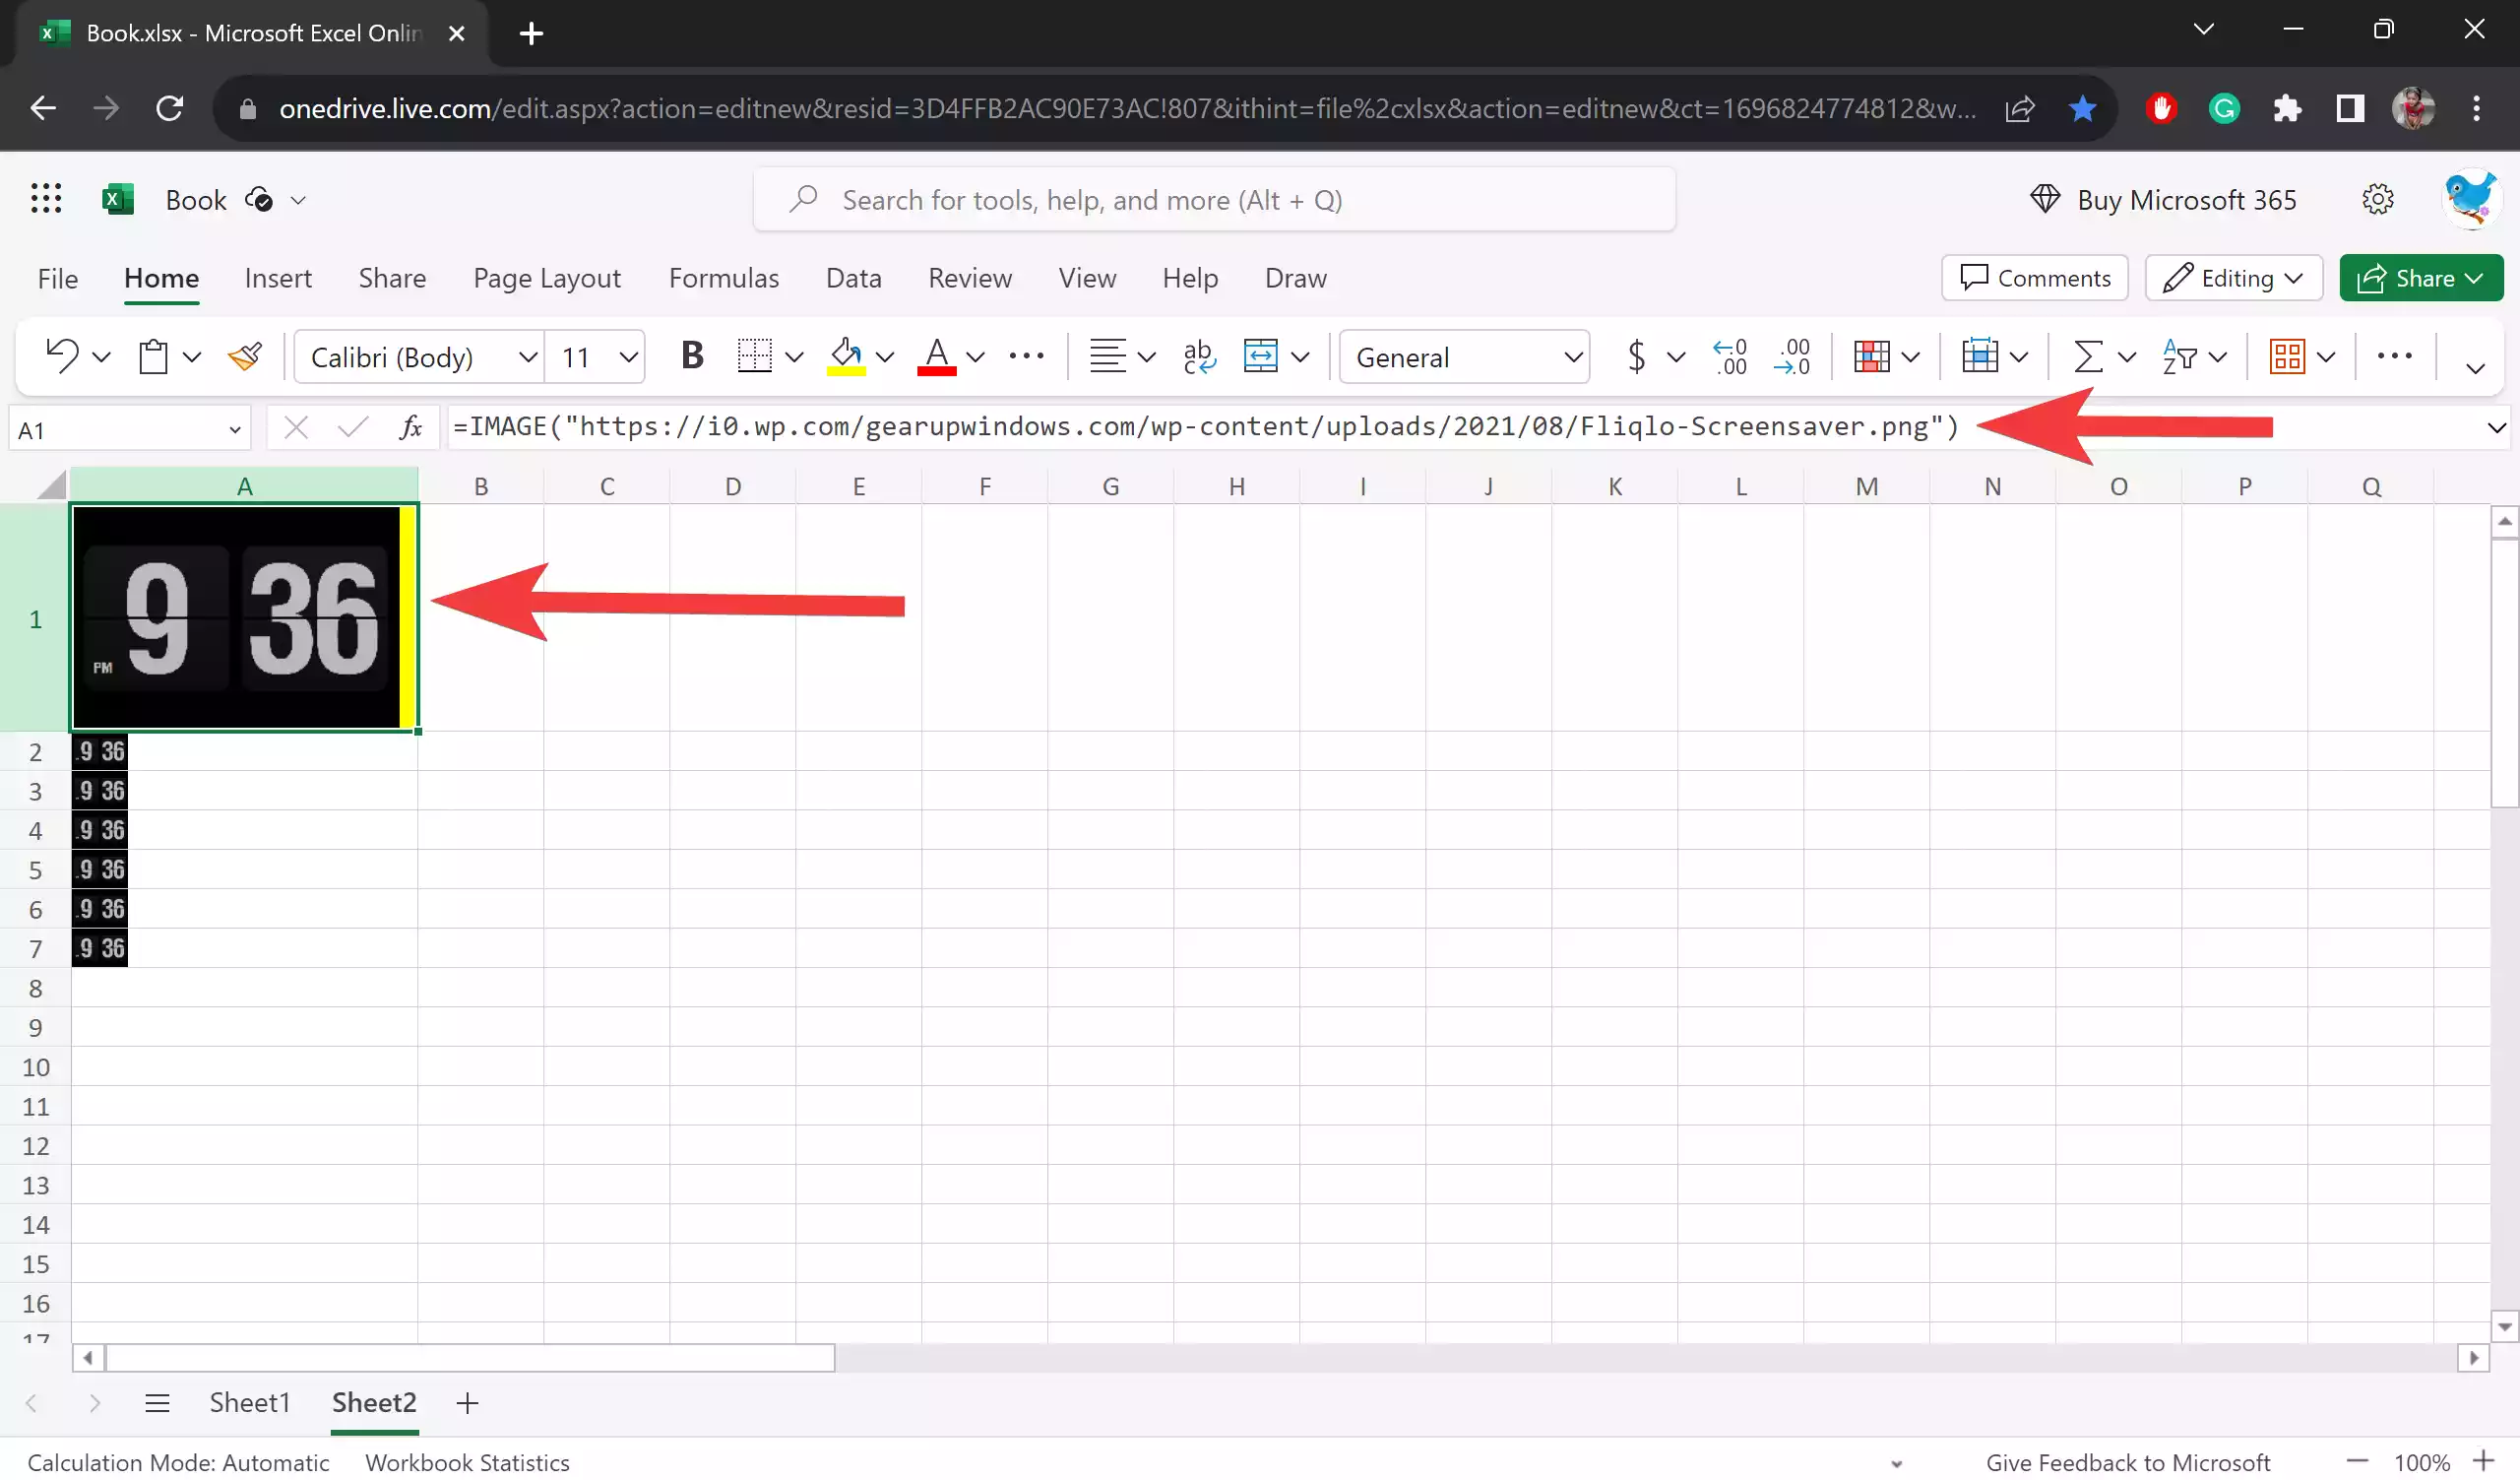
Step 5. After entering the formula, press the `Enter` key. Excel will retrieve the image from the specified URL and display it in the selected cell.
Step 6. Adjust Image Size (Optional): By default, Excel will insert the image at its original size. However, you can adjust the size of the image by resizing the cell. Simply drag the cell borders to make it larger or smaller.
Step 7. Modify the Image (Optional): You can further customize the image by applying Excel’s formatting and design tools. For instance, you can apply borders, adjust the alignment, or add captions to the image.
Step 8. Refresh the Image (if necessary): The beauty of the `IMAGE` function is that it can display dynamic content from a URL. If the source image on the internet changes, your image in Excel will also update. To manually refresh the image, select the cell and press `F9` on your keyboard, or right-click and choose “Refresh Image.”
Tips and Best Practices
1. Make sure the URL you provide is a direct link to an image file (e.g., a .jpg, .png, or .gif). Excel cannot display images from websites that require authentication or have other restrictions.
2. Ensure that the image URL is accessible and the image is hosted on a reliable server. If the image is moved or deleted, the link will break, and the image in Excel will not display.
3. To prevent broken links, you can download the image and insert it directly into Excel. This method is more static but ensures that the image remains available even if the online source changes.
4. Keep in mind that inserting multiple images using the `IMAGE` function can significantly slow down your spreadsheet, as each image is dynamically fetched from the web.
In Conclusion
The `IMAGE` function in Microsoft Excel is a powerful feature that allows you to insert images directly from the web into your spreadsheet. It’s a great tool for displaying live data, product images, charts, and more. By following the step-by-step guide outlined in this article and applying the best practices, you can use the `IMAGE` function to enhance your Excel workbooks and make them more visually appealing and informative.
