Windows 11 comes with a built-in PDF viewer that allows you to open and view PDF files. However, it might not have all the features you need or be as user-friendly as you would like. If you’re looking for an alternative PDF viewer for Windows 11, you may want to consider Brave, a free and open-source web browser that also comes with a built-in PDF viewer. Brave has many useful features that make it an excellent choice for viewing PDF files, such as a clean and easy-to-use interface, fast performance, and the ability to open multiple PDF files simultaneously.
In this article, we will show you how to make Brave the default PDF viewer on Windows 11. This will allow you to open and view PDF files in Brave by default instead of using the built-in PDF viewer in Windows 11 or any other PDF viewer you may have installed. Making Brave the default PDF viewer is a simple process that can be done in just a few steps, and we will guide you through each of them to help you get started.
How to Make Brave the Default PDF Viewer on Windows 11?
To make Brave the default PDF viewer on your Windows 11 machine, follow these steps:-
Step 1. Open the Settings app on your Windows 11 machine by clicking the Start button and selecting the gear icon or using the Windows key + I keyboard shortcut.
Step 2. In the Settings app, click on the “Apps” category in the left sidebar.
Step 3. Then, click on the “Default apps” tab on the right sidebar.
Step 4. In the “Set a default for a file type or link type” search box, type “.PDF” to filter the results.
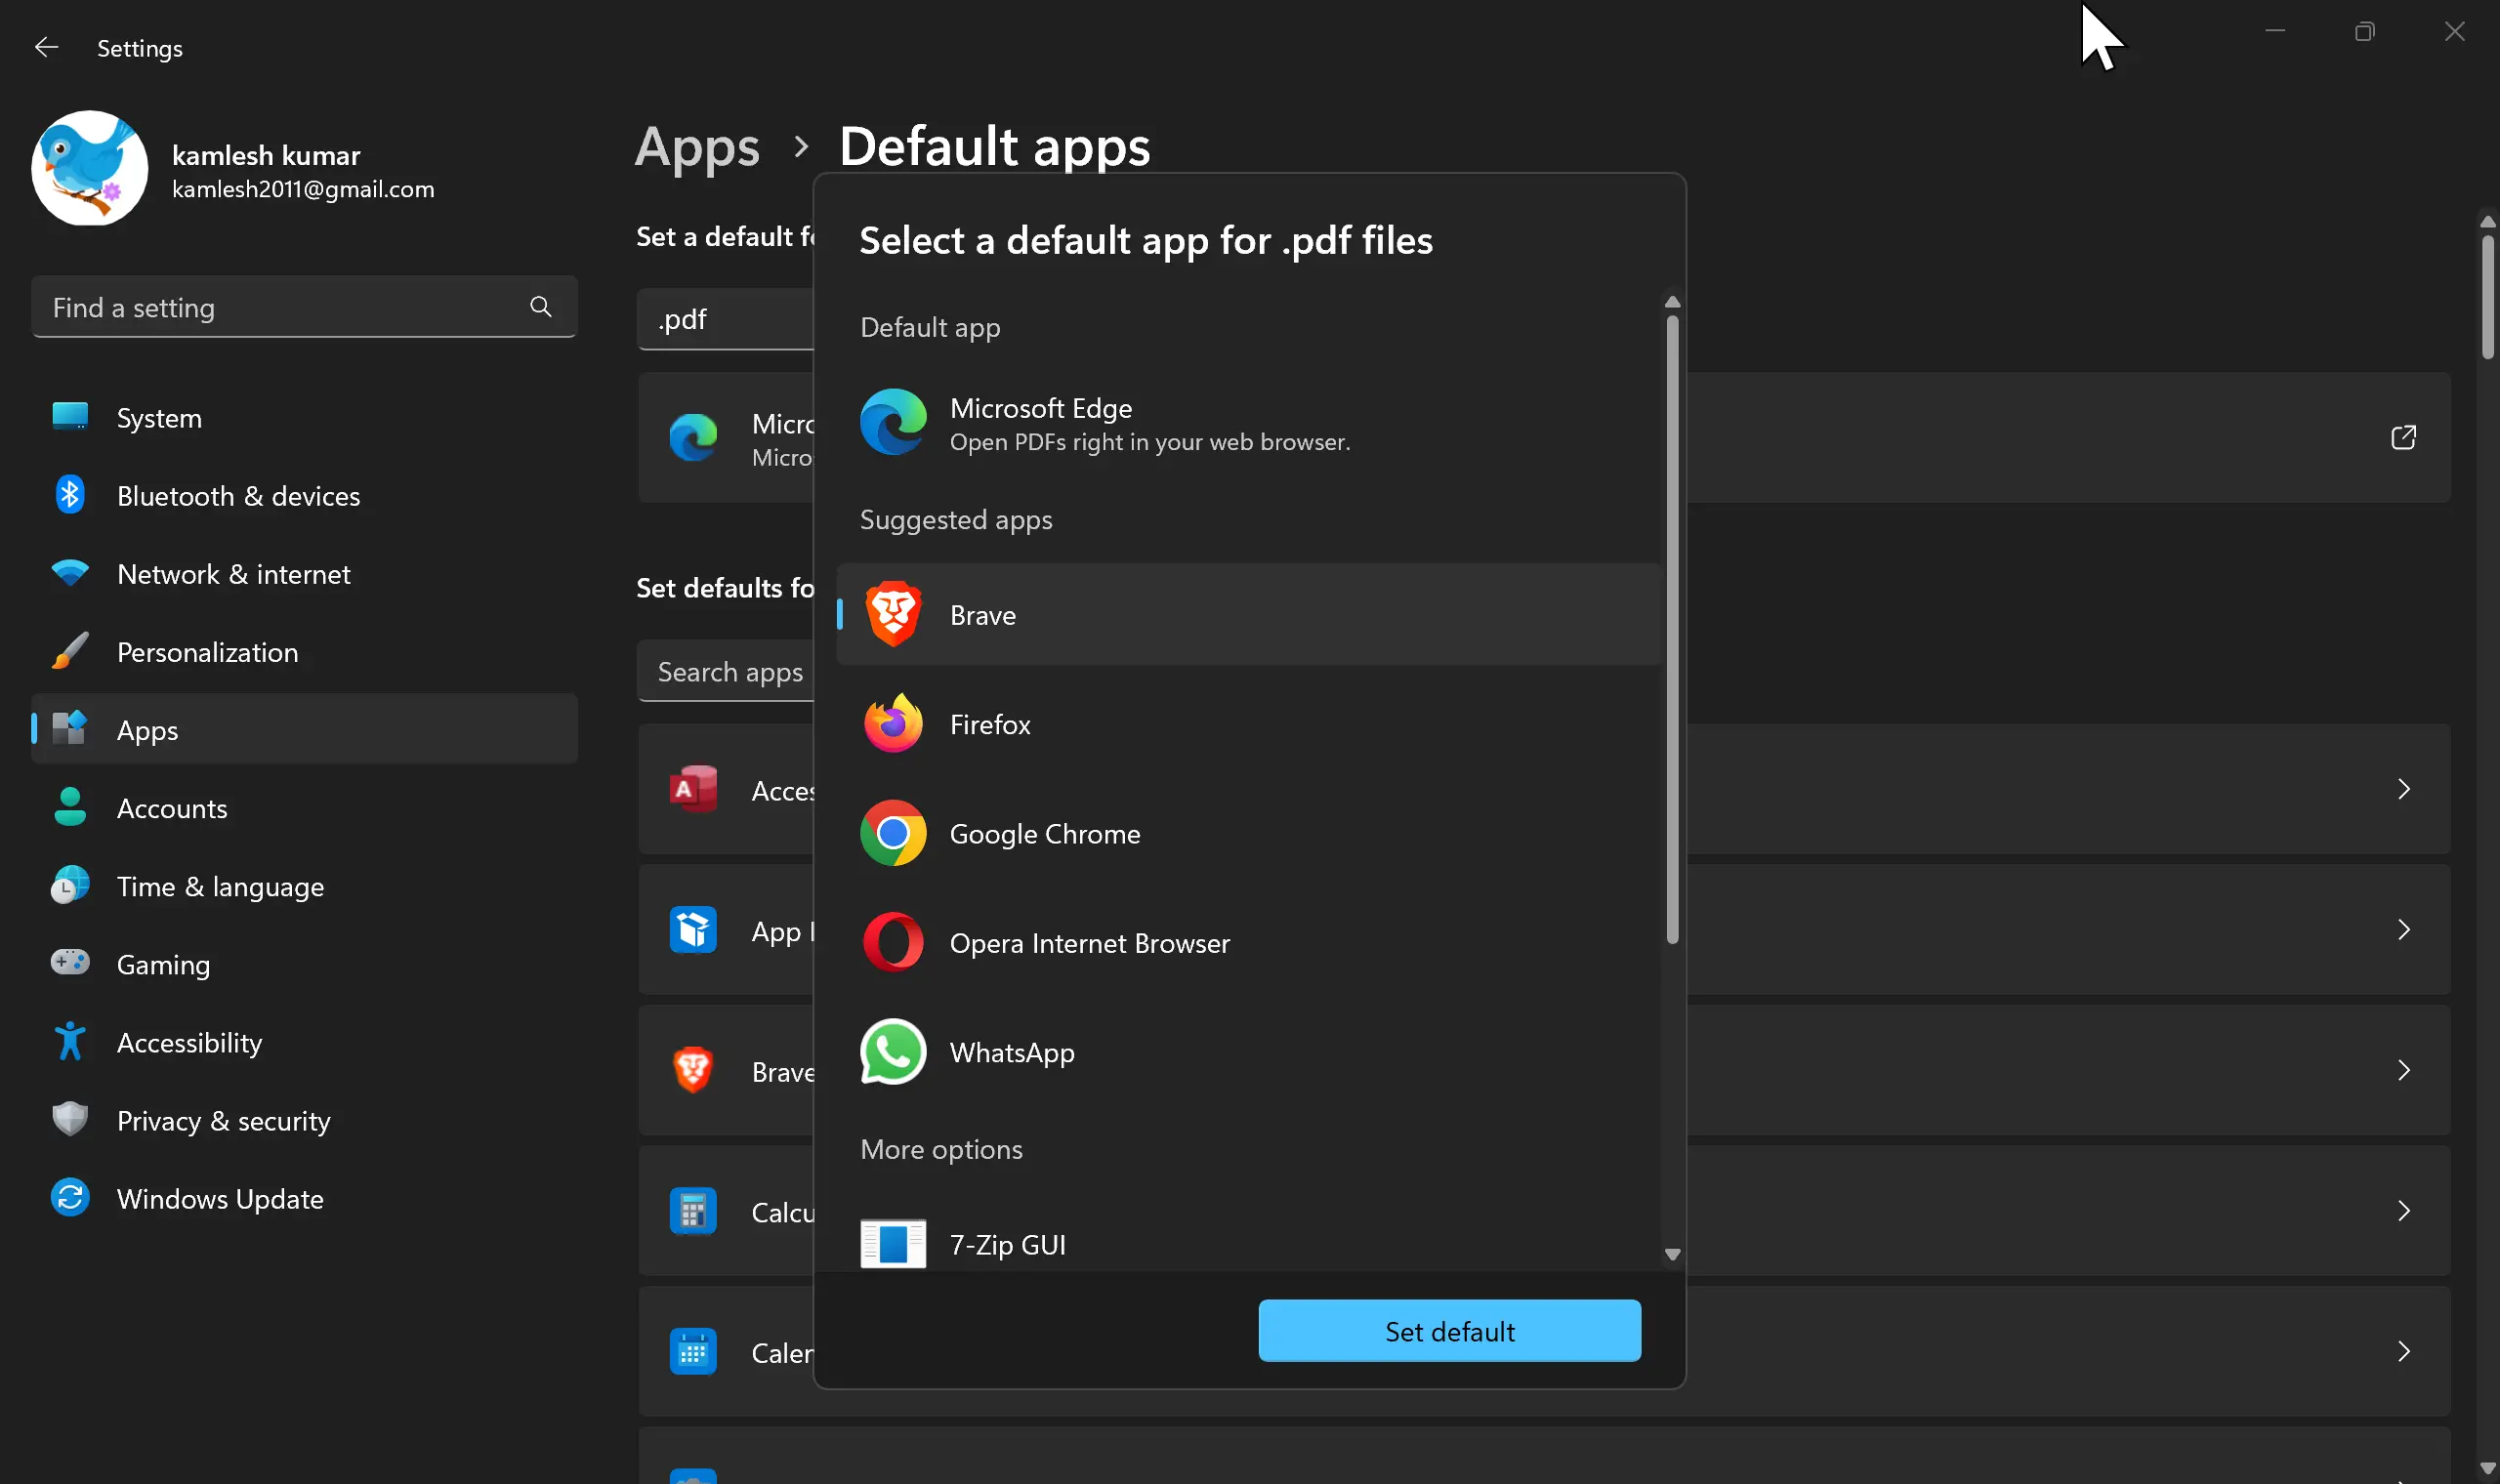
Step 5. Once you see the default PDF app, click on it to expand the settings.
Step 6. Under the “Suggested apps” section, click Brave to set it as your default PDF viewer.
Step 7. Finally, click the “Set default” button to apply your changes.
Congratulations, you have successfully set Brave as your default PDF viewer on Windows 11.