Renaming multiple files with specific patterns or replacing certain letters in their filenames can be a tedious task if done manually. However, with the help of Bulk Rename Utility, a powerful file renaming software for Windows 11 and 10, you can easily replace specific letters in multiple filenames with just a few simple steps. In this user-friendly article, we will guide you through the process, enabling you to save time and efficiently manage your files.
How to Replace Specific Letters From Multiple Filenames on Windows 11 or 10?
Follow these steps to replace specific letters from multiple filenames on Windows 11 or 10:-
Step 1. Begin by downloading Bulk Rename Utility from the official website. Once the download is complete, double-click the installer file and follow the on-screen instructions to install the software on your Windows 11 or 10 computer. Launch the application after installation.
Step 2. In the Bulk Rename Utility window, navigate to the folder that contains the files you want to rename. You can either click the “Add” button to manually select the files or simply drag and drop them into the application window. All the selected files will be displayed in the file list.
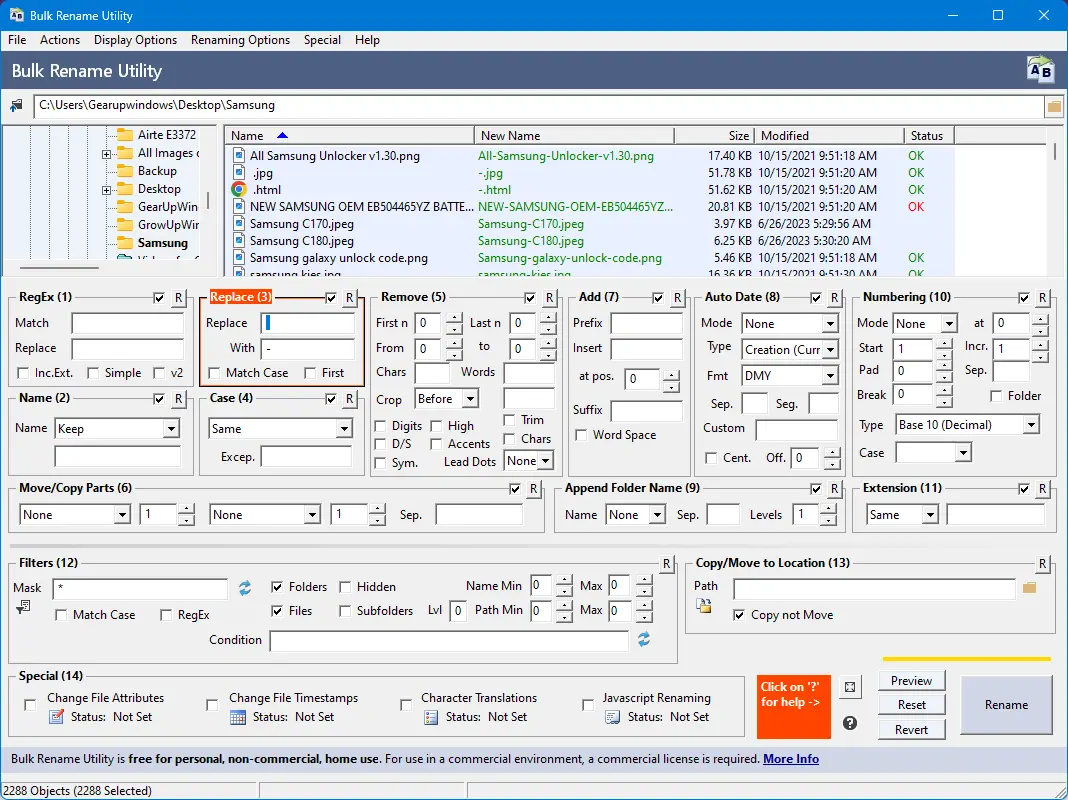
Step 3. To replace specific letters in the filenames, click on the “Replace” box under the “Replace (3)” option located at the top of the Bulk Rename Utility window.
Step 4. In the “Replace” box, enter the letter or characters that you want to replace in the filenames. For example, if you want to replace the letter “A” with the letter “B” in all the filenames, type “A” in the “Replace” field and “B” in the “With” field.
Step 5. If needed, you can further customize the renaming process by specifying additional options. For instance, you can choose whether to replace the specified letters throughout the entire filename or only in the file extension. Additionally, you can select the renaming scope, such as renaming files in subfolders or excluding specific files.
Step 6. Before proceeding with the renaming process, click the “Preview” button to see how the files’ names will be changed. This allows you to verify that the specified letters are being replaced correctly. If everything looks satisfactory, click the “Rename” button to apply the changes.
Step 7. A confirmation window will appear, prompting you to confirm the renaming operation. Review the changes one final time and click “Yes” to proceed. Bulk Rename Utility will swiftly rename the selected files, replacing the specified letters in their filenames.
Step 8. After the renaming process is complete, navigate to the folder where the files are located and ensure that the filenames have been updated as desired. You should observe that the specified letters have been successfully replaced in the filenames.
Compatibility
Bulk Rename Utility is compatible with all versions of Windows, e.g. Windows 11, 10, 8, 7, Vista, XP, Windows Server 2022, 2019, 2016, 2012, 2008, 2003, and 2000.
Conclusion
Bulk Rename Utility offers a convenient solution for efficiently renaming multiple files on Windows 11 or 10. By following the step-by-step instructions provided in this user-friendly article, you can effortlessly replace specific letters in multiple filenames, saving you valuable time and simplifying your file management tasks. With its intuitive interface and powerful features, Bulk Rename Utility streamlines the process of bulk file renaming, allowing you to organize your files effectively. Give it a try and experience the convenience of renaming files in bulk with ease.