In today’s interconnected world, where cybersecurity threats loom large, ensuring robust security measures on your Windows 11 computer is paramount. The Local Security Policy settings play a crucial role in defining security configurations, enforcing system-wide rules, and safeguarding your system against potential vulnerabilities. However, there may be instances where misconfigurations or alterations to these settings lead to operational issues or security concerns. In such cases, resetting the Local Security Policy settings to their defaults becomes imperative. In this gearupwindows guide, we’ll walk you through the step-by-step process of resetting Local Security Policy settings to their defaults in Windows 11, ensuring optimal security and stability for your system.
Understanding Local Security Policy Settings
Before diving into the reset process, it’s essential to grasp the significance of Local Security Policy settings. These settings, accessible via the Local Security Policy tool (secpol.msc), enable system administrators to configure various security policies on a local Windows 11 computer. These policies encompass a wide array of parameters, including user rights assignments, security options, account policies, and more, governing how users interact with the system and the privileges they possess.
Reasons to Reset Local Security Policy Settings
Resetting Local Security Policy settings to their defaults serves multiple purposes. Primarily, it allows users to rectify any issues stemming from erroneous configurations or unintended modifications. Whether due to user error, software conflicts, or malicious activities, restoring the settings to their original state can resolve operational disruptions and bolster system integrity. Moreover, periodic resets serve as a proactive measure to maintain a baseline level of security, mitigating potential risks posed by outdated or misconfigured policies.
Prerequisites for Resetting Local Security Policy Settings
Before proceeding with the reset process, ensure that you meet the following prerequisites:-
1. Administrator Privileges: You must have administrative privileges on your Windows 11 system to perform the reset operation.
2. Backup: While resetting Local Security Policy settings typically doesn’t result in data loss, it’s prudent to create a backup of critical files and settings to mitigate any unforeseen issues.
How to Reset Local Security Policy Settings to Their Defaults in Windows 11?
Follow these comprehensive steps to reset Local Security Policy settings to their defaults in Windows 11:-
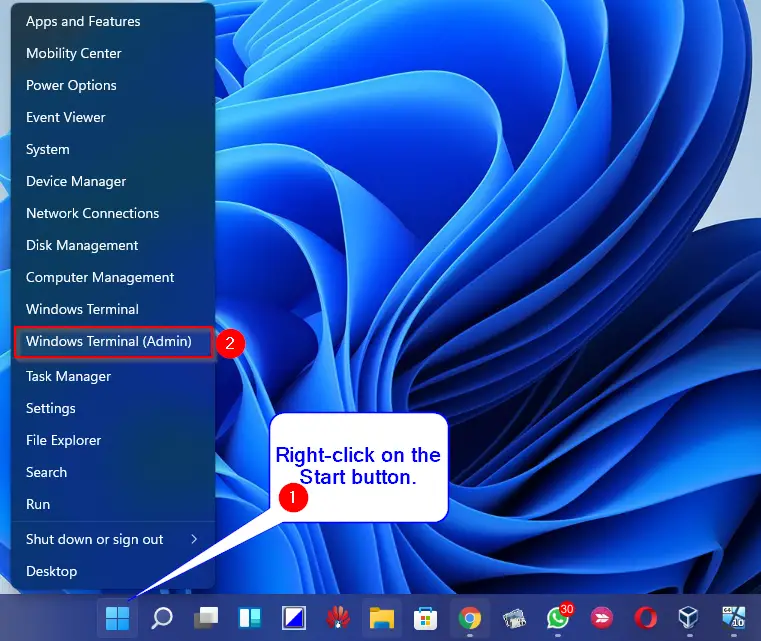
Step 1. Right-click on the Windows Start menu and select “Terminal (Admin)” from the context menu. This ensures that you have elevated privileges to execute the reset command.
Step 2. Depending on your preference, you can choose either PowerShell or Command Prompt to execute the reset command. Both methods achieve the same outcome.
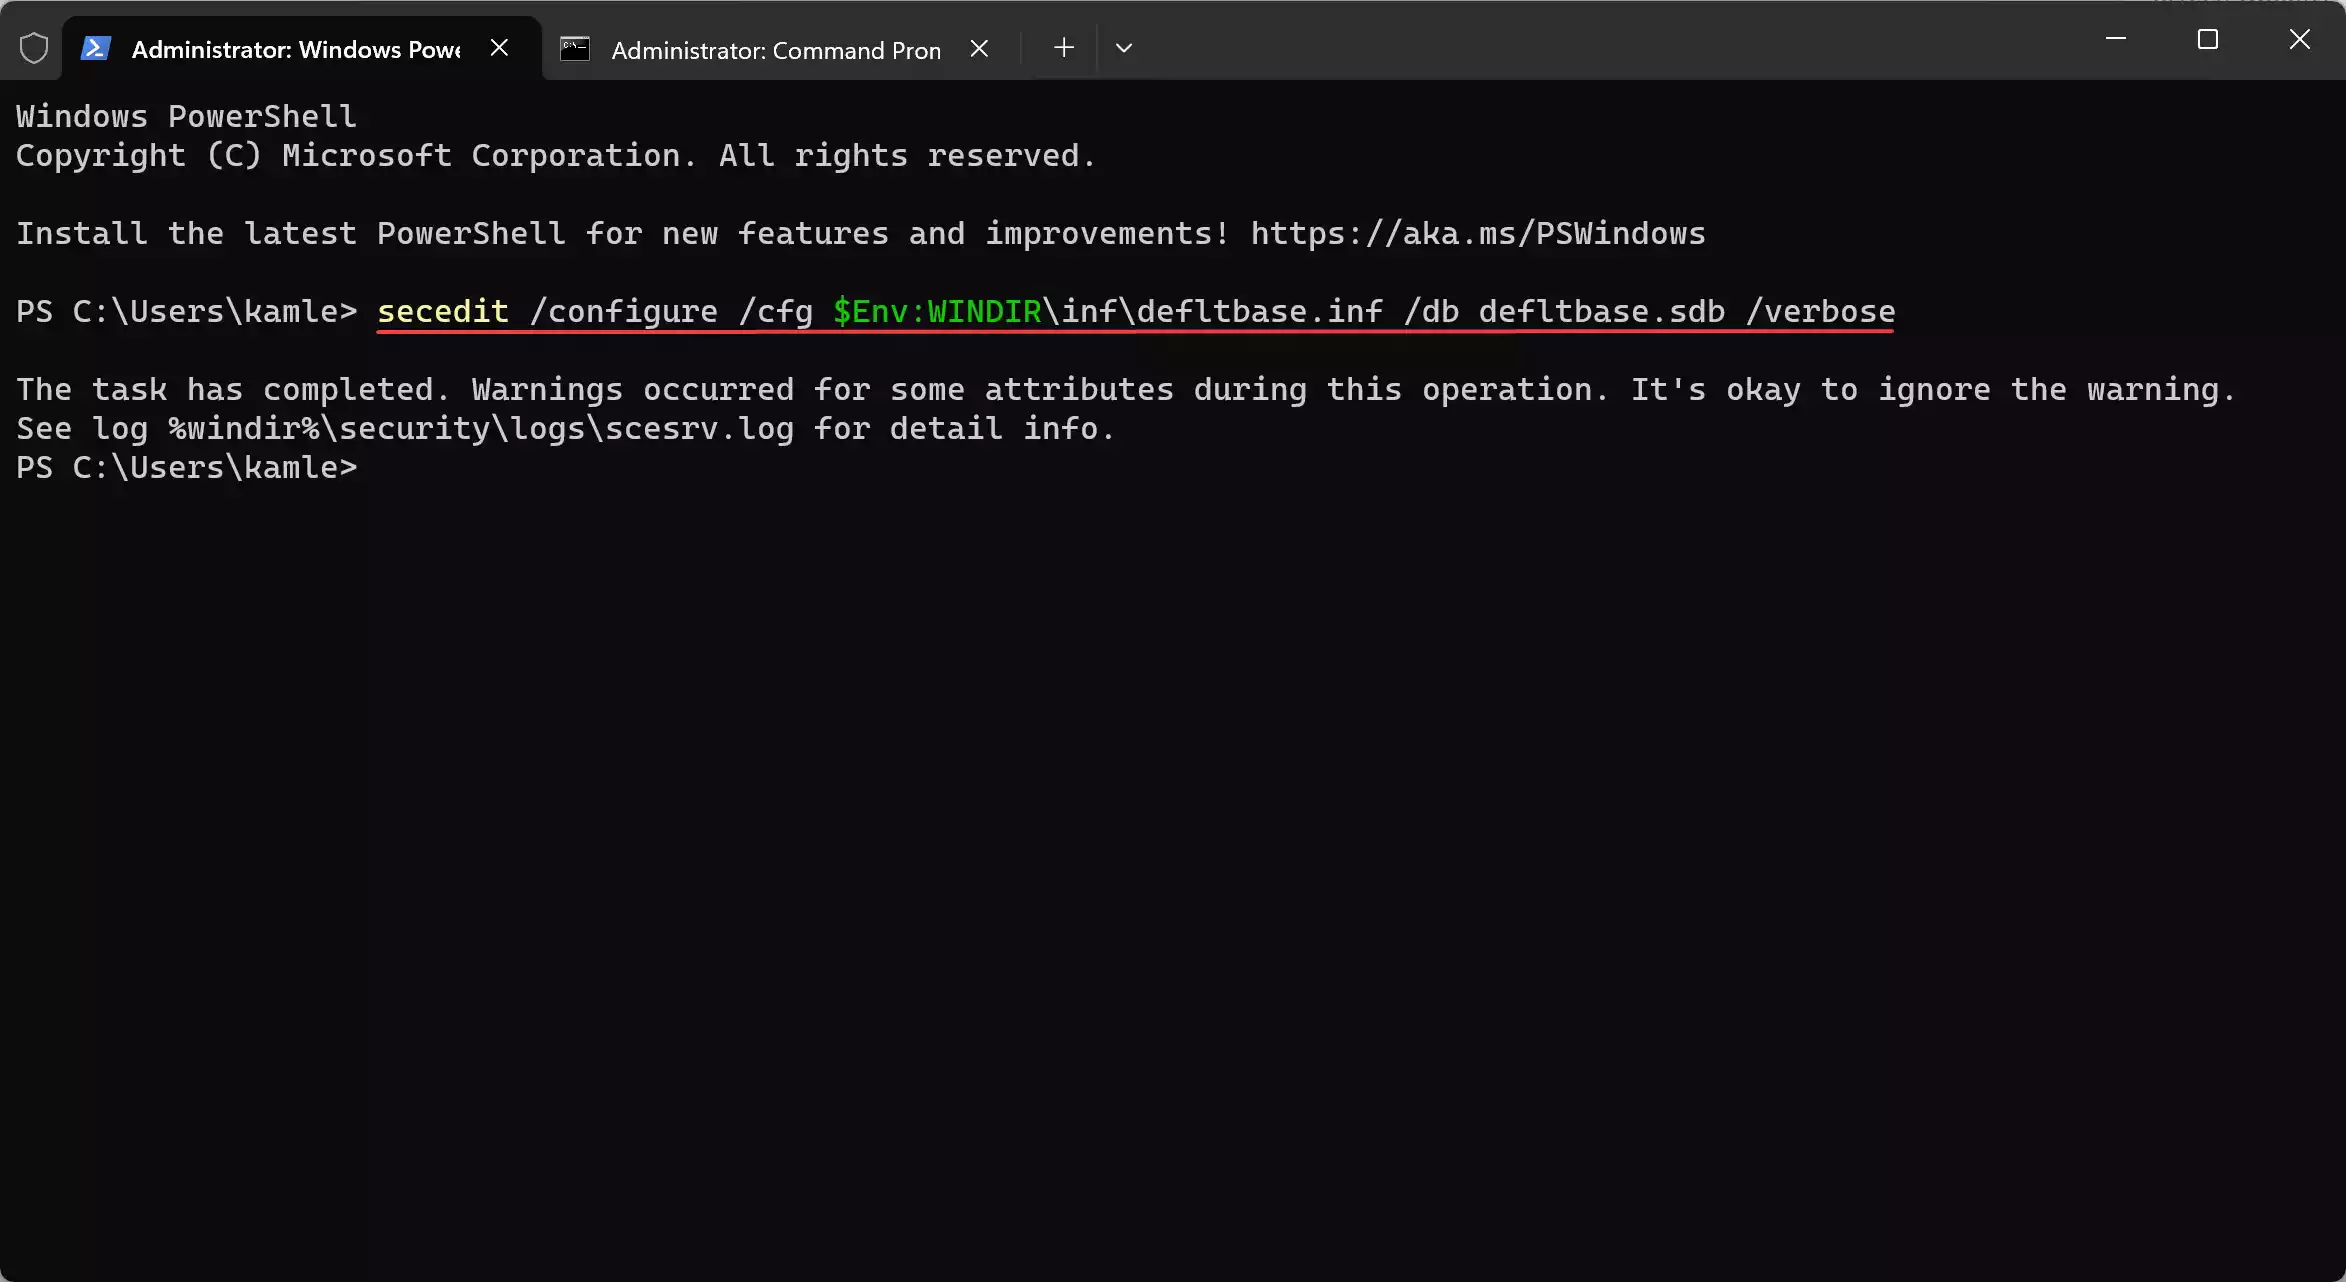
Step 3. In the PowerShell console, input the following command:-
secedit /configure /cfg $Env:WINDIR\inf\defltbase.inf /db defltbase.sdb /verbose
Alternatively, if using Command Prompt, input the following command:-
secedit /configure /cfg %windir%\inf\defltbase.inf /db defltbase.sdb /verbose
Step 4. Once the command execution is complete, restart your computer to apply the changes effectively.
Conclusion
In conclusion, resetting Local Security Policy settings to their defaults in Windows 11 is a straightforward yet crucial task in maintaining system security and stability. By following the step-by-step guide outlined above, users can effectively revert any misconfigurations or alterations, ensuring optimal performance and protection against potential threats. Remember to exercise caution when making changes to system settings and always maintain regular backups to safeguard your data. With proactive maintenance and adherence to best practices, you can fortify your Windows 11 system against cybersecurity risks and enjoy a seamless computing experience.