In the realm of technology, understanding the specific details of your laptop is crucial for various tasks, from troubleshooting to seeking compatible drivers. Among these details, the laptop model name stands as a pivotal identifier, distinguishing your device from others in the market. In this gearupwindows guide, we’ll navigate through Windows 11 to uncover multiple methods to find your laptop model name, ensuring you have the necessary information at your fingertips.
Importance of Knowing Your Laptop Model Name
Before delving into the methods of finding your laptop model name in Windows 11, it’s essential to grasp why this information holds significance. The laptop model name serves as a unique identifier, providing insights into your device’s specifications, manufacturer, and compatibility with software and hardware components. Whether you’re troubleshooting technical issues, seeking driver updates, or contacting customer support, knowing your laptop model name streamlines the process and facilitates efficient resolution.
How to Find a Laptop Model Name in Windows 11?
Follow one of the below-mentioned methods to find out your Laptop model name on Windows 11:-
Method 1: Utilizing Windows Settings
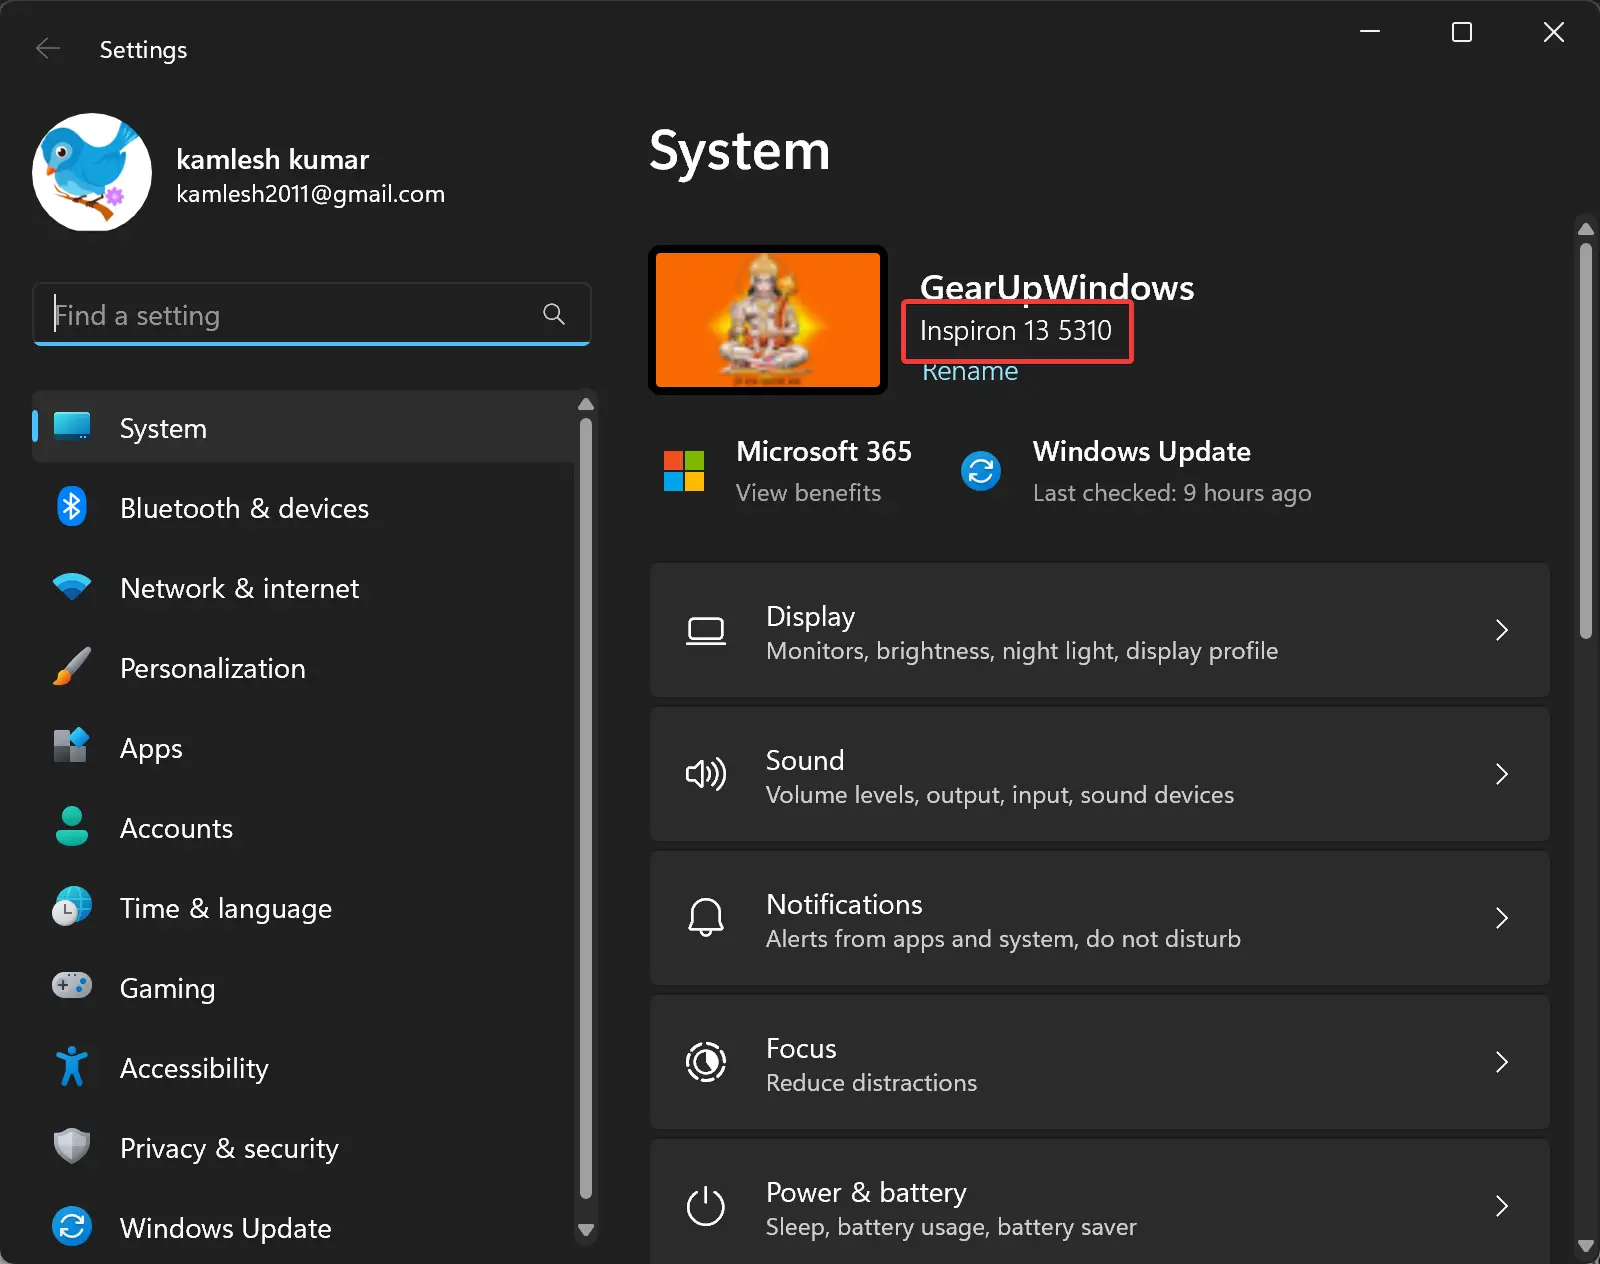
Step 1. Begin by opening the Windows Settings app. You can do this by clicking on the Start menu and selecting “Settings,” or by using the keyboard shortcut (Windows key + I).
Step 2. Select the “System” category in the left sidebar and on the right you can view the model number of your laptop.
Step 3. Alternatively, within the Settings app, click on the “System” category. Then, select the “About” tab from the right-hand menu.
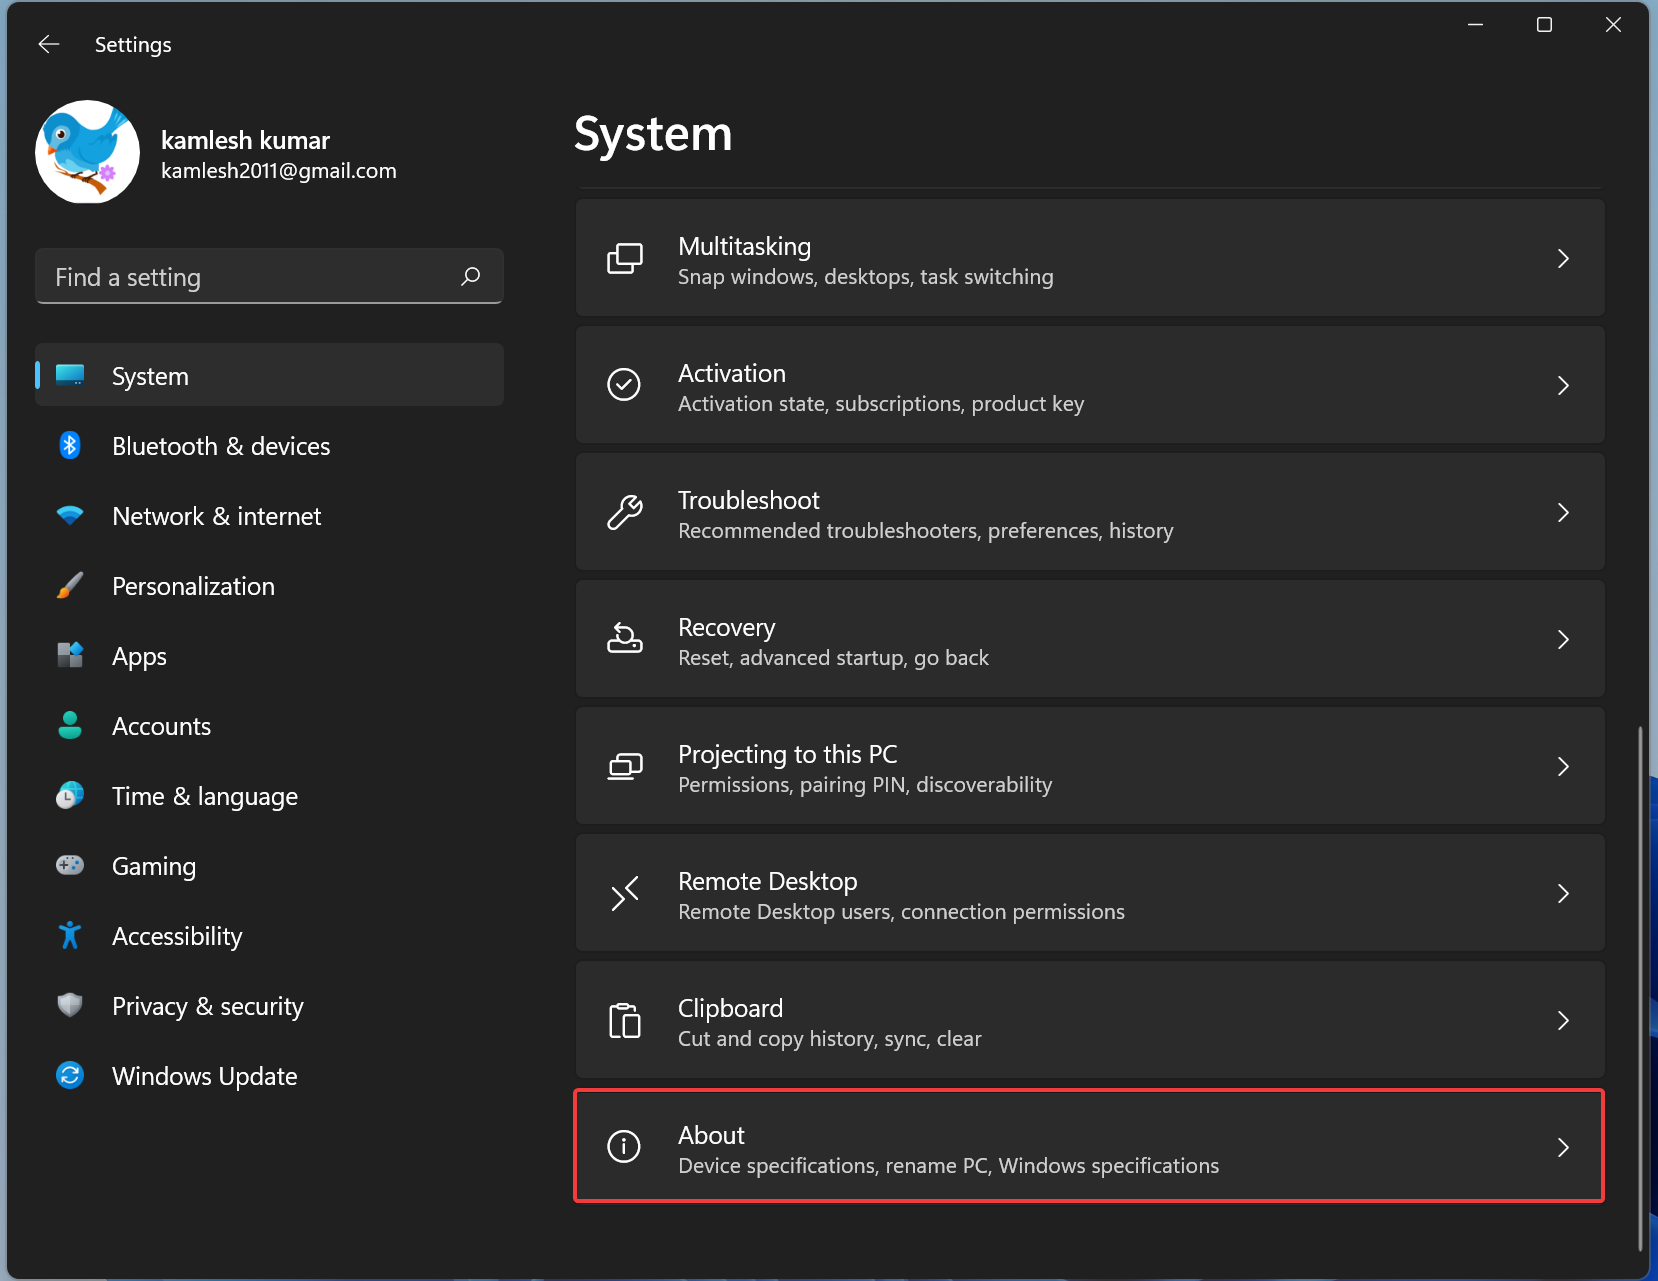
Step 4. On the top of the page, you’ll find essential information about your laptop, including the “Device name” and “Product name.”

Method 2: Leveraging Windows System Information
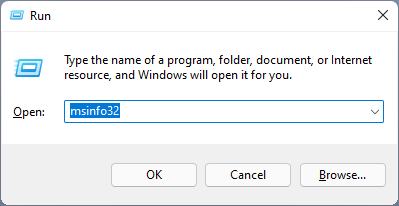
Step 1. Press the Windows key + R to open the “Run” dialog box. Type “msinfo32.exe” and press Enter to launch the System Information utility.
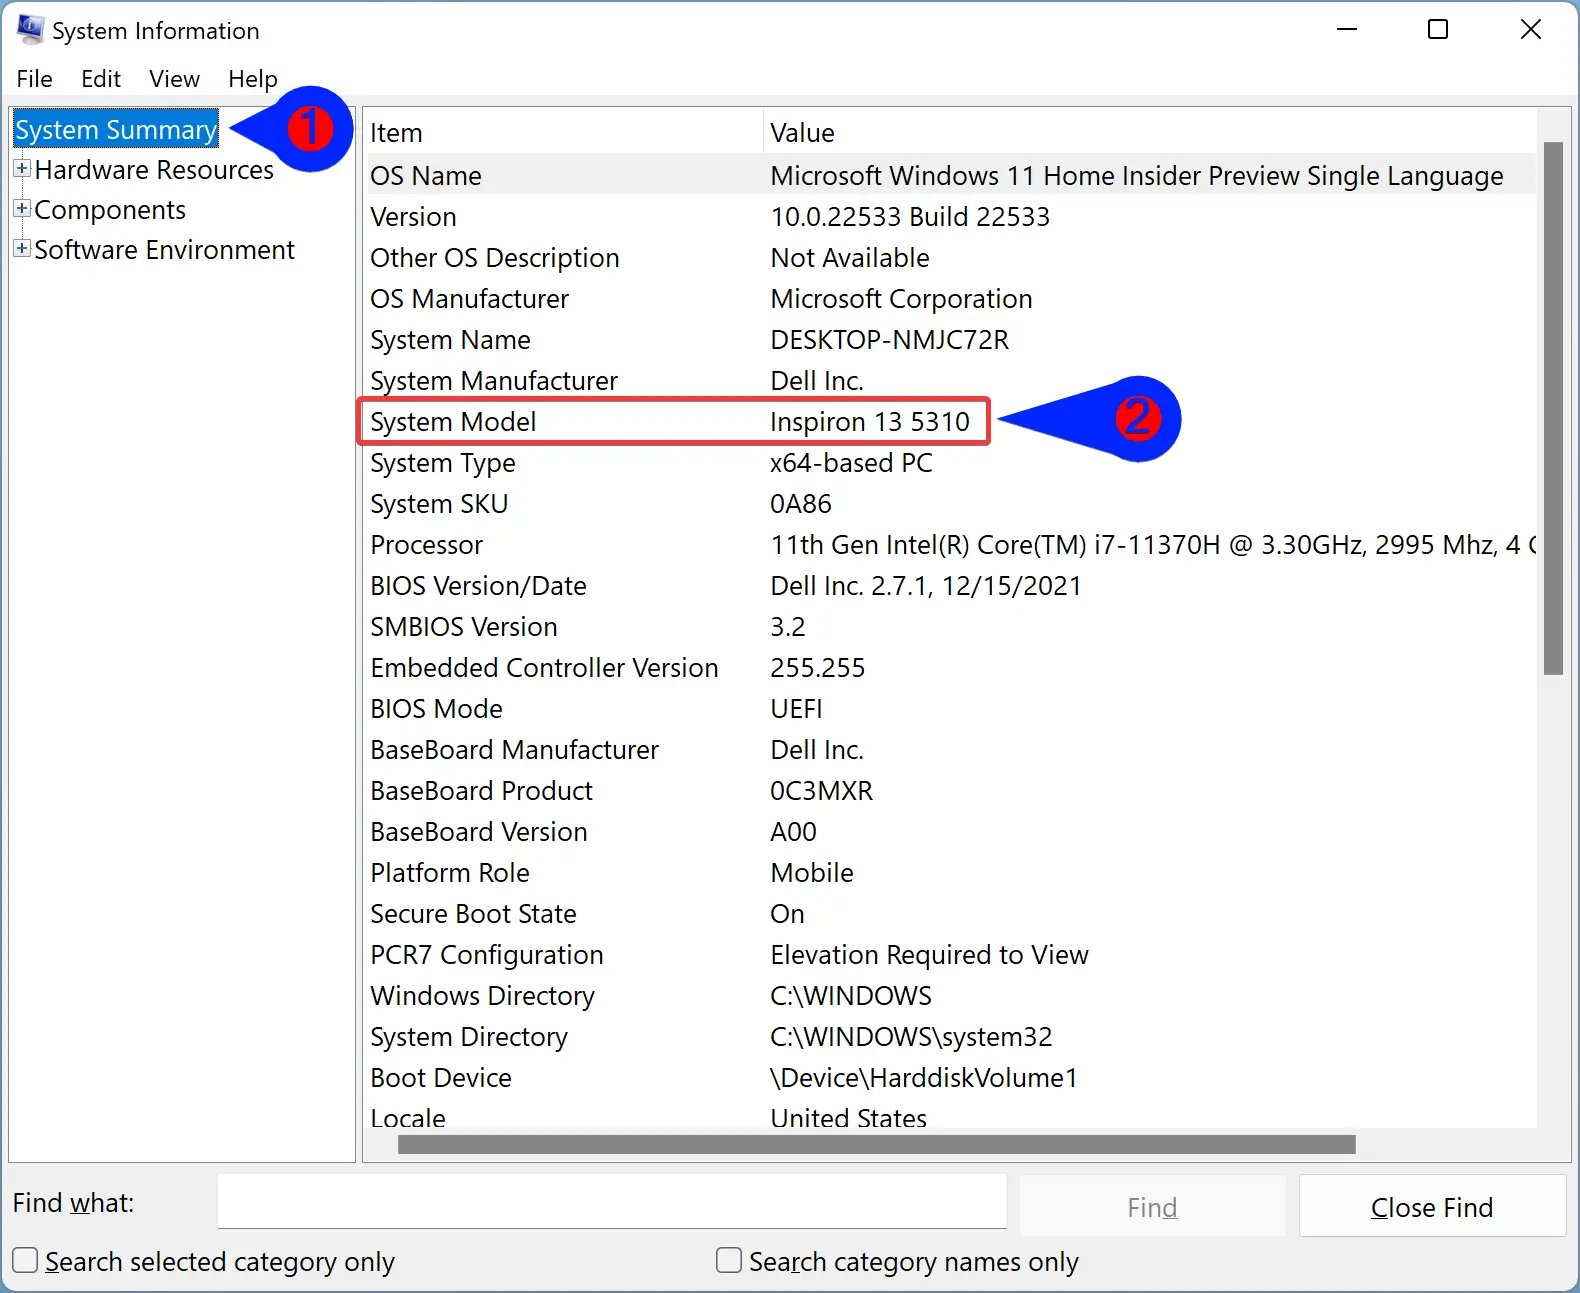
Step 2. In the System Information window, navigate to the “System Summary” section on the left-hand side. Look for the “System Model” entry in the right-hand pane. This entry will display the model name of your laptop.
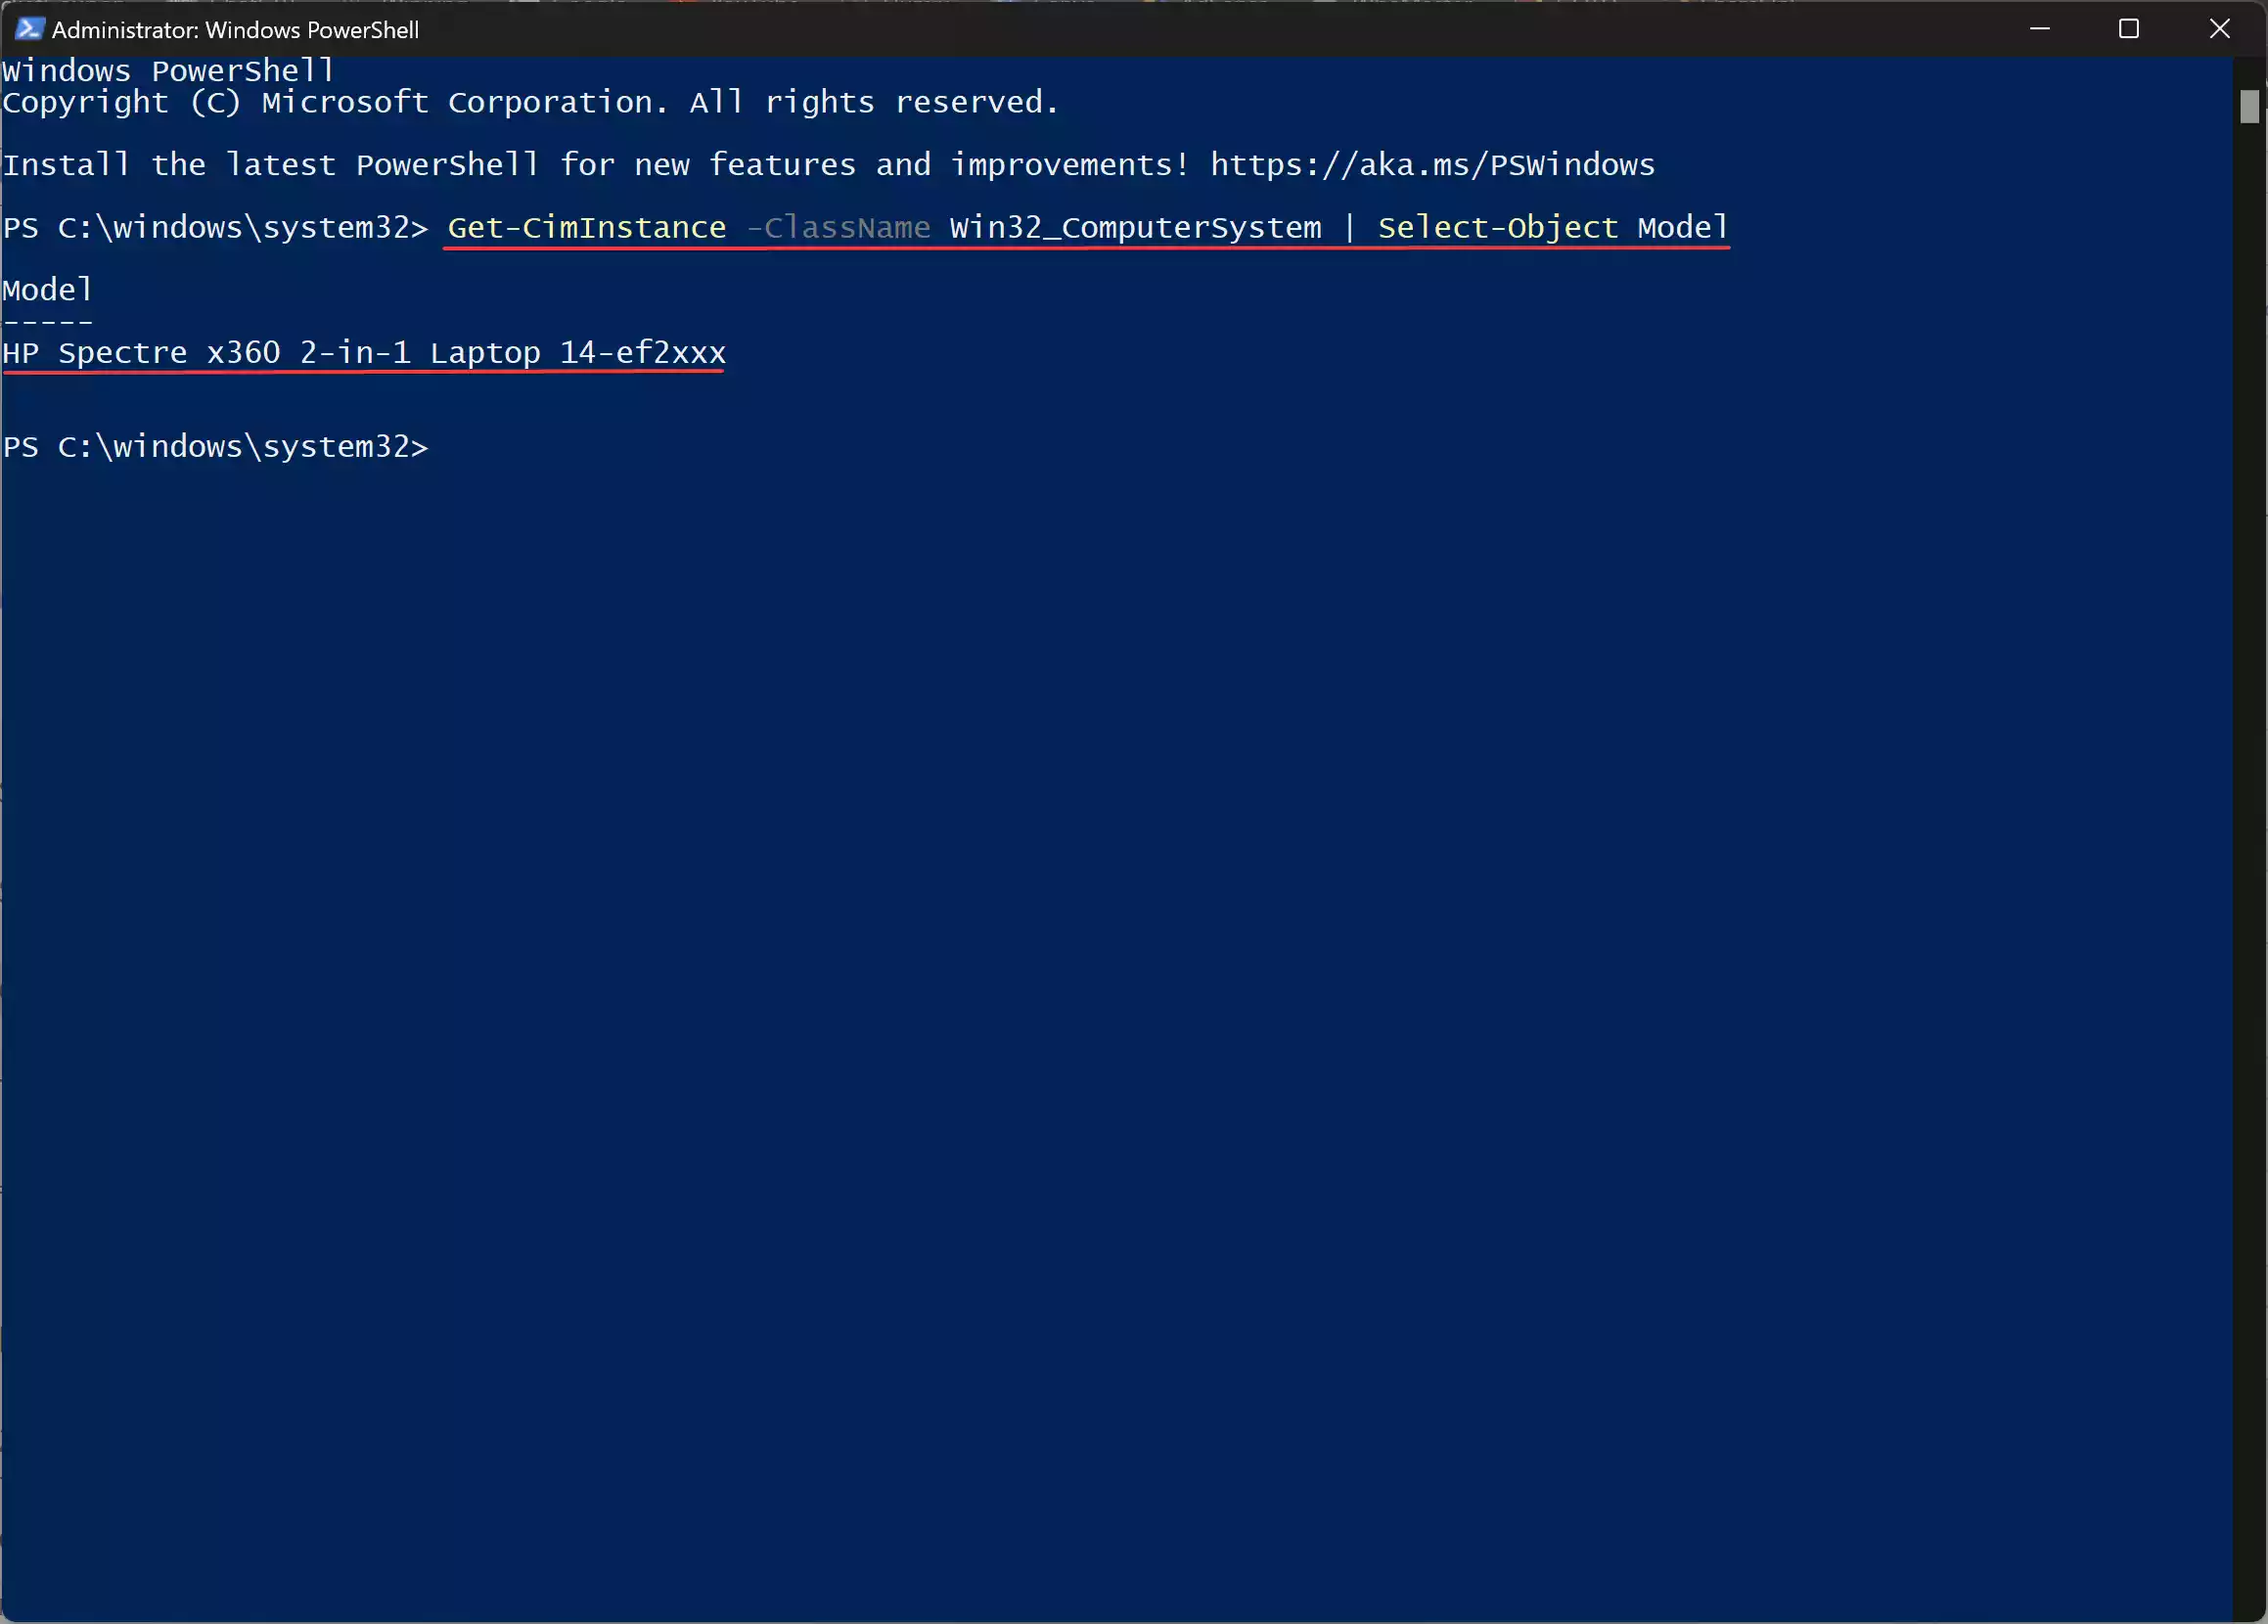
Method 3: Using Windows Terminal
Step 1. Open the Windows PowerShell app from the Start menu or by searching for it using the Windows search bar.
Step 2. Within Windows PowerShell, type the following command and hit Enter:-
Get-CimInstance -ClassName Win32_ComputerSystem | Select-Object Model
This command will display the model name of your laptop.
Method 4: Exploring Windows Registry Editor
Step 1. Press the Windows key + R to open the “Run” dialog box. Type “regedit” and press Enter to launch the Registry Editor.
Step 2. In the Registry Editor window, navigate to the following keys:-
Computer\HKEY_LOCAL_MACHINE\SYSTEM\CurrentControlSet\Control\SystemInformation
or,
Computer\HKEY_LOCAL_MACHINE\HARDWARE\DESCRIPTION\System\BIOS
Within these keys, you’ll find entries containing information about your laptop, including the model name.

Conclusion
In conclusion, knowing how to find your laptop model name in Windows 11 is essential for effective troubleshooting, maintenance, and optimization of your device. By leveraging the various methods outlined in this guide, you can effortlessly uncover this vital piece of information, empowering you to make informed decisions and ensure seamless performance from your laptop. Whether you prefer navigating through Windows Settings, exploring System Information, using Windows Terminal, or delving into the Registry Editor, each method offers a convenient way to unveil the mystery behind your laptop’s model name.
