Your laptop screen holds the potential to be more than just a blank canvas when idle. With the right tools, you can transform it into a captivating visual experience. One way to achieve this is by setting up an aesthetic clock screen saver that not only adds functionality but also elevates the overall ambiance of your workspace. In this gearupwindows guide, we’ll walk you through the steps to set up a stunning clock screen saver on your Windows 11 and Windows 10 laptop, turning idle moments into visually pleasing intervals.
How to Set Aesthetic Clock Screen Saver in Your Windows 11 and 10 Laptop?
Follow these steps to set an Aesthetic Clock Screen Saver in your Windows 11 and 10 laptop:-
Step 1. Open your preferred web browser and navigate to the website of your chosen clock screen saver provider. For this guide, we’ll use “Fliqlo” as an example. Go to fliqlo.com and download the setup file for your Windows 11 or 10. Please note that this free screensaver is also available for Mac.
Step 2. Once on the website, locate the desktop screen displayed in the center. Click on it to access the menu options. Alternatively, look for the menu icon usually positioned at the top-right corner of the page, and click on it.
Step 3. From the menu options, select the “Screensaver” tab. This will take you to the section where you can download the clock screen saver.
Step 4. Scroll down until you find the download options. Look for the option specifically designed for Windows. Click on the Download button to initiate the download process. This will typically result in a zip folder being downloaded to your computer.
Step 5. Once the zip folder is downloaded, locate it in your designated download location. Right-click on the folder and select “Extract All” to unzip its contents. This will reveal the files necessary for installing the screen saver.
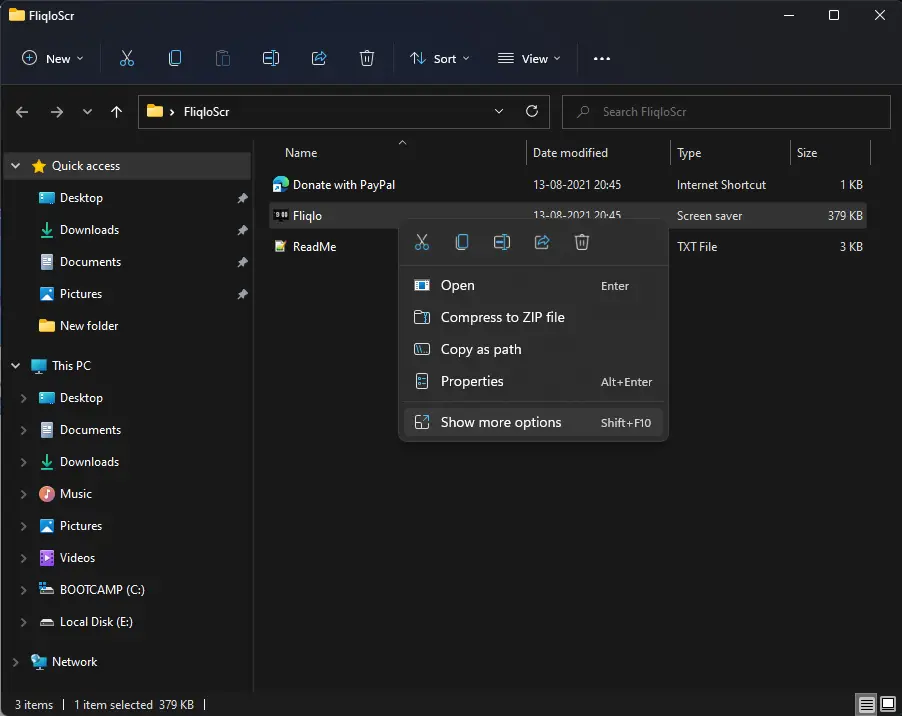
Step 6. Within the extracted folder, locate the file named “Fliqlo.scr” (or the equivalent screen saver file). Right-click on this file and choose “Install” from the context menu. This action will install the clock screen saver on your Windows laptop.
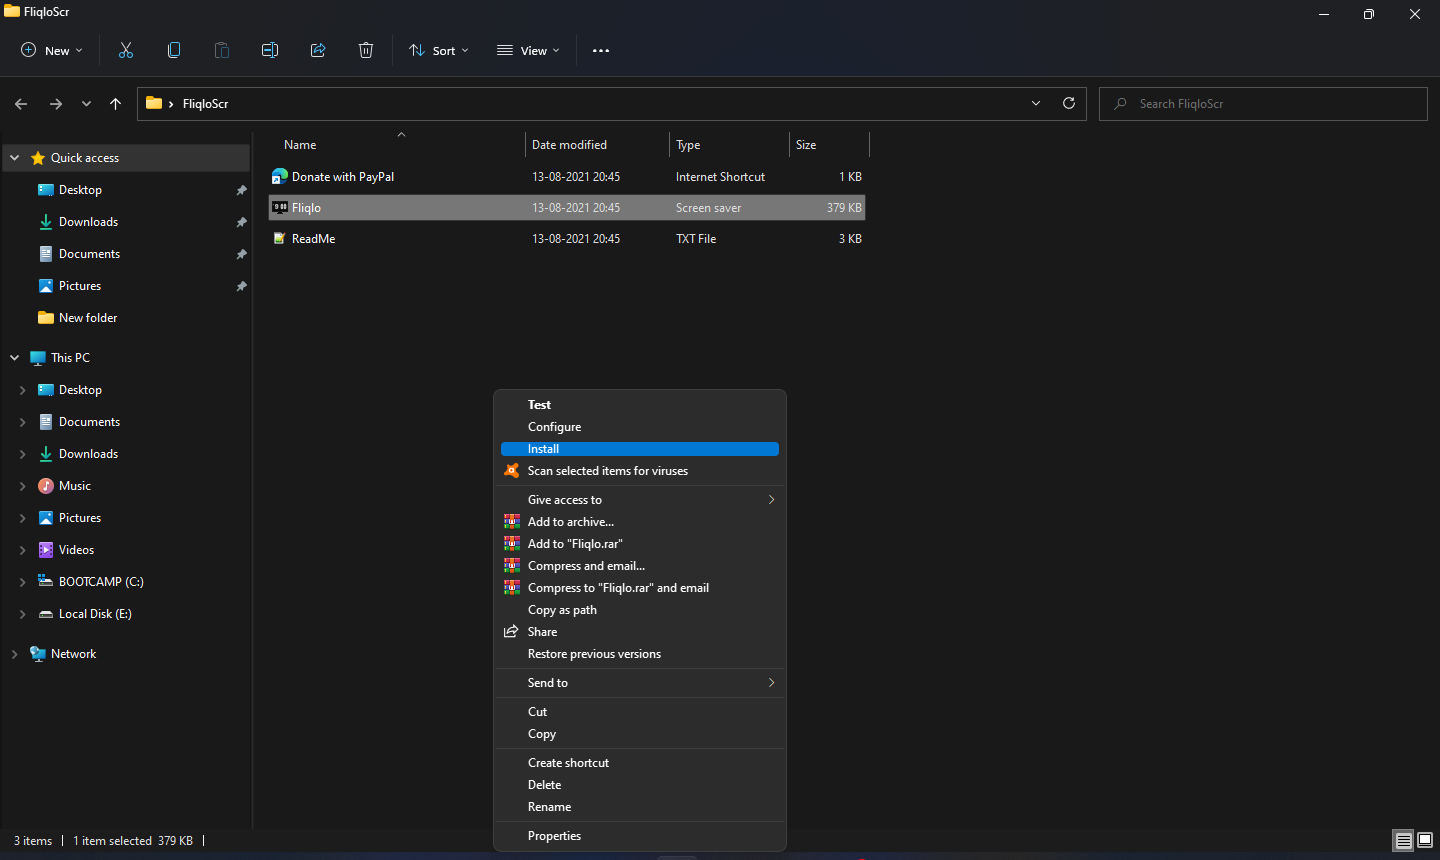
Note: For a Windows 11 PC, you’ll get the “Install” option after clicking on the “Show more options” option.
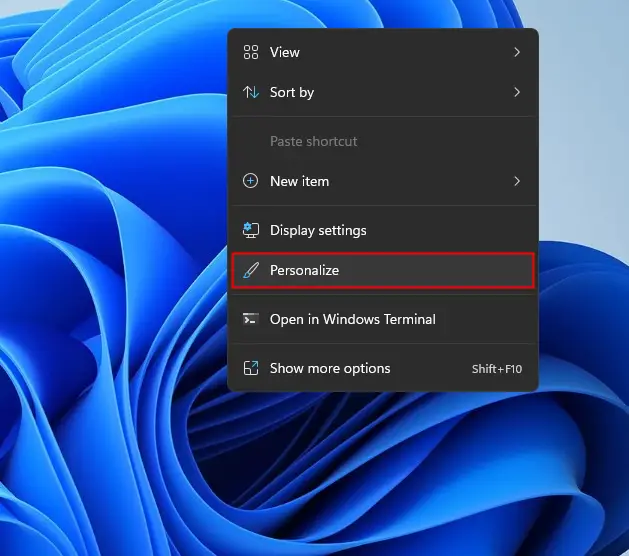
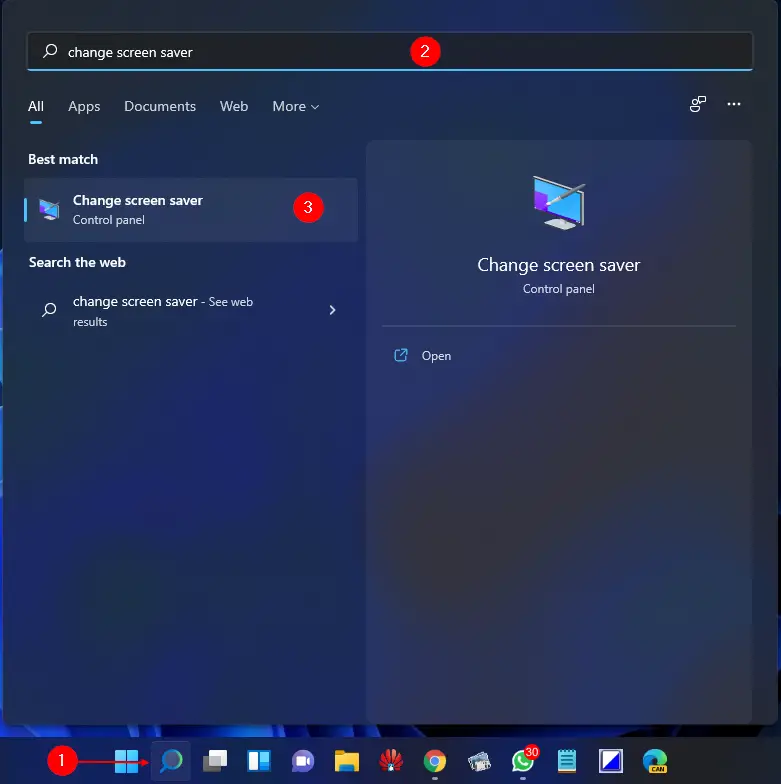
Step 7. After installing the screen saver, go to your desktop and right-click on an empty area. From the context menu, select “Personalize.” In the Personalization window, click on “Lock screen” from the left sidebar, then click on “Screen saver settings.”
Alternatively, click on the Start button or press the Windows key on your keyboard and type ‘change screen saver.’ In the available results, click on the ‘Change Screen Saver‘ option to open the ‘Screen Saver Settings‘ window.
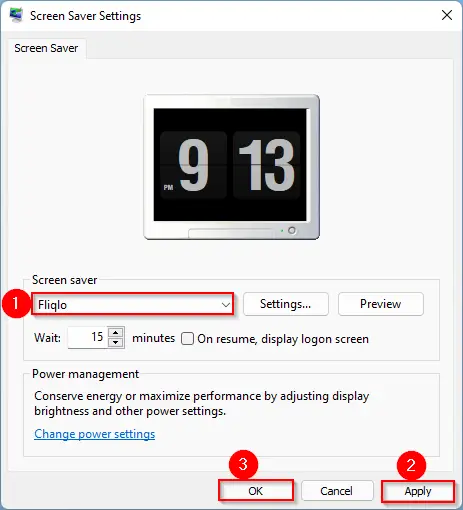
Step 8. In the Screen Saver Settings window, you’ll see a list of available screen savers. Look for the one you just installed (e.g., Fliqlo) and select it.
Step 9. Customize the settings according to your preferences, such as adjusting the waiting time before the screen saver activates. Once you’re satisfied with your settings, click “Apply” and then “OK” to save your changes.
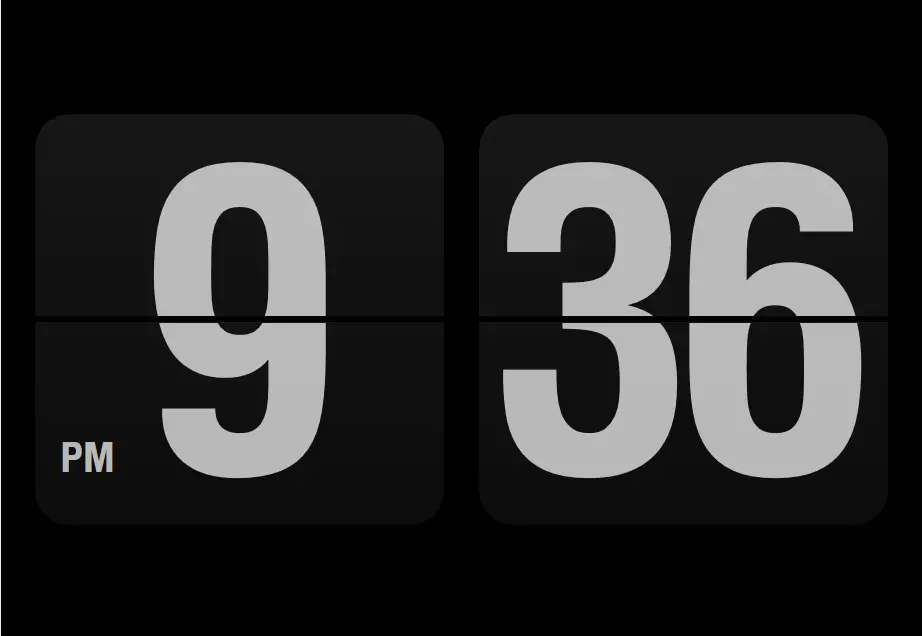
That’s it! Your clock screen saver is now set up and ready to enchant your laptop’s display. Whenever your screen is idle for the specified duration, the clock screen saver will activate, adding a touch of elegance to your workspace.
Conclusion
Setting up an aesthetic clock screen saver on your Windows 11 or Windows 10 laptop is a simple yet effective way to enhance your workspace environment. By following the steps outlined in this guide, you can effortlessly transform idle moments into visually pleasing intervals, elevating the ambiance of your workspace. Whether you’re seeking functionality or aesthetic appeal, a clock screen saver adds a touch of sophistication to your laptop’s display, making your workspace a more enjoyable place to be.