Google Chrome is a widely used web browser known for its speed, reliability, and user-friendly interface. However, over time, you may encounter issues with Chrome’s settings or extensions, leading to performance issues or unexpected behavior. In such cases, resetting Chrome to its default settings can often resolve these issues. In this guide, we’ll walk you through the step-by-step process of resetting Google Chrome settings to their defaults on both Windows 11 and Windows 10.
Why Reset Chrome Settings?
Resetting Chrome to its default settings can help resolve various issues, including:-
– Performance problems
– Browser crashes or freezes
– Unexpected behavior or errors
– Adware or malware infections
– Extension conflicts
How to Reset Chrome Settings on Windows 11 and 10?
Follow these simple steps to reset Google Chrome settings to their defaults on Windows 11 and Windows 10:-
Step 1. Launch Google Chrome on your Windows 11 or 10 computer. You can do this by clicking on the Chrome icon in your taskbar or by searching for “Chrome” in the Start menu and selecting it from the search results.
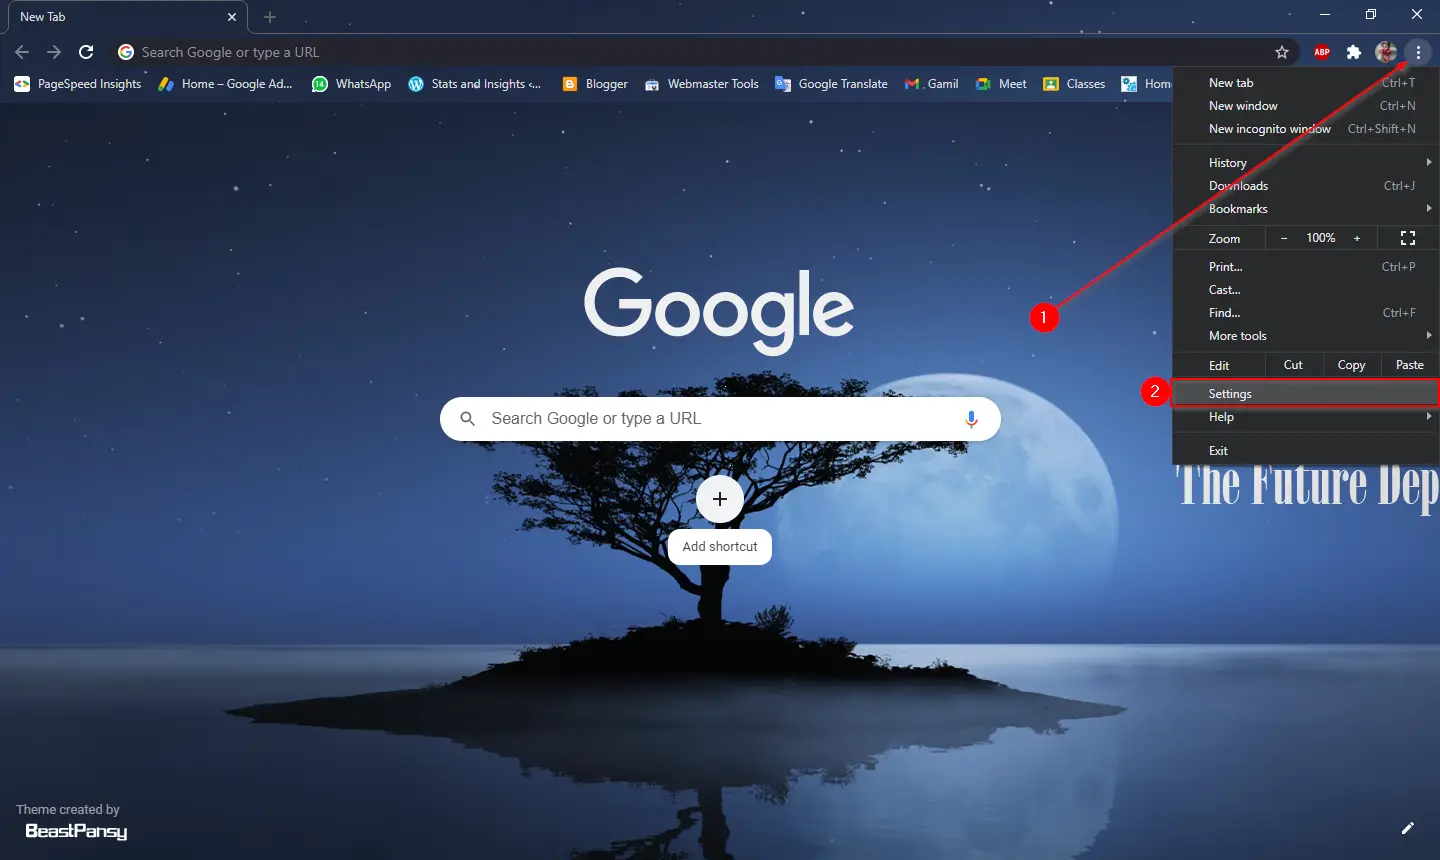
Step 2. Once Chrome is open, look for the three-dot menu icon located in the top-right corner of the browser window. Click on this icon to open the Chrome menu.
Step 3. From the dropdown menu, select the “Settings” option. This will open the Chrome Settings page in a new tab.
Step 4. Scroll down to the bottom of the Settings page and click on the “Reset settings” option on the left sidebar. This will expand the advanced settings menu, revealing additional options.
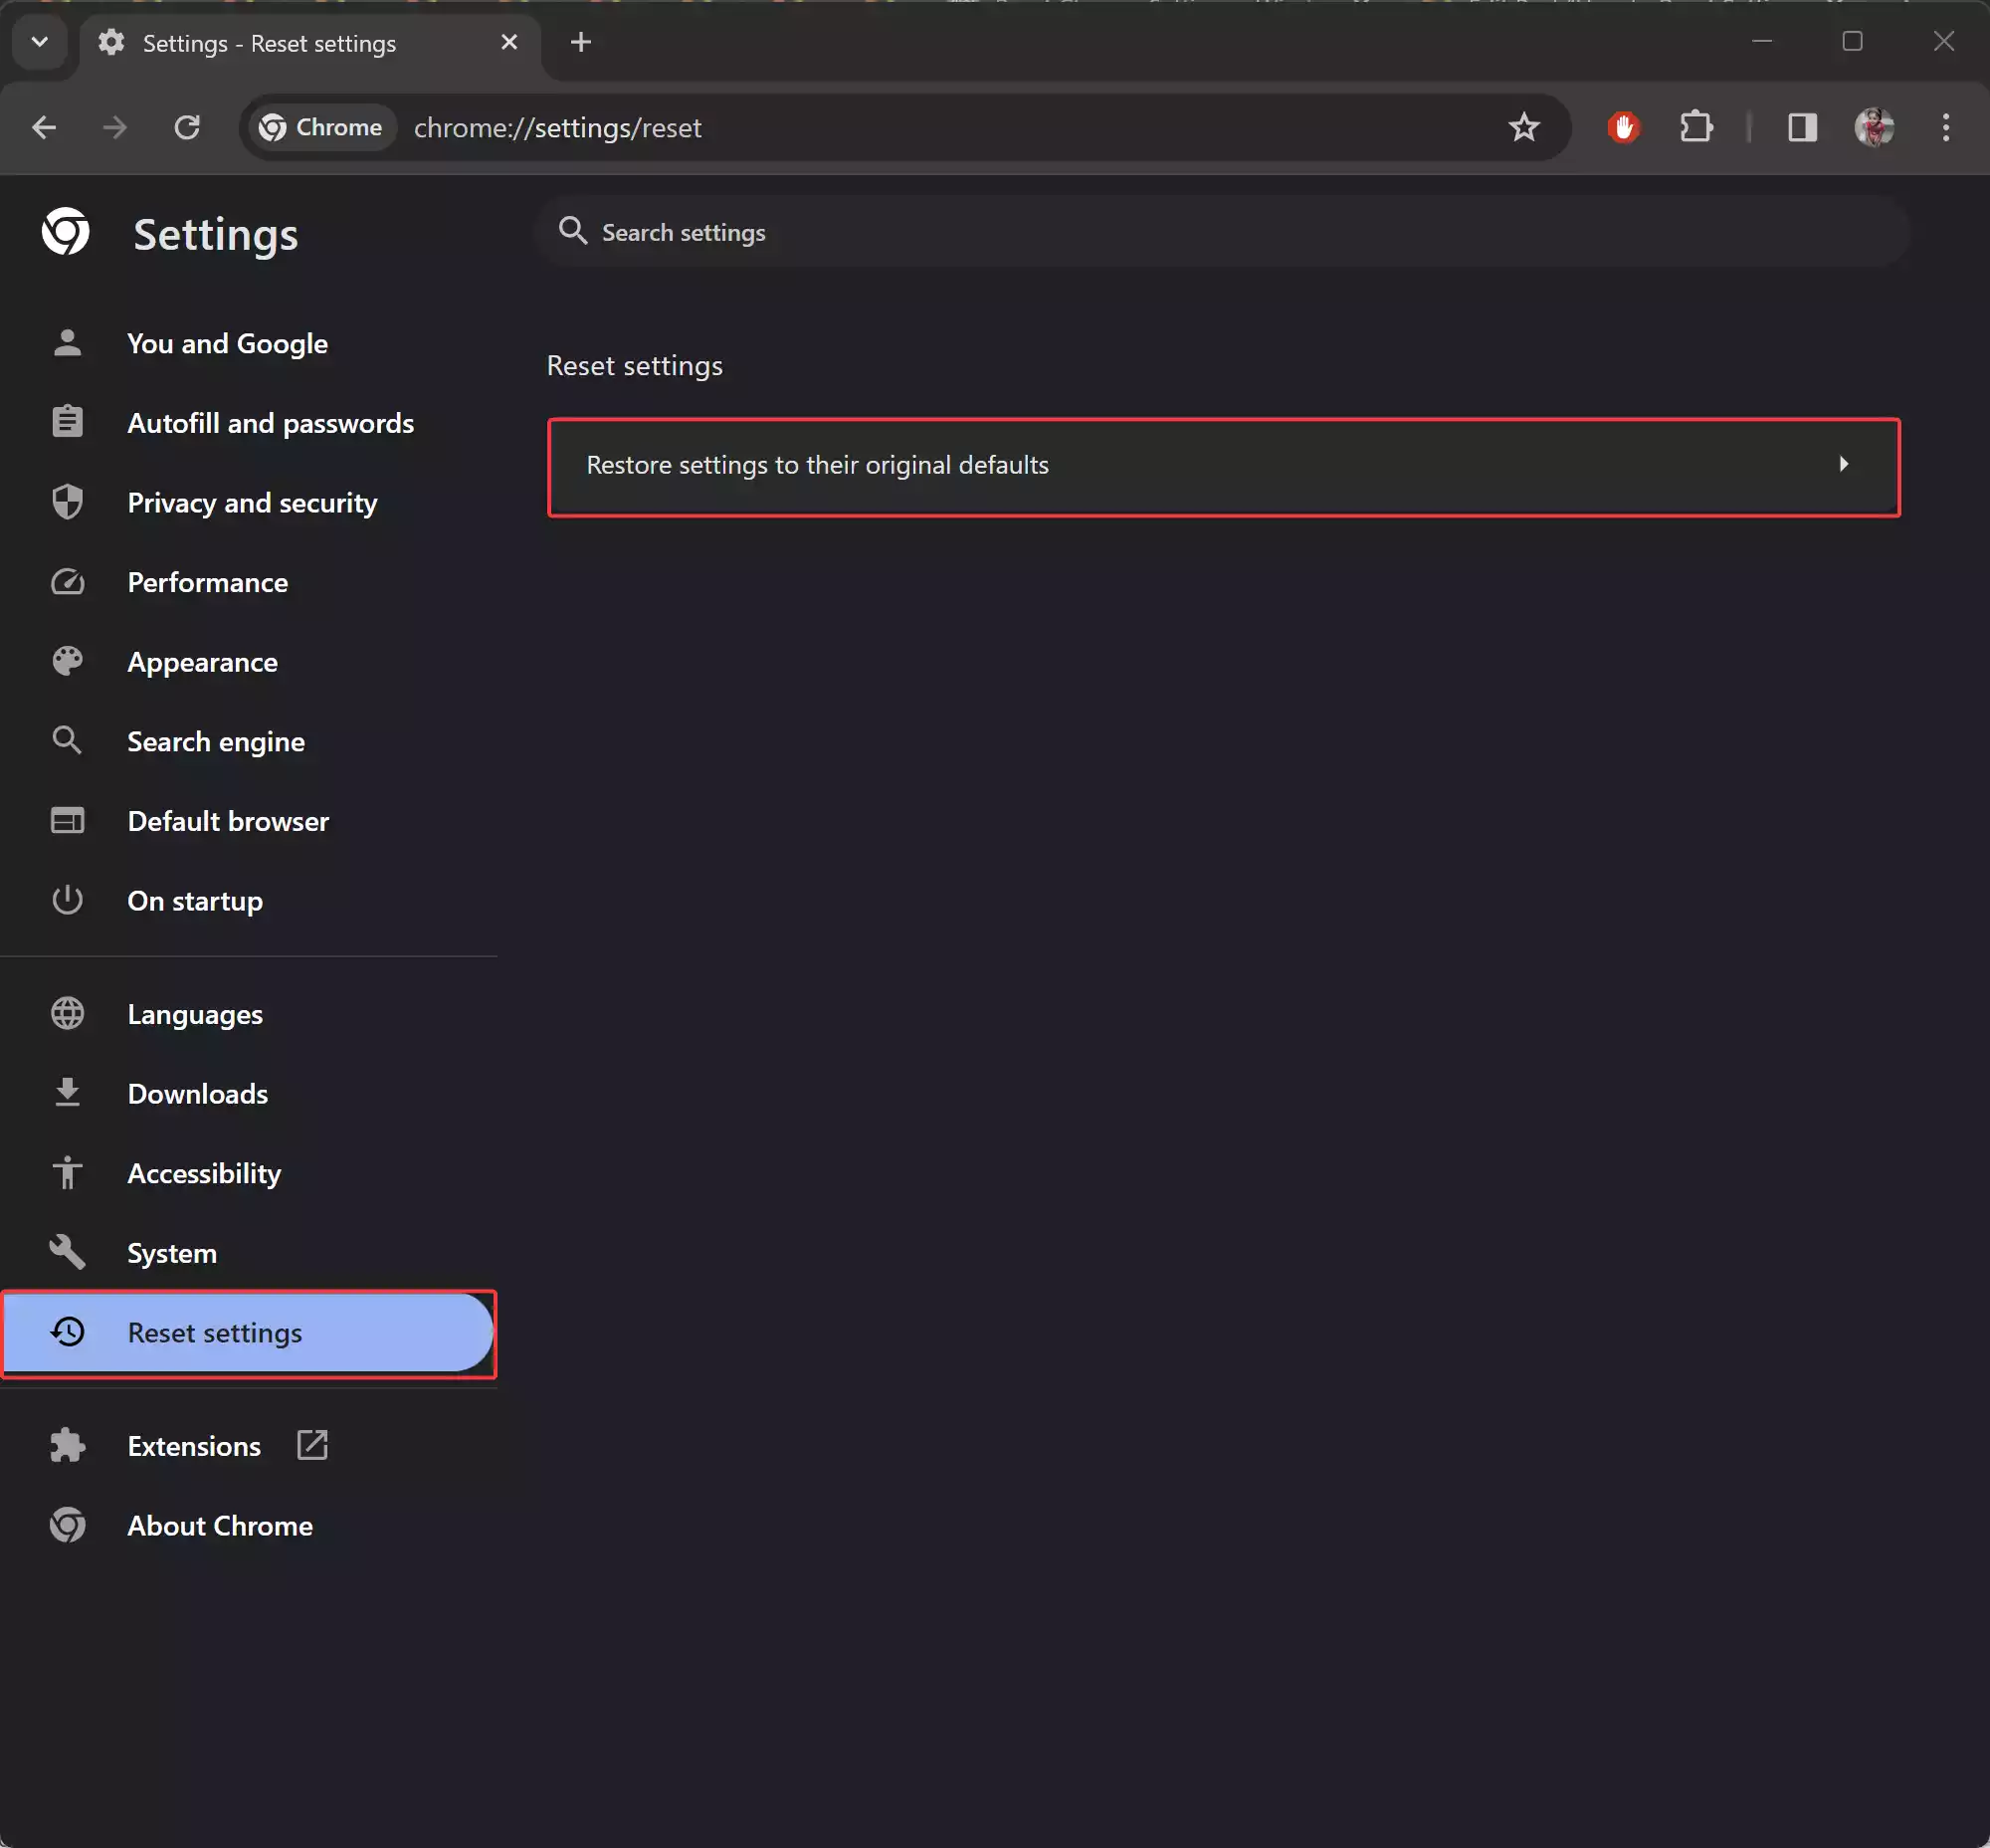
Step 5. Under the “Reset settings” section on the right sidebar, you’ll find the option to “Restore settings to their original defaults.” Click on this option to proceed.
Step 6. A confirmation dialog box will appear, explaining what will happen when you reset Chrome settings. Review the information provided to ensure you understand the consequences of resetting.
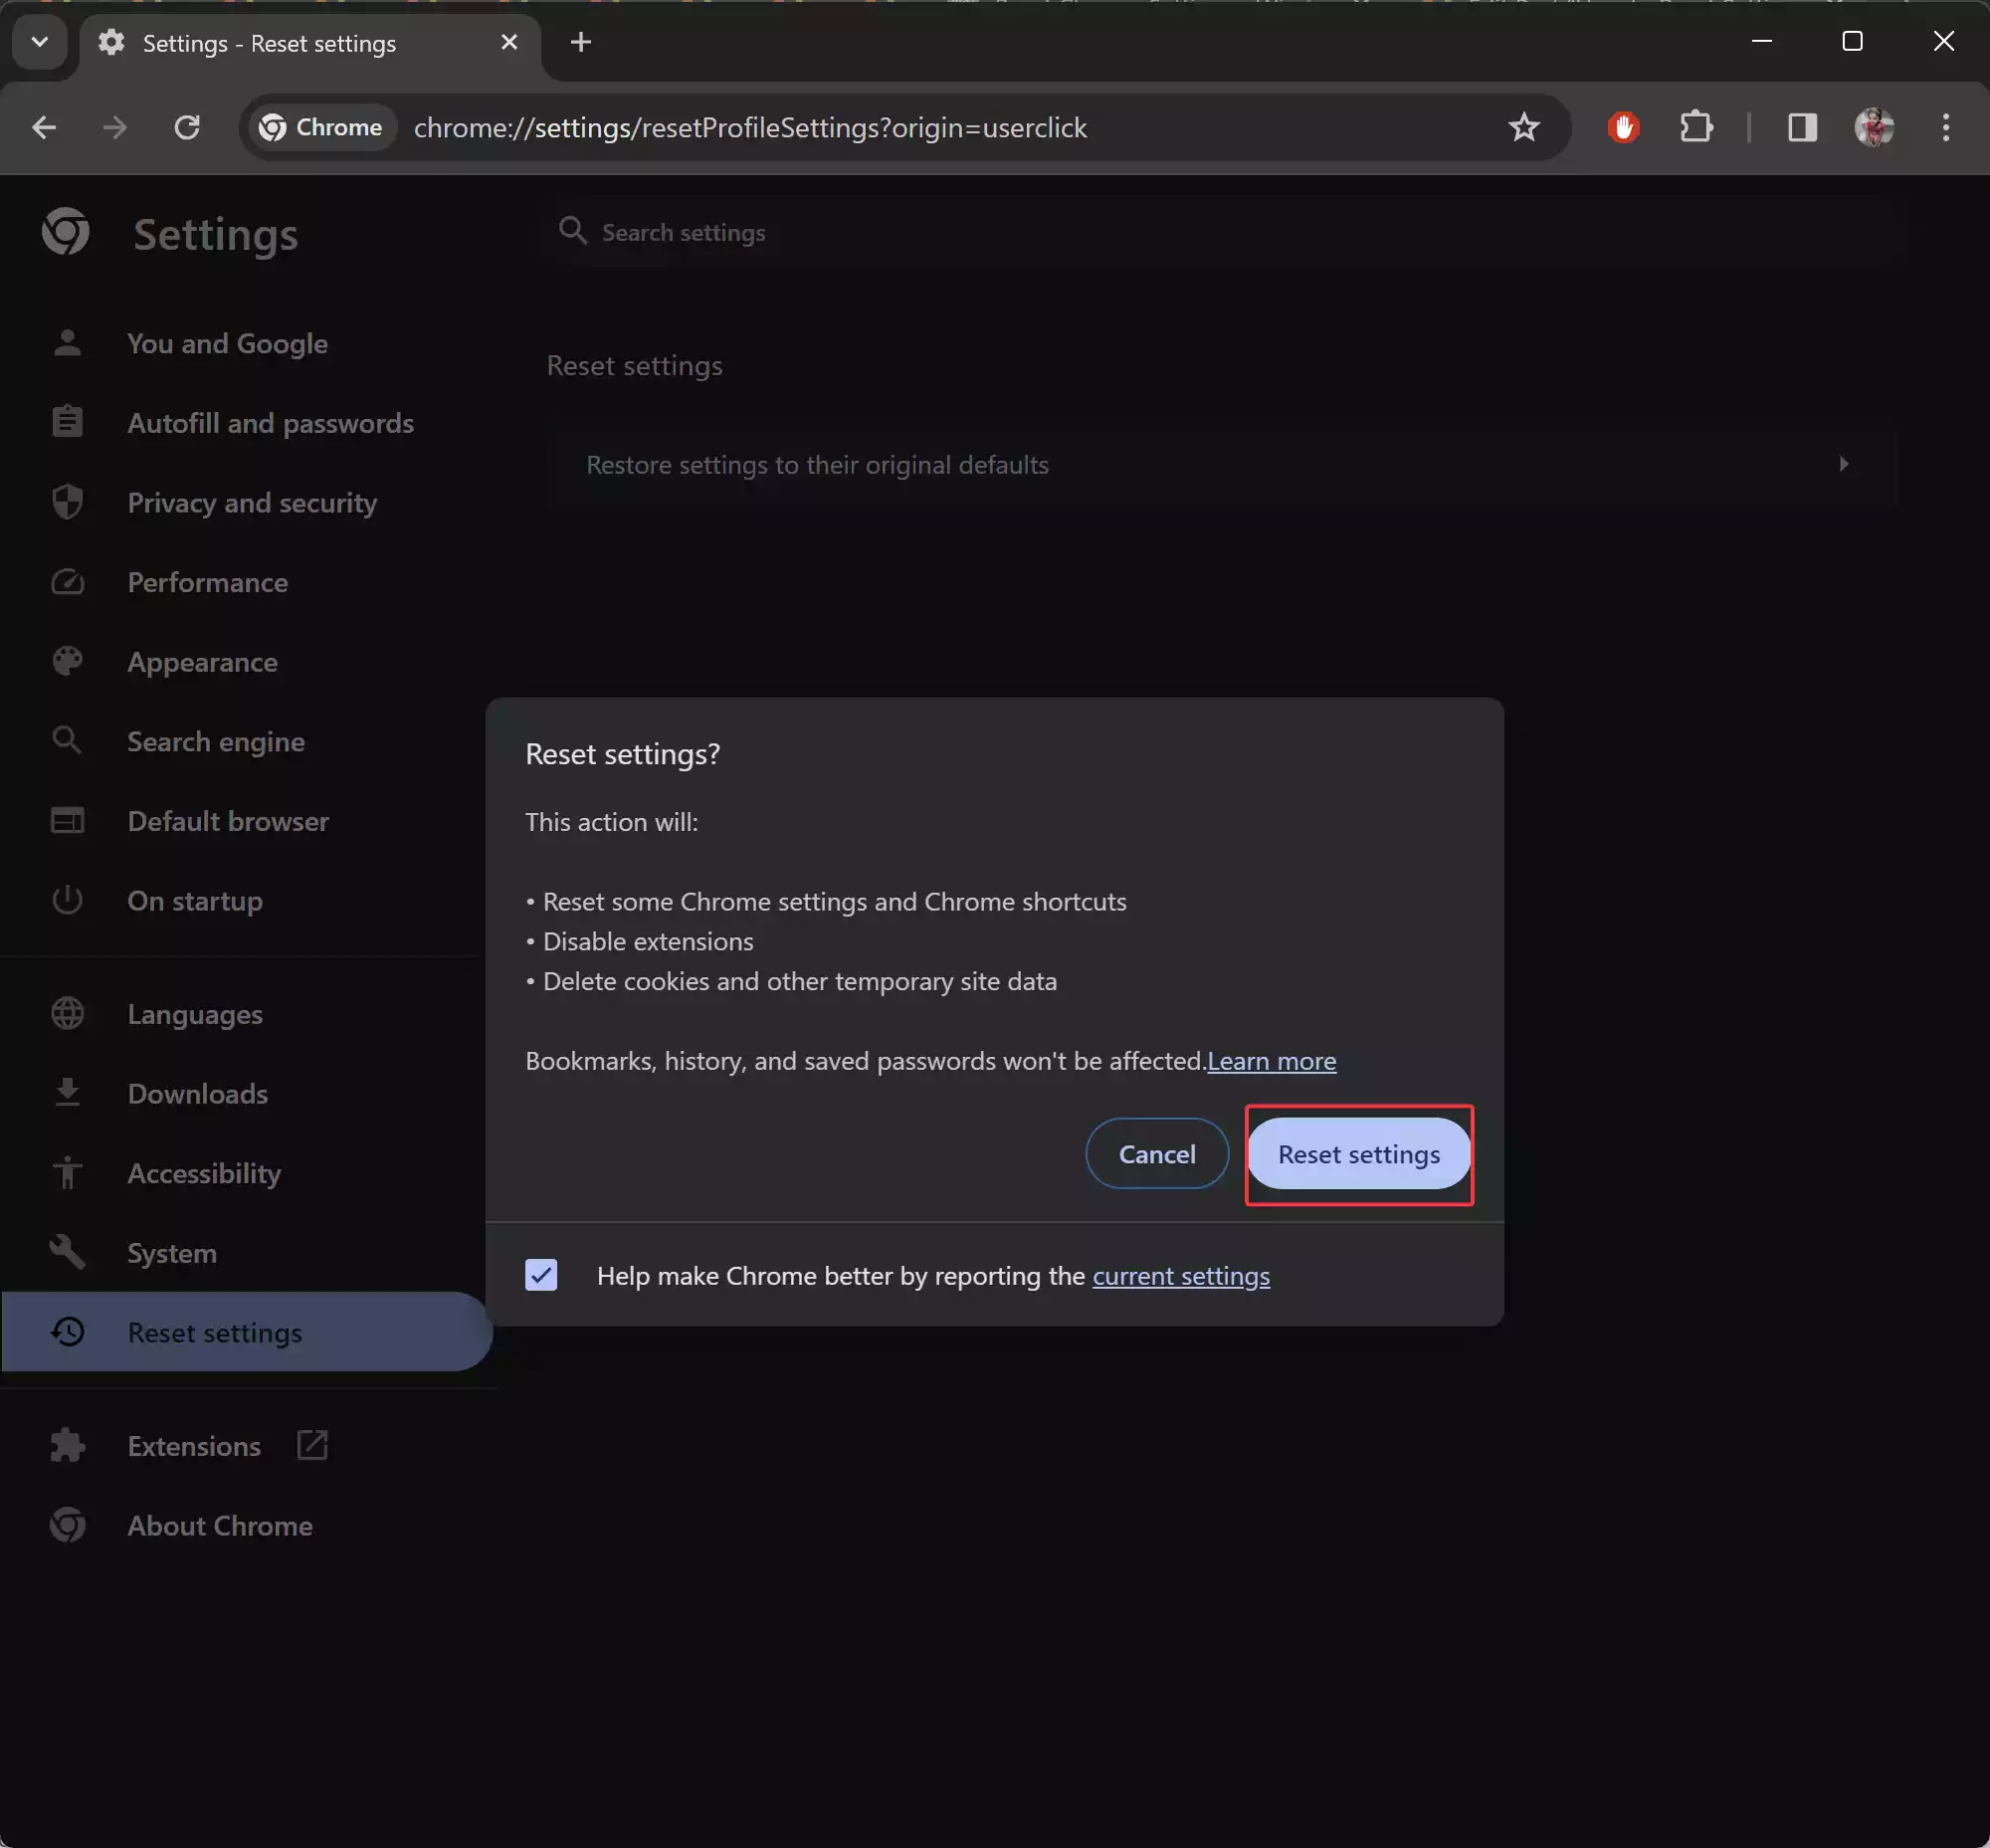
Step 7. If you’re ready to proceed, click on the “Reset settings” button. Chrome will then begin the process of restoring its default settings. This may take a few moments to complete, depending on your computer’s speed and the amount of data Chrome needs to reset.
Step 8. Once the reset process is complete, Chrome will automatically restart. You’ll be returned to the Chrome Settings page, where you can verify that the settings have been reset to their defaults.
Conclusion
Resetting Google Chrome settings to their defaults can help resolve various issues and improve browser performance on Windows 11 and Windows 10. By following the simple steps outlined in this guide, you can easily reset Chrome and restore it to its original state. If you encounter any further issues or need additional assistance, don’t hesitate to reach out to Chrome’s support resources or community forums for help.
Remember that while resetting Chrome settings will not delete your bookmarks, browsing history, or saved passwords, it will disable extensions and clear cached data such as cookies. Make sure to back up any important data before proceeding with the reset.
We hope this guide has been helpful to you in resetting Chrome on your Windows computer. Enjoy browsing with your refreshed Chrome settings!
