Audio issues can be frustrating when using a Windows 10 computer. From sound distortions to complete audio failure, these problems can disrupt your work and entertainment. Often, the culprit behind such issues is malfunctioning or outdated audio drivers. Fortunately, one of the first steps in troubleshooting audio problems is to restart your audio or sound drivers. In this article, we’ll guide you through the process of restarting audio drivers on Windows 10.
Windows 10 has a built-in setting to troubleshoot sound or audio, which is pretty good for diagnosing and fixing common sound issues. Whenever experiencing sound issues, you should run the sound troubleshooter (Settings > Update & Security> Troubleshoot) before doing anything else.
If the troubleshooter fails to diagnose the issue, you can manually check or restore sound settings to defaults.
Reinstalling the audio driver is the last resort while troubleshooting sound issues. However, before this, I will recommend restarting the audio driver.
While restarting the audio driver might not always fix the issue, it might sometimes help. Also, restarting the audio driver takes a few mouse clicks.
Why Restart Audio Drivers?
Before we dive into the how-to, let’s briefly discuss why it’s essential to restart your audio drivers. Windows 10 relies on specific software components known as drivers to communicate with hardware devices, including your audio card or integrated audio chipset. These drivers help facilitate the smooth functioning of your sound hardware. Occasionally, these drivers can become corrupted or encounter conflicts with other software or hardware, leading to audio issues.
Restarting your audio drivers is like hitting the reset button on them. It can resolve minor glitches, conflicts, and refresh the audio system, often solving audio problems without the need for more extensive troubleshooting.
How to Restart Audio or Sound Drivers on Windows 10?
Method 1: Disable and Enable the Audio Device
Sometimes, the sound on your Windows 10 computer may stop working, or you may encounter issues like distortion, crackling sound, or no sound at all. These problems could be due to malfunctioning or outdated sound drivers. Restarting your audio or sound drivers is a simple way to resolve such issues. Here’s how you can do it:-
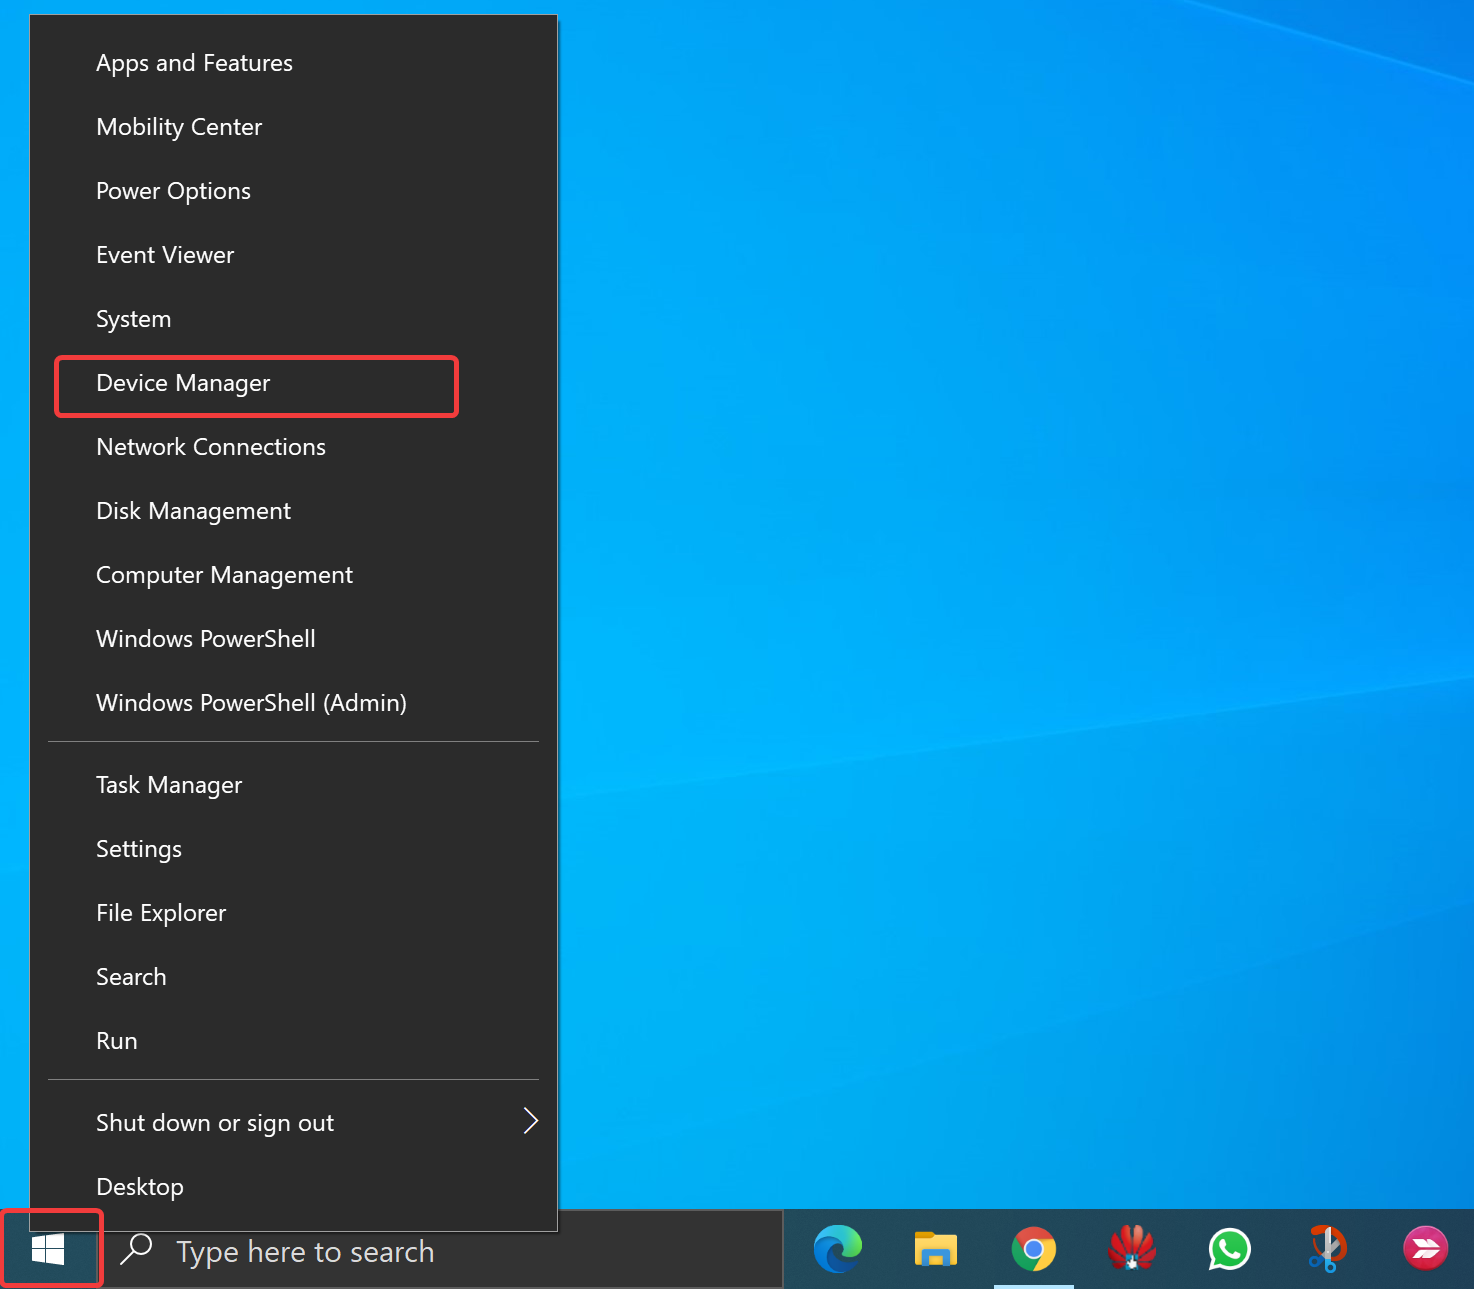
Step 1. First, press the “Windows key + X” shortcut on your keyboard to open the Quick Link menu.
Step 2. Next, select “Device Manager” from the list. This will open Device Manager.
Step 3. In the Device Manager window, locate the “Sound, video, and game controllers” section and click on it to expand.
Step 4. Locate the sound driver you want to restart, right-click on it, and select “Disable device” from the context menu.
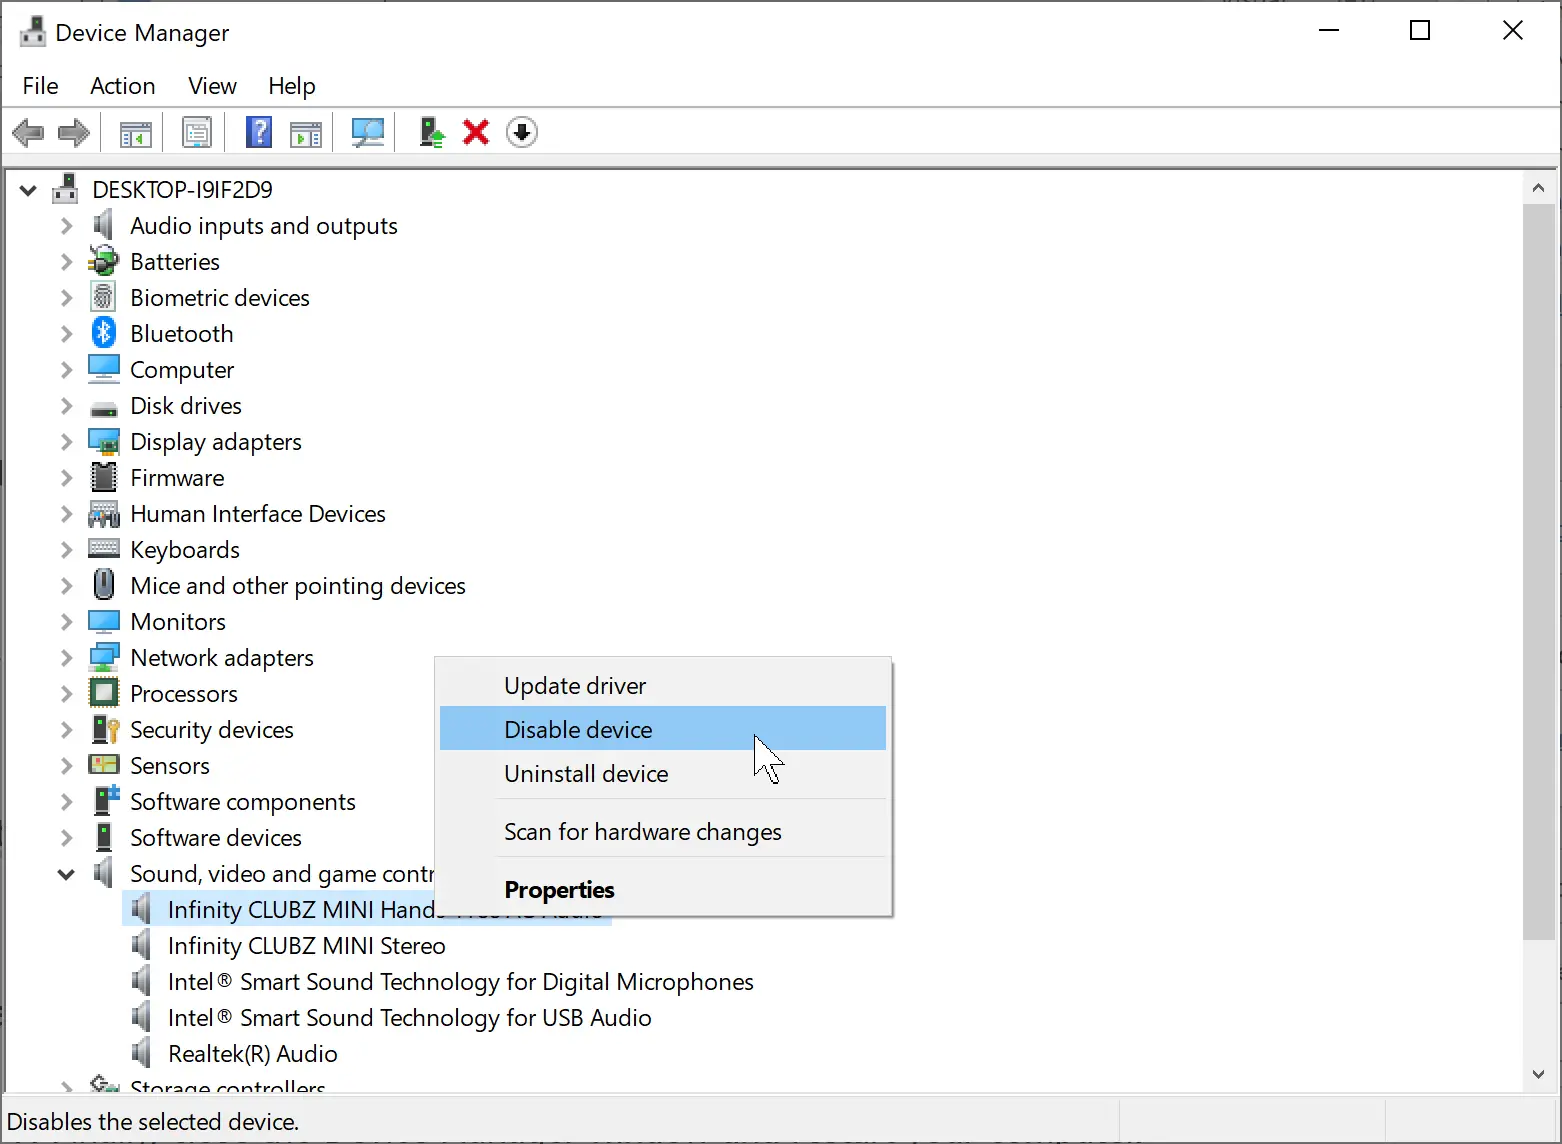
Step 5. A confirmation dialog box will appear “Disabling this device will cause it to stop functioning. Do you really want to disable it?” Click “Yes.”
Step 6. Wait a few seconds, then right-click on the same sound driver again and select “Enable device.”
Step 7. Finally, close the Device Manager window and restart your computer.
After the restart, Windows 10 will automatically reinstall the sound driver, and you should have a working sound system. If the problem persists, you may want to check for driver updates or seek further assistance.
Method 2: Restart the Windows Audio Service
The Windows Audio service is a crucial component responsible for managing audio on your system. Restarting this service can help refresh your audio drivers. Here’s how:-
Step 1. Press the Windows key + R to open the Run dialog box.
Step 2. Type “services.msc” and press Enter. This will open the Services window.
Step 3. In the Services window, scroll down and locate “Windows Audio.”
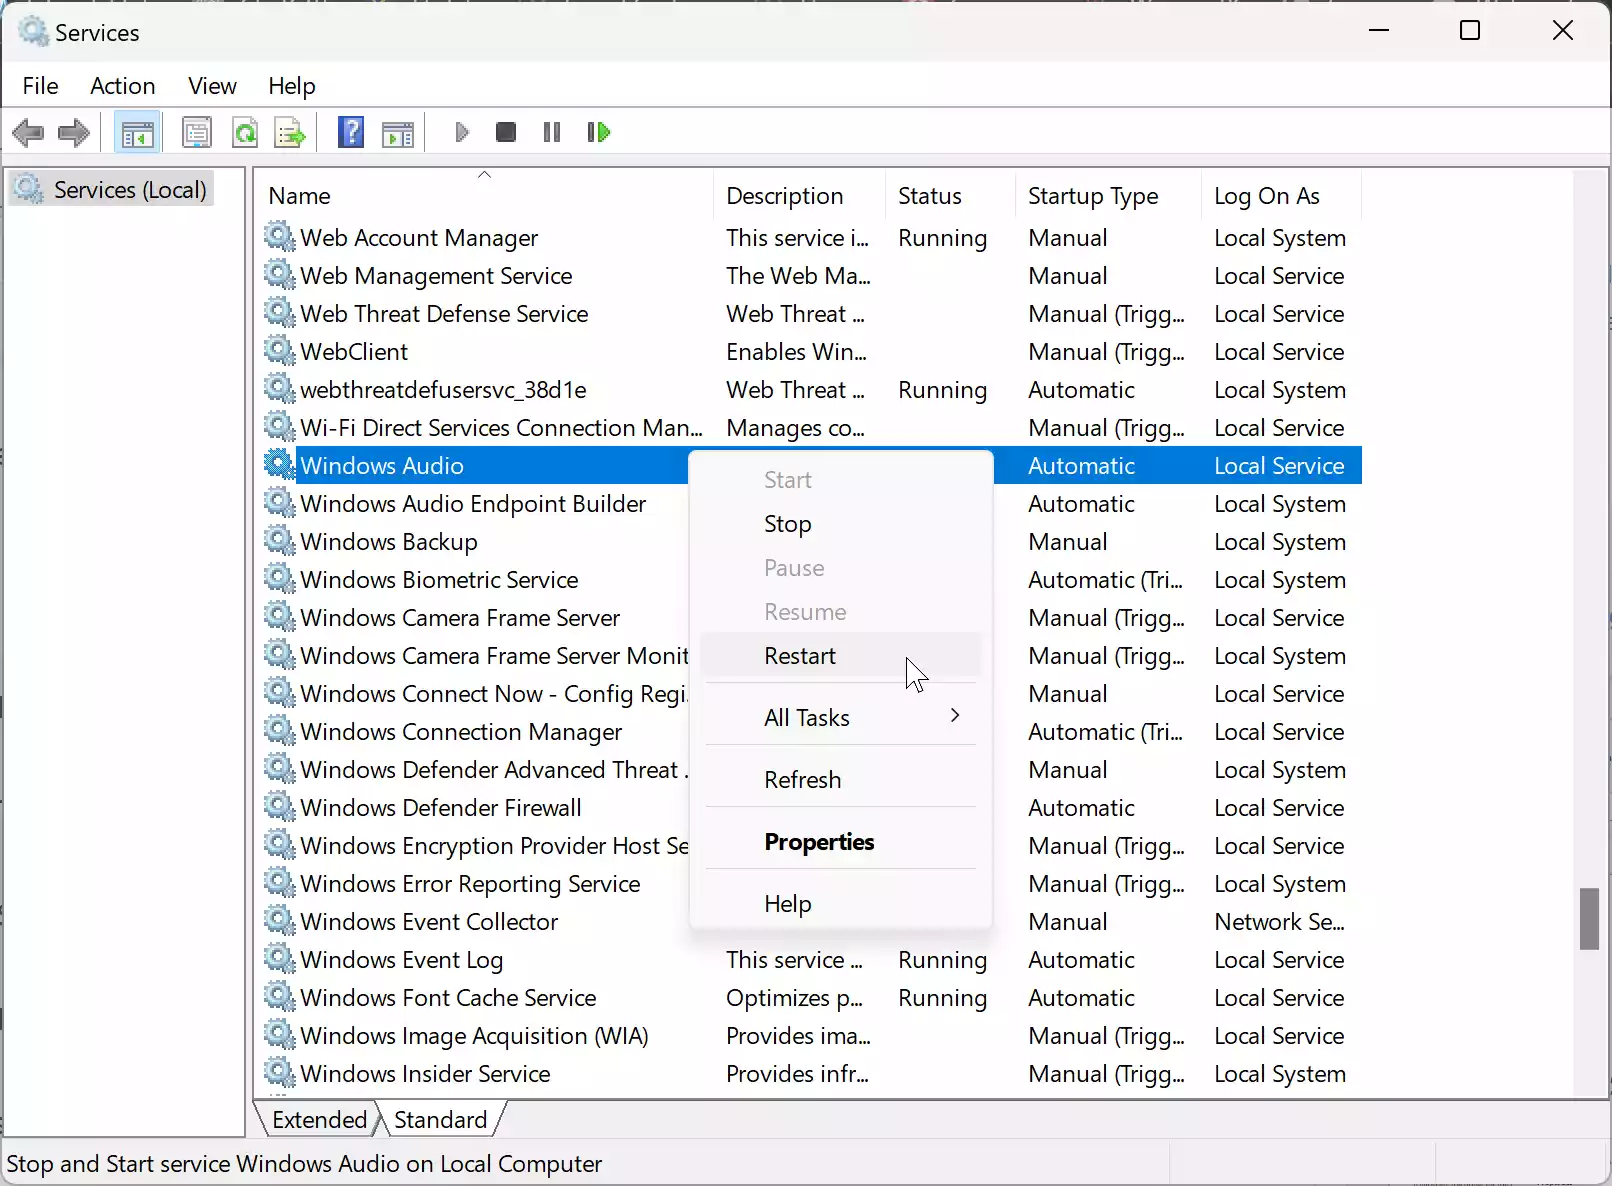
Step 4. Right-click on “Windows Audio” and select “Restart.”
Step 5. Additionally, find “Windows Audio Endpoint Builder” and restart it the same way.
Step 6. Close the Services window and check if your audio is working correctly.
Method 3: Update or Roll Back Audio Drivers
Outdated or incompatible audio drivers can cause audio problems. You can update or roll back your audio drivers using Device Manager:-
Step 1. Right-click on the Start button and select “Device Manager.” This will open Device Manager window.
Step 2. Expand the “Sound, video and game controllers” section in the Device Manager.
Step 3. Right-click on your audio device and select “Update driver.”
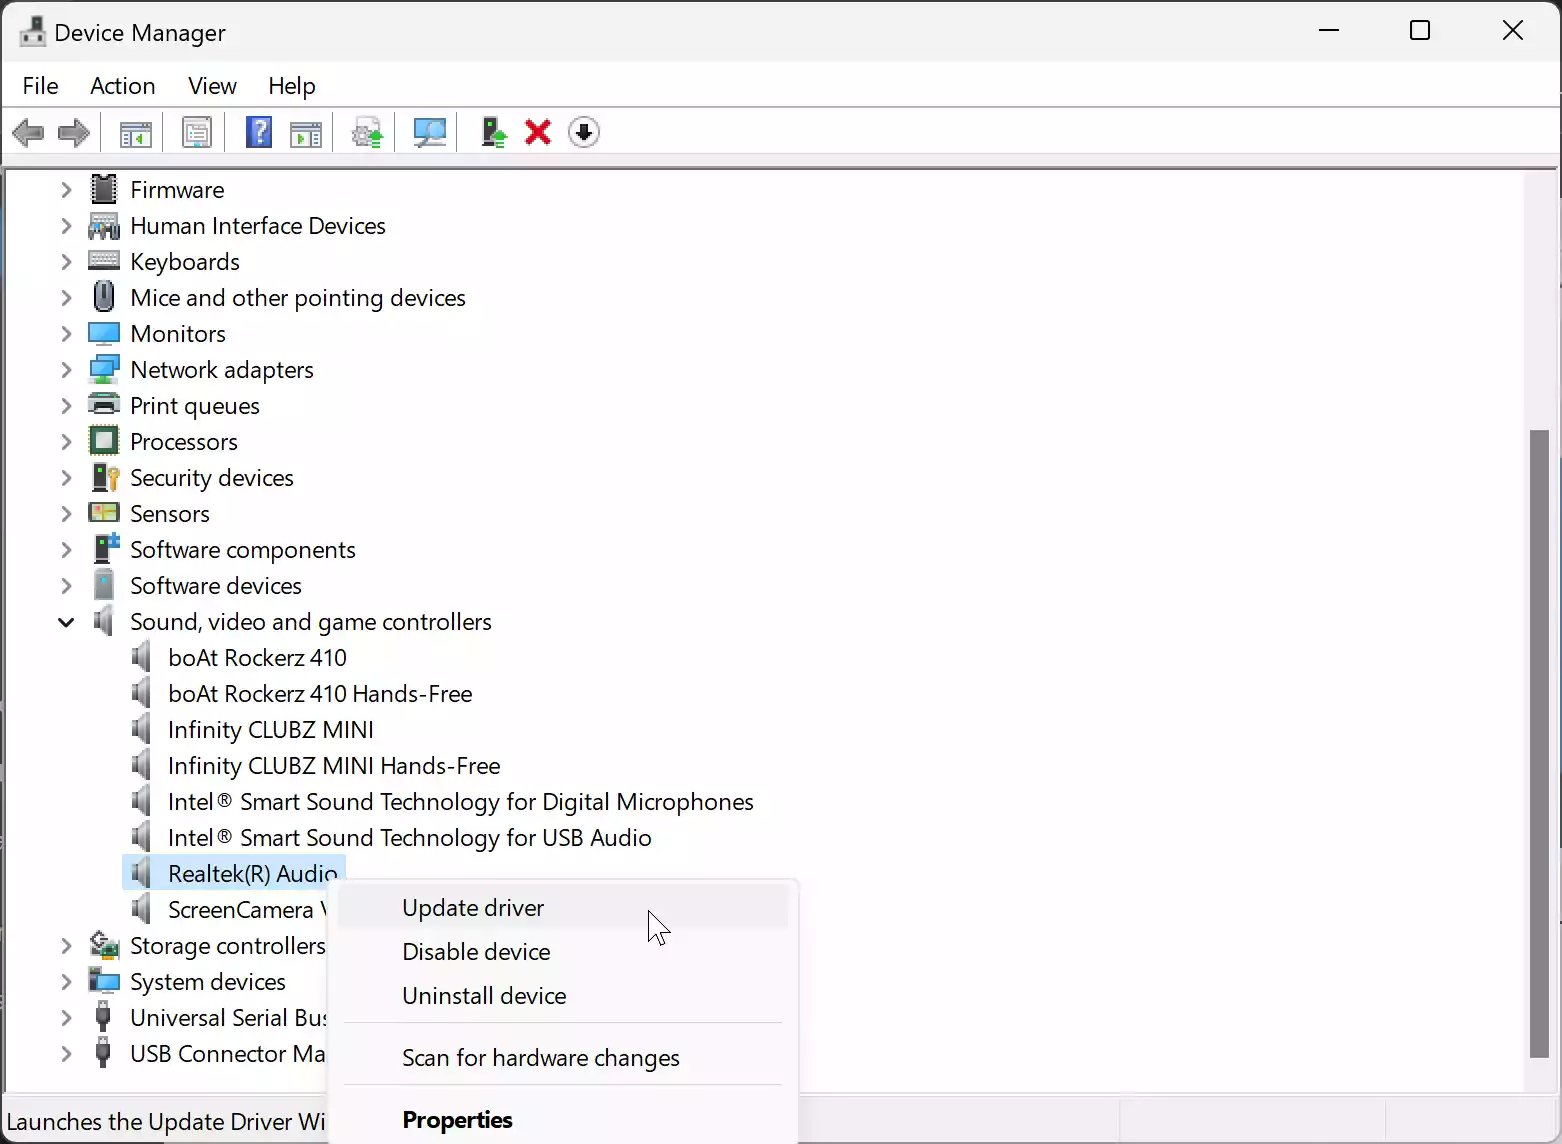
Step 4. Follow the on-screen instructions to update the driver software.
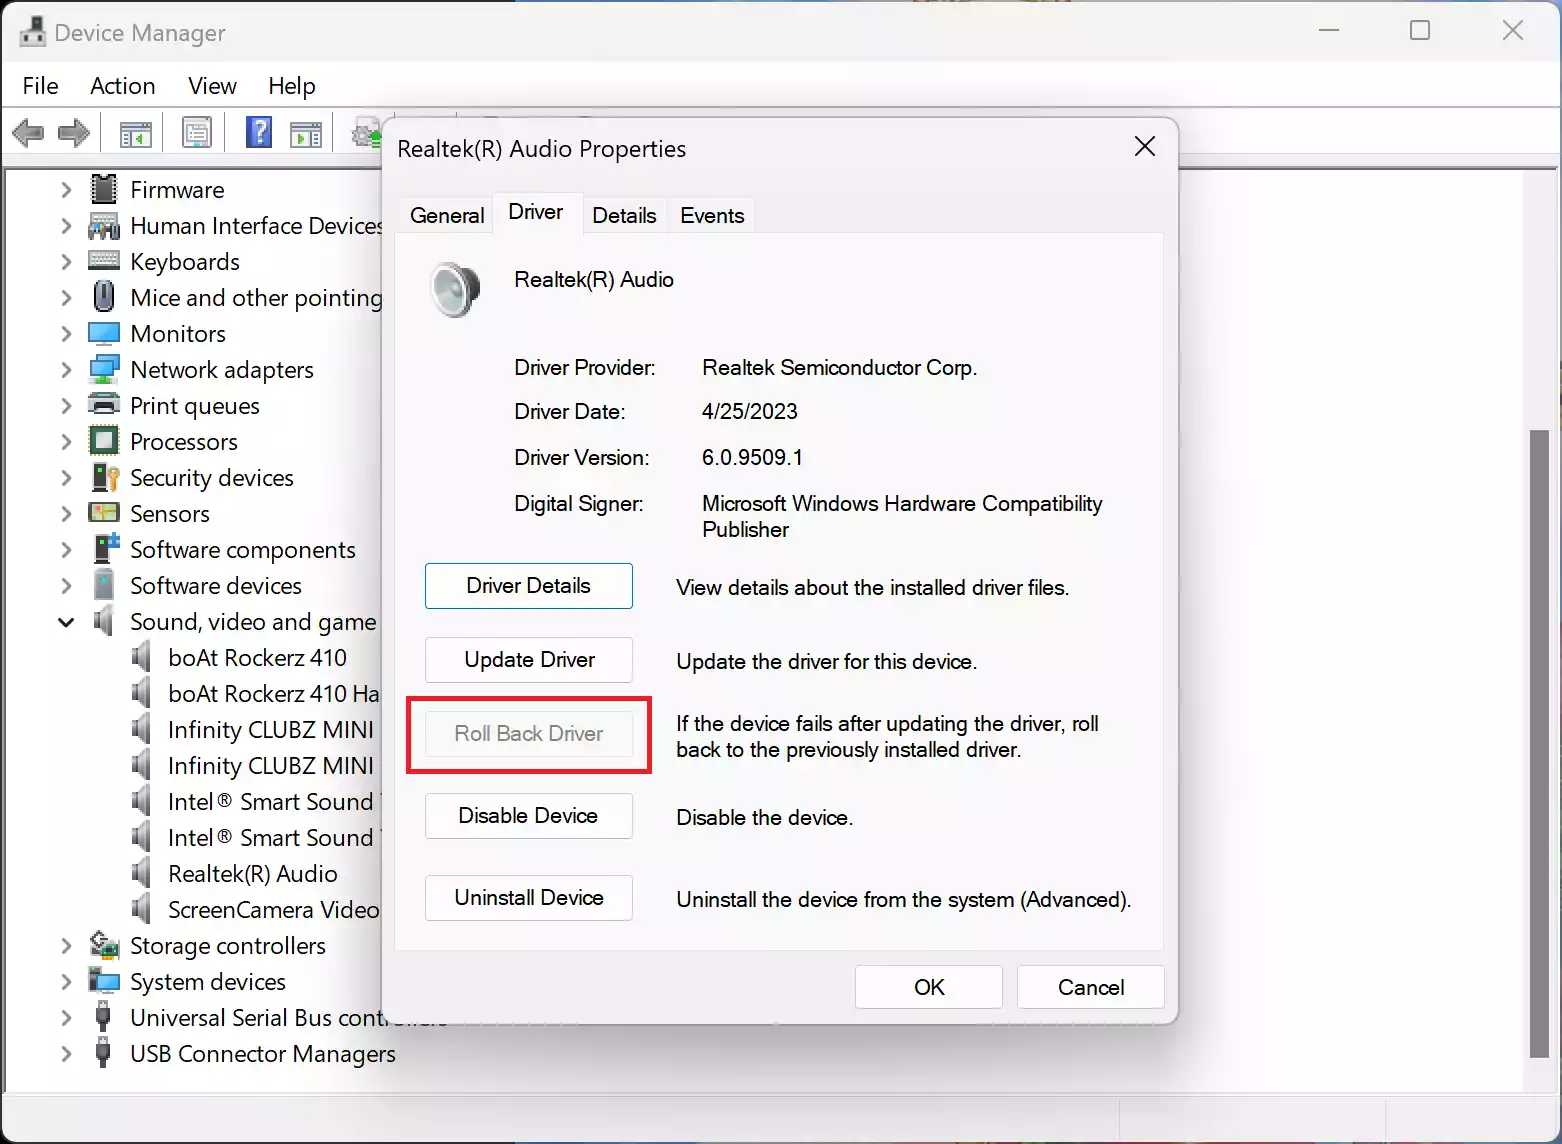
Step 5. Alternatively, you can also select “Properties” and go to the “Driver” tab to “Roll Back Driver” if that option is available.
Conclusion
Audio issues on Windows 10 can be frustrating, but often, they can be resolved by restarting your audio drivers. By following the steps outlined in this article, you can troubleshoot and potentially fix common sound problems on your computer. If the issues persist, consider seeking additional help from Microsoft support or consulting with a professional technician.