In this digital age, where we rely heavily on our computers, it’s essential to learn how to manage them efficiently. One of the ways to do that is by scheduling shutdowns. It is a useful feature that allows users to set up an automatic shutdown of their Windows 10 device at a specified time without the need to manually turn it off. In this article, we will walk you through the simple steps to schedule shutdown in Windows 10.
Scheduling shutdowns can be beneficial in various scenarios, such as when you need to leave your computer unattended for an extended period or when you want to save energy by automatically shutting down your device at a specific time. By using the built-in shutdown scheduler in Windows 10, you can easily manage and automate the shutdown process, saving you time and effort. So, let’s get started and learn how to schedule a shutdown in Windows 10.
How to Automatically Shut Down your Windows 10 computer?
If you want to save time by automatically shutting down your Windows 10 computer, you can easily set up a scheduled shutdown. By following these simple steps, you can configure your computer to shut down automatically at a specific time every day.
Step 1. To get started, click on the “Search” button on your taskbar and type in “Task Scheduler” in the search box.
Step 2. When Task Scheduler opens, click on Task Scheduler Library on the left sidebar.
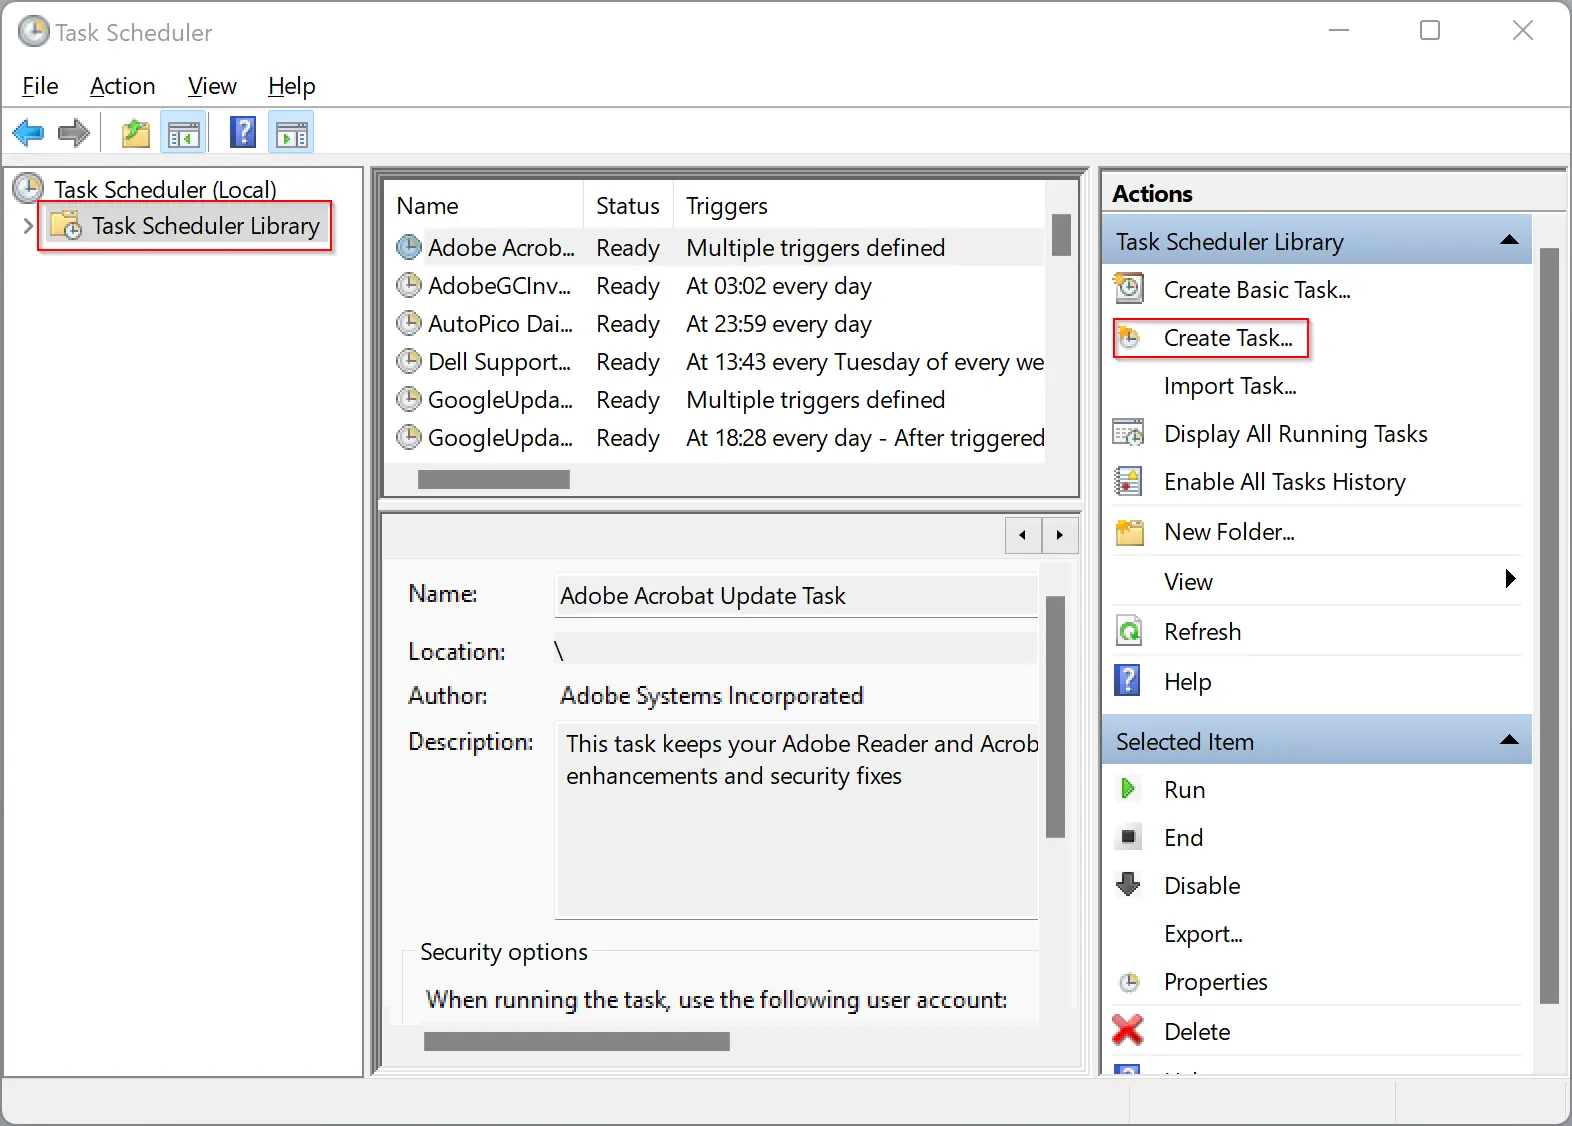
Step 3. On the right side pane, click the option “Create Task.”
Step 4. In the pop-up window that appears, select the “General” tab.
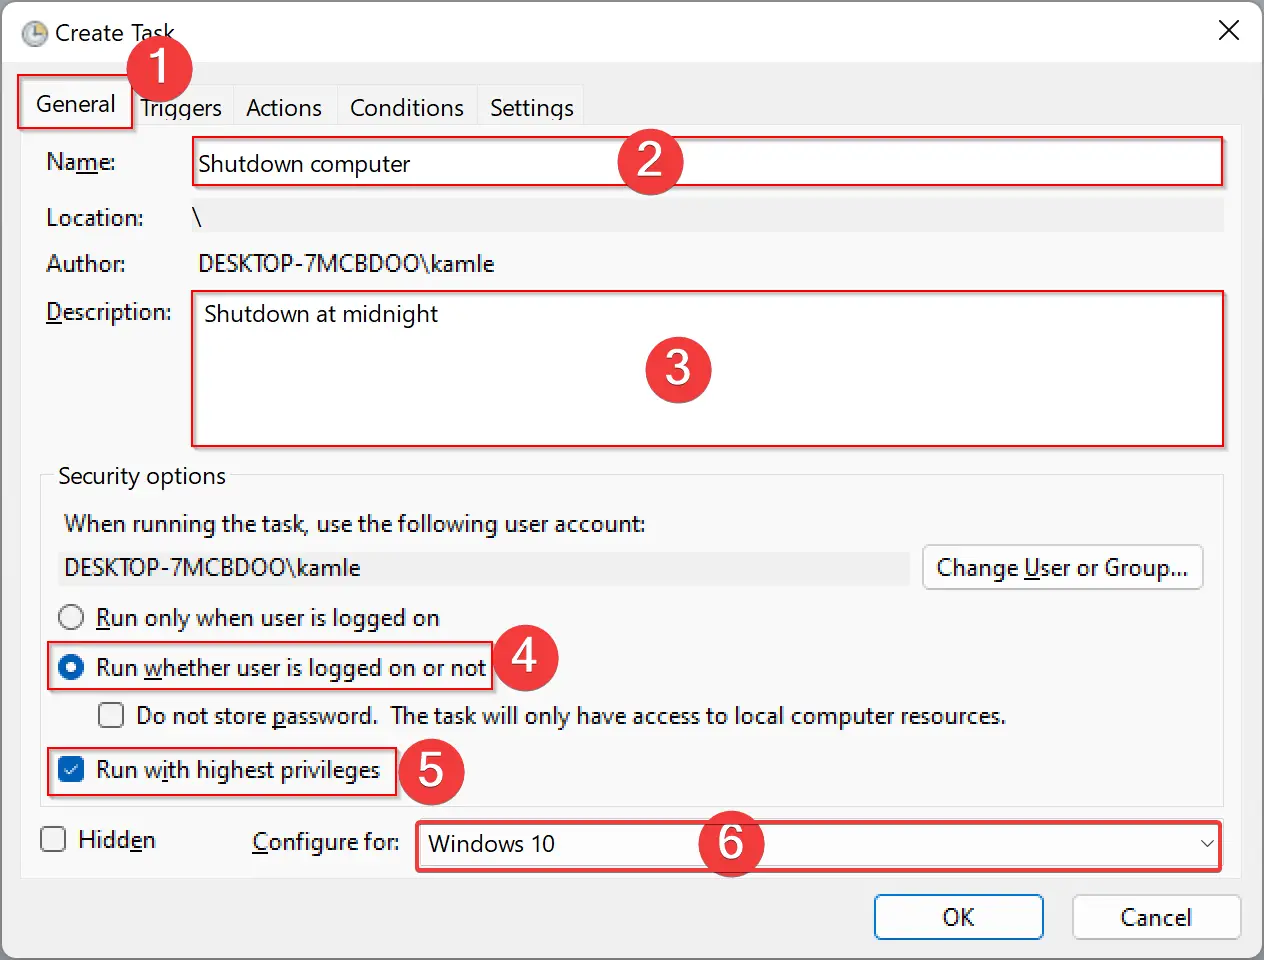
Step 5. Give a name to your task, such as “Shutdown Computer.”
Step 6. Write a description of the task in the Description box.
Step 7. Select the radio button “Run whether user is logged on or not.”
Step 8. Check the checkbox “Run with highest privileges.”
Step 9. Select “Windows 10” from the drop-down menu of “Configure for.”
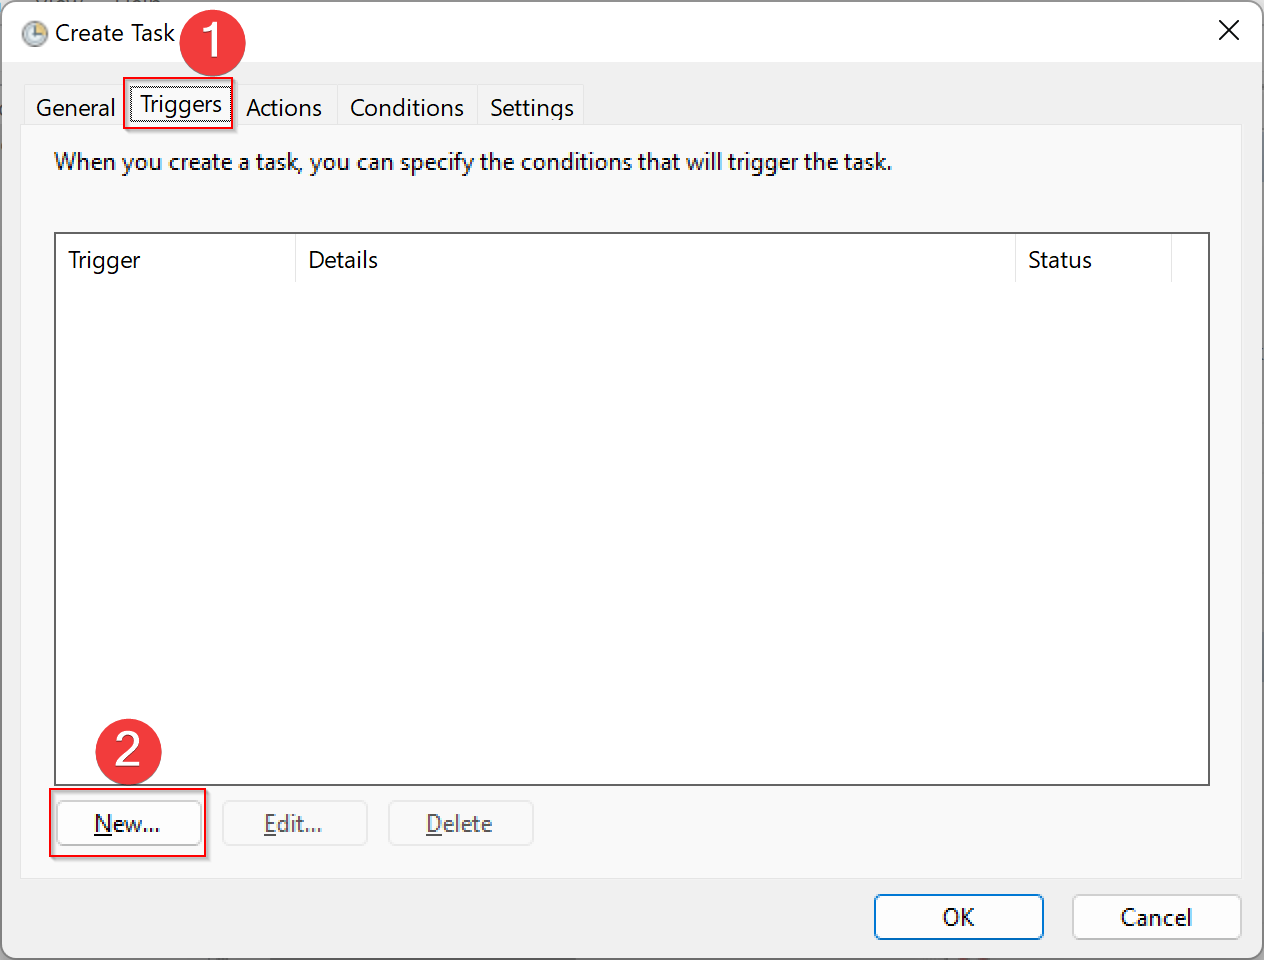
Step 10. Now, go to the “Triggers” tab and click the “New” button.
Step 11. A new pop-up window will open. Select “Begin the task” as “On a schedule.”
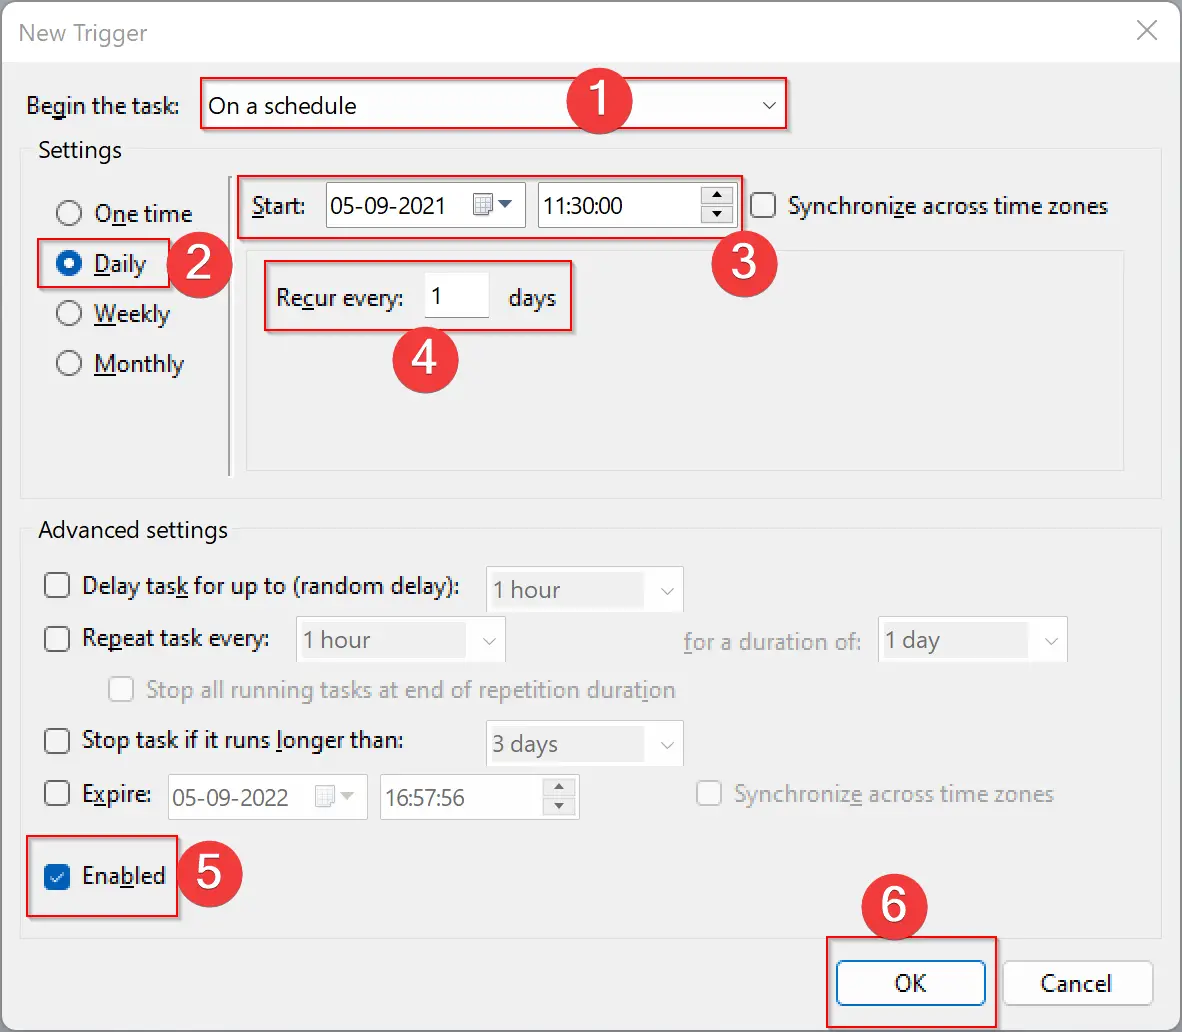
Step 12. Click the “Daily” option under the Settings section.
Step 13. Next to the Start option, select the date and time you want to trigger this task.
Step 14. Type “1” in the Recur every box.
Step 15. Check the option “Enabled” at the bottom.
Step 16. Click “OK” to exit from trigger settings.
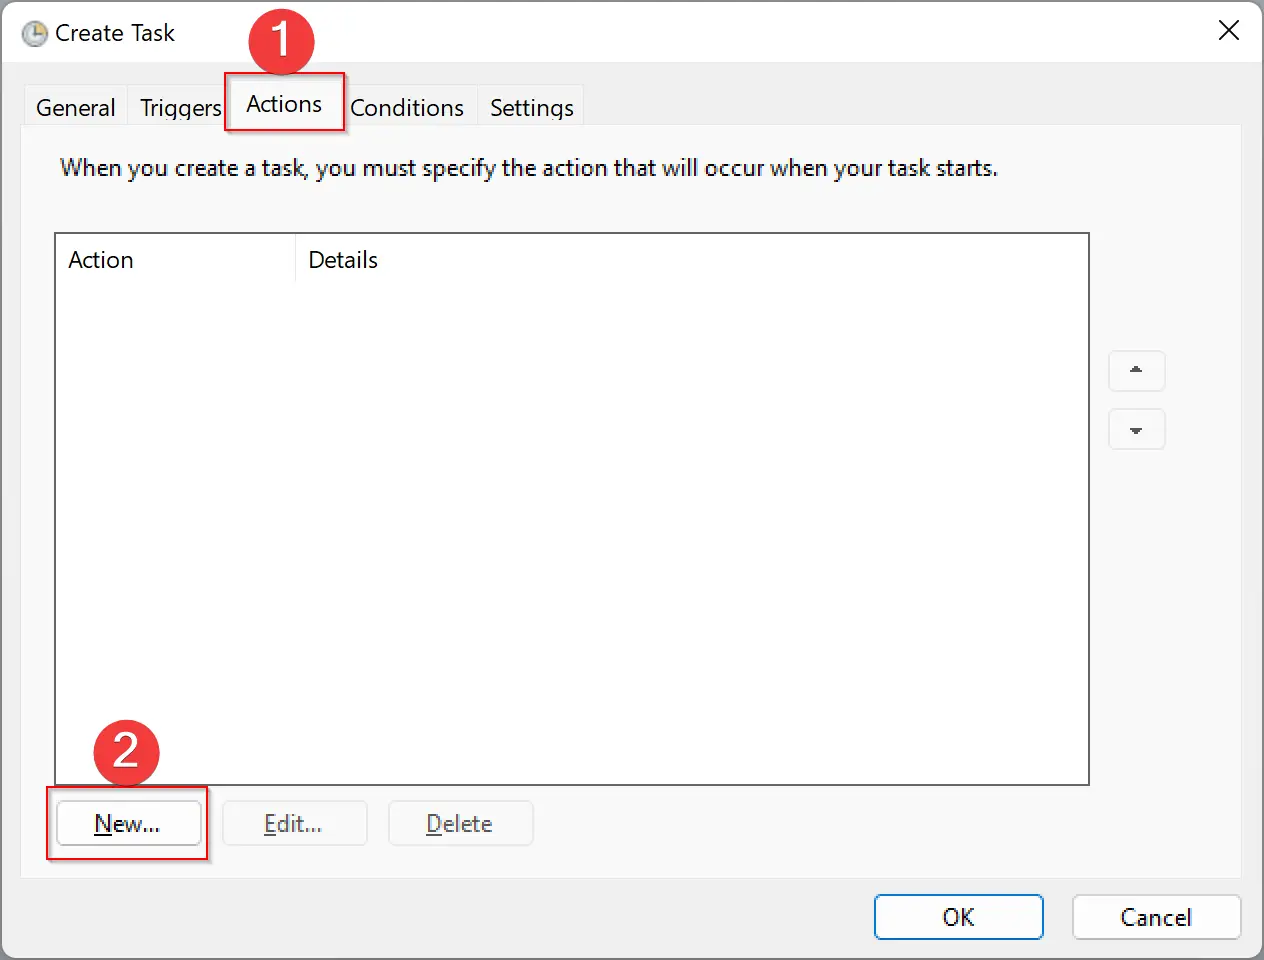
Step 17. Next, go to the “Actions” tab, and click the “New” button.
Step 18. On the new pop-up window, select “Start a program” from the Action drop-down menu.
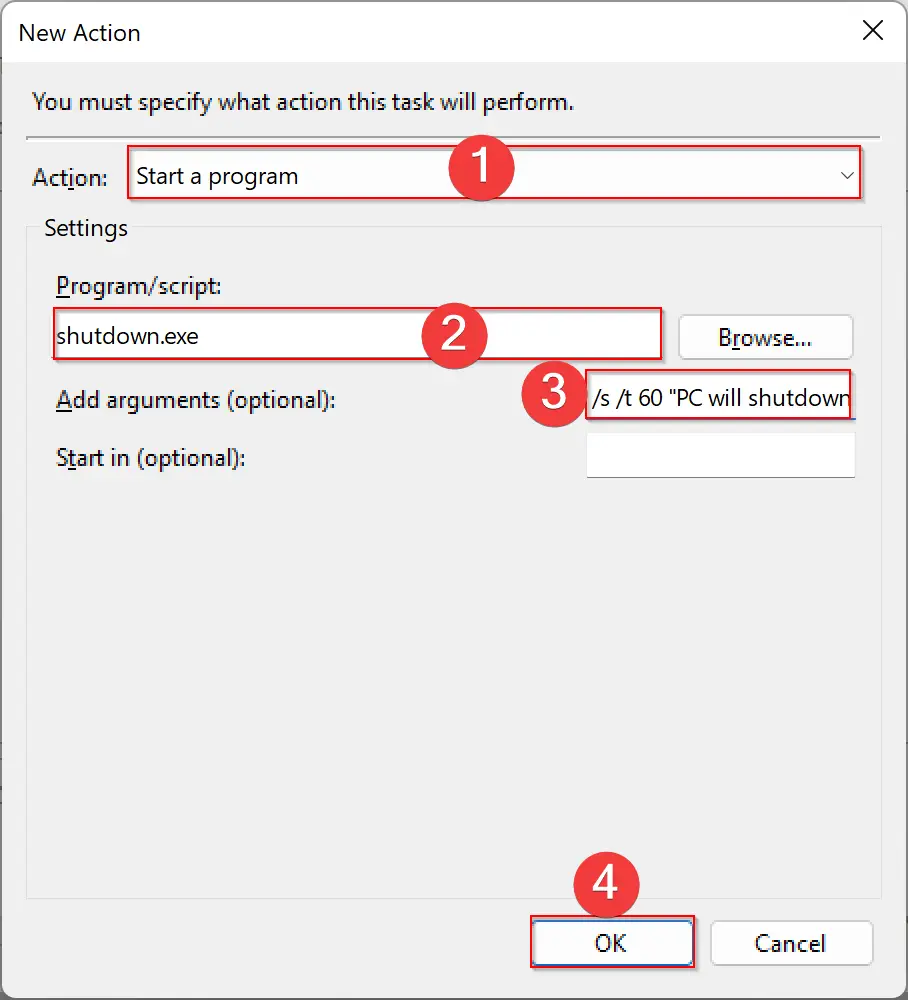
Step 19. Type “shutdown.exe” in the “Program/script” box.
Step 20. Type the following in the “Add arguments (optional)” box: “/s /t 60 “PC will shutdown in 60 seconds“”
Step 21. Click the “OK” button.
Step 22. Now, navigate to the “Conditions” tab.
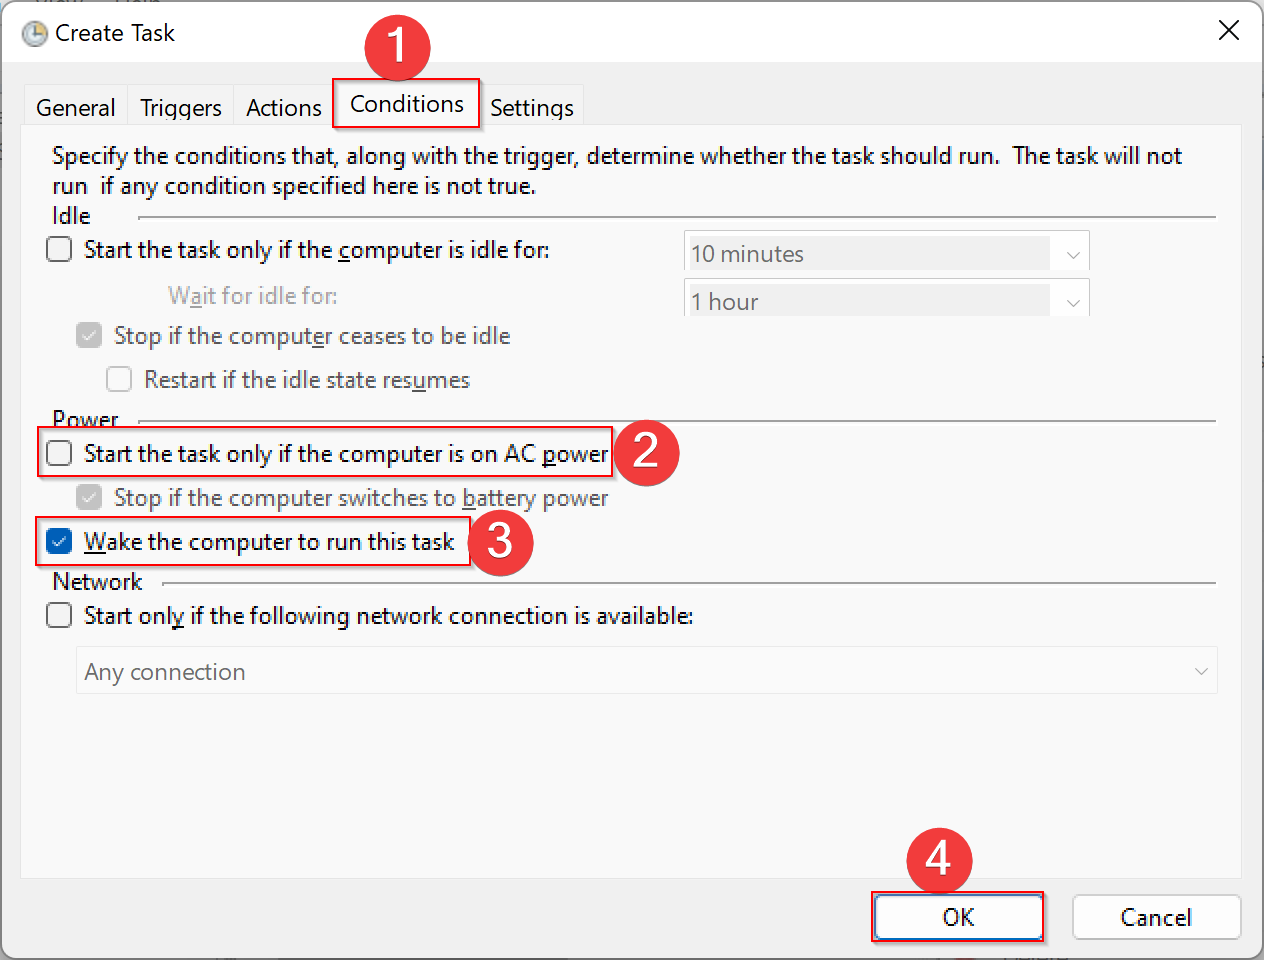
Step 23. Uncheck the checkbox “Start the task only if the computer is on AC power.”
Step 24. Check the box “Wake the computer to run this task.”
Step 25. Click “OK.”
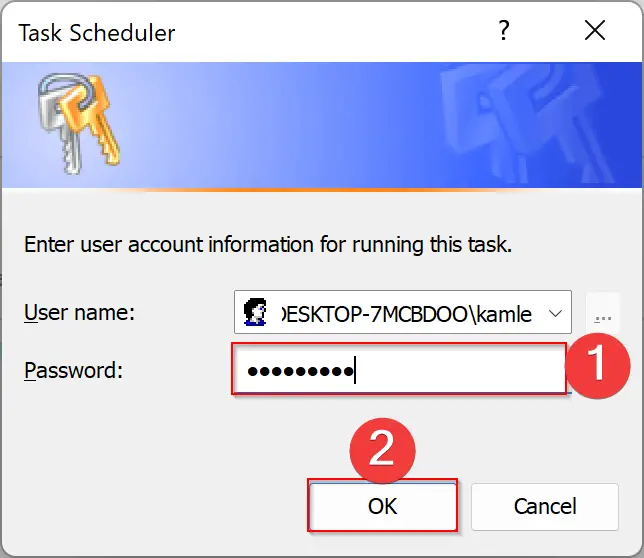
Step 26. Finally, enter the password of your administrative account when prompted by Task Scheduler.
After completing the above steps, you’ll see a new task under Task Scheduler.
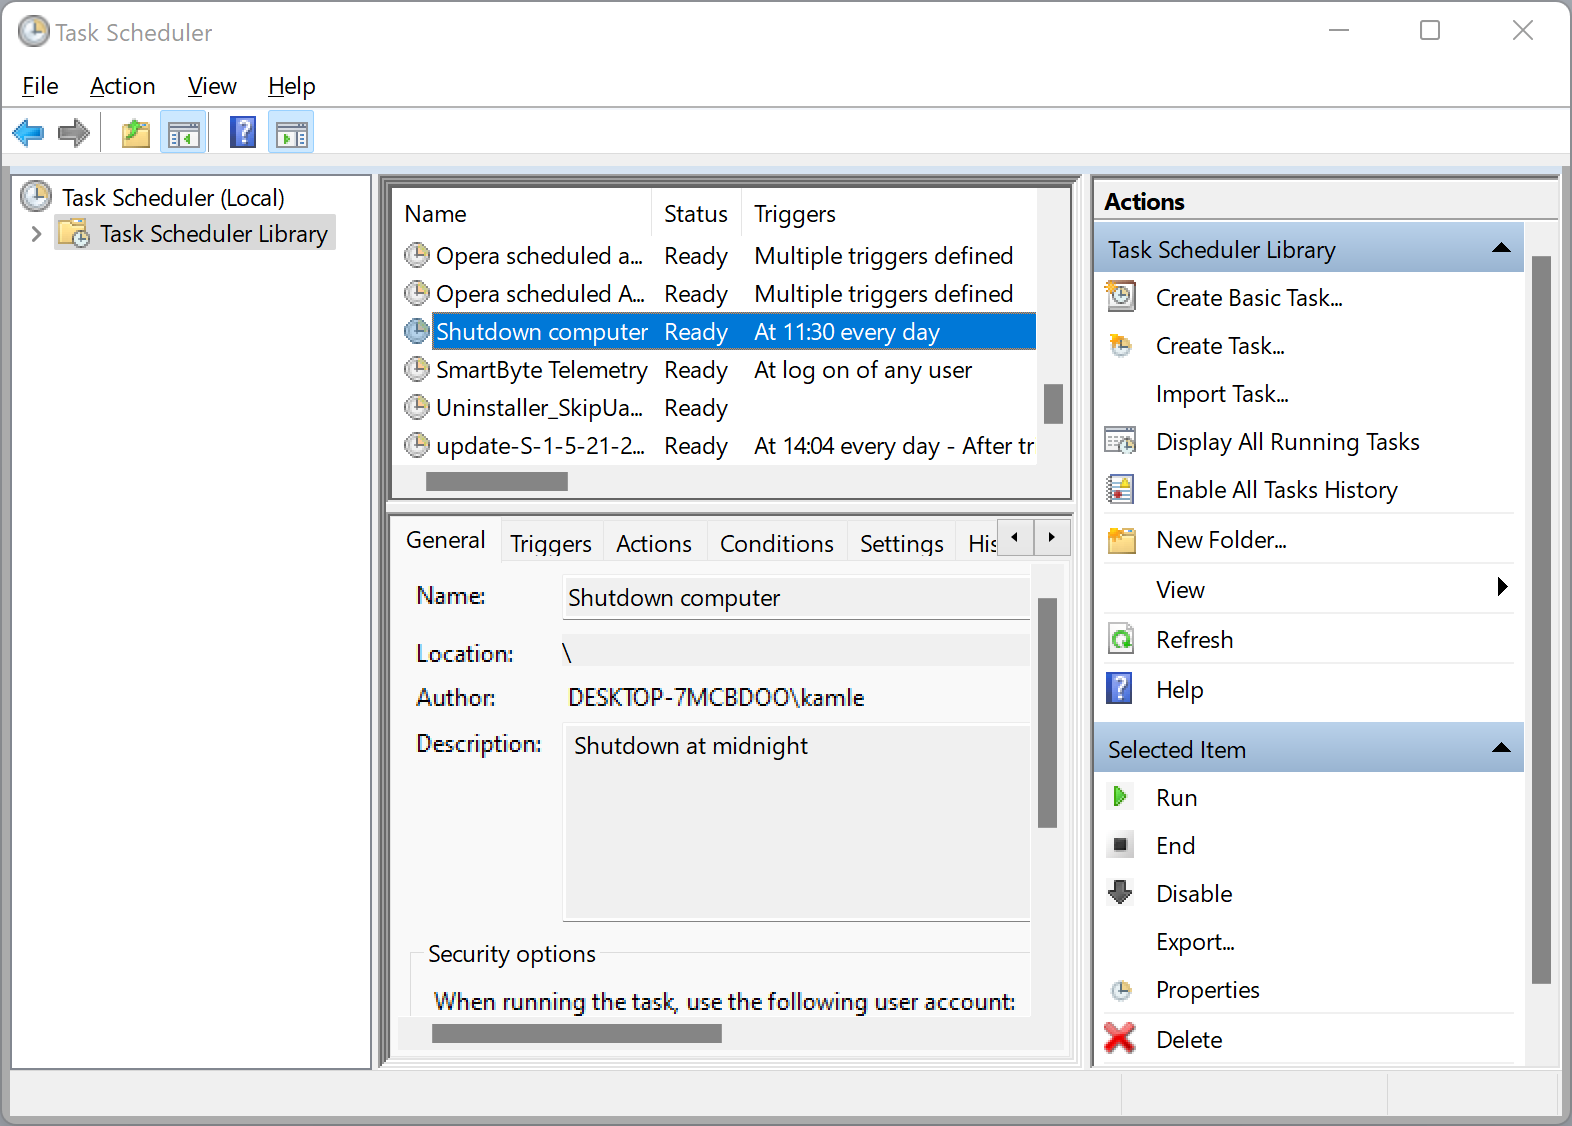
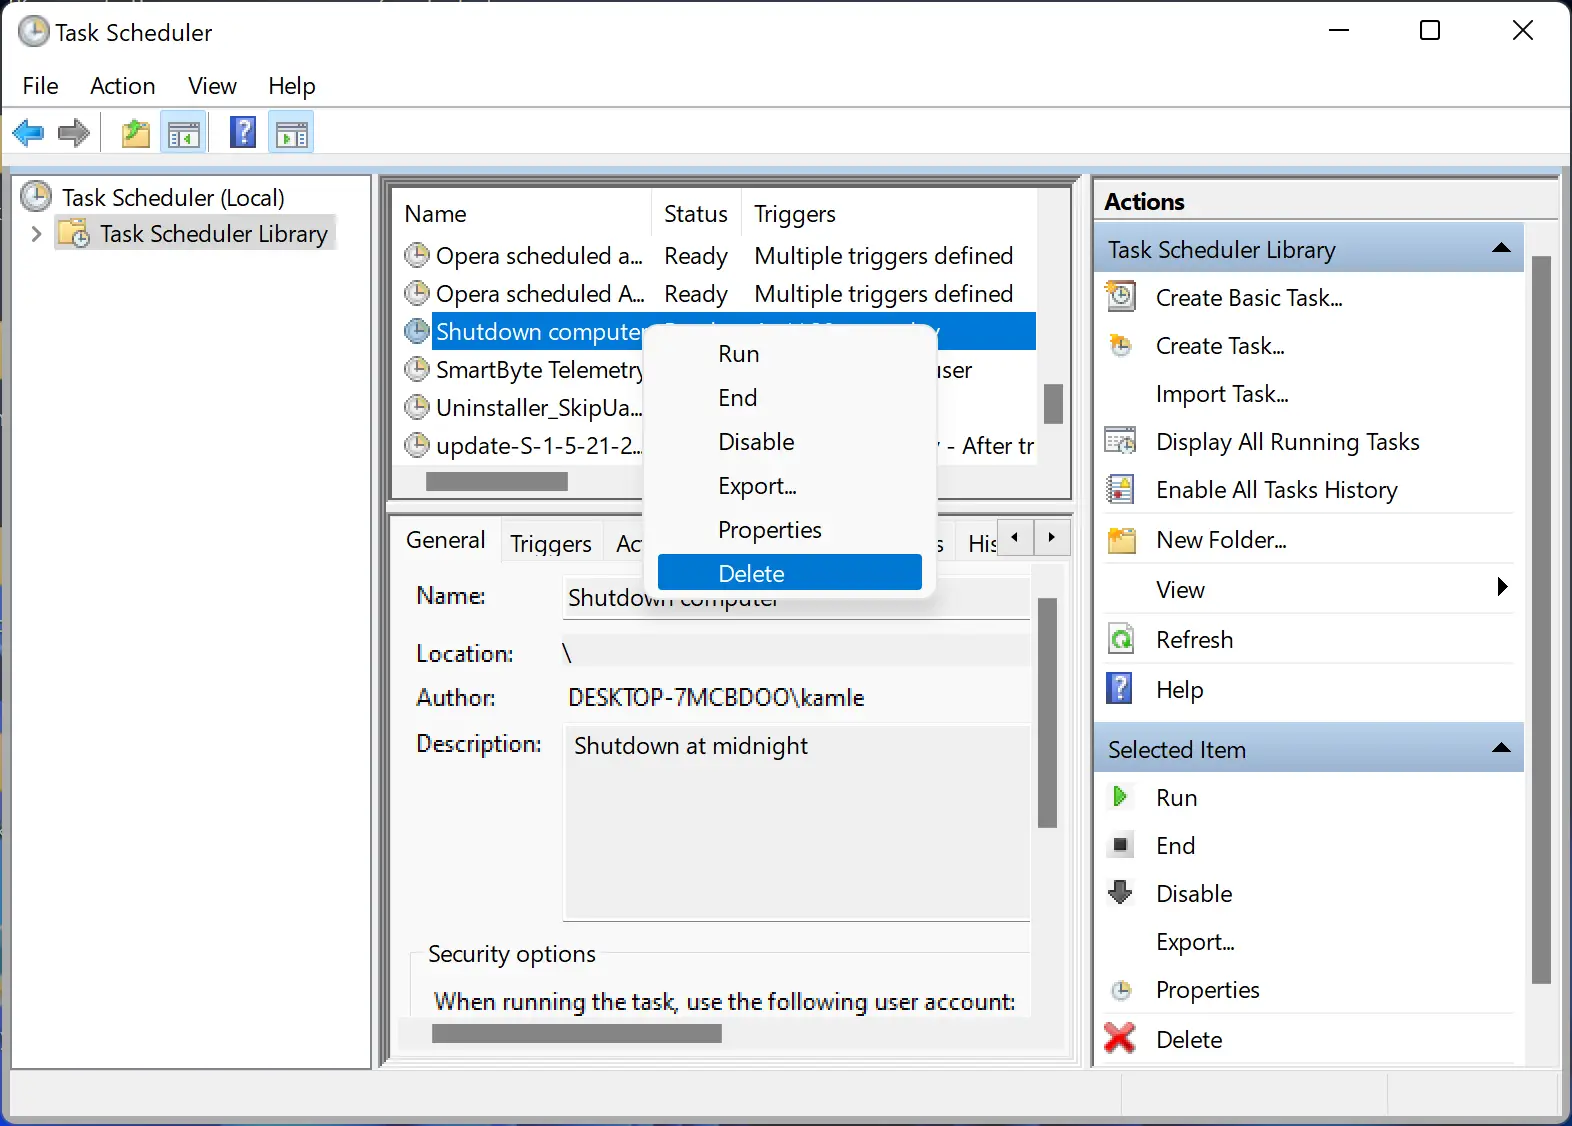
If you ever want to remove this task, simply right-click on it and select the “Delete” option.
If you’re a Windows user who prefers to use a third-party tool to schedule a shutdown, you have the option to download any of the following tools:-