If you use a shared PC where more than one person uses your computer, you might want to convey some message before a user logs in. It may also happen you are the administrator of a network, and you want to display a notice for all the users. No matter the reason, it is possible on Windows 11/10 to show custom messages when a user tries to log into a PC.
When you set the welcome or warning message on your computer, all members will be welcomed or alerted before signing in to your PC. There are at least two methods to display a custom message on Windows 11/10 PCs. You can display a notice using either Local Security Policy or Registry Editor. We will show both ways; you can follow either of the procedures to display a message on the login screen.
How to Display a Custom Message on Windows 11/10 Login Screen using Registry Editor?
Follow these steps to show a custom message on Windows 11/10 Login Screen using Registry Editor:-
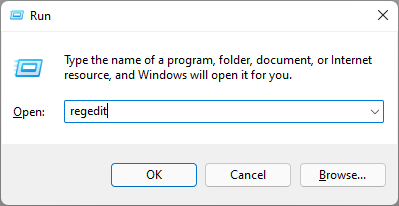
Step 1. Press Windows + R keys from the keyboard to open the Run command box.
Step 2. Type regedit and hit Enter from the keyboard to open the Registry Editor window.
Step 3. Navigate to the following key in the Registry Editor from the left sidebar:-
Computer\HKEY_LOCAL_MACHINE\SOFTWARE\Microsoft\Windows\CurrentVersion\Policies\System

Step 4. On the right pane of the System folder, find the string legalnoticecaption and then double-click on it to modify.

Step 5. Enter the message title under the “Value Data” field that you want to display on the login screen, and then click the OK button to save the changes.
Step 6. After that, find the legalnoticetext string and then double-click on it to modify. Enter your message text under the Value data field and click on the OK button to save the modification message.

Step 7. When done, close the Windows Registry and reboot your computer.
Before signing into your Windows 11/10 PC, you or other users on your computer will see the custom message that you have entered in the above steps.

How to Display a Custom Message on Windows 11/10 Login Screen through Local Security Policy?
Follow these steps to display a custom message on Windows 11/10 Login Screen through Local Security Policy:-
Step 1. Open Local Security Policy.
To do that, click the Start button on the taskbar and then type Local Security Policy. From the available top results, click its entry to open.

Step 2. When the Local Security Policy window opens, navigate to the following path from the left sidebar:-
Local Policies > Security Options

Step 3. On the right side pane, find “Interactive logon: Message title for users trying to log on” and double-click on it to open its settings.

Step 4. Under the Local Security Settings tab, type the message title in the provided text field.

Step 5. Click Apply.
Step 6. Click OK.
Step 7. Now, look for the policy name, “Interactive logon: Message text for users attempting to log on.” Double-click on it to modify its settings.

Step 8. Under the Local Policy Setting tab, type the custom message you would like to show on the Login screen.

Step 9. Click Apply.
Step 10. Click OK.
That’s it. Reboot your PC to see the custom notice before login into your desktop.
Conclusion
In conclusion, displaying a custom message on the login screen of your Windows 11/10 PC is a simple and useful way to communicate important information to all users. Whether you want to welcome users or display a warning, there are two easy ways to set up a custom message: using the Registry Editor or Local Security Policy. By following the steps outlined in this guide, you can easily add a message title and custom text to the login screen, which will be displayed to anyone who logs into the computer. This is a great way to keep all users informed and improve the overall security of your system.