Windows 10 offers various options for taking screenshots, whether you’re browsing the internet, watching a movie, or need to capture an important moment on your screen. Users can easily capture an entire window or a selected portion of the screen.
In traditional Windows operating systems, the keyboard button labeled “PrtScn” or “prt sc” is commonly used for screenshots. However, if your keyboard layout includes Function Key (fn), you’ll need to press and hold the function key and then press the PrtScn key to capture a screenshot using the keyboard.
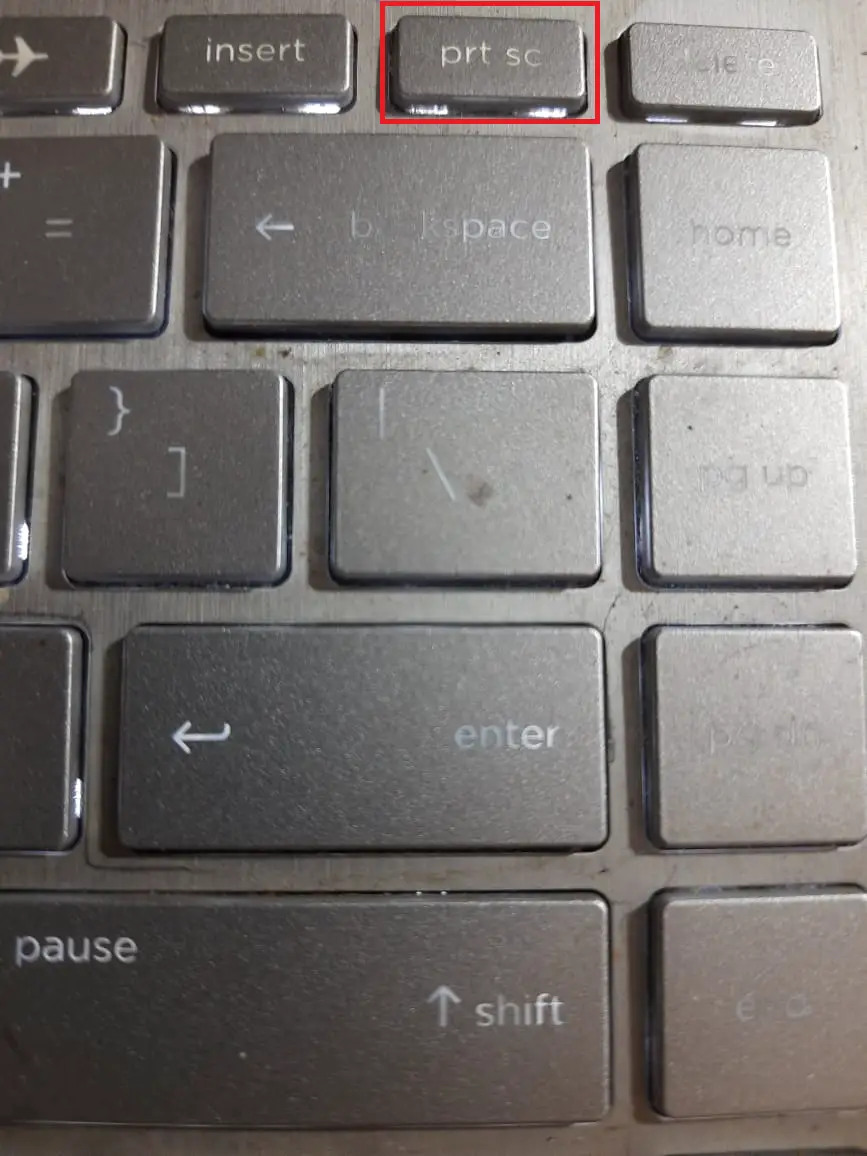
The PrtScn key captures the entire screen, but there are some key combinations that allow you to get desired results. For example:-
- PrtScn: Captures the entire active window and keeps it in the clipboard. You can paste this screenshot into any compatible program, such as MS Word or Paint.
- Alt + PrtScn: Captures only the active window and keeps it in the clipboard. You can paste this screenshot into any compatible program.
- Windows Key + Shift + S: Captures a selected portion of the screen and saves it in the clipboard, which you can paste into any compatible program.
- Windows Key + PrtScn: Saves the entire screen in an image file in the Pictures > Screenshots folder.
In Windows 10, there’s an inbuilt tool to take screenshots called the Snipping Tool. This tool is convenient for those who usually capture a desired portion of the active window, as it allows you to save the image directly in the desired folder.
How to take a screenshot in Windows 10 using the Snipping Tool?
Here’s how to take a screenshot in Windows 10 using the Snipping Tool:-
Step 1. Open the Start menu and type “Snipping.”
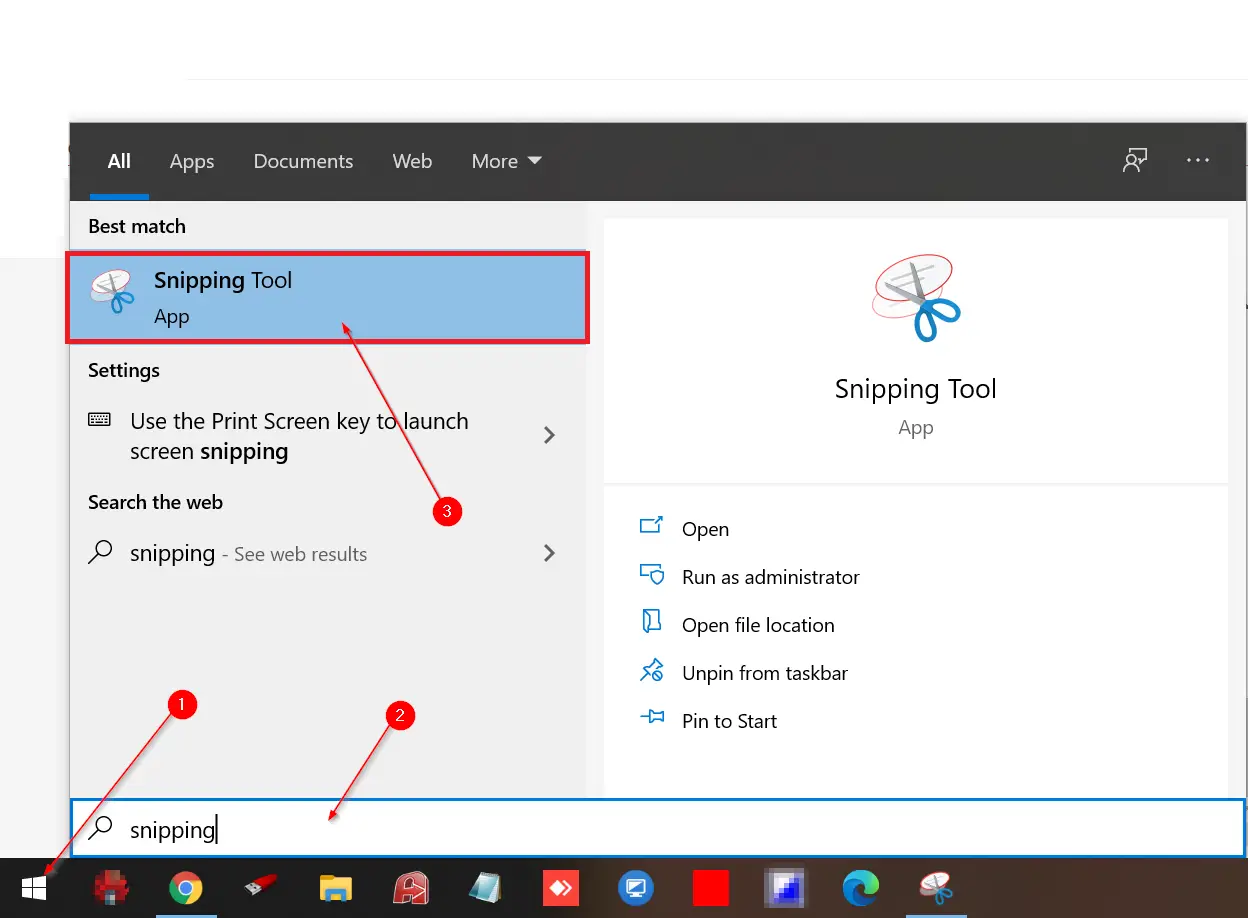
Step 2. Click on the Snipping Tool in the search results to launch it.
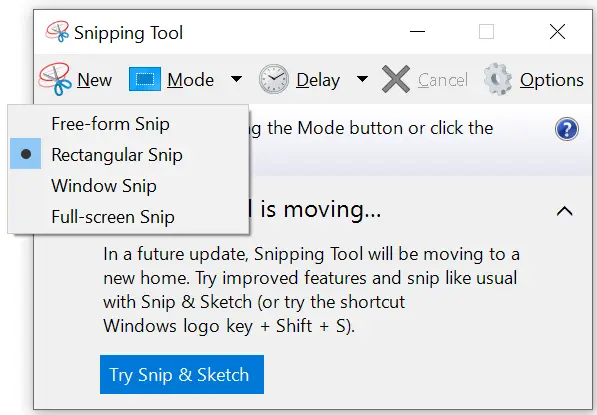
Step 3. Select the desired mode of shape from the Mode menu, such as Free-form Snip, Rectangular Snip, Window Snip, or Full-screen Snip.
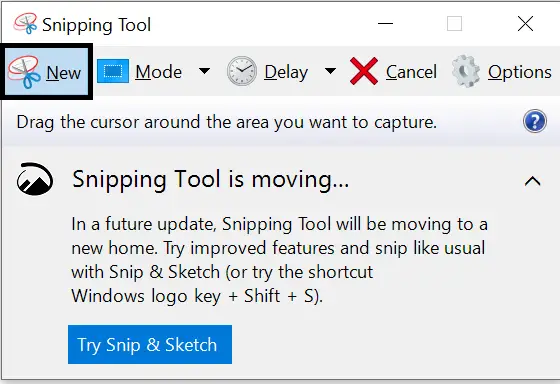
Step 4. Once you’ve selected the correct mode, click New and drag the mouse while pressing the left button to capture the desired active area of the screen. The screen will freeze until you capture the screenshot.
Step 5. Save the screenshot in the desired location.
By following these steps, you can easily capture and save screenshots using the Snipping Tool in Windows 10.
How to Capture Full Screen on Windows 10?
To capture the full screen on Windows 10, follow these easy steps:-
Step 1. Look for the “Print Screen” key on your keyboard. It may be labeled as “PrtScn,” “PrtSc,” or something similar. Instead of pressing it once, press and hold it for a moment until you see a brief animation or notification indicating that the screenshot has been taken.
Step 2. Pressing the “Print Screen” will instantly capture the full screen, including all open windows and applications.
Step 3. Open an image editing program such as Paint, Photoshop, or even Microsoft Word.
Step 4. Paste the captured screenshot into the program by pressing “Ctrl + V” or right-clicking and choosing “Paste.”
Step 5. Save the screenshot as an image file (e.g., JPEG or PNG) in your desired location on your computer.
By following these alternative steps, you can capture and save screenshots.
How to Capture the Active Window on Windows 10?
To capture the active window on Windows 10, use these steps:-
Step 1. Click on the window to make it the active window you want to capture.
Step 2. Locate and hold the “Alt” key on your keyboard.
Step 3. While holding down the “Alt” key, press the “Print Screen” key.
Step 4. Open an image editing program and paste the captured screenshot using the “Ctrl + V” keyboard shortcut.
How to Take Screenshots Using the Windows Key + Shift + S Shortcut?
On a Windows 10 PC, you can capture a specific area of the screen directly to the clipboard. To use this shortcut:-
Step 1. Press the “Windows” key + “Shift” + “S” simultaneously.
Step 2. Your screen will dim, and the cursor will turn into a crosshair.
Step 3. Click and drag the crosshair to select the area you want to screenshot.
Step 4. Release the mouse button to capture the selected area.
Step 5. The screenshot is now stored in your clipboard, ready to be pasted into an image editing program or document.
With these user-friendly methods, taking screenshots on your Windows 10 computer is a breeze. Whether you want to capture your entire screen, a specific window, or just a portion of your display, Windows 10 offers a range of options to meet your needs. Say goodbye to complicated processes and hello to effortless screenshotting!
Save precious moments, share crucial information, and boost your productivity by harnessing the power of screenshots on your Windows 10 computer today. It’s time to unleash your creativity and simplify your digital life with just a few clicks!
Conclusion
Windows 10 provides a variety of user-friendly options for capturing screenshots effortlessly. Whether you want to capture the entire screen, an active window, or a specific area, Windows 10 has got you covered. With these simple methods, you can easily save important moments, share information, and enhance your productivity through screenshots on your Windows 10 computer. Start utilizing these features today and simplify your digital life with just a few clicks!