If you use a limited internet plan, Windows 11 allows you to monitor your data usage and receive warnings before exceeding the limits. Although most Internet Service Providers (ISPs) give you unlimited access to the Internet, you may still come across services that offer a limited amount of data each month.
When using a capped data plan, you should use the “Data Usage” feature that Windows 11 offers. The feature is specially designed to monitor connection data usage during a specified cycle. You can also configure limits to get warnings to ensure you do not exceed the data allowance.
In this gearupwindows article, we will guide you on configuring and using the Data usage feature to control your internet bandwidth and avoid extra charges.
How to View Data Usage on Windows 11?
To monitor the data usage of the network adapters on Windows 11, use the following steps:-
Step 1. Open Settings app.
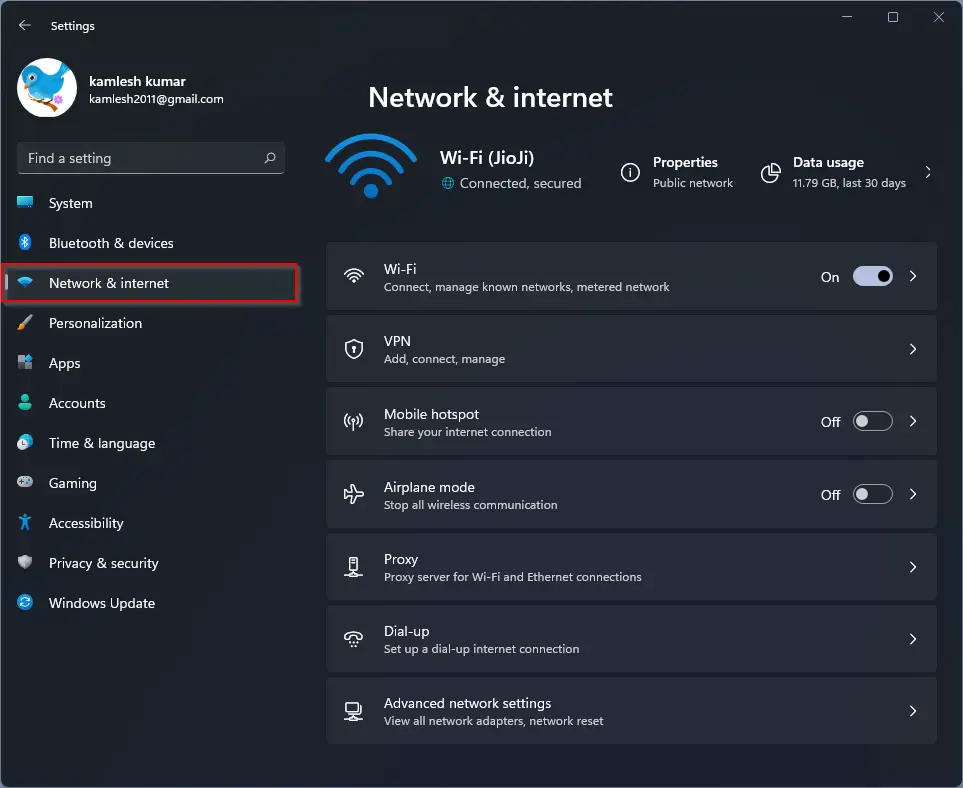
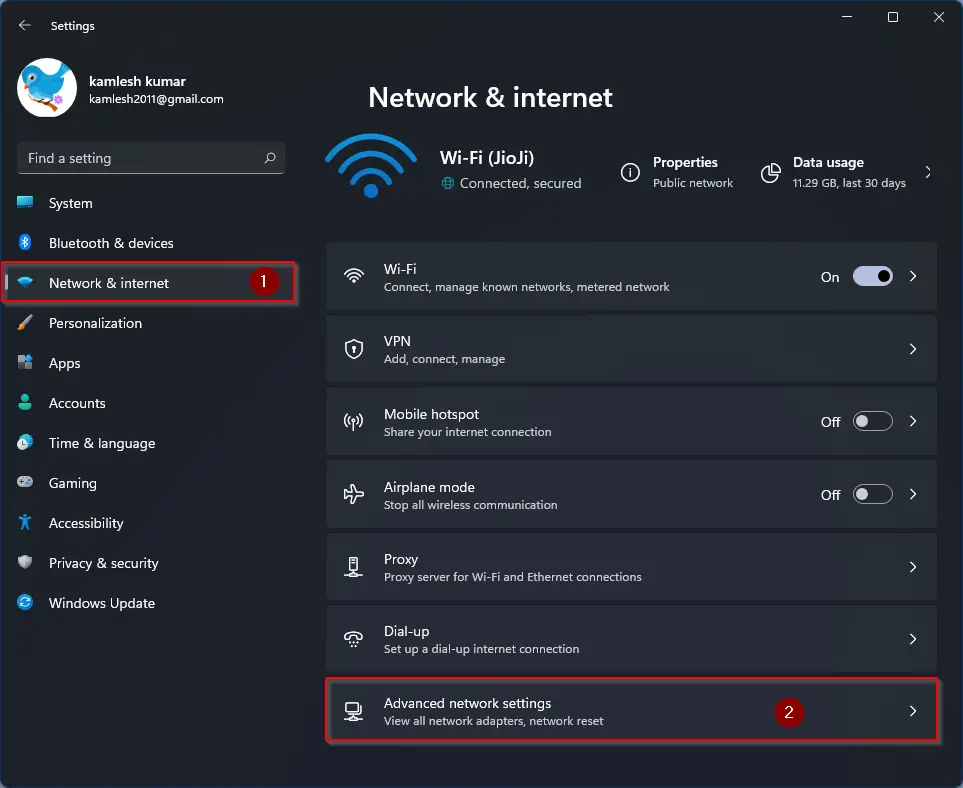
Step 2. Then, select Network & internet.
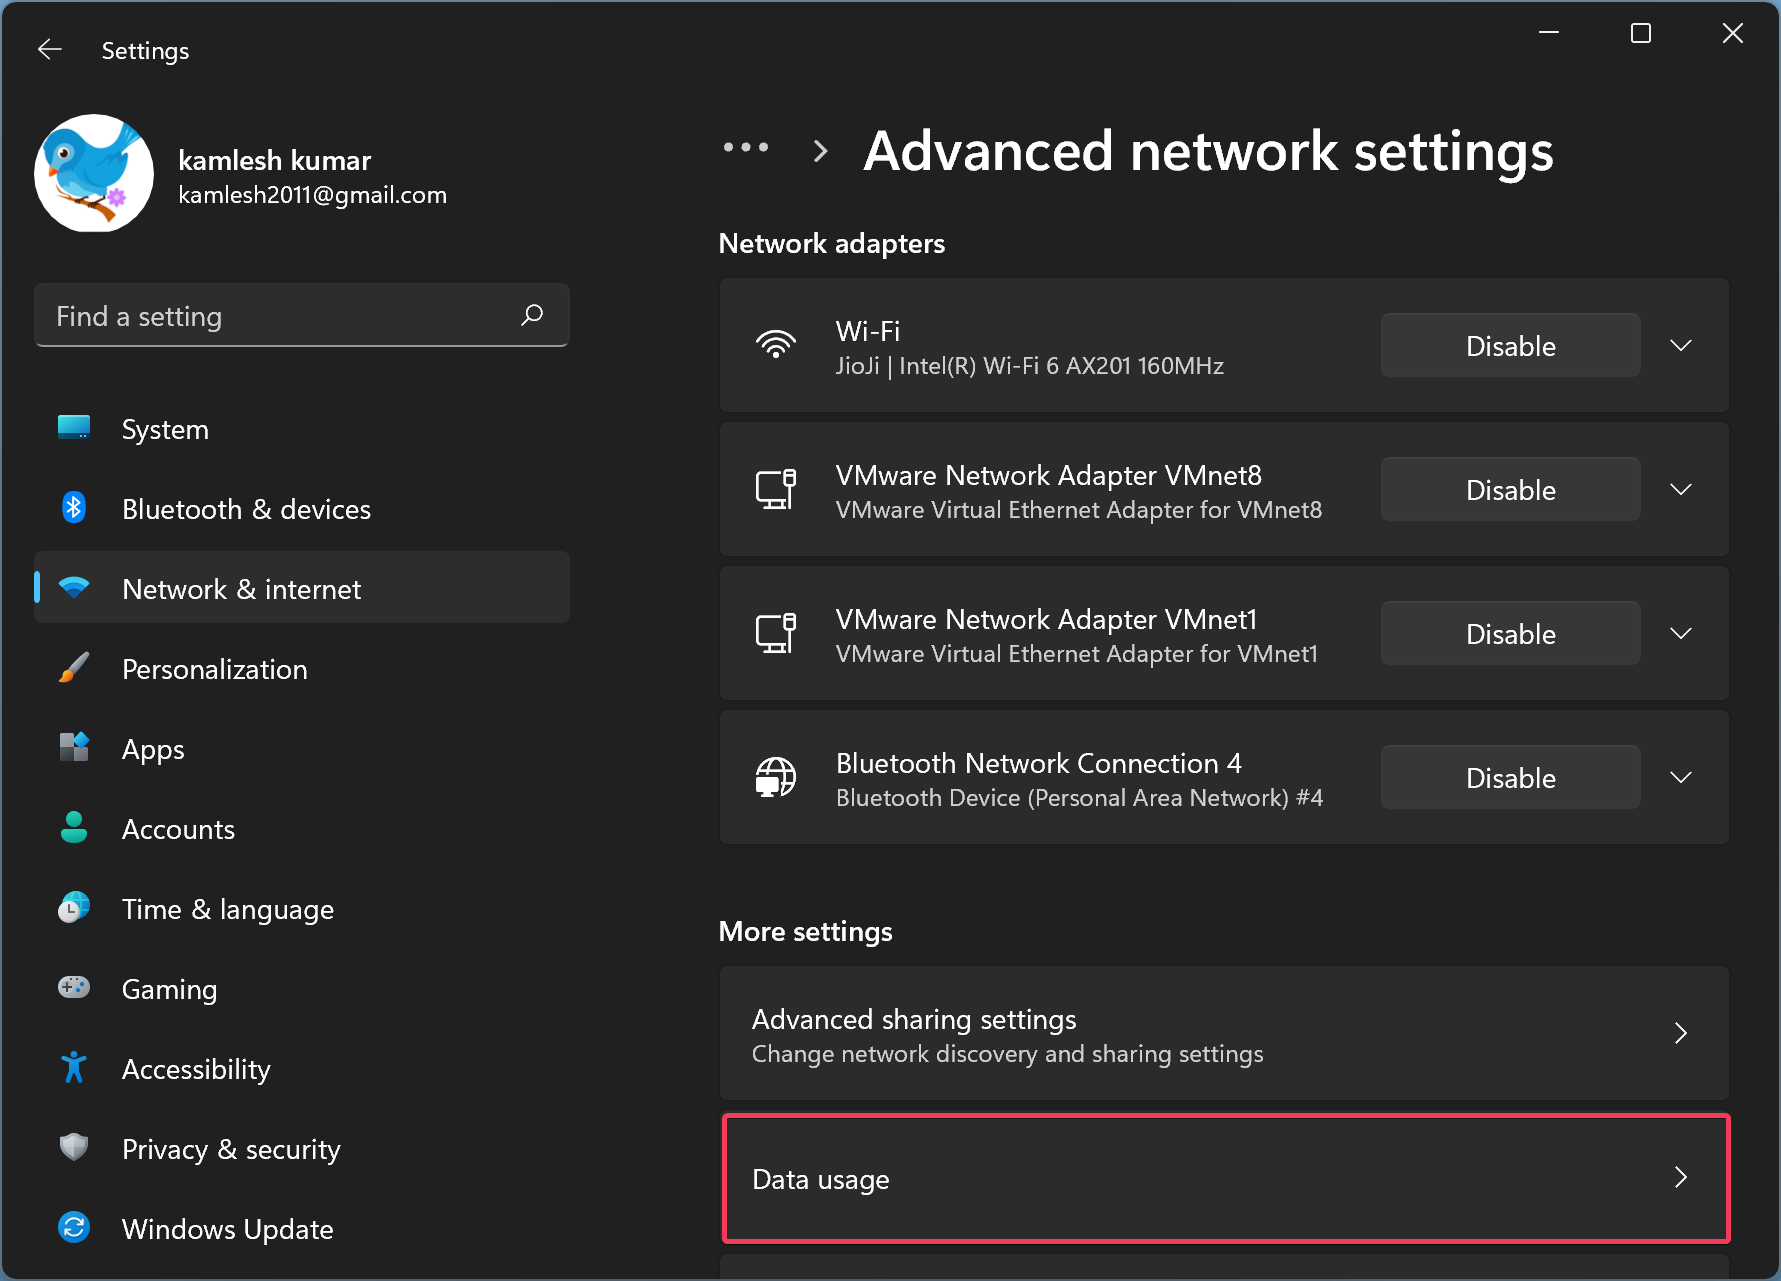
Step 3. After that, click the Advanced network settings page on the right side.
Step 4. When you’re done, under the “More settings” section, click the Data usage tile.
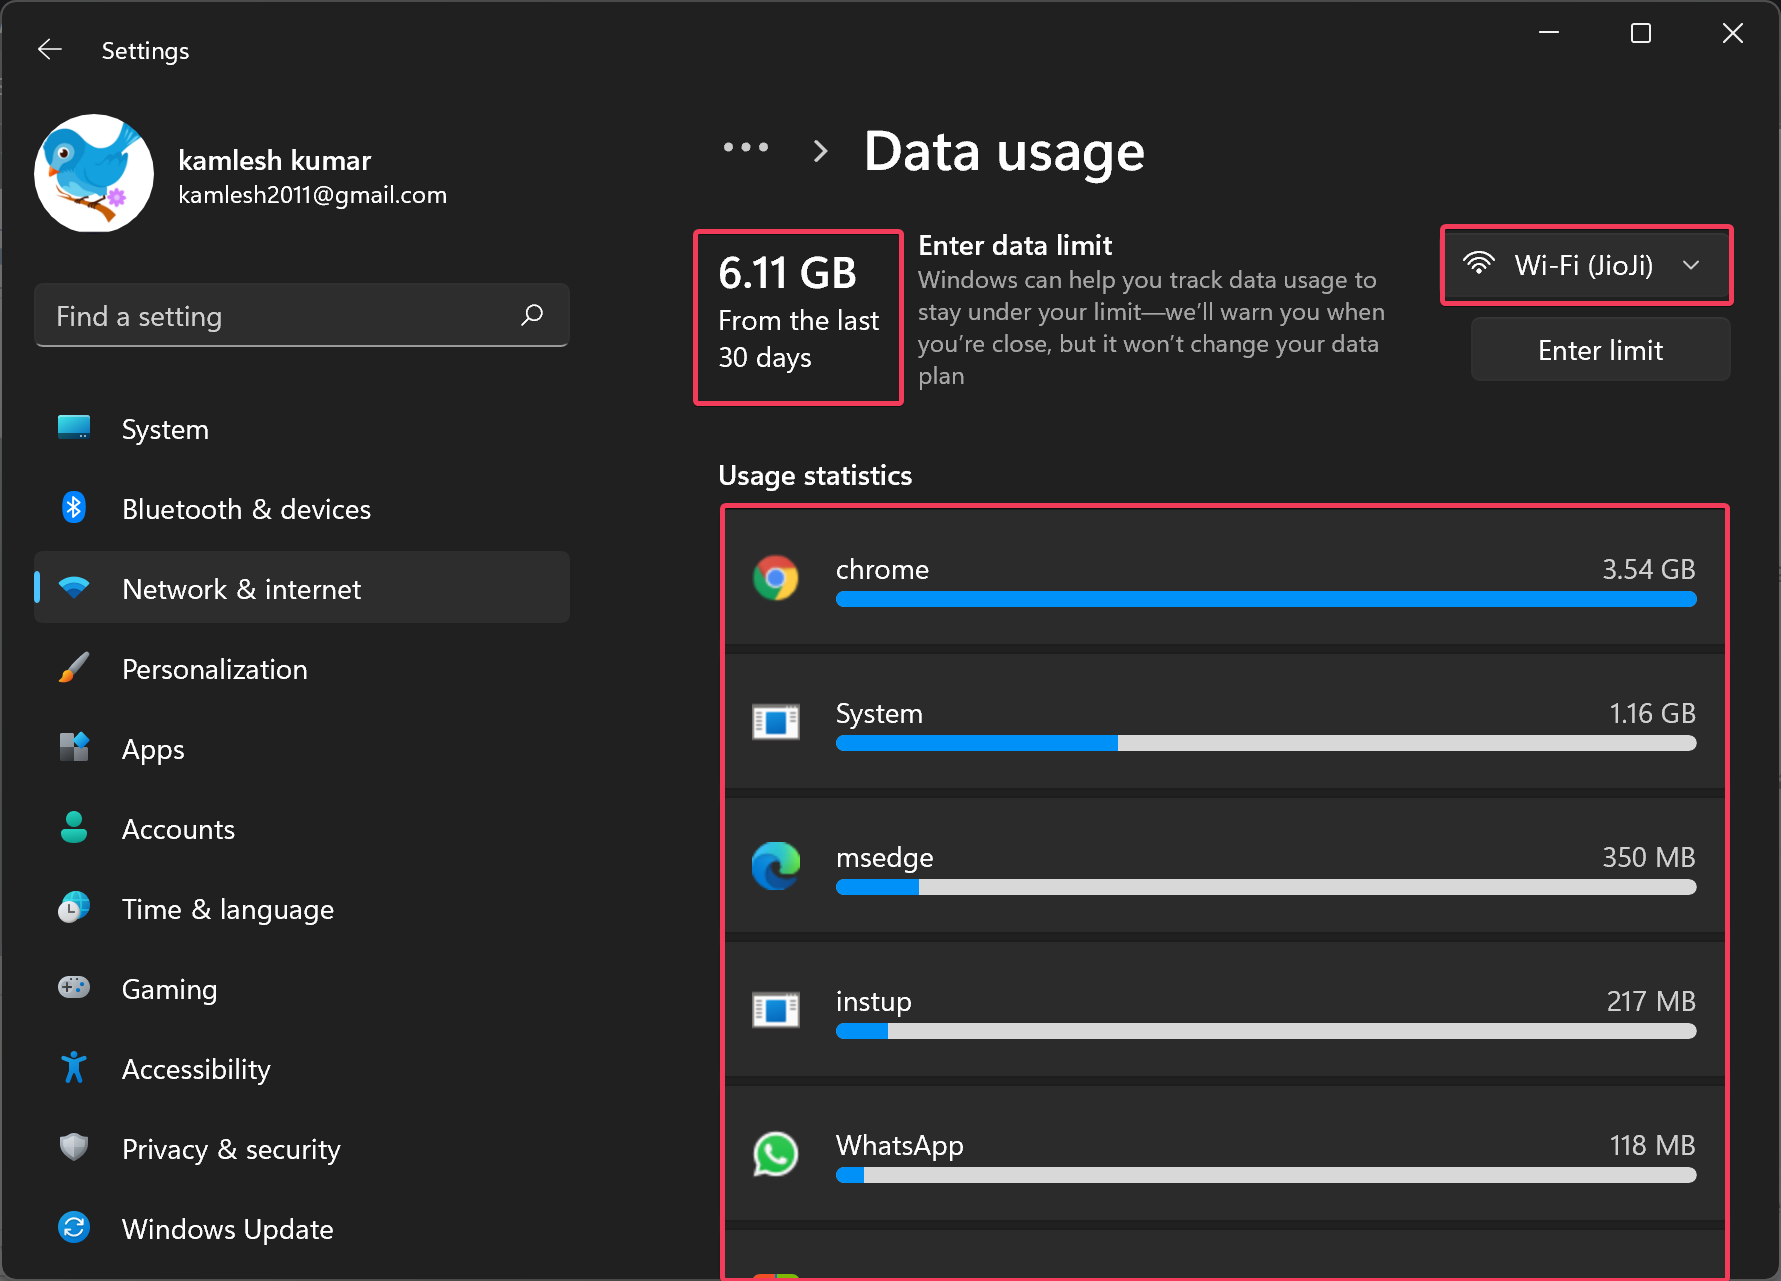
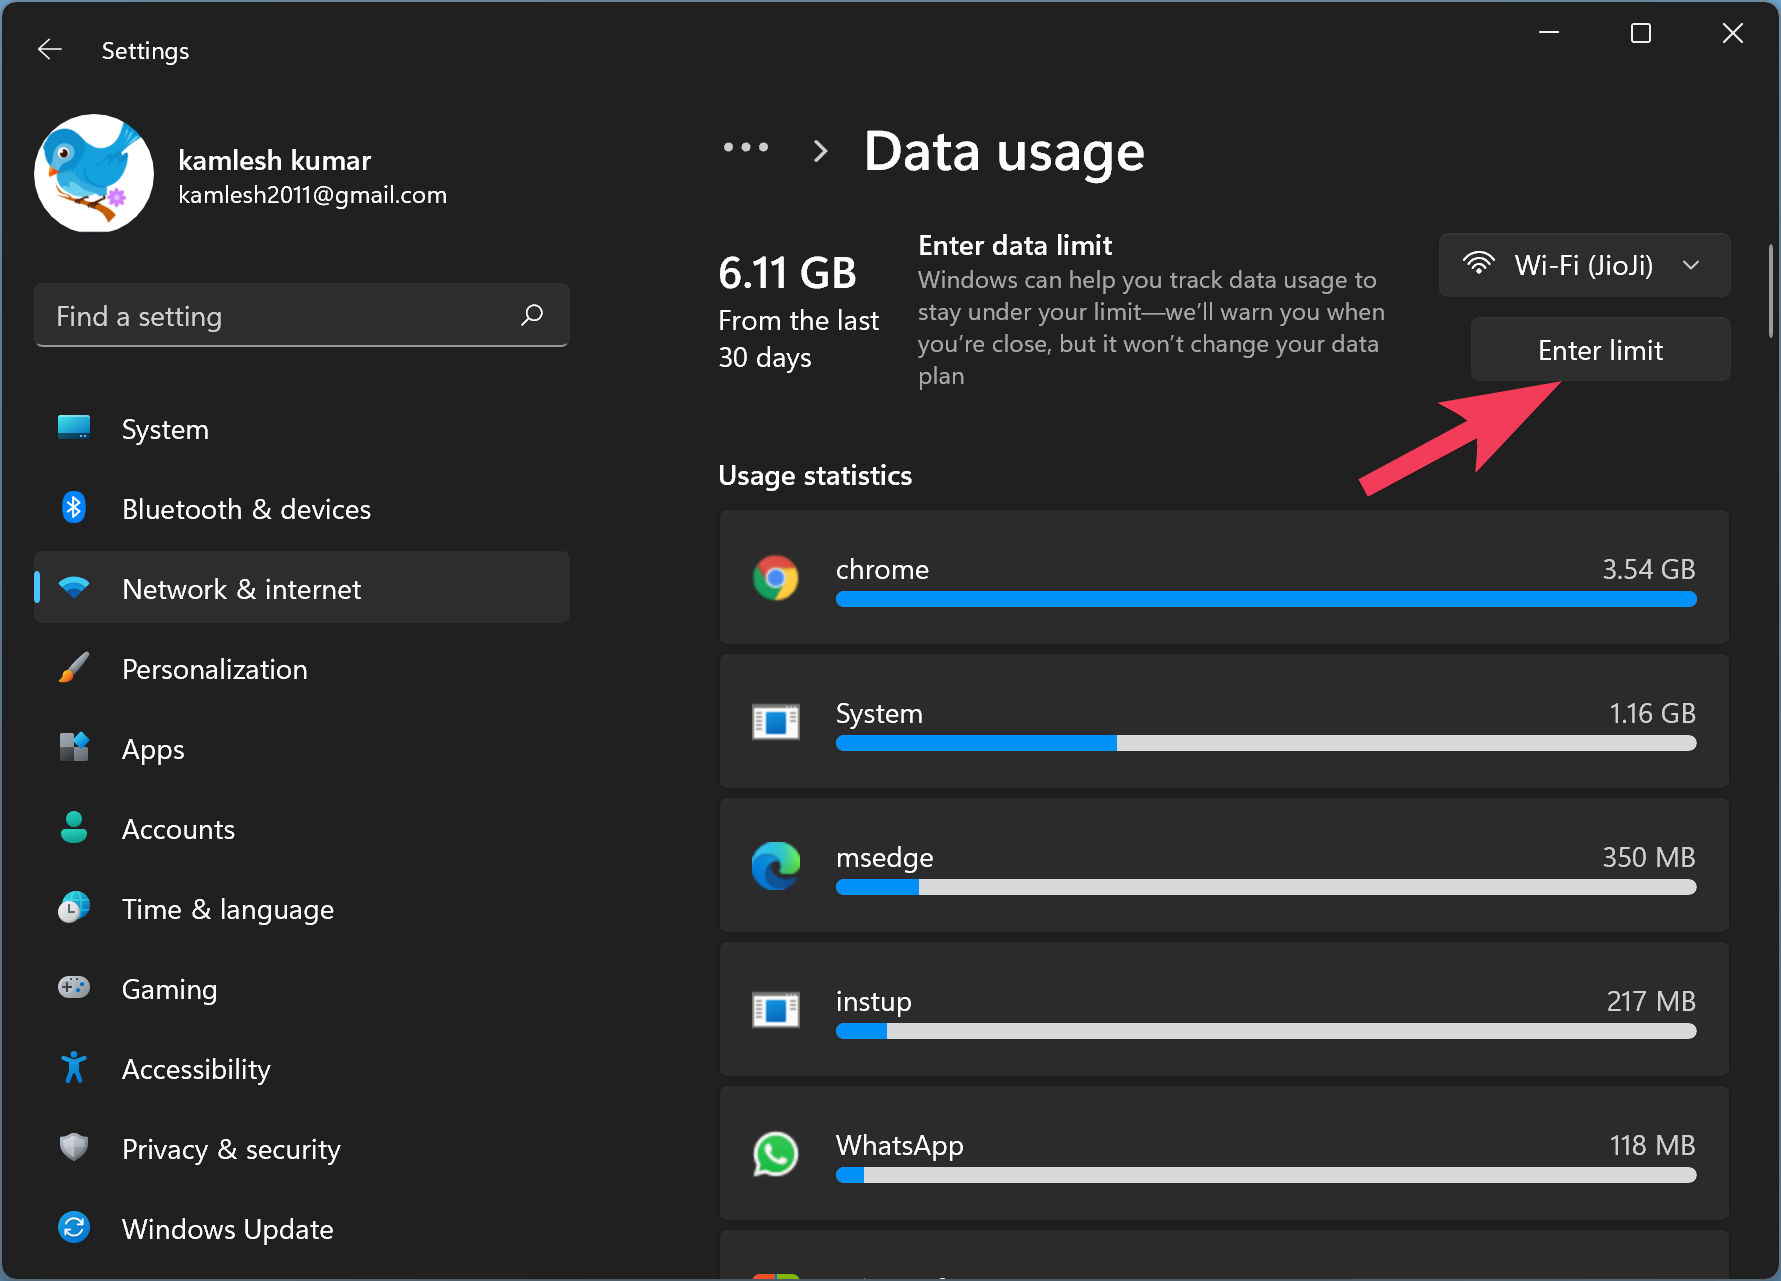
You can see the total data usage in the top-left corner for the last 30 days on the upcoming page. On this settings page, you can also review the usage statistics for each application. Here, you can switch the adaptor from the drop-down menu on the right-side top corner if you use multiple connections.
How to Reset Data Usage on Windows 11?
By default, data usage is enabled on Windows 11. If you want to start a new data usage counter, you’ll need to reset the usage history. To reset the data history, use these steps:-
Step 1. Open Settings app.
Step 2. Then, select Network & internet.
Step 3. After that, click the Advanced network settings page on the right side.
Step 4. When you’re done, under the “More settings” section, click the Data usage tile.
Step 5. Next, scroll down to the “Data usage” settings page, and then click the Reset button beside the “Reset usage stats” option.
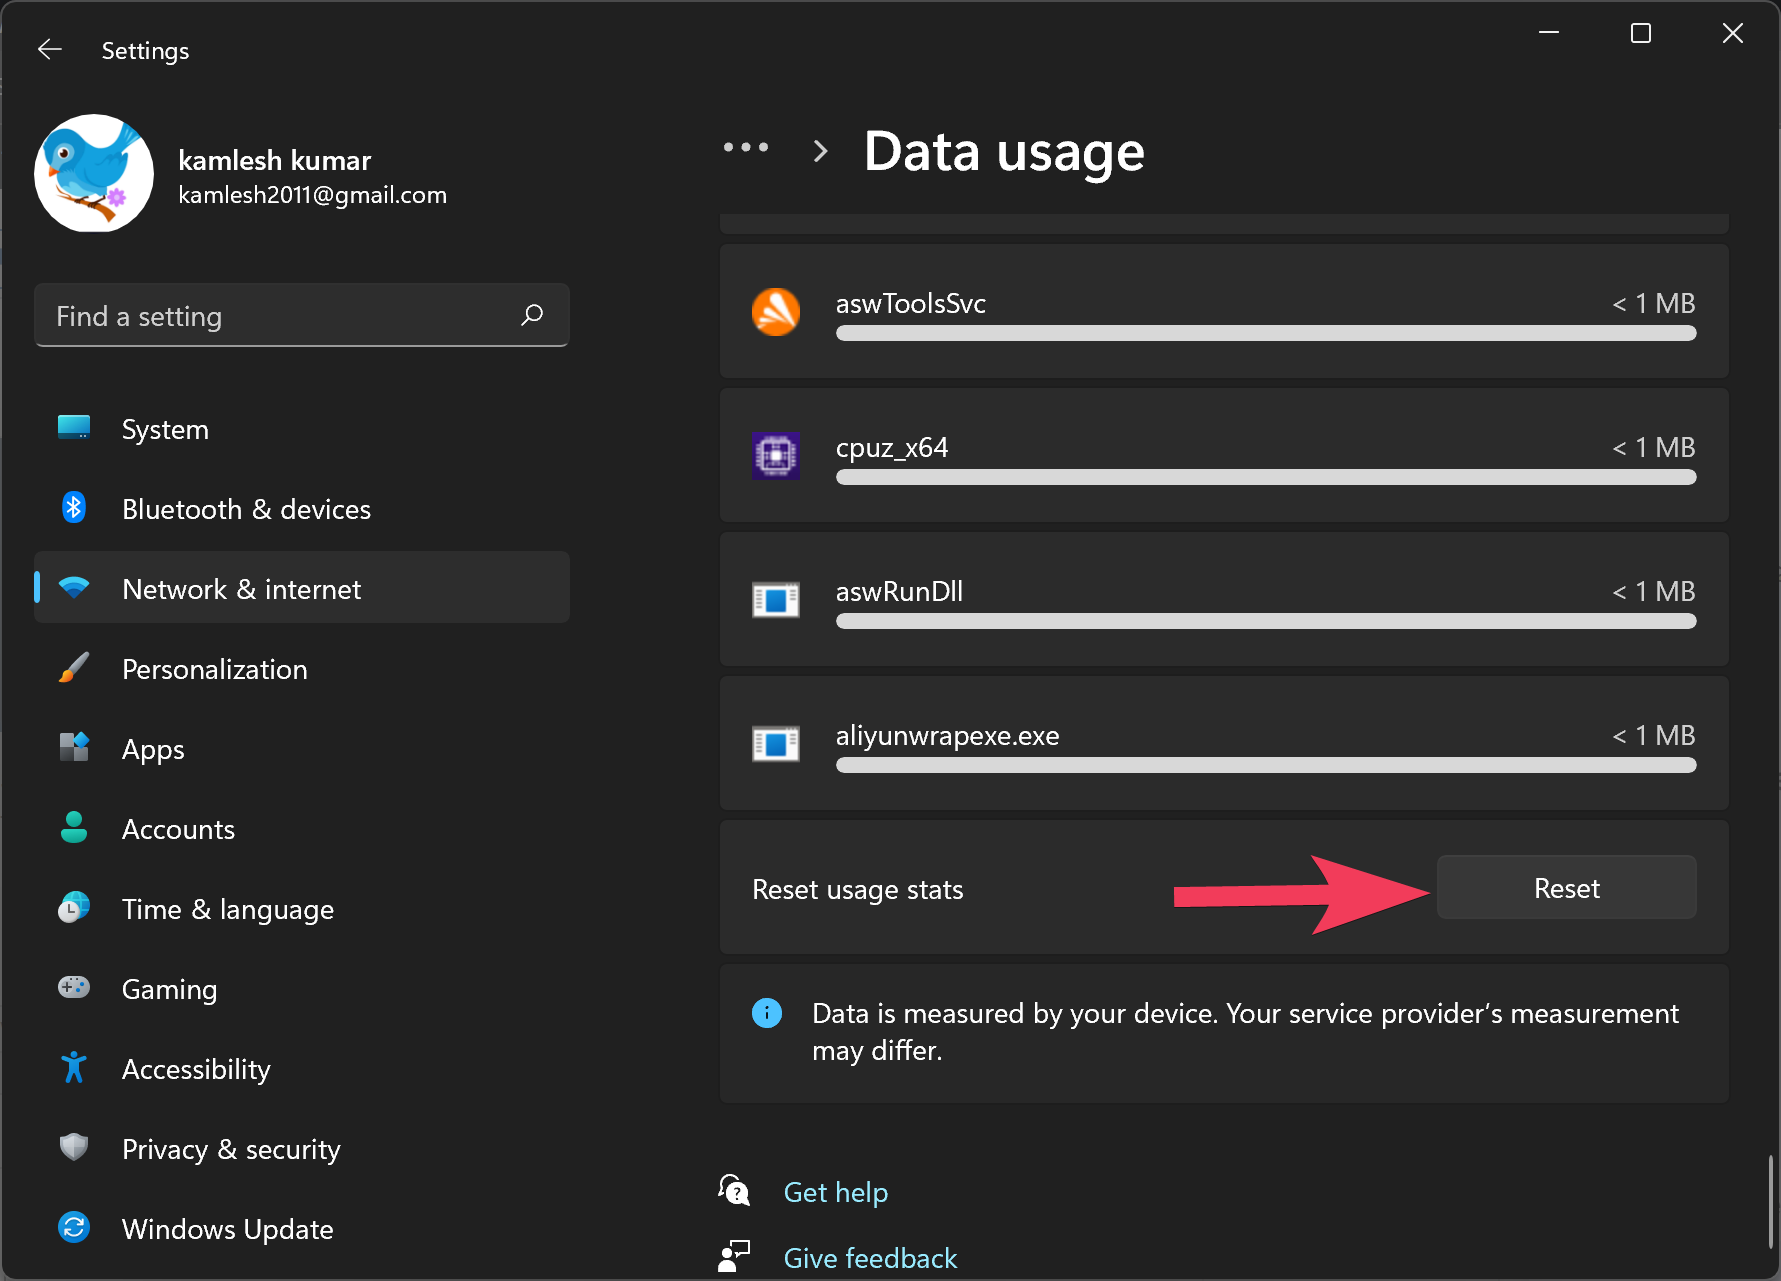
After completing these steps, the data usage history information will be reset on your computer.
How to Configure Data Usage Limit on Windows 11?
Windows 11 also allows you to configure data usage limits so that you can get alerts when you get closer to the data limit for a limited internet plan. To configure a data usage limit on your Windows 11 laptop or desktop computer, use these steps:-
Step 1. Open Settings app.
Step 2. Then, select Network & internet.
Step 3. After that, click the Advanced network settings page on the right side.
Step 4. When you’re done, under the “More settings” section, click the Data usage tile.
Step 5. Next, click the Enter limit button.
Step 6. You need to choose the limit type from Monthly, One time, or Unlimited on the pop-up window. Since most internet service providers have a monthly plan, we selected here Monthly option.
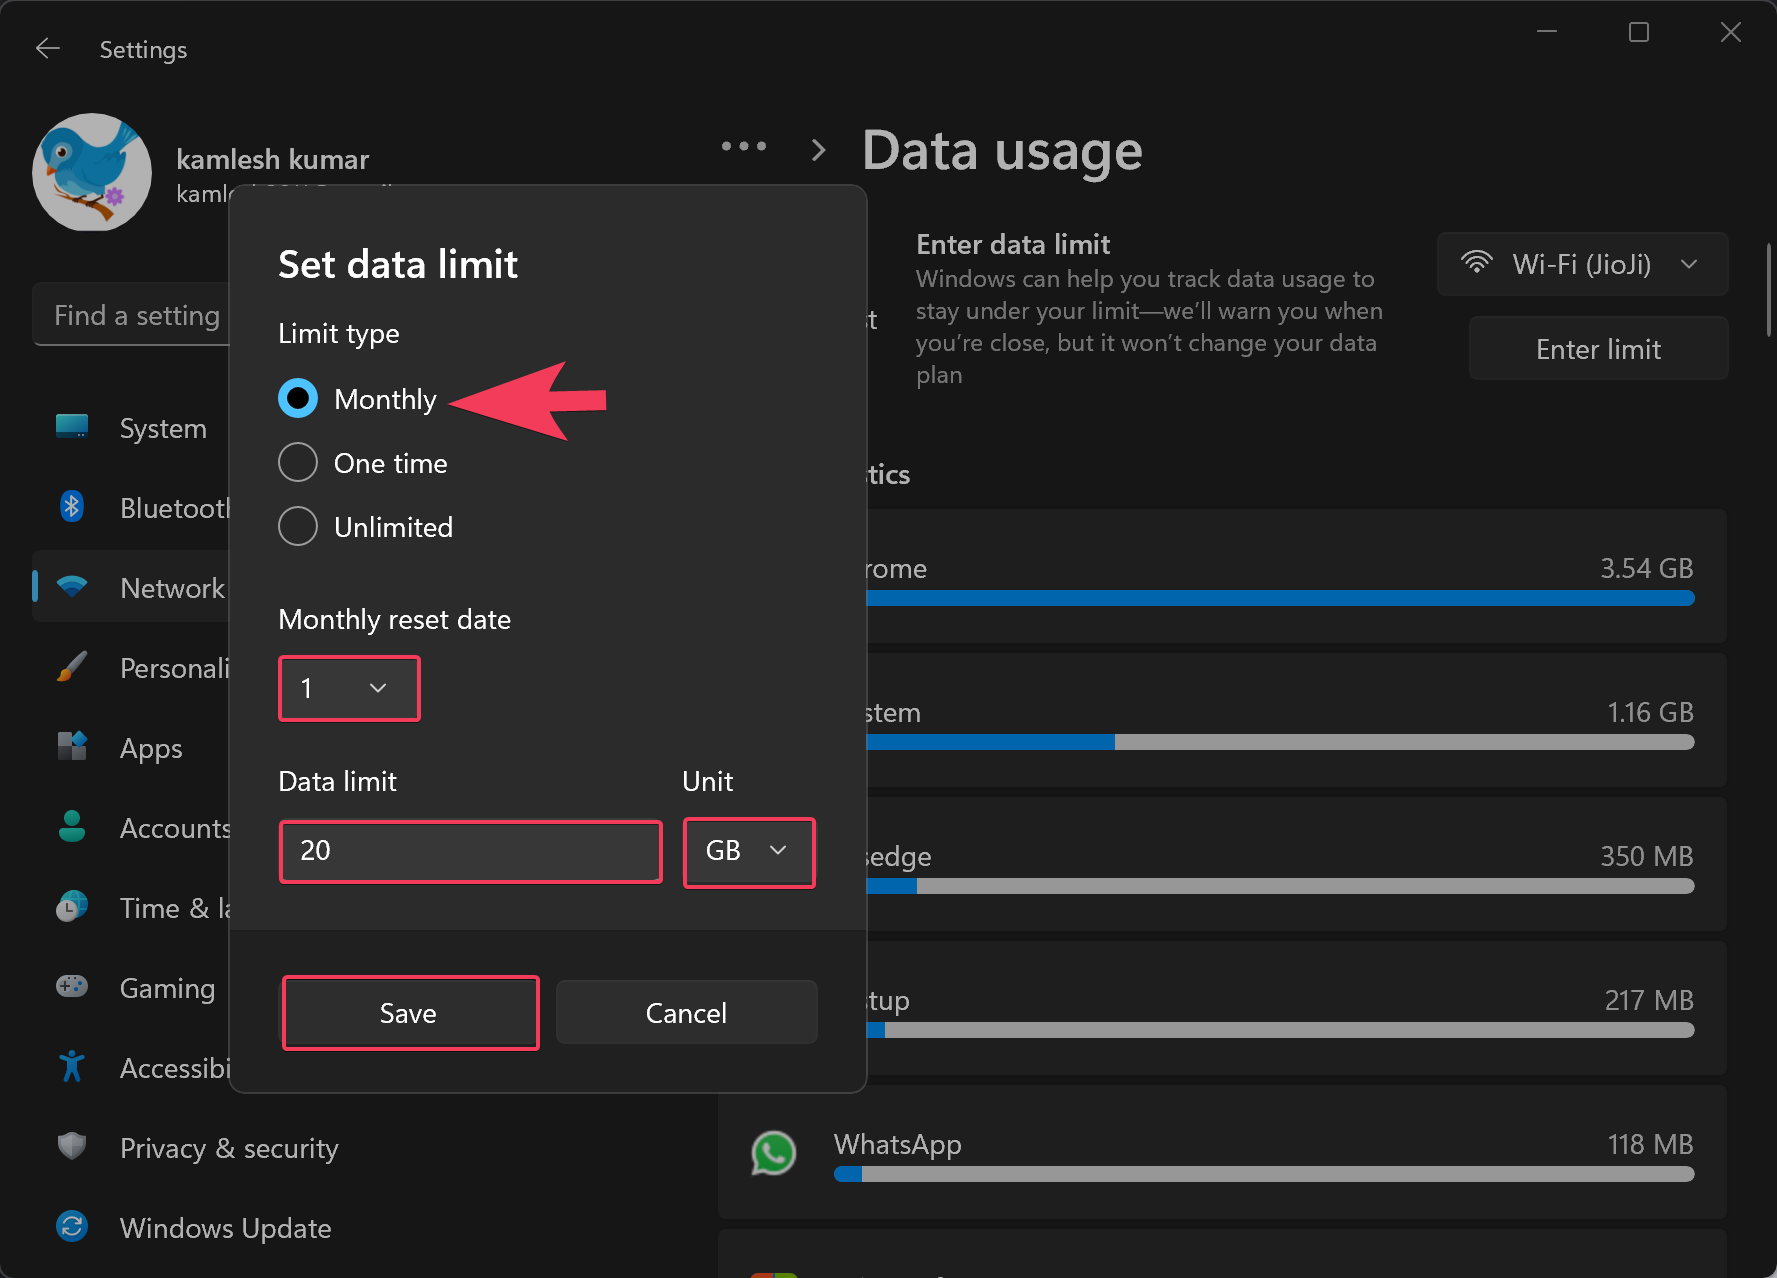
Step 7. When you select the “Monthly” option, the following settings will be available on your screen:-
- Monthly reset date — Let’s set when the data usage should reset automatically. If you want to control a data plan, you need to specify the day of the billing cycle.
- Data limit — Set the data allowance.
- Unit — Specify the data limit unit in megabytes (MB) or gigabytes (GB).
Step 8. Once you’re done, click the Save button.
After completing the above steps, your computer or laptop will monitor the data usage and send you a warning as you begin to reach the limit so you can take action accordingly.
How to Review Remaining Data on Windows 11?
To review the remaining data for the cycle you configured on your Windows 11 PC, do the following:-
Step 1. Open Settings app.
Step 2. Then, select Network & internet.
Step 3. After that, click the Advanced network settings page on the right side.
Step 4. When you’re done, under the “More settings” section, click the Data usage tile.
Step 5. On the “Data usage” settings page, you can confirm the remaining data, current usage, cycle date, and more.
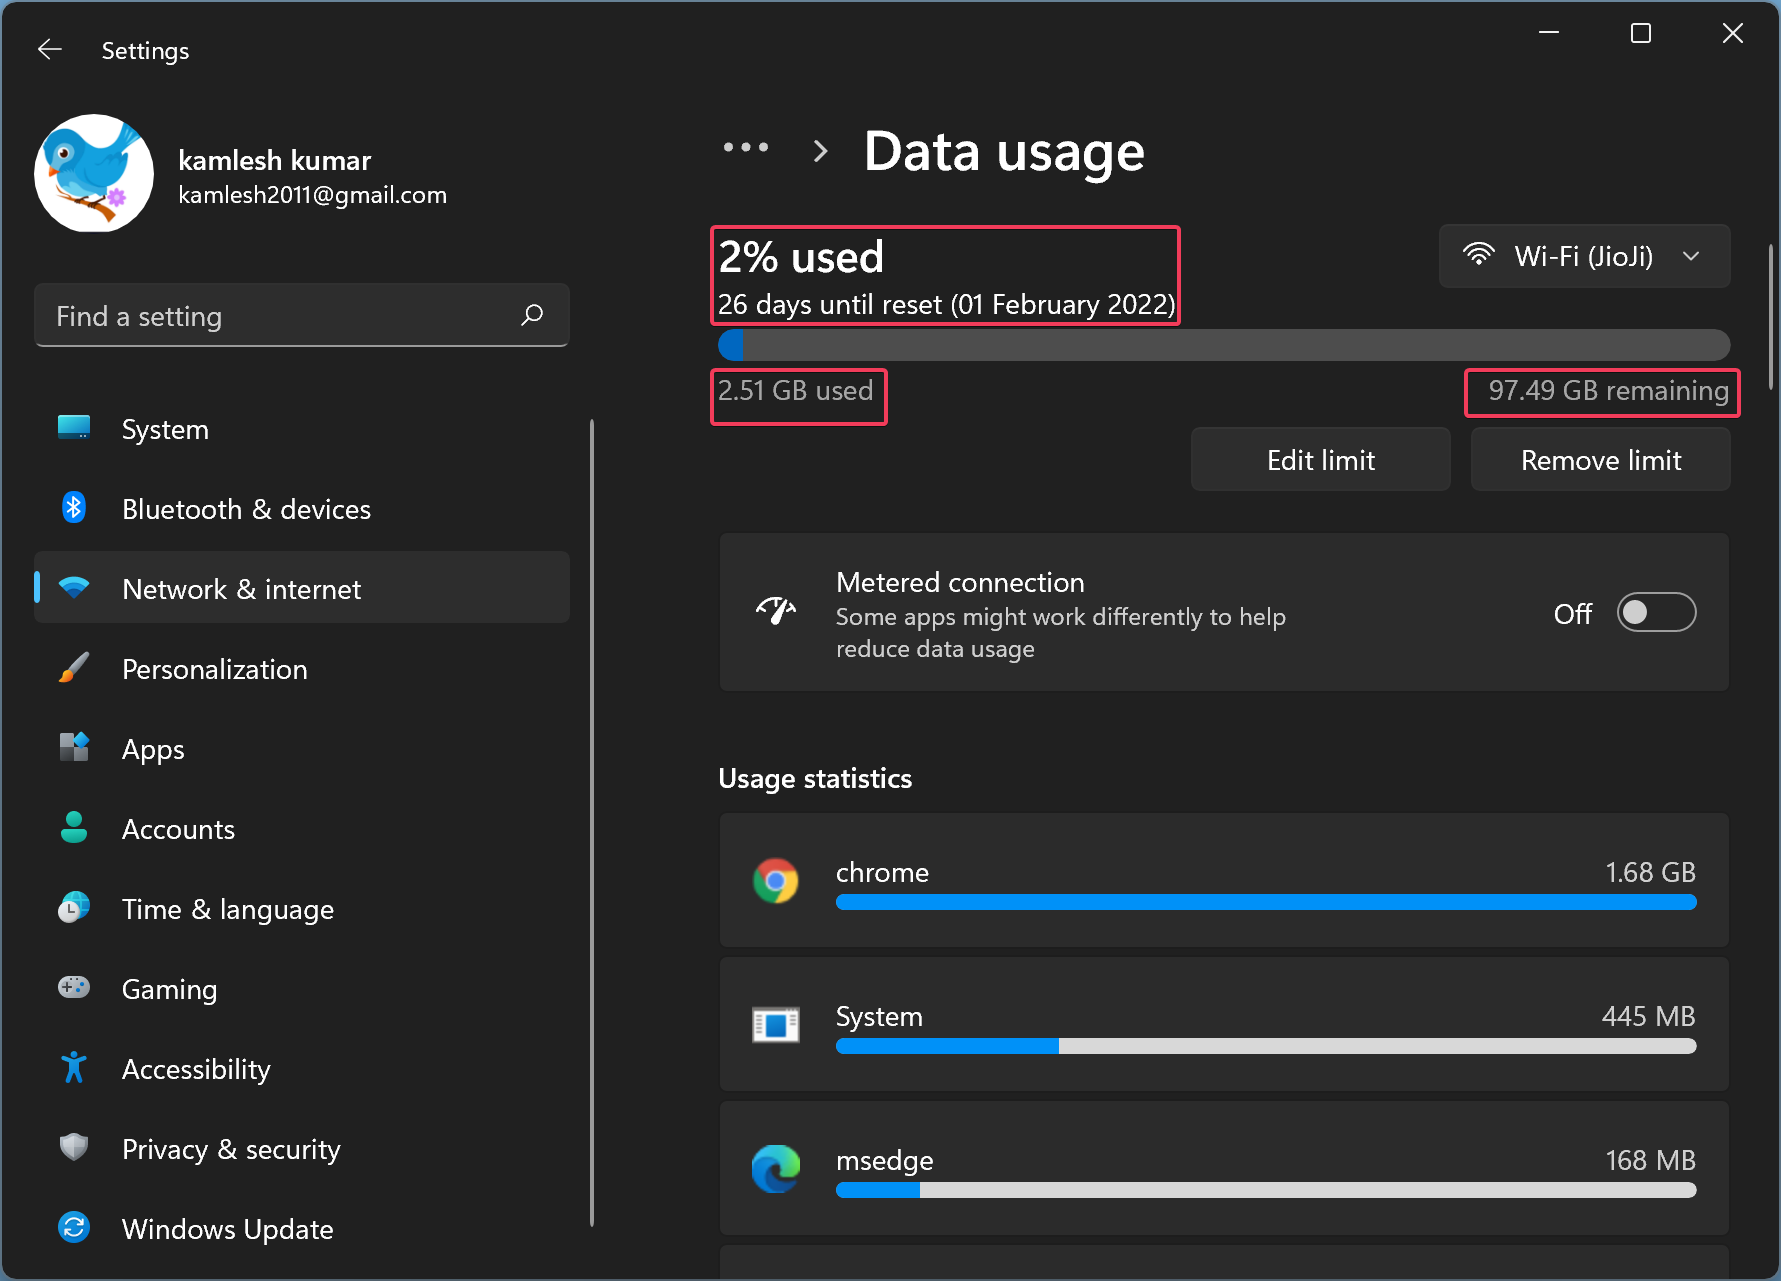
If you need, you can again modify the data limit by clicking the Edit limit button.
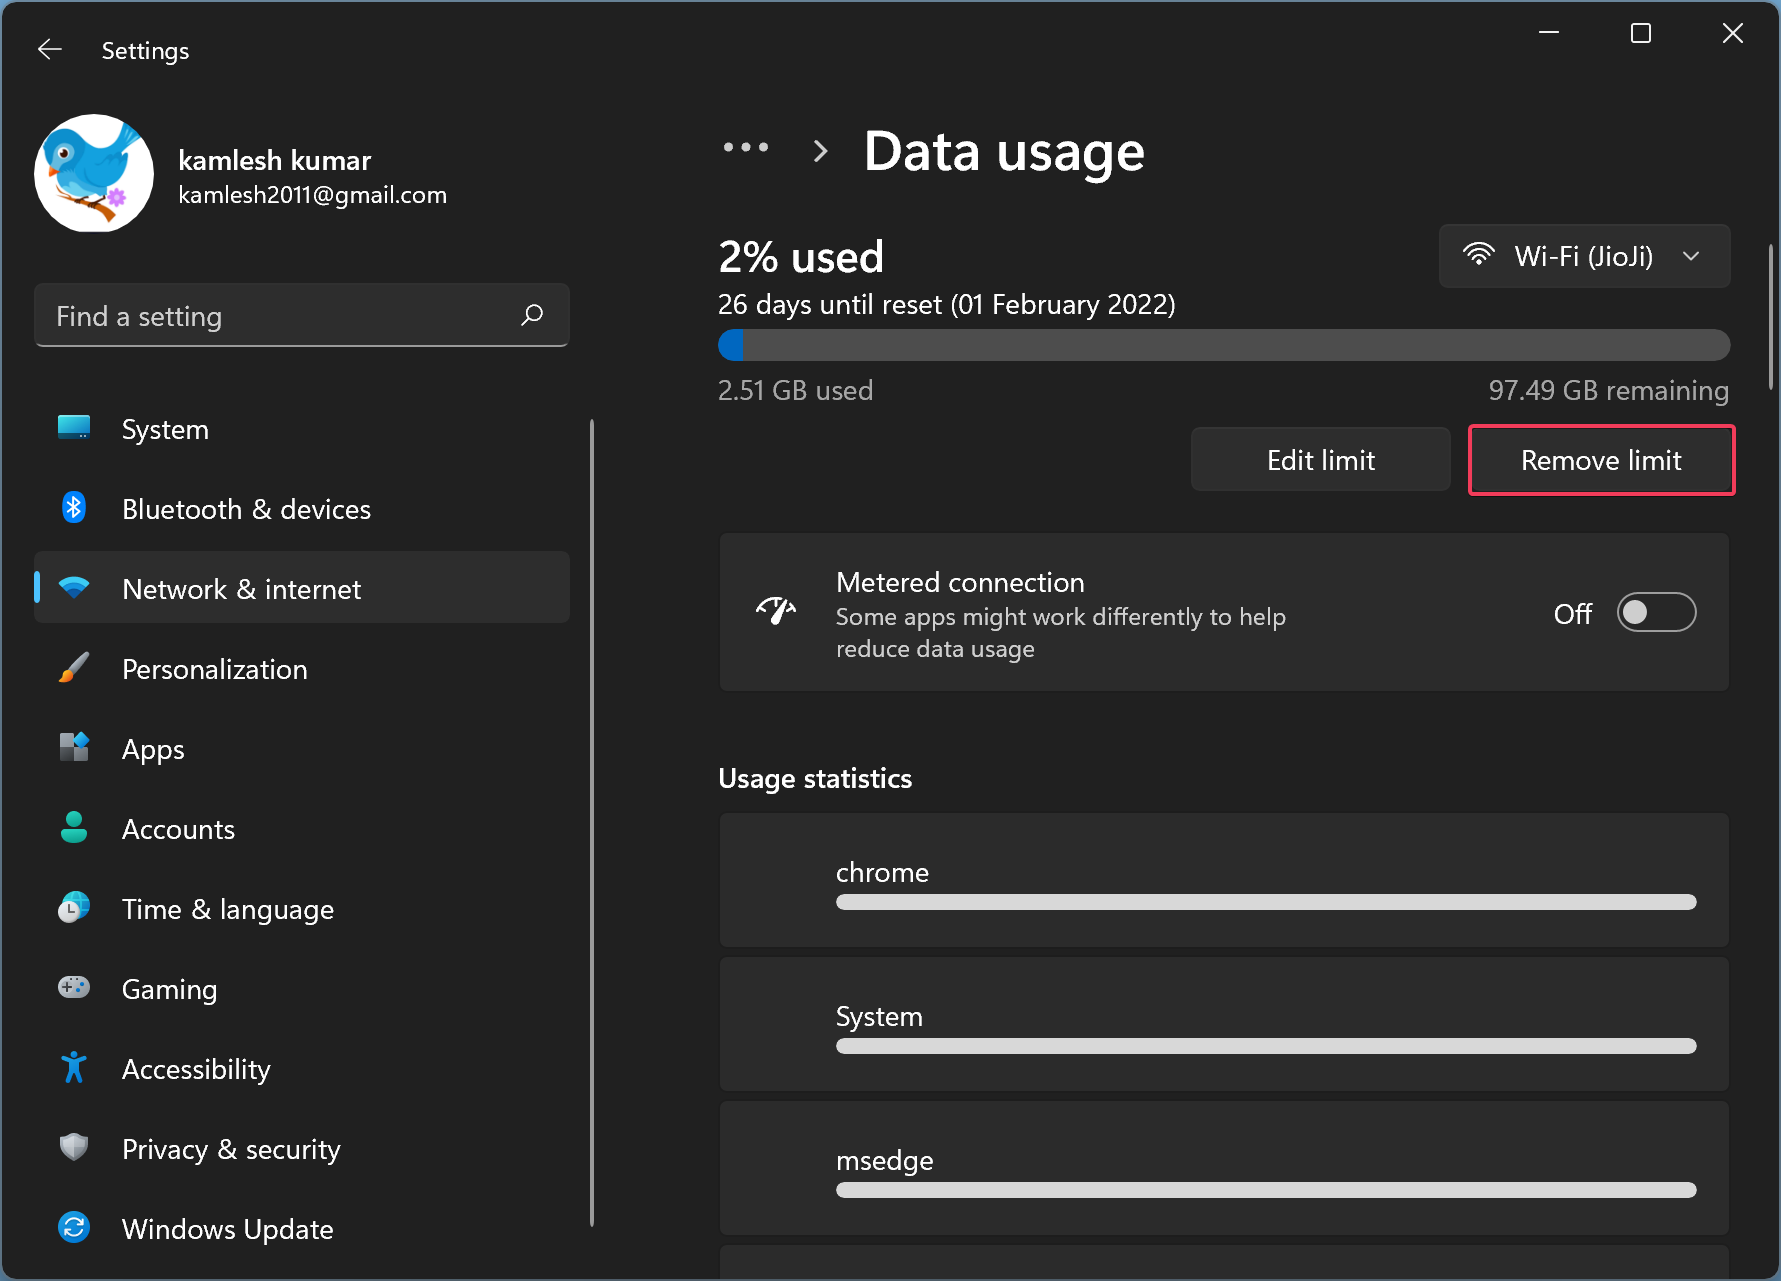
How to Remove Data Limit in Windows 11?
To remove a data limit configuration on Windows 11, use these steps:-
Step 1. Open Settings app.
Step 2. Then, select Network & internet.
Step 3. After that, click the Advanced network settings page on the right side.
Step 4. When you’re done, under the “More settings” section, click the Data usage tile.
Step 5. On the “Data usage” settings page, click the Remove limit button.
Step 6. Click the Remove button when prompted.
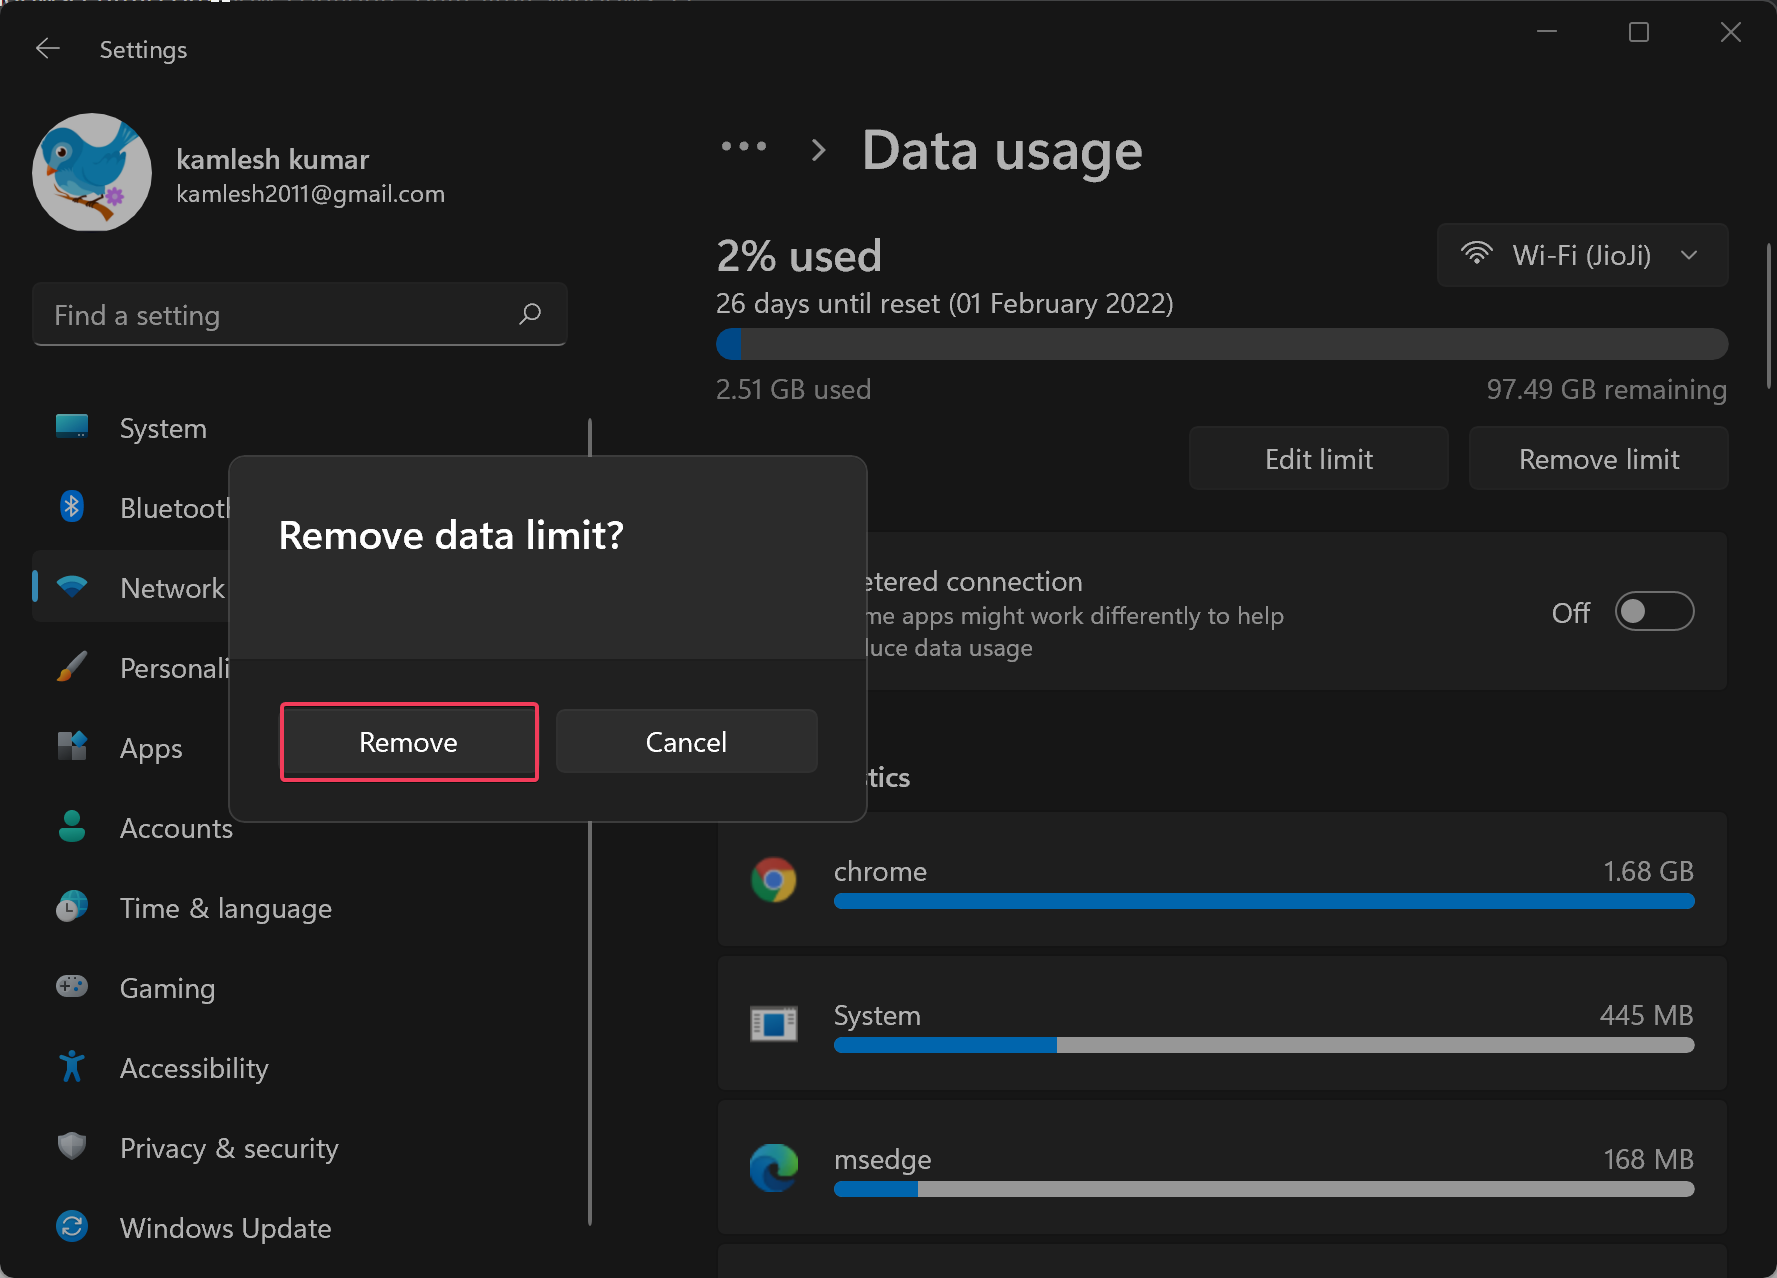
Once you complete the above steps, you will no longer receive warnings about data usage, but Windows 11 will continue to monitor the data usage.
Conclusion
In conclusion, using a limited internet plan can be challenging, especially if you frequently use the internet for browsing, streaming, and downloading. However, with Windows 11’s “Data Usage” feature, you can efficiently manage your internet bandwidth and avoid extra charges. By monitoring your data usage, setting up data limits, and receiving warnings when you reach the limit, you can take control of your internet usage and save money. We hope this guide has been helpful in configuring and using the Data Usage feature on Windows 11 to optimize your internet experience.